

When I created my first portfolio last year, I based it on what I had learned from freeCodeCamp (HTML, CSS and a little JavaScript).
At that point, I had only viewed my portfolio on localhost by viewing the files on my local computer. I didn’t know anything about how to host a website online.
Learning how to host my first website wasn’t easy but it was a great learning experience. If you're an aspiring web developer or just interested in launching your own static website, then I hope you will find this guide useful.
Who is this guide for?
This guide is aimed at complete beginners who want to host a static website (a site with fixed content). I will provide a how-to-guide for the following:
- How to buy a domain.
- How to configure your domain for an external hosting provider.
- How to host your website with Amazon Web Services (AWS).
- How to make your website secure (SSL certification) using Amazon Certification Manager.
There might be some terminology that’s new to you. Please go ahead and look up terms that are not familiar. I’ve put in useful links and explanations where I thought appropriate.
What is a domain name and DNS (Domain Name System)?
A domain name is your website address. For example thecodinghamster.com. But for a computer, a domain name is actually a series of numbers (an IP address). An IP address looks like this: 123.321.0.1
It’s not easy for us to remember a long string of numbers. So your computer refers to a DNS to translate a text based website address into an IP address which it can then understand. A DNS is like a directory.
I watched this great video which explains domain name, DNS and how this works in under five minutes. Please watch the first five minutes of the video if you're interested:
Where can you buy your domain name?
You can buy a domain name from a domain name registrar. Prices start from a few dollars. Your domain name is unique. Each domain name registrar offers different levels of services/support. But you can register your domain with any registrar.
What is a hosting provider?
“An Internet hosting service is a service that runs Internet servers, allowing organizations and individuals to serve content to the Internet. There are various levels of service and various kinds of services offered.”
When I was looking for a hosting provider for my website, I explored different options. The prices ranged from £2.00 — £5.00 per month with various storage options from 0.5GB to 10GB. The prices seemed reasonable but all I wanted to do was host a static website. It had a few images, HTML, CSS and JavaScript files. No dynamic content.
Why AWS?
After some further research, I found AWS. AWS offers a free tier option. Essentially, you get lots of free products. Some of them expire after 12 months and others are free in perpetuity. The only cost that you will incur for hosting a static website is the cost of setting up a hosted zone. This cost $0.50 per month. So I went with AWS and set up my account.
The great thing about AWS is the price and it’s a reliable hosting provider. But one thing to bear in mind is that you’re reliant on their documentation. As I started reading about what services AWS offered, it quickly became confusing! I used the official AWS guide provided for setting up static websites. But I found myself getting lost with clicking on a link to another link and so forth. I started researching other guides to make up for knowledge gaps.
I found this this excellent guide by Victoria Drake.
I followed Victoria Drake’s guide alongside the AWS one and managed to muddle through. But there were still a few things that were not explained which I hope to flesh out.
Before we proceed, here is your to do list:
- Do some research on domain registrars and buy your domain name.
- Sign up for a free account with AWS.
- Have both the documentation from AWS and Victoria Drake’s guide open. Use my guide to guide you through the documentation (hope that makes sense!).
Here we go!
AWS: Create a Hosted Zone on Route 53.
Route 53 is where all your DNS requests are handled.
The first thing you must set up is your hosted zone with Route 53. This is really easy if you bought your domain through AWS. A hosted zone is created automatically once you’ve purchase it. If you’ve done this then just skip to the next section (Set up your S3 Buckets).
However, if you were like me and bought your domain name via another registrar then please do the following.
This next part is how to create a Hosted Zone on Route 53 if you haven’t bought your domain name from AWS:
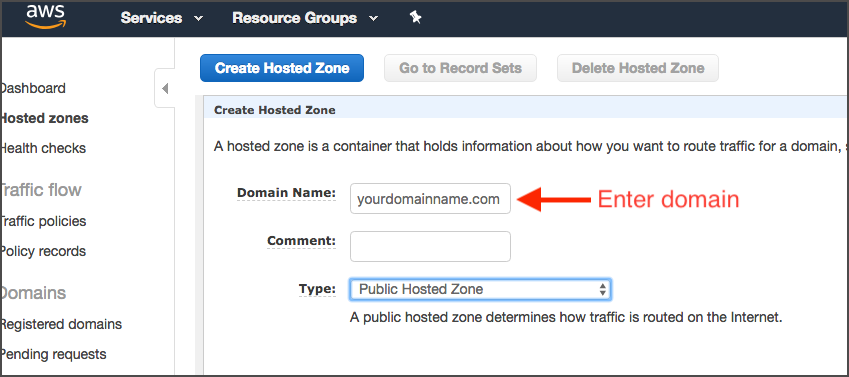
- Go to Route 53 in your console and click on “Create Hosted Zone”. Fill in your domain address, comment is optional and choose a “Public Hosted Zone”. Click on “Create”.
2. Once your hosted zone is created, you need your NS (Name Servers) records:
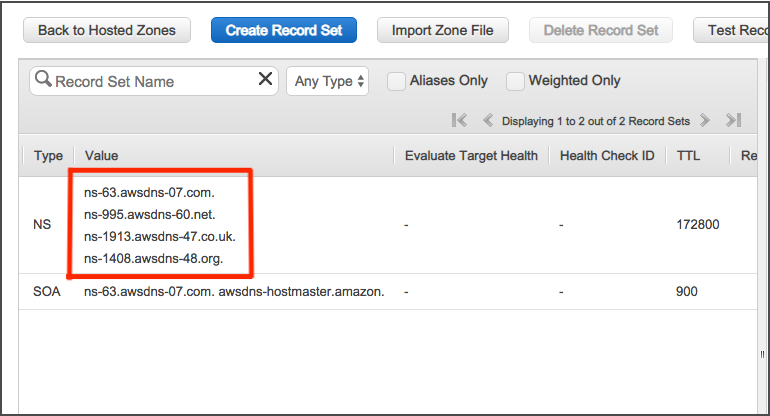
3. Go to your domain name registrar and login. Depending on your registrar, you should find a section in your settings called "Nameservers" which you can edit. You need to copy across the AWS NS records and change the existing NS records in your domain settings.
Please note, don't copy the full stop/period at the end of the NS record. For example, is should be “ns-63.awsdns-07.com”, not “ns-63.awsdns-07.com.”
It will take up to 24 hours to propagate.
Set up your S3 Buckets
In the meantime you can set up your S3 Buckets. The S3 Bucket is the storage for your files such as your index.html.
You must configure two buckets for your website: 1) yourdomainname.com and 2) www.yourdomainname.com.
The first bucket is your main bucket where you will upload all your documents, such as your index.html. The second bucket redirects to the first bucket. To set up your S3 Buckets, please follow the AWS documentation on how to set up your S3 bucket ( 2: Create and Configure Buckets and Upload Data).
In addition to the documentation, there are a few things to note:
- In section 2.1 (part 2): click on the link How Do I Create an S3 Bucket? This is a step by step guide and explain all the settings you need to choose.
- In section 2.1 (part 3): you don’t have to upload your website files yet. You can add a test index.html in the meantime.
Take note of your endpoint. You can find this in your S3 bucket > “Properties” tab > “Static Web Hosting” box. It should look something like this: http://yourdomainname.com.s3-website.eu-west-2.amazonaws.com
Add the Alias/“A” records in Route 53
Finally go back to Route 53 and open your hosted zone to set up your Alias records. You can follow the documentation on “Step 3: Add Alias Records for example.com and www.example.com”. It is quite straightforward.
Once the NS settings have propagated, your site is live! You’ll be able to visit your site at the domain address e.g. yourdomainname.com
However, please note that it won’t be secure and you’ll see a http:// prefix in the address bar. I’ll get to that in the next section.

How to make your website secure and what is a SSL certificate?
It’s very important to make your website secure and to do this you’ll need to get an SSL certificate. SSL stands for Secure Sockets Layer and it uses encryption to securely transfer data between a user and site. Google will also give a rankings boost for websites with HTTPS.
If you secure the website with an SSL certificate, you’ll see https:// and a padlock symbol in your address bar.

There are different types of SSL certificates: Extended Validation Certificate and a Domain validated certificate. For a personal website or blog, only a domain validated certificate is required. You also won’t see the name of your company on the left of the bar like the example above. You only get this if you have an Extended Validation Certificate which is more for large companies/enterprises.
How much does it cost for an SSL certificate?
I’ve seen a range of ways of getting an SSL certificate. You can pay a premium for a service that will do this on your behalf or you can do it for free with Let’s Encrypt. Let’s Encrypt is an official Certificate Authority (CA). But you have to renew your certificate every three months and the process is quite complicated.
I didn’t want to pay a premium or want the hassle of renewing every three months. Conveniently, AWS can issue SSL certificates for a very small fee. You pay $0.75 for each certificate issued and it lasts for one year.
If you choose not to go with AWS, make sure you do your research and choose a trusted CA!
How do you get an SSL certificate with AWS?
Log into your AWS console and navigate to the AWS Certificate Manager (ACM).
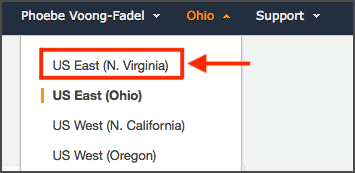
Make sure you change the region from the default (Ohio) to N. Virginia. This is not explicit in the guides and only the N. Virginia region can issue certificates. I learned the hard way and wasted a lot of time!
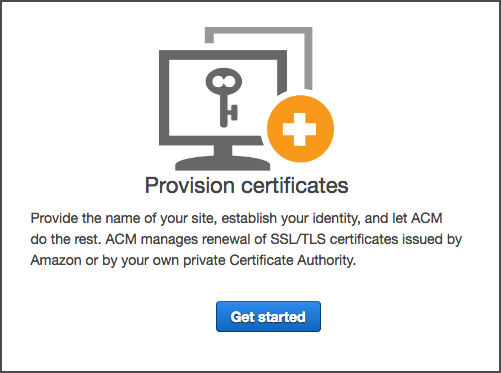
Then click on “Get Started” under “Provision Certificates”.
Follow the documentation with AWS (“Requesting a public certificate using the console”) and use Victoria Drake’s guide (under “SSL certificate”).
In addition to the guides there are few things that weren’t fully explained:
- You’ll need to validate your domain ownership by email or directly with DNS. I would suggest to always verify ownership by DNS validation.
- Once you’ve requested your certificate you’ll get something like this (except the status will be pending). Click on the “Export DNS Configuration file”:
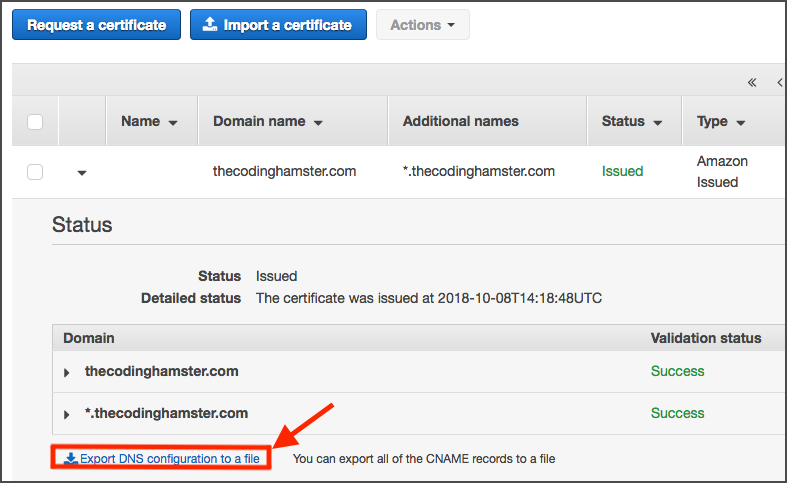
It’s an Excel spreadsheet which will contain something like this:

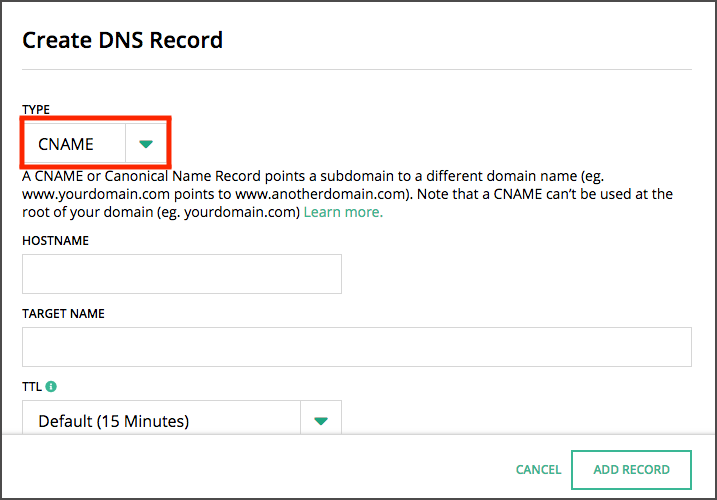
- You’ll need to add these records to your DNS settings with your registrar. Log in and go to DNS settings. The interface varies with different registrars but you’re looking for your Host records under your DNS settings.
- Click on “Add Record” > record type is CNAME:
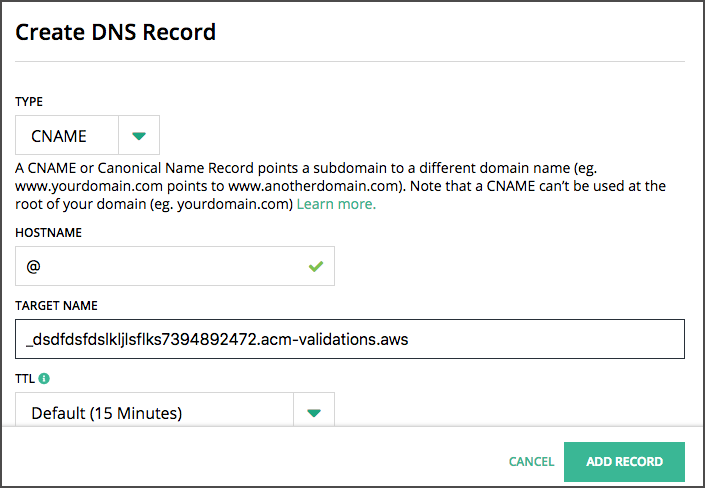
You need to add two records: 1) Hostname should be “@” and Target Name should be the Record value from the DNS configuration file.
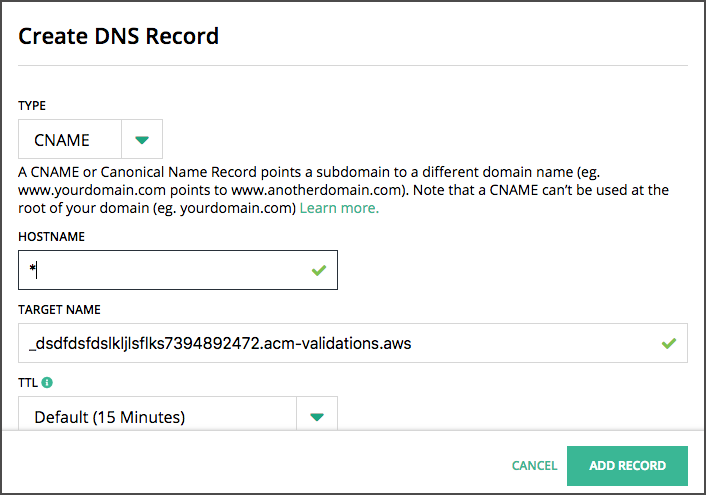
2) Hostname should be * (asterisk) and Target Name should be the Record value from the DNS configuration file.
If you want more information about the CNAME and record types, I found this helpful article.
It's quite long, but I've pulled out the useful part:
“Note: Hostname refers to the prefix before the domain name. To create a Blank record, use an @ in the Hostname field. This represents an empty prefix (so the name exactly matches the domain name; for example divapirate.com). The @ hostname is also referred to as the the root of the domain. An * (asterisk) in the Hostname is a wildcard, and represents any prefix. For example, creating a record for *.divapirate.com will point <any prefix>.divapirate.com at the IP address provided.”
You just need to wait for the verification. For me, this took about an hour.
How do you add your SSL certificate?
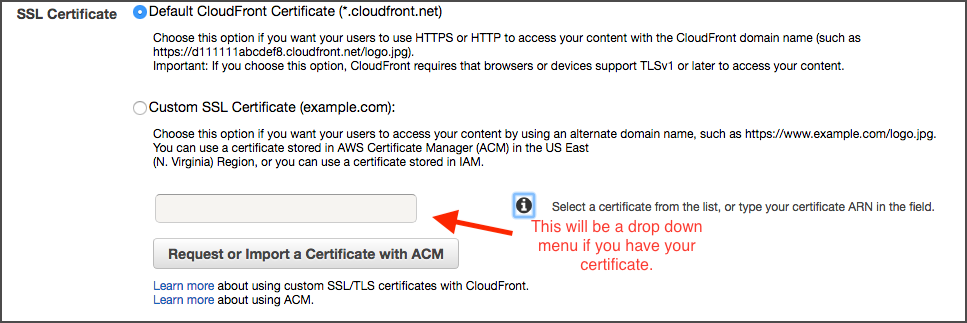
With AWS you can add SSL certificate to your website through setting up CloudFront. CloudFront is great for speeding up your website. I used the AWS documentation and Victoria Drake’s guide (look out for her useful tips).
Please note, when you create your CloudFront distribution, there’s a drop down menu to add your SSL certificate. If you have been issued with an SSL certificate already, it will be pre-populated in the drop down menu.
Your state in your CloudFront dashboard should changed to “Enabled”. This isn’t instant and takes a little time.
Almost there…
Finally, you need to get your Domain Name from the CloudFront distribution. It should be something like this dsfdser83543.cloudfront.net.
Go back to Route 53 > hosted zone > change both Alias records (Alias Target) to the CloudFront Domain Name.
Voila! You have hosted your first secure static website with AWS.
Hope you found this useful. If you have any questions or just want to say hello, find me on Twitter @PhoebeVF
A big thank you to Victoria Drake for her guide. For a more advanced tutorial on this topic, please check out Victoria's article: "Hosting your static site with AWS S3, Route 53, and CloudFront".
Illustrations courtesy of https://undraw.co