

Before we dive into the Helm package manager, I'm going to explain some key concepts to deploying any application anywhere. I'll also give you a brief introduction to Kubernetes terminology.
What is Kubernetes?
Kubernetes (K8s) is an open-source system for automating deployment, scaling, and management of containerized applications
kubernetes.io
Now you might be asking yourself, "Well, what does that mean?"
Kubernetes is essentially a very nice set of APIs for deploying, managing, and scaling applications.
The applications are packaged with Docker, and then the logic surrounding the deployment of the application is expressed using Helm templates. The templates themselves are instructions that are then run using the Kubernetes API.
There are a ton of Helm packages already created to take care of your application deployment needs!
I like to think of Kubernetes + Helm as a one stop shop for my application DevOps needs.
Fun Fact Time!
The entire container ecosystem, including Docker, has a very fun nautical theme. Docker has whales, Kubernetes has pods (of whales), and its logo looks like the steering portion of a ship, and Helm is the helm of a ship.
Aren't they cute?
Deploying an Application on Kubernetes
First of all, no matter where you deploy an application there are going to be some things that remain the same anywhere, and I do mean anywhere! ;-) Whether you are deploying to your laptop, a remote server, an AWS EC2 instance, High Performance Computing systems, or Kubernetes, the underlying concepts do not change.
I think of pretty much everything, tech concepts in particular, as a series of layers. Once you understand what those fundamental layers are you can get cooking.
Application Layers
These are:
| General | Kubernetes |
|---|---|
| Data Layer | PVC or Persistent Volume Claims |
| Application Layer | Pods |
| Services | SVC |
Let's take these on one at a time.
Data Layer / Persistent Volume Claims (PVCs)
This is nice and straight forward. When you need to persist data you persist it to a filesystem. This can be local storage or some sort of networked file system (NFS). If you are using a database the database also eventually persists to a filesystem.
Application Layer / Pods
The application layer is what we typically think of in a deployment. Its the part we apt-get install, npm run or docker run. An application could be an NGINX web server, a Python or Node.js app, or a Spark application to name a few.
Applications are either Kubernetes Deployments or Stateful Set, depending on whether or not they persist data (or have a state).
A MySQL database would be an example of a Stateful application. It needs to keep track of information about itself.
An NGINX server would be a Kubernetes Deployment, because it does not need to keep track of any information about itself — it is stateless.
Services Layer / SVC
The services layer is where we expose our Application to the outside world. This is generally accomplished by saying "Hey, I have an app running on this port". You might have run these directly, or done something like a proxy pass in NGINX or Apache.
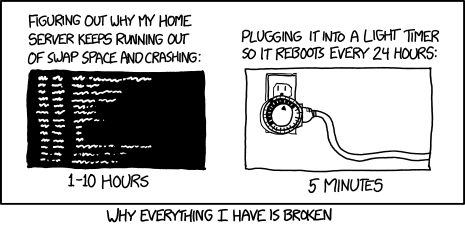
Site Reliability Layers
Site reliability is our ability to confidently say our application is up, running, and will probably stay up and running!
To be real, we want an API to essentially do this. ?
XKCD - Hard Reboot
| General | Kubernetes |
|---|---|
| Monitoring | metrics-server |
| Scaling (or Load Balancing) | Horizontal Pod Autoscaler (HPA) |
| Service Rules | Container specs |
Monitoring Layer / Metrics Server
The monitoring layer answers the question "How is our app doing"? Ideally it would answer questions like "How much CPU is left on that machine?" and "Are we out of memory yet"?
Scaling Layer / HPA
Have you ever had an application that worked great until too many people started using it at once? You take care of this by scaling the instances of your application up or down.
With web applications, you'll often see the term load balancing, too. This functionality is built into many process managers and https servers such as PM2 and Gunicorn.
In Kubernetes you accomplish this with a Horizontal Pod Autoscaler, or HPA, which you give specific rules for how to scale up or down.
Service Rules Layer
Have you ever wanted to automate when / how your application should restart? Maybe you want it to restart 3 times and then give up. Or maybe you want it to restart, but not right away.
Give it some time! You may also want some objective measure to test whether or not you application is up and running.
Deploying Applications on Kubernetes
Kubernetes applications can be deployed either through the CLI, or by writing YAML templates that describe the various PVCs, Pods (whether they are Deployments or Stateful sets), and Service (SVC) layers.
The Helm Package Manager
Helm is the best way to find, share, and use software built for Kubernetes.
https://helm.sh/
The Helm package manager allows us to wire up complex Kubernetes deployments into a single package, that can be installed with a single command.
Helm uses a templating language on top of Kubernetes YAML definitions to allow more versatility to our deployments.
Probably the most important point to note with Helm is that it has been widely accepted by the community. This means that there are lots of resources for using Helm, getting started, and also oodles of preconfigured Helm Charts!
It's very rare for me to ever have to create a Helm package completely from scratch. I can nearly always find a good starting point from one or more of the Helm charts that are already available.
Deploy NGINX on Kubernetes
First, let's talk about a base NGINX deployment without Helm.
As you can see, there is a lot of stuff to keep track of and we probably wouldn't be typing this by hand. That is where the Helm package manager comes in, but it's good to take a look to know what is happening first! ;-)
# Source: nginx/templates/deployment.yaml
apiVersion: apps/v1
kind: Deployment
metadata:
  name: nginx
  labels:
    app.kubernetes.io/name: nginx
    helm.sh/chart: nginx-6.0.1
    app.kubernetes.io/instance: nginx
    app.kubernetes.io/managed-by: Helm
spec:
  selector:
    matchLabels:
      app.kubernetes.io/name: nginx
      app.kubernetes.io/instance: nginx
  replicas: 1
  template:
    metadata:
      labels:
        app.kubernetes.io/name: nginx
        helm.sh/chart: nginx-6.0.1
        app.kubernetes.io/instance: nginx
        app.kubernetes.io/managed-by: Helm
    spec:
      containers:
        - name: nginx
          image: docker.io/bitnami/nginx:1.19.0-debian-10-r2
          imagePullPolicy: "IfNotPresent"
          ports:
            - name: http
              containerPort: 8080

          livenessProbe:
            failureThreshold: 6
            initialDelaySeconds: 30
            tcpSocket:
              port: http
            timeoutSeconds: 5
          readinessProbe:
            initialDelaySeconds: 5
            periodSeconds: 5
            tcpSocket:
              port: http
timeoutSeconds: 3Now let's break down the different parts of the Kubernetes Deployment definition.
Metadata
I want to very briefly touch on the labels. Only briefly, because chances are you will be fine with the defaults and not need to touch them.
One of the goals of Kubernetes is that it should abstract the actual physical server away. You shouldn't usually have to care if your app is running on node1 or node2. Of course at some point you do care, and then you will start to get into labels.
Until then, don't worry about them and just stick with the defaults.
Containers
This is the part of the application that will be most relevant to you when you are deploying applications. You need to define your containers.
A single Deployment Pod can have many containers. That container has, at the very least a name, a repo, and a tag:
      containers:
        - name: nginx
          #image:  "repo:tag"
image: docker.io/bitnami/nginx:1.19.0-debian-10-r2Once you have the base you need to define the ports that will get picked up by the service. See that separation of concerns?:
          ports:
            - name: http
              containerPort: 8080
App Rules
Then, at some point, we want to know if our app is running. We can even determine exactly where it is in it's lifecycle with the various hooks:
         livenessProbe:
            failureThreshold: 6
            initialDelaySeconds: 30
            tcpSocket:
              # This corresponds to the ports[0].name
              port: http
            timeoutSeconds: 5
          readinessProbe:
            initialDelaySeconds: 5
            periodSeconds: 5
            # This corresponds to the ports[0].name
            tcpSocket:
              port: http
timeoutSeconds: 3Names
This is more of a general concept, but I do want to point out that giving things names is very important in the Kubernetes ecosystem. Notice that we gave our container and port a name. Later on when we need to refer to them we use that name.
Deploy NGINX on Kubernetes with a Helm Chart
The Helm package manager creates a series of templates that can be modified through the Helm CLI. Each of these templates corresponds to one of our Kubernetes types that we discussed earlier.
Here is an example of the bitnami/nginx helm chart:
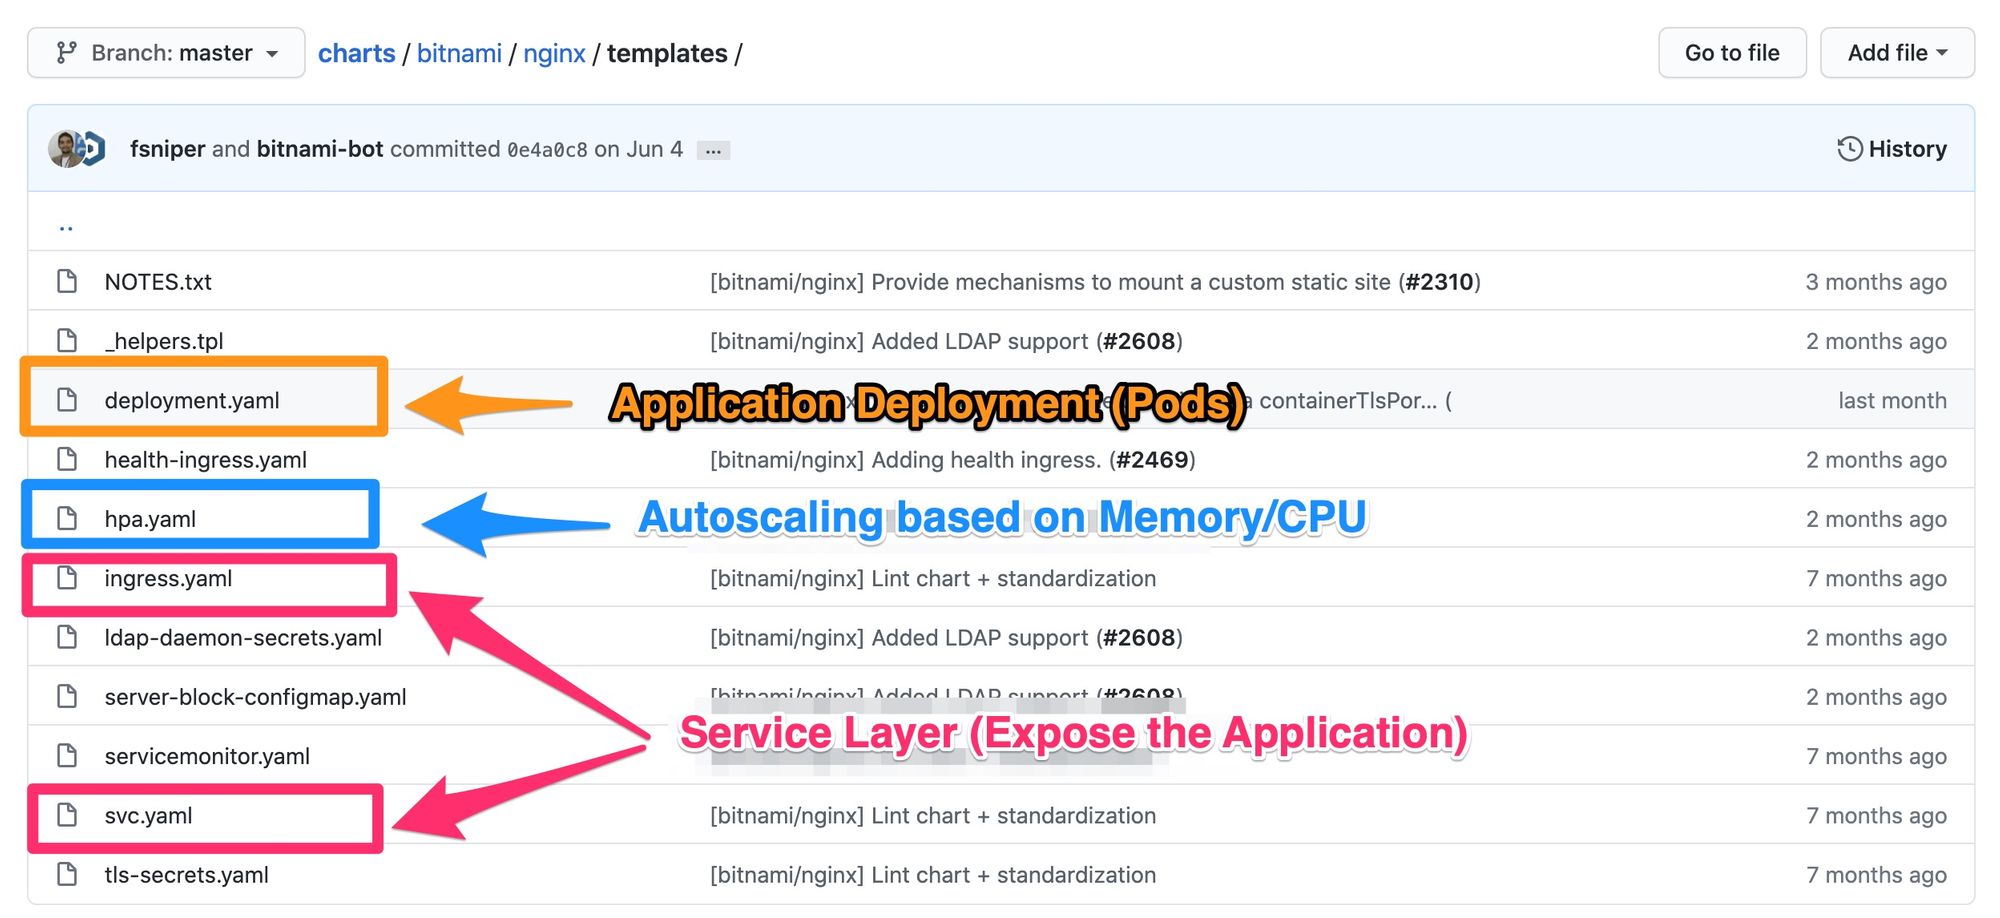
Here is that same block with the Helm templating language. For the sake of brevity I have omitted some parts of the template. If you would like to see the whole thing you can take a look at it in the GitHub repo.
(This is for demonstration purposes and is not a fully functional Helm chart. Please don't use this. Grab the actual Helm chart instead.)
# Source: nginx/templates/deployment.yaml
apiVersion: apps/v1
kind: Deployment
metadata:
  name: {{ template "nginx.fullname" . }}
  labels: {{- include "nginx.labels" . | nindent 4 }}
spec:
  selector:
    matchLabels: {{- include "nginx.matchLabels" . | nindent 6 }}
  replicas: {{ .Values.replicaCount }}
  template:
    metadata:
      labels: {{- include "nginx.labels" . | nindent 8 }}
      # Omitted the annotation labels!
    spec:
      containers:
        - name: nginx
          image: {{ template "nginx.image" . }}
          imagePullPolicy: {{ .Values.image.pullPolicy | quote }}
          ports:
            - name: http
              containerPort: {{ .Values.containerPort }}
            {{ if .Values.containerTlsPort }}
            - name: https
              containerPort: {{ .Values.containerTlsPort }}
            {{ end }}
          {{- if .Values.livenessProbe }}
          livenessProbe: {{- toYaml .Values.livenessProbe | nindent 12 }}
          {{- end }}
          {{- if .Values.readinessProbe }}
          readinessProbe: {{- toYaml .Values.readinessProbe | nindent 12 }}
          {{- end }}
          {{- if .Values.resources }}
          resources: {{- toYaml .Values.resources | nindent 12 }}
          {{- end }}
Where do the Helm Template values come from?
Now, this is what I really like about Helm. The values that are exposed in the template come from one of two places.
Templated Functions
They come from the template itself, as shown here.
{{ template "nginx.fullname" . }}We can find that this is defined in our templates/_helpers.tpl, which is a way of getting more complex functions that we could get with just a yaml file.
# templates/_helpers.tpl
{{/*
Create a default fully qualified app name.
We truncate at 63 chars because some Kubernetes name fields are limited to this (by the DNS naming spec).
*/}}
# Here is the nginx.fullname
{{- define "nginx.fullname" -}}
{{- if .Values.fullnameOverride -}}
{{- .Values.fullnameOverride | trunc 63 | trimSuffix "-" -}}
{{- else -}}
{{- $name := default .Chart.Name .Values.nameOverride -}}
{{- if contains $name .Release.Name -}}
{{- .Release.Name | trunc 63 | trimSuffix "-" -}}
{{- else -}}
{{- printf "%s-%s" .Release.Name $name | trunc 63 | trimSuffix "-" -}}
{{- end -}}
{{- end -}}
Values exposed in the Values.yaml
This is actually a very neat feature and what makes Helm so powerful and configurable.
Each Helm chart comes along with a values.yaml. You can put whatever you want in the values.yaml, and then use it throughout your Helm chart, and it's exposed through the CLI!
## Bitnami NGINX image version
## ref: https://hub.docker.com/r/bitnami/nginx/tags/
##
image:
  registry: docker.io
  repository: bitnami/nginx
  tag: 1.19.1-debian-10-r0
  ## Specify a imagePullPolicy
  ## Defaults to 'Always' if image tag is 'latest', else set to 'IfNotPresent'
  ## ref: http://kubernetes.io/docs/user-guide/images/#pre-pulling-images
  ##
pullPolicy: IfNotPresentThen we see this referred to in our templates as:
# templates/deployment.yaml

# ...
      containers:
        - name: nginx
          image: {{ template "nginx.image" . }}
imagePullPolicy: {{ .Values.image.pullPolicy | quote }}Everything in the values.yaml can also be modified through the Helm CLI:
helm upgrade --install nginx bitnami/nginx \
--set image.tag="my-new-tag"It would then render the containers[0].image as image: docker.io/bitnami/nginx:my-new-tag
Wrap Up
That's it! I hope that you've learned a little about Kubernetes and its package manager Helm. Hopefully it isn't quite as scary as it once was.