

The @ViewChild and @ViewChildren decorators in Angular provide a way to access and manipulate DOM elements, directives and components. In this tutorial, we'll see an Angular 8 example of how to use the two decorators.
You can use ViewChild if you need to query one element from the DOM and ViewChildren for multiple elements.
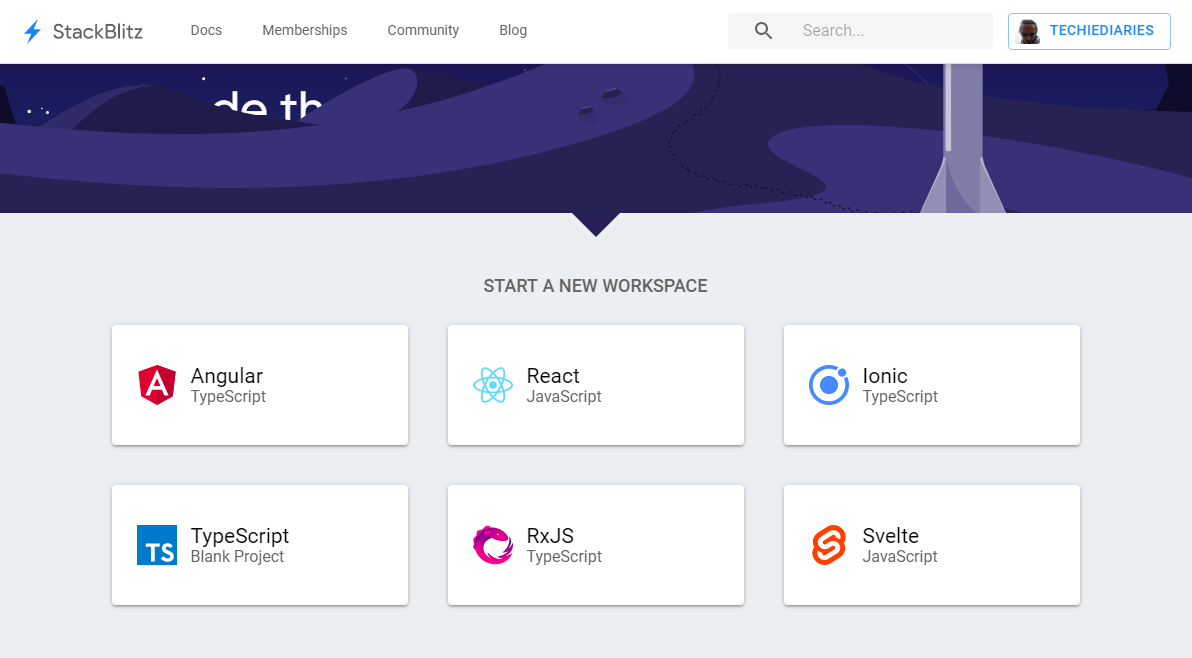
We'll be using an online development IDE available from https://stackblitz.com/ so you don't need to set up your local development machine for Angular at this point.
Head over to Stackblitz, sign in with your GitHub account and choose an Angular workspace:
You should be presented with an online IDE with an Angular 8 project
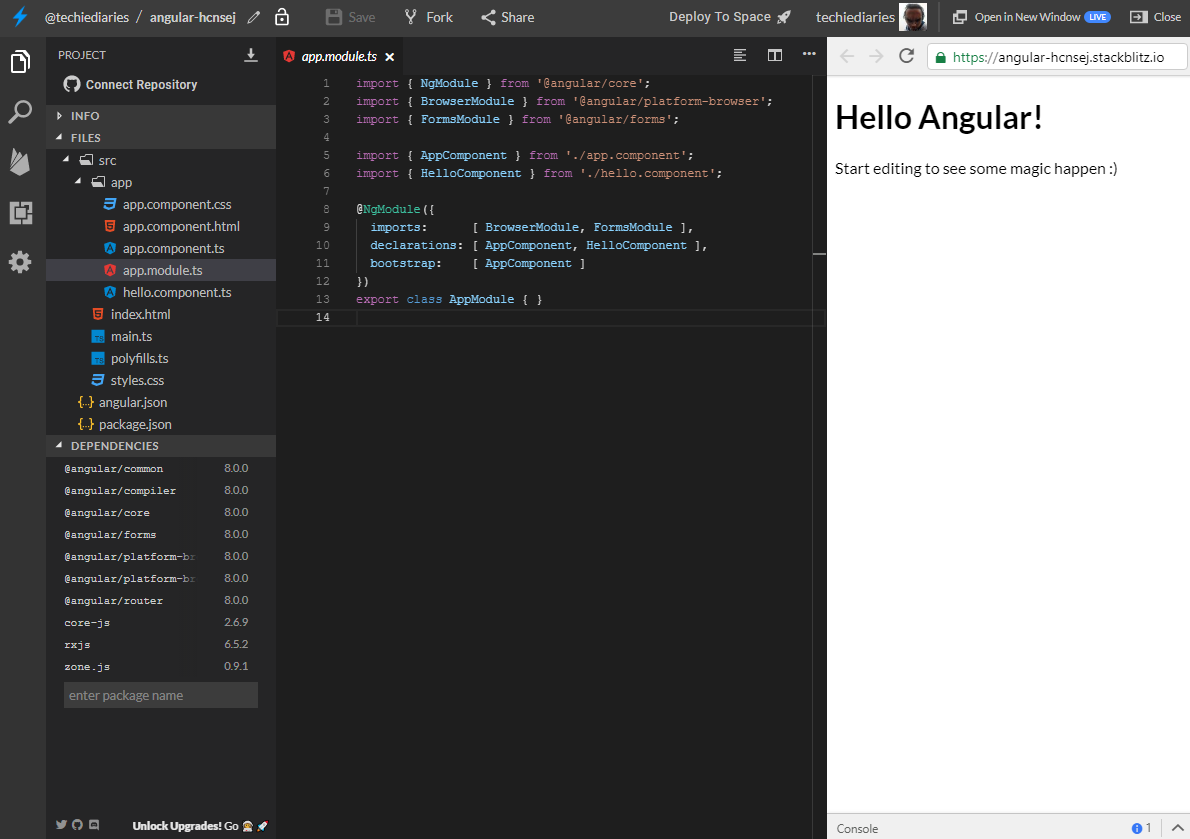
Our Angular project contains the usual App component and a child component called HelloComponent and defined in the src/app/hello.component.ts file with the following code:
import { Component, Input } from '@angular/core';

@Component({
  selector: 'hello',
  template: `<h1>Hello !</h1>`,
  styles: [`h1 { font-family: Lato; }`]
})
export class HelloComponent  {
  @Input() name: string;
}
The component accepts a name property and uses an inline template which simply displays the value passed via the name property from the parent component.
In the component decorator, we used hello as the selector for the component so in the the HTML template of the App component defined in the src/app/app.component.htmlfile, we include the child component using the following code:
<hello name=""></hello>
<p>
  Start editing to see some magic happen :)
</p>
After running our Angular application the hello component is rendered and becomes part of the DOM so we can query it just like any normal DOM element.
What's ViewChild in Angular?
ViewChild is a decorator that creates a view or DOM query. According to the docs
A property decorator that configures a view query. The change detector looks for the first element or the directive matching the selector in the view DOM. If the view DOM changes, and a new child matches the selector, the property is updated.
The decorator takes the following meta information:
selector- the selector of the element to query. This can be a directive type or a name.read- read a different token from the queried elements.static- This is new in Angular 8 and indicates whether or not to resolve query results before change detection runs.
ViewChild can take the following selectors:
- Classes with the
@Componentor@Directivedecorators i.e components and directives, - Template reference variables,
- Providers,
TemplateRef
Now, let's go back to our src/app/app.component.ts file and let's see how we can query the child component using ViewChild. First, change the code accordingly:
import { Component, ViewChild, AfterViewInit } from '@angular/core';

import { HelloComponent } from './hello.component';

@Component({
  selector: 'my-app',
  templateUrl: './app.component.html',
  styleUrls: [ './app.component.css' ]
})
export class AppComponent implements AfterViewInit {
  name = 'Angular';
  @ViewChild(HelloComponent, {static: false}) hello: HelloComponent;

  ngAfterViewInit() {
    console.log('Hello ', this.hello.name);
  }
}
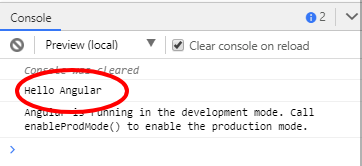
In the console, you should get Hello Angular:
Now, let's explain the code.
First, we imported HelloComponent and ViewChild and AfterViewInit from the @angular/core package:
import { Component, ViewChild, AfterViewInit } from '@angular/core';
import { HelloComponent } from './hello.component';
Next, we create a query called hello that takes HelloComponent as the selector and has static equals to false:
@ViewChild(HelloComponent, {static: false}) hello: HelloComponent;
In Angular 8, timing for ContentChild and ViewChild needs to be specified explicitly.
See: Why do I have to specify {static: false}? Isn't that the default?
Next, in the ngAfterViewInit() life-cycle hook, we can use the query to access the DOM element for the hello component. In our example, we accessed the name property of the component, after it's mounted in the DOM, which contains the Angular string:
  ngAfterViewInit() {
    console.log('Hello ', this.hello.name);
  }
We can access any properties and even methods from the queried component.
Note: View queries are set before the ngAfterViewInit callback is called.
Querying Standard HTML Elements with Template References
We can also query standard HTML elements using ViewChild and template reference variables. Let's go back to our src/app/app.component.html file and change it as follows:
<hello name=""></hello>

<p #pRef>
  Start editing to see some magic happen :)
</p>
We simply added the helloRef template reference to our hello component. Now let's change our code to access the component using its reference. Go back to the src/app/app.component.ts file and change accordingly:
import { Component, ViewChild, AfterViewInit, ElementRef } from '@angular/core';

import { HelloComponent } from './hello.component';

@Component({
  selector: 'my-app',
  templateUrl: './app.component.html',
  styleUrls: [ './app.component.css' ]
})
export class AppComponent implements AfterViewInit {
  name = 'Angular';
  @ViewChild(HelloComponent, {static: false}) hello: HelloComponent;

  @ViewChild('pRef', {static: false}) pRef: ElementRef;

    ngAfterViewInit() {
    console.log(this.pRef.nativeElement.innerHTML);
    this.pRef.nativeElement.innerHTML = "DOM updated successfully!!!";
  }
}
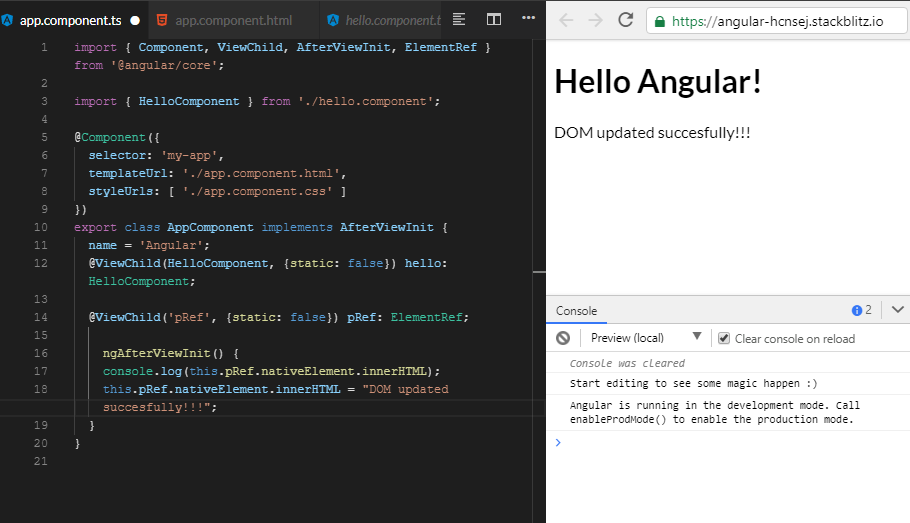
We import ElementRef and we create a query configuration to access the <p> DOM element with the #pRef template reference as follows:
@ViewChild('pRef', {static: false}) pRef: ElementRef;
Next, in the ngAfterViewInit() method we can access and modify the native DOM element using the nativeElement object of ElementRef:
  @ViewChild('pRef', {static: false}) pRef: ElementRef;

    ngAfterViewInit() {
    console.log(this.pRef.nativeElement.innerHTML);
    this.pRef.nativeElement.innerHTML = "DOM updated successfully!!!";
  }
This is the live example from this link.
What's ViewChildren in Angular?
ViewChildren is another property decorator which is used to query the DOM for multiple elements and return a QueryList.
According to the docs:
You can use ViewChildren to get the QueryList of elements or directives from the view DOM. Any time a child element is added, removed, or moved, the query list will be updated, and the changes observable of the query list will emit a new value.
Let's see an example.
Go to the src/app/app.component.html file and update it as follows:
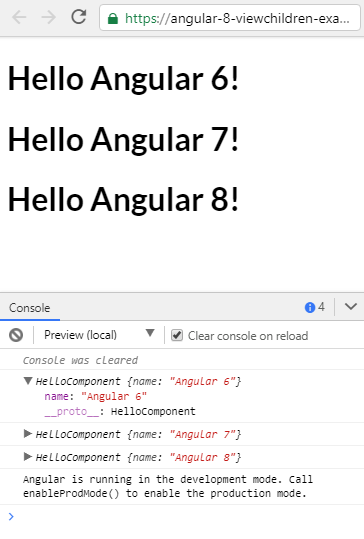
<hello  name="Angular 6"  ></hello>
<hello  name="Angular 7"  ></hello>
<hello  name="Angular 8"  ></hello>
We are simply diplsaying the hello component three times. Let's now query the DOM. Open the src/app/app.component.ts file and change it as follows:
import { Component, ViewChildren, AfterViewInit, QueryList } from '@angular/core';

import { HelloComponent } from './hello.component';

@Component({
  selector: 'my-app',
  templateUrl: './app.component.html',
  styleUrls: [ './app.component.css' ]
})
export class AppComponent implements AfterViewInit {
  name = 'Angular';
  @ViewChildren(HelloComponent) hellos: QueryList<any>;

  ngAfterViewInit() {

     this.hellos.forEach(hello => console.log(hello));

  }
}
You should this output in the console:
Now, let's explain the code.
First we import ViewChildren, AfterViewInit and QueryList from @angular/core package.
Next, we create a query configuration for accessing multiple DOM elements:
@ViewChildren(HelloComponent) hellos: QueryList<any>;
@ViewChildren returns a QueryList which stores a list of items. When the state changes Angular will automatically update this query list.
Finally, in the ngAfterViewInit() method, we can iterate over the query list and log each DOM element:
  ngAfterViewInit() {
     this.hellos.forEach(hello => console.log(hello));
  }
You can find the live example from this link.
Conclusions
In this tutorial, we've seen how we can access and modify the DOM in Angular 8 using ViewChild and ViewChildren decorators and a couple of other APIs like QueryListand ngAfterViewInit()
This post was originally posted in techiediaries.