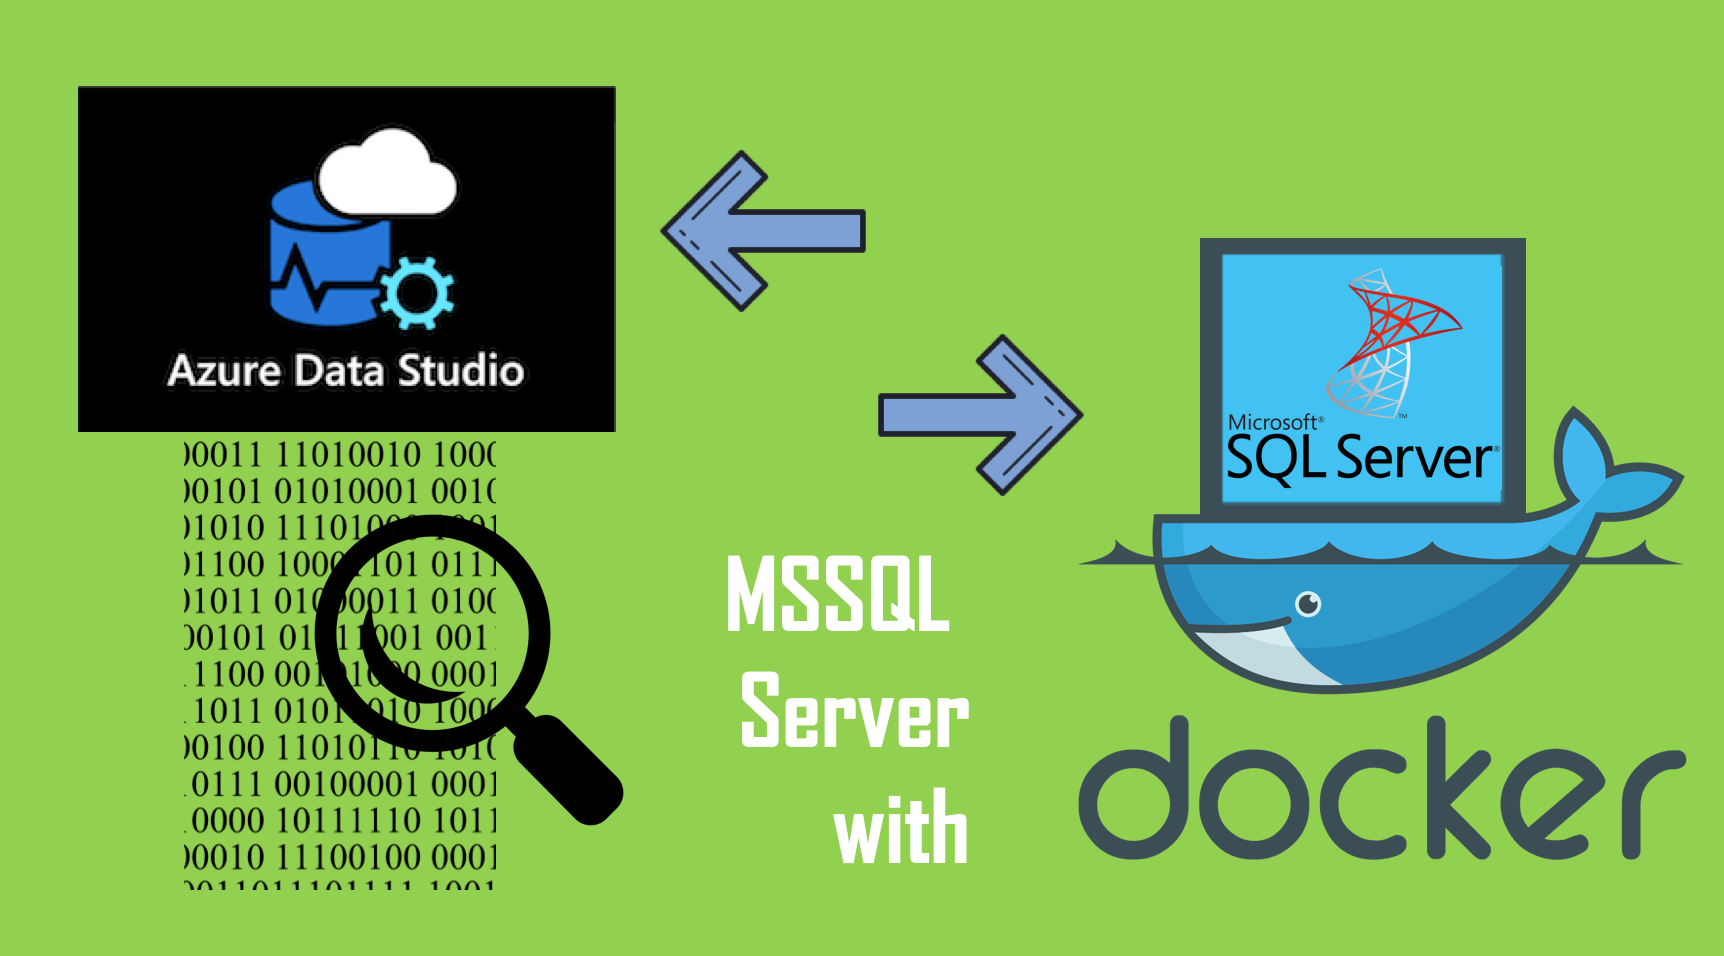
This guide shows you how to use Docker to pull a MSSQL Server image and run it. Azure Data Studio is a cross-platform database tool that will be using to connect our Docker container with MSSQL and execute SQL statements.
At the end, I will show you how to import a database to the Docker file system so that you can access it through Azure Data Studio.
Check out other related guides here:
- How to Connect your AWS RDS Microsoft SQL Server using Azure Data Studio
- How to Import a Sample Database to your AWS RDS Microsoft SQL Server using S3
We will be touching on the technologies shown below:

- Database: Microsoft SQL Server
- Container to pull mssql-server-demo: Docker
- Installer for mssql-cli: Node.js (Run-time Environment) / Node Package Manager (NPM)
- Database tool and GUI: Azure Data Studio
Building our Environment with Docker
Installing Docker
Full guide for this portion here:
- Download Docker CE (Community Edition) for Mac here.
- To install, double-click on the .dmg file and then drag the Docker application icon to your Application folder.
What is Docker?
Docker is a platform that enables software to run in its own isolated environment. SQL Server (from 2017) can be run on Docker in its own isolated container.
Once Docker is installed, you simply download — or “pull” — the SQL Server on Linux Docker Image to your Mac, then run it as a Docker container. This container is an isolated environment that contains everything SQL Server needs to run.
Launch Docker
Open your Docker application, it should be located in the Applications folder.
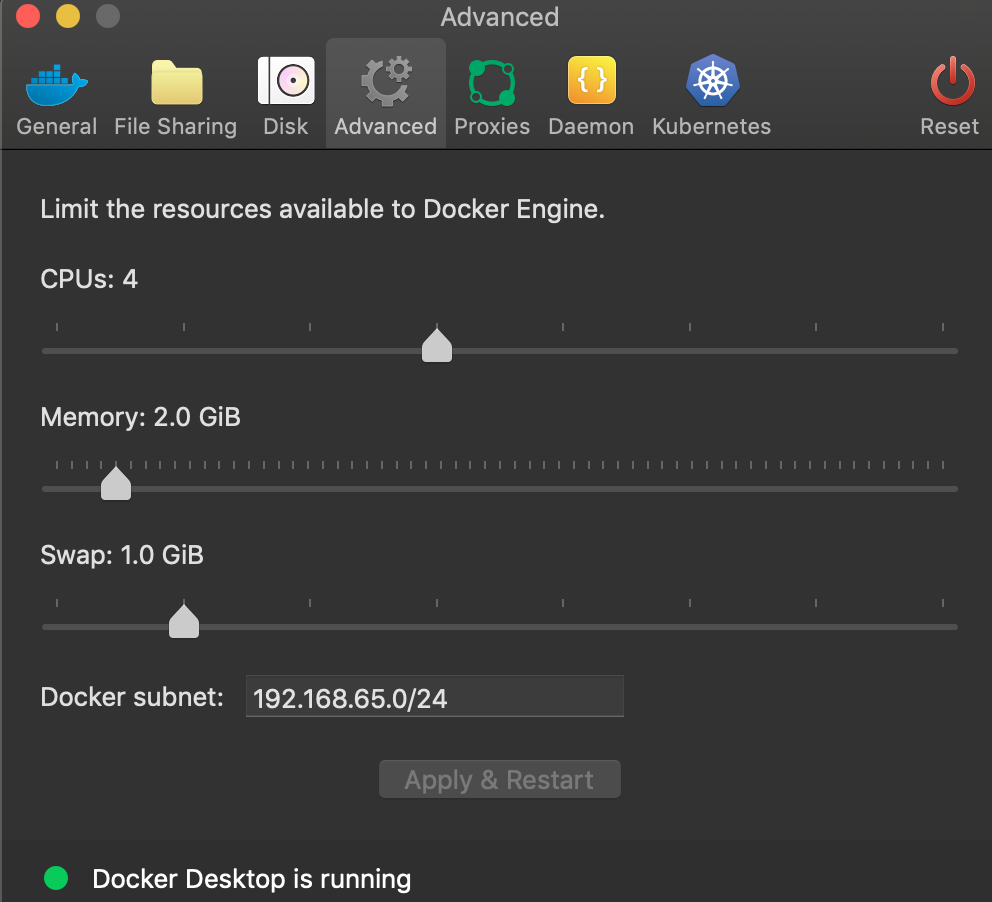
Increase the Memory
By default, Docker will have 2GB of memory allocated to it. SQL Server needs at least 3.25GB. To be safe, increase it to 4GB if you can. Since this is just a playground, 2GB should be enough.
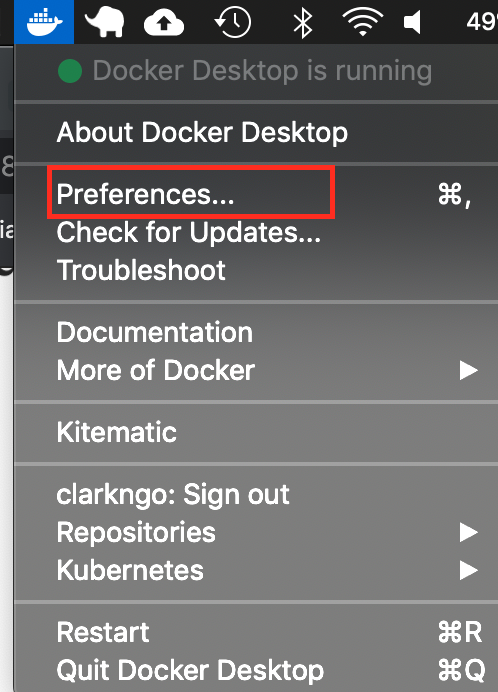
Optional - in case you want to increase memory size:
- Select Preferences from the little Docker icon in the top menu
- Slide the memory slider up to at least 2GB
- Click Apply & Restart
Download SQL Server
Open a Terminal window and run the following command.
sudo docker pull mcr.microsoft.com/mssql/server:2019-latestThis downloads the latest SQL Server 2019 for Linux Docker image to your computer.
You can also check for the latest container version on the Docker website if you wish.
Launch Docker Image
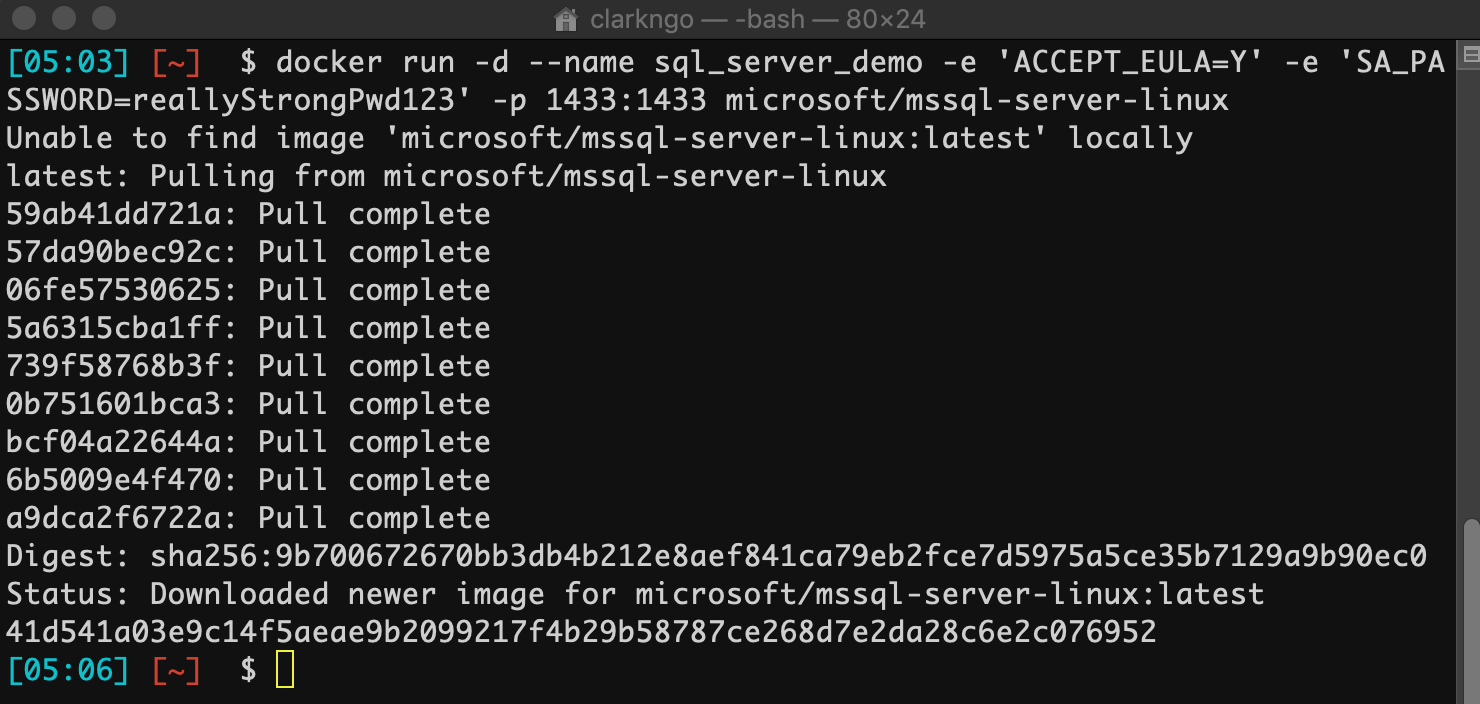
Run the following command to launch an instance of the Docker image you just downloaded:
docker run -d --name sql_server_demo -e 'ACCEPT_EULA=Y' -e 'SA_PASSWORD=reallyExample output:
Check the Docker container (optional)
You can type the following command to check that the Docker container is running.
docker psIf it’s up and running, it should return something like this:

If you accidentally closed your Docker App, open your terminal and type
docker start sql_server_demoInstall the Node.js and NPM
Check if you have Node.js and NPM. Run the following commands in your terminal.
node -v
npm -v
If you get an output with a version number, skip the rest of this section.
Then visit the Node.js website by clicking the following link:
Click the LTS version (the version number may be various) download button to download the Node.js package:
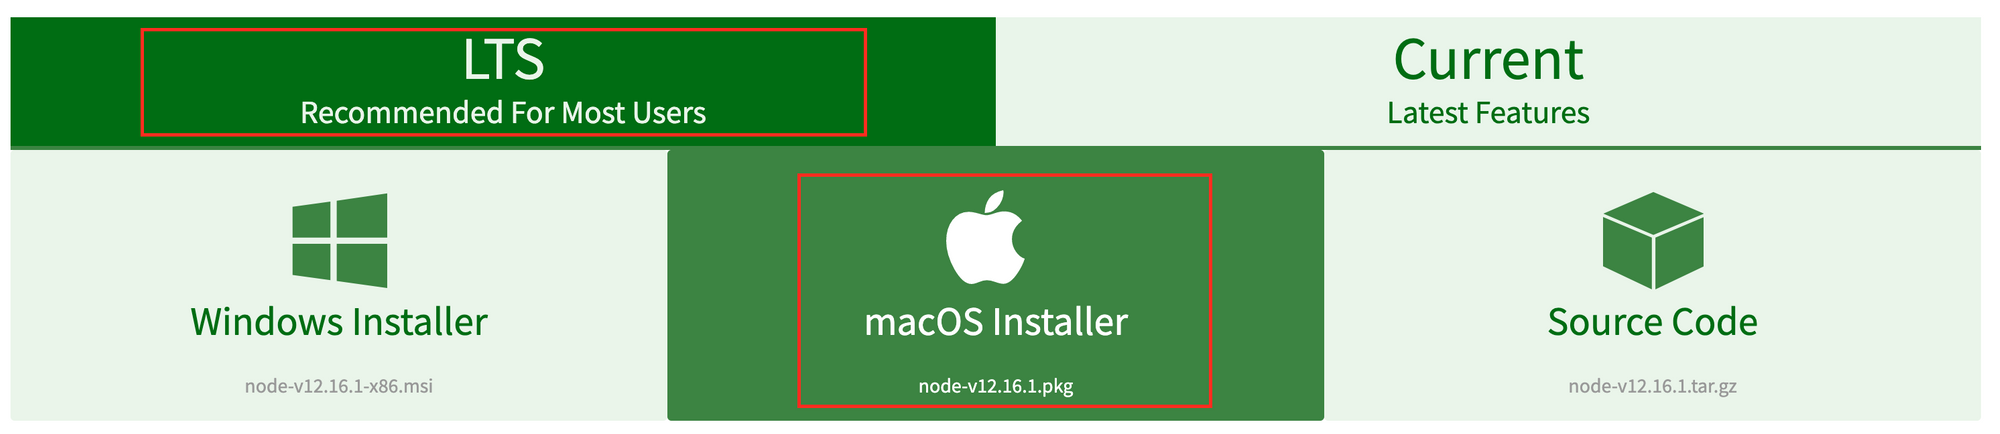
Next click and run the package after downloading. MacOS and Windows will have different installation process. Please follow the instruction to install the Node.js.
Then test again if Node.js and NPM were installed successfully by running the following commands in the terminal:
node -v
npm -v
An output should look like this:

Install sql-cli
Run the following command to install the sql-cli command line tool. This tool allows you to run queries and other commands against your SQL Server instance.
npm install -g sql-cliIf you get a permission error, use the sudo command:
sudo npm install -g sql-cliConnect to MSSQL Server
Connect to your SQL Server using the mssql command, followed by the username and password parameters. Syntax: -u <username> -p <password>
mssql -u sa -p reallyStrongPwd123Your output should look like this if you successfully connected:

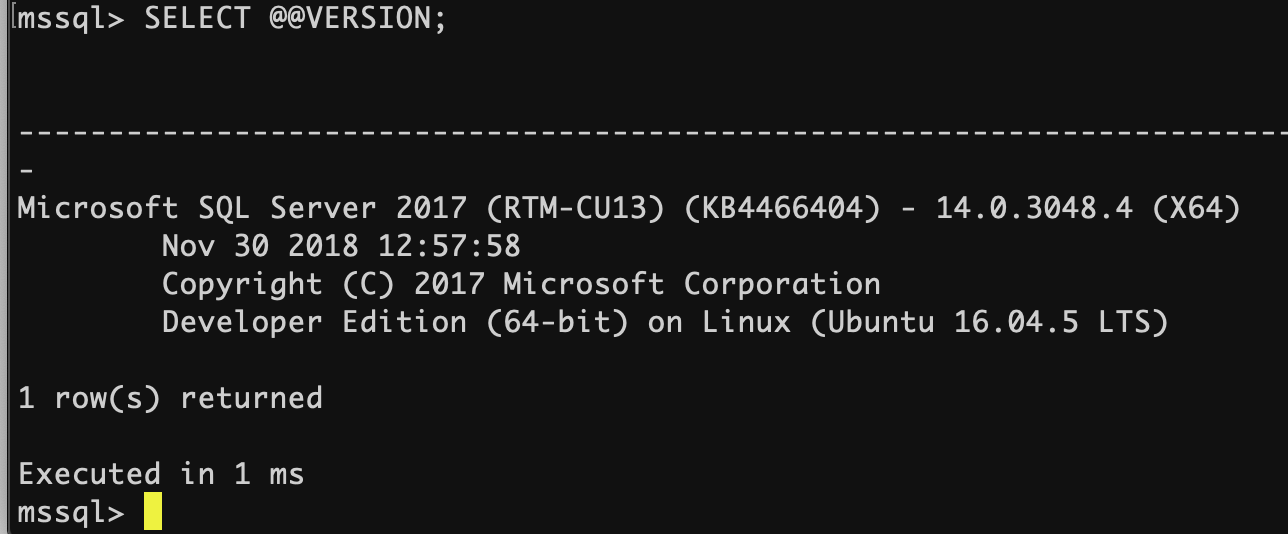
Run a Quick Test
Run a quick test to check if you can connect to your SQL Server. Use the following SQL statement to check your SQL Server version:
SELECT @@VERSION;If it’s running, you should see something like this:
Download an SQL Server GUI - Azure Data Studio
Azure Data Studio (formerly SQL Operations Studio) is a free GUI management tool that you can use to manage SQL Server on your computer. You can use it to create and manage databases, write queries, backup and restore databases, and more.
Azure Data Studio is available on Windows, Mac and Linux.
Install Azure Data Studio
To install Azure Data Studio onto your Mac:
- Visit the Azure Data Studio download page, and click the .zip file for macOS
- Once the .zip file has finished downloading, double click it to expand its contents
- Drag the .app file to the Applications folder (the file will probably be called Azure Data Studio.app)
Connect to SQL Server
Now that Azure Data Studio is installed, you can use it to connect to SQL Server.
- Launch Azure Data Studio. It is located in your Applications folder.
- Enter the login credentials and other information for the SQL Server instance that you’d like to connect to:
It should look similar to this:
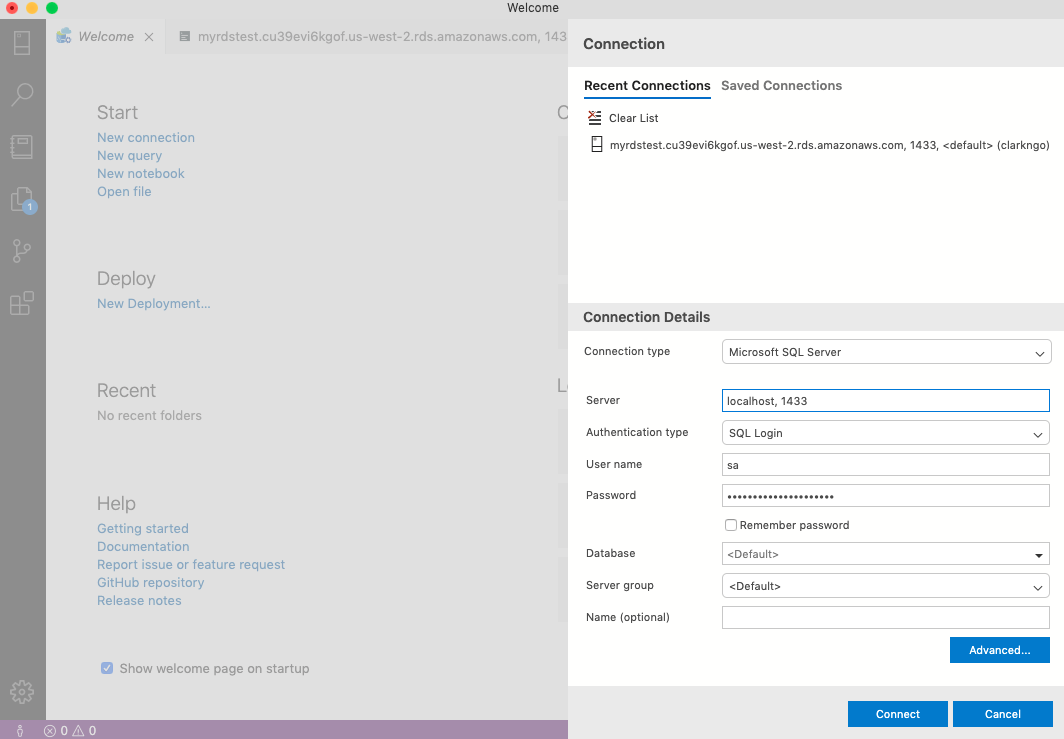
It should look similar to this:
- Server Name: localhost, [port number]
Example: localhost, 1433 - Authentication Type: SQL Login
- User name: [your SQL Server username] or sa
- Password: [your SQL Server password] or reallyStrongPwd123
- Database Name: <default>
- Server Group: <default>
If you use a port other than the default 1433, click Advanced and enter it in the Port field.
Alternatively, you can append it to your server name with a comma in between. For example, if you used port 1400, type in localhost,1400.
You can now go ahead and create databases, run scripts, and perform other SQL Server management tasks.
- Click New Query
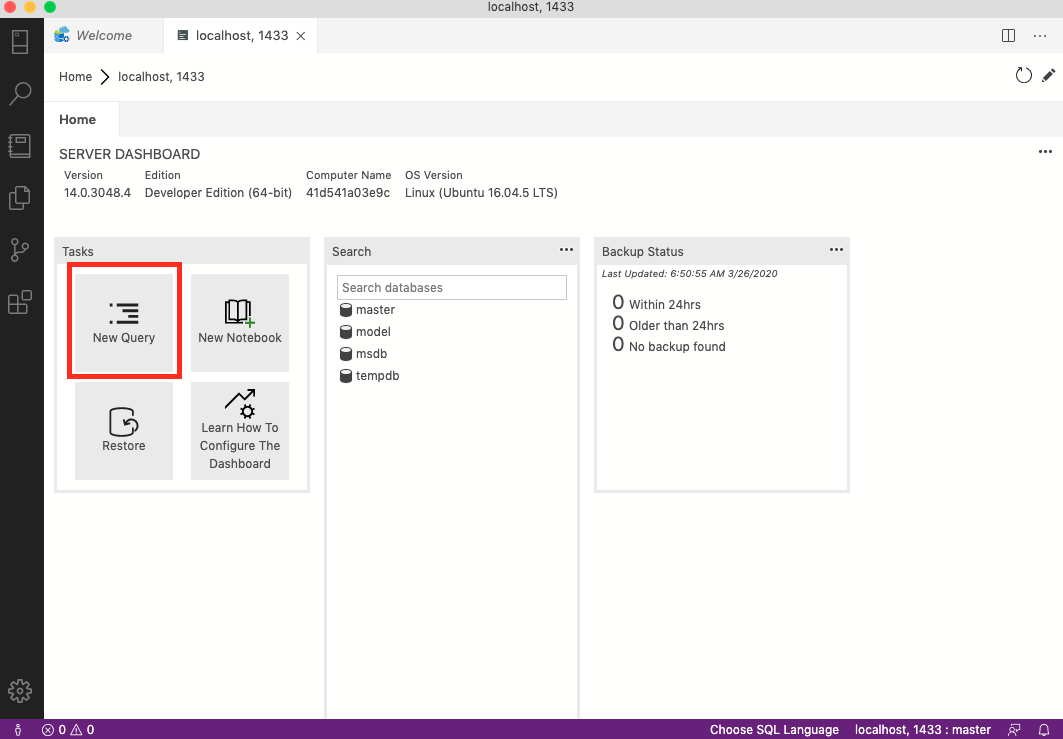
2. Type SELECT @@VERSION, then Click Run Query.
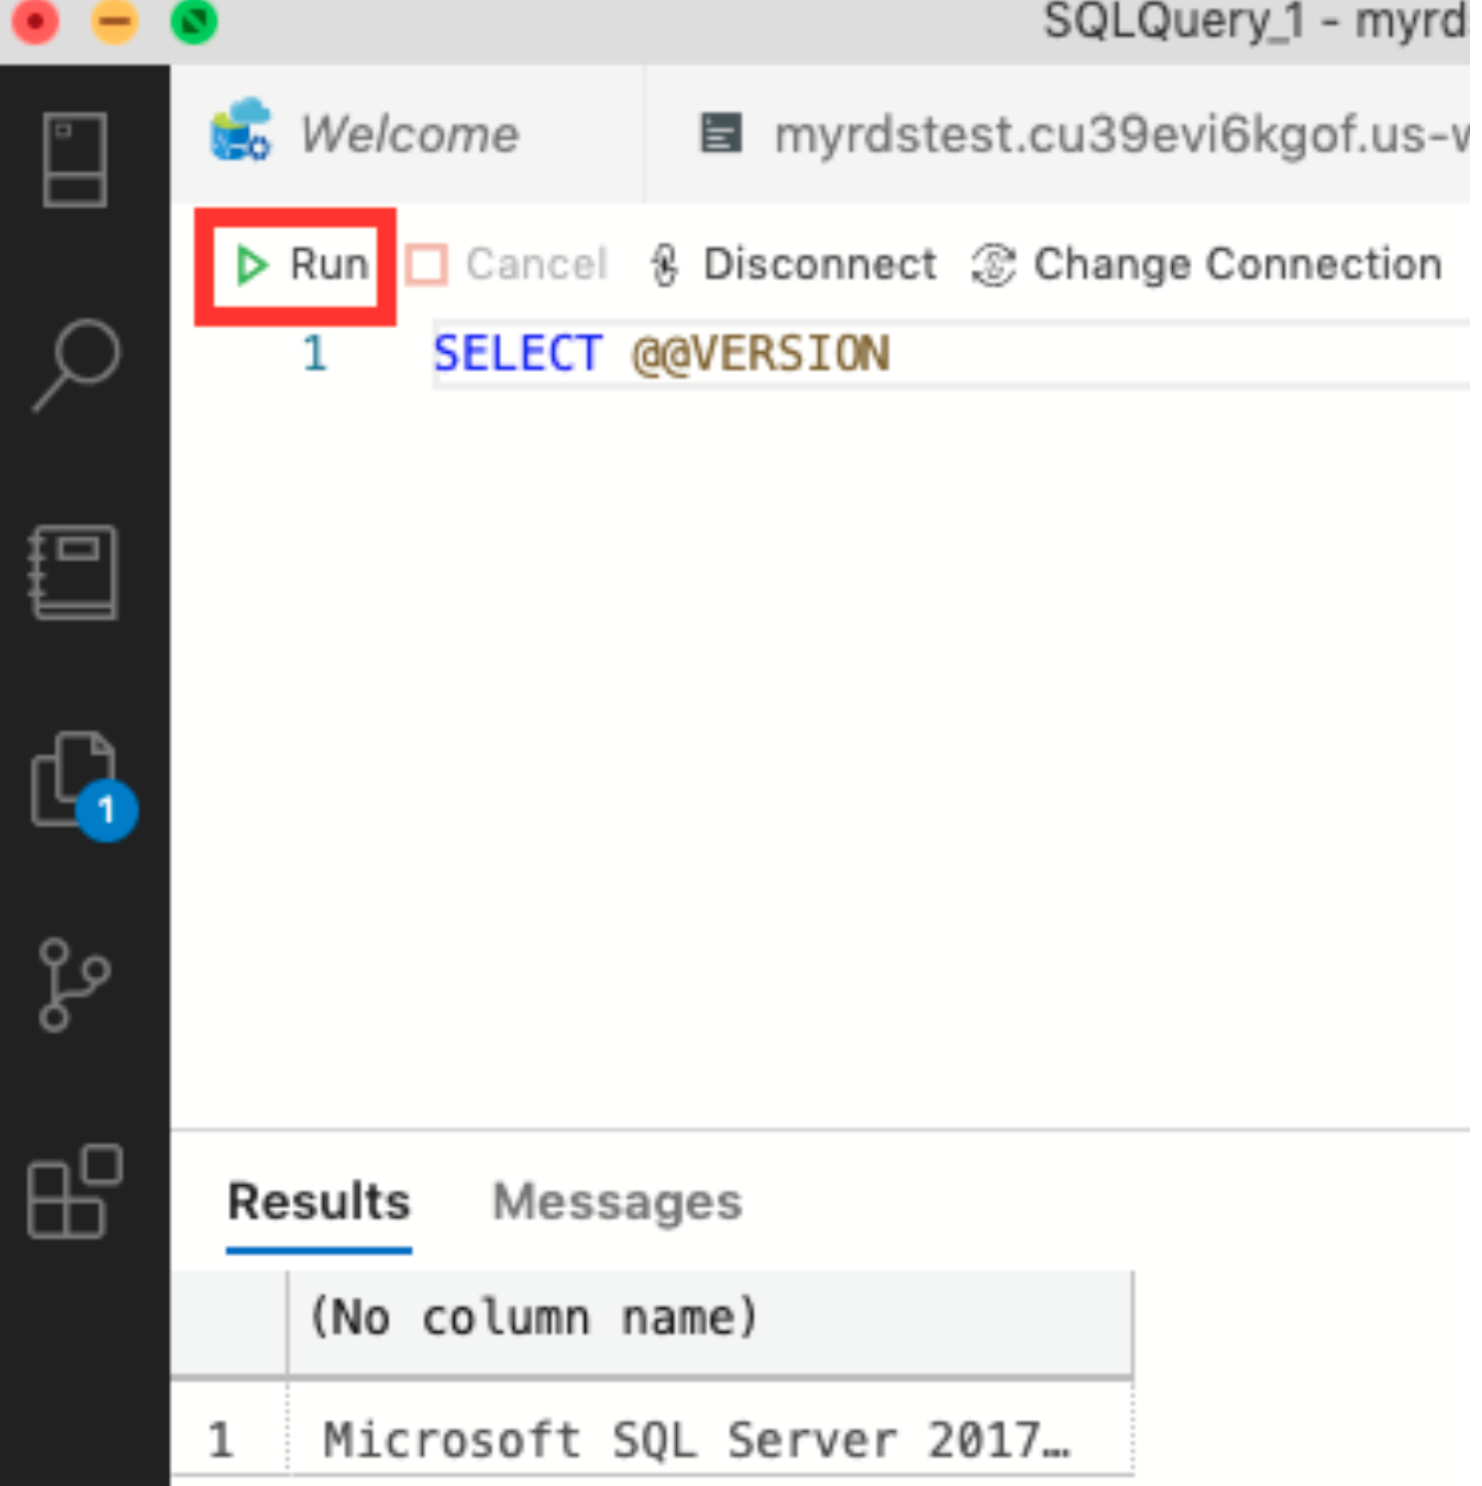
You should be able to see: Microsoft SQL Server in the Results.
Importing a sample database to your SQL Server using Azure Data Studio
Download the sample database file AdventureWorks
To get the OLTP downloads of AdventureWorks, go to this link and choose any sample database. In my example, I choose AdventureWorks2017.bak. We will upload this to the S3 Bucket.
Copying the file to your docker
Type the following command in the terminal following this syntax:
docker cp <location_of_file> <container_id>:/var/opt/mssql/dataIt should look like this:

If you forgot your container id, use the docker ps command.

Importing the sample database in Docker
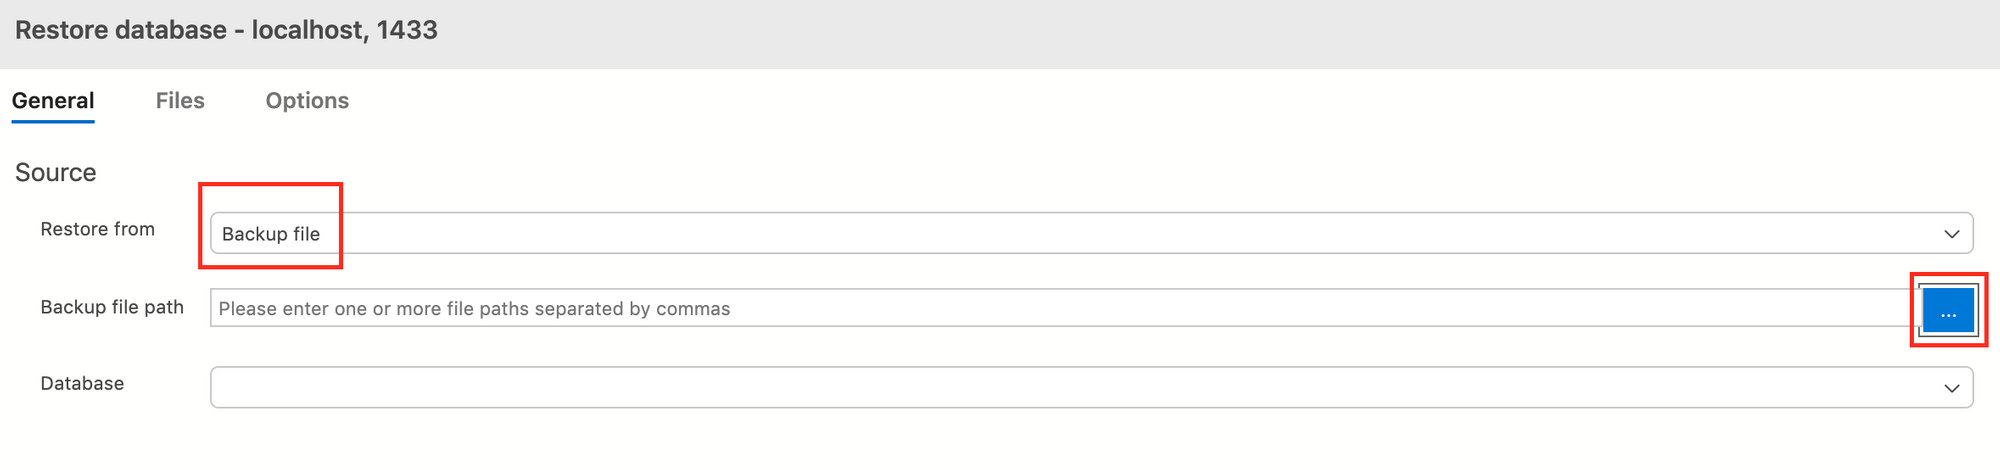
Go to Azure Data Studio, and click the localhost, 1443, then choose Restore.

Then choose Backup file as the selection for Restore from. Next, click the blue button on the right of Backup file path.
Look for the sample database file. It should be located in
/var/opt/mssql/data/AdventureWorks2017.bak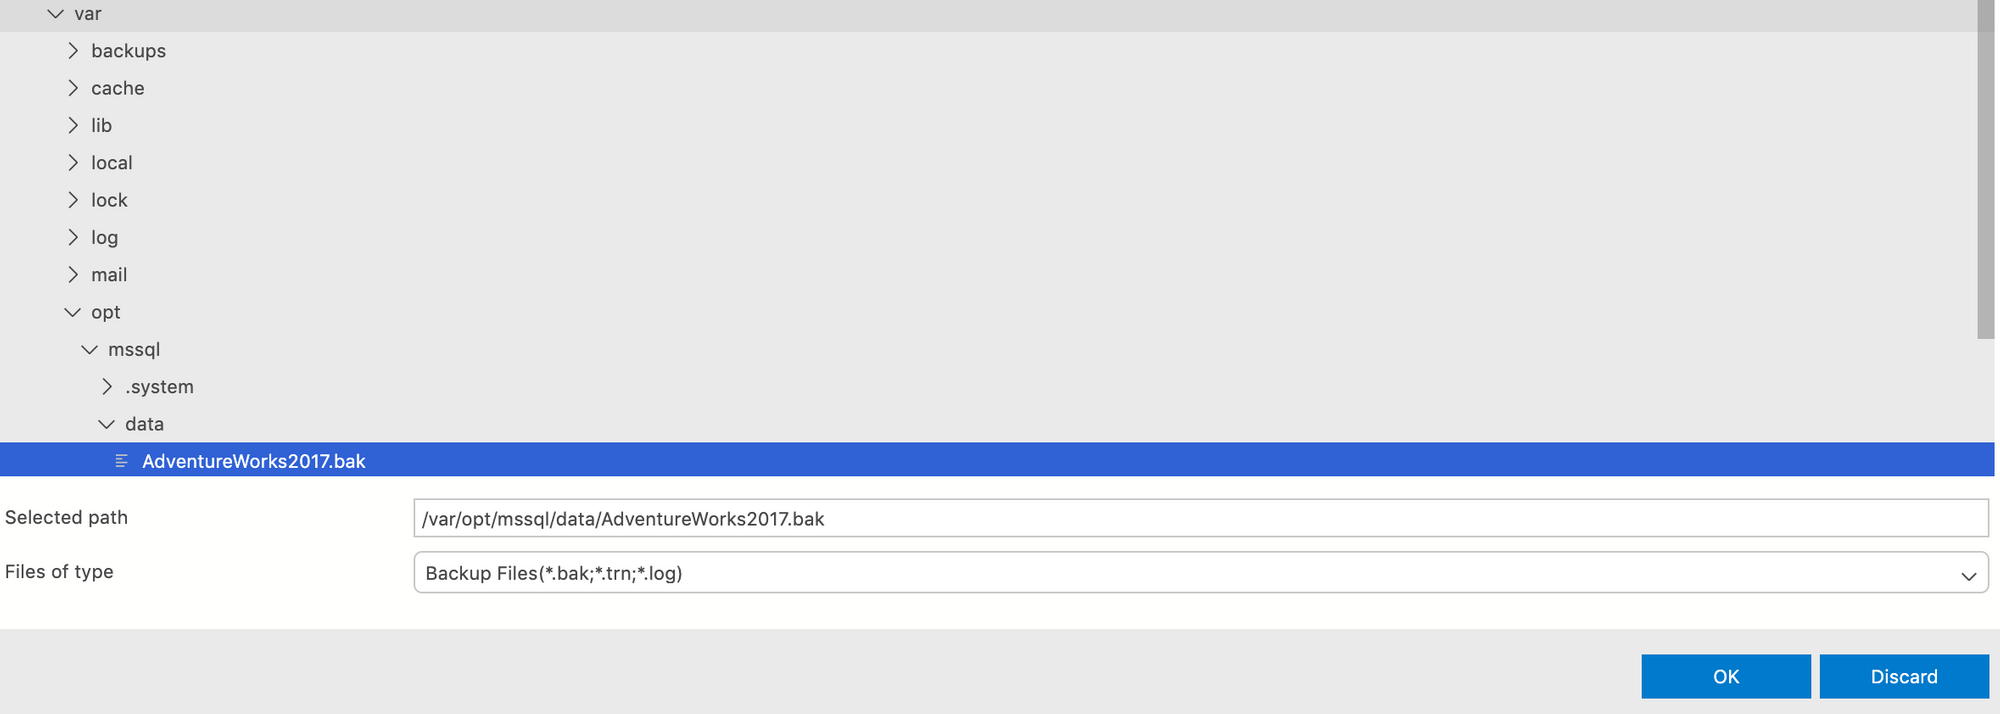
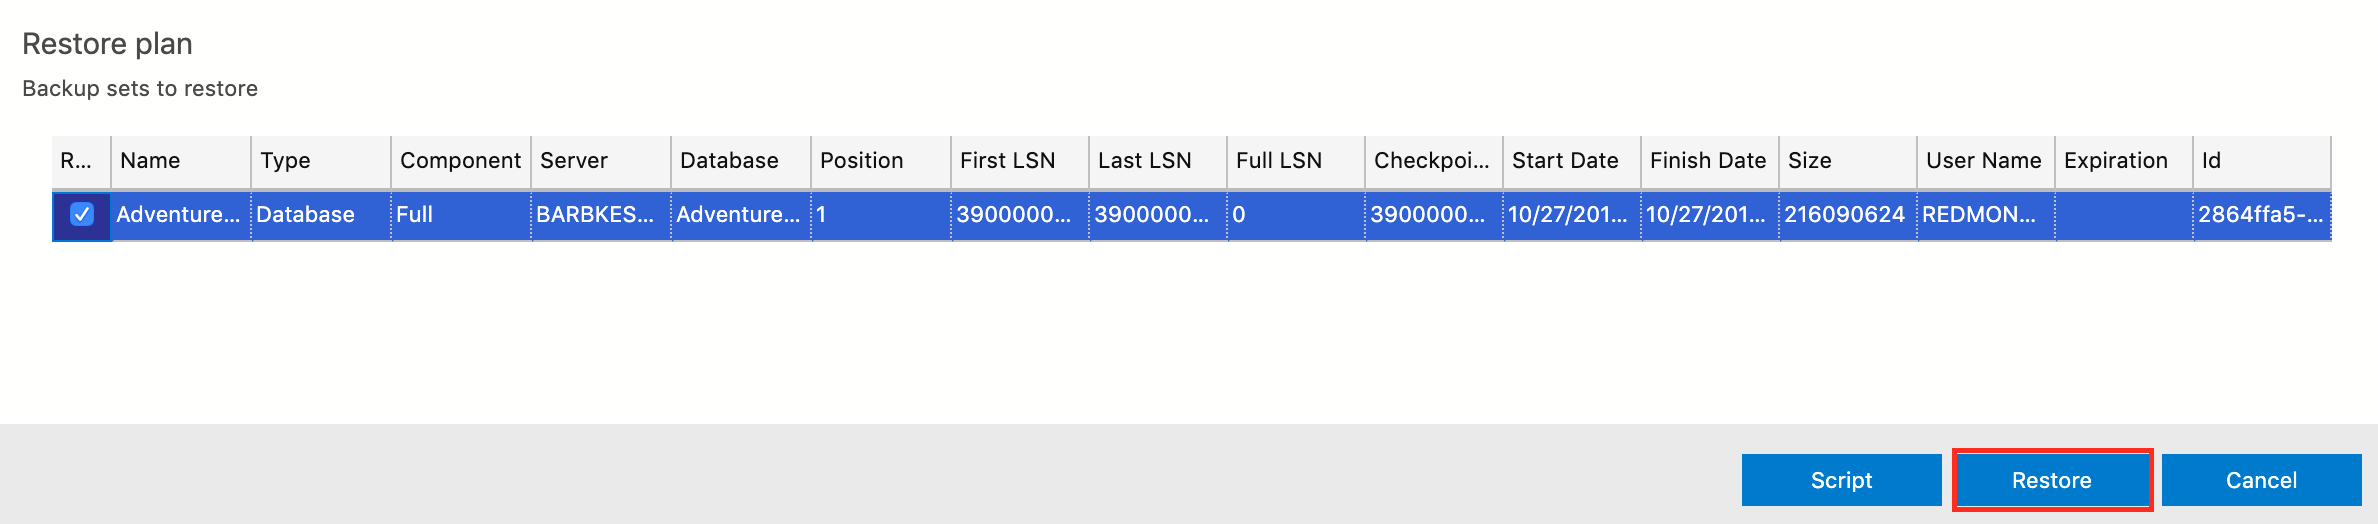
Choose Restore.
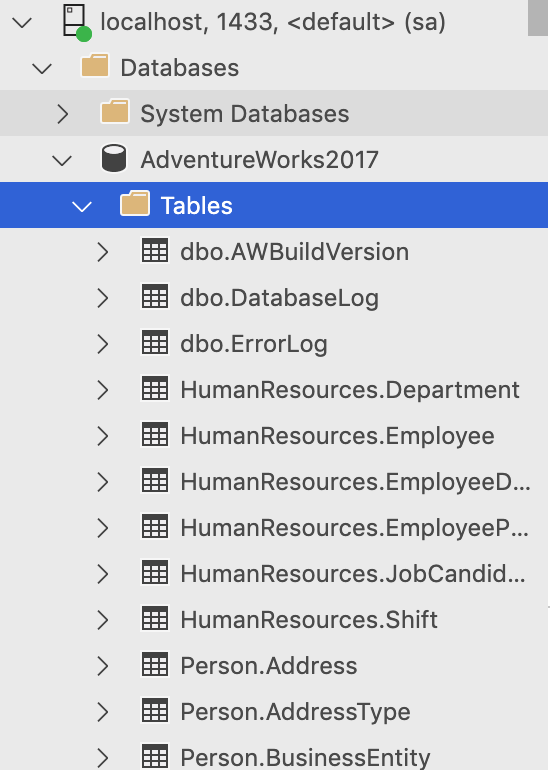
Check your localhost, 1443. It should generated a Database named AdventureWorks2017 and have contents such as Tables and Views. If not, right-click on localhost, 1443 and choose Refresh. You can also restart your Azure Data Studio application.
Testing the sample database
- Choose AdventureWorks2017 from the dropdown menu.
- Write a SQL query:
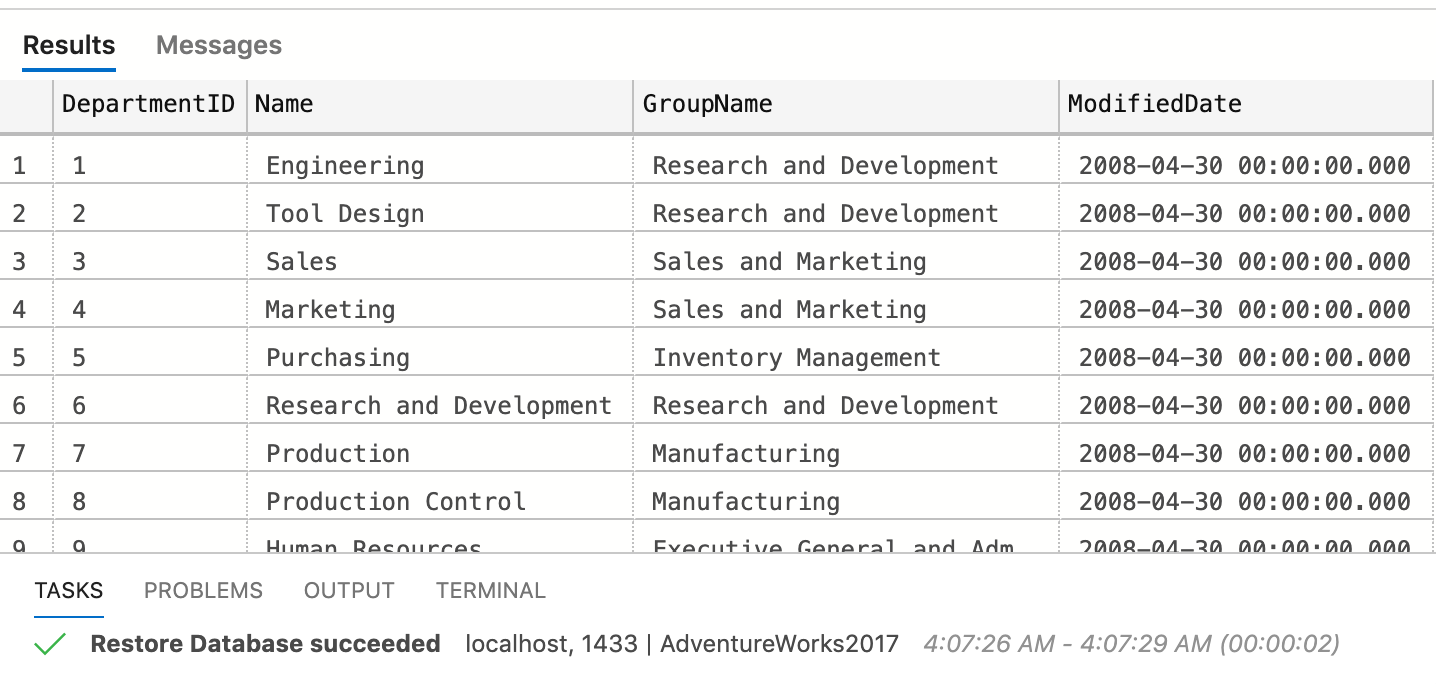
SELECT * FROM HumanResources.Department;3. Click Run to run the query.

You should have an output like this:
Congratulations! ???
Resources:
Connect with me on LinkedIn here