Voice apps completely change the way we interact with the digital world. Voice adds another dimension to human-computer interaction that developers are only beginning to explore.
In this article, I will show you how you can use your existing backend architecture & APIs, connecting them with your voice apps to offer a new experience to your customers. Voice apps borrow a lot from our general development process, not requiring separate development resources.
What we are building
We are going to build a superhero search app using the Open Source Superhero API.
I have added a wrapper around this API to make it accessible from our Voice App. You can find the code in this gist - https://gist.github.com/akash-joshi/476ead410a244a48e037c138ba2387b0.
Take a look at the completed app below:
We will build this for Voice apps (Alexa and Google). We will be using the platform VoiceFlow, which allows us to build voice apps visually.
Voiceflow Tutorial
VoiceFlow is a visual way to create voice apps, and is very easy to use and understand.
Firstly, create an account there to get started.
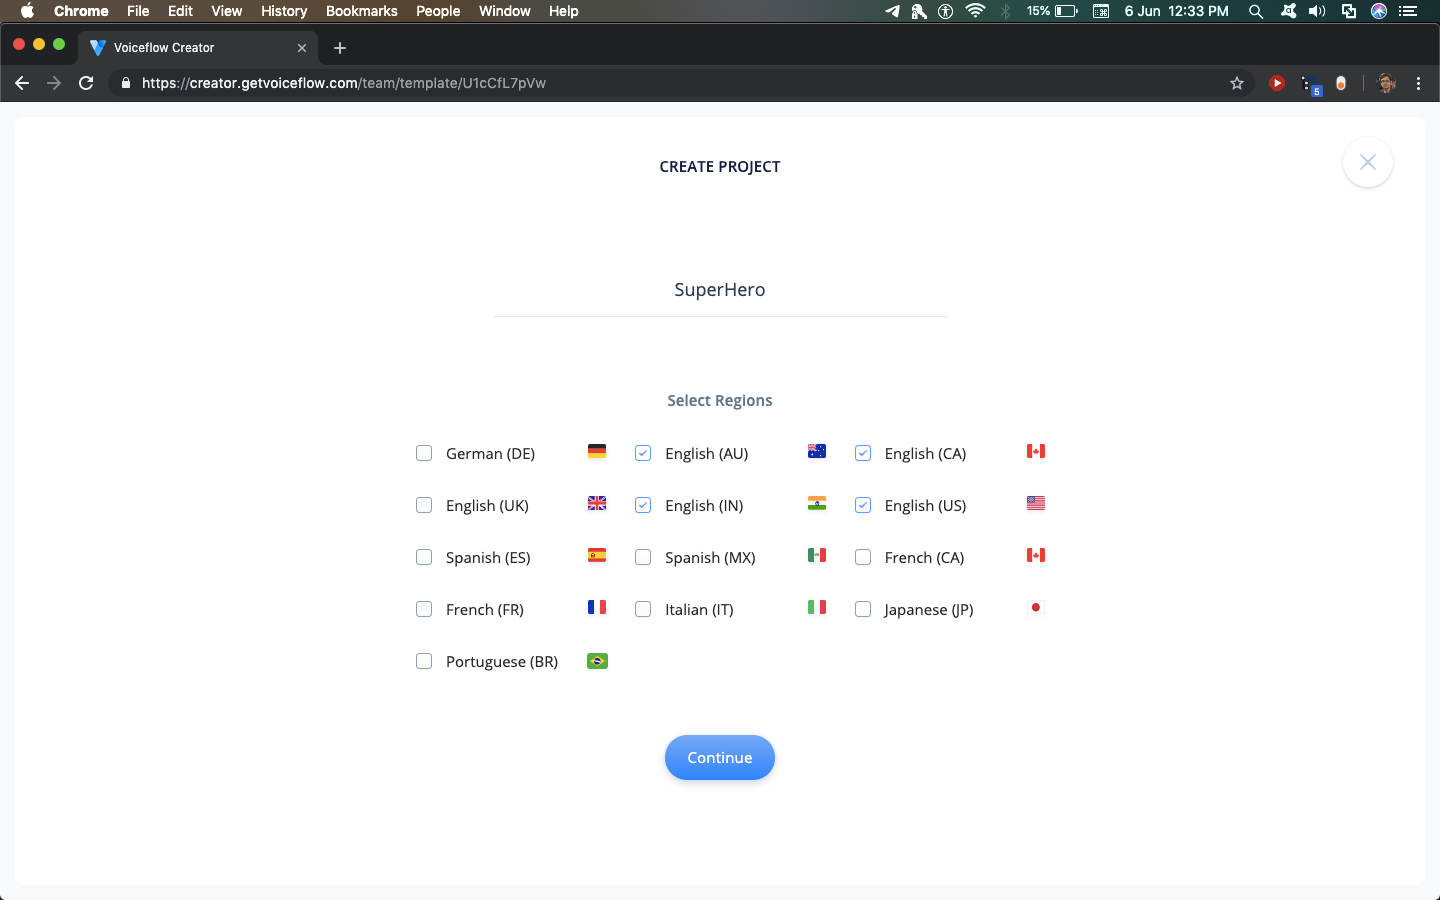
After creating an account, create a new project, giving it an appropriate name. For the purpose of this tutorial, we have chosen all English regions as deployment regions.

You will end up on a blank canvas after this. Don't be overwhelmed by all the options present on the screen, this tutorial will guide you through all the relevant blocks required.
In the blocks submenu on the left, you will see several blocks which can be used to build an Alexa or Google skill. Each block performs a certain function, and Voiceflow is based on building Voice apps by combining these blocks.
1. Speak Block
The first block that we will use is the Speak Block. We will use it to make Alexa say something to the user. Drag a speak blog onto the canvas, rename it to Introduction and write a suitable introduction to your app in the text area. I will use "Welcome to Superhero! Say the name of a hero to search!".
At any point, test out your app by clicking on the Play Button.

2. Capture Block
The next block we will use is the Capture block. It is used to capture data from the user's voice and store it into a variable.
Firstly, create a new variable in the 'Variables' submenu on the left by typing a name and pressing enter. Use the name 'hero' for now.

Adding a capture block, name "Input Type" as "Actor" and "Capture input To" as "hero".

Add a speech block after it, saying : "Searching for {hero}. <break time='2s' /> ". We use curly brackets to use a variable in speech. Be sure to enter {hero} by hand so that Voiceflow detects it as a variable. The <break time='2s' /> is a tag which is part of a language called Speech Synthesis Markup Language (SSML). You can read more about it on Amazon's official documentation page.

3. API Block
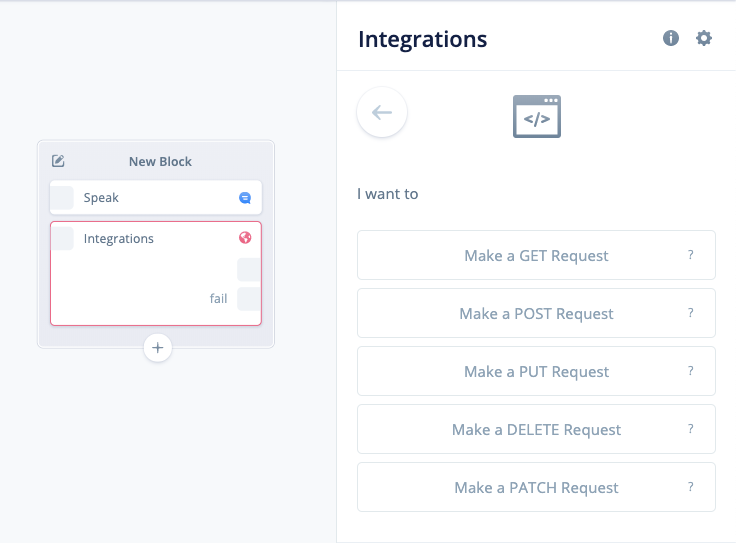
Click on the Plus icon below your Speak block to add another step to the block. Add an Integration block from the list. After that, click on the integration block & set up the options in this order:
- Choose an integration - "Custom API" since we will be using a custom API to get some data.

2. I want to - "Make a GET request" since we are using a GET request to get JSON data from an API.

We will use a custom API (https://super-search-akashjoshi.flexiple.now.sh/?hero=)to get the superhero data.
Try navigating to https://super-search-akashjoshi.flexiple.now.sh/?hero=superman in your browser to see what kind of data is returned by the API. Replace superman with any hero that you want to search for.
We replace the hero name with the {hero} variable so that the API fetches the desired hero correctly.
Paste
https://super-search-akashjoshi.flexiple.now.sh/?hero={hero}
into the URL bar. Be sure to type in {hero} by yourself so that Voiceflow detects it as a variable.

However, we aren't done yet. Click on Test Integration to test the API call.
The response from the API has to be mapped into output variables so that they are spoken to the user.
Add variables for name, fullName, born, alignment, work & base from the variables side-bar.
Copy the output path of the JSON file by clicking on the response tab of the Test Integration tab and paste it into the output menu. Do this for all of the following - name, fullName, born, alignment, work & base.
Check the short video below to understand how to map the JSON output with your Voiceflow variables:

In the image above, we can see that the Integration has 2 outputs, one without a prefix text, and one with fail as prefix. The one without the prefix text is a success state output, and the one with fail output is when our API call fails.
Add a speech block saying 'The hero was not found' connected to the fail state. If the API succeeds and a hero was found matching the {hero} variable, all the output variables will be set with the correct values. Otherwise, they will be to the default value of 0.
4. If Block
Add an if block to the canvas, and check whether fullName = 0. If it is 0, connect it to the "Not Found" block.
Watch the short video below to understand how to add conditions to If blocks:
Else, the hero was found. So, speak the hero name by writing in a speech block: "Their hero name is {name}. Their full name is {fullName}. They were born in {born}. They are {alignment}. They work as a {work} from {base}. <break time='3s' /> Do you want to search another hero?"
Again, be sure to type in the variable names so that Voiceflow detects them as variables.
To clear out the variables after the skill completes, add a "Set" block to the canvas and set fullName to 0. This step is necessary, because if the variables are not cleared, the previous answer will be repeated by the skill!

5. Choice Block
We shouldn't end the skill here. We should allow the user a choice on whether they want to search for another superhero. Change the text in the "Not Found" block to ask whether the user wants to search for more at the end.
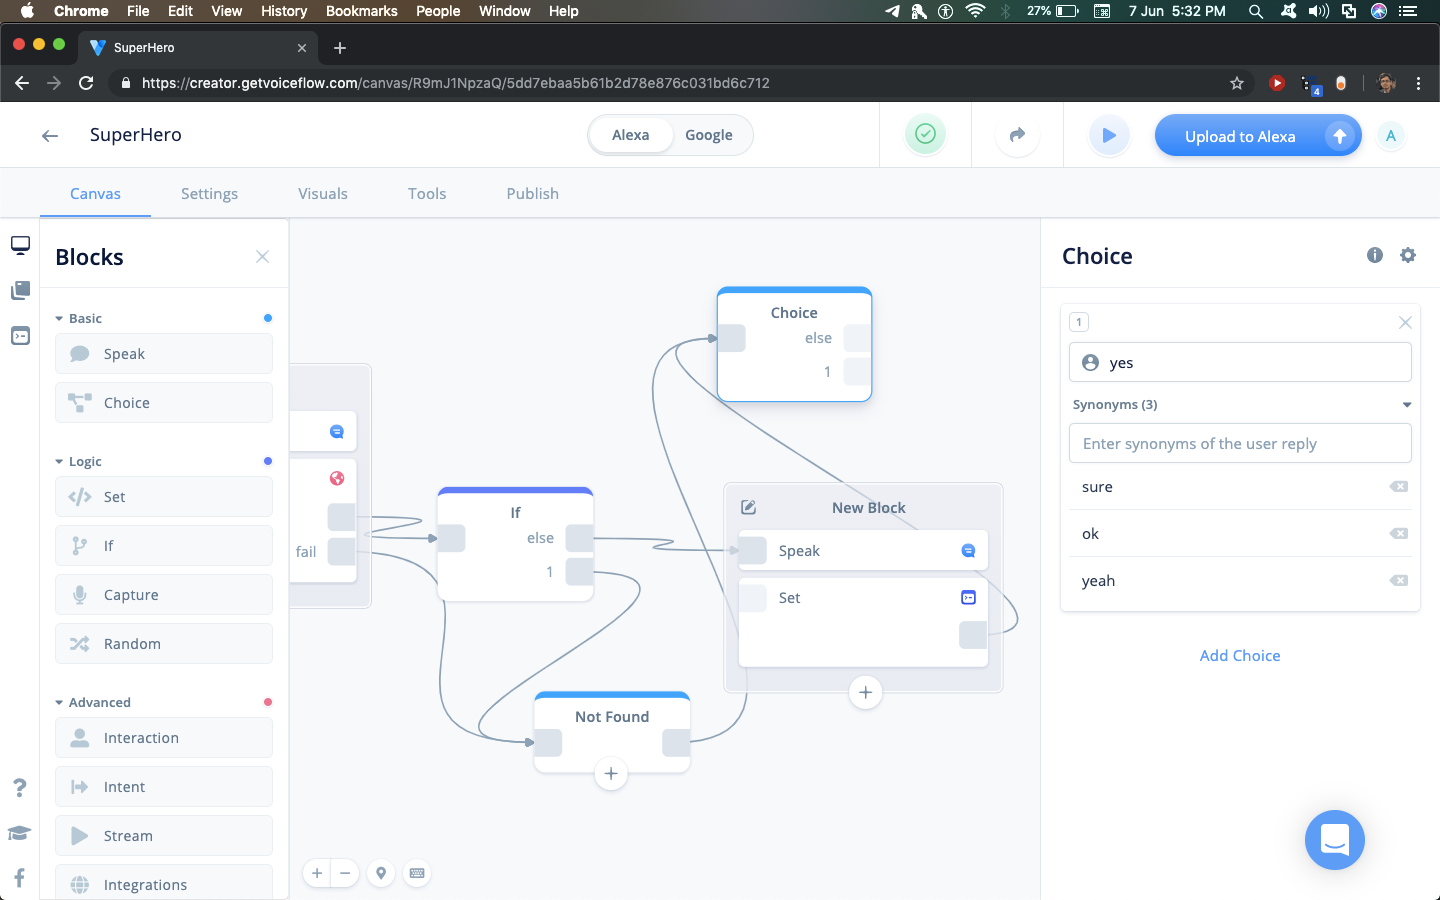
Add a Choice block to the canvas. The choice block allows us to perform certain actions based on user voice. This block checks whether the user wants to search for another hero. Enter synonyms of Yes for searching further.

For else, add a Flow block, selecting Stop Flow as a flow.

Connect the ' 1 ' output of the Choice block to a speech block asking user to say another Hero name, and connect it to the Capture block. Look at the image below to understand how it's done.

And we are done! Test out your app by clicking on the play button.
6. Deployment
a. Alexa
To deploy your app to the Alexa platform, click on the Publish tab, connect your Amazon developer account and fill the form options according to relevance to your skill (like Description, Skill Name, etc.)
Be sure not to change any of the default invocations that may break your skill during deployment and cause you to resubmit it.
In case you get some part wrong while submitting, the review process is very helpful & they will let you know what went wrong in the submission.
b. Google
Click on the instruction link to see instructions to add the Google Assistant file to Voiceflow. After adding the file, follow the publish to production guide from here . Few caveats in the Google deployment process:
- Your invocation name cannot have any keywords which may be used during invocation. Eg, you cannot name the action 'Superhero Search', because 'Search' may be used as a invocation name.
- You need to add a custom privacy policy from Google. You can't use the one from Voiceflow as it has mentions of Alexa or skills, which will cause your action to be declined. You can use a template I built here. It has instructions on how to write your privacy policy and where to keep it.
- The final point would be to not use the term 'Alexa' or 'skill' at any point in your action description or within the app. If there are any occurrences in the app, replace them with something more generic so you can use the same codebase for Alexa & Google. Replace 'Alexa' & 'skill' with 'Google' & 'actions' in the description and similar places.
What Next?
App ideas:
The interesting point about voice apps is that you can use them as an extension for your existing apps. For example, If you have already built a messaging app like this one, the voice platform can be an easy way of sending and reading messages on your app. For a blog writing platform, a voice app may be an easy way to take notes before actually sitting down to write an article. Even for a product posting platform like ProductHunt or Remote.tools, you can easily integrate voice to read out description and other details on the products.
In such ways, voice apps can be used to enhance user experience.
Useful links:
https://learn.voiceflow.com/articles/2705386-uploading-your-project-to-google-assistant
https://developer.amazon.com/docs/custom-skills/speech-synthesis-markup-language-ssml-reference.html
Hope you liked this article. I have also written a more extensive article which adds a web-based frontend to this app making it a complete ecosystem.
Happy Coding!

