

Thank you for sharing your expertise and your insights with the developer community.
Our publication will help you share your knowledge with developers, designers, and data scientists around the world.
As one of the most-visited technology sites on the web, freeCodeCamp.org can help you reach thousands of people who will benefit from your wisdom.
Our nonprofit also has a large social media presence, strong accessibility, SEO, and an established reputation as a serious learning resource. All of these will translate into more readership for your tutorials.
In this style guide, we’ll give you tips for how you can maximize your impact by making your tutorials as strong as possible.
Substance Wins the Day
This is not a place for “blog-a-day”-style challenges or stream-of-consciousness observational posts.
Bring your facts. Bring your quotes. Bring your code snippets. Bring your data visualizations.
Years of data show that the more in-depth and/or detailed a tutorial is, the longer people will spend reading it, and the more likely they will share it with their friends.
If you’re not able to write at least 500 words about your topic, try doing some more research on it first. (There are exceptions to this general rule – for example, if you're explaining a very narrow and specific topic.)
By diving deeper and expanding upon your research, you’ll be able to deliver more insight to your readers. More on this below, when we talk about handbooks and books.
Package Your Tutorial Properly
People are busy. So you have to capture their attention immediately. How do you do that? With a compelling headline.
Headlines: The only part of your tutorial that 100% of people will read
Before you start writing your tutorial, spend time crafting a compelling headline. Your entire tutorial will then spring forth from that headline and hook back in to support it.
Over the past 8 years, we've experimented with many formats. We've found that deep technical tutorials are the most helpful for our publication's readership of millions of developers around the world.
Here are a few headline structures we’ve found that work well for tutorials:
- "How to fix…"
- "How to build…"
- “How to [task] with [tool]”
- "How [something] works"
- "The [adjective] guide to…"
- “What is [noun]?”
- "A history of [something]”
- "The [something] Handbook" (for longer tutorials of at least 7,000-10,000 words), or "The [something] Book" (for much longer tutorials of 10,000+ words).
You can also include keywords in your title that people often search. Don't include too many ("keyword stuffing" isn't good), but it's worth thinking about what people are searching for that will lead them to your article.
Add a Cover Image
Once you’ve chosen your clear, informative headline, add a nice cover image. To do this, click the gear in the top-right corner. (Do not add it in the body of the article immediately under the headline.)
Some contributors create their own cover art for their tutorial. A free site like Canva.com can help you with this process. (If you want to prevent the edges of your images from getting cut-off when your tutorial is shared on Twitter or LinkedIn, use an image aspect ratio of 1.91:1. You can also move the text in from the edges a bit.)
Some things to keep in mind when creating your cover image:
- Use nicely contrasting colors so the images/text really pop
- Don't include too much text in your images – just focus on the main subject/keywords (So, for example, instead of including all this text: "How to Build a Food Ordering App with React", you could just say "How to Build an App with React" or "Build a React App".)
- In general, remember: simpler is usually better for cover images. You want an eye-catching image that's easy to view/read on smaller devices.
- You can use your cover images to help build your "brand" as a writer. If you create consistently designed images, people will often start to recognize your tutorials by the cover image alone.
If you don’t have an image, you can download a no-attribution-needed image from a site like Pexels, Unsplash, or Wikipedia, save it, and then upload it to Ghost.
Set Your Post URL
You can set your tutorial's URL directly (under the Settings gear). We recommend keeping these short and descriptive like “machine-learning-with-pytorch-tutorial” or “how-to-push-to-git-remote-repository”.
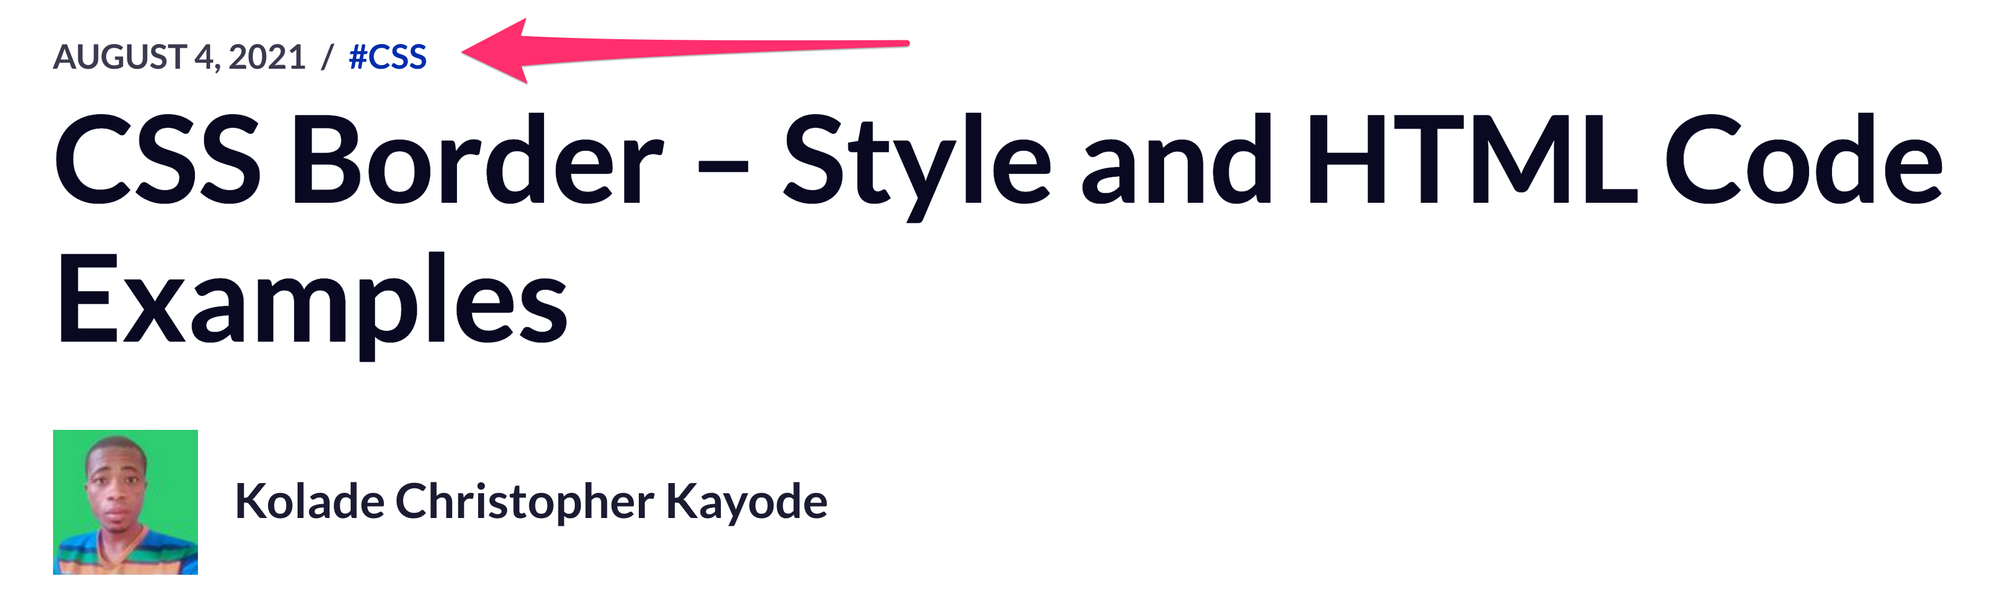
Choose Your Tags
You can choose one to five tags for your tutorial. Once you've chosen them, just let the editorial team know and we'll add them for you.
These tags will make it easier for readers to discover your tutorial through search and when browsing tags.
The first tag you choose is the most important, and it will show up above your tutorial, like this.
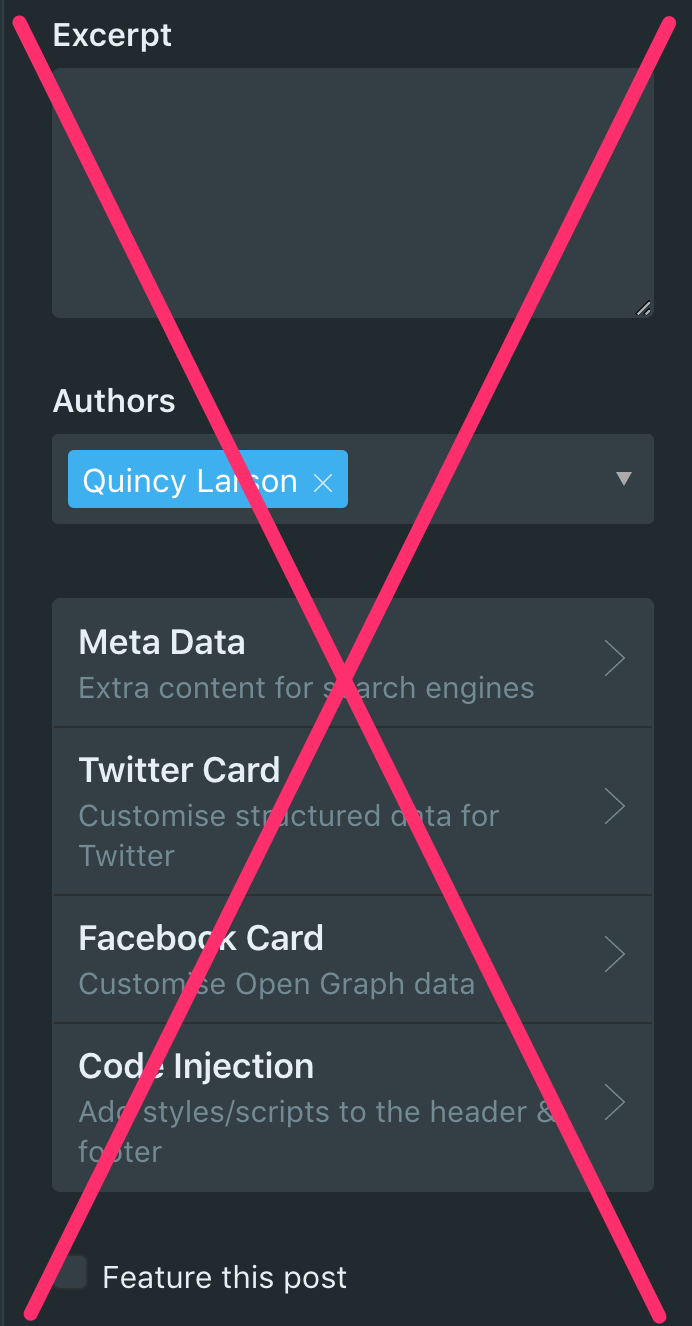
Please don’t change any of the meta information in the menu. Our publication has sane default values for these.
Tips for Writing a Tutorial People Will Actually Read
Grammar, spelling, and formatting do matter
It’s easier to read tutorials that are clear and properly formatted. Here are some tips to make your tutorial as readable as possible:
- Keep it simple. Use simple, straightforward language whenever possible.
- Use short sentences. Break down longer sentences into shorter ones. This helps people read faster and understand better.
- Use short paragraphs. Break down longer paragraphs into one or two sentence paragraphs. Walls of text will make your readers abandon your tutorial or switch to “skimming” mode.
- Clean up the punctuation. Too many exclamation marks can be distracting!!! Semi-colons are rarely necessary; just use a period instead. And ellipses are... well... usually a bit much.
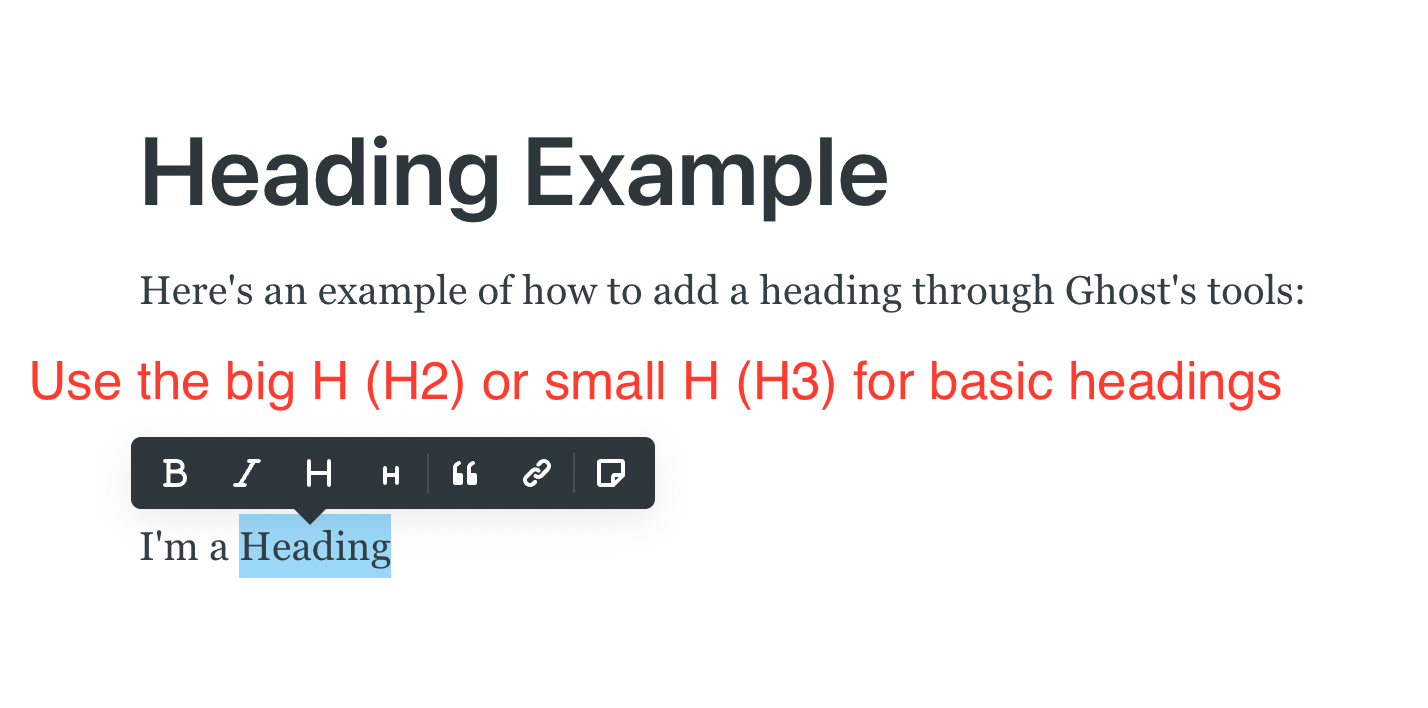
- Use sub-headings to structure your text. Our publication gives you both large and small heading sizes for your toolkit. Use large headings for main topics, and smaller sub-headings for sections within those topics.
You can add headings with Markdown Syntax (## for H2, ### for H3, and so on), or by double-clicking on the text you want to make a heading. The following menu will appear:
- Don't use excessive bold, italics, or both. Too much text formatting makes it hard to read. Especially if you use both bold and italics together. Use bold and italics separately, and sparingly.
- Remove abbreviations. They make tutorials harder to understand. Spell out any acronym that isn’t well-known. Turn Latin expressions like “e.g.” into “for example” and “… etc.” into “and so on ...”
- Use proper capitalization: Make sure to capitalize all proper nouns. For example, JavaScript, Git, CSS, and so on.
- Stay on topic. People's time is finite, and we want them to get in, learn what they need, and get on with their learning journey.
Use active voice whenever possible
People typically use active voice naturally in conversation. It's more casual and approachable, and implies action and authority.
So try to use active voice in your tutorials whenever possible. This will be the vast majority of the time.
Here's an example of active voice:
"You can install Node.js by following these steps."
Here's an example of passive voice:
"Node.js can be installed by following these steps."
It may seem subtle, but the active example connects more easily with the reader and helps them follow the instruction confidently.
Sometimes it helps to think of writing a tutorial like you're explaining something to a friend. You don't need to use overly complex language, you'll be friendly and polite, and things will flow logically.
Add syntax highlighting to your code
You can create a code block by typing three backticks (```), followed by the programming language you're using, then hitting the spacebar.
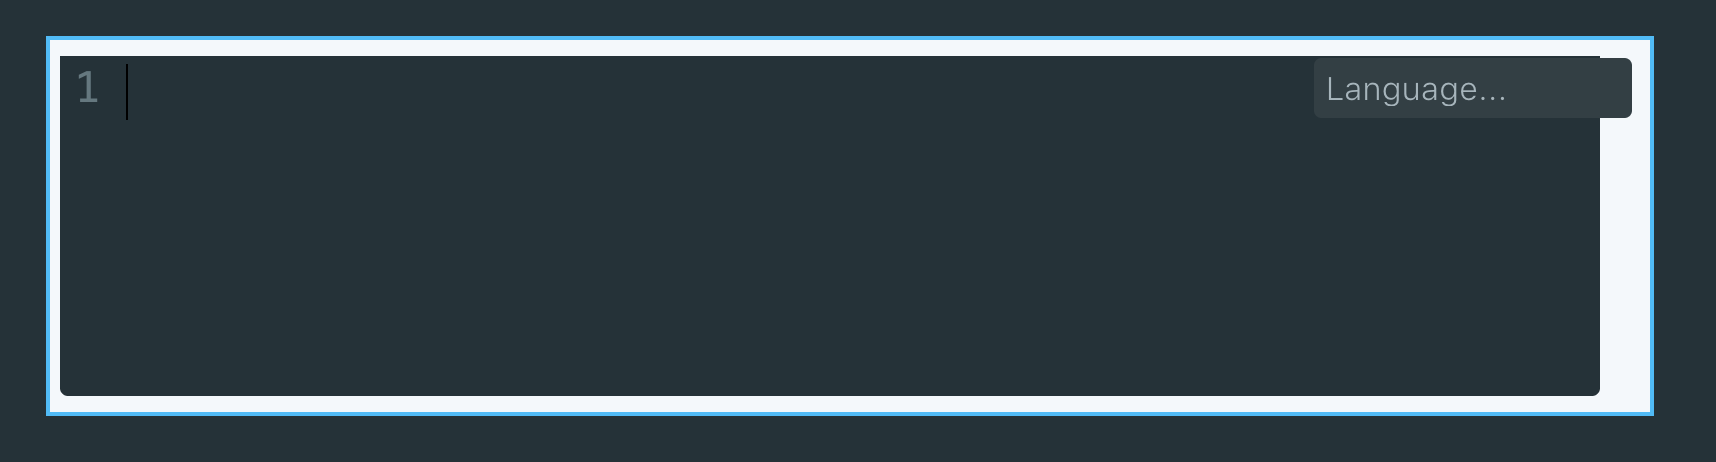
Specifying the programming language will let Ghost add syntax highlighting to your code.
For example, typing ```js will give you JavaScript syntax highlighting. And we support syntax highlighting for a dozen other popular programming languages as well.
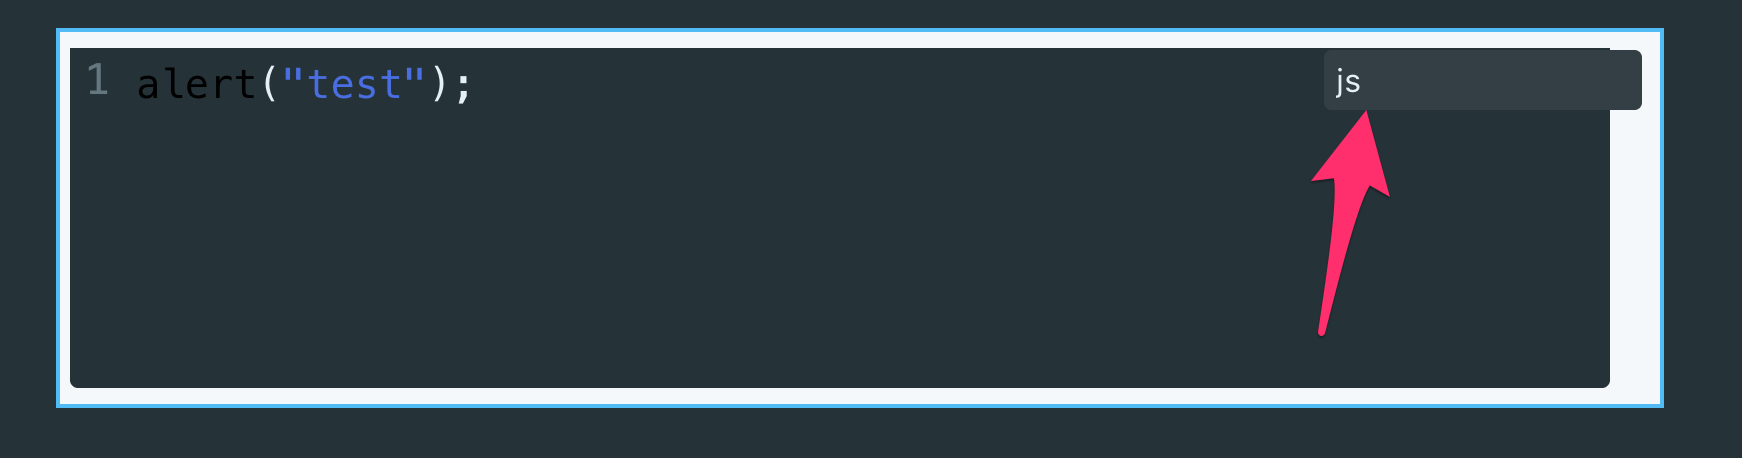
If you want to write in-line code, you can just wrap it in single backticks. This will format it like this: code so it's obvious that you're discussing a particular function or element.
How to Structure Your Tutorials:
- Write a concise introduction that tells readers what they’ll learn during the tutorial, what your goals are, and/or what they'll accomplish.
- Explain any prerequisites readers will need to follow along (for example, knowledge of HTML and CSS, understanding of React hooks, VSCode installed/set up, and so on)
- Walk readers through the tutorial in a logical and organized step-by-step way (or if it's not a tutorial that lends itself to this structure, present the information in a way that's easy to follow).
- Use a numbered list like this one to indicate steps that should occur in a particular order. Or you can just use subheadings that flow in a logical way.
- Pack in as much detail as you can.
- Close out by reminding readers what they just learned and accomplished with a concise conclusion.
Write longer comprehensive tutorials instead of multi-part tutorials
We’ve observed time and time again that people will not bother reading the second, third, or nth part in a series if they haven’t read all the previous parts.
At the same time, we’ve seen that very long, in-depth tutorials work surprisingly well. People will bookmark your tutorial or share it on social media so they can come back to it.
When people see that a tutorial is long, they’ll often assume the tutorial is serious and comprehensive. This inspires people to slow down and really spend time reading your tutorial. Many people will even open up their code editor and code along at home.
Books and Handbooks
freeCodeCamp is happy to publish your in-depth books and handbooks on our community publication. We have many books and handbooks published already, and we've found that they do very well with our audience of people learning to code and developers looking to level up their skills.
So what constitutes a regular tutorial vs a handbook vs a book?
Generally, tutorials are more focused. They surgically tackle a more narrowly defined topic, often to help readers figure out how to do something in particular. For example, "How to Use MySQL Stored Procedures to Simplify Database Operations", or "Git Change Commit Message – How to Edit Commit Messages with Git Amend".
Handbooks are quite substantial – say, 7,000-10,000 words – and offer a broader treatment of a larger topic. For example, "How Promises Work in JavaScript – A Comprehensive Beginner's Guide", or "Front End JavaScript Development Handbook – React, Angular, and Vue Compared".
Books are even more substantial and in-depth, and are often well over 10,000 words. For example, Quincy Larson, freeCodeCamp's founder, wrote this book about how to learn to code and get a developer job to help aspiring devs successfully navigate their coding journeys and job searches.
For these longer-format types of submissions (and any longer tutorials you write), please add a clickable table of contents so readers know what to expect and can jump to a certain section if needed. You can add it right after the introduction, before diving into the main part of the tutorial.
You can read about how to add a ToC in this guide: How to Add a Table of Contents to Your Article.
And if you need more detailed info, read this guide on how to get headings and IDs for your ToC.
Also, if you're submitting a full-length book, let us know. One of freeCodeCamp's team members has designed a beautiful book cover that offers a simple and consistent way to package the books we publish. Here's what it looks like:
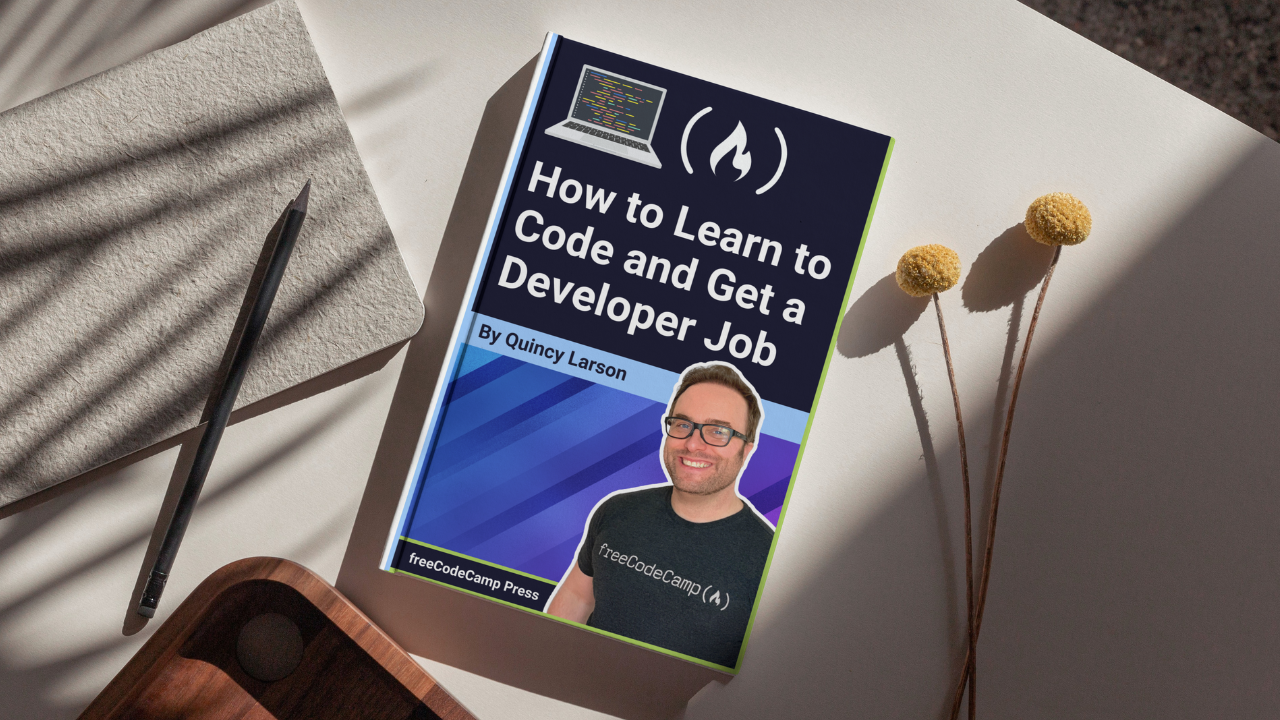
You can submit a photo of yourself, and we'll add your photo along with your book's title and your name, to the template before publishing.
If you'd rather not add your photo, that's ok. We can use an avatar, include an abstract image, or create a design to add instead.
Keep it as G-rated as possible
The freeCodeCamp community is mostly adults, but there are some children here as well.
Try not to use profanity unless it’s in a direct quote, and steer clear of potentially offensive memes.
Finally, if a tutorial seems to violate freeCodeCamp’s code of conduct, we will immediately delete it. But we will save a copy of it and send it to you for your own records, so that you don’t lose your work.
Use No-Attribution-Needed images or images/diagrams you have created yourself
You can include screenshots and other images you've created yourself. But if you don't own the rights to a photo, use a similar image that is no-attribution-needed instead. These don't require licensing fees or attribution.
Again, if you need a stock-image, some websites where you can find these images are Pexels, Unsplash, and Wikipedia.
Please do not hotlink images. Instead, just download any images you want to use in your tutorial, then drag them into Ghost. This way freeCodeCamp can serve the images through our own reliable CDNs (for better performance and accessibility). And please try to keep image sizes under 1MB.
Also keep in mind that people using screen readers won't be able to see your images, diagrams, graphs, and screenshots. So please include a concise and relevant caption on all images that are important to understanding your tutorial. This is helpful for accessibility and allows you to point out critical additional information about the image.
Some images – such as webcomics – are created with sharing in mind. For these, you can insert the image then say "Image credit: XKCD" with a link to the specific page for the webcomic.
Always Credit Your Sources and Don't Plagiarize
Plagiarism is when someone misrepresents someone else’s writing (or image or code, and so on) as their own. It is a serious offense that gets people fired from jobs and kicked out of schools. And we take it just as seriously on freeCodeCamp's publication.
Few people have been brazen enough to attempt plagiarism on freeCodeCamp's publication. But there have been a few of them over the years. We've caught them, removed their tutorials, and banned them from our community for life.
Plagiarism is generally an intentional act. That being said, if you don't know what constitutes plagiarism, you might accidentally fail to cite your sources or properly quote passages. So please read through the following carefully if you have any doubt in your mind about what plagiarism is.
How to properly cite your sources
If you are paraphrasing (or quoting directly) something someone said in another tutorial, video, course, or other medium, you should credit them. This means adding a link to the original source and using pull quote formatting, like this:
"This game is controlled entirely by typing into a command line interface. Because the game is real-time in nature, this can lead to some intense moments of rapidly typing commands as you try to save your drones from danger." (Source: Quincy Larson)
This includes text (or code) taken from official documentation, StackOverflow, GitHub, and all similar resources. If you're copying and pasting something from a source like that, make sure you cite it and link to it.
Always attribute quotes to the people who originally said them. If it’s a multi-line quote, you can use pull quotes like these to break up longer paragraphs:
“When you have wit of your own, it’s a pleasure to credit other people for theirs.”
― Criss Jami
If your code is heavily inspired by (or borrowed from) someone else's code, you should credit them.
Before you publish a tutorial that leans heavily on someone else's work, ask yourself: does my tutorial expand substantially on that person's work? If not, it may not warrant a tutorial.
A final note on using other people's words: it's always better to use your own when you can. So rather than copy/pasting and quoting other sources excessively, try to digest the information and explain it in your own words. It'll help you understand it better, and you won't risk plagiarizing someone else's work.
But if you must quote or borrow from another source, make sure to cite it properly.
Some examples of plagiarism
Here are a couple examples of plagiarism – so, what not to do. The first should be fairly clear (it's copied word for word):
Original text:
Just a quick note before we get started: Instagram's desktop interface and mobile app are quite different. Most people use Instagram on their mobile device (from the Instagram app) because that's where you can actually post photos. (Source: Abbey Rennemeyer)
Plagiarized text:
Ok, everyone ready to learn about Instagram? Let's dive in!
Just a quick note before we get started: Instagram's desktop interface and mobile app are quite different. Most people use Instagram on their mobile device (from the Instagram app) because that's where you can actually post photos.
Now that we have that out of the way, we're ready to go.
As you can see, the plagiarized text is sandwiched between original text. It's tempting to add phrases or paragraphs that someone else has crafted really well. But unless you cite those parts, it's plagiarism.
The second example, below, may not stand out as much. But if you're paraphrasing someone else's words closely, that's still plagiarism.
Original text:
There are many reasons you might want to share photos and videos on Instagram.
Perhaps you're starting a business or launching a product. You might work for a company that wants to have an Instagram presence. Maybe you want to build your personal brand as a photographer, traveler, or artist. Or you just want to share what you're into right now via pictures.
Whatever the reason, Instagram is a great place to share ideas, messaging, and art online. (Source)
Plagiarized text:
There are lots of reasons to share photos and videos on Insta.
Maybe you're starting your own business or launching some product. Maybe you work for an organization who wants to have an Instagram presence. Or maybe you want to create your own brand. Or you just want to show what you're doing now in pictures.
Either way, Instagram is a great place to post those ideas, messages, and art online.
As you can see, the above text is heavily based on the original text. It might change a few words, or leave a few out, but it's clear that the person didn't write it on their own. Again, this is not OK, and would be considered plagiarism.
If you have any questions about what constitutes plagiarism, please do some research and make sure you know how to properly cite your sources and create original work.
A note on Generative AI tools
Generative AI can be helpful to developers and writers. But it should not serve as a replacement for your own skillful writing.
It's fine to use tools like ChatGPT/GPT-4 to help you research a topic, generate unique code samples, and so on. But it's not a good idea to copy/paste an entire article written by ChatGPT into Ghost and submit it without any modifications.
As Beverly Sills said: “There are no shortcuts to any place worth going."
We ask that you continue to write your tutorials yourself – with some help from generative AI and other resources if needed.
We also ask that you run all your code samples to make sure they work, put the code in a formatting tool like Prettier to make sure it's properly formatted and doesn't have any syntax errors, and fact check extensively when you're not sure about a topic.
Here at freeCodeCamp, we've always believed that quality is better than quantity. So take your time, do the research, and write your helpful tutorials.
Proof-read your tutorial. Then proof-read it again.
Some contributors write quickly so they can get their ideas down on paper. Other contributors do all their research before they write a single word.
Whatever your writing process, be sure to step away from your tutorial and come back with a fresh pair of eyes.
Read your tutorial over again. Then read it out loud. You'll be amazed at the little errors, misspellings, and awkward phrases you catch.
No cross-posting, please.
Cross-posting is generally ineffective. If you want a lot of people to read your tutorial, we recommend you publish that tutorial in a single publication – whether that's freeCodeCamp's publication, or your own blog, or an online magazine.
A couple exceptions to this:
- It can be worth it to cross-post a tutorial within a walled garden (that is not indexed by Google) like LinkedIn.
- And if you want to feature your own writing from other publications on your own blog for potential employers to see, you can cross-post onto your own blog and just use a canonical URL to point back to the original publication. This will reduce the likelihood that Google gets confused and shows the wrong version in its results.
You can, however, take some of your personal blog posts on a similar topic (such as "Visual Studios Plugins" or "Advanced Bash Commands") and anthologize them (or join them together) into a single, longer freeCodeCamp tutorial.
Our philosophy is that since we are going to spend hours coaching you on your tutorials, meticulously editing them, and publicizing them to the broader freeCodeCamp community, we ask that you not cross-post it on open publishing sites like Medium.
Acceptable ways you can self-promote in your tutorial
freeCodeCamp.org is a donor-supported nonprofit. We don’t want anyone to get the impression that we do “paid placement” (we don’t) as this could discourage people from donating to us.
At the same time, we totally understand that you may want to publicize your latest book, course, or SaaS application, or get people to sign up for your mailing list or follow you on Twitter.
We ask that you keep this as tasteful as possible. It is perfectly fine to have a one-sentence call-to-action for your product at the end of your tutorial.
Don’t open your tutorial with a link to your product, as this looks spammy. And don't use affiliate links in your tutorial unless they are links to books or courses that you have personally created.
Also note that we do not allow branded accounts. We forbid any sort of ghost writing. And we will not transfer tutorials from one employee in a company to another.
And please – do not write stories on behalf of other people who have not yet earned their freeCodeCamp contributor account.
Note that for your own SEO purposes – unlike most popular websites – all links on our publication are rel="doFollow". This means that yes – each page you link to (including your own blog) will get a boost in Google rankings. Please keep this in mind and don't over-do it.
Finishing up the process
Once you’re confident your story is ready for readers, email a link to your draft to editorial@freecodecamp.org. Our editorial team will go through and make edits to further strengthen your tutorial before publishing it.
We'll focus on improving the headline if necessary, making sure the opening paragraphs are compelling, and fixing any formatting issues or grammatical errors we find.
If we still think your tutorial needs some work, we will tell you so. You can then re-submit it once you've made any changes we request.
And finally, an important note: if a company is paying you to write an article and then try to publish it on freeCodeCamp's community publication, please disclose this to the editorial team when you submit your draft.
Other Helpful Tutorial-Writing Tips
You can use GitHub Markdown
Did you know you can use GitHub-flavored Markdown to compose your tutorial?
You can paste markdown into /news and it will be instantly converted to rich text.
You can also type markdown syntax at the beginning of a line - say # or ## for headings, or * for a bulleted list – then start typing. The text will change to your specified format.
Go easy on the embeds
You can embed things like tweets and YouTube videos if you want. Just click the + icon at the beginning of a new line, and you can choose from a variety of embedding tools.
This said, we encourage you to use these sparingly, for three reasons:
- The embeds make a call to an external service, such as Twitter, which may slow down the experience
- Many people who read the publication are doing so using screen readers. A large portion of the developer community lives with visual impairments (or completely blindness). Embeds are less accessible than text.
- Each publication tutorial has an Accelerated Mobile Pages version, and the embeds may not show up properly there.
Use "You" instead of "We" when possible
Sometimes it's tempting to use "we" when writing a tutorial. "Now we need to install Node.js...". It's a natural way to communicate.
But we've found that using the 2nd person ("you") is more effective. It makes it feel like you're speaking directly to the reader, and gives the reader agency when following along with your guide.
There are exceptions, of course – we've used "we" a lot in this style guide, for example! :) But use your best judgement and try to use "you" when it's appropriate.
How to View your Analytics in Google Analytics
You may want to check in on your articles and see how they're doing. We've created a custom dashboard in Google Analytics that shows how many people have viewed your tutorials within a 28-day period.
Here's what it looks like:
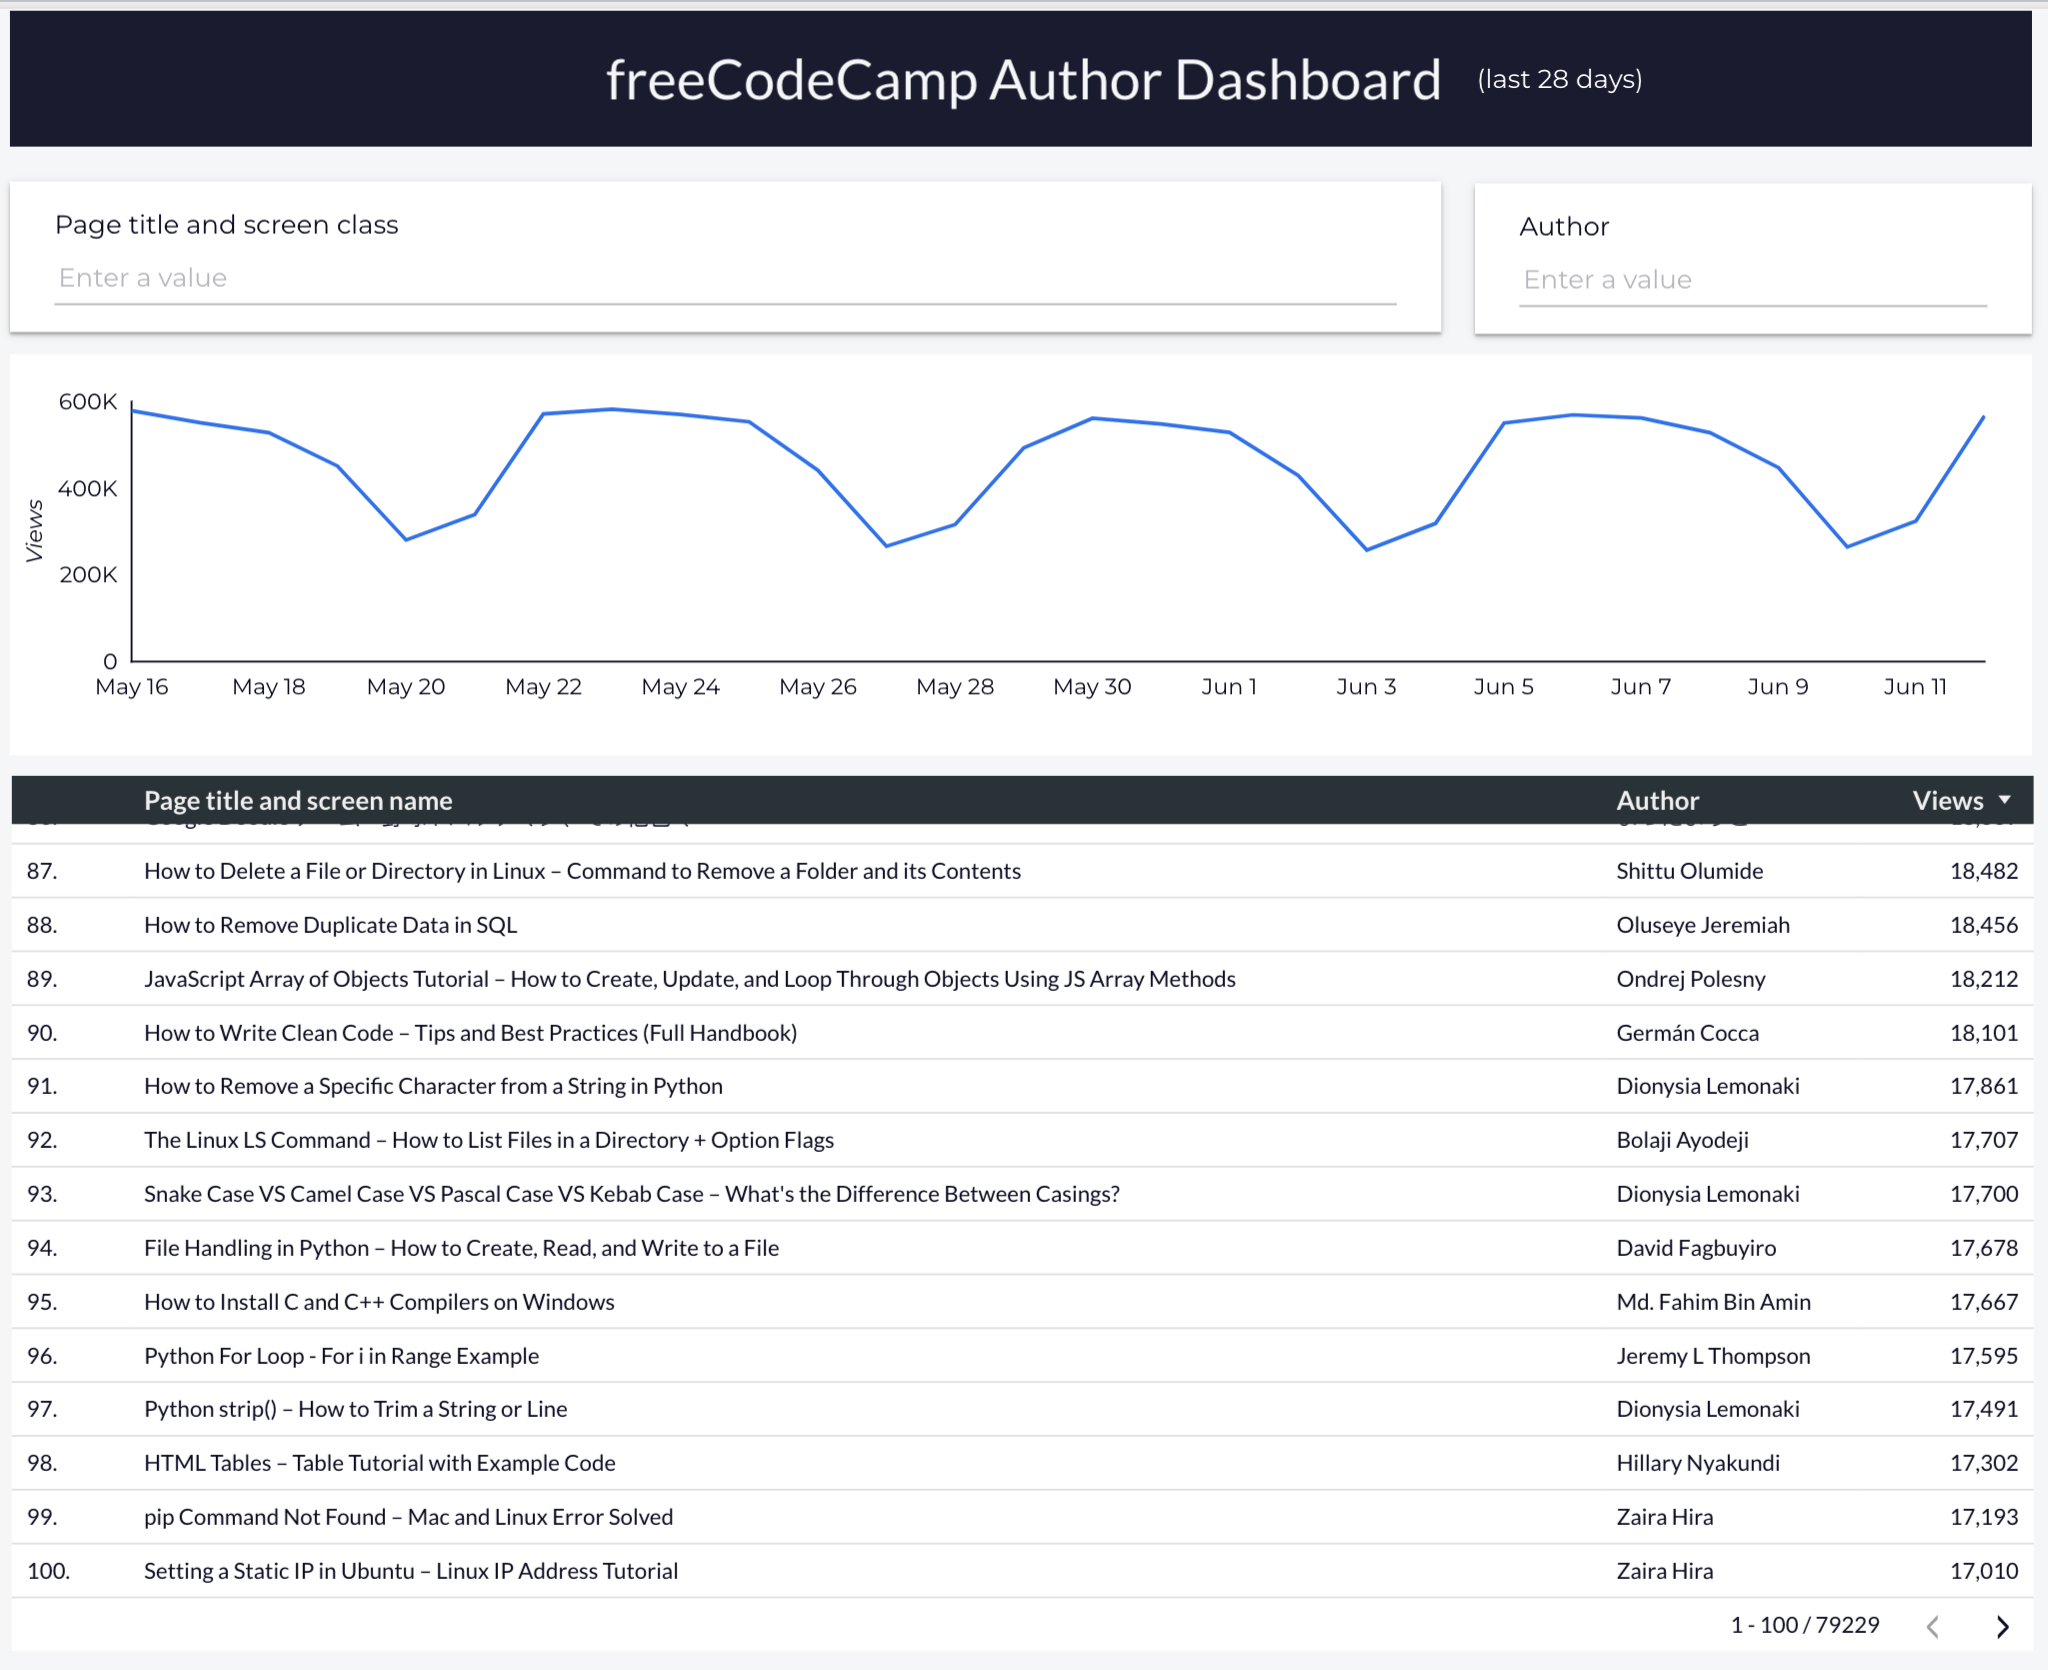
As you can see at the top of the screenshot, you can search for articles by title. You can also search for your name to see the views for all your published articles.
Next, you'll see a graph that shows how many views the freeCodeCamp publication is getting over the past 28-day period.
And finally you'll see a list published tutorials arranged by number of views (starting from the tutorial with the most views, currently).
This information can give you important insights into how many people are seeing your articles, which articles you've written are performing particularly well, and so on.
Once you have permissions, have set up your account, and have emailed us about your first article draft, we'll give you access to this dashboard. If you'd like access to these analytics and you don't have it yet, please just email the editorial team and we'll get you set up.
How to Apply for a Contributor Account
If you don't have a contributor account yet, you can apply for one here. We appreciate your patience while we get to your application. If we think you're a good fit, you'll hear back from us with instructions for next steps. Just please keep in mind that we receive many applications and it takes a while to get through them all.
Thank you for sharing your insights with the developer community.
We hope this guide will help you write better tutorial so the entire community can benefit from your insight.
Happy coding!
— The freeCodeCamp Editorial Team