

The web is vast and it's full of static websites and apps. But just because those apps are static, it doesn't mean they have to be boring.
How can we use Framer Motion to add some animations to our web apps and provide a more interactive experience?
- What is Framer Motion?
- What are we going to build?
- Step 0: Installing Framer Motion in your Next.js app
- Step 1: Animating the page title with Framer Motion in a Next.js app
- Step 2: Adding animated hover effects with Framer Motion to elements in a Next.js app
- Step 3: Adding page transitions with Framer Motion to a Next.js app
- Step 4: Using Framer Motion keyframes for advanced animations
- Bonus Step: Getting a little weird with animations in our Next.js Rick and Morty app
What is Framer Motion?
Framer Motion is an API that comes straight from the Framer API. It provides ready-to-go animations and gesture controls that makes it easy to create dynamic effects.
What is Framer? Framer itself is a UI prototyping tool that allows you to create interactive interfaces with animations that you can hand off to your team, while the Framer API is a Javascript library that lets you do that with code.
The Motion API stems from that work, but is conveniently available as a separate package that we can use for animation control.
What are we going to build?
We’re going to use the concepts of Framer Motion to add interaction and page transition effects to our app.

We’ll start off with some basic animations that happen when the page load, learn how to trigger them on hover, and build out a wrapper that allows us to gracefully transition our pages in Next.js.
Before getting started
This is the second part of series of articles walking through building a Rick and Morty wiki. The first part focuses on requesting the data from the Rick and Morty API and creating dynamic pages.
How to Create a Dynamic Rick and Morty Wiki Web App with Next.js
While you can follow along without walking through the first one, it might be helpful to have a place to start from. Otherwise, you should be able to follow along most of this with any React app.
Step 0: Installing Framer Motion in your Next.js app
Since we’re going to use Framer Motion to provide our animation features, the first thing we want to do is install it!
Once you have the app running locally, you can install it with:
yarn add framer-motion
# or
npm install framer-motion
And at this point you can start back up your development server and we’ll be ready to go!

Step 1: Animating the page title with Framer Motion in a Next.js app
To get started, we’re going to animate the page title in our wiki app. Particularly, we’re going to configure Framer Motion to make the title fade in and grow when the page first loads.
First things first, we need to import Motion into our app.
Start off by adding the following import statement to the top of pages/index.js:
import { motion } from 'framer-motion';
And now that we’re ready to use motion, we can get started by wrapping out <h1> title with a motion component:
<motion.div>
  <h1 className="title">
    Wubba Lubba Dub Dub!
  </h1>
</motion.div>
Wrapping our element is what’s going to allow us to hook into the Motion API.
If we reload our page though, it won’t be doing anything yet. That’s because we haven’t yet configured our animation, so let’s do that!
When using the Motion API with our <motion.x> component, we have two basic concepts we need to use:
- Animation lifecycle
- Variants
Each of the animation lifecycle props such as initial and animate allow us to define our animation’s name as a variant.
Our variants prop is where we configure those animations by defining variant names along with the animation we’d like them to perform.
So to start, let’s add two lifecycle definitions to our title component by adding two lifecycle props:
<motion.div initial="hidden" animate="visible">
  <h1 className="title">
    Wubba Lubba Dub Dub!
  </h1>
</motion.div>
Now, we want to define those:
<motion.div initial="hidden" animate="visible" variants={{
  hidden: {},
  visible: {},
}}>
  <h1 className="title">
    Wubba Lubba Dub Dub!
  </h1>
</motion.div>
We’re defining two variants — hidden and visible — which we then reference in the initial and animate lifecycle props.
Now again, reloading the page, it still won’t do anything since we still haven’t defined the animations themselves, so let’s do that:
<motion.div initial="hidden" animate="visible" variants={{
  hidden: {
    scale: .8,
    opacity: 0
  },
  visible: {
    scale: 1,
    opacity: 1,
    transition: {
      delay: .4
    }
  },
}}>
  <h1 className="title">
    Wubba Lubba Dub Dub!
  </h1>
</motion.div>
Here’s what’s going on:
- We have two different lifecycles, an initial and an animate. The initial is what “initially” loads when the page loads where animate is what happens after the page loads
- In our initial state, we’re setting the element to be slightly scaled down with a 0 opacity
- When the page loads and triggers our animation, we set the scale back to 1 and the opacity back to 1
- We’re also setting a delay on our transition so that it ways .4s before firing the animation. This is just to help let things load a tiny bit before triggering
So in the above, what’s actually happening is .4s after the page loads, we’re going to fade in the title and make it look like it’s slightly growing.
And if we save that and reload the page, we can see our title’s effect!

Step 2: Adding animated hover effects with Framer Motion to elements in a Next.js app
Now that we have a basic understanding of how to add animations when the page loads, let’s starting adding some interaction.
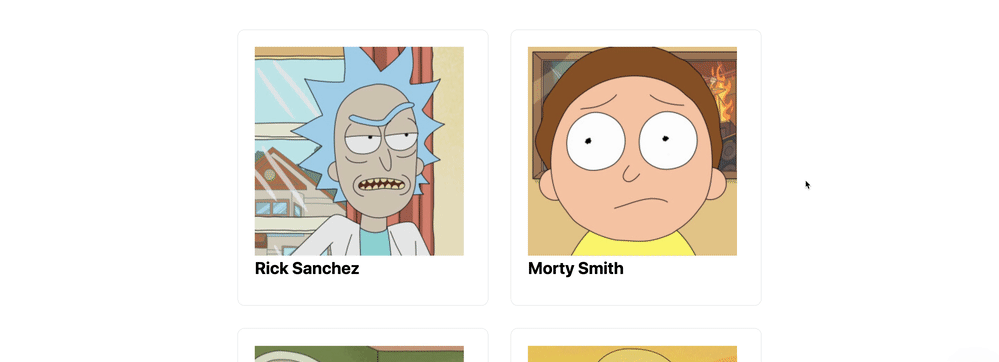
We’re going to add some hover effects to each character card. That way, when your cursor moves over one of the cards, we’ll trigger our animation.
First, inside of our unordered list grid <ul className=“grid”>, let’s update the list element <li> to be a <motion.li> element:
<motion.li key={id} className="card">
  ...
</motion.li>
If you save and reload the page, you’ll notice that we actually have an issue.

Because of the integration between motion and the Next.js CSS integration, our app is getting tripped up on the class name.
While this isn’t fixing it at it’s “core”, we can fix this for our demo by removing the jsx prop from our top <style> block where inside, we have our .card definition.
Change:
<style jsx>{`
To:
<style>{`
Now if we reload our page, we’re back to where we started off.
In order to add our hover effect, we’re going to create a new prop on our <motion.li> component called whileHover and fill it with some base styles:
<motion.li key={id} className="card" whileHover={{
  scale: 1.2,
  transition: {
    duration: .2
  }
}}>
Above, we’re telling motion that when someone hovers over our element, we want it to grow by scaling it to 1.2 and we want that animation to last .2s.
And if we reload the page, we can see our animation!
If you look at the bottom of the effect though, when the card grows, it’s overlapping with the card below it and looks a bit broken. We can fix that by applying some z-indexing and a background color!
<motion.li key={id} className="card" whileHover={{
  position: 'relative',
  zIndex: 1,
  background: 'white',
  scale: 1.2,
  transition: {
    duration: .2
  }
}}>
And if we reload the page again, we can now see that as our card grows, it appears on top of the card below it!

Step 3: Adding page transitions with Framer Motion to a Next.js app
Triggering some animations when the page loads and hover effects is cool, but it’s a nice touch when your app can provide graceful transitions between pages. That can be part of what makes it feel more like a “web app” as opposed to a static “website”.
To do this, we’ll need to configure our Next.js app with a wrapper around the root pages of the website. This will allow us to hook into the navigation lifecycle and properly animate our pages.
Getting started, we need to create a new file under the pages directory called _app.js:
// In pages/_app.js
function App({ Component, pageProps }) {
  return (
    <Component {...pageProps} />
  )
}

export default App;
While we don’t necessarily have to understand the specifics of what’s happening, we’re basically creating a wrapper where we can patch in additional functionality.
With this new file, if you reload the page, you shouldn’t see any changes yet.
Next, we’re going to add our foundation that allows us to set up our page transitions.
First, let’s import motion at the top of our page:
import { motion } from 'framer-motion';
Then, similar to our other animations, let’s create a new <motion.div> component that wraps around our page.
<motion.div initial="pageInitial" animate="pageAnimate" variants={{
  pageInitial: {
    opacity: 0
  },
  pageAnimate: {
    opacity: 1
  },
}}>
  <Component {...pageProps} />
</motion.div>
Here, we’re setting an initial state with an opacity of 0 and an animate state with an opacity of 1, with the idea that it will fade in.
Now if you hit refresh, you’ll notice that the page fades in. But if you click on one of the characters, when the character page loads, it doesn’t fade in.

The issue is, currently, the motion component doesn’t understand it’s a new route, so we need to force it to recognize that and update.
To do this, we’re going to destructure the router argument in our App props:
function App({ Component, pageProps, router }) {
And on our motion component, we’re going to use it as a key:
<motion.div key={router.route} initial="pageInitial" animate="pageAnimate" variants={{
Now if we reload the page and navigate between our character page and our homepage, you’ll see it’s now fading in the content!

Step 4: Using Framer Motion keyframes for advanced animations
Now that we’ve got the basics of setting up animations in our app’s lifecycle, we can get more advanced by using keyframes.
The way keyframes work, is when we define an animation, we can set that animation to move through a set of different values for our given property, allowing us to build custom animations to our liking.
For instance, say we want to make an element on hover grow to 2x the size, make it a little bit smaller to 1.5x the size, and then back up to 2x the size all in one animation sequence. We can do that with keyframes!
The syntax for that would look like this:
scale: [1, 2, 1.5, 2]
We’re specifying our sequence using an array that says we want our element to start off at it’s normal size at 1x, then the next frame it will grow to 2x, then shrink a little to 1.5x, then finally grow back to 2x.
To test this out, we’re going to make some changes on our hover effect that we’ve already configured for our character cards.
In pages/index.js, update the whileHover property on our motion list elements to:
<motion.li key={id} className="card" whileHover={{
  position: 'relative',
  zIndex: 1,
  background: 'white',
  scale: [1, 1.4, 1.2],
  rotate: [0, 10, -10, 0],
  transition: {
    duration: .2
  }
}}>
We’re specifying 2 sets of keyframes, which are the following:
- It’s initial size is 1x and has 0 rotation (or no rotation)
- It then scales to 1.4x the size and rotates 10 degrees
- It then scales back down to 1.2x the size and rotates the other way to -10 degrees
- At this point, the scale keyframes are complete, so we wouldn’t be scaling anything more, but we have 1 last rotation, where we rotate back to our initial position of 0 (or no rotation)
And if we reload the page and hover over our elements, we can see our effects in action!

Without keyframes, we can only do animation effects from a single initial state to another single value. But with our keyframes, we can add more dynamic animations moving around to different values.
Bonus Step: Getting a little weird with animations in our Next.js Rick and Morty app
To add another layer of fun to this, we can play with other properties that make our animations even more dynamic.
To start, we’re going to kick our hover effects up a notch.
On our pages/index.js file inside the whileHover prop of our <motion.li> card element, let’s add the following property:
filter: [
  'hue-rotate(0)',
  'hue-rotate(360deg)',
  'hue-rotate(45deg)',
  'hue-rotate(0)'
],
Here, we’re setting up a new set of keyframes that will “rotate” the hue of the image based on the hue-rotate CSS function.
And if we save and reload our page, this gives us a nice little color effect.

But that’s too subtle enough for me — I want it a little more weird.
Let’s update our filter property to the following:
filter: [
  'hue-rotate(0) contrast(100%)',
  'hue-rotate(360deg) contrast(200%)',
  'hue-rotate(45deg) contrast(300%)',
  'hue-rotate(0) contrast(100%)'
],
Now, not only does the color change, we use the contract CSS function to make the colors more extreme giving us an even stranger effect.

Next, we can do something a bit similar with our page transitions!
To do this, we’re going to use a new part of the Motion component lifecycle — the exit. To do this, we need to make use of Motion’s AnimatePresence component which allows us to animate components when they’re removed from the React tree.
So to start, let’s open up pages/_app.js and import that component at the top:
import { motion, AnimatePresence } from 'framer-motion';
Next, we want to wrap our <motion.div> component with our new AnimatePresence component:
<AnimatePresence>
      <motion.div key={router.route} initial="pageInitial" animate="pageAnimate" variants={{
With our component wrapped, we can now set our new lifecycle prop exit along with its variant:
<motion.div key={router.route} initial="pageInitial" animate="pageAnimate" exit="pageExit" variants={{
  pageInitial: {
    opacity: 0
  },
  pageAnimate: {
    opacity: 1
  },
  pageExit: {
    backgroundColor: 'white',
    filter: `invert()`,
    opacity: 0
  }
}}>
In the above, we’re:
- Configuring a
pageExitvariant - We set out
exitlifecycle prop topageExit - Inside of our
pageExitvariant, we set the background color to white and we add a filter to invert the colors
Note: it’s important to set the background color to white, otherwise, the invert filter won’t apply to the background.
And if we save and reload the page, when we navigate to another element, we get our effect!

What else can we do?
Add some animations to stagger the search results
If you check out my original demo that I wrote this tutorial based on, I add a feature that makes the results float in by shifting up slightly.
We can do that with the staggerChildren transition property and the setting the x and y position properties on our list elements.
https://github.com/colbyfayock/rick-and-morty-wiki/blob/master/pages/index.js#L11
Animate the buttons
Currently the buttons are just static. Add some hover and click effects to the buttons like Load More at the bottom.
Add more weird effects
This is Rick and Morty after all, make it as weird as you can! But still make sure it’s usable.
