
In this article, I'll show you how to deploy a static website for free in only 3 minutes, using a cloud storage service like Google Drive or Dropbox.
And no - fast.io didn't pay me or freeCodeCamp to create this article. We don't have any relationship with them. I'm just writing about this because I found their tool to be really exciting and useful for quickly hosting static websites for free.
Note: The information in this tutorial is now outdated, but this article stays here for posterity. Here are some helpful articles you may like on a similar topic.
What is Fast.io?
Fast.io is a solution created by Mediafire to simplify how the web works. In a few words, their goal is to make your life easier by making the web more accessible and manageable.
It was launched at the end of 2019, so I'm sharing it with you now.
How it works
When you use Fast.io, you will be able to connect to your cloud (Google Drive, DropBox, etc.), choose a website name, and deploy your content all in a few clicks.
If your content is ready, only 3 minutes are required to put your content online and make it accessible to everyone.
Once your website is online, you can configure it, add a custom domain name, and connect Google Analytics so you know how many people you are reaching.
I haven't mentioned this yet, but the service automatically updates your website once you modify the source files. For example, if you are using Google Drive to share your content, once you change something in your HTML page, it will be updated.
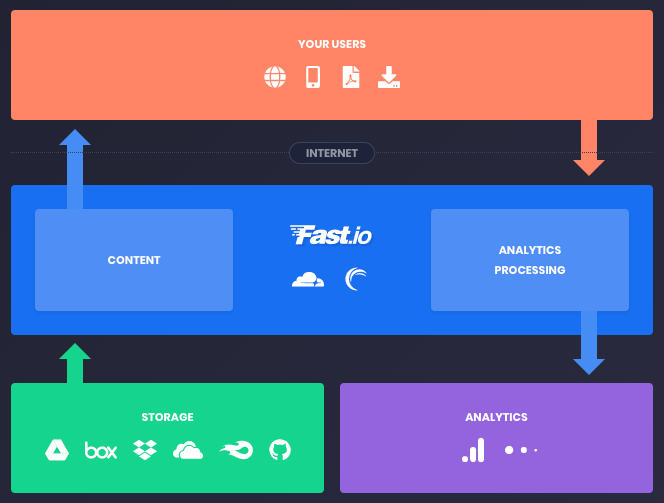
Available storage providers
Here's a list of available storage providers if I were to publish my website today:
- GitHub
- Dropbox
- Google Drive
- Box
- Mediafire
- OneDrive
As you can imagine, this list is going to grow as new services are added. But even now, you have many possibilities to host your static website.
Competitors
There are already a number of different companies who allow you to quickly get a static website online. The most famous solutions are GitHub Pages, Heroku, and Netlify.
I'm not necessarily saying that Fast.io is the best one, but I like how simple it is to deploy a basic website.
Quick note: if you want to deploy something more complex – like a Python Flask website – you can't do it with Fast.io. In this case, I highly recommend using Heroku.
As I told you, I'm going to be transparent with you. Fast.io an excellent service for certain tasks.
What is a static website?
Before showing you how to deploy your website, I think it's essential to define what a static website is and what the differences are from a dynamic site.
A static website contains web pages with fixed content. The content of your page is in HTML, and all users see the same thing.
For example, you can use this type of site when you want to do a landing page for your website (a basic page with information about your product).
The main difference between that and a dynamic website is, of course… the dynamic part!
A dynamic website uses a server technology to build the page when a user requests the website.
For example, you can use this type of site for your blog. Every time you add a new article to your database, the website will display it.
It’s time to deploy your website
Are you ready to share your page with everyone? Let’s do it!
In this part, I will show you how to put your website online in a few clicks. I’m going to use a basic HTML page, but once you understand how Fast.io works you are free to modify everything.
1) Create a index.html file
You need to create an index.html file with your HTML code inside. I recommend that you to start with something simple because you can always update it later.
Save the file on your computer.
<!DOCTYPE html>
<html>
  <head>
    <title>My Static Website</title>
  </head>
  <body>
    <h1>My Static Website</h1>
    <p>
      Hello, I'm online, and everyone can see me!
    </p>
  </body>
</html>2) Open the Fast.io homepage
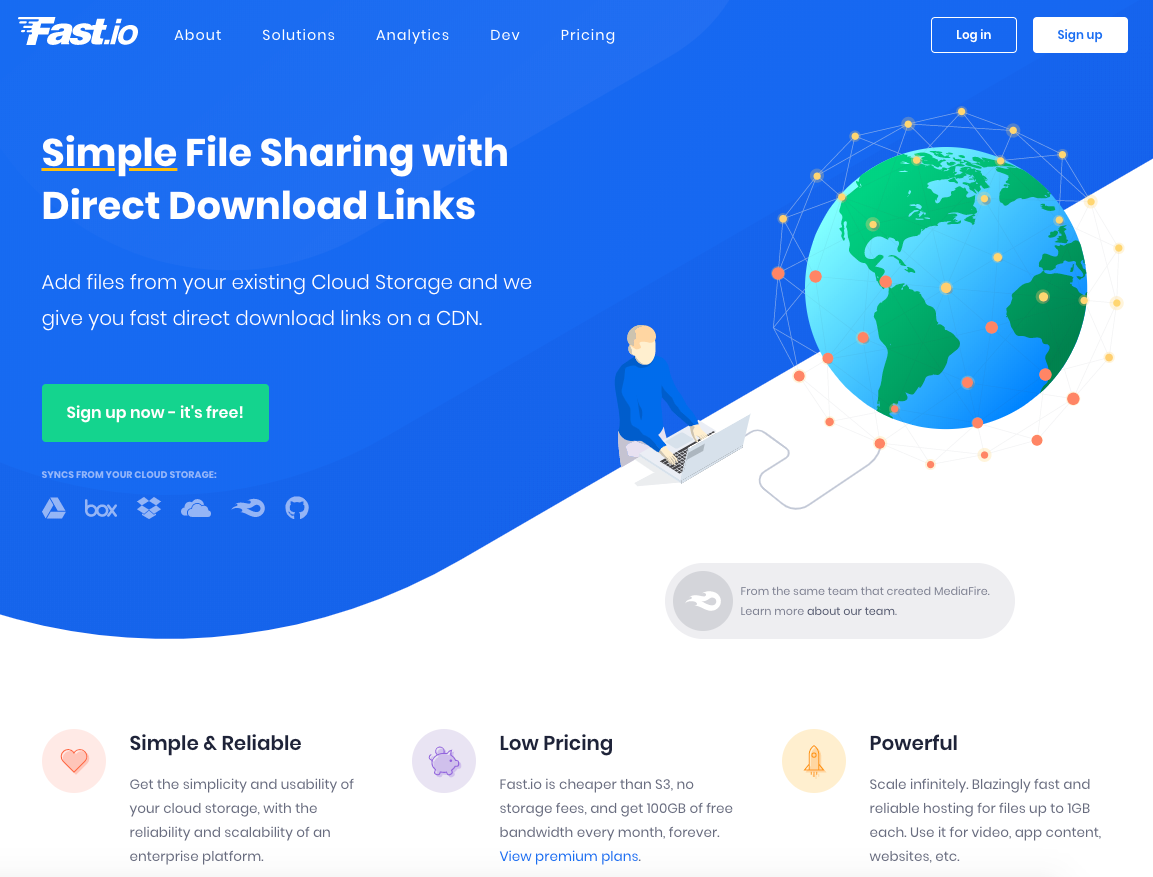
All you need to do to start with Fast.io is open the website. Once you've done that, click on "Sign up now - it's free!".
3) Configure Google Drive

This page appears after step 2 and allows you to select a storage provider. Select "Google Drive".
If you want to create a website with another provider, you can do that later by adding it through your account page.
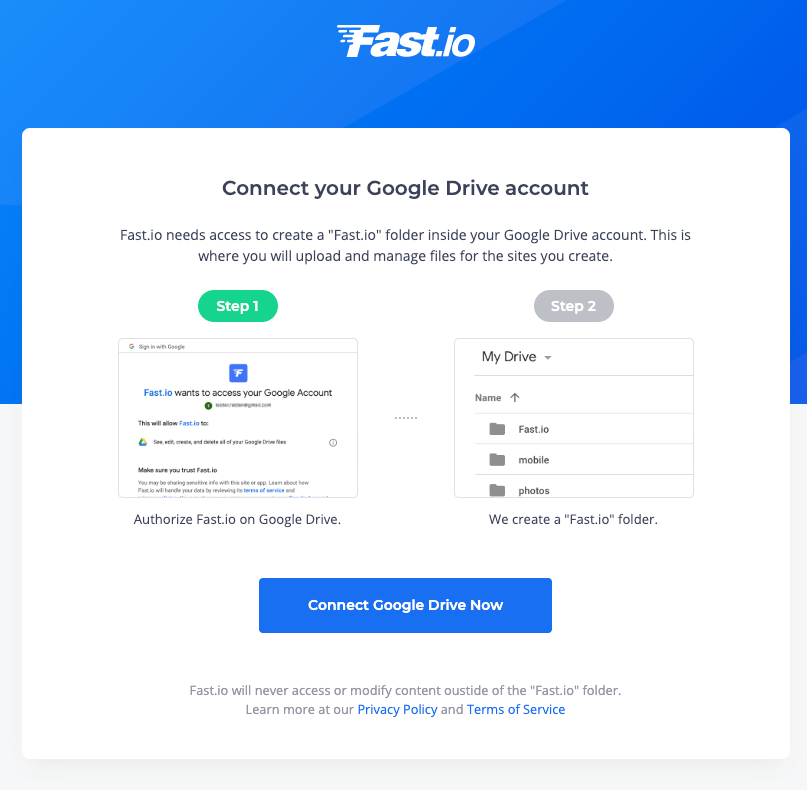
Fast.io needs access to your Google Drive account to work. They will create a "Fast.io" folder to contains your website(s). Click on "Connect Google Drive Now".
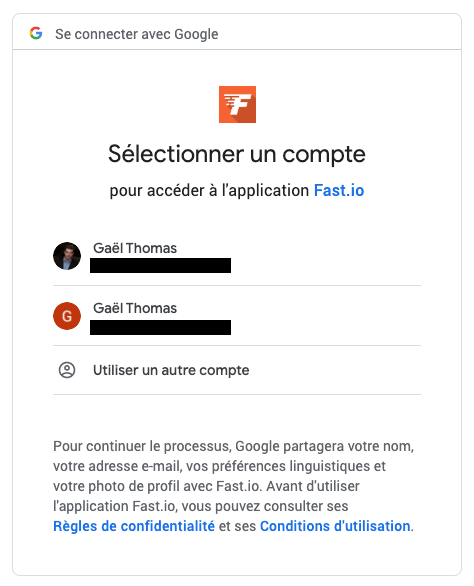
You need to select your Google account to link it with Fast.io.
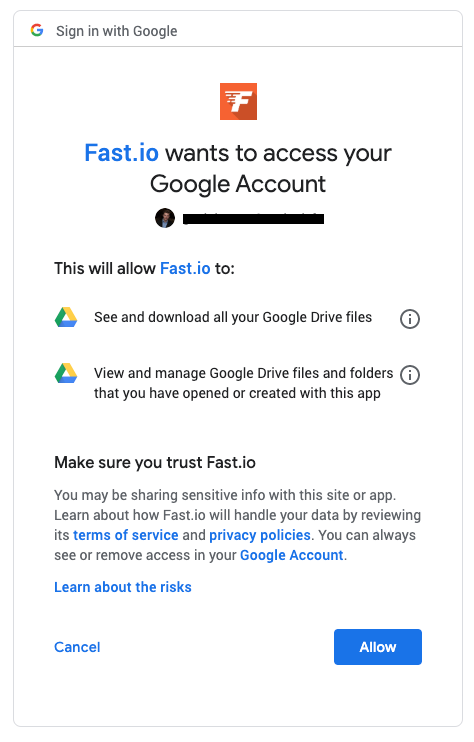
You need to allow Fast.io to access your Google account to link it correctly.
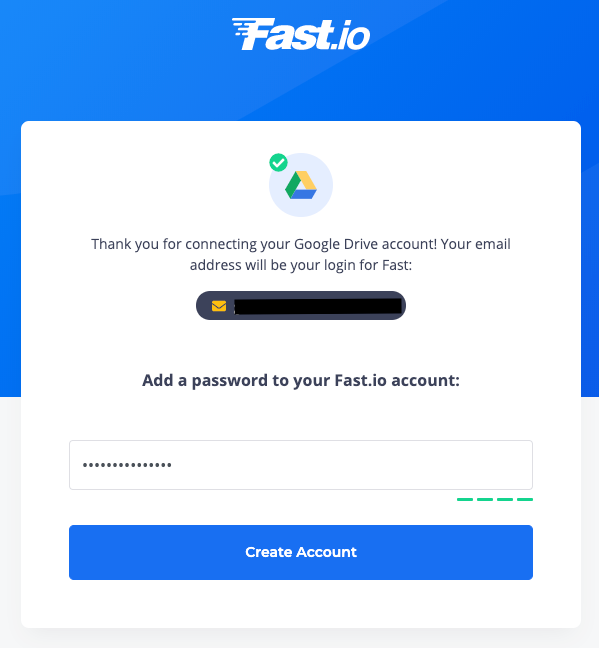
Your account is now ready, so just choose a password and then click on "Create Account".
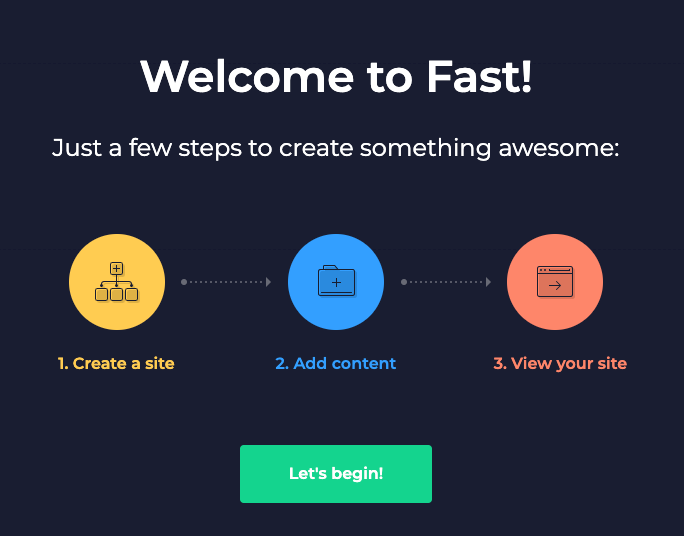
When your account is ready, a "Welcome to Fast!" page will appear. Click on "Let's begin!".
4) Create your website
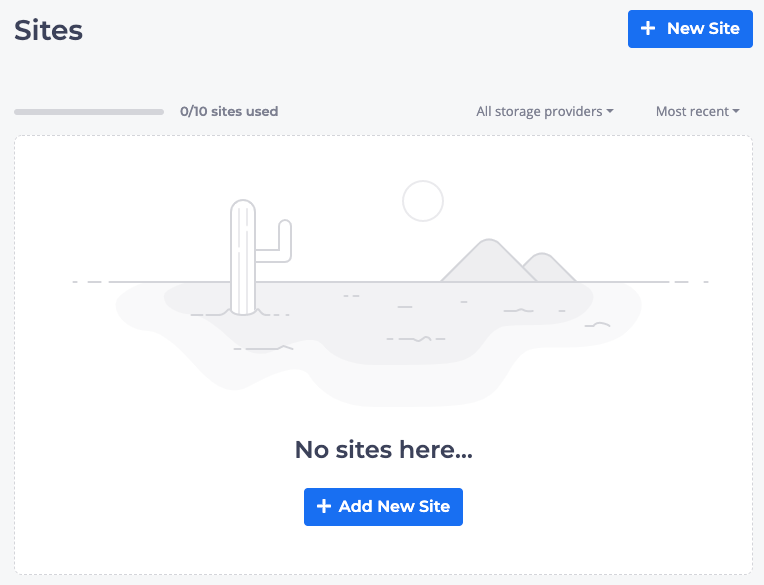
You are ready to create your website and share it with everyone! Click on "Add New Site".
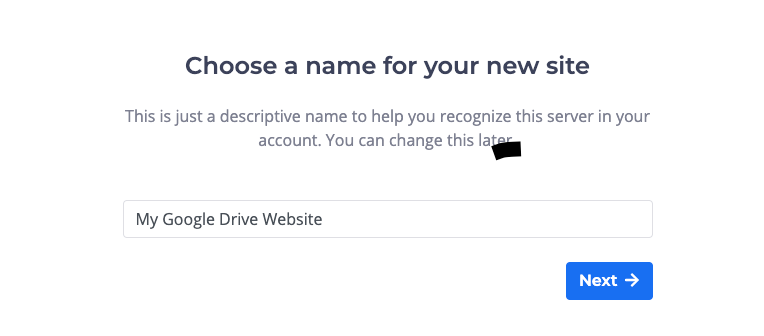
Choose your website name and type it in the input box. When you've finished, click on "Next".
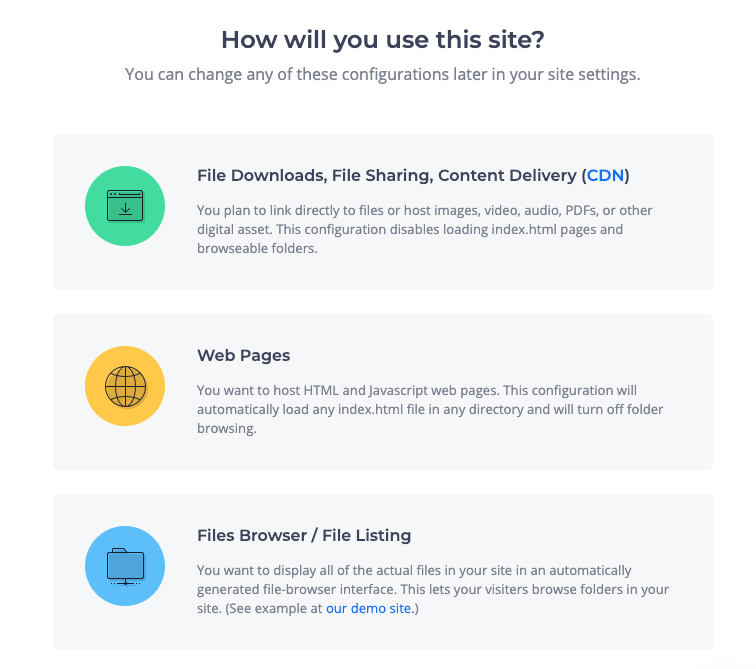
Fast.io allows you to create three website types: a File Sharing website, a Web Page, or a Files Browser website.
In our case, we will select "Web Pages" because we want to host an HTML web page.
If later you want to create a website to share some documents, you have to go back to your dashboard, create a new one, and select File Downloads.
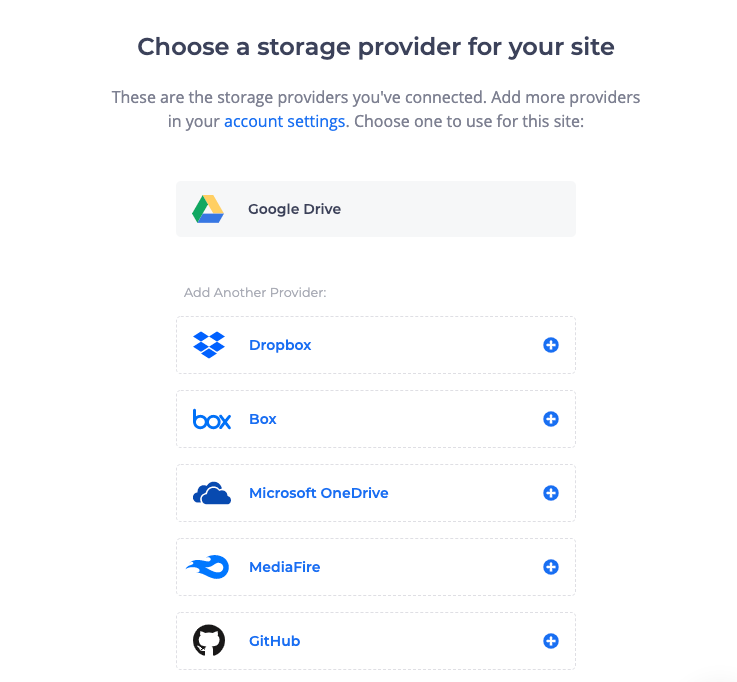
Once you clicked on "Web Pages", you need to select your storage provider. Click on "Google Drive".
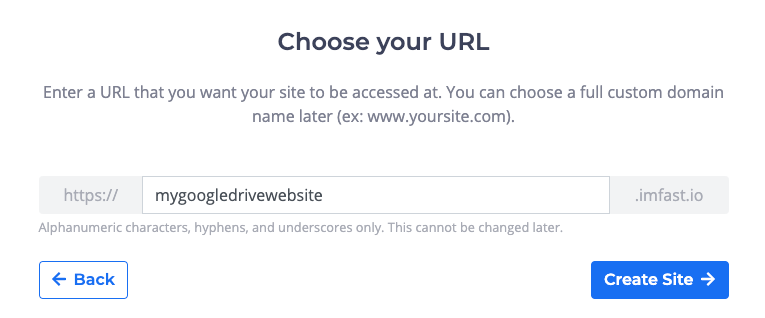
Choose your website URL and type it in the input box. When you've finished, click on "Create Site".
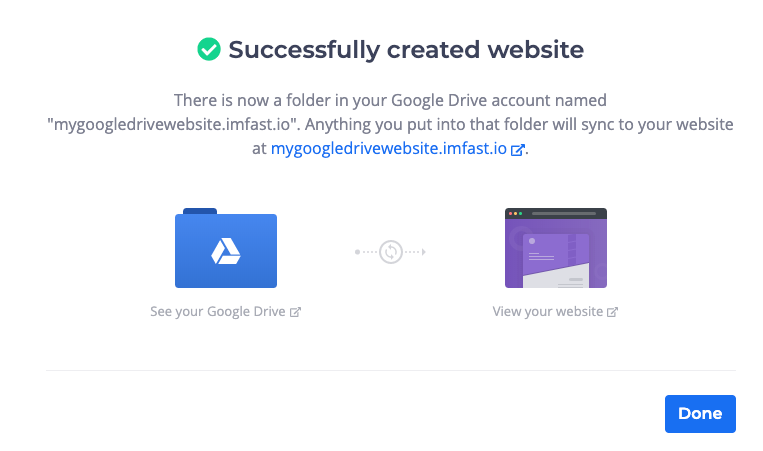
You did it! Your website is online and available at the URL you chose. In my case, you can find my site on mygoogledrivewebsite.imfast.io
5) Upload your index.html
If you open your website, you may notice an error because you didn't upload your index.html file on your Google Drive.
Here are two ways to do that:
- Open your Google Drive and search for the Fast.io folder, then the folder of your website (in my case, "mygoogledrivewebsite.imfast.io").
- On the step 4 success page, click on "See your Google Drive".
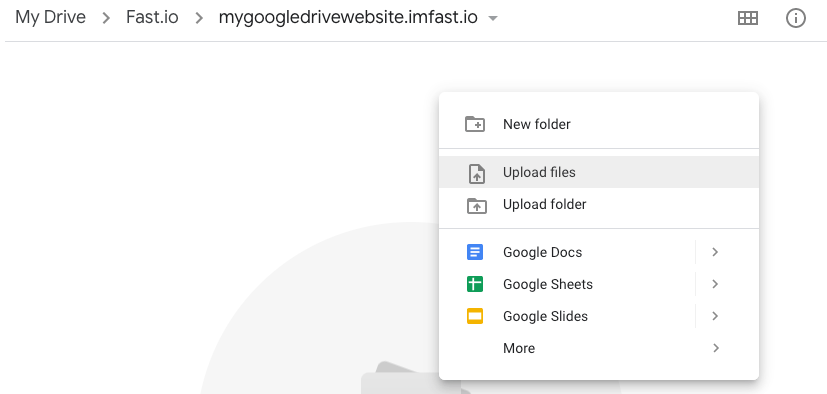
Once you've done that, right-click with your mouse and select "Upload files". A new window will open, find your "index.html" file - select it.

Wait for a little bit before the change appears on your website.
6) Celebrate!

Spread the word to all your friends! Your website is live and everyone can see it!
? Share it on Twitter by clicking here! ?
7) Bonus
If you are curious and want to configure everything, you can go back to your dashboard and click on your website.
You will be able to link your website to Google Analytics (visitors statistics), change your domain name (for example, mywebsite.com), and a lot more!
Conclusion
What do you think of this new service? Did you find it fast and easy?
Feel free to share this article if you liked it.
If you want more content like this, you can follow me on Twitter, where I tweet about web development, self-improvement, and my journey as a full stack developer!