This post is originally from www.jaredwolff.com
In Part 1 we’ve learned the anatomy of a Protocol Buffer. In Part 2 we’ve learned how a Bluetooth Low Energy Service gets pieced together on the Nordic NRF52 SDK. This final post brings together all the elements in an end-to-end working example.
Let’s get going!
P.S. this post is lengthy. If you want something to download, click here for a a beautifully formatted PDF. (Added bonus, the PDF has all three parts of this series!)
Setting Everything Up

Go look at the Readme.md in each of the example repositories. (You will have to clone the repositories, sign up here to get the code).
I’ve made the setup for the firmware dead simple. For the javascript side, it’s a bit more hairy but’ doable! I’ll also include the instructions here as well:
Firmware Setup (For Mac)
- Initialize the full repository (there are submodules!):
git submodule update --init - Install
protocusing Homebrew:brew install protobuf - Run
make sdk. This will download your SDK files. - Run
make tools_osx. This will download your ARMGCC toolchain (for Mac). For other environments see below. - Run
make gen_keyonce (and only once)! This will set up your key for DFU. - Run
makeand this will build your bootloader and main app.
Note: You only have to do steps 1-5 once.
Javascript App Setup (For Mac)
Prerequisite: you will need Xcode command line tools. You can get those here.
- Clone this repo to a place on your computer
- Make sure you have nvm installed
- Run
nvm install v8.0.0 - Run
nvm install v10.15.3 - Run
nvm use v8.0.0 - Run
yarn(if you don’t have yarnnpm install yarn -g) - Once installed, run
nvm use v10.15.3 - Then run
node index.jsto start the example
Using NVM helps mitigate a compile issue with the Bluetooth library. You mileage may vary on this one.
How the heck does this work?
In this project, the Protocol Buffer has two functions. The first as a “command” to the bluetooth device. Secondly, a “response” to that command from the device.
Our example javascript app command uses “This is” as the payload. With the power of some string operations, let's make a full sentence out of it!
The series of events looks something like this:
- The test app connects and sends that data using our Bluetooth Low Energy service.
- On the firmware decodes the message.
- The firmware modifies the original data by adding “ cool.” Resulting in "This is cool"
- The firmware encodes the payload and makes the data available for reading.
- The app finally reads the characteristic, decodes and displays the result!
Seems complicated but there's some benefits to this:
- In Protocol Buffers, data structures are well defined. This means that it has some great error checking abilities. If you're using any type of data structure you may have to code your own data validation.
- Encoding and decoding is simple and straight forward. You can encode same data on different platforms and always get the same decoded result.
Want to get the example up and running? Seeing is believing after all. Let's do this.
Is This Thing On?
Once you're done with the setup (above), let's get this firmware programmed! Lucky for you it's only two quick steps!
- Plug in your NRF52 DK board
- Run
make flash_all. (This compiles and flashes all the code for the project.)
Once flashed, the easiest way to know if things are working is when Led 1 is blinking. That means it’s advertising and ready for a connection.

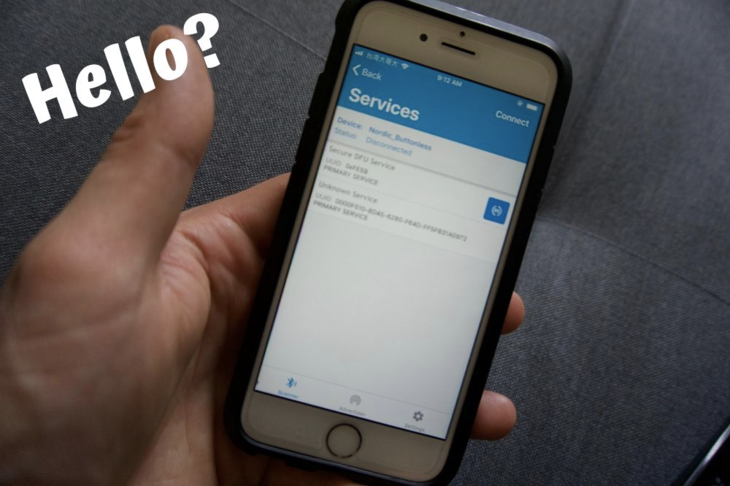
Let’s make sure it’s advertising correctly though. You can grab a tool like NRF Connect for iOS or Android. Or, you can grab LightBlue. (Also available for iOS and Android)
Open up one of the app and scan for advertising devices. You’ll be looking for Nordic_Buttonless.
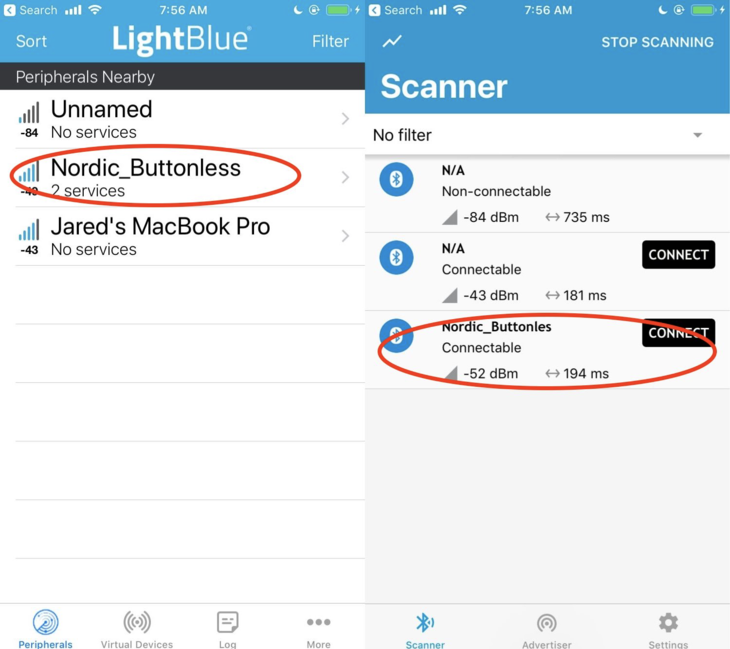
Now let’s connect and double check our connectable services & characteristics:
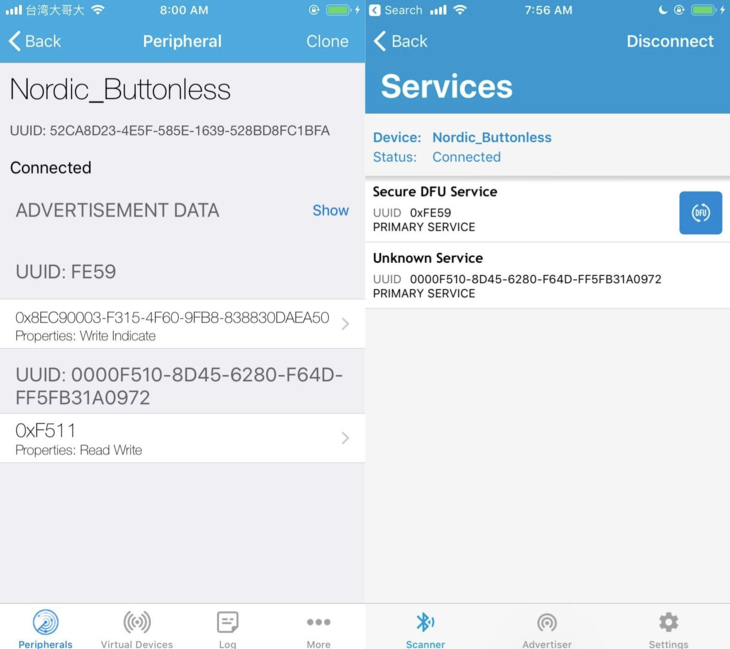
As you can see there are two services. One is Nordic’s DFU service. The other is our Protocol Buffer service!
You can compare PROTOBUF_UUID_BASE in ble_protobuf.h with the UUID of the “Unknown Service”. Nordic’s chips are Little Endian while the data here is Big Endian format. (i.e. you’ll have to reverse the bytes to see that they’re the same!)
You can even click in further to see the characteristics in NRF Connect. In the case of LightBlue, the characteristic UUIDs are already shown.
Using the Javascript App
So, once we’re up and advertising, it’s time to run the app.
Simply change to the ble-protobuf-js directory and run node index.js
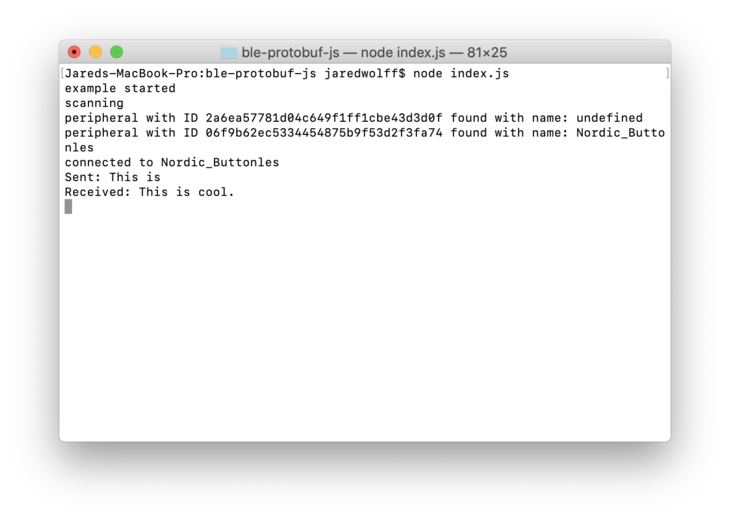
If you've installed everything correctly, you should start seeing output like:
example started
scanning
peripheral with ID 06f9b62ec5334454875b9f53d2f3fa74 found with name: Nordic_Buttonles
It should then immediately connect and send data to the device. It should receive the response immediately and print it to the screen.
connected to Nordic_Buttonles
Sent: This is
Received: This is cool.
Bingo!
You’ve made it!
? Congrats if you made it this far through the tutorial. You should now be feeling confident enough to start playing with the software code. Maybe you’ll cook up something cool?
Here’s links to some resources that you may find handy.
- Protocol Buffer documentation
- NanoPB - (the implementation of Protocol Buffers we used for this project)
- Nordic SDK Documentation
- Again, here are the links to Part 1 and Part 2
- If you haven’t already, get all the code for this project
Conclusion
Protocol Buffers are quite versatile and convenient. Using them with Bluetooth Low Energy service is one way that you can take advantage. As the connected world of IoT continues to expand, I have no doubt that we'll be seeing more use cases in the future!
I hope this has inspired you to incorporate Protocol Buffers into your own project(s). Make sure you download the sample code and get started right now.
Has this tutorial been useful for you? Let me know what you think.