
Visual Studio Code has become the most popular source code editor out there. It is lightweight but powerful, and it is no doubt my favorite.
In this article, I am going to walk you through how to get started and set up VS Code for Web Developers.
Here's a video you can watch if you want to supplement this article:
Introduction to VS Code
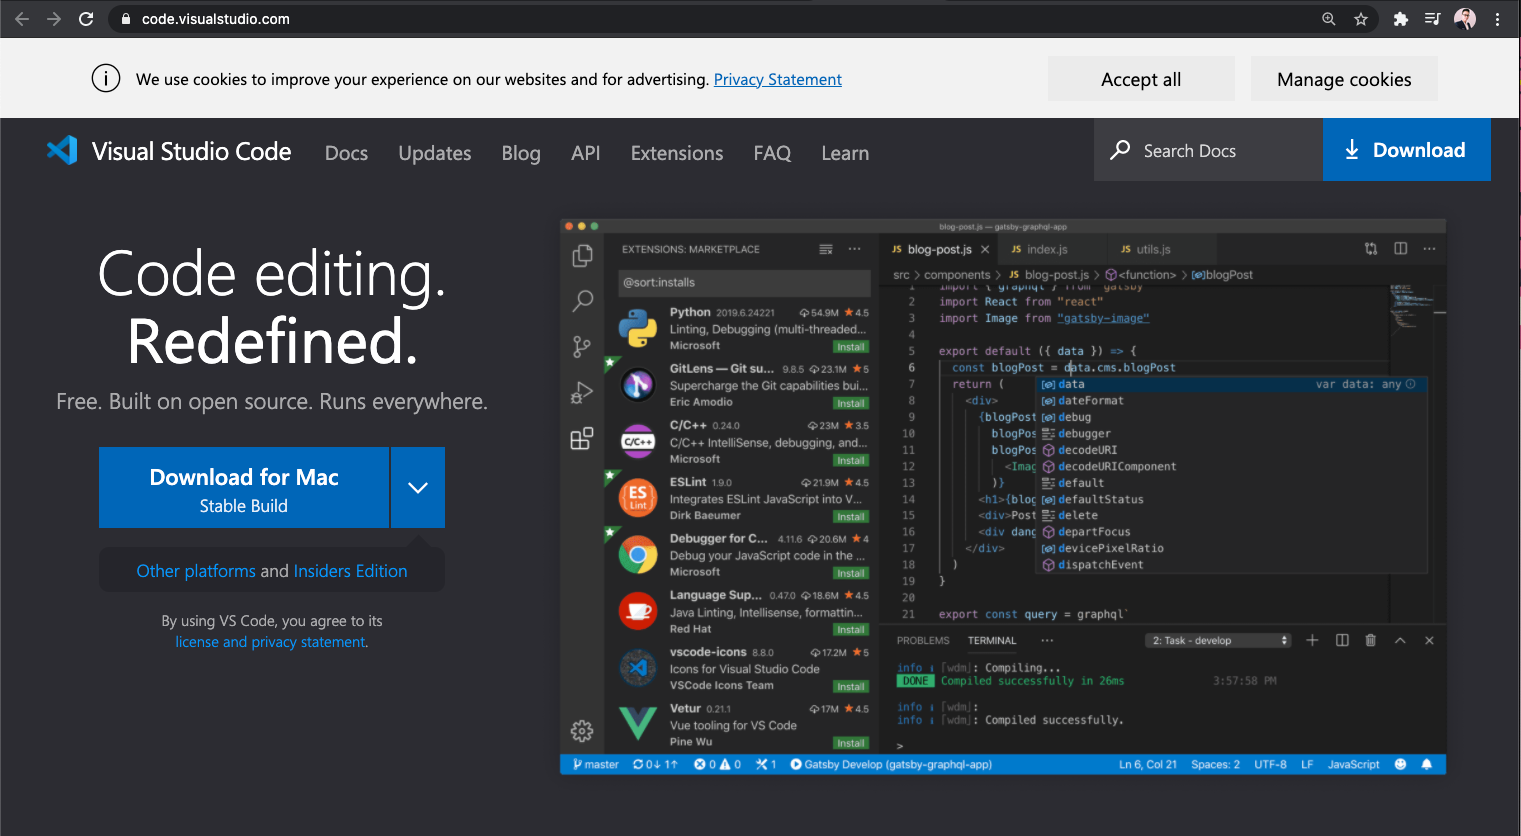
If you don't yet have VS Code installed on your computer, head to code.visualstudio.com to download it. You can open the dropdown to choose the versions you want to download, but usually, the big button should do the work.
VS Code Welcome Tab
Once you have it installed and opened, the first thing you will see is a Welcome tab. Here, you'll find 5 sections:
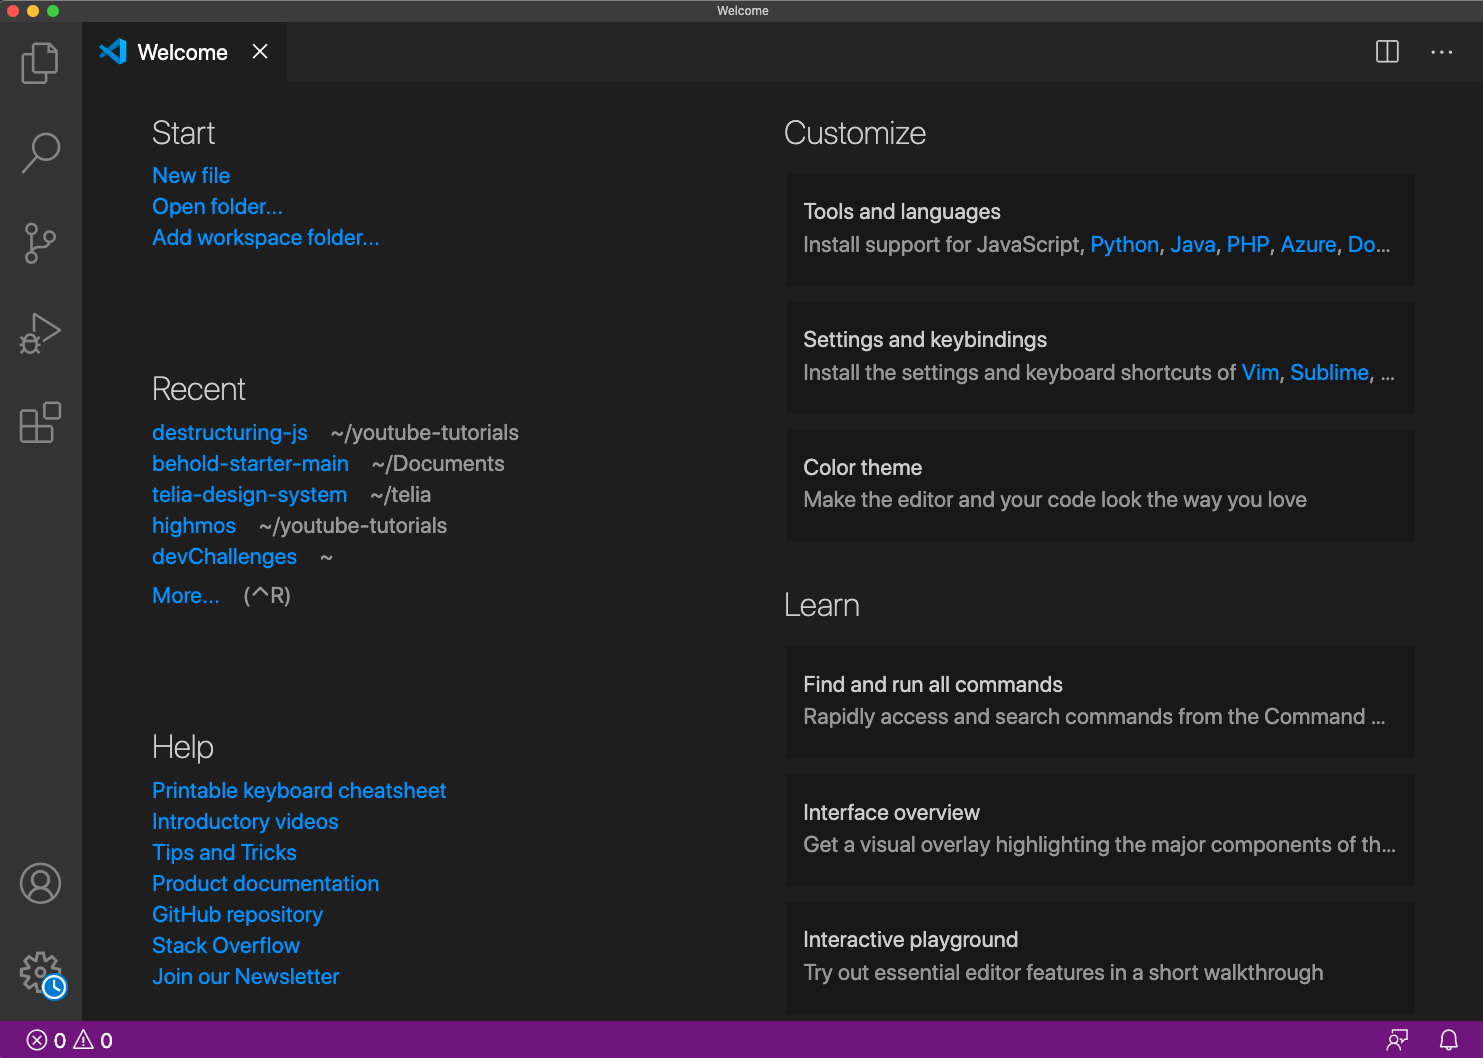
Start: You can choose to either create a new file or open a folder.
Recent: You can find any recently opened folders
Help: You can find some handy information. For example, the printable keyboard cheatsheet or a series of introduction videos.
Customize: You can see that you can install settings and keyboard shortcuts from other code editors like Vim or Atom. So in case you are used to using these editors at the moment, you can go ahead and check it out.
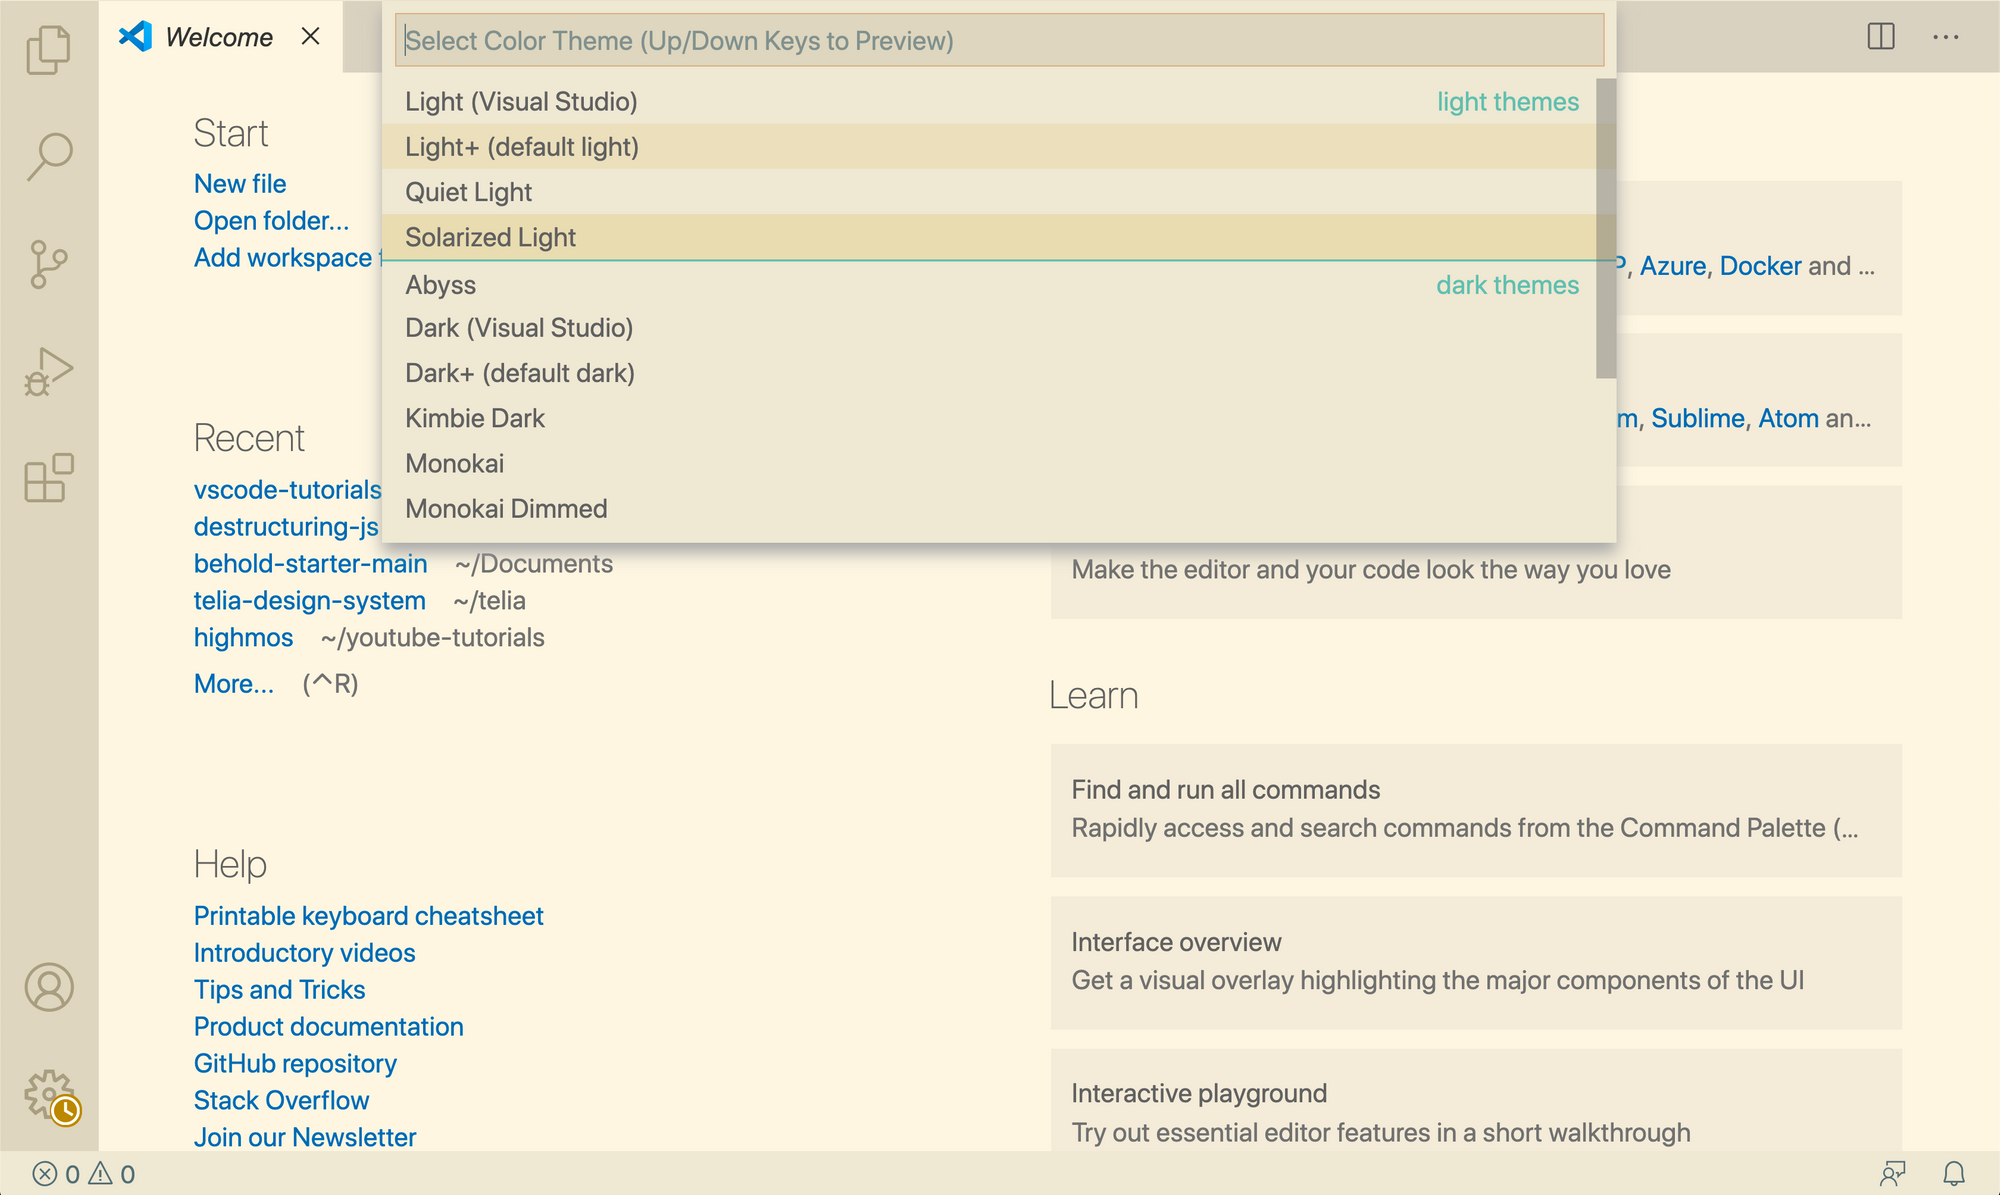
But what we want to look into is the color theme. If you select it you can see that there is a list of themes to choose from. You can also use the up and down arrow keys to preview the themes. But my favorite theme is the default one, so I am gonna stick with it.
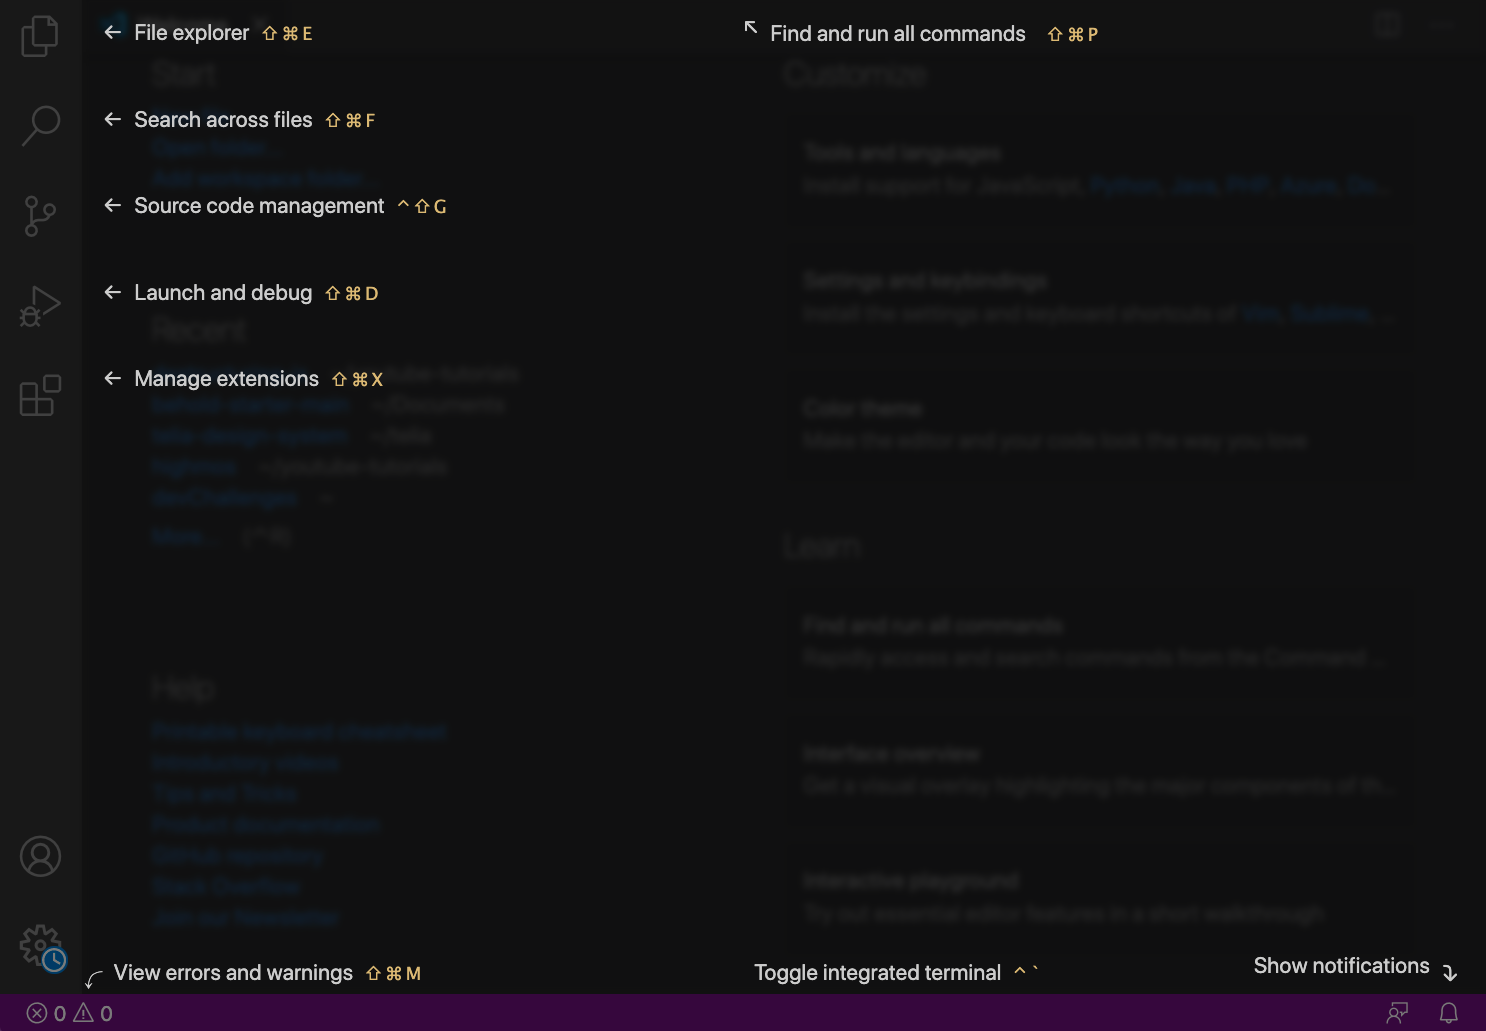
Learn: Here you'll find 3 selections. The first selection on the list is Find and run all commands. With this, we can find and run all the available commands. We are going to use this a lot, so I recommend that you to memorize the short-cut, which is Command/Control + Shift + P.
The second selection is Interface Overview. If we select it, we can see the most common elements on the user interface and we can also see the shortcut to toggle the elements:
The last selection is the Interactive Editor Playground. Here, you can find the highlight features from VS Code with instructions and examples.
Let's select Emmet, for instance. With Emmet, we can write shortcuts and then expand them into a piece of code.
So let's say, for example, that we want to create an unordered list element with 3 items inside and each item has a class name of "fruit". We can type ul>li.fruit*3 and press tab.
You can also see that in the existing example (ul>li.item$*5), they tried to create an unordered list element and 5 items with a class name of item inside. But the class name also comes with numbering:
<ul>
    <li class="item1"></li>
    <li class="item2"></li>
    <li class="item3"></li>
    <li class="item4"></li>
    <li class="item5"></li>
</ul>
In this section, you can also find a link to the Emmet Cheat Sheet, which is super useful.
Alright, I recommend that you check out all of these features. There are a lot of them, and it's okay if you don't understand it all now. You can always come back in the future.
VS Code File Explorer
Next, let's go to File Explorer by selecting the first tab on the side navigation or Command/Control + Shift + E.
Here you can open an existing folder, but let's create a new folder and a new file. Instead of opening a new window, let's open the terminal in VS Code. You can select the error and warning button on the status bar and then select the Terminal tab or you can use the shortcut Control + `.
Right now I am in my home directory. Let's create a new folder by typing mkdir vscode-tutorials and let's go inside it with cd vscode-tutorials.
Now we want to open this folder, so we can select the open folder button and navigate to the folder directory – but that's a lot of work. So instead, in the terminal, we can say code .. Now, you might face an error: bash: code: command not found.
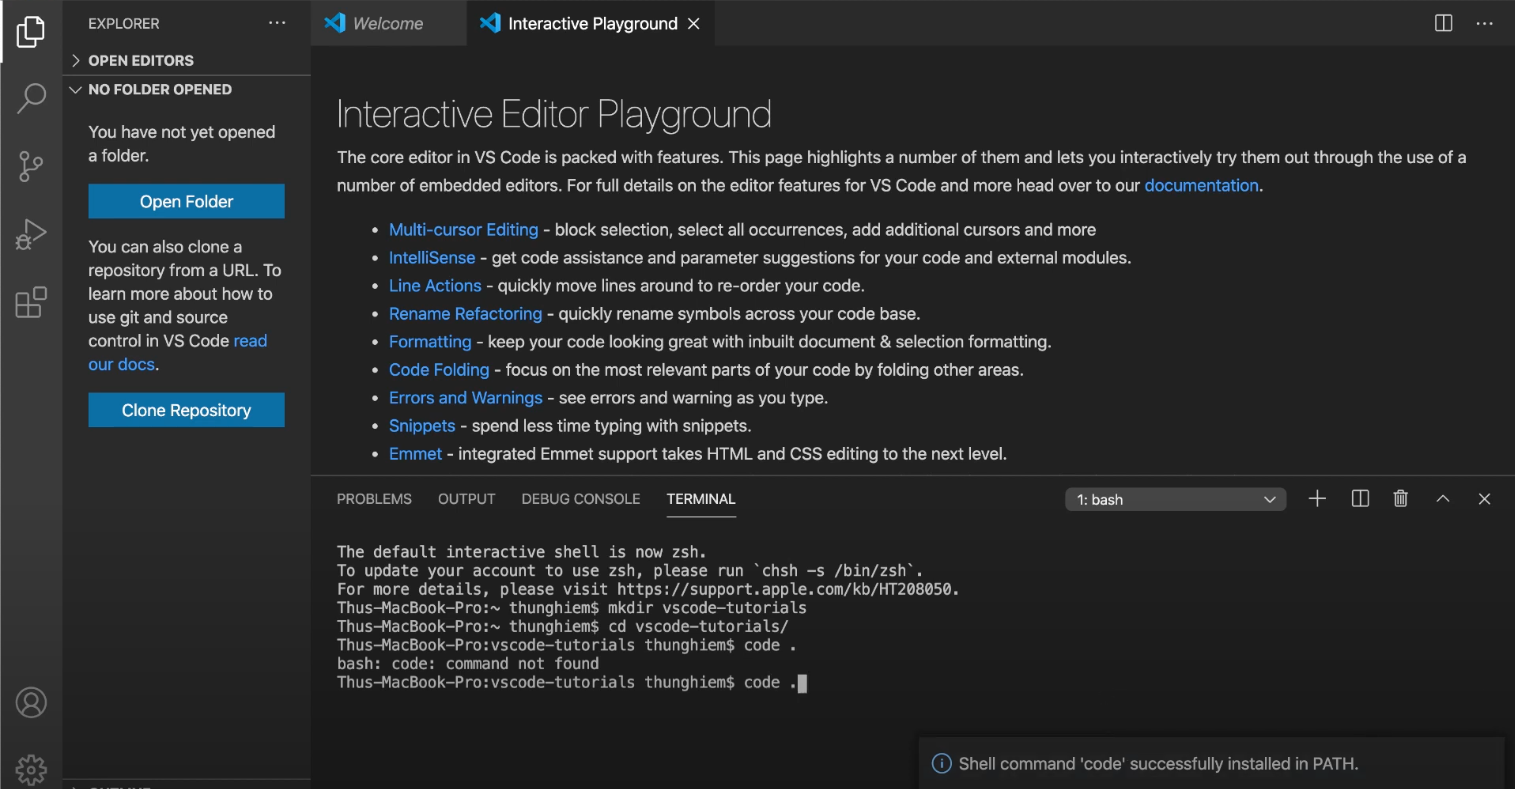
To fix this, we can open the Command Palette and search for Shell Command: Install code command in Path, and select it. Now if we go back to the terminal and type code ., the new VS Code window will be opened with the created folder.
Alright, next, we want to create a new file. In the folder section, we can click the new file icon or right-click and select new file. Let's name the file index.html, and inside it let's type the exclamation mark (!) and press tab or enter. With Emmet, it will generate an HTML template.
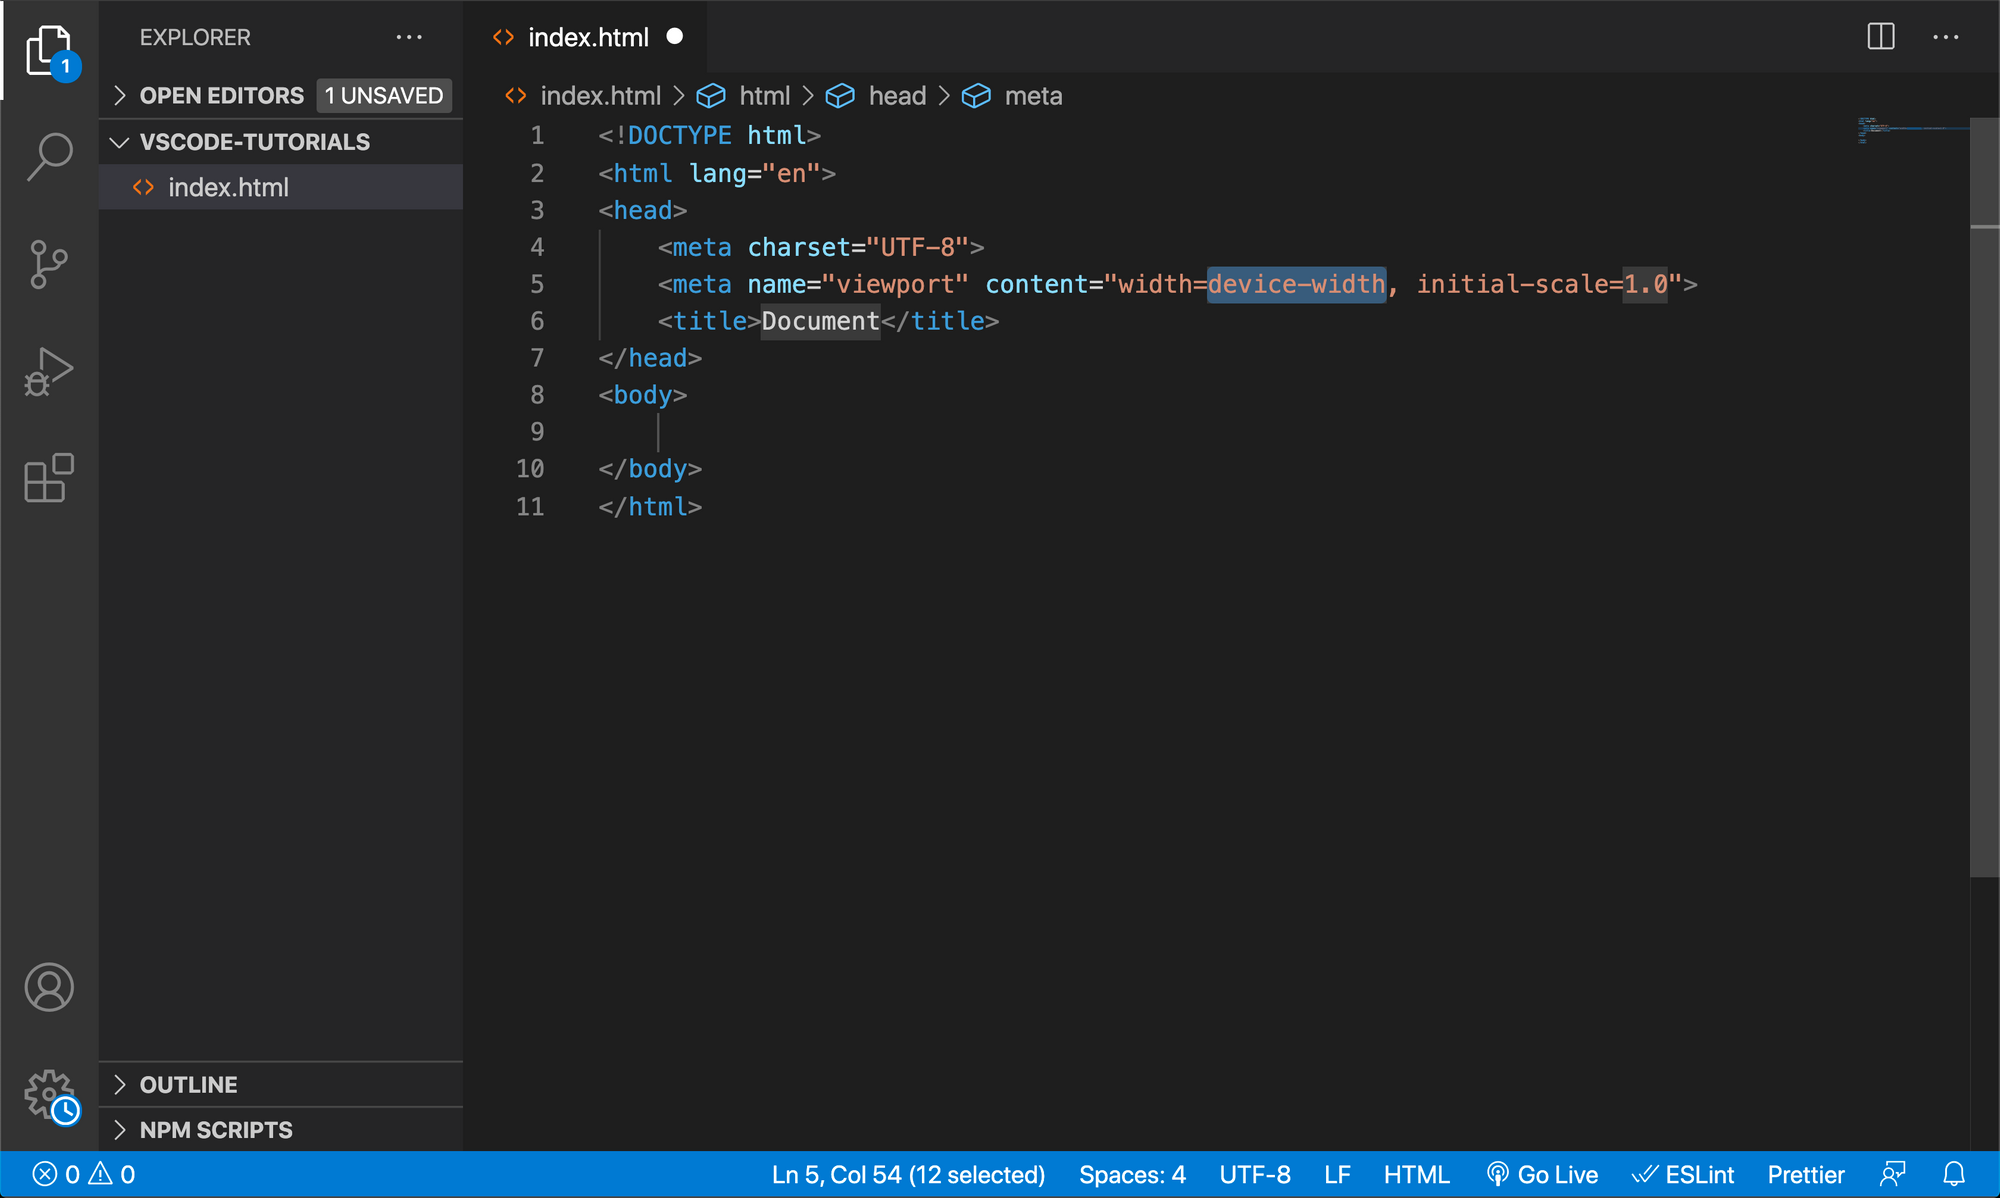
Now let's open the Command Palette again, and search for Format Document and select it. You can see that it add spacings between different sections and cleans up our code.
This is a super useful feature from VS Code. But we don't want to search for Format Document all the time and we want it to format whenever we save the file.
You also notice here that the indention is now equal to 4 spaces, which in my opinion is a bit much. So let's change it to 2. And to do that, we can go to settings or use the shortcut Command/Control + ,.
In the Commonly Used tab, we can change the Tab size to be 2 and under Text Editor/Formatting, we can select Format on Save. Now whenever we save, the files will be properly formatted.
VS Code Extensions
The last thing I want to show you how to use is Extensions. You can select the extensions tab from the side navigation or with the shortcut: Command/Control + Shift + X.
Here we can filter the extensions by, for example, Most Popular or Recommended.
There are many extensions to choose from. But the first extension that we need to install is Live Server. With this, we can have a local server reload static web pages.
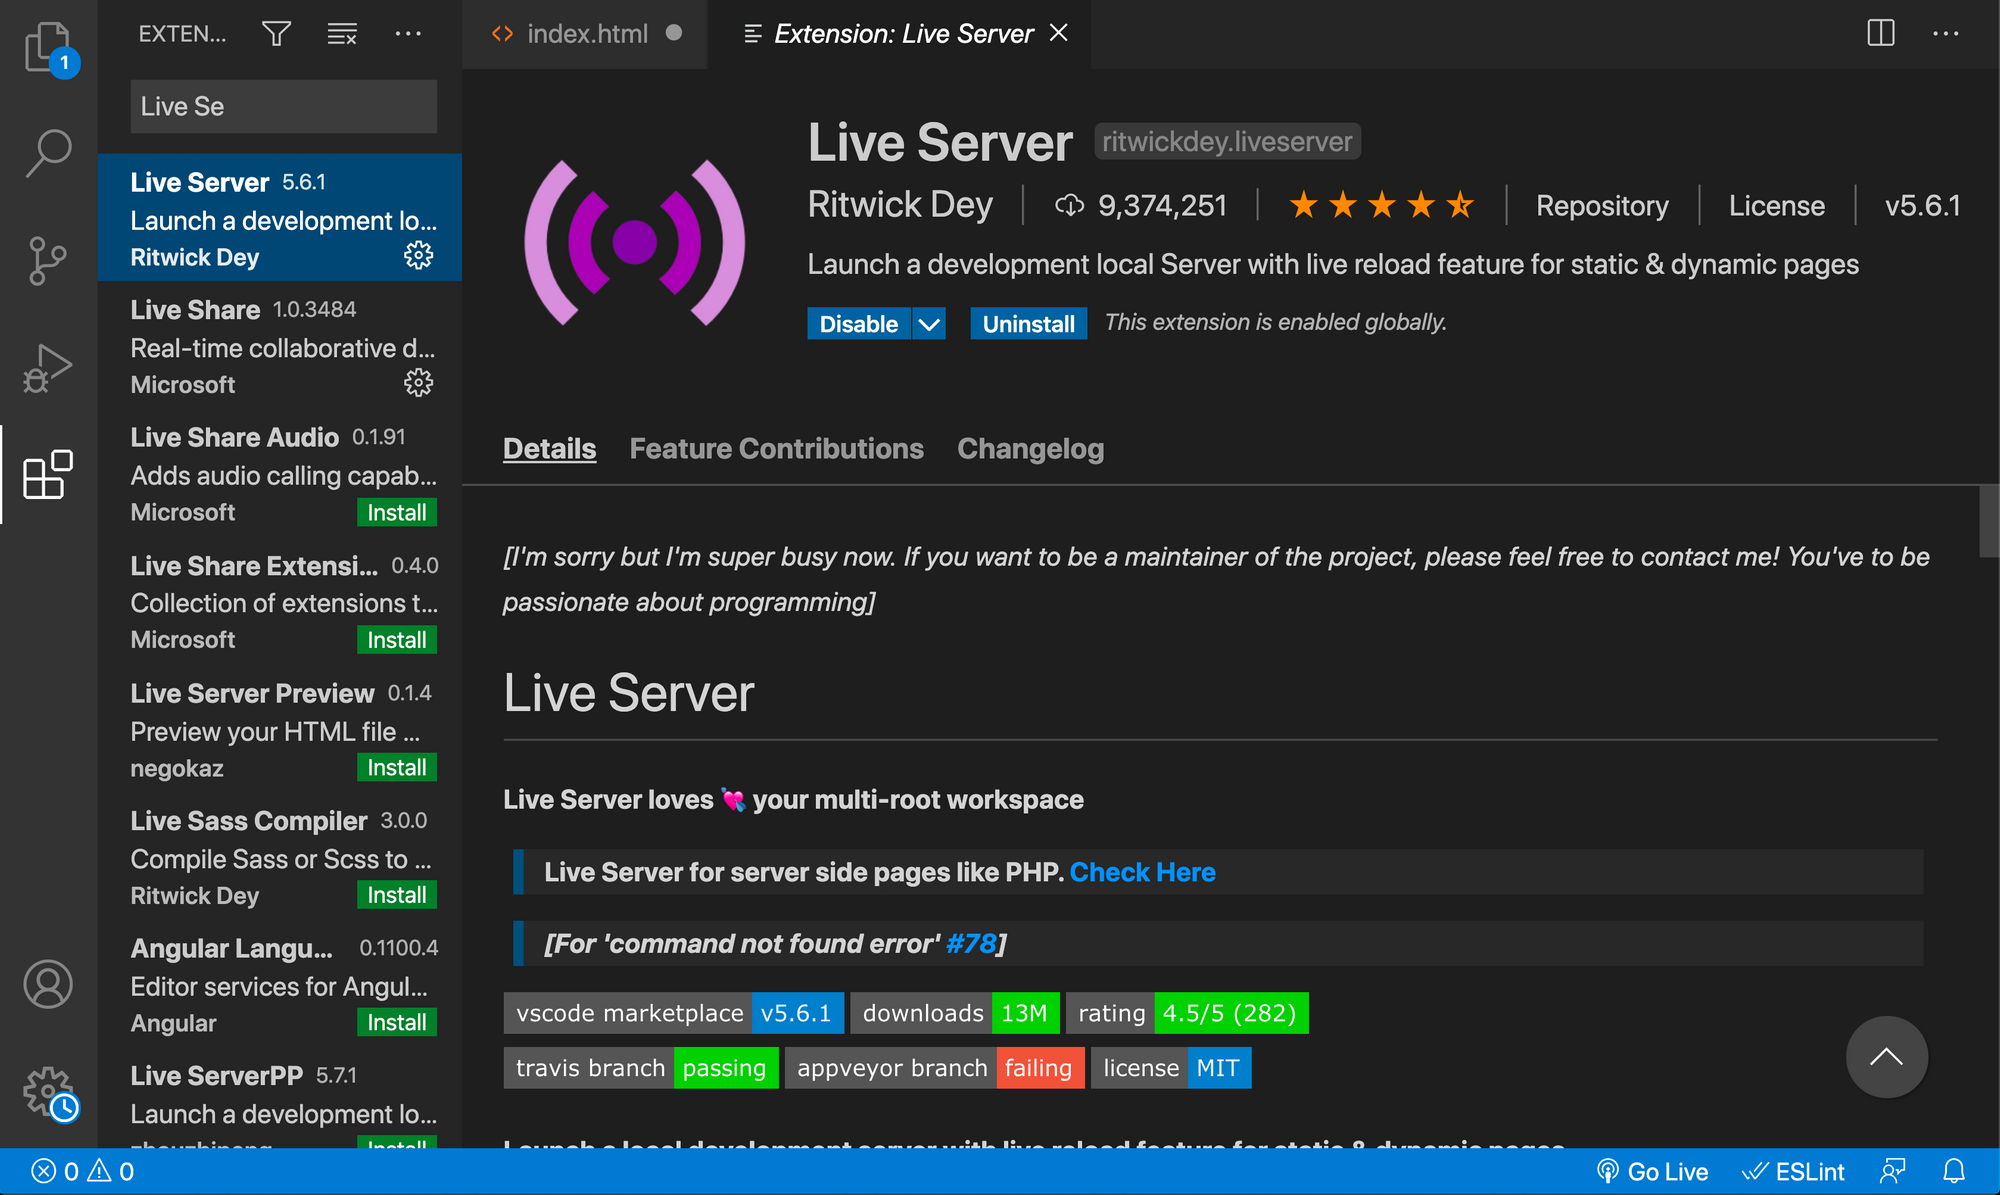
For example, if we go to our index.html and open the Command Palette and search for Live Server: Open with Live Server you can see that a new tab on the browser is opened.
And if we create a new element on our HTML, for example <h1>VScode Introduction<h1/>, after we save the page will automatically be reloaded and we can see the changes. In index.html, you can also open the live server with the go live button on the status bar.
Conclusion
There are many other useful extensions, but I will cover them in another article and video.
For now, with this introduction and setup guide, I am sure that you are ready to start your Web Development Journey.
That concludes the article. You can follow me on social media for future updates. Otherwise, stay happy coding and see you in future posts.
__________ 🐣 About me __________
- I am the founder of DevChallenges
- Subscribe to my Channel
- Follow my Twitter
- Join Discord