Introduction
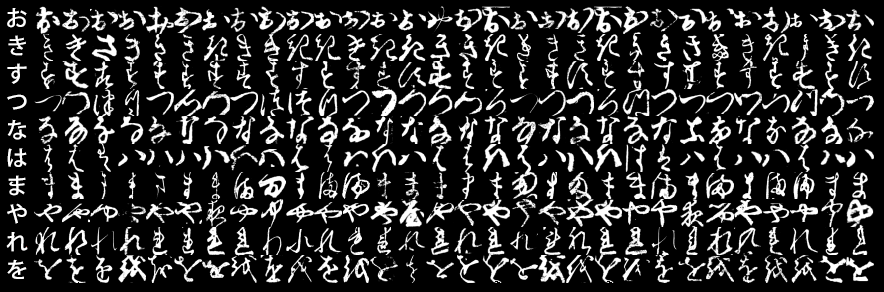
Hi. Hello. こんにちは
Those squiggly characters you just saw are from a language called Japanese. You’ve probably heard of it if you’ve ever watched Dragon Ball Z.

Here’s the problem though: you know those ancient Japanese scrolls that make you look like you’re going to unleash an ultimate samurai ninja overlord super combo move.
Yeah, those. I can’t exactly read them, and it turns out that very few people can.
Luckily, a bunch of smart people understands how important it is that I master the Bijudama-Rasenshuriken, so they invented this thing called deep learning.
So pack your ramen and get ready. In this article, I’ll show you how to train a neural network that can accurately predict Japanese characters from their images.
To ensure that we get good results, I’m going to use of an incredible deep learning library called fastAI, which is a wrapper around PyTorch that makes it easy to implement best practices from modern research. You can read more about it on their docs.
With that said, let’s get started.
KMNIST
OK, so before we can create anime subtitles, we’re going to need a dataset. Today we’re going to focus on KMNIST.
This dataset takes of examples of characters from the Japanese Kuzushiji script, and organizes them into 10 labeled classes. The images measure 28x28 pixels, and there are 70,000 images in total, mirroring the structure of MNIST.
But why KMNIST? Well firstly, it has “MNIST” in its name, and we all know how much people in machine learning love MNIST.

So in theory, you could just change a few lines of that Keras code that you copy-pasted from Stack Overflow and BOOM! You now have computer code that can revive an ancient Japanese script.
Of course, in practice, it isn’t that simple. For starters, the cute little model that you trained on MNIST probably won’t do that well. Because, you know, figuring out whether a number is a 2 or a 5 is just a tad easier than deciphering a forgotten cursive script that only a handful of people on earth know how to read.

Apart from that, I guess I should point out that Kuzushiji, which is what the “K” in KMNIST stands for, is not just 10 characters long. Unfortunately, I’m NOT one of the handfuls of experts that can read the language, so I can’t describe in intricate detail how it works.
But here’s what I do know: There are actually three variants of these Kuzushiji character datasets — KMNIST, Kuzushiji-49, and Kuzushiji-Kanji.
Kuzushiji-49 is variant with 49 classes instead of 10. Kuzushiji-Kanji is even more insane, with a whopping 3832 classes.
Yep, you read that right. It’s three times as many classes as ImageNet.
How to Not Mess Up Your Dataset
To keep things as MNIST-y as possible, it looks like the researchers who put out the KMNIST dataset kept it in the original format (man, they really took that whole MNIST thing to heart, didn’t they).
If you take a look at the KMNIST GitHub repo, you’ll see that the dataset is served in two formats: the original MNIST thing, and as a bunch of Numpy arrays.
Of course, I know you were probably too lazy to click that link. So here you go. You can thank me later.

Personally, I found the NumPy array format easier to work with when using fastai, but the choice is yours. If you’re using PyTorch, KMNIST comes for free as a part of torchvision.datasets.
The next challenge is actually getting those 10,000-year-old brush strokes onto your notebook (or IDE, who am I to judge). Luckily, the GitHub repo mentions that there’s this handy script called download_data.py that’ll do all the work for us. Yay!

From here, it’ll probably start getting awkward if I continue talking about how to pre-process your data without actual code. So check out the notebook if you want to dive deeper.
Moving on…
Should I use a hyper ultra Inception ResNet XXXL?
Short Answer
Probably not. A regular ResNet should be fine.
A Little Less Short Answer
Ok, look. By now, you’re probably thinking, “KMNIST big. KMNIST hard. Me need to use very new, very fancy model.”
Did I overdo the Bizzaro voice?
The point is, you DON’T need a shiny new model to do well on these image classification tasks. At best, you’ll probably get a marginal accuracy improvement at the cost of a whole lot of time and money.
Most of the time, you’ll just waste a whole lot of time and money.
So heed my advice — just stick to good ol’ fashion ResNets. They work really well, they're relatively fast and lightweight (compared to some of the other memory hogs like Inception and DenseNet), and best of all, people have been using them for a while, so it shouldn’t be too hard to fine-tune.
If the dataset you’re working with is simple like MNIST, use ResNet18. If it’s medium-difficulty, like CIFAR10, use ResNet34. If it’s really hard, like ImageNet, use ResNet50. If it’s harder than that, you can probably afford to use something better than a ResNet.
Don’t believe me? Check out my leading entry for the Stanford DAWNBench competition from April 2019:

What do you see? ResNets everywhere! Now come on, there’s got to be a reason for that.
Hyperparameters Galore
A few months ago, I wrote an article on how to pick the right hyperparameters. If you’re interested in a more general solution to this herculean task, go check that out. Here, I’m going to walk you through my process of picking good-enough hyperparameters to get good-enough results on KMNIST.
To start off, let’s go over what hyperparameters we need to tune.
We’ve already decided to use a ResNet34, so that’s that. We don’t need to figure out the number of layers, filter size, number of filters, etc. since that comes baked into our model.
See, I told you it would save time.
So what’s remaining is the big three: learning rate, batch size, and the number of epochs (plus stuff like dropout probability for which we can just use the default values).
Let’s go over them one by one.
Number of Epochs
Let’s start with the number of epochs. As you’ll come to see when you play around with the model in the notebook, our training is pretty efficient. We can easily cross 90% accuracy within a few minutes.

So given that our training is so fast in the first place, it seems extremely unlikely that we would use too many epochs and overfit. I’ve seen other KMNIST models train for over 50 epochs without any issues, so staying in the 0-30 range should be absolutely fine.
That means within the scope of the restrictions we’ve put on the model when it comes to epochs, the more, the merrier. In my experiments, I found that 10 epochs strike a good balance between model accuracy and training time.
Learning Rate
What I’m about to say is going to piss a lot of people off. But I’ll say it anyway — We don’t need to pay too much attention to the learning rate.
Yep, you heard me right. But give me a chance to explain.
Instead of going “Hmm… that doesn’t seem to work, let’s try again with lr=3e-3 ,” we’re going to use a much more systematic and disciplined approach to finding a good learning rate.
We’re going to use the learning rate finder, a revolutionary idea proposed by Leslie Smith in his paper on cyclical learning rates.
Here’s how it works:
- First, we set up our model and prepare to train it for one epoch. As the model is training, we’ll gradually increase the learning rate.
- Along the way, we’ll keep track of the loss at every iteration.
- Finally, we select the learning rate the corresponds to the lowest loss.
When all is said and done, and you plot the loss against the learning rate, you should see something like this:

Now, before you get all giddy and pick 1e-01 as the learning rate, I’ll have you know that it’s NOT the best choice.
That’s because fastai implements a smoothening technique called exponentially weighted averages, which is the deep learning researcher version of an Instagram filter. It prevents our plots from looking like the result of giving your neighbors’ kid too much time with a blue crayon.

Since we’re using a form of averaging to make the plot look smooth, the “minimum” point that you’re looking at on the learning rate finder isn’t actually a minimum. It’s an average.
Instead, to actually find the learning rate, a good rule of thumb is to pick the learning rate that’s an order of magnitude lower than the minimum point on the smoothened plot. That tends to work really well in practice.
I understand that all this plotting and averaging might seem weird if all you’ve been brute-forcing learning rate values all your life. So I’d advise you to check out Sylvain Gugger’s explanation of the learning rate finder to learn more.
Batch Size
OK, you caught me red-handed here. My initial experiments used a batch size of 128 since that’s what the top submission used.
I know, I know. Not very creative. But it’s what I did. Afterward, I experimented with a few other batch sizes, and I couldn’t get better results. So 128 it is!
In general, batch sizes can be a weird thing to optimize, since it partially depends on the computer you’re using. If you have a GPU with more VRAM, you can train on larger batch sizes.
So if I tell you to use a batch size of 2048, for example, instead of getting that coveted top spot on Kaggle and eternal fame and glory for life, you might just end up with a CUDA: out of memory error.
So it’s hard to recommend a perfect batch size because, in practice, there are clearly computational limits. The best way to pick it is to try out values that work for you.
But how would you pick a random number from the vast sea of positive integers?
Well, you actually don’t. Since GPU memory comes is organized in bits, it’s a good idea to choose a batch size that’s a power of 2 so that your mini-batches fit snugly in memory.
Here’s what I would do: start off with a moderately large batch size like 512. Then, if you find that your model starts acting weird and the loss is not on a clear downward trend, half it. Next, repeat the training process with a batch size of 256, and see if it behaves this time.
If it doesn’t, wash, rinse, and repeat.
A Few Pretty Pictures
With the optimizations going on here, it’s going to be pretty challenging to keep track of this giant mess of models, metrics, and hyperparameters that we’ve created.
To ensure that we all remain sane human beings while climbing the accuracy mountain, we’re going to use the wandb + fastai integration.
So what does wandb actually do?
It keeps track of a whole lot of statistics about your model and how it’s performing automatically. But what’s really cool is that it also provides instant charts and visualizations to keep track of critical metrics like accuracy and loss, all in real-time!
If that wasn’t enough, it also stores all of those charts, visualizations, and statistics in the cloud, so you can access them anytime anywhere.
Your days of starting at a black terminal screen and fiddling around with matplotlib are over.
The notebook tutorial for this article has a straightforward introduction to how it works seamlessly with fastai. You can also check out the wandb workspace, where you can take a look at all the stuff I mentioned without writing any code.
Conclusion
これで終わりです
That means “this is the end.”
But you didn't need me to tell you that, did you? Not after you went through the trouble of getting a Japanese character dataset, using the learning rate finder, training a ResNet using modern best practices, and watching your model rise to glory using real-time monitoring in the cloud.
Yep, in about 20 minutes, you actually did all of that! Give yourself a pat on the back.
And please, go watch some Dragonball.