
To use images in Xcode, you need to upload them to Assets.xcassets, located in the Supporting Files folder. There are two options you can go with: bitmaps (aka .png files) or vectors (aka .pdf files). The first step is deciding which file type you’d like to use.
The difference between bitmaps and vector assets
Most tutorials online use bitmap assets, which are .png files. This requires you to drag over 3 copies of the image into Xcode.
However there is a school of thought that believes vector assets are superior. This article has a great explanation of why that’s the case. Vector assets are .svg files (or .pdf for Xcode). If you choose to use vectors assets, you only need to upload one version of the image to Xcode.

Here’s what I’ve heard from those much wiser then I–Android phones use algorithms from the vector asset to generate the image in any size required. Makes sense given the wide breadth of devices and screen sizes for Android.
However vector assets in iPhones don’t actually scale with algorithms (apparently). So you don’t get higher quality images by using vectors over bitmaps. Instead what you get is the same quality as bitmap. The iPhone simply takes the “vector” asset and converts it to the same three bitmap sizes.
Aside from the algorithm logic above, there are a few more objective benefits of using vector assets for iPhones.
- Reduces likelihood of human error. Right now there are three bitmap sizes (1x, 2x ,3x). That means you need to upload three images to your assets. That’s three opportunities to accidentally drag and drop the wrong image. When you use vector assets (which come up as universal in Xcode), you only need to upload one image instead of three. There’s less chance of uploading the incorrect size or image.
- Speed. Same reason as #1. If you are using a lot of images in your app, then using vector assets reduces the number of images you need to upload by a third.
- Future proofing. The iPhone currently only uses three image sizes (1x, 2x, 3x). This is to do with the increased retina quality of the screens. When Apple introduced the high retina screens a few years ago, the number of pixels per point increased for a sharper image.
It seems extremely likely that similar technological increases will continue to occur. In the future, we may need to upload 4x, 5x and 6x images. If we use a vector asset, the app will scale the image for us. This saves us from dropping in the new sizes of the bitmap asset.
Although I have to admit I’m a bit confused about this, given that iPhone vector assets don’t seem to actually work on algorithms. So I’m not sure how they will automatically scale to larger sizes. But my wise mentor explained this and I trust him!
The one big downside for using vector assets in Xcode is that most places don’t provide the .pdf file. You need to convert it from .svg yourself.
Update on 18 June 2017: Apple have announced in WWDC that iOS is now supporting true scalar images! Or at least, that’s what I think they announced. Now there is even more reason to use to use a single scale.
How to upload a vector asset
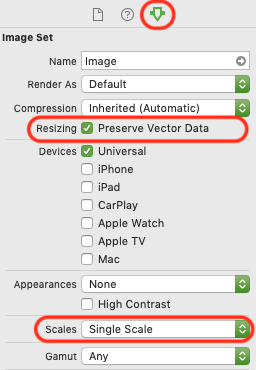
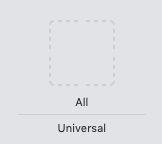
Head to the attributes menu. Change the scales to “single scale”, and check the resizing box to “preserve vector data”. This will change the upload option to “all” instead of 1x, 2x, 3x.

Next you drag and drop your .pdf file into the one slot. I’m not too sure how to convert .svg to .pdf yet, but I assume it’s fairly easy with Preview.
How to upload .png files
If you decide to go ahead with .png, you’ll need to upload three versions of your file. This is to cover the varying screen resolutions of the different iPhones.
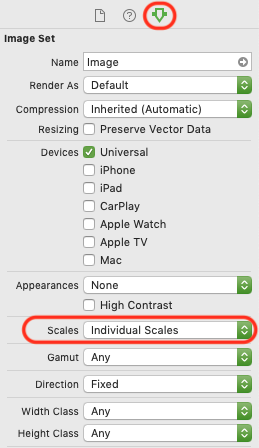
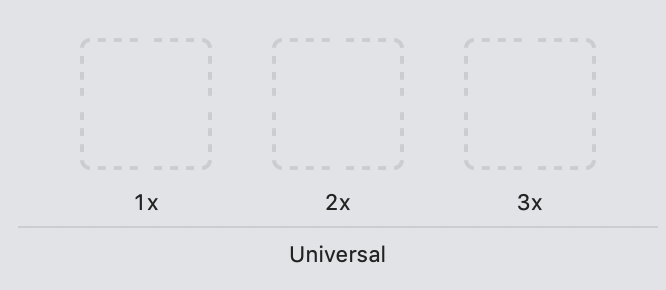
First, ensure the “scales” option in the attributes menu is set to “individual scales”. This is the default option, and it will show you three slots that you should fill:
Second, find an image that you want to use in your app. Let’s assume it’s this icon:

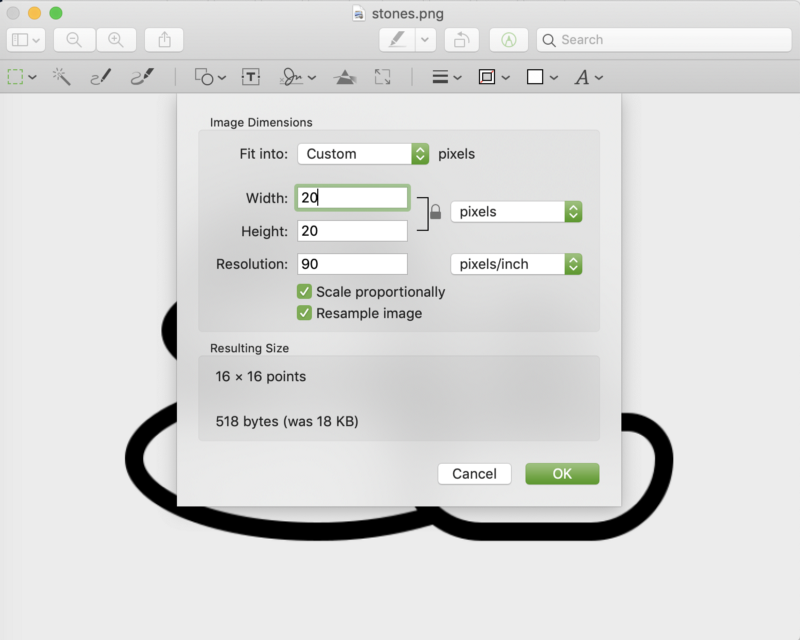
Wow that’s big. It’s because I downloaded the 512 pixel version from the site. However I only want the image to be 20 x 20 pixels in my app. To convert the image to 20 pixels, I’ll resize it in Preview.
Make three copies of the original image. The names of your image should look something like this: zen.png, zen@2x.png, zen@3x.png. The important part is that the files all have the same name (here I’m using zen), and two of them end with @2x and @3x. When you use this naming convention, Xcode will be able to automatically find the correct size based on the device type.
Next, open the image in Preview and go to Tools > Adjust size to bring up the menu below. Specify 20 x 20 pixels. Press ok and save the change. This is your base image, zen.png.
Do the same thing for zen@2x.png. Only this should be 40 x 40 pixels. One more time for zen@3x.png. This will be 60 x 60 pixels.
Now you can drag and drop the images into the correct boxes in Xcode. Done!