

In this article, I'll introduce a no-code, no-software and no-cost solution to publishing sophisticated web sites managed by non-technical people. The full codebase is on GitHub here.
Sir Issac Newton discovered the law of gravity when practicing “social distancing” during the Plague. What will YOU do? One silver lining of quarantine is that all this free time brings out the entrepreneur spirit and creativity in us.
However, especially because of the quarantine, now more than ever, any new idea or project must have a web site. Traditional CMS solutions like Wordpress, Squarespace, or Wix are difficult to use, look dated, are expensive, or all of the above!
We wanted to create a web site that has a sophisticated look and feel, yet is easy to customize. A non-technical person should be able to edit the source files and see the changes appear on the live web site in a few minutes. Ideally, it should also be free (forever free, not just free-for-now), and can scale to handle millions of visitors if it becomes popular.
Is this possible?
In this short article, I will walk you through a solution based on the Hugo framework, GitHub Pages, and GitHub Actions. You can get up and running with your shiny new website by the end of this article.
It is so easy that my 9-year-old son did it. He now manages a web site for his fictional country called Arenztopia. Check out the back story.
TL;DR
If you just want to get started with a working web site as soon as possible, first make sure that you have a free GitHub account.
Go to this GitHub repository, and click on the “Fork” button on the top right, and fork it to your own account.

Go to your forked repository, and click on the Actions tab. You will see a message like the one in the picture below. Click on the “I understand my workflows …” button.

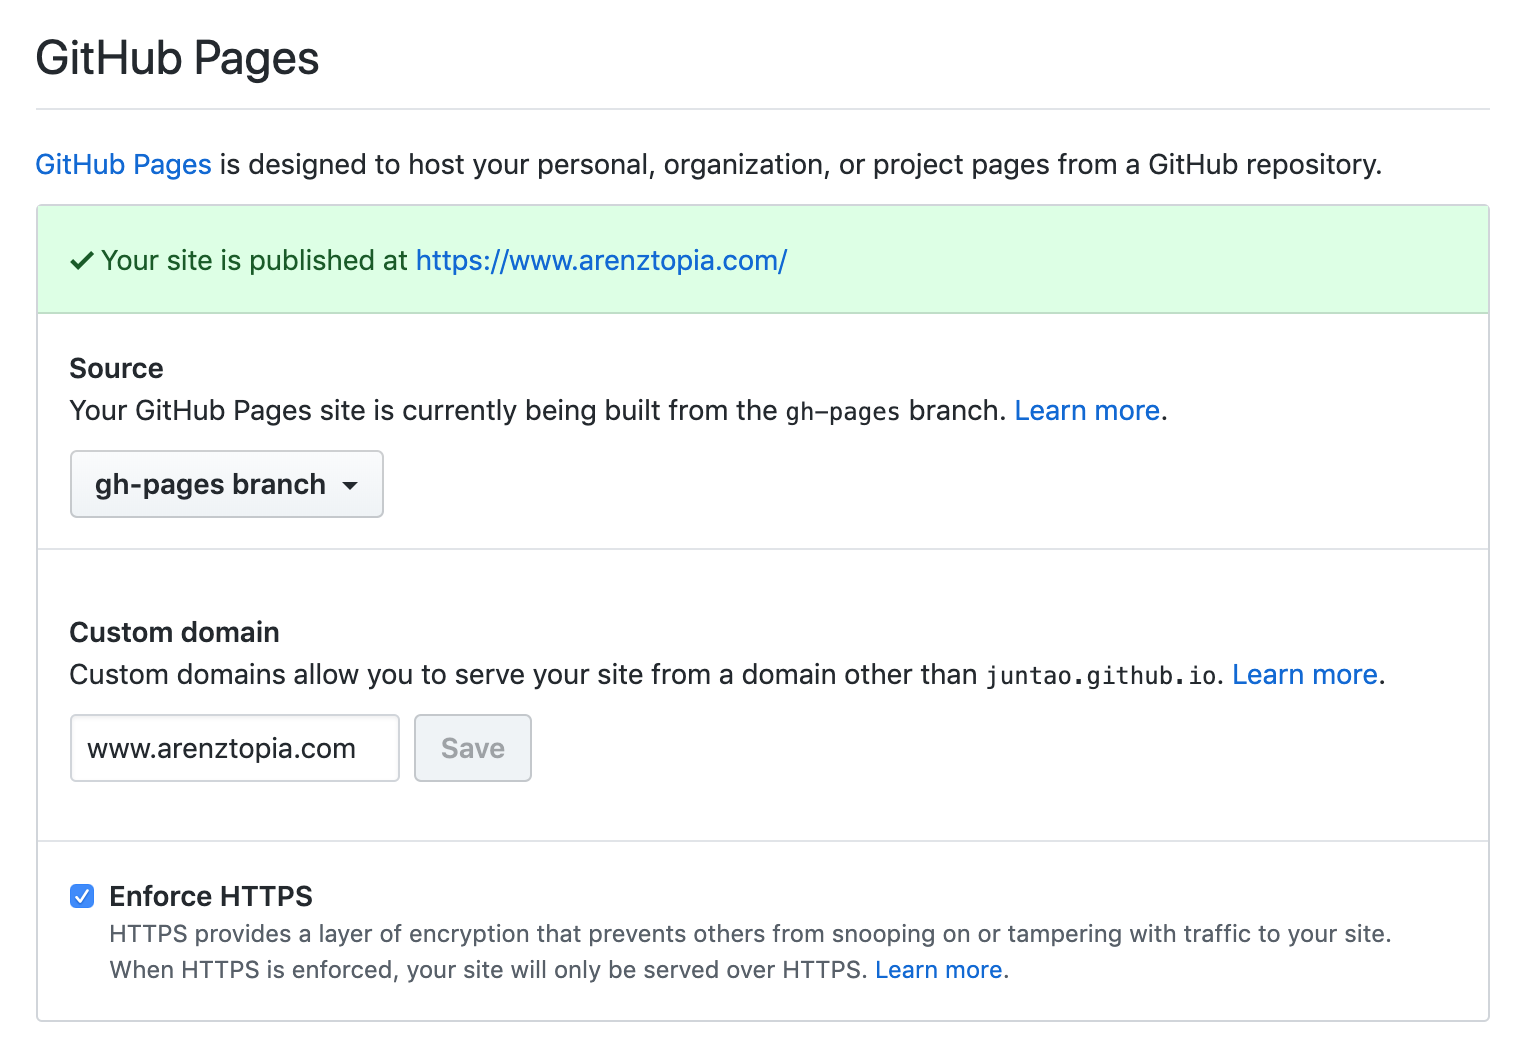
Go to the Settings tab of your repository, and then scroll down to GitHub Pages. Re-select the gh-pages from the dropdown for the web site to build.

Go to the Code tab of the repository, open the config.toml file, and edit it. Change its title attribute to something else, and click on the “Commit changes” button at the bottom. We need this step to trigger the workflow at the new repository.
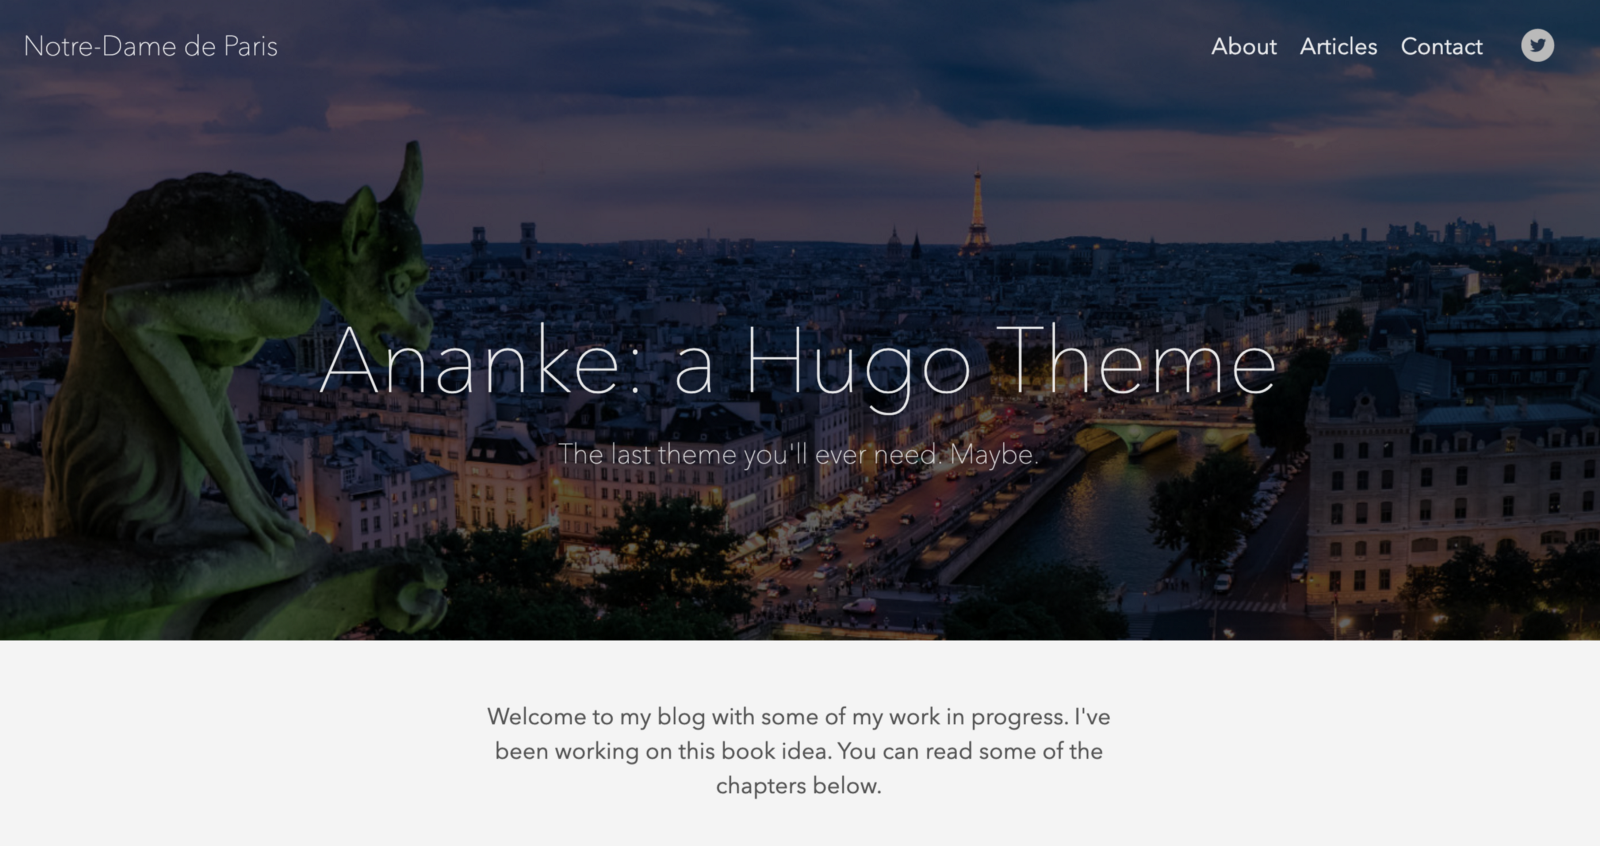
Wait a few minutes, go to the “published at” web address at GitHub Pages and you will see the template web site.
Next, you can customize the site by editing the config.toml file and the files in the content folder. Go to the “Add your own content” section at the end of this article to see how. You can check out the instructions for the Ananke theme here.
That’s it for the quick start! In the next several sections, I will explain in more detail the concepts and processes.
Hugo basics
Older generation CMS solutions like Wordpress are too difficult to adapt to new web site designs, and commercially hosted solutions like SquareSpace are too expensive and not flexible enough. Static web site generators like Hugo offer a good balance among features, flexibility, and ease of authoring.
- Hugo web sites can be customized and modified through configuration files.
- New pages and content sections can be written in markdown instead of HTML. That makes content authoring much easier.
- There are many modern design themes to choose from.
- The output of Hugo is a static HTML web site that can be deployed on any low-cost hosting provider.
- Together with static web site hosting services like GitHub Pages and Netlify, they can offer a completely free solution.
The Hugo software distribution is available on all major operating systems. You can learn about it here. But, since we will use GitHub Actions to automatically build our Hugo web sites, we do not actually need to install Hugo software here.
Here is how to do it.
Create a template website
First, select a Hugo theme. There are many. Some are geared toward web sites with one or more content web pages, while others are optimized for blog-like sites with timestamped posts.

Find one you like, download a zip package or clone a GitHub repo, and unpack the theme into a folder. Let’s assume that the theme distribution is unpacked into a folder called my-theme. The following are commands in a Linux terminal. You could use the Terminal app on Mac or PowerShell on Windows.
Next, create your web site project directory on your computer.
$ mkdir -r my-site/themesCopy the theme folder into your project.
$ cp -r my-theme my-site/themesNext, copy the theme’s exampleSite to the project’s top-level directory.
$ cd my-site
$ cp -r themes/my-theme/exampleSite/* ./
Edit the config.toml in the project root directory my-site/ to point to the right theme.
baseURL = "/"themesDir = "themes"theme = "my-theme"Next, create a GitHub repo called my-site, and push the my-site directory onto its master branch. Here are the steps for uploading files from GitHub’s web UI. Now we are ready to publish the theme example site.
For a Hugo-based system to be useable to a non-developer (or a young developer who has yet to master the command line tools), we must automate the process of building and deploying the static web site.
Automate deployment
In the GitHub project, go to Settings and enable GitHub Pages. Select the source to be the gh-pages branch.
Next, we create a GitHub Actions workflow to run the Hugo command on the source files from master branch, and push the generated HTML files to the gh-pages branch for publication. From the project’s Actions tab, click on the “set up a workflow yourself” button.
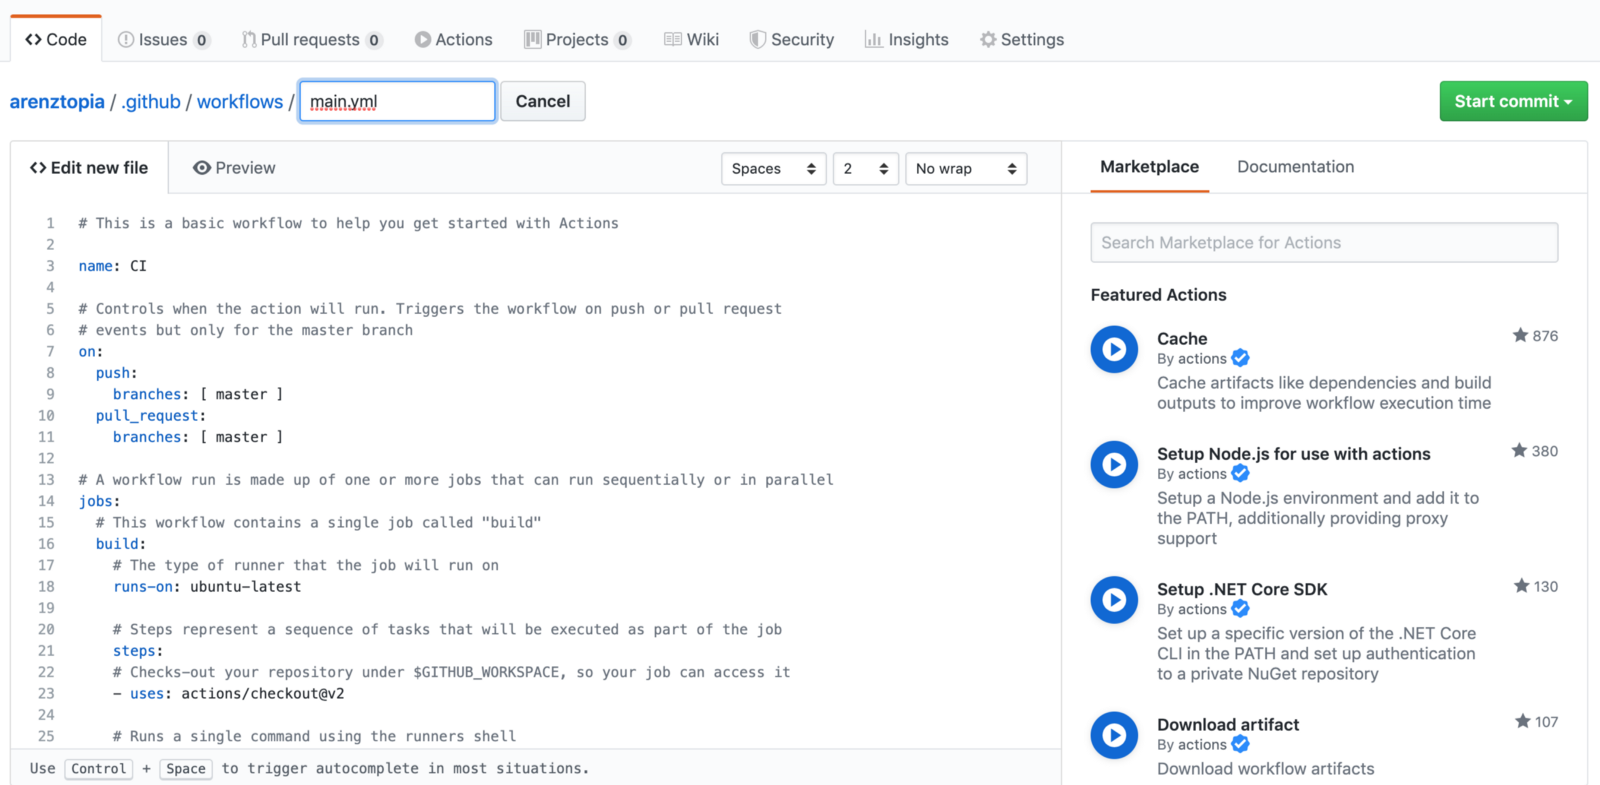
The workflow is stored in the master branch as .github/workflows/main.yml file. The content of the file is as follows.
name: github pages

on:
  push:
    branches:
      - master

jobs:
  deploy:
    runs-on: ubuntu-18.04
    steps:
      - uses: actions/checkout@v1  # v2 does not have submodules option now
        # with:
        #   submodules: true

      - name: Setup Hugo
        uses: peaceiris/actions-hugo@v2
        with:
          hugo-version: '0.62.2'
          extended: true

      - name: Build
        run: hugo

      - name: Deploy
        uses: peaceiris/actions-gh-pages@v3
        with:
          github_token: ${{ secrets.GITHUB_TOKEN }}
          publish_dir: ./public
What happens here is that the web site authors and editors will change content and files on the master branch. Whenever new content is pushed to the master branch, the automated GitHub Actions workflow will set up the Hugo software, run the hugo command, and turn those files into HTML files for a static web site.
The HTML files are pushed to the gh-pages branch of the same repository. They will be published on the specified web address by GitHub Pages as configured.
Notice the cname attribute in the last line. That is the custom domain name we set up with GitHub Pages. If you do not have a custom domain name, just remove this line, and you can access your web site at the domain provided by GitHub Pages.
Now go to the web site, and you should see the theme’s default web page.

Add your own content
To change the default theme web site to your own content, you just need to change the files on the master branch. Please refer to the documentation of your selected theme. In general, Hugo templates work like this:
- The web pages are authored in markdown format and the
mdfiles are in thecontentfolder. - Each
mdfile has a header section with properties such as the page’s menu placement, priority, timestamp, excerpt, etc. - The overall configuration, such as the menu items and properties used by multiple pages, are stored in the
datafolder. - Static content such as raw HTML files, JavaScript files, and image files can be placed in the
staticfolder.
In particular, here is how you customize the Ananke theme that comes with our template:
- The config.toml file allows you to configure the website title, social icons on all pages, and the big featured image on the home page.
- All images should be uploaded to the static/images folder.
- The content/_index.md file contains the text for the home page.
- To add pages to the site, you can just create markdown files in the content folder. An example is the contact.md file. Notice that at the top of the file, there are attributes to control whether this page should be on the website menu.
- To add articles to the site, you can create markdown files in the content/post folder. Those are blog-like content articles that have dates and titles at the top. The most recent two articles will show up on the home page.
If you are interested in learning more and see how we did it, you can watch our progress at
Good luck and stay healthy!
About the author
Dr. Michael Yuan is the author of 5 books on software engineering. His latest book Building Blockchain Apps was published by Addison-Wesley in Dec 2019. Dr. Yuan is the co-founder of Second State, a VC-funded startup that brings WebAssembly and Rust technologies to cloud, blockchain, and AI applications. It enables developers to deploy fast, safe, portable, and serverless Rust functions on Node.js.
Prior to Second State, Dr. Yuan was a long time open source contributor at Red Hat, JBoss, and Mozilla. Outside of software, Dr. Yuan is a Principal Investigator at the National Institutes of Health, with multiple research awards on cancer and public health research. He holds a PhD in astrophysics from the University of Texas at Austin.