
The cascading nature of CSS sometimes makes it tough to understand and use. Developers at all levels often struggle while trying to figure out how to use certain features, and you'll often find yourself googling or asking a colleague for help.
So when you're having issues dealing with CSS, don’t be hard on yourself – it happens to everyone.
Since CSS can be mystical and tricky, you must also be tricky if you hope to demystify it. That’s why, in this article, I'm bringing you 10 awesome CSS tricks that will make things easier for you as a developer, especially if you are a beginner.
1. How to Fix Horizontal Scroll on a Web Page in CSS
If you're styling your web page and you see a horizontal scroll bar at the bottom, you need to find the element that has a width greater than the available screen width.
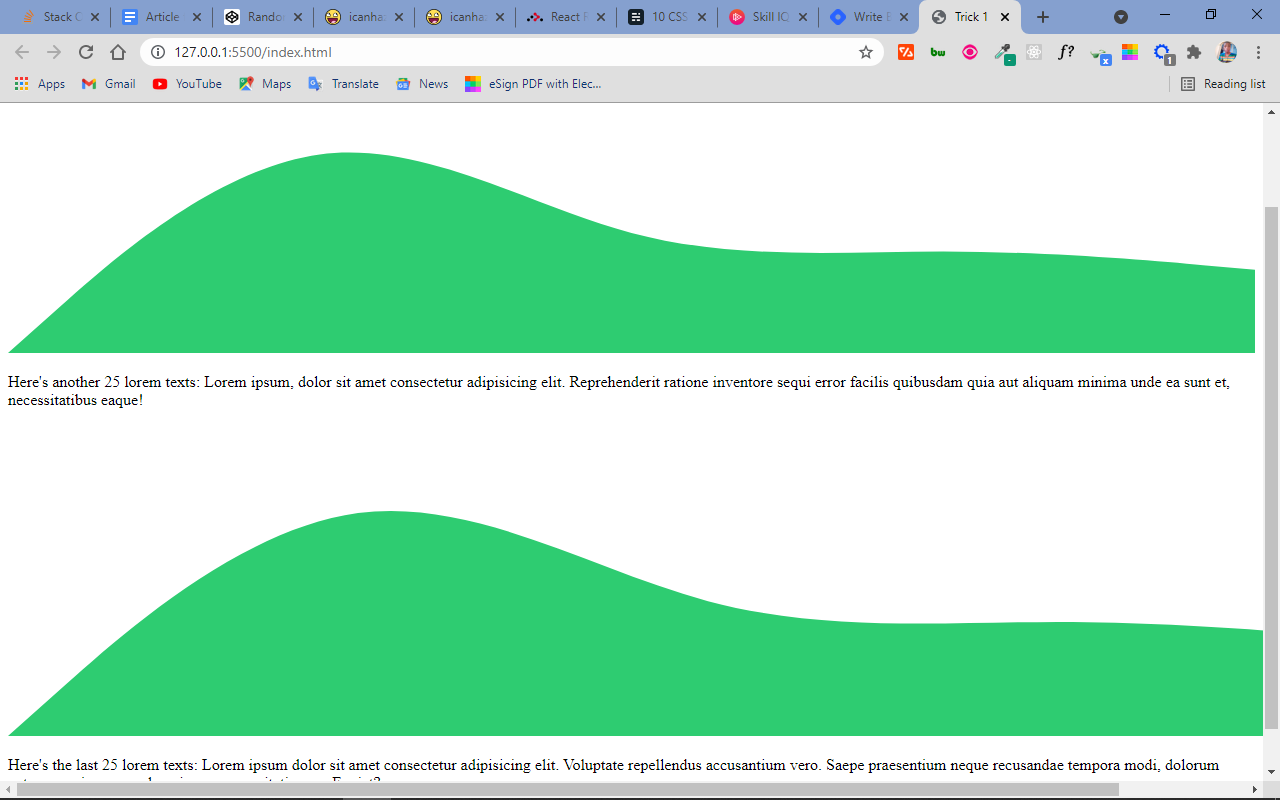
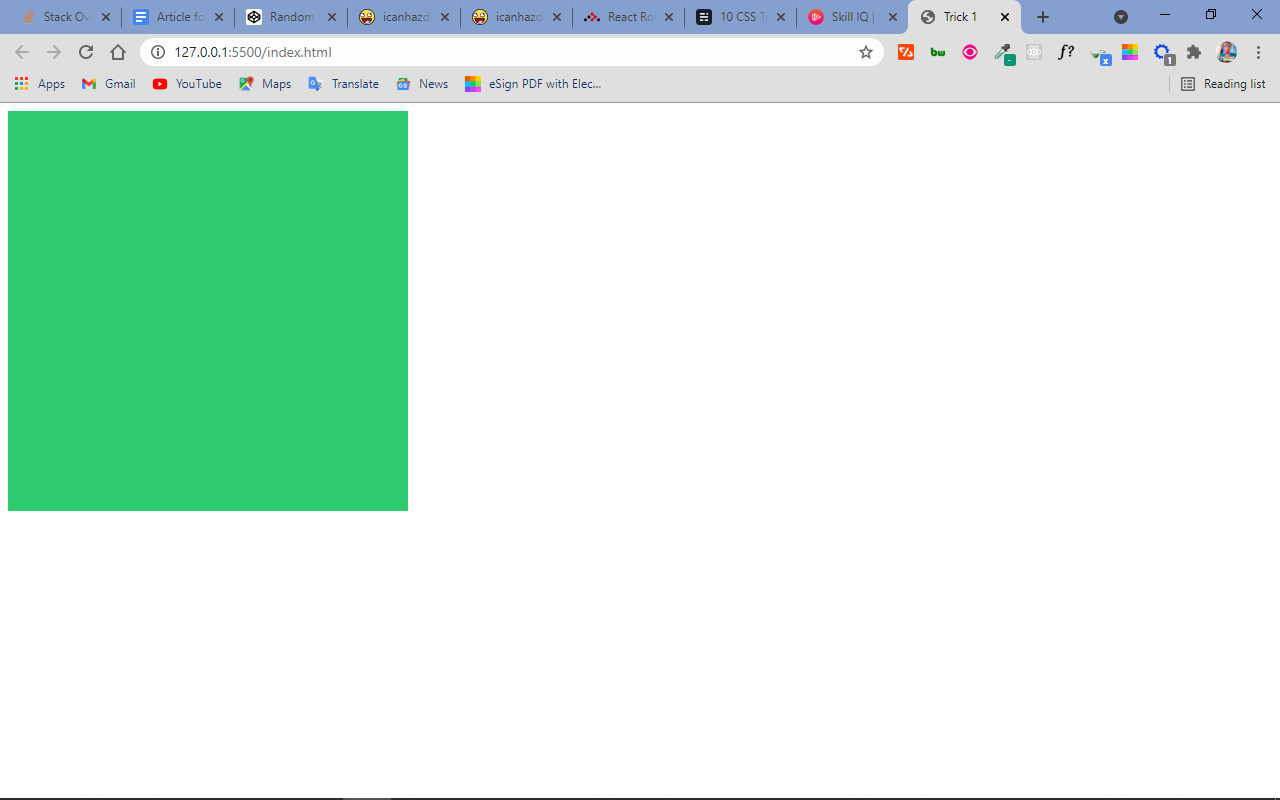
For example, in the screenshot below, you can see there's a horizontal scroll:
You can use the universal selector (*) to find the culprit element by applying the following rules:
* {
border: 2px solid red;
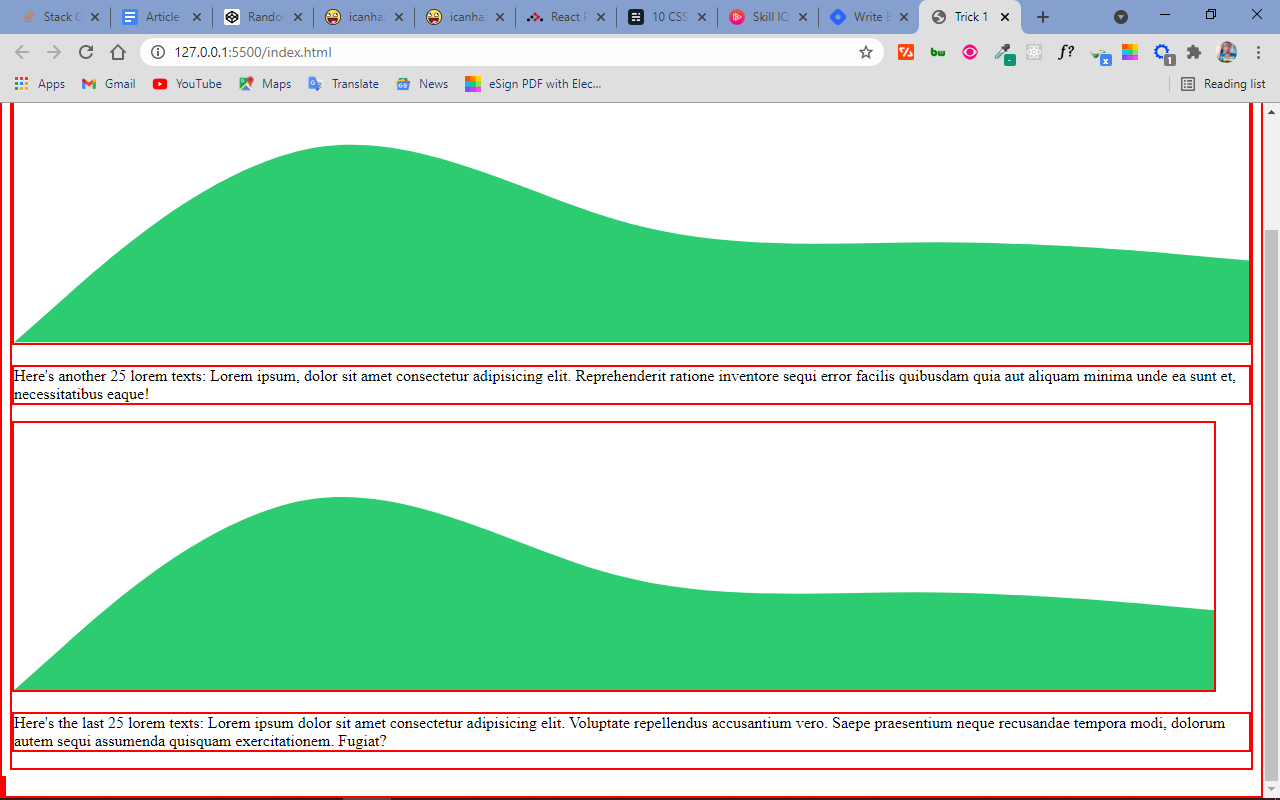
}This applies a red border of 2 pixels to every element on the page and so you can easily figure out which element you need to adjust.
After applying the above style, this is the result:
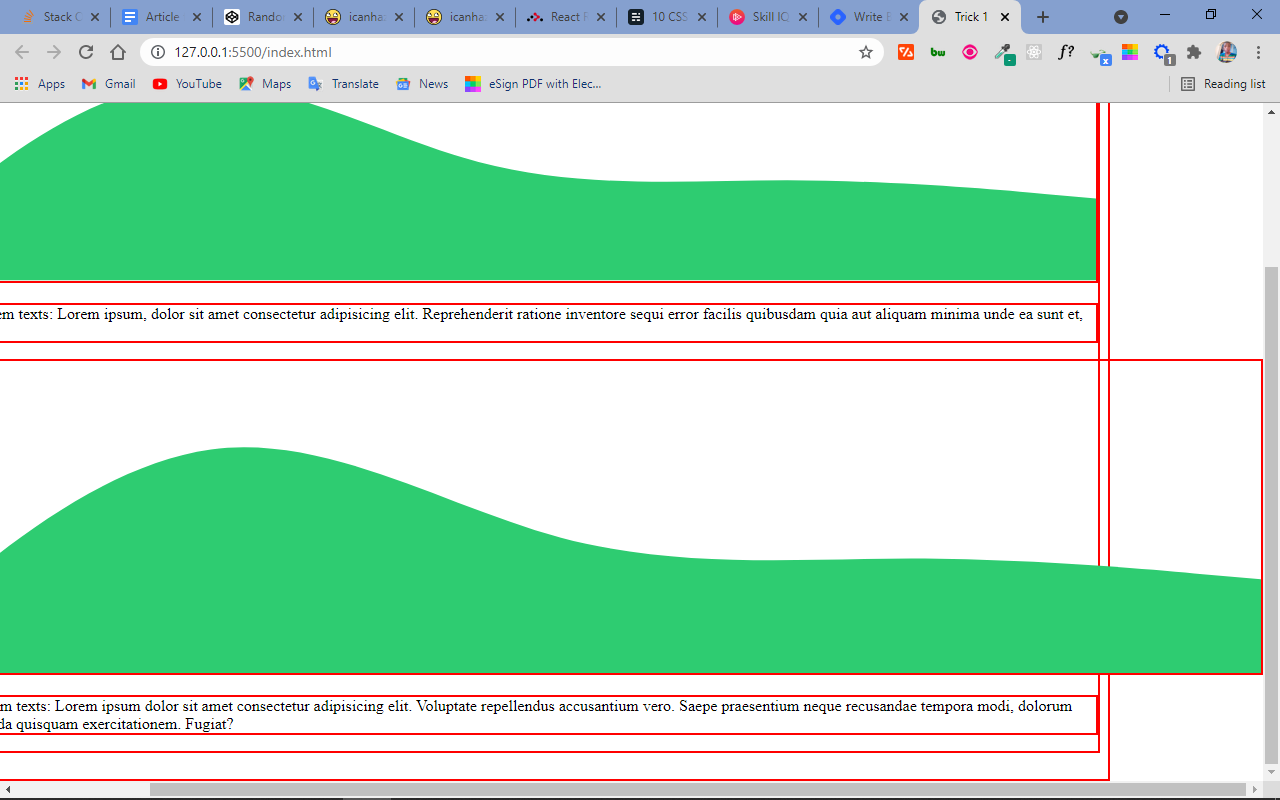
You can see that the second green wave is causing the horizontal scroll. This is because the width was set to 1400px which is wider than the 1200px available screen width.
.wave2 {
  width: 1400px;
}
Setting the width back to 1200px or removing it entirely will fix the issue so there's no horizontal scroll anymore.
2. How to Override a Style in CSS
In certain specific cases, you might want to override a particular style that already exists (like from a library). Or you might have a template with a large stylesheet you need to customize a particular part of.
In these situations, you can either apply the rules of CSS specificity, or you can use the !important exception in front of your rule.
In the example below, the !important gives every h1 element an emerald green variation of #2ecc71 (my favorite color):
h1 {
    color: #2ecc71 !important;
}
But beware – using this exception is considered bad practice, and you should avoid it whenever possible.
Why? Well, !important actually breaks the cascading nature of CSS, and it can make debugging more difficult.
The best use case for !important is to use it to identify a problem in your codebase when you're dealing with a large stylesheet of templates or old code. Then you can quickly fix the problem and remove the exception.
Instead of using !important to apply styles, you can learn more about CSS specificity and apply those rules.
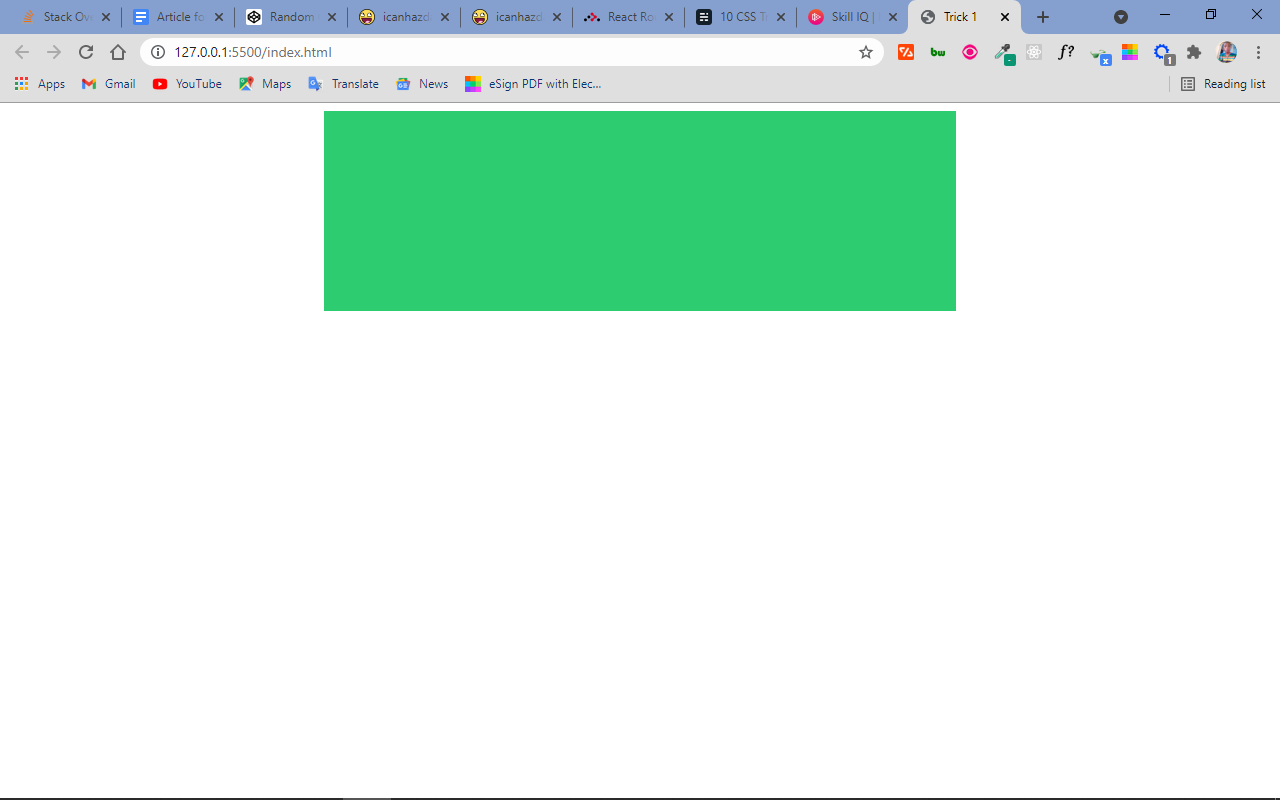
3. How to Make a Square with CSS
If you want to make a square without having to mess around too much with width and height, you can style your div [or span as the case may be] by setting a background color, the width you need, and then an aspect-ratio with equal figures. The first figure is for the top and bottom dimension, the second is for left and right.
You can take this further by playing with the two figures to make rectangles and whatever square you want.
<div class="square"></div>
.square {
  background: #2ecc71;
  width: 25rem;
  aspect-ratio: 1/1;
}
4. How to Center a div with CSS
Centering a div can become pretty difficult as your stylesheet gets larger. To style any div, give it a block display, a margin of auto, and a width under 100%.
<div class="center"></div>
.center {
    background-color: #2ecc71;
    display: block;
    margin: auto;
    width: 50%;
    height: 200px;
}
5. How to Remove Extra Padding in a Box in CSS
Using box-sizing: border-box will ensure that no extra padding gets added to a box when you set a width and padding for it. This will help your layouts look a lot nicer.
* {
margin: 0;
padding: 0;
box-sizing: border-box;
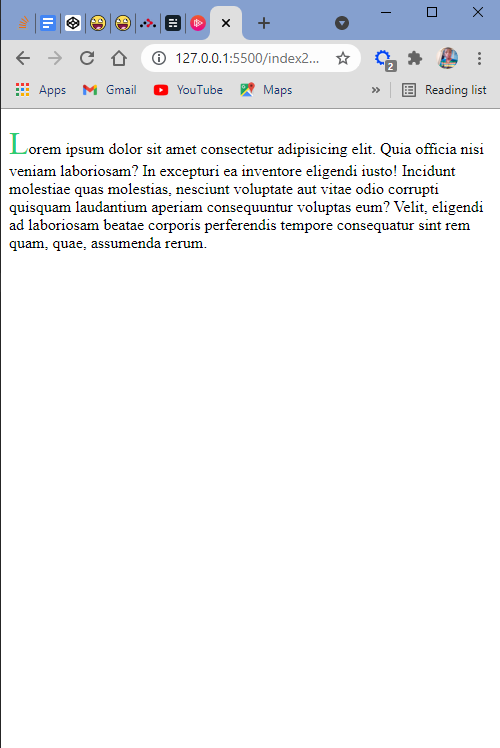
}6. How to Make a Drop Cap with CSS
You can make a drop cap with the first-letter pseudo-element. Yes! The drop cap you see in newspapers.
Select the appropriate HTML element and apply the style as I did below:
 <p class="texts">
      Lorem ipsum dolor sit amet consectetur adipisicing elit. Quia officia nisi
      veniam laboriosam? In excepturi ea inventore eligendi iusto! Incidunt
      molestiae quas molestias, nesciunt voluptate aut vitae odio corrupti
      quisquam laudantium aperiam consequuntur voluptas eum? Velit, eligendi ad
      laboriosam beatae corporis perferendis tempore consequatur sint rem quam,
      quae, assumenda rerum.
 </p>
p.texts::first-letter {
  font-size: 200%;
  color: #2ecc71;
}
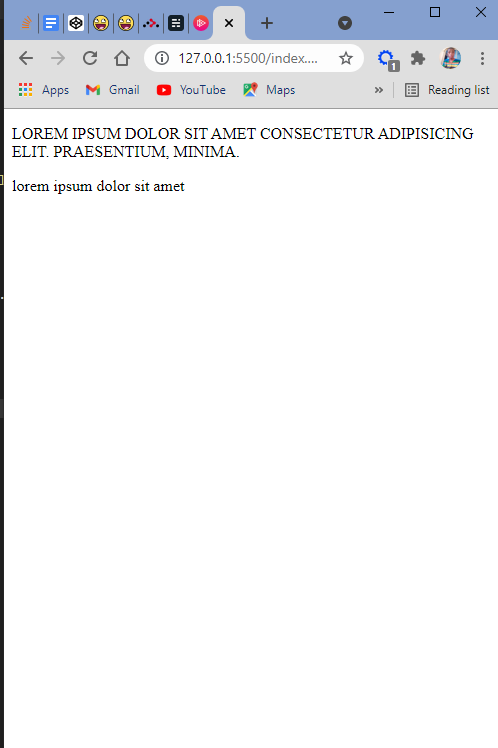
7. How to Make Text Uppercase or Lowercase in CSS
Uppercase or lowercase letters don't have to come directly from your HTML. You can force any text to be UPPERCASE or lowercase in your CSS.
I hope there will be options for SentenceCase and tOGGLEcASE in the future. But why would you want to make a text tOGGLEcASE anyway?
<p class="upper">
      Lorem ipsum dolor sit amet consectetur adipisicing elit. Praesentium,
      minima.
</p>
<p class="lower">LOREM IPSUM DOLOR SIT AMET</p>
.upper {
  text-transform: uppercase;
}

.lower {
  text-transform: lowercase;
}
8. How to Declare Variables to Keep Your CSS DRY
Variables? Yes. You can declare variables in CSS.
When you declare variables, you can use them in a number of other stylings. If you have anything to change, you change only that variable and the result will be reflected anywhere they are being used. This will help keep your CSS code DRY (Don’t Repeat Yourself).
You can declare a variable by placing it in the root scope so it's global in the stylesheet. And to use your variable, you put the property inside curly braces next to the "var" keyword.
It is common to declare the variable(s) at the top of the stylesheet – that is, before the resets.
:root {
  --text-color: hsl(145, 63%, 49%);
}

p {
  color: var(--text-color);
}
9. How to Use the :before and :after Selectors to Add Additional Content to Your CSS
The :before selector in CSS helps you insert content before an element:
<p class="texts">
  Lorem ipsum dolor sit amet consectetur adipisicing elit. Praesentium,
  minima.
</p>
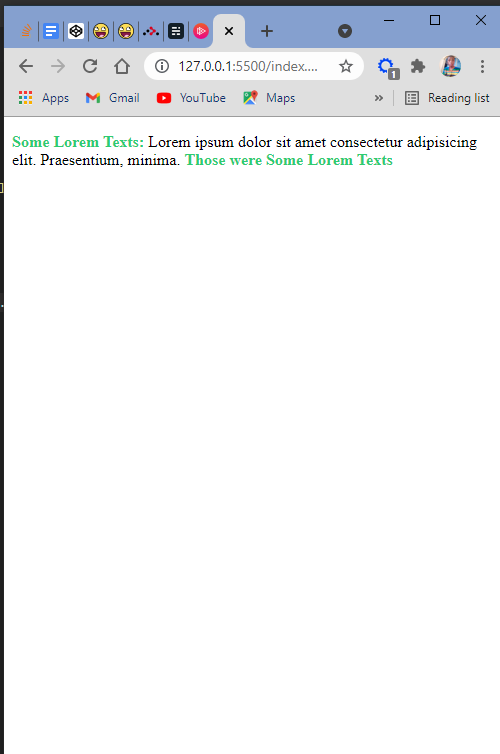
p.texts::before {
  content: "Some Lorem Texts: ";
  color: #2ecc71;
  font-weight: bolder;
}
The :after selector does the same, but it inserts the content after the element:
p.texts::after {
  content: " Those were Some Lorem Texts";
  color: #2ecc71;
  font-weight: bolder;
}
10. How to Get Smooth Scrolling With Pure CSS
You can apply smooth-scroll on a web page without having to write complex JavaScript or use a plugin. So if you have anchor tags that link to several portions on the web page and you click them, the scrolling is smooth.
html {
  scroll-behavior: smooth;
}
That's it!
Thank you for reading. Connect with me via my portfolio and Twitter, where I spend most of my time tweeting and engaging in coding and web development-related topics.