

New front end features often require back end data support – especially where new endpoints are concerned.
For example, an application that needs an authenticated user experience may need a new /authenticate endpoint.
If for any reason endpoint development is stalled or lags behind, despite the sprint planning, you will be faced with the question: do you build with or without the data?
Fortunately, there is a third option: building with mock data (which could work depending on your use case). This option is especially beneficial when the feature is a must-have by the end of a sprint.
Some other pros of having mock data handy include:
- Better testing with different API response data
- Secure testing with de-identified data
- Re-usable test data
- Smoother demos — just in case the real server decides to be offline
There are multiple tools that can help with creating and using mock data, such as Postman and its mock servers. You can also integrate these tools in front end applications for use in development.
A Postman mock server is straightforward to set up and integrate with an Angular application – particularly, when it is paired with an Angular interceptor. It might not be for every use case, but it offers a convenient way of working with mock data.
What is a Postman Mock Server?
Postman is a collaborative API platform that is designed to support the complete lifecycle of APIs. It provides tools and integrations that help with designing, documenting, testing, monitoring, sharing, and using APIs.
A Postman Mock Server is a dummy API server that accepts requests to endpoints you create in a collection and returns the responses you specify in examples. It has its own base URL and an optional API key for added security.
A Postman collection is a logical grouping that helps organize related requests, while a Postman example is an instance of a request in action. It is made up of the request and an expected response.
The Postman documentation provides more comprehensive details about collections and examples if you want to learn more.
Once you’ve decided to work with a Postman Mock Server, you then need to integrate it with the application in such a manner as to not:
- Disrupt ongoing development
- Break the application
There are two popular ways that come to mind:
- Using a proxy
- Using a HTTP Interceptor
The major difference between these two options is that the proxy is applied at build-time, while the interceptor is applied at run-time.
What is a Proxy?
A proxy server is a software tool that often acts as an intermediary between a client and a server. It receives requests from the client, modifies, and diverts some of them to other servers.
Angular uses Webpack's dev-server as a proxy. It can be configured to divert some requests to a different server, through the Angular CLI. This is what makes it a viable solution to use with a Postman mock server in development.
What is an Angular HTTP Interceptor?
Angular's HttpInterceptor is a lightweight class that can tap into an outgoing request or an incoming response. It can be used to inspect a request or transform parts of it, like the URL or headers. If you use an interceptor instead of a proxy:
- You can access run-time environment variables to determine whether to divert a request to the mock server
- You will not need to re-serve the application after a change to the interceptor — code changes trigger reloads (if live reloads are enabled)
The proxy and the interceptor can essentially do the same thing: tap into and transform outgoing requests. However, each option has its own pros and cons.
Interceptor vs Proxy
- An interceptor will require relatively less set-up than a proxy
- A proxy will necessitate setting build-time environment variables in the system or a
.envfile (an interceptor may need this if an API key is required) - A change to the proxy will require the application to be re-served while a change to an interceptor will trigger a reload
- If you are unfamiliar with setting up a proxy in Angular, there is an expected gentle learning curve. However, there is an even gentler learning curve when creating an interceptor since it's just a class
Using an interceptor seems like a more straightforward option for this simple use case.
How to Create a Postman Mock Server
The first step to using a mock server is to create one. First, ensure you have a Postman account and a workspace. You can create both from the platform's website. A Postman workspace is like a dashboard that organizes your work, tools, and collaborators.
Then, create a Postman collection to group and organize the requests you would like the mock server to handle.
Next, add a request to the collection. It can be any type of CRUDL request. Use your actual server's URL – like you would when testing a real endpoint.
Here's a snapshot of a workspace with a collection and a GET request:
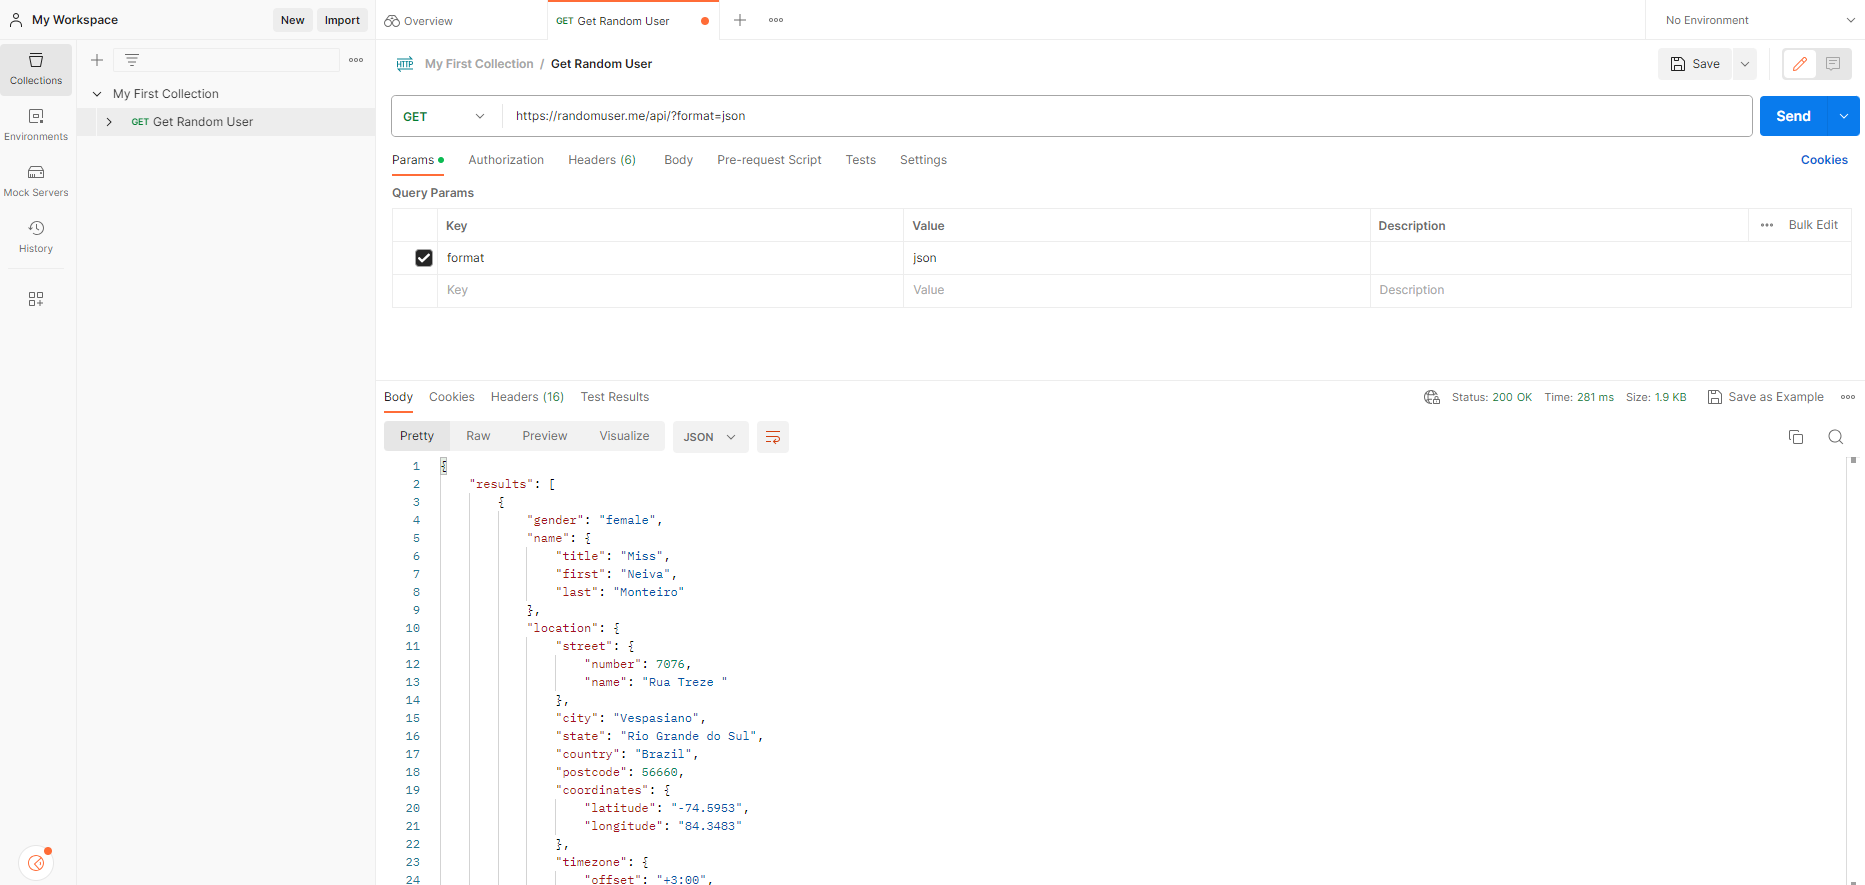
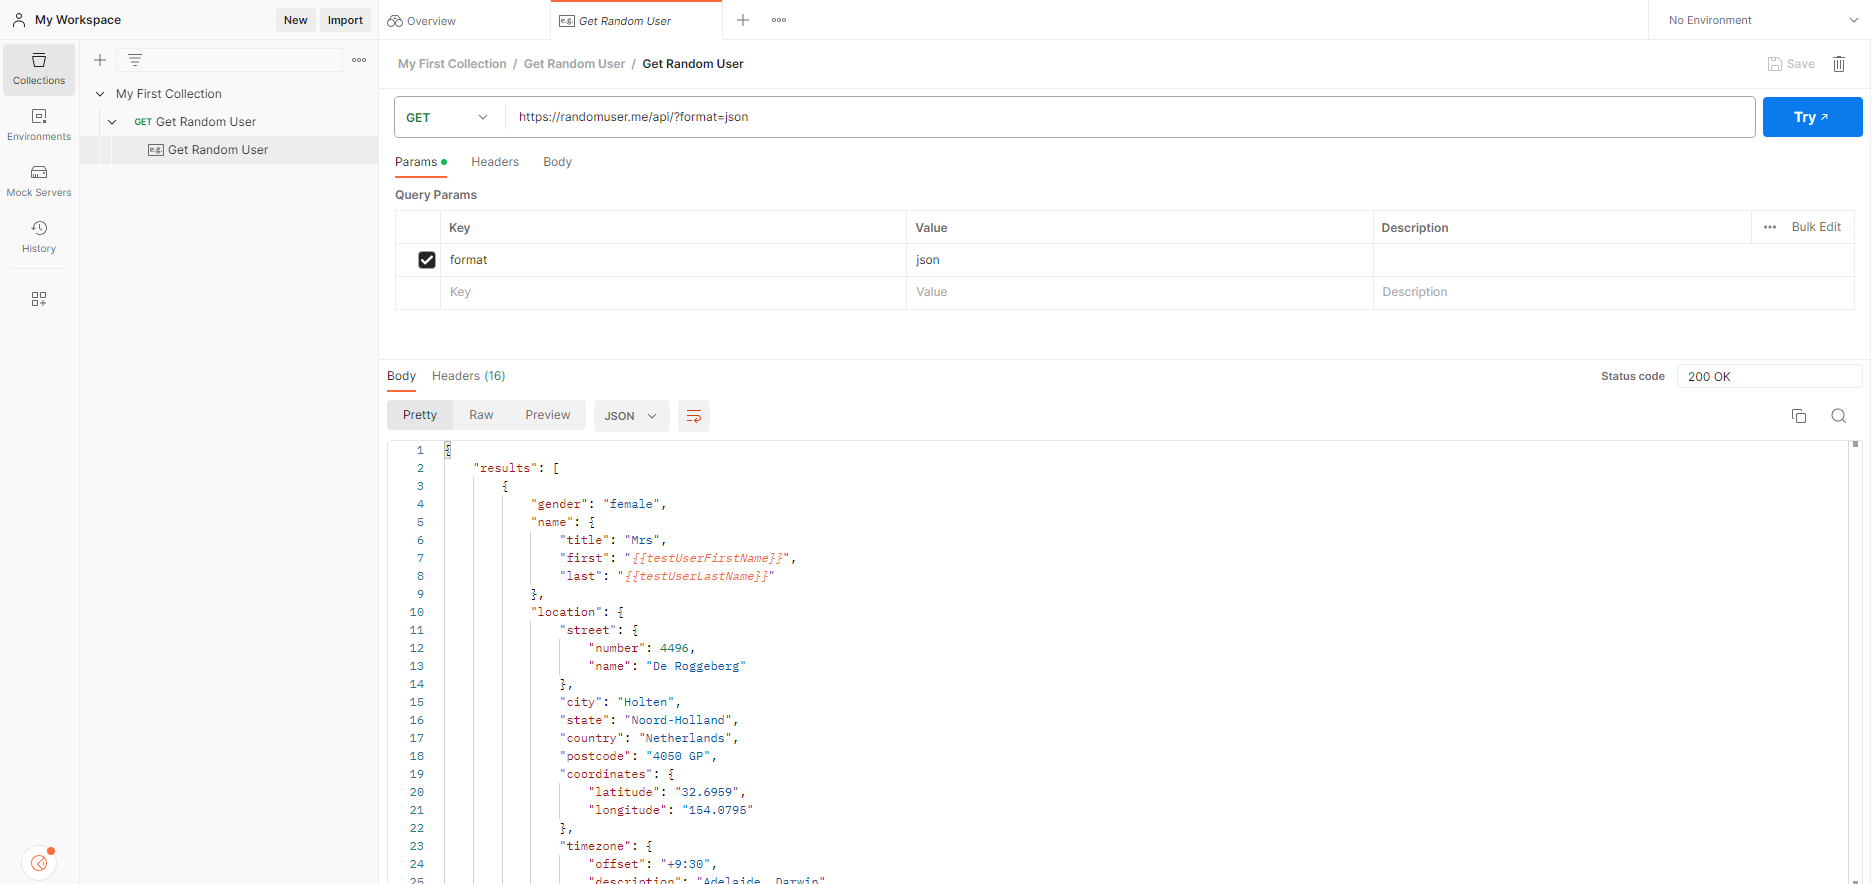
Next, test your endpoint by sending the request. Do this until you get a successful response back then save the response as a Postman example. You can update the example by removing any sensitive data like user information or PII.
Here's a snapshot of an updated example. Some user information has been replaced with some mock data using Postman variables.
Finally, create a Postman mock server from the collection you just created. You can do this by clicking on the ellipsis beside the collection and selecting Mock collection (at least, at the time of this writing). Here's a snapshot of these steps.
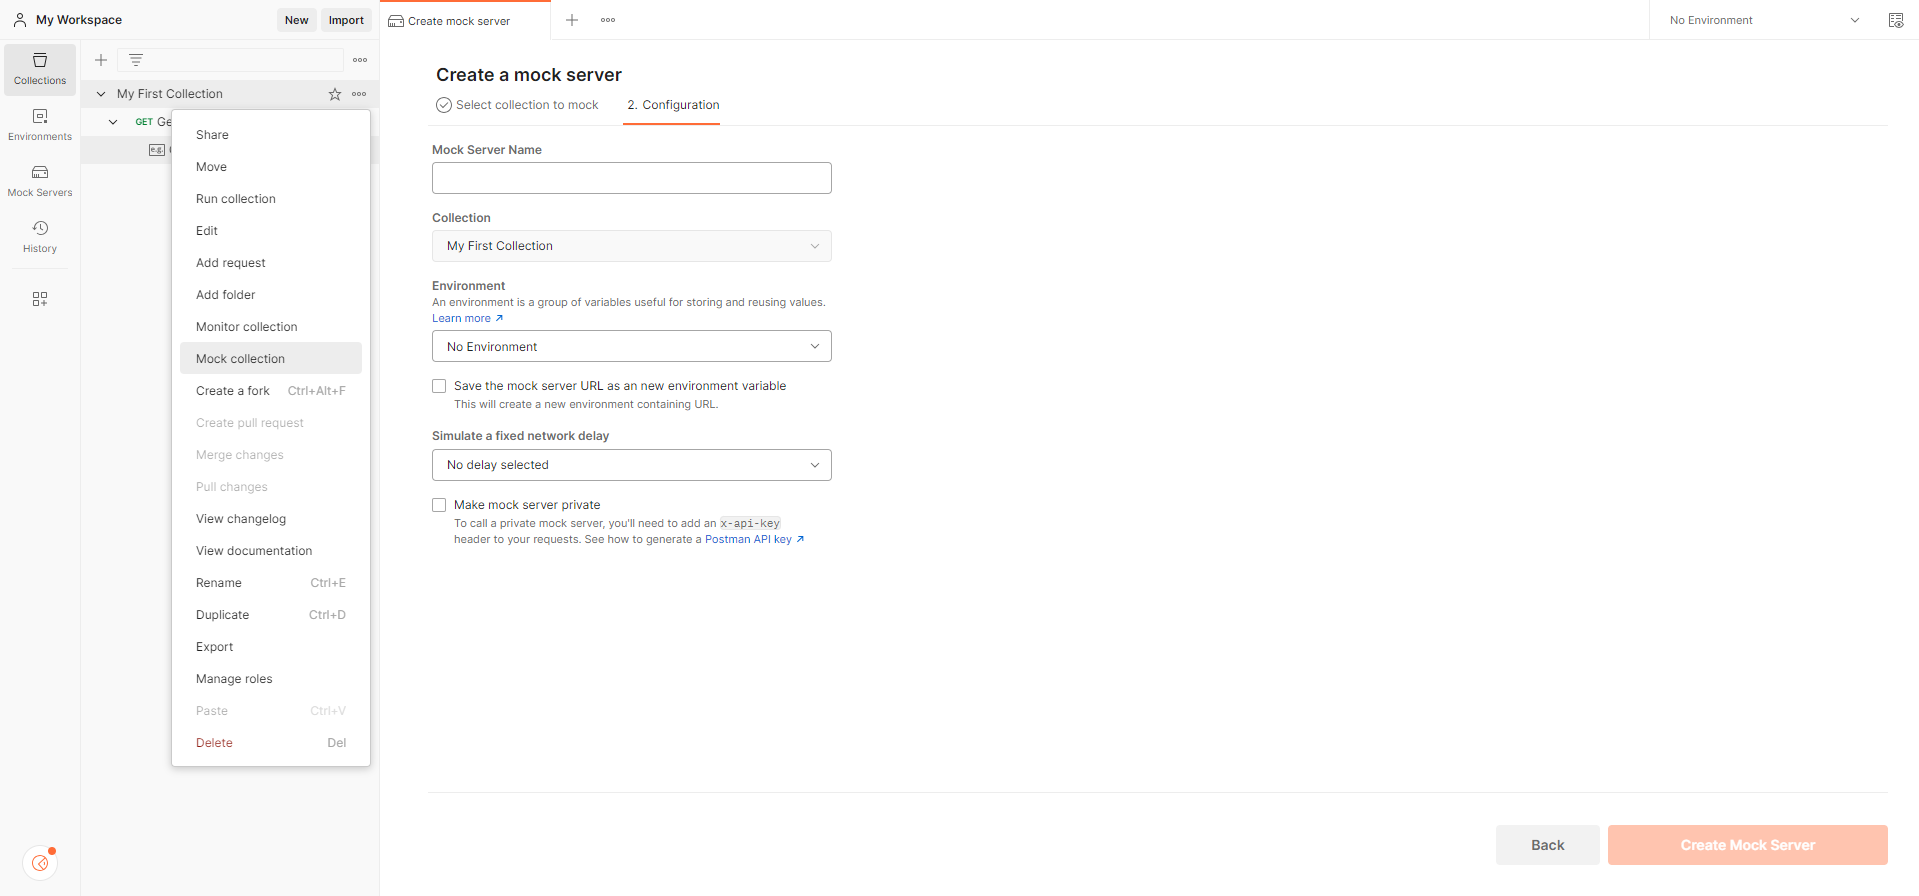
You will be presented with a simple form that will allow you to configure the mock server.
For example, you can rename the mock server or make it private–this means it will need an API key.
Once the mock server is configured, click Create Mock Server . You will then be provided with a URL for the server. Copy the URL.
To associate the mock server with your requests and examples, go into the collection and update the URLs. Replace the base URLs of the requests and examples with the copied mock server's base URL. Send a few requests within Postman to verify that your set up was successful.
Note:
- If your API is private, you can generate an API key from the settings in your account
- Your mock server keeps a log of the requests it receives which you can view in your workspace
After creating the mock server, create the interceptor in your Angular application.
For more information, you can refer to the documentation.
How to Create an Angular HTTP Interceptor
An interceptor is an injectable class that implements Angular’s HttpInterceptor interface.
This interface has one required method — the intercept method. This method primarily does one thing: it takes request and handler arguments and passes the request to the next method of the handler. Requests can be altered before they are passed on to the handler.
@Injectable()
export class ApiInterceptor implements HttpInterceptor {
  intercept(req: HttpRequest<unknown>, next: HttpHandler):
    Observable<HttpEvent<unknown>>
  {
    return next.handle(req);
  }
}
To use a created interceptor in the application, add it to the providers array at the same level where the HttpClientModule is imported:
[{ provide: HTTP_INTERCEPTORS, useClass: ApiInterceptor, multi: true }]This is so it can be managed by Angular’s Dependency Injection system as optional dependencies of the HttpClient service. The HttpClient service is used for making HTTP requests.
Note that when it comes to using interceptors, order is important.
For example, if you provide another interceptor that adds authentication headers after an API interceptor that adds an API key header, the request may send unnecessary headers to the mock server.
Finally, integrate the mock server with your application.
For more information, refer to the documentation.
How to Use an Angular Http Interceptor with a Postman Mock Server
First, specify an environment variable to toggle between mock data and real data. Environment variables in Angular are primarily defined as TypeScript variables in environment files:
// environment.ts file

export const environment = {
  production: false,
  useMock: true,
  postman: {
    baseUrl: "postman-mock-server-url",
    apiKey: "optional-mock-server-api-key"
  }
};
At least for framework versions <15.
Then, use the environment variable in the interceptor. Where you can clone an outgoing request and update its URL before passing it to the handler:
@Injectable()
export class ApiInterceptor implements HttpInterceptor {
  intercept(req: HttpRequest<unknown>, next: HttpHandler):
    Observable<HttpEvent<unknown>>
  {
    if (environment.useMock) {
      // optional headers
      const headers = new HttpHeaders({
        "x-api-key": "my-api-key"
      });
      const cloneReq = req.clone({ url: this.getUpdatedURL(req.url), headers });
      return next.handle(cloneReq);
    }
    return next.handle(req);
  }
}
Conclusion
To summarize, using mock data in applications, especially data-intensive ones, can be cumbersome. But they do have their merits.
Reusable mock data helps make testing better and more secure particularly if the data is varied and de-identified. Furthermore, they help progress development while real data are unavailable.
There are a couple of tools that help with creating and managing mock data through mock servers, like Postman.
These tools are not only nifty for API and back end software engineers, but also for front end software engineers.