

One of the new features in Angular v16 is automatic route parameter mapping using the @Input() decorator.
What does that mean? Well, you may have code that reads route parameters using the Activated Route service, like this:
  private route = inject(ActivatedRoute);

  ngOnInit(): void {
    const id = this.route.snapshot.paramMap.get('id');
    if (id) {
      console.log(this.id);
    }
  }
We first inject the Activated Route service. Then we get the route parameter from that activated route snapshot, dotting down to the get() method and passing in the name of the route parameter.
In Angular v16 and later, our code can instead read route parameters like this:
  @Input() id = '';

  ngOnInit(): void {
    console.log(this.id);
  }
Here we use an input property defined with the @Input() decorator. Angular automatically reads the route parameter and assigns it to the input property. This syntax is much shorter and easier!
Let's walk through an example: first using the Activated Route service, then trying out the new input property syntax to read route parameters.
You can watch the associated video here for a demonstration:
How to Configure a Route with a Parameter
Whether we use Activated Route or an input property, we first need to configure our route with a parameter.
As an example, let's say we have a Product List component that displays a list of products as shown in Figure 1. When the user clicks a product name, we load the Product Detail component to display detail for that product (Figure 2).
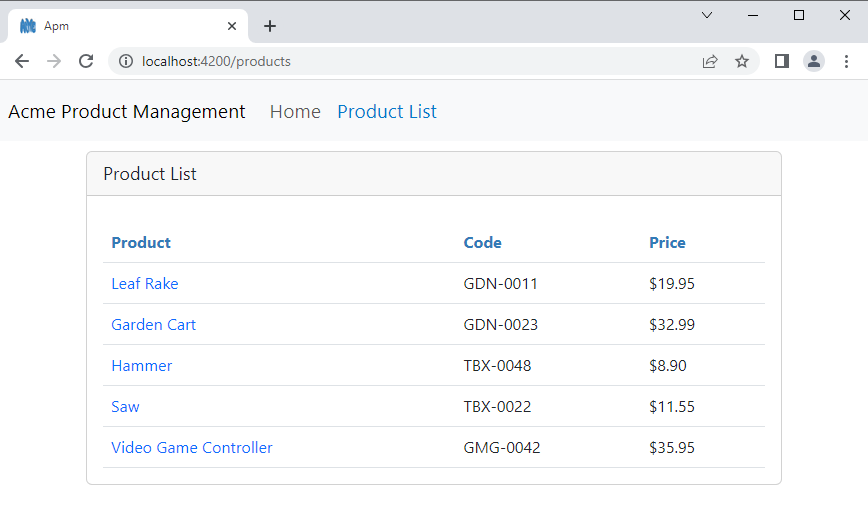
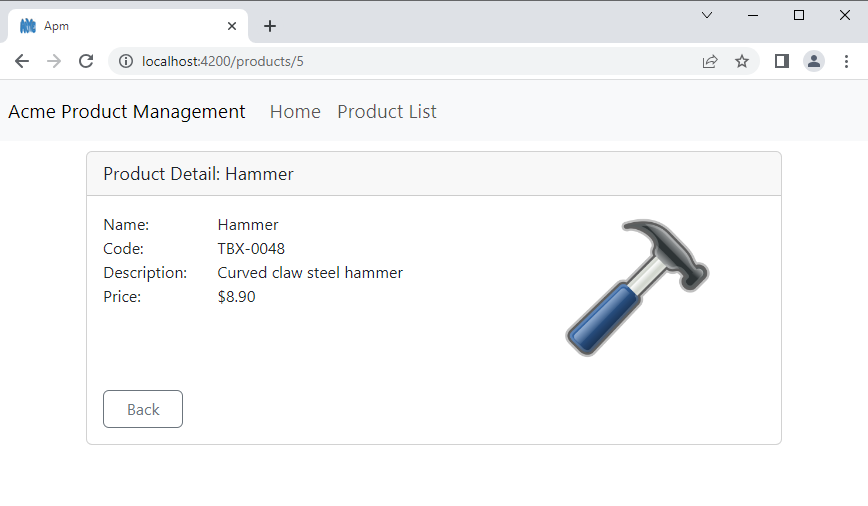
To achieve this feature, the Product List component adds the id of the selected product to the route as a parameter. This is shown in the address bar in Figure 2. The Product Detail component reads that id from the route parameter and uses it to display the selected product's detail.
The configuration for the product detail route looks like this:
{ path: ':id', component: ProductDetailComponent }We identify a route parameter by adding a colon before the parameter name, which in this example is id. Anywhere we reference this parameter we'll use this name.
The product detail route is activated when the user clicks on a product link in the Product List component. The code for that link uses the routerLink directive to set the id parameter:
<a [routerLink]="[product.id]"> {{ product.productName }} </a> When the user clicks on this link, the routerLink adds the product's id to the URL. The router uses the route configuration to find a matching route path and routes to the Product Detail component.
Code in the Product Detail component then reads the parameter from the URL and displays the product's detail.
How to Read Route Parameters (Activated Route)
One technique to read the parameter from the URL uses Angular's Activated Route service.
import { Component, OnInit, inject } from '@angular/core';
import { ActivatedRoute } from '@angular/router';


  private route = inject(ActivatedRoute);

  ngOnInit(): void {
    const id = Number(this.route.snapshot.paramMap.get('id'));
    if (id) {
      this.productDetailService.setSelectedProductId(id);
    }
  }
We first inject the Activated Route service using Angular's new inject() keyword. Alternatively, we could use the constructor to inject this service dependency.
To read the parameter when the Product Detail component first loads, we use the OnInit lifecycle hook. We declare a constant for the parameter. Then we set that constant using the Activated Route service. We access the route snapshot's paramMap, and call its get() method, passing in the name of the parameter to get. This name must match the parameter name we defined in the route configuration.
Route parameters are strings so the get() method returns a string, or null if the parameter isn't found. In this example, the product ids are numbers. So we use the Number() constructor to create a number from the string.
If the code successfully reads the id from the route, we set that id into the Product Detail service. The Product Detail service then finds the product with the defined id. Our component binds to the resulting product and displays that product's detail.
We can simplify this code if we use the @Input() decorator instead.
How to Start Using @Input() for Route Parameters
The first thing we need to do, and the step I so often forget, is to let Angular know that we want to use input properties to read route parameters. We do that in the application configuration.
How we do that depends on the type of bootstrapping our application uses.
With standalone component bootstrapping, we bootstrap an application like this:
import { bootstrapApplication } from '@angular/platform-browser';
import { appConfig } from './app/app.config';
import { AppComponent } from './app/app.component';

bootstrapApplication(AppComponent, appConfig)
  .catch((err) => console.error(err));
Then, in the appConfig, we provide the routes like this:
import { ApplicationConfig } from '@angular/core';
import { provideRouter, withComponentInputBinding } from '@angular/router';

import { provideHttpClient } from '@angular/common/http';
import { routes } from './app.routes';

export const appConfig: ApplicationConfig = {
  providers: [
    provideHttpClient(),
    provideRouter(routes, withComponentInputBinding())
  ]
};
The provideRouter() function sets up the providers for the router. We pass in the routes and withComponentInputBinding(). It's the withComponentInputBinding() that let's Angular know that we want to use input properties to read route parameters.
If you are instead using NgModule bootstrapping, the code looks something like this:
import { platformBrowserDynamic } from '@angular/platform-browser-dynamic';
import { AppModule } from './app/app.module';

platformBrowserDynamic().bootstrapModule(AppModule)
  .catch(err => console.error(err));
In this example, theAppModule imports the AppRoutingModule which looks like this:
import { NgModule } from '@angular/core';
import { RouterModule } from '@angular/router';

import { WelcomeComponent } from './home/welcome.component';

@NgModule({
  imports: [
    RouterModule.forRoot([
      { path: 'welcome', component: WelcomeComponent },
      { path: '', redirectTo: 'welcome', pathMatch: 'full' },
      {
        path: 'products',
        loadChildren: () =>
          import('./products/product.module').then(m => m.ProductModule)
      },
      { path: '**', redirectTo: 'welcome', pathMatch: 'full' }
    ], { bindToComponentInputs: true })
  ],
  exports: [RouterModule]
})
export class AppRoutingModule { }
In the RouterModule.forRoot(), we set bindToComponentInputs to true to let Angular know that we want to use input properties to read route parameters.
We've now enabled the automatic route parameter mapping using input properties.
How to Read Route Parameters (@Input)
We add an input property using the @Input() decorator.
@Input() id = '';We can name the input property the same as the route parameter, which in this example is id. Route parameters are strings, so we set the initial value to an empty string.
If we want to use a different property name, such as productId, we can. But then we need to pass the route parameter name to the @Input() decorator, like this:
@Input('id') productId ='';That way, Angular can match up the route parameter to the appropriate input property.
We can then simplify the OnInit lifecycle hook code like this:
  ngOnInit(): void {
    if (this.id) {
      this.productDetailService.setSelectedProductId(Number(this.id));
    }
  }
Since we're using an input property, we no longer need the Activated Route. We can simply access the input property directly. Since the setSelectedProductId() method is expecting a number, we add the Number() constructor around the id to convert it to a number.
How to Transform Input Properties
Starting with Angular v16.1, the @Input() decorator provides a transform function. We use the transform function to perform a transformation or execute other logic when an input property changes.
To further simplify our code, Angular introduced two built-in transformation functions: booleanAttribute and numberAttribute.
For our case, we want to transform the route parameter string, to a number. Using a transformation function, our code then looks like this:
 import { Component, OnInit, Input, numberAttribute } from '@angular/core';


  @Input({transform: numberAttribute}) id = 0;

  ngOnInit(): void {
    if (this.id) {
      this.productDetailService.setSelectedProductId(this.id);
    }
  }
We pass an object to the @Input() decorator and set the transform function to numberAttribute. Since the string route parameter is then transformed to a number, we change the initial value to 0 in place of an empty string ''. And now that the resulting id is a number, we no longer need to convert it ourselves with the Number() creation function.
Why Use Route Parameters?
One question I always like to ask myself is "why". Why do we need route parameters at all? Couldn't the Product List component store the id in a property of a service? Then the Product Detail component could read that id from the service instead of from the route.
One key reason is that by appending the id to the URL, we get deep linking. Deep linking allows the user to save or share the URL and have it automatically directly link to a specific product.
Say that your birthday is coming up and you send a friend an Amazon link. That link wouldn't be useful if it didn't navigate directly to a specific product.
Use deep linking any time you want to allow your users to save or send direct links.
Wrapping Up
Starting with Angular v16, we can use an input property, defined with the @Input() decorator, to access route parameters. This gives us a shorter and easier syntax. We no longer need to work with Angular's Activated Route service.
But don't forget to enable this functionality!
- If you are using standalone bootstrapping, add
withComponentInputBinding()toprovideRouter(). - For classic NgModule bootstrapping, set
bindToComponentInputsto true inRouterModule.forRoot().
To see these concepts in action, check out the demo provided in this video: