
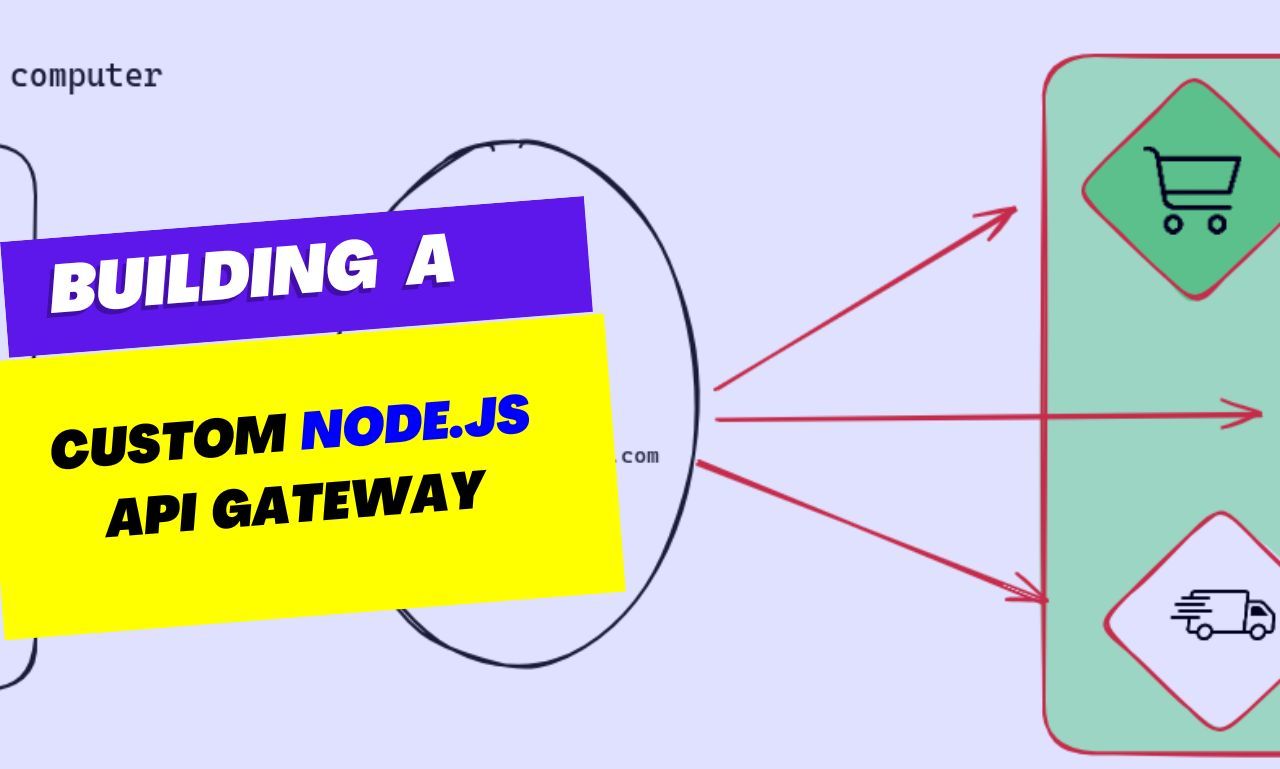
In the era of microservices, where applications are divided into smaller, independently deployable services, managing and securing the communication between these services becomes crucial. This is where an API gateway comes into play.
An API gateway serves as a central entry point for all client requests. It provides various functionalities such as routing, load balancing, authentication, and rate limiting.
In this article, we’ll explore how you can build out a custom API gateway using Node.js.
Here's what we'll cover:
- What is an API Gateway?
- Security in API Gateways
- How to Build a Custom API Gateway with Node.js
- Conclusion
Prerequisites
This is a beginner's guide that should be relatively easy to follow. But to fully understand and get the most out of it, basic knowledge of Node.js such as installation, setting up, and spinning up a server is vital.
Without further ado, let's dig in!
What is an API Gateway?
API gateways act as intermediaries between clients and back-end services in a Microservices architecture. They abstract the complexity of the underlying services and expose a unified API to clients.
By consolidating multiple service endpoints into a single entry point, API gateways simplify client-side code and improve the overall scalability and performance of the system.
Compared to other popular API gateway solutions like Kong, AWS API Gateway, and Tyke, building a custom API gateway using Node.js offers flexibility and customization options tailored to your specific project requirements.
To get a little more understanding of what an API gateway is, I recommend you check out this article if you haven’t.
Benefits of Using an API Gateway:
- Improved scalability and performance through request routing and load balancing: API gateways facilitate request routing and load balancing, distributing incoming traffic across multiple backend services to ensure optimal performance and scalability.
- Simplified client-side code by providing a unified API endpoint: With a unified API endpoint provided by the API gateway, clients can interact with multiple services seamlessly, reducing complexity and improving the maintainability of client-side code.
- Enhanced Security: API gateways offer robust security features such as authentication, authorization, and rate limiting, protecting backend services from unauthorized access and potential security threats.
Security in API Gateways
Security is paramount in modern software development, especially when dealing with distributed systems and microservices. API gateways play a crucial role in enforcing security measures to safeguard sensitive data and prevent unauthorized access to APIs.
Common security features implemented in API gateways include:
- JWT Authentication: Verifying the identity of clients using JSON Web Tokens (JWT) to ensure secure communication between clients and backend services.
- OAuth2 Integration: Providing secure access control and authorization mechanisms using OAuth2 protocols to authenticate and authorize client requests.
- SSL Termination: Encrypting traffic between clients and the API gateway using SSL/TLS protocols to protect data in transit from eavesdropping and tampering.
Now you should have a general overview of what an API gateway is and why it's important.
In the next section, we will delve into the process of building a custom API gateway using Node.js. I'll demonstrate how to implement security features using the http-proxy-middleware package.
How to Build a Custom API Gateway with Node.js
As I've already discussed, we'll be using Node.js for this tutorial. In my opinion, Node.js is by far the easiest and most popular web framework. Anyone can learn how to use it.
For this guide, I assume you already know or have a basic understanding of Node.js and how to set up a server.
Getting Started – Installations and Setup
To get started, create a new folder called “API-gateway” entirely outside your front-end or your back-end code. Once the folder is created, open it on your terminal and run npm init -y. This will set up npm and then you’re ready to roll things out!
We’ll be using a couple of NPM packages, and it’s best to install them now. The most important one is the http-proxy-middleware. This middleware or package is what will route our requests from one endpoint (www.domain.com/auth ) to each corresponding endpoint (www.externaldomain.com/v1/bla/auth, www.externaldomain.com/v1/bla/projects ) as defined in our microservices.
To install the http-proxy-middleware, simply run npm i http-proxy-middleware on the root folder on your terminal. If it's installed, you’re good to go.
Next, we’ll need the remaining packages. Simply run npm install express cors helmet morgan on your terminal in the root folder of the API gateway.
The above command installs the following:
- Express: our Node.js library for creating our server and running our code
- Cors: middleware to manage and control any cross-origin requests
- Helmet: yet another middleware for securing our HTTP response headers
- Morgan: a logging tool we can use to track both success and error logs
Lastly, install Nodemon. This is a tool that spins up your server whenever you save a file using npm install --save-dev nodemon.
Now, go to your package.js file and update the scripts section. It should look like this:
"scripts": {
 "start": "node index.js",
 "dev": "nodemon index.js",
 "test": "echo \"Error: no test specified\" && exit 1"
},
To finally start testing things out, create a new file called index.js in that same api-gateway folder.
If you get everything right, you should have the following files:
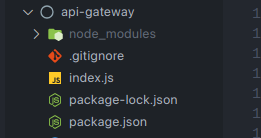 An image showing the file structure of our code base
Putting it All Together
A good code practice is to break things down as much as possible into smaller components.
But for this guide, we’re going to break that rule and put all the code into that one index.js file we created from the steps above. We'll be doing it this way because having too many files and an overly complex set up here might be confusing, especially while you're learning how things work.
First thing first, open the index.js file you’ve created and paste the following code into it:
const express = require("express");
const cors = require("cors");
const helmet = require("helmet");
const morgan = require("morgan");
const { createProxyMiddleware } = require("http-proxy-middleware");
In the code above we're just importing packages.
Next up, initialize and set up the imported packages like this:
// Create an instance of Express app
const app = express();


// Middleware setup
app.use(cors()); // Enable CORS
app.use(helmet()); // Add security headers
app.use(morgan("combined")); // Log HTTP requests
app.disable("x-powered-by"); // Hide Express server information
Remember that an API gateway is a single source of truth for all your services or external URLs. This means you must have other services or URLs you want to forward the requests to.
Assuming you already have your other services running either locally or deployed, let’s move to the next section of the code.
// Define routes and corresponding microservices
const services = [
 {
   route: "/auth",
   target: "https://your-deployed-service.herokuapp.com/auth",
 },
 {
   route: "/users",
   target: "https://your-deployed-service.herokuapp.com/users/",
 },
 {
   route: "/chats",
   target: "https://your-deployed-service.herokuapp.com/chats/",
 },
 {
   route: "/payment",
   target: "https://your-deployed-service.herokuapp.com/payment/",
 },
 // Add more services as needed either deployed or locally.
];
In the above code, we created a services array list and defined objects each containing routes (where we’ll make requests to) and targets (where the requests will be forwarded to).
Make sure to update the routes and targets to suit your needs.
Can you guess what’s next…?
Well, it’s finally time to create the simple logic to forward the requests to our target URL, setting up a rate limit and timeouts. And do you know what’s coming next? A code sample, lol:
// Define rate limit constants
const rateLimit = 20; // Max requests per minute
const interval = 60 * 1000; // Time window in milliseconds (1 minute)

// Object to store request counts for each IP address
const requestCounts = {};

// Reset request count for each IP address every 'interval' milliseconds
setInterval(() => {
  Object.keys(requestCounts).forEach((ip) => {
    requestCounts[ip] = 0; // Reset request count for each IP address
  });
}, interval);

// Middleware function for rate limiting and timeout handling
function rateLimitAndTimeout(req, res, next) {
  const ip = req.ip; // Get client IP address

  // Update request count for the current IP
  requestCounts[ip] = (requestCounts[ip] || 0) + 1;

  // Check if request count exceeds the rate limit
  if (requestCounts[ip] > rateLimit) {
    // Respond with a 429 Too Many Requests status code
    return res.status(429).json({
      code: 429,
      status: "Error",
      message: "Rate limit exceeded.",
      data: null,
    });
  }

  // Set timeout for each request (example: 10 seconds)
  req.setTimeout(15000, () => {
    // Handle timeout error
    res.status(504).json({
      code: 504,
      status: "Error",
      message: "Gateway timeout.",
      data: null,
    });
    req.abort(); // Abort the request
  });

  next(); // Continue to the next middleware
}

// Apply the rate limit and timeout middleware to the proxy
app.use(rateLimitAndTimeout);

// Set up proxy middleware for each microservice
services.forEach(({ route, target }) => {
  // Proxy options
  const proxyOptions = {
    target,
    changeOrigin: true,
    pathRewrite: {
      [`^${route}`]: "",
    },
  };

  // Apply rate limiting and timeout middleware before proxying
  app.use(route, rateLimitAndTimeout, createProxyMiddleware(proxyOptions));
});
I added a bunch of good code comments to help you understand what's going on.
Congratulations if you know what’s happening above. If you don’t, you can read about the http-proxy-middleware package.
But let’s get serious, we’re not done yet.
The above code still won’t work, as we need one more thing: writing a function to start the server when called upon.
Add the following code sample to the bottom of the index.js after all of the code you’ve added above:
// Define port for Express server
const PORT = process.env.PORT || 5000;


// Start Express server
app.listen(PORT, () => {
 console.log(`Gateway is running on port ${PORT}`);
});
With that, when you run npm run dev, it spins up your server and you should be able to test this out using tools like Postman or any other tool you use to test APIs.
Now, before we go, let’s try to make this a little bit spicy!
Let’s add a 404 function to track and return a nice 404 message to a user if they navigate or send a request to a URL that doesn’t exist.
So on our services array defined above, we don’t have any routes defined for products. This means that if a user sends a request to /product, they’d get a server error because the request can’t be handled.
To tell the user that the URL is not found, we can add the following code sample just before we define the port and listen to it:
// Handler for route-not-found
app.use((_req, res) => {
 res.status(404).json({
   code: 404,
   status: "Error",
   message: "Route not found.",
   data: null,
 });
});


// Define port for Express server
Conclusion
Building a custom API gateway with Node.js offers developers a flexible and customizable solution for managing, routing, and securing API calls in a microservices architecture.
Throughout this tutorial, we've explored the fundamental concepts of API gateways, including their role in simplifying client-side code, improving scalability and performance, and enhancing security.
By leveraging the power of Node.js and the http-proxy-middleware package, we've demonstrated how to implement a basic API gateway that proxies requests to multiple backend services. We've also enhanced our gateway with essential features such as rate limiting and timeouts to ensure reliable and secure communication between clients and services.
As you continue to explore the world of microservices and distributed systems, remember that API gateways play a crucial role in orchestrating communication and enforcing security measures. Whether you choose to build a custom solution or utilize existing gateway platforms, understanding the principles and best practices outlined in this tutorial will empower you to architect robust and scalable systems.
I encourage you to experiment with the code samples provided and explore further customization options to suit your project's unique requirements. The complete source code for this tutorial can be found here: https://github.com/irorochad/api-gateway.
Thank you for joining me on this journey to explore the intricacies of API gateways with Node.js. Happy coding!