
HTML5 comes equipped with a native video player. It's shipped with a simple user interface, functionality, and some basic controls in the browser. And while the functionality of the default video player via the browser works perfectly, the user interface isn't so beautiful and fancy, and it's just not generally aesthetically pleasing.
For this reason, most modern web applications and platforms like Udemy, Netflix, YouTube, and Amazon Prime don't ship the default built-in HTML5 video player to their users. Instead, they build their own customized versions with a sleek user interface to make their platforms more attractive and user-friendly.
If you have ever been curious how these companies and web platforms are able to pull off such feat, then this article is for you.
You'll get some hands-on experience while following along with a step-by-step guide that teaches you how you can build and customize your own HTML5 video player. You'll learn how to customize the user interface, extend the functionality, and build your own fantastic custom controls and features.
You'll also learn how to build all this using nothing other than the native Video API provided by JavaScript in the browser – no external libraries or tools required.
Prerequisites
- Fundamental knowledge of HTML5 and CSS
- Fundamental knowledge of Tailwind CSS
- Fundamental knowledge of JavaScript (ES6)
- A code editor of your choice
- A browser that supports modern features of JavaScript (for example Chrome or Mozilla Firefox)
Here's what we'll cover:
- Getting Started
- How to Set Up the Development Environment
- How to Build a Customized UI using Tailwind CSS
- How to Implement the Play and Pause Functionality
- How to Implement the Rewind and Fast Forward Functionality
- How to Implement the Mute and Unmute Functionality
- How to Update the Progress Bar Relative to the Video Time
- How to Implement the Seeking Functionality
- How to Implement Keyboard Navigations for Accessibility
- Where to Go from Here
- Conclusion
Getting Started
In this article, we will be using Tailwind CSS as the styling tool to build out the custom video player UI. We'll also use JavaScript to build out the functionality of the controls.
Note that using Tailwind CSS is optional, as any styling tool will suffice here like SCSS, CSS, styled-components and so on – it's totally up to you.
I've split this tutorial into different sections, each addressing a specific aspect of the custom video player functionality. Each new section will build upon the previous ones to complete the player. By the end of the article, you will have a fully functional HTML5 custom video player.
In this tutorial, we'll concentrate on specific features of the video player. These features will offer opportunities and ideas for building additional functionalities. The features we'll cover are:
- Play and Pause
- Rewind and Fast Forward
- Mute and Unmute
- Video Seeking
- Keyboard navigations (utilizing the Spacebar for play and pause, and the Arrow keys for rewind and fast forward).
We won't address responsive design here, as we won't be focusing on making the video player mobile responsive. This omission should present a challenge and a learning opportunity for you.
Now, let's delve into setting up our development environment so we can start building.
How to Set Up the Development Environment
The initial step is to setup an efficient development environment to ensure smooth workflow. We'll use Vite for this purpose.
Before progressing to the next part of this section, make sure that you have NodeJS and NPM or Yarn installed on your computer, as they are necessary for installing tools and setting up your development environment seamlessly.
How to setup the project with Vite
To scaffold a project in Vite, open your terminal and type in the following command:
yarn create vite
Vite will guide you in configuring and selecting the appropriate tools for your development environment.
The first step is to choose a project name – you have the freedom to choose any name you prefer. In this article, I'll be using "html5-video-player" as the project name.
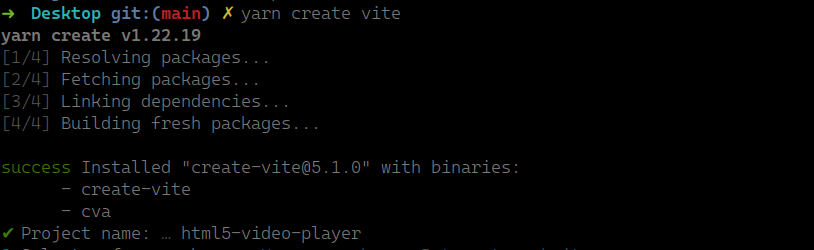 Terminal output after running 'yarn create vite' command
The next step is selecting the project framework. This project will be written in pure JavaScript, so choose "Vanilla" and then select "JavaScript" on the next prompt.
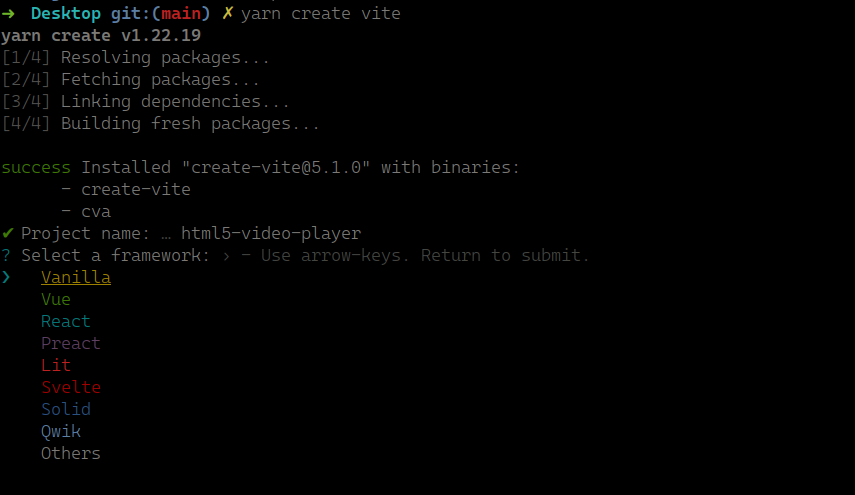 Terminal output after inputting a project name, asking to select a framework for the project
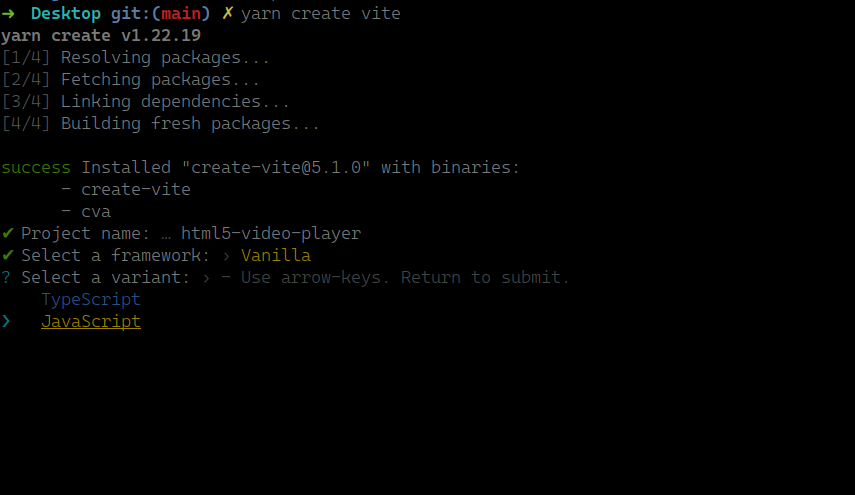 Terminal output afte selecting the 'Vanilla' framwork
Now, Vite has successfully set up your environment using the selected tools. It's time to install the dependencies necessary for Vite to function properly. Follow the instructions provided by Vite in the CLI.
 Terminal showing a success message on setting up the environment
If you named your project like mine, then run the command below exactly as it is. If you chose a different name, simply substitute my project name with yours and proceed in the same manner.
cd html5-video-player
This command will navigate to the project directory where your development environment resides. From there, you can proceed to install the dependencies.
yarn
Once the dependencies are installed, let's proceed to the next step, which involves setting up Tailwind CSS as our styling tool. This process is straightforward, similar to how we set up Vite.
Open your terminal and execute the following commands:
yarn add -D tailwindcss postcss autoprefixer
This will install Tailwind CSS, our styling tool, as well as PostCSS and Autoprefixer. These tools will assist Tailwind CSS in functioning effectively within your project.
The next command involves setting up the configuration files for Tailwind CSS and PostCSS.
Open your local terminal once again and type in the following command:
npx tailwindcss init
 Creating Tailwind CSS configuration file.
As mentioned in the command message, a file named tailwind.config.js will be generated at the root of the project folder. This file will contain your configuration for styling, including settings for fonts, colors, plugins, and more. For further details, refer to the TailwindCSS documentation.
Open the Tailwind CSS configuration file that was generated in your code editor and make the following edits to it:
/** @type {import('tailwindcss').Config} */
export default {
  content: ['./index.html'],
  theme: {
    extend: {},
  },
  plugins: [],
}
Here, we simply edited the content key to specify the file where TailwindCSS should read for Tailwind CSS classes. This file happens to be the index.html file, where our main work will take place.
Next, you'll need to configure PostCSS, which doesn't have an automated setup command like TailwindCSS. So you'll create the configuration file manually. Navigate to the project's root folder and create a file named postcss.config.js.
After creating the postcss.config.js file, simply copy and paste the provided code snippet into the file.
export default {
  plugins: {
    tailwindcss: {},
    autoprefixer: {},
  },
};
Next, configure your style.css file to utilize Tailwind CSS defaults. This saves you from the tedious task of setting up CSS defaults manually.
Open the style.css file in your code editor, delete its contents, and then paste the following code snippet into the file:
@tailwind base;
@tailwind components;
@tailwind utilities;
Delete unneccasary files and code
The files generated by Vite primarily serve as guides for adding your own files and using the bundler effectively. So you can delete most of them since they are unnecessary for this project.
Below are the files to be removed from the project:
counter.jsjavascript.svg
Once you've done that, you can move on to the next step in this section, which involves removing unnecessary code.
Open the main.js file located at the root of the project, and delete all the code within it.
Then, navigate to the index.html file and delete all of its current content. Afterwards, copy and paste the below code snippet into the file:
<!DOCTYPE html>
<html lang="en">
  <head>
    <meta charset="UTF-8" />
    <link rel="icon" type="image/svg+xml" href="/vite.svg" />
    <meta name="viewport" content="width=device-width, initial-scale=1.0" />
    <link rel="stylesheet" href="./style.css" />
    <title>HTML5 Custom Video Player</title>
  </head>
  <body>
    <h1 class="text-3xl font-bold underline text-red-800">Hello world!</h1>
    <script type="module" src="/main.js"></script>
  </body>
</html>
And with that, you're finished with this part! Your development environment is now set up, ready for you to begin building your custom HTML5 video player
To confirm that your environment is set up properly, check the following:
- The project files and folders should resemble the following structure:
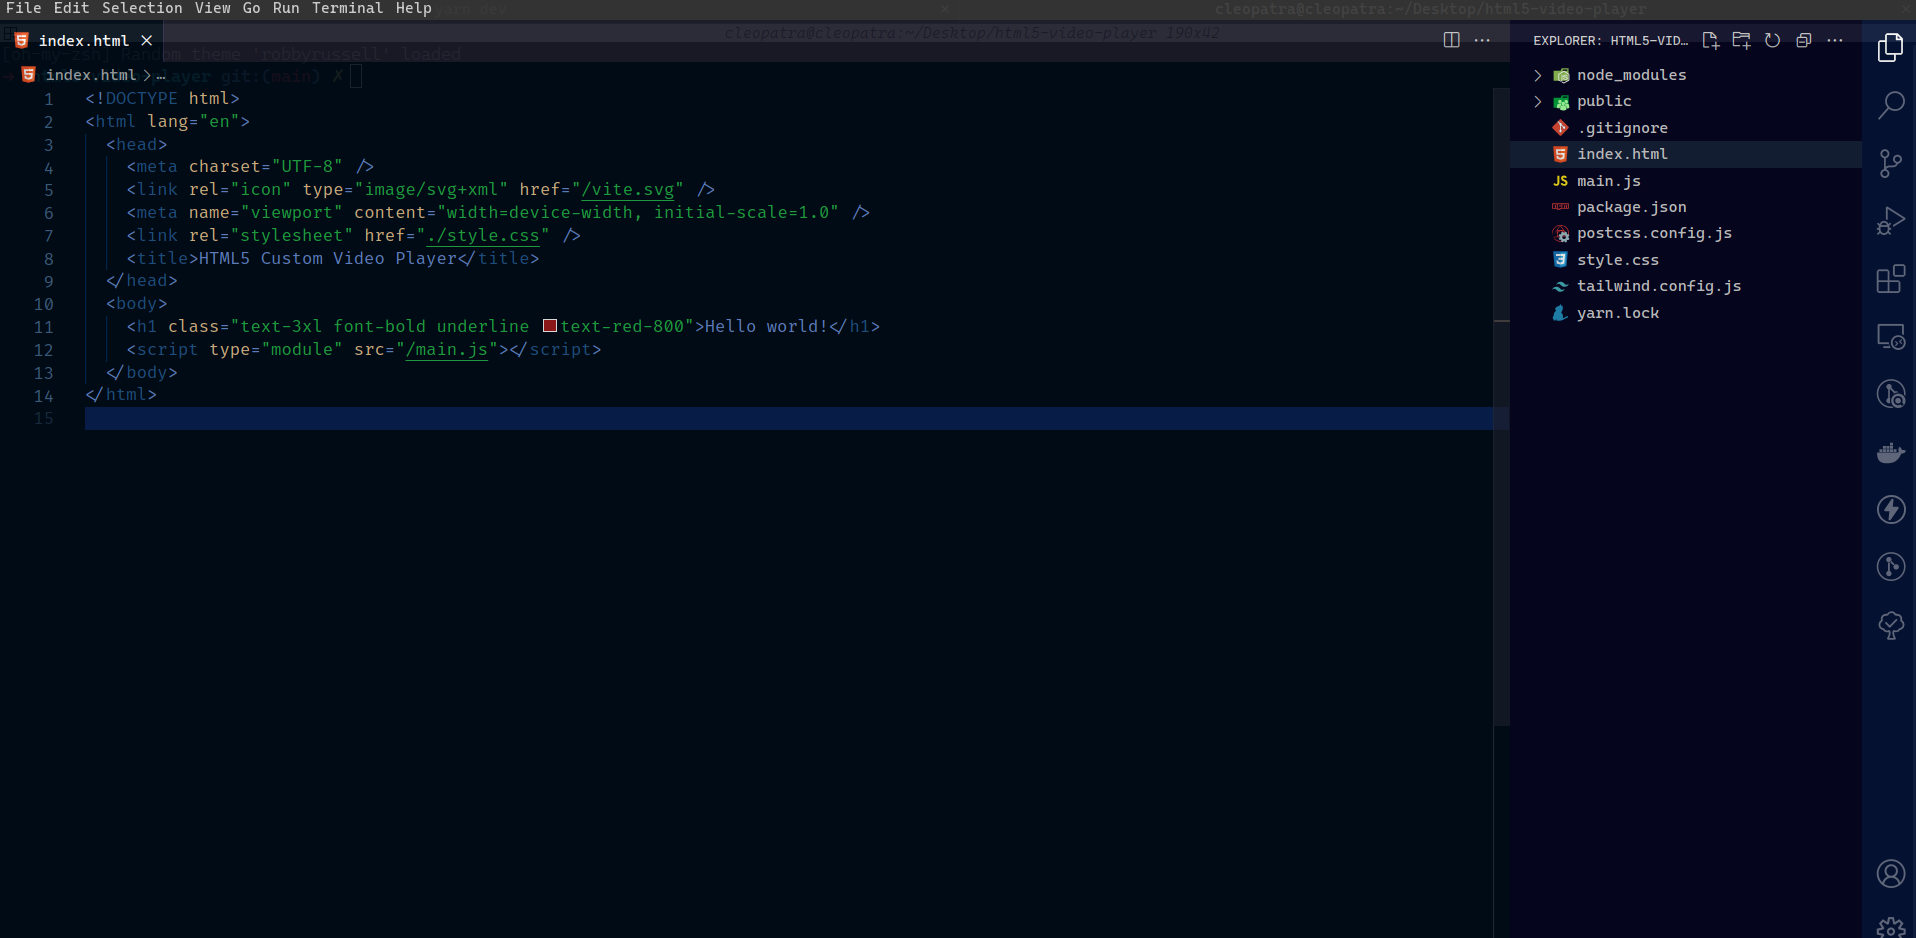 Project setup completed: Visual Studio Code displaying project structure.
- Open your terminal and run the following command:
yarn dev
This will create a development server where your webpage will be hosted. Open the URL provided by Vite.
 Launching Vite development server with 'yarn dev' command.
Upon opening the link http://localhost:5173/, you should see this:
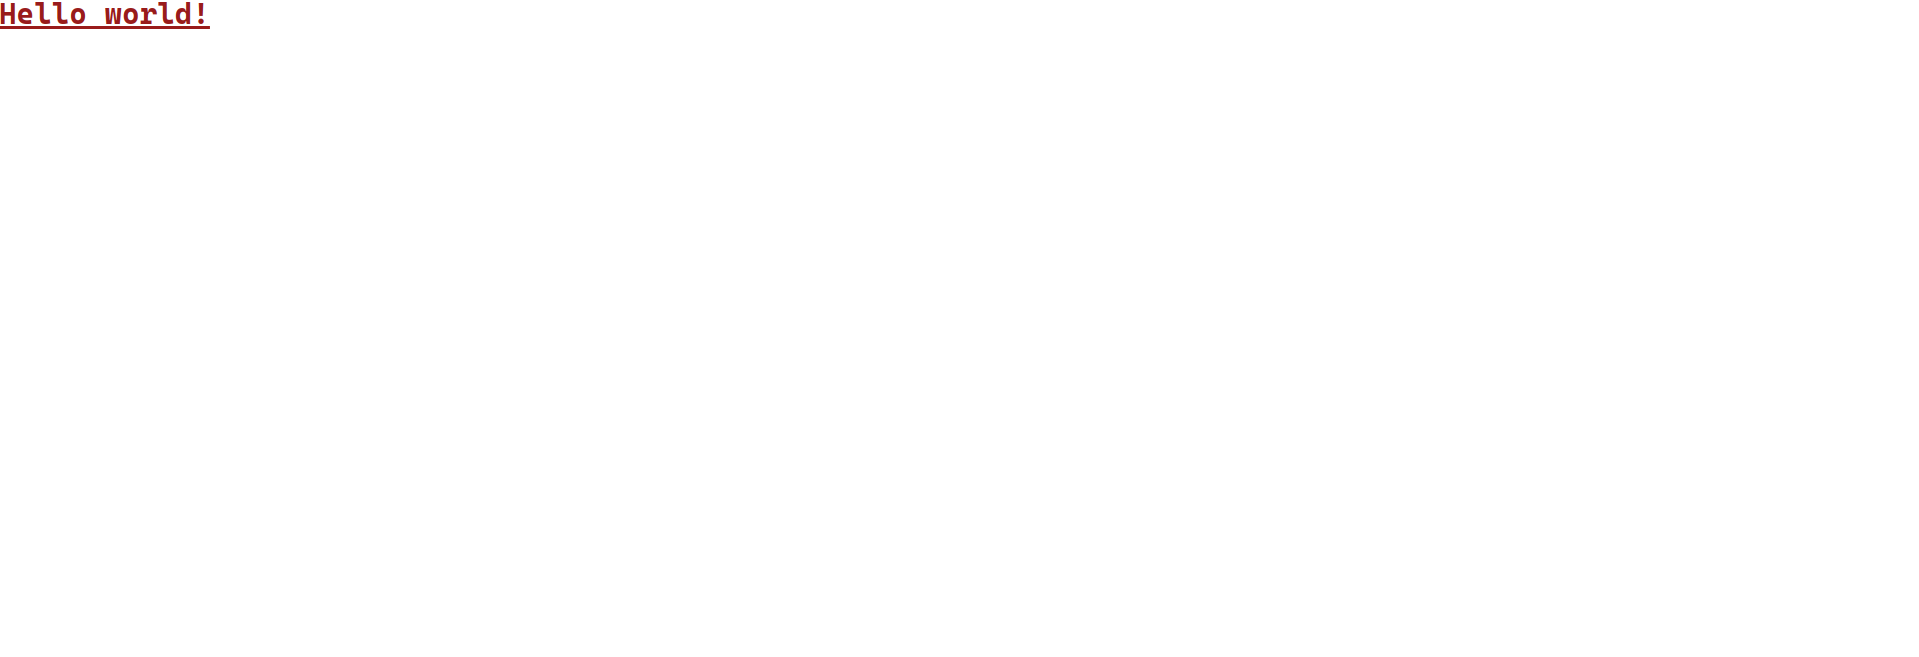 The initial user interface displayed after executing 'yarn dev' command.
Congratulations! You have successfully completed this section on setting up your development environment, which will let us work effectively as we build our custom HTML5 video player.
Troubleshooting: If you find that your setup isn't working as expected, don't worry. Simply delete the project folder and repeat the process. You may have missed a step or some tools might not have installed correctly. Also, double-check your Tailwind CSS and PostCSS configuration files to ensure they contain the correct code as shown above.
How to Build a Customized UI using Tailwind CSS
This section covers all the styling required to construct the UI of the custom HTML5 video player. We'll take a step-by-step walkthrough of the process.
First, copy and paste the following link tag into the head of your HTML, above the link to the stylesheet:
<link
  href="https://fonts.googleapis.com/icon?family=Material+Icons"
  rel="stylesheet"
/>
This allows us to use Materialize CSS icons, which are essential for styling our buttons in the UI.
Next, let's focus on styling the video element in our markup. Simply replace the body element with the provided code snippet below:
<body class="bg-indigo-950 p-10">
  <div
    id="container"
    class="w-4/5 h-4/5 mx-auto rounded-lg overflow-hidden relative group"
  >
    <!-- VIDEO -->
    <figure>
      <video class="w-full">
        <source src="/your-video.mp4" />
      </video>
    </figure>
  </div>
  <script type="module" src="/main.js"></script>
</body>
The provided code snippet includes the markup and styling for the video element, as well as an outer div acting as a container for the entire video player UI. The video element is nested within a figure element.
For the source element, specify the path to the video you wish to play. You can find videos online, download them, and add them to the "public" directory within the project folder. Then, link the src attribute of the source element to the video file. You can find free downloadable videos here.
Next, let's style the controls using the Materialize CSS Icons you linked in your HTML. Place the following code snippet below the figure element inside the body element.
<!-- CONTROLS -->
<div
  id="controls"
  class="opacity-0 p-5 absolute bottom-0 left-0 w-full transition-opacity duration-300 ease-linear group-hover:opacity-100"
>
  <!-- PROGRESS BAR -->
  <div id="progress-bar" class="h-1 w-full bg-white cursor-pointer mb-4">
    <div
      id="progress-indicator"
      class="h-full w-9 bg-indigo-800 transition-all duration-500 ease-in-out"
    ></div>
  </div>
  <div class="flex items-center justify-between">
    <div class="flex items-center justify-between">
      <!-- REWIND BUTTON -->
      <button
        id="rewind"
        class="transition-all duration-100 ease-linear hover:scale-125"
      >
        <i class="material-icons text-white text-3xl w-12">replay_10 </i>
      </button>

      <!-- PLAY BUTTON -->
      <button
        id="play-pause"
        class="transition-all duration-100 ease-linear hover:scale-125"
      >
        <i class="material-icons text-white text-5xl inline-block w-12"
          >play_arrow</i
        >
      </button>

      <!-- FAST FORWARD BUTTON -->
      <button
        id="fast-forward"
        class="transition-all duration-100 ease-linear hover:scale-125"
      >
        <i class="material-icons text-white text-3xl w-12">forward_10 </i>
      </button>
    </div>

    <div>
      <!-- VOLUME BUTTON -->
      <button
        id="volume"
        class="transition-all duration-100 ease-linear hover:scale-125"
      >
        <i class="material-icons text-white text-3xl">volume_up</i>
      </button>
    </div>
  </div>
</div>
This code segment defines the layout and behavior of the controls for a video player. It begins by setting up a container div (<div id="controls">) that holds all the control elements. The container is initially invisible (opacity-0) and becomes visible with a smooth transition (transition-opacity duration-300 ease-linear) when the user hovers over it (group-hover:opacity-100).
Within the container, there's a progress bar (<div id="progress-bar">) for tracking the video's progress. It consists of a white background bar (bg-white) with a movable indicator (<div id="progress-indicator">) colored in indigo (bg-indigo-800). The progress bar is responsive and allows users to seek to different parts of the video.
Below the progress bar are control buttons for various functions. The rewind, play/pause, and fast forward buttons are grouped together within a flex container (<div class="flex items-center justify-between">). Each button (<button>) is styled to enlarge slightly (hover:scale-125) when hovered over.
- The rewind button (
<button id="rewind">) contains an icon (<i class="material-icons text-white text-3xl w-12">replay_10</i>) indicating a ten-second rewind. - The play/pause button (
<button id="play-pause">) contains an icon (<i class="material-icons text-white text-5xl w-12">play_arrow</i>) toggling between play and pause states. - The fast forward button (
<button id="fast-forward">) contains an icon (<i class="material-icons text-white text-3xl w-12">forward_10</i>) indicating a ten-second fast forward.
Separately, there's a volume button (<button id="volume">) located to the right of the control buttons. It contains a volume icon (<i class="material-icons text-white text-3xl w-12">volume_up</i>).
Overall, this code segment combines HTML and Tailwind CSS classes to create a functional and visually appealing set of controls for a video player.
The final puzzle is disabling the default browser feature, and we wouldn't want our custom HTML5 video player to clash with or be overridden by the default styling provided by browsers.
Copy and paste the code snippet below into your style.css file, directly below the Tailwind CSS directives:
@layer base {
  video::-webkit-media-controls {
    display: none;
  }

  video::-webkit-media-controls-play-button {
    display: none;
  }

  video::-webkit-media-controls-volume-slider {
    display: none;
  }

  video::-webkit-media-controls-mute-button {
    display: none;
  }

  video::-webkit-media-controls-timeline {
    display: none;
  }

  video::-webkit-media-controls-current-time-display {
    display: none;
  }
}
This piece of code is used to customize the appearance and behavior of the default media controls provided by the WebKit browser engine (commonly used in browsers like Safari and some versions of Google Chrome) for the <video> element.
Each CSS rule within the @layer base block targets specific parts of the default media controls and hides them from view by setting their display property to none. Here's a breakdown of each rule:
video::-webkit-media-controls: This rule targets the entire set of media controls for the<video>element and hides them completely. By hiding the controls, you can implement your own custom controls using JavaScript and CSS, providing a more tailored and consistent user experience across different browsers.video::-webkit-media-controls-play-button: This rule targets the play button within the default media controls and hides it. We might want to hide the play button if we're using a custom play button design or handling playback control programmatically.video::-webkit-media-controls-volume-slider: This rule targets the volume slider within the default media controls and hides it. Similar to hiding the play button, you might choose to hide the volume slider if you're implementing your own volume control UI.video::-webkit-media-controls-mute-button: This rule targets the mute button within the default media controls and hides it. If you have a custom mute/unmute button or want to manage audio muting programmatically, you can hide the default mute button.video::-webkit-media-controls-timeline: This rule targets the timeline (progress bar) within the default media controls and hides it. By hiding the timeline, you can implement your own progress bar with custom styling and additional functionality.video::-webkit-media-controls-current-time-display: This rule targets the current time display within the default media controls and hides it. If you're implementing a custom UI for displaying the current playback time, you can hide the default display.
Overall, this code allows for complete customization of the default media controls provided by WebKit browsers, letting you create a unique and tailored user experience for video playback on your websites.
Check your localhost URL to see a customized UI displayed like this:
 Custom video player UI without mouse hover, controls hidden.
However, upon hovering, the controls will fade in and the UI will be displayed like this:
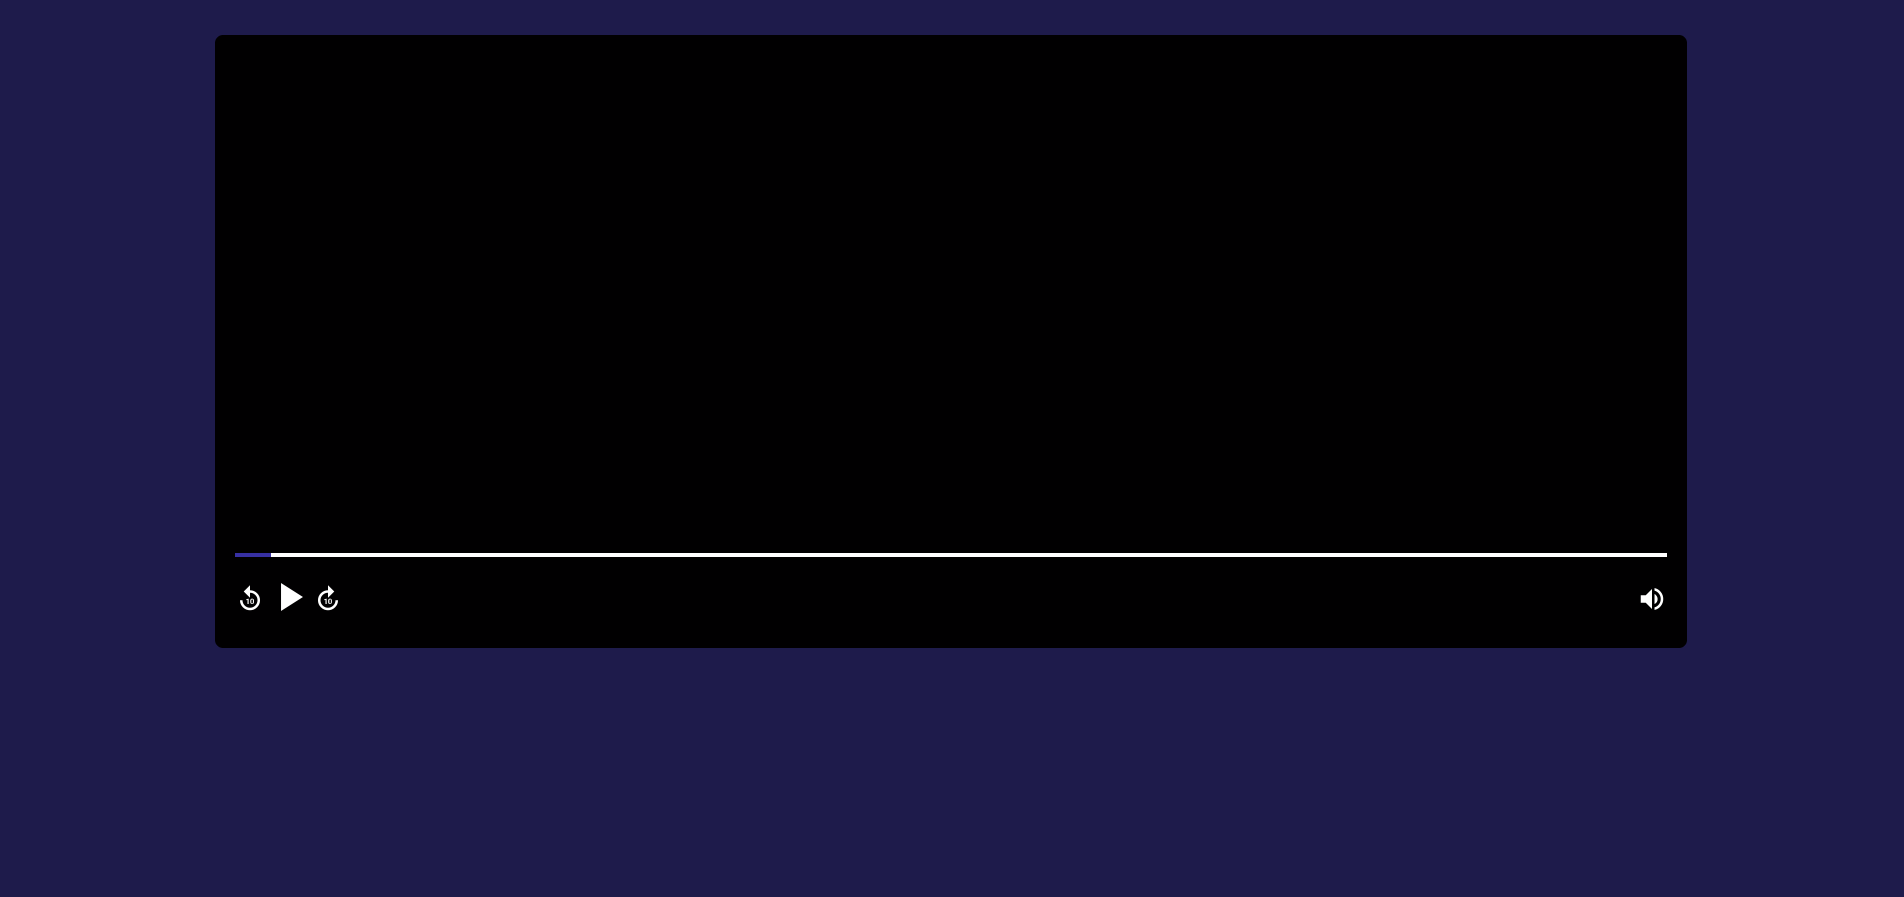 Custom video player UI with visible controls upon mouse hover.
And there you have it! You've successfully constructed a customized HTML5 video player. Now, it's time to breathe life into it by using JavaScript to develop the controls and functionality, which we'll tackle in the upcoming sections.
How to Implement the Play and Pause Functionality
To implement the play and pause feature on the HTML5 custom video player, you'll start by selecting the play and pause buttons using their respective IDs from the markup. You can also select the video element. Then you'll programmatically control the playback using the Video API provided by JavaScript in the browser. Let's get started.
"use strict";

const playNpauseBtn = document.querySelector("#play-pause");
const video = document.querySelector("video");
From the code snippet above:
"use strict";ensures JavaScript runs in strict mode, catching common coding mistakes.const playNpauseBtn = document.querySelector("#play-pause");selects the play/pause button from the HTML using its ID.const video = document.querySelector("video");selects the video element from the HTML.
Next, let's create two functions:
playNpauseFn: This function will handle playing and pausing the video.updatePlayNPauseIcon: This function will update the play and pause icons based on the video's current state. For example, if the video is playing, it will show the pause icon, and vice versa.
Now, let's examine how this will function in the following code snippet.
function playNpauseFn() {
  video.paused ? video.play() : video.pause();
}

function updatePlayNPauseIcon() {
  const icon = playNpauseBtn.querySelector("i");
  icon.textContent = "";

  icon.textContent = video.paused ? "play_arrow" : "paused";
}
Let's understand what's happening. Beginning with the playNpauseFn function, when it's called, it checks the current state of the video using the paused method available in the Video API. If the video is paused, it plays the video. Otherwise, it pauses the video. This is accomplished using the ternary operator in JavaScript.
Alternatively, you can rewrite this using the if/else statement, as shown below:
function playNpauseFn() {
  if (video.paused) {
    video.play();
  } else {
    video.paused();
  }
}
The code sample above accomplishes the same task as the previous version – either one will work.
Now, let's move on to the second function, updatePlayNPauseIcon. This function updates the play and pause icons based on the current state of the video. Let's review how it's implemented.
Check out the icon styling below:
<button
  id="play-pause"
  class="transition-all duration-100 ease-linear hover:scale-125"
>
  <i class="material-icons text-white text-5xl inline-block w-12">play_arrow</i>
</button>
This code makes a button with the ID "play-pause" that holds an icon specified by the <i> tag. Materialize CSS uses the text "play_arrow" inside the <i> tag to show the matching icon. If you change the text inside <i>, Materialize CSS updates the icon accordingly.
Now, let's focus on the function responsible for updating the icon. Take a look at it below in isolation:
function updatePlayNPauseIcon() {
  const icon = playNpauseBtn.querySelector("i");
  icon.textContent = "";

  icon.textContent = video.paused ? "play_arrow" : "paused";
}
This function, updatePlayNPauseIcon(), is responsible for updating the play/pause icon based on the current state of the video.
- It first selects the icon element inside the play/pause button.
- Then, it clears any existing text content within the icon.
- Finally, it sets the text content of the icon to "play_arrow" if the video is paused, or "paused" if the video is currently playing. This dynamically changes the icon displayed on the button to reflect the current playback state.
Note: The way you update icons programmatically can vary based on the icon service and its API. This particular implementation is specific to Materialize CSS icons.
Next, let's connect these functions to the events that trigger them. Let's see how that works below:
video.addEventListener("play", updatePlayNPauseIcon);
video.addEventListener('click', playNpauseFn)
video.addEventListener("pause", updatePlayNPauseIcon);
playNpauseBtn.addEventListener("click", playNpauseFn);
In this code:
video.addEventListener("play", updatePlayNPauseIcon);: This line adds an event listener to the video element, specifically listening for the "play" event. When the video starts playing, it triggers theupdatePlayNPauseIconfunction, updating the play/pause icon accordingly.video.addEventListener('click', playNpauseFn): This line adds an event listener to the video element for the "click" event. When the video is clicked, it triggers theplayNpauseFnfunction, which plays or pauses the video.video.addEventListener("pause", updatePlayNPauseIcon);: This line adds an event listener to the video element, listening for the "pause" event. When the video is paused, it triggers theupdatePlayNPauseIconfunction to update the play/pause icon.playNpauseBtn.addEventListener("click", playNpauseFn);: This line adds an event listener to the play/pause button element. When the button is clicked, it triggers theplayNpauseFnfunction, which plays or pauses the video.
We have four event listeners on the two selected elements. Let's break down what's happening:
- The video element listens for the "play" event. When the video starts playing, it triggers
updatePlayNPauseIcon, updating the icon based on the video's current state. - The video element also listens for a click event. When clicked, it triggers
playNpauseFn, which toggles between playing and pausing the video. - Also, the video element listens for the "pause" event. When the video is paused, it triggers
playNpauseFn, toggling the video's playback state. - The play/pause button element also listens for a click event. When clicked, it triggers
playNpauseFn, toggling between playing and pausing the video.
That concludes this section. You can now try the play and pause functionality. The video should pause and play effectively, with the icons updating correctly.
At the moment your custom video should player should be doing this:
 Testing out the play and pause functionality
In the next section, we'll be implementing the rewind and fast forward feature.
How to Implement the Rewind and Fast Forward Functionality
Now that we've implemented the play and pause functionality, the next features to add are rewind and fast forward. These common features allow users to skip forward or backward in the video by a set number of seconds.
First, let's begin by selecting the corresponding buttons from the HTML document using their IDs and storing them in variables:
const rewindBtn = document.querySelector("#rewind");
const fastForwardBtn = document.querySelector("#fast-forward");
Once that's completed, you need to construct the function responsible for implementing the rewind and fast forward functionality. Below is the code snippet:
function rewindNforwardFn(type) {
  video.currentTime += type === "rewind" ? -10 : 10;
}
This function, called rewindNforward, is responsible for rewinding or fast-forwarding the video. Here's how it works:
- It takes a parameter called
type, which indicates whether you want to rewind or fast forward. - If
typeis "rewind", it subtracts 10 seconds from the current playback time of the video (video.currentTime). - If
typeis not "rewind" (indicating that you want to fast forward), it adds 10 seconds to the current playback time of the video. This allows users to navigate through the video either backward or forward by 10-second intervals, depending on the value oftype.
Next, you need to connect the event listeners on the buttons to trigger the rewindNforward function.
rewindBtn.addEventListener("click", () => rewindNforwardFn("rewind"));
fastForwardBtn.addEventListener("click", () => rewindNforwardFn("forward"));
This code adds event listeners to the rewind and fast forward buttons. When the rewind button is clicked, it triggers the rewindNforward function with the argument "rewind", indicating that you want to rewind the video.
Similarly, when the fast forward button is clicked, it triggers the rewindNforward function with the argument "forward", indicating that you want to fast forward the video.
Feel free to test it out and observe how it functions on the user interface (UI).
 Testing the rewind and fast forward functionality
How to Implement the Mute and Unmute Functionality
To add the mute and unmute functionality, you'll follow the same process as you did for the previous functionalities.
You'll begin by selecting the volume button from the HTML document using the querySelector method:
const volumeBtn = document.querySelector("#volume");
Then, create the functions responsible for muting and unmuting the video, and update the icon accordingly when either of these events occurs.
function muteNunmuteFn() {
  video.muted = video.muted ? false : true;
}

function updateVolumeIcon() {
  const icon = volumeBtn.querySelector("i");
  icon.textContent = "";
  icon.textContent = video.muted ? "volume_off" : "volume_up";
}
This code comprises two functions:
muteNunmuteFn(): This function toggles the video's mute state. If the video is currently muted, it unmutes it. Otherwise, it mutes the video.updateVolumeIcon(): This function updates the volume icon displayed on the volume button. It clears any existing icon content, then sets the icon text to "volume_off" if the video is muted, and "volume_up" if the video is not muted.
The final step is to connect the functions with event listeners so that they are executed when the event is triggered. Below are the code snippets for this:
video.addEventListener("volumechange", updateVolumeIcon);
volumeBtn.addEventListener("click", muteNunmuteFn);
This code sets up two things:
- It adds an event listener to the video element, listening for the "volumechange" event. When this event occurs (that is, when the volume is changed), it triggers the
updateVolumeIconfunction to update the volume icon accordingly. - It adds an event listener to the volume button. When the volume button is clicked, it triggers the
muteNunmuteFnfunction, toggling between muting and unmuting the video.
Similar to the play and pause events, the video also has a volumechange event triggered when the volume or mute status changes. You set up the video to listen for this event, so when it occurs, the event listener runs the function to update the volume icon accordingly.
 Testing out the mute and unmute functionality
How to Update the Progress Bar Relative to the Video Time
In this section, you'll see how to update the progress bar as the video plays, allowing users to track their progress through the video.
The progress bar currently doesn't move as the video plays and the time changes. We're going to fix that
To start, you'll remove the fixed width styling for the progress bar. Originally added for styling purposes, it's no longer needed as you'll dynamically adjust the width using JavaScript. Update the class from w-9 to w-0 in the div element with the id "progress-indicator".
<!-- PROGRESS BAR -->
<div id="progress-bar" class="h-1 w-full bg-white cursor-pointer mb-4">
  <div
    id="progress-indicator"
    class="h-full w-0 bg-indigo-800 transition-all duration-500 ease-in-out"
  ></div>
</div>
Moving on to implementing the progress bar update, the first step is to select the progress bar indicator element. This element's width will increase as the video time progresses. Below is the code snippet to achieve this:
const progressIndicator = document.querySelector("#progress-indicator");
Once the progress indicator is selected, your next task is to implement the function responsible for updating it.
function updateProgress() {
  const progressPercentage = (video.currentTime / video.duration) * 100;

  progressIndicator.style.width = `${progressPercentage}%`;
}
In the code snippet above, the function called updateProgress calculates the percentage of video progress by dividing the current time of the video by its total duration and then multiplying by 100. This percentage is used to set the width of the progress indicator element, visually representing how much of the video has been watched.
Let's break down the function. In the first line of code, you calculate the percentage of the video's current time compared to its total duration. You do this by dividing the current time by the total duration of the video. For example, if a video is 30 seconds long and the current time is 3 seconds, 3 divided by 30 equals 0.1.
You then multiply this decimal by 100 to get the percentage. So, 0.1 multiplied by 100 equals 10. This means you are 10% into the 30-second video.
Finally, you use this percentage to update the width of the progress indicator accordingly.
Next, let's add an event listener that triggers this function. See the code snippet below:
video.addEventListener('timeupdate', updateProgress);
Similar to other events in the Video API, there's another one called timeupdate. This event is triggered as the currentTime of the video changes. So, as the time updates, the updateProgress function is automatically executed each time the event is fired, causing the progress indicator to update accordingly.
 Testing out the time progress functionality
How to Implement the Seeking Functionality
The seeking functionality is a vital aspect of video players. While rewind and fast forward are efficient for small skips, users often want to make larger jumps to specific parts of the video. Clicking rewind or fast forward, which only moves in fixed increments, can be frustrating for users. So the seeking functionality proves invaluable in such scenarios.
Let's begin by selecting the progress bar element from the Document Object Model (DOM).
const progessBar = document.querySelector("#progress-bar");
Having obtained the progress bar from the DOM using its ID, your next step is to construct the seeking function. You can find the implementation in the following code snippet:
function seekingFn(e) {
  const updatedTime = (e.offsetX / progessBar.offsetWidth) * video.duration;

  video.currentTime = updatedTime;
}
Let's breakdown the function and understand what's going on.
The function, seekingFn, adjusts the current playback time of the video based on the position where the user clicks on the progress bar. It calculates the updated time by dividing the horizontal offset of the click relative to the progress bar width by the total width of the progress bar. Then it multiplies it by the total duration of the video. Finally, it sets the current time of the video to the calculated updated time.
Next, add the event listener:
let mouseIsDown = false;

progessBar.addEventListener("mousedown", () => (mouseIsDown = true));
progessBar.addEventListener("mouseup", () => (mouseIsDown = false));
progessBar.addEventListener("click", seekingFn);
progessBar.addEventListener("mousemove", (e) => mouseIsDown && seekingFn);
In the code snippet above, the code handles mouse events on the progress bar for seeking functionality:
mouseIsDownis a variable that tracks whether the mouse button is pressed down.- When the mouse button is pressed down (
mousedownevent),mouseIsDownis set to true. - When the mouse button is released (
mouseupevent),mouseIsDownis set to false. - When the progress bar is clicked (
clickevent), theseekingFnfunction is triggered to seek to the clicked position. - When the mouse moves over the progress bar (
mousemoveevent), ifmouseIsDownis true, meaning the mouse button is pressed, then theseekingFnfunction is triggered, allowing seeking while dragging the mouse.
 Testing the seeking functionality
How to Add Keyboard Navigation for Accesibility
Our video player currently supports pointer devices like mice and light pens. But we aim to ensure accessibility for users who may not have or be able to use such devices. So we're striving to make our custom HTML5 video player usable without the need for a pointer device, utilizing keyboards instead.
Using the space bar for play and pause
Let's start by improving the play and pause functionality. In most video players, it's common to use the space bar on the keyboard to toggle between playing and pausing a video. This is the first keyboard navigation feature we'll implement.
Below is a code snippet demonstrating how to achieve this:
window.addEventListener("keyup", (e) => {
  if (e.code === "Space") {
    playNpauseFn();
  }
});
This code listens for when a key on your keyboard is released, known as a "keyup" event. If the key released happens to be the space bar, it triggers the function that toggles between playing and pausing the video. You'll just be reusing the function you made earlier for this.
Here's a step-by-step explanation of the code:
window.addEventListener("keyup", (e) => { ... }):You're adding an event listener to the
windowobject.This listener is triggered when a key is released (
keyupevent).(e) => { ... }:This is an arrow function that gets executed when the
keyupevent occurs.The
eparameter represents the event object containing information about the event.if (e.code === "Space") { ... }:This condition checks if the key that was released is the space bar.
e.codeprovides the code of the key that triggered the event.playNpauseFn();:If the released key is the space bar, this function is called.
- The
playNpauseFnfunction is responsible for toggling between playing and pausing the video.
Using the arrow keys to rewind and fast forward
You can use the left arrow key to rewind and the right arrow key to fast forward a video, in addition to the space bar for playing and pausing.
Building upon the previous code snippet for play and pause functionality, you can incorporate the arrow keys for rewinding and fast forwarding the video.
window.addEventListener("keyup", (e) => {
  if (e.code === "Space") {
    playNpauseFn();
  } else if (e.code === "ArrowLeft") {
    rewindNforwardFn("rewind");
  } else if (e.code === "ArrowRight") {
    rewindNforwardFn("forward");
  } else {
    return;
  }
});
This code snippet sets up an event listener on the window object for the keyup event. When any key is released, the provided callback function is triggered with an event parameter. Inside the callback function, there are conditional statements to check which key was pressed:
- If the pressed key is the Space bar ("Space"), the
playNpauseFnfunction is executed, toggling between play and pause of the video. - If the pressed key is the left arrow key ("ArrowLeft"), the
rewindNforwardFnfunction is called with the argument "rewind", indicating the video should be rewound. - If the pressed key is the right arrow key ("ArrowRight"), the
rewindNforwardFnfunction is called with the argument "forward", indicating the video should be fast forwarded. - If the pressed key isn't the space bar, left arrow, or right arrow, the function returns without performing any action.
How your code should look now
We've now finished building our custom HTML5 video player. Congratulations to you on learning this.
If you encountered any difficulties or missed any steps along the way, don't worry. You can find the code snippets for each major file below:
index.html
<!DOCTYPE html>
<html lang="en">
  <head>
    <meta charset="UTF-8" />
    <link rel="icon" type="image/svg+xml" href="/vite.svg" />
    <meta name="viewport" content="width=device-width, initial-scale=1.0" />
    <link
      href="https://fonts.googleapis.com/icon?family=Material+Icons"
      rel="stylesheet"
    />
    <link rel="stylesheet" href="./style.css" />
    <title>HTML5 Custom Video Player</title>
  </head>
  <body class="bg-indigo-950 p-10">
    <div
      id="container"
      class="w-4/5 h-4/5 mx-auto rounded-lg overflow-hidden relative group"
    >
      <!-- VIDEO -->
      <figure>
        <video class="w-full">
          <source src="/oceans.mp4" />
        </video>
      </figure>

      <!-- CONTROLS -->
      <div
        id="controls"
        class="opacity-0 p-5 absolute bottom-0 left-0 w-full transition-opacity duration-300 ease-linear group-hover:opacity-100"
      >
        <!-- PROGRESS BAR -->
        <div id="progress-bar" class="h-1 w-full bg-white cursor-pointer mb-4">
          <div
            id="progress-indicator"
            class="h-full w-0 bg-indigo-800 transition-all duration-500 ease-in-out"
          ></div>
        </div>
        <div class="flex items-center justify-between">
          <div class="flex items-center justify-between">
            <!-- REWIND BUTTON -->
            <button
              id="rewind"
              class="transition-all duration-100 ease-linear hover:scale-125"
            >
              <i class="material-icons text-white text-3xl w-12">replay_10 </i>
            </button>

            <!-- PLAY BUTTON -->
            <button
              id="play-pause"
              class="transition-all duration-100 ease-linear hover:scale-125"
            >
              <i class="material-icons text-white text-5xl inline-block w-12"
                >play_arrow</i
              >
            </button>

            <!-- FAST FORWARD BUTTON -->
            <button
              id="fast-forward"
              class="transition-all duration-100 ease-linear hover:scale-125"
            >
              <i class="material-icons text-white text-3xl w-12">forward_10 </i>
            </button>
          </div>

          <div>
            <!-- VOLUME BUTTON -->
            <button
              id="volume"
              class="transition-all duration-100 ease-linear hover:scale-125"
            >
              <i class="material-icons text-white text-3xl">volume_up</i>
            </button>
          </div>
        </div>
      </div>
    </div>
    <script type="module" src="/main.js"></script>
  </body>
</html>
style.css
@tailwind base;
@tailwind components;
@tailwind utilities;

@layer base {
  video::-webkit-media-controls {
    display: none;
  }

  video::-webkit-media-controls-play-button {
    display: none;
  }

  video::-webkit-media-controls-volume-slider {
    display: none;
  }

  video::-webkit-media-controls-mute-button {
    display: none;
  }

  video::-webkit-media-controls-timeline {
    display: none;
  }

  video::-webkit-media-controls-current-time-display {
    display: none;
  }
}
main.js
"use strict";

const playNpauseBtn = document.querySelector("#play-pause");
const video = document.querySelector("video");
const rewindBtn = document.querySelector("#rewind");
const fastForwardBtn = document.querySelector("#fast-forward");
const volumeBtn = document.querySelector("#volume");
const progressIndicator = document.querySelector("#progress-indicator");
const progessBar = document.querySelector("#progress-bar");

function playNpauseFn() {
  video.paused ? video.play() : video.pause();
}

function updatePlayNPauseIcon() {
  const icon = playNpauseBtn.querySelector("i");
  icon.textContent = "";

  icon.textContent = video.paused ? "play_arrow" : "paused";
}

function rewindNforwardFn(type) {
  video.currentTime += type === "rewind" ? -10 : 10;
}

function muteNunmuteFn() {
  video.muted = video.muted ? false : true;
}

function updateVolumeIcon() {
  const icon = volumeBtn.querySelector("i");
  icon.textContent = "";
  icon.textContent = video.muted ? "volume_off" : "volume_up";
}

function updateProgress() {
  const progressPercentage = (video.currentTime / video.duration) * 100;

  progressIndicator.style.width = `${progressPercentage}%`;
}

function seekingFn(e) {
  const updatedTime = (e.offsetX / progessBar.offsetWidth) * video.duration;

  video.currentTime = updatedTime;
}

// PLAY AND PAUSE FUNCTIONALITY
video.addEventListener("play", updatePlayNPauseIcon);
video.addEventListener("click", playNpauseFn);
video.addEventListener("pause", updatePlayNPauseIcon);
playNpauseBtn.addEventListener("click", playNpauseFn);

// REWIND AND FAST FORWARD
rewindBtn.addEventListener("click", () => rewindNforwardFn("rewind"));
fastForwardBtn.addEventListener("click", () => rewindNforwardFn("forward"));

// MUTE AND UNMUTE
video.addEventListener("volumechange", updateVolumeIcon);
volumeBtn.addEventListener("click", muteNunmuteFn);

// PROGRESS
video.addEventListener("timeupdate", updateProgress);

// SEEKING
let mouseIsDown = false;

progessBar.addEventListener("mousedown", () => (mouseIsDown = true));
progessBar.addEventListener("mouseup", () => (mouseIsDown = false));
progessBar.addEventListener("click", seekingFn);
progessBar.addEventListener("mousemove", (e) => mouseIsDown && seekingFn);

// KEYBOARD NAVIGATIONS
window.addEventListener("keyup", (e) => {
  if (e.code === "Space") {
    playNpauseFn();
  } else if (e.code === "ArrowLeft") {
    rewindNforwardFn("rewind");
  } else if (e.code === "ArrowRight") {
    rewindNforwardFn("forward");
  } else {
    return;
  }
});
Alternatively, you can find all the code on the GitHub repository I've created for this project. If you find it helpful, consider giving the repository a star – I'd really appreciate it!
You can access the live site by visiting here.
Where to Go from Here
Now that you've finished reading this article, remember that your journey doesn't end here. There's a whole world of possibilities waiting for you to explore and build upon what you've learned.
The Video API offers a wide range of features you can experiment with, such as adding playback rate controls, volume adjustment, or even subtitles. You can also enhance your project with animations, and interactions, and ensure it's mobile responsive, perhaps even enabling landscape mode for mobile devices.
For further inspiration and ideas, feel free to check out my version of the project here – although it's still a work in progress. I'm excited to see what you'll create!
If you decide to share your project, don't forget to tag me—I'd love to give it a review and offer any feedback. Keep pushing forward, and happy coding!
Conclusion
Congratulations! You've reached the end of this article and have gained valuable hands-on experience in building your own custom HTML5 video player. By incorporating keyboard navigation and optimizing for accessibility, you've ensured a seamless user experience.
I'm excited to see what you'll create with your newfound knowledge, so don't forget to share your projects with me.
Thank you for reading, and see you next time!
Contact information
Would you like to get in touch with me? Don't hesitate to reach out through any of the following channels:
- Twitter / X: @developeraspire
- Email: developeraspire5@gmail.com