
By Jess Wilk
If you want to learn how to navigate the ever-evolving job market by scraping job posting sites like Indeed.com, then this guide is for you.
What is a Job Scraper?
In the digital age, tools known as Job Board Scrapers (or just Job Scrapers) have become indispensable for people looking to automate the process of gathering data from job board websites.
Job boards are online platforms that showcase many job openings from various sectors. Some popular examples include Indeed.com and ZipRecruiter.com. These boards are the pulse of the job market, reflecting current job trends, company needs, and skills in high demand.
The primary objective of a Job Scraper is to meticulously collect details such as job titles, descriptions, company names, locations, and occasionally salary data from the listings on these sites. This information serves a dual purpose: it helps job seekers in their job search by providing them with a comprehensive overview of the market, and analysts can also use it to track job trends and market dynamics.
What You'll Learn Here
This tutorial will use the Python programming language, the most popular and versatile tool for web scraping tasks. Python's rich ecosystem of libraries, such as BeautifulSoup and Scrapy, makes it an ideal choice for developing efficient and effective Job Scrapers.
If you’re new to Python, you can check out the Introduction to Python course on Hyperskill, where I contribute as an expert.
By the end of this guide, you will be equipped to build your own Job Scraper and have a deeper understanding of the job search landscape and how to navigate it using data-driven insights.
Whether you're a job seeker looking to get an edge in your job search, a data analyst tracking job market trends, or a developer interested in the technical aspects of web scraping, this tutorial will provide valuable knowledge and skills.
Good Python Frameworks for the Job
There are several Python frameworks and libraries you can use for scraping job details from a job listing website. Those are:
- Beautiful Soup
- Scrapy
- Selenium
- Pyppeteer
We'll be using Pyppeteer for this article as it has some key advantages over other libraries. If you have yet to hear of Pyppeteer, it's the Python port of the popular Puppeteer framework. You can learn more about Puppeteer from the official website.
Pyppeteer has most of the functionalities of Puppeteer and is written for Python programmers. Here are some of its most helpful features:
- Pyppeteer controls a real browser. A lot of websites block robots from entering their websites. Because Pyppeteer uses a real browser, you can avoid many blockings like that.
- With Pyppeteer, you can programmatically mimic user actions such as clicks, form submissions, and keyboard inputs. This makes it possible to navigate complex user flows, as we'll do in this article.
- Because Pyppeteer operates a full browser, it inherently supports modern web features such as CSS selectors, XPath, and WebSockets. Although we only need some of these modern features for this article, it's better to learn scraping with such a tool, as you'll likely need those features when doing more complex scraping tasks.
Here's What We'll Cover:
- Prerequisites
- How to Get Started with Pyppeteer
- How to Extract Job Listings with Pyppeteer
- How to Write the Scraping Code
- What Are the Next Steps?
Prerequisites
The only prerequisite for this tutorial is having Python installed on your machine. If you still need to do that, go ahead and install Python from the official website, and you are ready to proceed with the rest of the article.
How to Get Started with Pyppeteer
Create a Virtual environment
Before starting with Pyppeteer, let's create a virtual environment for this project.
python -m venv env
This command will create a new folder named env in your project directory, containing a separate Python installation.
You need to activate the virtual environment. On Windows, you can activate the environment using the following command:
.\env\Scripts\activate
On MacOS and Linux, you have to do it using the following command:
source env/bin/activate
Install Pyppeteer
With the active virtual environment, we can install Pyppeteer using pip, the package manager. Pip comes already installed when you install Python.
pip install pyppeteer
After running the above command, pip will download and install Pyppeteer and its dependencies.
Remember that Pyppeteer will download a recent Chromium version compatible with the API version it uses.
Suppose you already have a local installation of Chrome/Chromium, and you want Pyppeteer to use that instead. In that case, you can set the PYPPETEER_CHROMIUM_REVISION environment variable to an empty string before installing Pyppeteer. This will prevent Pyppeteer from downloading Chromium.
export PYPPETEER_CHROMIUM_REVISION=""
pip install pyppeteer
However, setting environment variables is different on Windows. You have to use the following command for that:
set PYPPETEER_CHROMIUM_REVISION=
pip install pyppeteer
How to Extract Job Listings with Pyppeteer
Identify Target Data on Job Boards
Before writing your scraping code, examine the website you intend to scrape.
Visit job board websites like Indeed.com and ZipRecruiter.com. Inspect the page elements where job details are displayed (right-click on the page and select "Inspect" in most browsers). Take note of the HTML structure and the class names of elements containing job titles, descriptions, company names, locations, and other relevant information.
In this article, you'll learn how to scrape Indeed.com. Go to Indeed.com, and you will see the following home page:
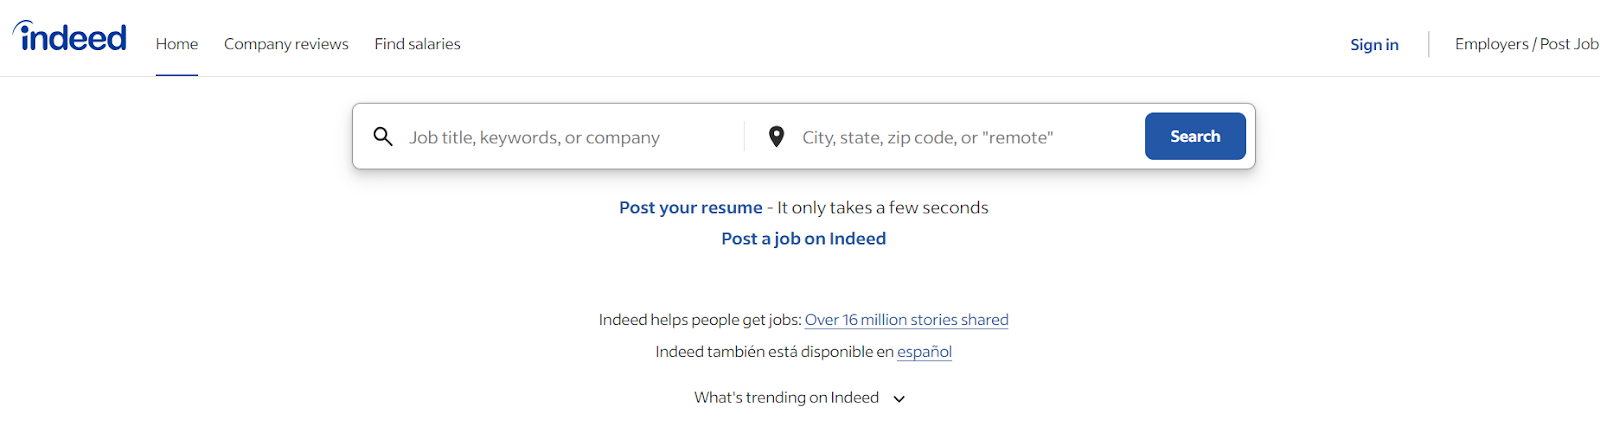
It has a search button with two input fields. You can type the job title in the first input field and the country in the second input field.
Let's type "Software Engineer" for the job title and "USA" for the country, then click "Search." You will then be redirected to a new page that contains all the jobs related to Software Engineers in the USA. Now we can scrape job details from this redirected page.
So, what are the steps to automate this process?
- Open a browser instance.
- Go to Indeed.com.
- Add "Software Engineer" to the first input field.
- Add "USA" to the second input field.
- Click the "Search" button.
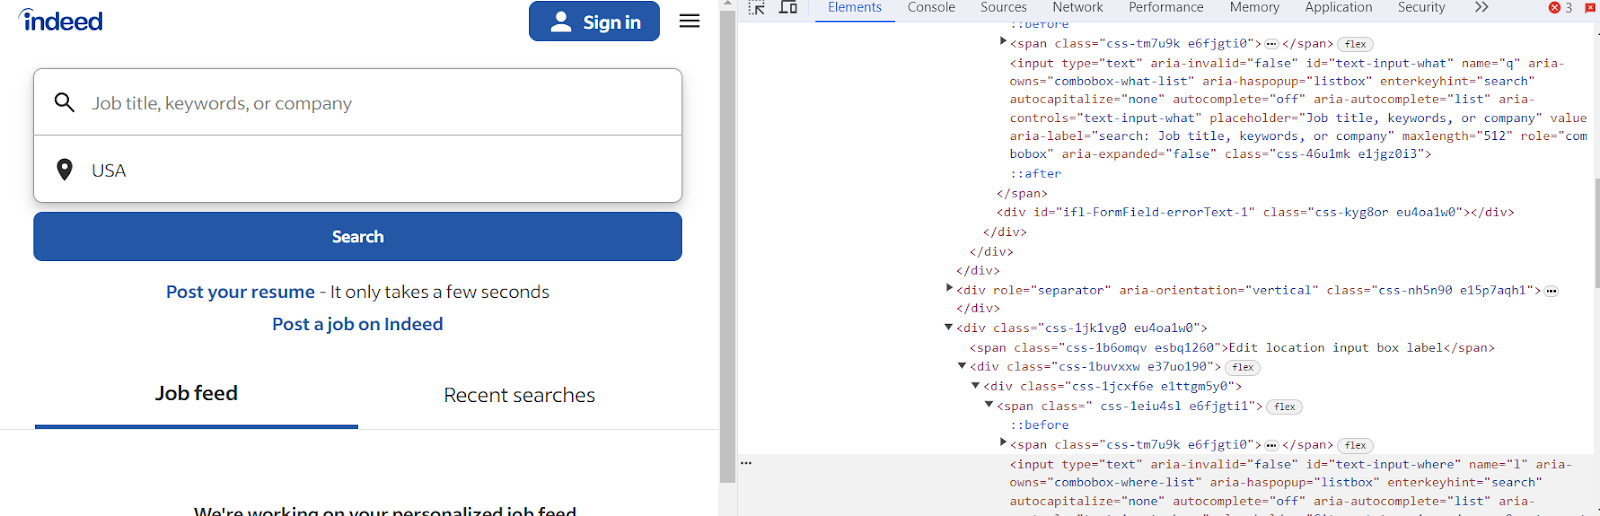
To accomplish steps 3 and 4, we need to inspect the webpage and find unique attribute values for those HTML elements.
When examining the page's HTML source code, you'll notice that the ID of the job title input field is "text-input-what," and the ID of the second input field, where you enter the location, is "text-input-where."
After we click "Search," we'll be taken to a new page.
On this page, our goal is to extract details like the job title, the company name, and the location of the job. A close examination of the HTML code reveals the following:
- Job titles are enclosed within h2 tags that have the class jobTitle.
- Company names are located inside a span nested within a div bearing the attribute data-testid= "company-name".
- Locations can be found within a span and inside a div, but this one has the attribute data-testid= "text-location".
With this understanding, let's proceed to write our code.
How to Write the Scraping Code
In Pyppeteer, we can use the following lines of code to execute the above mentioned steps.
First, launch the browser instance.
browser = await launch(headless=False)
page = await browser.newPage()
Then go to indeed.com.
await page.goto('https://www.indeed.com')
Wait for the input field elements to load. This step is crucial as the code often runs faster than the page loads.
    await page.waitForSelector('#text-input-what')
    await page.waitForSelector('#text-input-where')
Type 'Software Engineer' in the job title input and Type 'USA' in the location input.
  await page.type('#text-input-what', 'Software Engineer')
  await page.type('#text-input-where', 'USA')
Click the search button.
await page.click('button[type="submit"]')
Wait for next page to load
await page.waitForNavigation()
Extract Job title, Company name, and Job location and print the information.
job_listings = await page.querySelectorAll('.resultContent')
    for job in job_listings:
        # Extract the job title
        title_element = await job.querySelector('h2.jobTitle span[title]')
        title = await page.evaluate('(element) => element.textContent', title_element)


        # Extract the company name
        company_element = await job.querySelector('div.company_location [data-testid="company-name"]')
        company = await page.evaluate('(element) => element.textContent', company_element)


        # Extract the location
        location_element = await job.querySelector('div.company_location [data-testid="text-location"]')
        location = await page.evaluate('(element) => element.textContent', location_element)


        print({'title': title, 'company': company, 'location': location})
Close the browser.
await browser.close()
Once we put together the complete code, we get the code you see below. async and await are keywords used in asynchronous programming. If you want to learn more about it, you can read this article. Asynchronous programming is useful for making scraping more efficient.
import asyncio
from pyppeteer import launch


async def scrape_indeed():
    browser = await launch(headless=False)
    page = await browser.newPage()


    await page.goto('https://www.indeed.com')


    await page.waitForSelector('#text-input-what')
    await page.waitForSelector('#text-input-where')


    await page.type('#text-input-what', 'Software Engineer')
    await page.type('#text-input-where', 'USA')


    await page.click('button[type="submit"]')


    await page.waitForNavigation()


    job_listings = await page.querySelectorAll('.resultContent')
    for job in job_listings:
        # Extract the job title
        title_element = await job.querySelector('h2.jobTitle span[title]')
        title = await page.evaluate('(element) => element.textContent', title_element)


        # Extract the company name
        company_element = await job.querySelector('div.company_location [data-testid="company-name"]')
        company = await page.evaluate('(element) => element.textContent', company_element)


        # Extract the location
        location_element = await job.querySelector('div.company_location [data-testid="text-location"]')
        location = await page.evaluate('(element) => element.textContent', location_element)


        print({'title': title, 'company': company, 'location': location})


    await browser.close()


# Run the coroutine
if __name__ == '__main__':
    asyncio.run(scrape_indeed())
As you become familiar with each line of this code, you can experiment with it in various ways. For instance, you can add different cities and job titles to scrape diverse results.
Scraping any other site follows a similar process. All you need to do is identify the relevant HTML elements and their unique attributes related to the details you want to extract, and then adjust the code accordingly.
What Are the Next Steps?
As the next steps, you can do the following:
Store the Scraped Data
Instead of merely printing the scraped data, you can store it in a CSV or JSON file for later use. You can do this with the following code snippet, which saves the data in a CSV format.
with open('jobs.csv', 'w', newline='', encoding='utf-8') as file:
        writer = csv.writer(file)
        writer.writerow(['Title', 'Company', 'Location'])
Clean and Organize Data
Once you've scraped the necessary data, cleaning and organizing it effectively is the next critical step.
This process involves removing duplicate entries to ensure each listing is unique, standardizing job titles to a standard format for easy comparison, or filtering out listings that do not meet your specific criteria. This step is crucial for creating a refined list of job openings that are relevant and valuable to users.
Also, consider categorizing the data into different fields like 'List Of Company' and 'Relevant Company', which can help structure the data more coherently and make it user-friendly for analysis and retrieval.
Create a Job Board Interface
After cleaning and organizing your data, it's time to decide on a framework or tool to present your curated list of job openings.
Whether you opt for a basic web page for a straightforward display of listings, an intricate web application with advanced search and filter capabilities, or a mobile app for on-the-go access, the key is to ensure your job portal is user-friendly and accessible.
Your interface should allow users to easily navigate through the 'List Of Job Opening' and explore opportunities by categories such as job title, company size, location, and other relevant criteria.
Consider Legal and Ethical Considerations
Understanding the legal and ethical implications of web scraping is paramount. This includes respecting the robots.txt file of each website you scrape and adhering to their terms of service.
Ethical scraping practices are not just about compliance – they're about ensuring that your scraping activities do not detrimentally impact the website's operation or unfairly exploit the data provided.
As you collect data from company sites and job portals, always prioritize transparency and respect for the data source, balancing data collection and ethical standards.
Conclusion
With these steps, you should have a functioning job board scraper using Python and Pyppeteer. Remember, web scraping can be complex due to the dynamic nature of web pages, so expect to make adjustments as websites change their structure over time.
Thank you for reading! I'm Jess, and I'm an expert at Hyperskill. You can check out an Introduction to Python course on the platform.