

In this tutorial, you'll learn how to build a mobile quiz application that authenticates users, allows them to take tests, and ranks them based on their scores.
The application leverages some of Supabase's features, such as authentication and database storage, to build a secured full-stack mobile application.
Additionally, you'll learn how to create React Native applications with Expo, generate a set of questions and answers from ChatGPT, and perform CRUD operations and user authentication with Supabase.
To fully understand this tutorial, you'll need to have a basic knowledge of React Native and data fetching in React applications.
Table of Contents
- Mobile Application Demo
- How to set up a React Native application with Expo
- How to style the React Native application with Tailwind CSS
- How to build the application screens
- How to build the authentication screens
- How to build the tab screens
- How to build the stack screens
- How to generate quiz questions and answers from ChatGPT
- How to add Supabase to React Native
- How to add Supabase authentication to React Native applications
- How to sign up new users
- How to sign in existing users
- How to log users out of the application
- How to protect screens from unauthenticated users
- How to interact with the Supabase database
- How to save user's score to the database
- How to retrieve data from Supabase
- Conclusion
Mobile Application Demo
To preview the application, download Expo Go and paste the links below into the app URL field:
Android: exp://u.expo.dev/update/a4774250-e156-4d34-bcfc-a4f2549c2e1d
iOS: exp://u.expo.dev/update/7e5f8ba5-89c4-4c1d-b219-a613ace642df
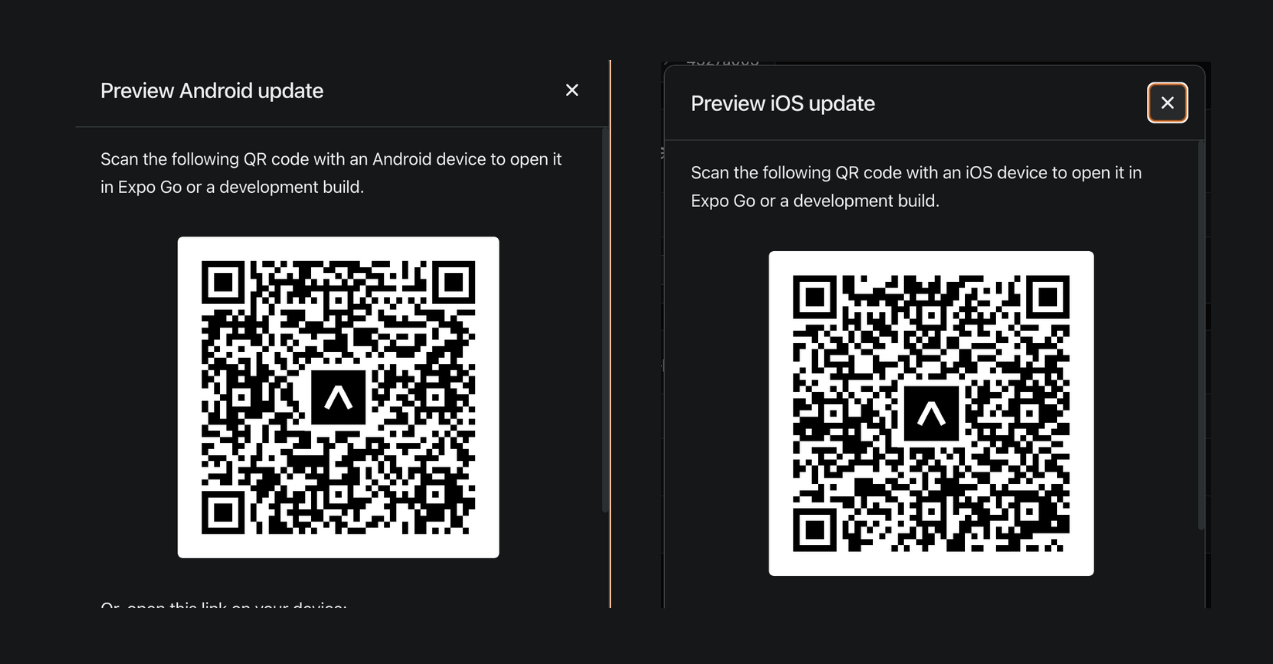 Scan the QR code to preview the mobile quiz application within the Expo Go application
How to Set Up a React Native Application with Expo
Expo is an open-source platform that allows you to create cross-platform applications easily with JavaScript. It saves us from the complex configurations required to create a native application with the React Native CLI, making it the easiest and fastest way to build and publish React Native apps.
Execute the code snippet below to create a new Expo project that uses Expo Router for navigating between screens.
npx create-expo-app@latest --template tabs@50
Expo Router is an open-source file-based routing system that enables users to navigate between screens easily. It is similar to Next.js, where each file name represents its route name.
Start the development server to ensure that the app is working as expected.
npx expo start
How to style the React Native application with Tailwind CSS
Tailwind CSS is a CSS framework that lets you create modern and stunning applications easily.
However, to style Expo applications using Tailwind CSS, you need to install NativeWind – a library that uses Tailwind CSS as its scripting language.
Run the code snippet below to install NativeWind and its dependencies:
npx expo install nativewind@^4.0.1 react-native-reanimated tailwindcss
Execute npx tailwindcss init within your terminal to create a tailwind.config.js file. Update the file with the code snippet below:
/** @type {import('tailwindcss').Config} */
module.exports = {
    content: ["./app/**/*.{js,jsx,ts,tsx}"],
    presets: [require("nativewind/preset")],
    theme: {
        extend: {},
    },
    plugins: [],
};
Create a globals.css file within the root of your project and add the Tailwind directives below:
@tailwind base;
@tailwind components;
@tailwind utilities;
Update the babel.config.js file with the code below:
module.exports = function (api) {
  api.cache(true);
  return {
    presets: [
      ["babel-preset-expo", { jsxImportSource: "nativewind" }],
      "nativewind/babel",
    ],
  };
};
Create a metro.config.js file within the root of your project and paste the code snippet below into the file:
const { getDefaultConfig } = require("expo/metro-config");
const { withNativeWind } = require('nativewind/metro');

const config = getDefaultConfig(__dirname)

module.exports = withNativeWind(config, { input: './globals.css' })
Finally, import the ./globals.css file into the app/_layout.tsx file to enable you to style your application with Tailwind CSS:
//👉🏻 Within ./app/_layout.tsx

import "../globals.css";
Great job on creating the React Native project with Expo! Now, you're ready to add some style using Tailwind CSS. If you encounter any problems while installing NativeWind, check out the documentation for a step-by-step guide.
How to Build the Application Screens
Here, I'll guide you through building the application screens. They are divided into three categories:
- The Authentication screens – the register and login screens.
- The Tab layout screens – the dashboard, leaderboard, and profile screens.
- The Stack screens – the test and test completion screens.
The application prompts new users to create an account and log in before allowing access to the Tab layout screens.
On the dashboard screen, users can take tests on various topics. The leaderboard screen showcases the top ten users. Users can log out or preview their previous attempts on the profile page.
 Application Demo
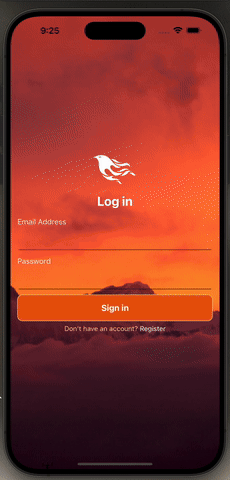
How to Build the Authentication Screens
The authentication screens accept the user's email and password and ensure the credentials are valid before creating an account or granting access to the application.
 The Authentication Screens
Create an index.tsx and a register.tsx file within the app folder and a component that accepts the user's email and password using the React Native TextInput component.
import { Text, View, TextInput, Pressable, Alert } from "react-native";
import { Link, useRouter } from "expo-router";
import { useState } from "react";

export default function LoginScreen() {
    const [email, setEmail] = useState<string>("");
    const [password, setPassword] = useState<string>("");
    const [loading, setLoading] = useState<boolean>(false);
    const router = useRouter();

    //👇🏻 triggered when the user submits the email & password
    const handleLogin = () => {
        if (!email.trim() || !password.trim())
            return Alert.alert("Error", "Please fill in all fields");
        setLoading(true);
        console.log({
            email,
            password,
        });
        router.replace("/(tabs)/");
    };

    return (
        <View>
        {/** -- user interface--*/}
        </View>
    );
}
The code snippet stores the user's email and password in states using the React useState hook. The handleLogin function accepts the user's email and password when the form is submitted and ensures that they are not empty before logging them to the console and redirecting the user to the Dashboard page.
You can create the user interface using the code snippet below. It displays the input fields for the user's credentials and an interactive Sign-in button that executes the handleLogin function. Additionally, the loading state ensures that the button is only pressed once.
<View className=' flex-1'>
    <View className='w-full px-4'>
        <Text className='text-3xl mb-4 font-bold text-white text-center'>
            Log in
        </Text>

        <Text className='text-lg text-gray-200'>Email Address</Text>
        <TextInput
            className='w-full border-b-[1px] py-4 rounded-md mb-3 text-white font-bold'
            value={email}
            onChangeText={setEmail}
        />
        <Text className='text-lg text-gray-200'>Password</Text>
        <TextInput
            className='w-full border-b-[1px] py-4 rounded-md mb-3 text-white font-bold'
            secureTextEntry
            value={password}
            onChangeText={setPassword}
        />
        <Pressable
            className={`w-full ${
                loading ? "bg-orange-200" : "bg-orange-600"
            } rounded-xl p-4 border-[1px] border-orange-200`}
            disabled={loading}
            onPress={() => handleLogin()}
        >
            <Text className='text-white text-center font-bold text-xl'>
                {loading ? "Authenticating..." : "Sign in"}
            </Text>
        </Pressable>
        <Text className='text-center mt-2 text-orange-200'>
            Don't have an account?{" "}
            <Link href='/register'>
                <Text className='text-white'>Register</Text>
            </Link>
        </Text>
    </View>
</View>
For instance, the loading state becomes true when a user clicks the Sign-in button. The Pressable component (button) has a disabled attribute set to the loading state to ensure that the user does not press the button multiple times. Additionally, you can use the loading state to notify the user that the request is processing.
The register.tsx file is also similar to the login.tsx file. You only need to change the words from Login to Register.
How to Build the Tab Screens
The Tab Screens consist of the Dashboard, Leaderboard, and Profile screens.
 The Tab Screens
Create a (tabs) folder containing index.tsx, leaderboard.tsx, profile.tsx, and _layout.tsx files within the app folder.
cd app
mkdir (tabs)
cd (tabs)
touch index.tsx leaderboard.tsx profile.tsx _layout.tsx
After creating the _layout.tsx file within the (tabs) folder, update the _layout.tsx to specify Tab screen navigation for the newly created screens. The screens use icons from the Expo Vector Icons library.
import { Tabs } from "expo-router";
import { Ionicons, MaterialIcons, FontAwesome5 } from "@expo/vector-icons";
import { ActivityIndicator } from "react-native";

export default function TabScreen() {
    return (
        <Tabs
            screenOptions={{
                tabBarActiveTintColor: "#f97316",
                tabBarInactiveTintColor: "gray",
                tabBarShowLabel: false,
                headerShown: false,
                tabBarStyle: {
                    backgroundColor: "#ffedd5",
                    borderTopColor: "#ffedd5",
                },
            }}
        >
            <Tabs.Screen
                name='index'
                options={{
                    tabBarIcon: ({ color }) => (
                        <Ionicons name='home' size={24} color={color} />
                    ),
                }}
            />
            <Tabs.Screen
                name='leaderboard'
                options={{
                    tabBarIcon: ({ color }) => (
                        <MaterialIcons name='leaderboard' size={24} color={color} />
                    ),
                }}
            />
            <Tabs.Screen
                name='profile'
                options={{
                    tabBarIcon: ({ color }) => (
                        <FontAwesome5 name='user-alt' size={24} color={color} />
                    ),
                }}
            />
        </Tabs>
    );
}
Next, update the RootLayoutNav component within the _app/layout.tsx file to render all the screens within the application.
function RootLayoutNav() {
    return (
        <Stack screenOptions={{ headerShown: false }}>
            <Stack.Screen name='(tabs)' />
            <Stack.Screen name='(stack)' />
            <Stack.Screen name='index' />
            <Stack.Screen name='register' />
        </Stack>
    );
}
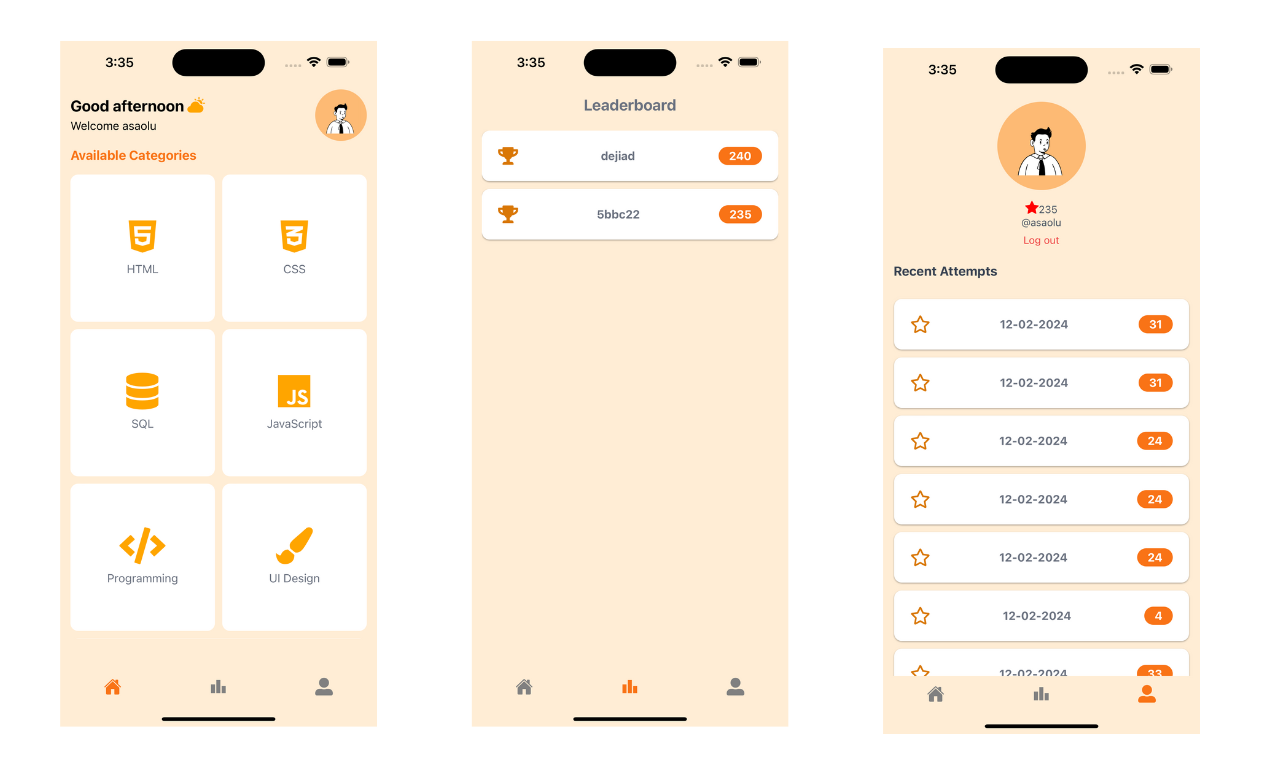
The Dashboard Screen
Update the component to allow users to select four categories from a list of categories.
export default function HomeScreen() {
    const greet = getGreeting();
    const router = useRouter();
    const { session } = useAuth();
    const [loading, setLoading] = useState<boolean>(false);
    const [userCategories, setUserCategories] = useState<string[]>([]);

    const fetchQuestions = async () => {};

    const handleStartTest = async () => {
        Alert.alert("Start Test", "Are you sure you want to start the test?", [
            {
                text: "Cancel",
                style: "destructive",
            },
            {
                text: "Yes",
                onPress: () => fetchQuestions(),
            },
        ]);
    };

    return (
        <SafeAreaView className='flex-1 bg-orange-100 px-4 py-2'>
            <View className='flex flex-row items-center justify-between mb-2'>
                <View>
                    <Text className='font-bold text-2xl mb-[1px]'>
                        Good morning
                        <Ionicons name='partly-sunny-sharp' size={24} color='orange' />
                    </Text>

                    <Text className='text-lg'>Welcome User</Text>
                </View>
            </View>
            {userCategories.length === 4 && (
                <Pressable
                    className={`w-full h-[70px] flex items-center justify-center ${
                        loading ? "bg-orange-300" : "bg-orange-500"
                    } rounded-xl mb-2`}
                    disabled={loading}
                    onPress={() => handleStartTest()}
                >
                    <Text className='text-xl font-bold text-orange-50'>
                        {loading ? "Loading questions..." : "START TEST"}
                    </Text>
                </Pressable>
            )}

            <View className='w-full flex-1'>
                <Text className='text-xl font-bold text-orange-500 mb-4'>
                    Available Categories
                </Text>
                <FlatList
                    data={categories}
                    numColumns={2}
                    contentContainerStyle={{ width: "100%", gap: 10 }}
                    columnWrapperStyle={{ gap: 10 }}
                    renderItem={({ item }) => (
                        <Categories
                            item={item}
                            userCategories={userCategories}
                            setUserCategories={setUserCategories}
                        />
                    )}
                    showsVerticalScrollIndicator={false}
                    keyExtractor={(item) => item.id}
                />
            </View>
        </SafeAreaView>
    );
}
The code snippet above renders a list of categories where users can select only four categories to answer questions on and start the quiz.
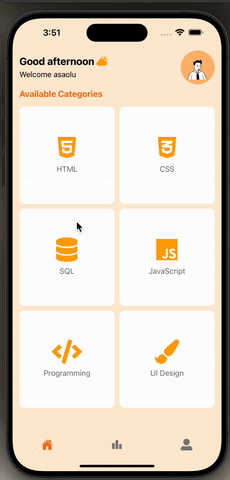 The Dashboard Screen
The Leaderboard Screen
The Leaderboard screen displays the top ten users ranked in descending order.
import { Text, FlatList, SafeAreaView } from "react-native";
import Board from "../../components/Board";

interface Props {
    total_score: number;
    user_id: string;
}

export default function LeaderboardScreen() {
    const [leaderboard, setLeaderboard] = useState<Props[]>([]);

    return (
        <SafeAreaView className='flex-1 bg-orange-100 p-4'>
            <Text className='text-2xl font-bold text-gray-500 text-center mb-6'>
                Leaderboard
            </Text>

            <FlatList
                data={leaderboard}
                renderItem={({ item }) => <Board item={item} />}
                keyExtractor={(item) => item.user_id}
                showsVerticalScrollIndicator={false}
            />
        </SafeAreaView>
    );
}
The code snippet above renders a FlatList with ten items. You can create an array containing ten users and pass it into the FlatList for now.
The Profile Screen
The Profile Screen displays the user's image, recent attempts, and a log-out button that enables the user to sign out of the application.
export default function ProfileScreen() {
    const [loading, setLoading] = useState<boolean>(false);
    const [total_score, setTotalScore] = useState<number>(0);
    const [attempts, setAttempts] = useState<string[]>([]);

    const handleSignOut = async () => {
        setLoading(true);
    };

    return (
        <SafeAreaView className='flex-1 bg-orange-100 p-4'>
            <View className='flex items-center justify-center mb-6'>
                <Text className='text-gray-600 mb-[1px]'>
                    <FontAwesome name='star' size={20} color='red' />
                    <Text>45</Text>
                </Text>
                <Text className='text-gray-600 mb-2'>@dhastix</Text>

                <Pressable onPress={() => handleSignOut()} disabled={loading}>
                    <Text className='text-red-500'>
                        {loading ? "Logging out..." : "Log out"}
                    </Text>
                </Pressable>
            </View>

            <Text className='font-bold text-xl text-gray-700 mb-3 px-4'>
                Recent Attempts
            </Text>

            <FlatList
                data={attempts}
                contentContainerStyle={{ padding: 15 }}
                renderItem={({ item }) => <Attempts item={item} />}
                keyExtractor={(item, index) => index.toString()}
                showsVerticalScrollIndicator={false}
            />
        </SafeAreaView>
    );
}
The code snippet above displays the user's image, the sign-out button, and all the user's attempts. You can create an array of items for testing purposes.
How to Build the Stack Screens
The Stack Screens comprise two screens – the quiz screen and the screen that displays the user's score after completing a quiz session.
 The Stack Screens
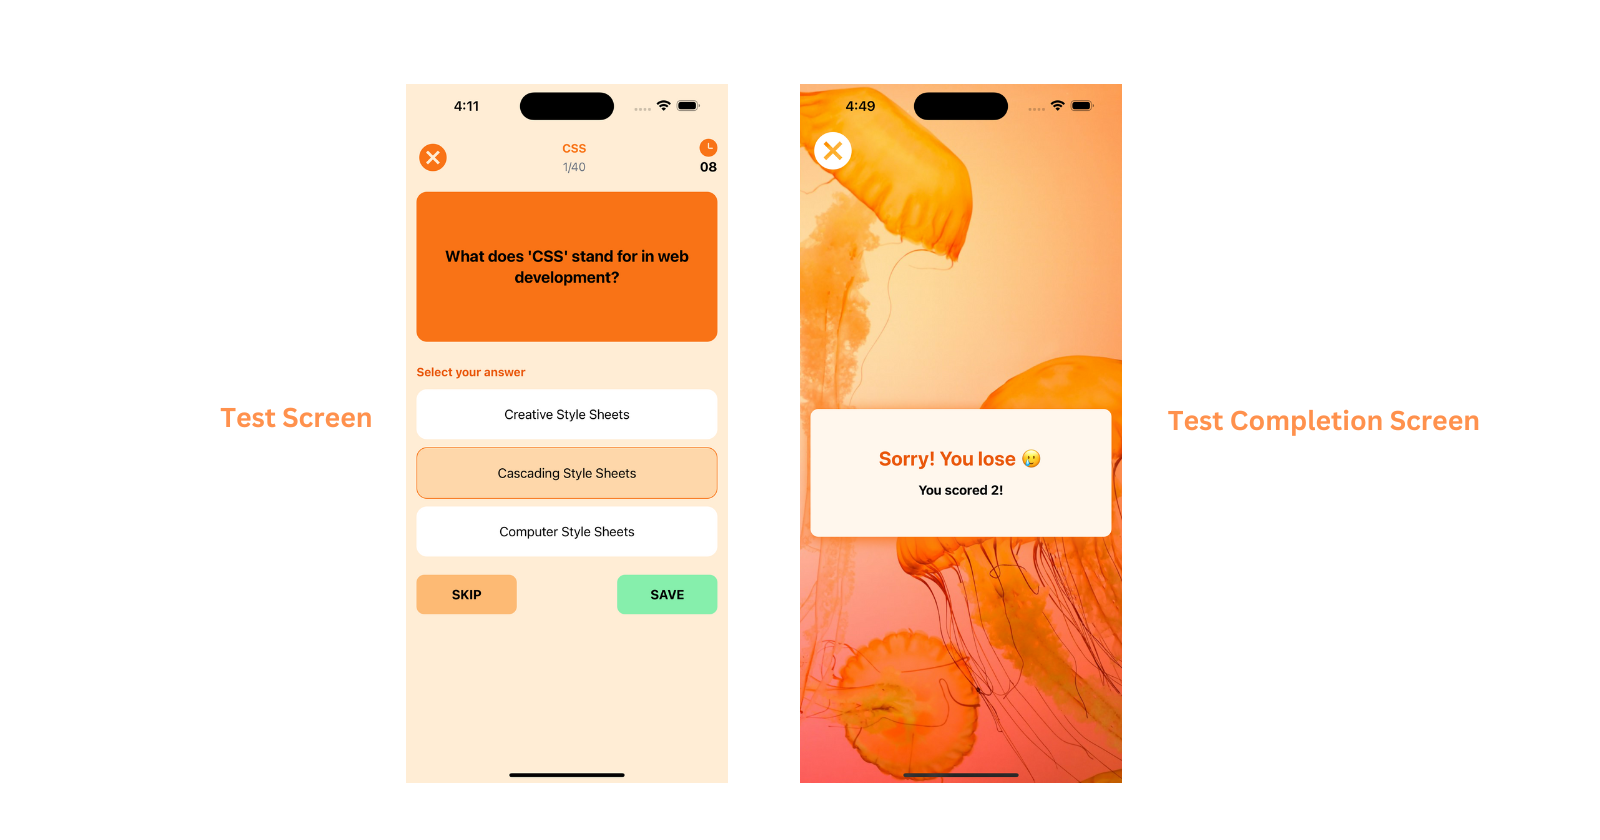
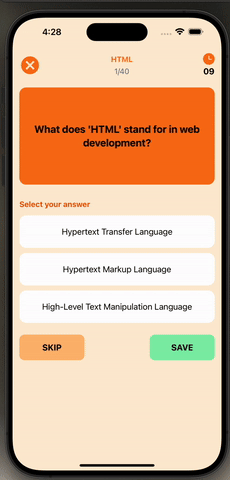
The Quiz Screen
The Quiz Screen displays a timer that countdowns from 15 seconds before moving to the next question. It shows the question, its category, available options, the Skip and Next buttons, and a cancel icon.
Create a similar screen to the one shown below. You can use this as a guide.
 The Quiz Screen
The Quiz Completion Screen
It displays the user's score after completing a test.
import {
    SafeAreaView,
    Text,
    Pressable,
    View,
    ImageBackground,
} from "react-native";
import { MaterialIcons } from "@expo/vector-icons";
import { useLocalSearchParams } from "expo-router";

export default function CompletedScreen() {
    const { score } = useLocalSearchParams();

    return (
        <View className='flex flex-1 bg-orange-400'>
            <ImageBackground
                source={{ uri: "https://source.unsplash.com/NAP14GEjvh8" }}
                className='flex-1 p-4'
            >
                <SafeAreaView />
                <Pressable onPress={() => router.replace("/(tabs)/")}>
                    <MaterialIcons name='cancel' size={60} color='white' />
                </Pressable>

                <View className='flex-1 flex items-center justify-center'>
                    <View className='bg-orange-50 w-full py-[50px] rounded-xl p-4 flex items-center justify-center shadow-lg shadow-orange-500'>
                        <Text className='text-3xl text-orange-600 font-bold mb-4'>
                            {Number(score) > 20 ? "Congratulations🥳" : "Sorry! You lose 🥲"}
                        </Text>
                        <Text className='font-bold text-xl'>You scored {score}!</Text>
                    </View>
                </View>
            </ImageBackground>
        </View>
    );
}
The code snippet above accepts the user's score as a parameter after completing the quiz and displays the score to the user.
How to Generate Quiz Questions and Answers from ChatGPT
When building a quiz application, the first question is: how do you get the questions and options for the application? You can either create a list of questions or search for a suitable public API.
However, I'll guide you through creating a list of questions and options in JSON format using ChatGPT. Use this prompt to generate questions and answers from ChatGPT:
Generate 25 distinct questions on and ensure they are in JSON format containing an id, category which is , a question attribute containing the question, an options array of 3 options, and an answer property.
The prompt returns a JSON result containing the questions and answers. You can host them on GitHub or save them to a database.
The questions and answers I'm using in this mobile application are available on GitHub. Feel free to clone or copy the files.
Once your questions and answers are ready, you can connect the application to Supabase.
How to Add Supabase to React Native
Supabase is an open-source Firebase alternative that enables you to create secured and scalable software applications within a few minutes.
It provides a secured Postgres database, a complete user management system that handles various forms of authentication (including email and password, email sign-in, and social authentication), a file storage system that lets you store and serve files of any size, real-time communication, and many other features.
In this tutorial, I'll walk you through the following:
- How to authenticate users and control access to some application screens with Supabase.
- How to save the users' scores to the database to enable you to rank them based on their scores.
First, you need to install Supabase and its required dependencies. You can do that with the following commands:
npm install @supabase/supabase-js
npm install react-native-elements @react-native-async-storage/async-storage react-native-url-polyfill
npx expo install expo-secure-store
Create a supabase.ts file within your project and copy the code snippet below into the file to initiate Supabase:
import "react-native-url-polyfill/auto";
import * as SecureStore from "expo-secure-store";
import { createClient } from "@supabase/supabase-js";

const ExpoSecureStoreAdapter = {
    getItem: (key: string) => {
        return SecureStore.getItemAsync(key);
    },
    setItem: (key: string, value: string) => {
        SecureStore.setItemAsync(key, value);
    },
    removeItem: (key: string) => {
        SecureStore.deleteItemAsync(key);
    },
};

const supabaseUrl = "YOUR_REACT_NATIVE_SUPABASE_URL";
const supabaseAnonKey = "YOUR_REACT_NATIVE_SUPABASE_ANON_KEY";

export const supabase = createClient(supabaseUrl, supabaseAnonKey, {
    auth: {
        storage: ExpoSecureStoreAdapter as any,
        autoRefreshToken: true,
        persistSession: true,
        detectSessionInUrl: false,
    },
});
Next, visit the Supabase homepage, sign in, and create a new organization and project.
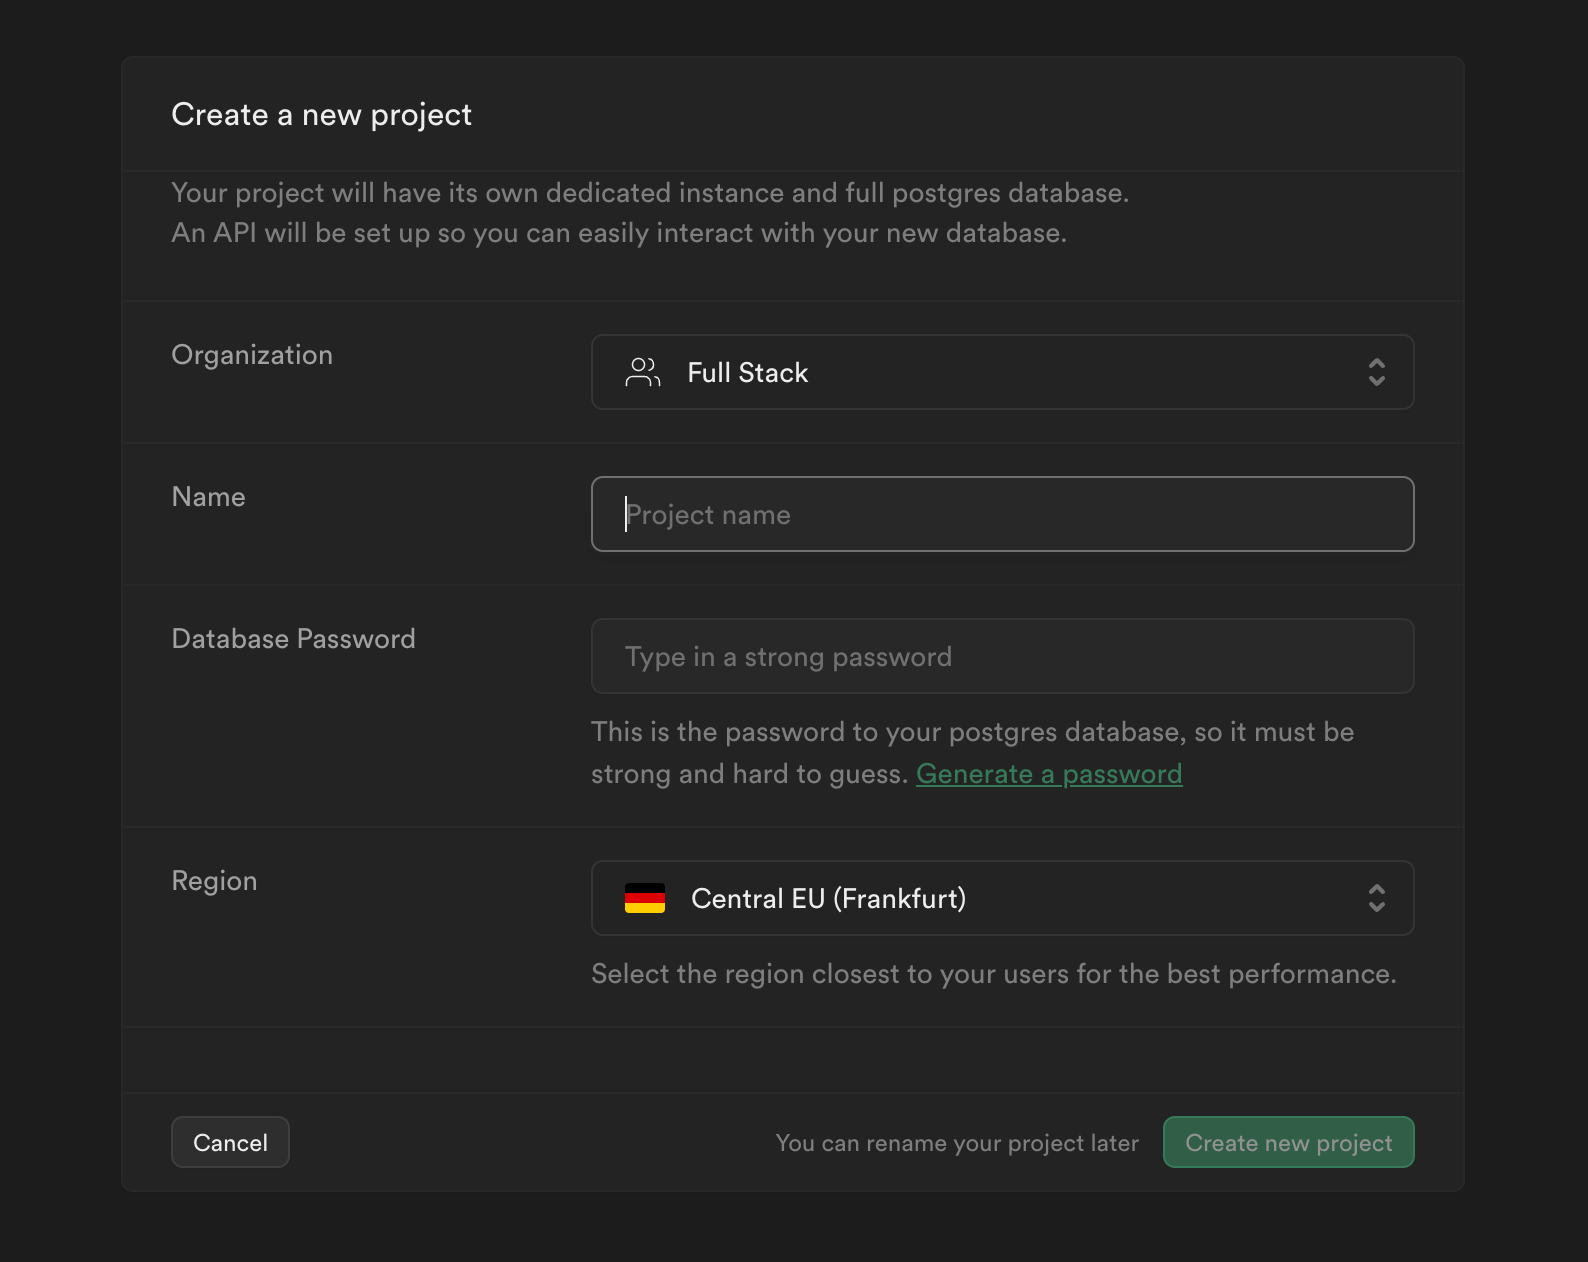 Create a new Supabase project
Click the Settings icon on the sidebar and select API to copy the project URL and the public API key.
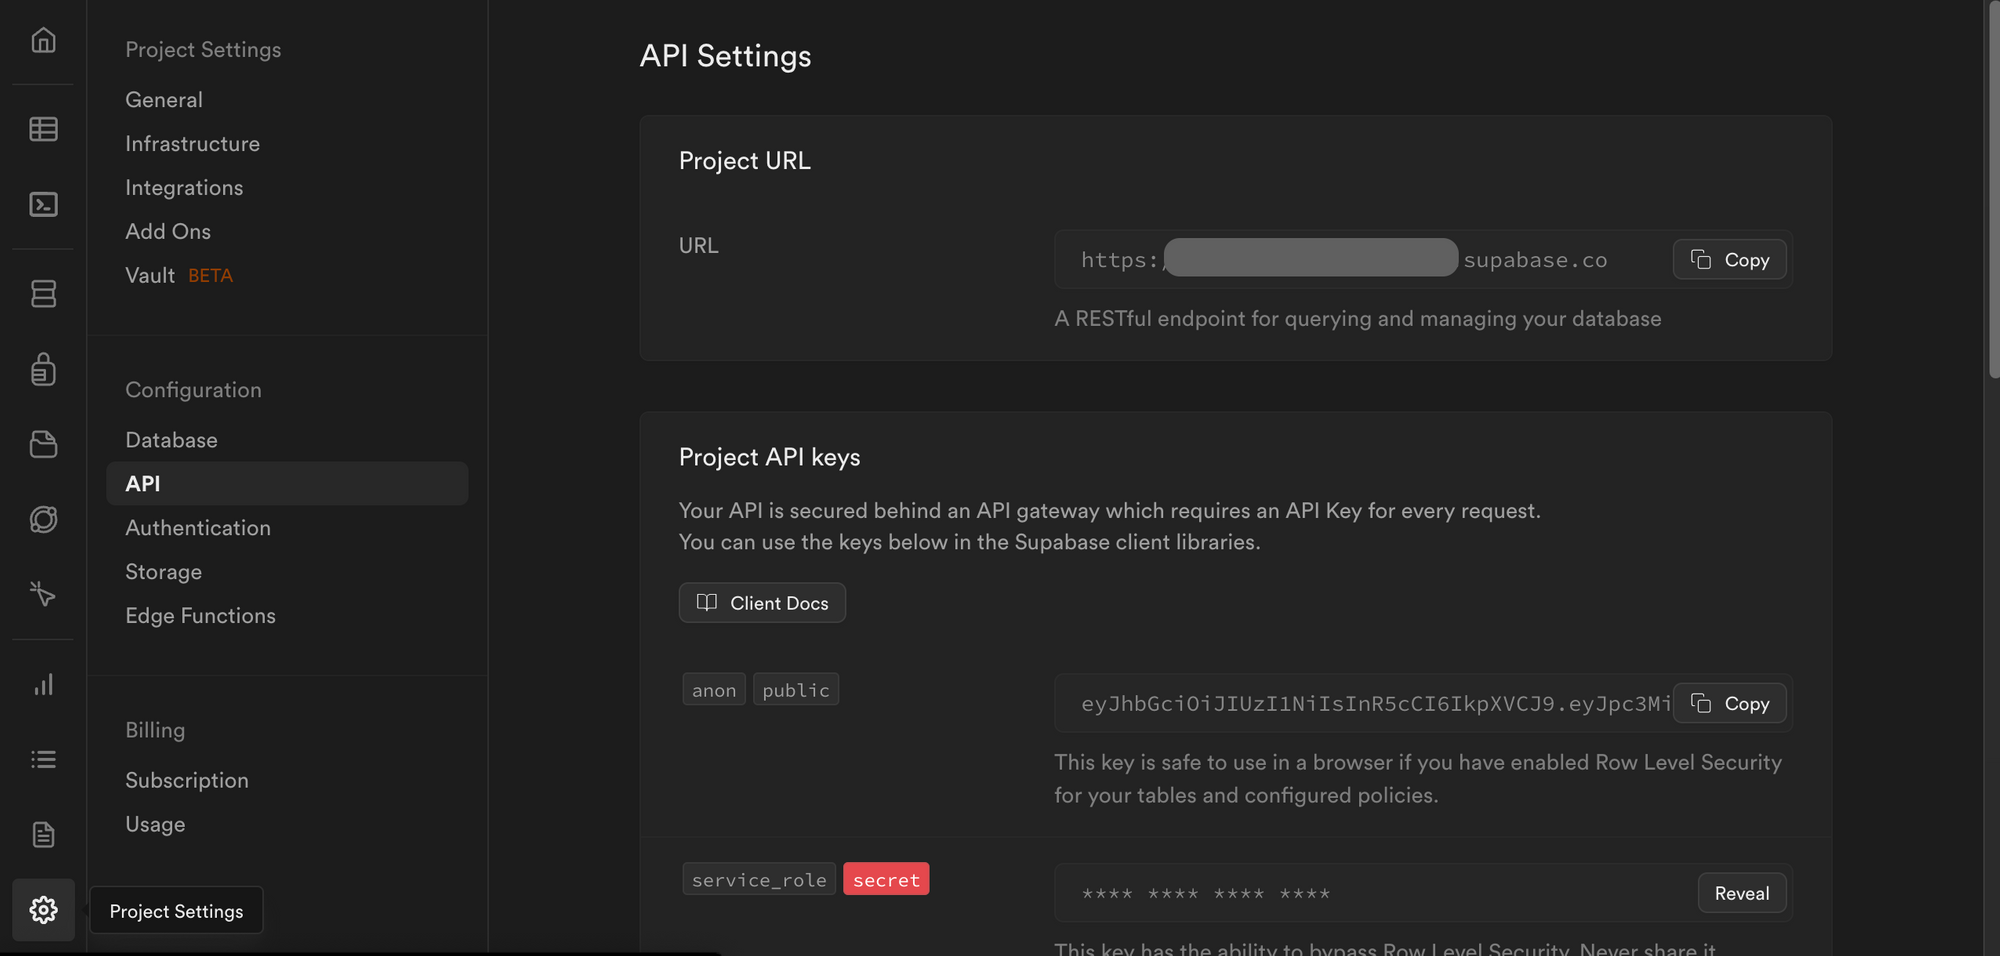 Supabase API settings containing project credentials
Create a .env.local file and copy the credentials into the variables. Update the supabase.ts file to use the Supabase URL and API key.
EXPO_PUBLIC_API_URL=<YOUR_SUPABASE_URL>
EXPO_PUBLIC_API_KEY=<YOUR_SUPABASE_API_KEY>
Congratulations! You can now interact with Supabase from your application and access various features such as authentication, database, file storage, and so on.
How to Add Supabase Authentication to React Native Applications
Supabase offers various forms of authentication. But we only need the email and password method of authentication for this application.
How to sign up new users
The code snippet below accepts an email and a password and creates an account for the user. Otherwise, it returns an error if any of the credentials is invalid.
//👇🏻 import supabase from supabase file
import { supabase } from "../lib/supabase";

//👇🏻 sign up function
const handleRegister = async () => {
    if (!email.trim() || !password.trim())
        return Alert.alert("Error", "Please fill in all fields");
    const { error } = await supabase.auth.signUp({ email, password });
    if (error) return Alert.alert("Error", error.message);
    router.replace("/");
};
With the supabase.auth.signUp() function, Supabase handles the authentication process. If successful, the user is redirected to the login page. Otherwise, it displays an error message.
How to sign in existing users
This function allows existing users to access the application. It accepts the user's email and password and logs the user into the application.
//👇🏻 import supabase from supabase file
import { supabase } from "../lib/supabase";

//👇🏻 register function
const handleLogin = async () => {
    if (!email.trim() || !password.trim())
        return Alert.alert("Error", "Please fill in all fields");
    const { error } = await supabase.auth.signInWithPassword({ email, password });
    if (error) return Alert.alert("Error", error.message);
    router.replace("/(tabs)/");
};
The supabase.auth.signInWithPassword() function validates the user's email and password and redirects the user to the Dashboard screen. Otherwise, it returns the necessary authentication error.
How to log users out of the application
Supabase also allows users to sign out of the application. You can execute this function when the user clicks a button within the Profile page.
//👇🏻 import supabase from supabase file
import { supabase } from "../lib/supabase";

//👇🏻 sign out function
const handleSignOut = async () => {
    try {
        const { error } = await supabase.auth.signOut();
        if (error) throw error;
    } catch (error) {
        console.log(error);
    }
};
How to protect screens from unauthenticated users
You've been able to add the sign-up, sign-in, and log-out functionalities to the React Native application. But the Dashboard and other screens containing sensitive data are still accessible to unauthenticated users.
How do we fix this?
In this section, I'll walk you through how to protect screens from unauthorized users using the React Context API.
The React Context API allows us to pass data through the component tree without needing to pass props down manually at every level.
Create an AuthProvider.tsx file. This is where the data to be passed down the application screens is stored. Copy the code snippet below into the file:
import { supabase } from "./supabase";
import { Session } from "@supabase/supabase-js";
import {
    PropsWithChildren,
    createContext,
    useContext,
    useEffect,
    useState,
} from "react";

type AuthData = {
    session: Session | null;
    loading: boolean;
};

//👇🏻 data to be passed down the components
const AuthContext = createContext<AuthData>({
    session: null,
    loading: true,
});

export default function AuthProvider({ children }: PropsWithChildren) {
    const [session, setSession] = useState<Session | null>(null);
    const [loading, setLoading] = useState(true);

    //👇🏻 fetches the current user's session
    useEffect(() => {
        const fetchSession = async () => {
            const {
                data: { session },
            } = await supabase.auth.getSession();
            setSession(session);
            setLoading(false);
        };

        fetchSession();
        supabase.auth.onAuthStateChange((_event, session) => {
            setSession(session);
            setLoading(false);
        });
    }, []);

    return (
        <AuthContext.Provider value={{ session, loading }}>
            {children}
        </AuthContext.Provider>
    );
}
//👇🏻 custom hook for using the context (data)
export const useAuth = () => useContext(AuthContext);
The code snippet retrieves the current user's session. If the user is signed in, the session and loading state variables are updated to show that the user is active, and they are passed into other components within the application.
The useAuth custom hook allows you to access the state variables (session and loading) within the application screens.
To access the context (data) available within the application screens, wrap the entire application with the AuthProvider. So now, update the RootLayoutNav component within the app/_layout.tsx file as shown below:
import AuthProvider from "../lib/AuthProvider";

function RootLayoutNav() {
    return (
        <AuthProvider>
            <Stack screenOptions={{ headerShown: false }}>
                <Stack.Screen name='(tabs)' />
                <Stack.Screen name='(stack)' />
                <Stack.Screen name='index' />
                <Stack.Screen name='register' />
            </Stack>
        </AuthProvider>
    );
}
Congratulations! You've successfully set up the context. Next, how do we read the context and ensure that only authenticated users can view some of the application screens?
You can do this using the custom useAuth hook. For example, you can protect the Tabs screens via the (tabs)/_layout.tsx file.
import { Tabs, Redirect } from "expo-router";
import { useAuth } from "../../lib/AuthProvider";
import { ActivityIndicator } from "react-native";

export default function TabScreen() {
    const { session, loading } = useAuth();

    if (!session) {
        return <Redirect href='/' />;
    }

    if (loading) {
        return <ActivityIndicator size='large' color='#f97316' />;
    } else {
        return (
            <Tabs
                screenOptions={{
                    tabBarActiveTintColor: "#f97316",
                    tabBarInactiveTintColor: "gray",
                    tabBarShowLabel: false,
                    headerShown: false,
                    tabBarStyle: {
                        backgroundColor: "#ffedd5",
                        borderTopColor: "#ffedd5",
                    },
                }}
            >
                {/**-- screens--*/}
            </Tabs>
        );
    }
}
The code snippet above checks if there is a session for the current user. If null, the application redirects the user to the login screen. If the application is yet to determine the user's status, it displays a loading icon.
How to Interact with the Supabase Database
In this section, I'll walk you through creating the database for the mobile application. You'll learn how to store and retrieve the user's scores and rank them based on their total score.
Before we proceed, note that the application calculates the user's score after answering each question on the test screen. Upon completion, the user's score is retrieved and displayed on the test completion screen.
const handleSave = () => {
    //👇🏻 checks if the user has not completed the test
    if (count < questions.length - 1) {
        //👇🏻 updates the user's score if the selected answer is correct
        if (questions[count].answer === userAnswer) {
            setUserScore((userScore) => userScore + 1);
        }
        //👇🏻 change the question, refresh the selected answer and time
        setCount((count) => count + 1);
        setSelectedBox(null);
        setTime(15);
    } else {
        //👇🏻 test completed
        router.push({
            pathname: "/(stack)/completed",
            params: { score: userScore },
        });
    }
};
Within your Supabase project, select Table Editor from the sidebar menu and create a new table containing the following columns:
id– contains a unique ID for each row of data.created_at– represents the time the data was created.attempts– a text array containing the score and date attributes.total_score– represents a user's cumulative score. We'll rank users using this scoreuser_id– a unique ID used to identify each user's data.
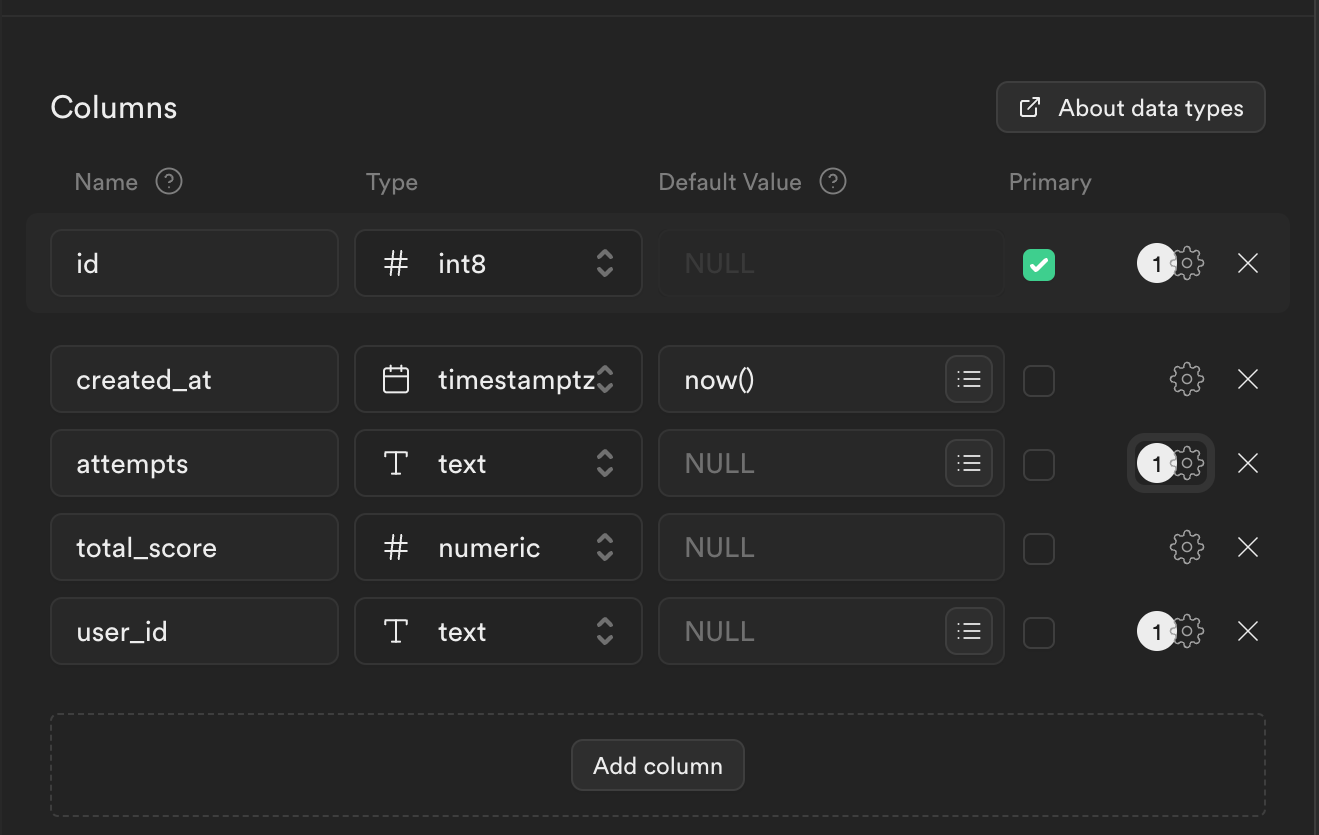 The Table Columns
Finally, you can add a Row Level Security that allows only authenticated users interact with the database.
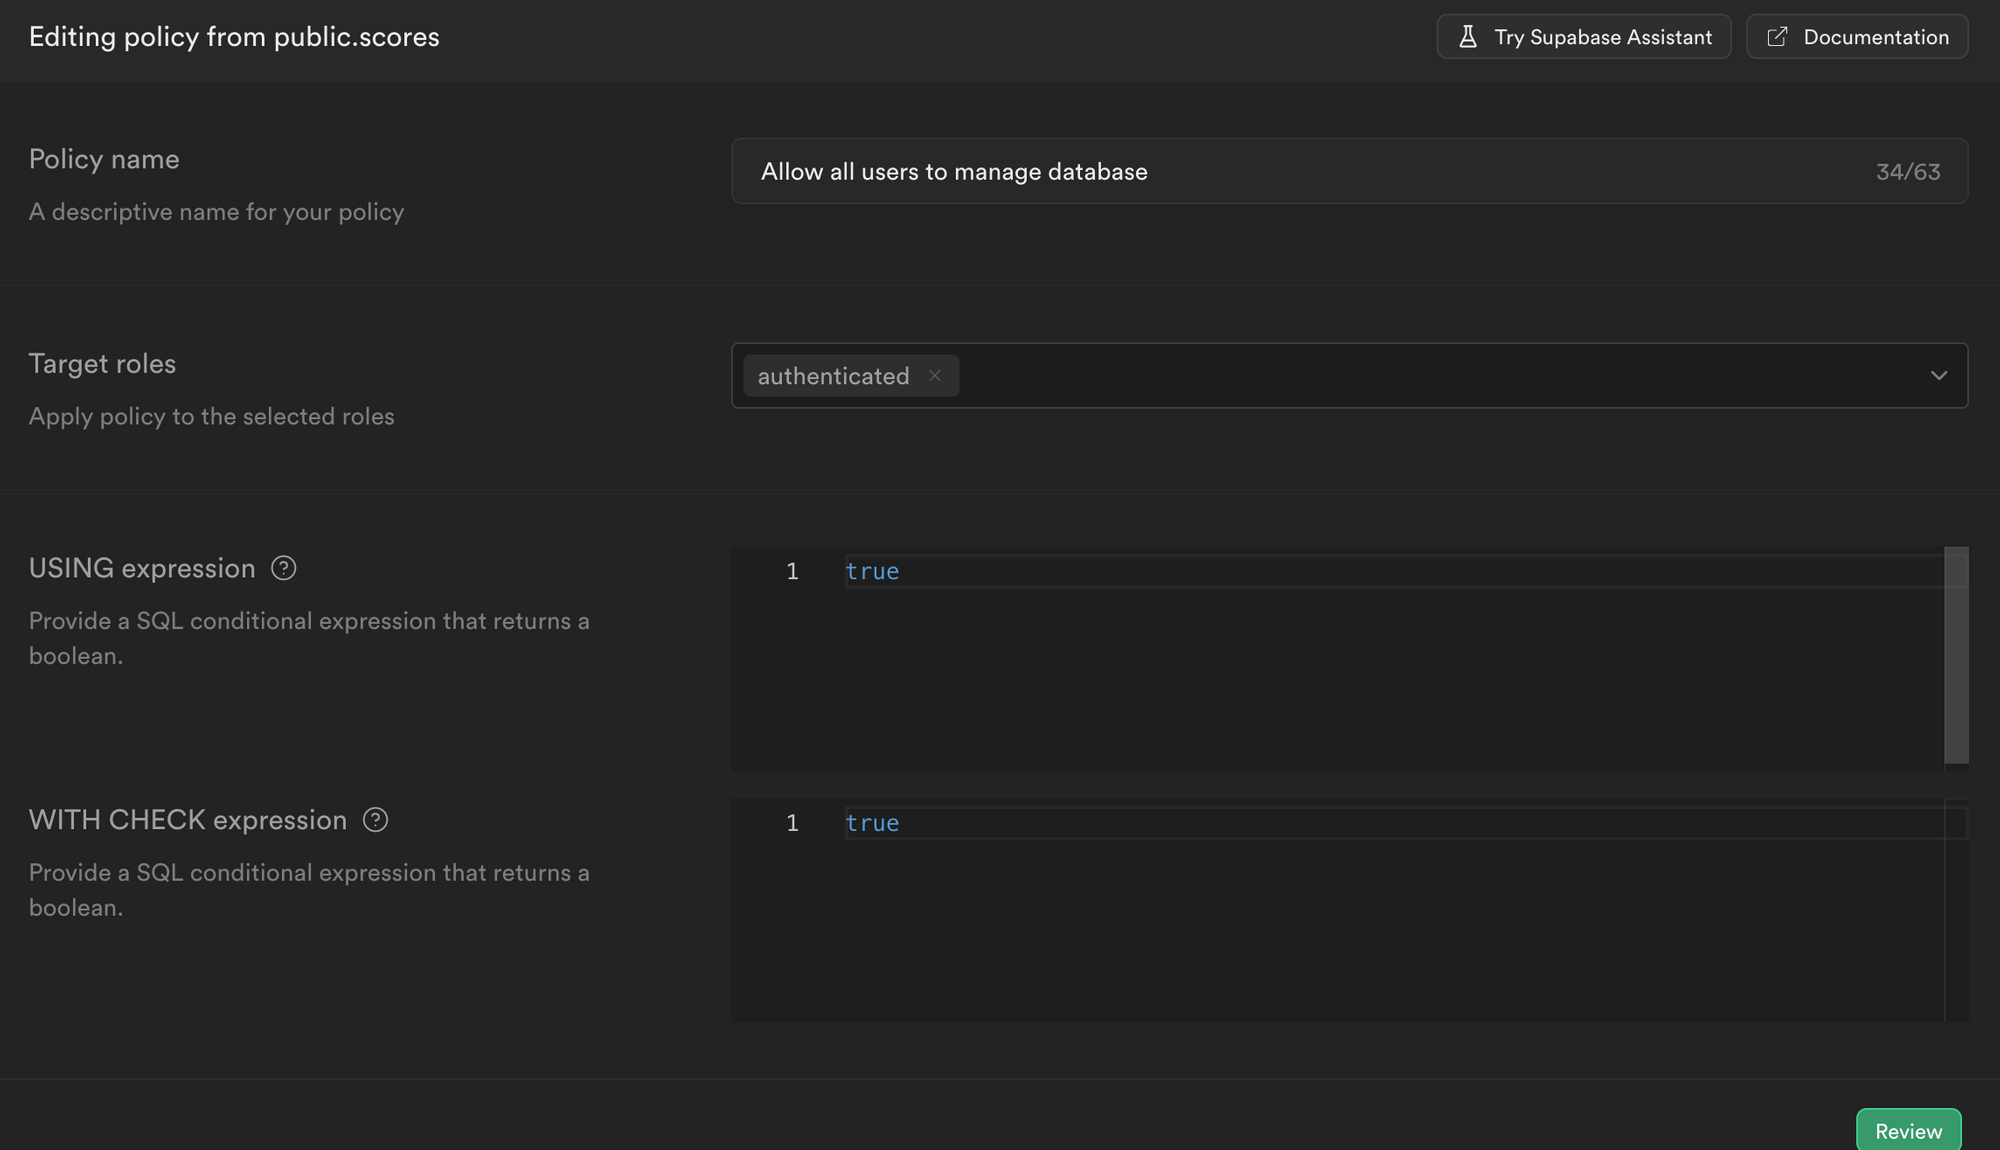 The Table Row Level Security Policy
How to save the user's score to the database
Before you can save a user's score to the database, you need to check if the user's data already exists – meaning the user has taken a test before. If true, you need to update the user's score with the latest test score. Otherwise, add the data to the database.
The code snippet below accepts the user's score and user's ID (from the session data) and saves the user's score to Supabase.
export const saveScore = async (userScore: number, userID: string) => {
    try {
        //👇🏻 check if the user data exists
        const { data, error } = await supabase
            .from("scores")
            .select()
            .eq("user_id", userID);
        if (error) throw error;

        //👇🏻 if the user data does not exist, insert a new one
        if (error || !data.length) {
            const { data, error } = await supabase
                .from("scores")
                .insert({
                    attempts: [{ score: userScore, date: getCurrentDate() }],
                    total_score: userScore,
                    user_id: userID,
                })
                .single();
            if (error) throw error;
        } else {
            //👇🏻 if the user data exists, update the attempts and total_score
            const { data: updateData, error } = await supabase
                .from("scores")
                .update({
                    attempts: [
                        ...data[0].attempts,
                        { score: userScore, date: getCurrentDate() },
                    ],
                    total_score: data[0].total_score + userScore,
                })
                .eq("user_id", userID);
            if (error) throw error;
        }
    } catch (err) {
        console.log(err);
    }
};
How to retrieve data from Supabase
Recall that you need to rank the users based on their scores on the Leaderboard screen and retrieve the user's attempts on the Profile screen.
The code snippet below accepts a user's ID and retrieves the attempts and total score from the database.
export const getUserAttempts = async (userID: string) => {
    try {
        const { data, error } = await supabase
            .from("scores")
            .select("attempts, total_score")
            .eq("user_id", userID);
        if (error) throw error;
        return { attempts: data[0].attempts, total_score: data[0].total_score };
    } catch (err) {
        return { attempts: "", total_score: 0 };
    }
};
The code snippet below retrieves the top ten users from the database based on their score.
export const getLeaderBoard = async () => {
    try {
        const { data, error } = await supabase
            .from("scores")
            .select("total_score, user_id")
            .order("total_score", { ascending: false })
            .limit(10);
        if (error) throw error;
        return data;
    } catch (err) {
        return null;
    }
};
Congratulations! You've successfully completed the project for this tutorial.
Conclusion
In this tutorial, you’ve learned how to:
- build React Native mobile applications with Expo,
- style your mobile applications with Tailwind CSS,
- create stack and tab screen navigations using Expo Router,
- use Supabase and leverage its authentication and database features to build full-stack applications.
Supabase is an amazing tool that enables you to build a full-stack software application with no hassle. If you are looking forward to shipping great software products or side projects faster, consider using Supabase.
Expo also saves us from the complexities of setting up and developing mobile applications using the React Native CLI. It enables you to focus more on building your applications while it handles the necessary configurations, including deployment.
Feel free to customise the application using ChatGPT to generate questions and answers tailored to any niche or topic.
The source code for this tutorial is available in this GitHub repository.
Thank you for reading!