
Pokemon is a Japanese media franchise consisting of video games, animated series and films, a trading card game, and other related media.
In this blog, we will be building with a Pokemon GraphQL API that gives us data about different Pokemons.
We will be using Apollo and GraphQL to handle the data fetching, and React for building our front-end application.
No worries if you don't know these technologies, I will be walking you through the basics as you read on.
Prerequisites
You should have these in your computer to follow along:
- Nodejs v18+
- A code editor
- A web browser
Let's create our React app.
React Application Setup
To create your React app, navigate to your terminal, and use the Command Prompt. Open your Command Prompt and choose your preferred location for creating your React project. Let's go with Desktop.
cd Desktop
The above command will navigate to your Desktop.
npm create vite@latest pokemon-app -- --template react
npm create vite@latest will start to build a new project using Vite. But we attached the name of our project (pokemon-app) and the technology or framework our app will be using (-- -- template react).
You can set another template like svelte, vanilla or vue and the project will be created using that framework. Read more about Vite on its official website.
After the Vite installation, run the following commands:
cd pokemon-app
npm install
npm run dev
We'll use the commands above to finish the React setup.
Run the first command, cd pokemon-app, to navigate to the pokeman-app folder.
Run code . to open the folder in your code editor.
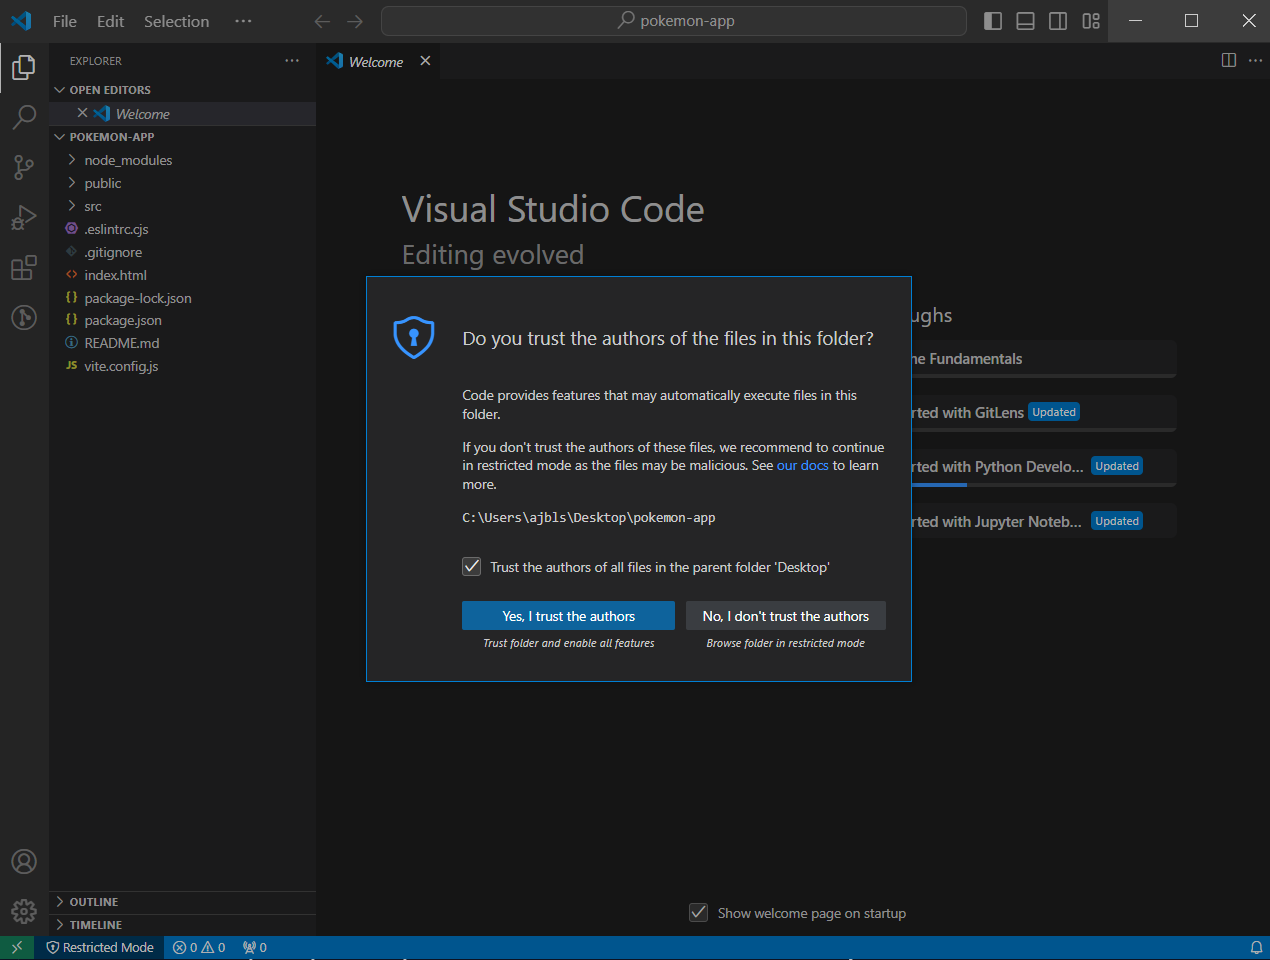 modal displaying over VSCode to accept that you trust the authors of the files opened in VSCode
Mark the trust the author checkbox if that pops up.
Open your code editor's terminal. If you are running VSCode on Windows, the shortcut is `Ctrl + `` .
Run the other 2 commands in the terminal one after the other.
npm install
npm run dev
Your project should be running in the browser now.
We will be managing our data fetching using GraphQL and Apollo.
How to Use GraphQL and Apollo
GraphQL is a query language for APIs and a runtime for fulfilling queries with your existing data. It allows you to request only the data you need in your application and nothing more, making it very efficient and flexible.
Apollo is a state management library that allows you to manage local and remote data with GraphQL. It can be used to fetch, cache, and modify application data, all while automatically updating your UI.
Let's install the packages you need.
Installing Packages
Run the command below in your terminal to install the Apollo client.
npm install @apollo/client
Navigate to your main.jsx file and import these:
import React from "react";
import ReactDOM from "react-dom/client";
import App from "./App.jsx";
import {
  ApolloProvider,
  ApolloClient,
  InMemoryCache,
} from "@apollo/client";
import "./index.css";
You have imported React and ReactDOM for DOM manipulation.
ApolloClient is responsible for managing your application's data fetching and state management. It handles sending GraphQL queries and mutations to your GraphQL server and caching the results.
ApolloProvider will be used to wrap your React application to provide the Apollo Client instance to all your components so that your application can access data fetched through Apollo Client.
InMemoryCache is a cache implementation to store the results of GraphQL queries in memory for efficient access and retrieval.
You have also imported index.css to style your application.
How to Create an Apollo Client
const client = new ApolloClient({
  uri: "https://graphql-pokemon2.vercel.app/",
  cache: new InMemoryCache(),
});
The code above creates a new instance of ApolloClient with the some configurations:
uri: This specifies the URL of your GraphQL API endpoint. This is the endpoint where your Apollo Client will send GraphQL queries and mutations.cache: This configures the cache implementation for Apollo Client to use an in-memory cache to access data and store the result of GraphQL queries, reducing the need to re-fetch data from the server.
You can now wrap your <App /> component with ApolloProvider:
ReactDOM.createRoot(document.getElementById("root")).render(
  <React.StrictMode>
    <ApolloProvider client={client}>
      <App />
    </ApolloProvider>
  </React.StrictMode>
);
Note that client props was also passed to provide your application with ApolloClient configuration.
Go to your App.jsx component and input this:
import React from "react";
import { PokemonsContainer } from "./components/PokemonsContainer";

export default function App() {
  return (
    <main>
      <PokemonsContainer />
    </main>
  );
}
You imported React and PokemonsContainer will be created. The PokemonsContainer component was wrapped in main tag and will be rendered when the component is pasted in the DOM.
Let's create the PokemonsContainer component in a file located in components folder. That is:
📂 src/components/PokemonsContainer.jsx
Pokemons Container Component
import React from "react";
import { useQuery } from "@apollo/client";
import { Pokemon } from "../components/Pokemon";
import { GET_POKEMONS } from "../graphql/get-pokemons";
The useQuery from @apollo/client is used for executing queries in an Apollo application. To do that, useQuery() is called and a GraphQL query string is passed as a argument. When your component renders, useQuery returns an object from Apollo Client that contains loading, error, and data properties that you can use to render your UI.
Pokemon component was imported to render a user interface for a Pokemon, this will be built shortly.
GET_POKEMONS was also imported. This will contain a GraphQL query.
After importing the above functions, continue building your page.
export function PokemonsContainer() {
  const { loading, error, data } = useQuery(GET_POKEMONS, {
    variables: { first: 5 },
  });

  if (loading) return <p>Loading...</p>;
  if (error) return <p>Error: {error.message}</p>;

  const pokemons = data?.pokemons || [];
  return (
    <div className="container">
      {pokemons &&
        pokemons.map((pokemon) => (
          <Pokemon key={pokemon.id} pokemon={pokemon} />
        ))}
    </div>
  );
}
As mentioned earlier, useQuery returns an object from Apollo Client that contains loading, error, and data properties. They are destructured here so you can access them in the page.
Notice that we're providing a configuration option (variables) to the useQuery hook. { variables: { first: 5 } } was also passed as the second argument. The variables option is an object that contains all of the variables we want to pass to our GraphQL query. In this case, we passed an object { first: 5 } to specify that we want the first five Pokemons.
If the query is still loading, <p>Loading...</p> is returned to signify the user while <p>Error: {error.message}</p> will be returned if there is an error.
The pokemons constant was created to hold the value of the Pokemons property of the data object. If data.pokemons is not available, the pokemons constant will be an empty array.
A div is returned with a classname of container which checks if pokemons is available and maps the array over the Pokemon component.
Let's create the Pokemon component:
📂src/components/Pokemon.jsx
Pokemon Component
import React from "react";

export function Pokemon({ pokemon }) {
  return (
    <div className="pokemon">
      <div className="pokemon__name">
        <p>{pokemon.name}</p>
      </div>
      <div className="pokemon__meta">
        <span>{pokemon.maxHP}</span>
        <span>{pokemon.maxCP}</span>
      </div>
      <div className="pokemon__image">
        <img src={pokemon.image} alt={pokemon.name} />
      </div>
      <div className="pokemon__attacks">
        {pokemon.attacks.special.slice(0, 3).map((attack) => (
          <span key={`${attack.name}-${attack.damage}`}>{attack.name}</span>
        ))}
      </div>
    </div>
  );
}
The structure of an instance of a Pokemon is defined here with the classname for styling. The name, maxHP, maxCP, image and attacks array will be rendered.
Let's create the GET_POKEMONS GraphQL query.
📂src/graphql/get-pokemons
GraphQL Query
import gql from "graphql-tag";

export const GET_POKEMONS = gql`
  query pokemons($first: Int!) {
    pokemons(first: $first) {
      id
      name
      image
      maxHP
      maxCP
      attacks {
        special {
          name
          damage
        }
      }
    }
  }
`;
You imported gql from graphql-tag and created a GraphQL query named GET_POKEMONS.
The pokemons query function was wrapped in strings for the gql function to parse them into query documents.
$first: Int! means that your query is expecting a variable called first, which is an integer, and the ! symbol after the Int means that the variable is required.
Recall that we created the variables object in the PokemonsContainer component, it's here below.
 const { loading, error, data } = useQuery(GET_POKEMONS, {
   variables: { first: 5 },
 });
pokemons(first: $first) was also declared. $first will be assigned to 5 here (we passed in 9 in the above code snippet). Thus, the array will contain only 5 objects. Each object will contain id, name, image, maxHP, maxCP, and attacks object which will contain the special object containing name and damage.
The GraphQL server might contain more properties but will only return the properties listed above. That is one of the cool functionalities of GraqhQL – it gives you only the data you request for.
Styling our Application
Your index.css should contain this:
/* RESETS
=========================================== */
html {
  -webkit-box-sizing: border-box;
  box-sizing: border-box;
}

*,
*:before,
*:after {
  -webkit-box-sizing: inherit;
  box-sizing: inherit;
}

body {
  margin: 20px 0;
  padding: 0 20px;
  line-height: 1;
  font-family: "Segoe UI", Tahoma, Geneva, Verdana, sans-serif;
  color: #202020;
  background-color: #fbfbfb;
  font-smooth: always;
  -webkit-font-smoothing: antialiased;
  -moz-osx-font-smoothing: grayscale;
}

/* POKEMON APPLICATION
=========================================== */
.container {
  display: flex;
  max-width: 80%;
  margin: auto;
  height: 100vh;
  justify-content: space-between;
  align-items: center;
  gap: 10px;
}

.container p {
  margin: 0;
}

.container .pokemon {
  width: 20%;
  background-color: #fff;
  background-clip: border-box;
  border: 1px solid rgba(0, 0, 0, 0.125);
  border-radius: 0.25rem;
  box-shadow: 0 0.125rem 0.25rem rgba(0, 0, 0, 0.075);
  overflow: hidden;
  /* margin: 5px; */
}

.container .pokemon__name {
  background-color: #ecd018;
  text-align: center;
  padding: 10px;
}

.container .pokemon__name p {
  text-transform: uppercase;
  font-weight: bold;
  color: white;
  letter-spacing: 4px;
  text-shadow: 0px 1px 2px rgba(0, 0, 0, 0.4);
}

.container .pokemon__image {
  padding: 20px;
  min-height: 300px;
  display: flex;
  align-items: center;
  justify-content: center;
}

.container .pokemon__image img {
  max-width: 100%;
  height: auto;
}

.container .pokemon__attacks {
  display: flex;
  padding-left: 10px;
  padding-right: 10px;
  justify-content: space-between;
}

.container .pokemon__attacks span {
  width: 32%;
  background-color: #f16820;
  border-radius: 3px;
  padding: 7px;
  font-weight: 700;
  color: #fff;
  padding-left: 10px;
  padding-right: 10px;
  font-size: 12px;
  margin-bottom: 10px;
  word-wrap: break-word;
  text-align: center;
  line-height: 15px;
}

.container .pokemon__meta {
  display: flex;
  justify-content: space-between;
  margin-top: 10px;
  padding: 0 10px;
}

.container .pokemon__meta span {
  color: white;
  text-shadow: 0px 1px 2px rgba(0, 0, 0, 0.4);
  background-color: #7bb7b7;
  font-weight: bold;
  margin: 0;
  padding: 5px 20px;
  border-radius: 5px;
}
All things done right, you should have this in your browser:
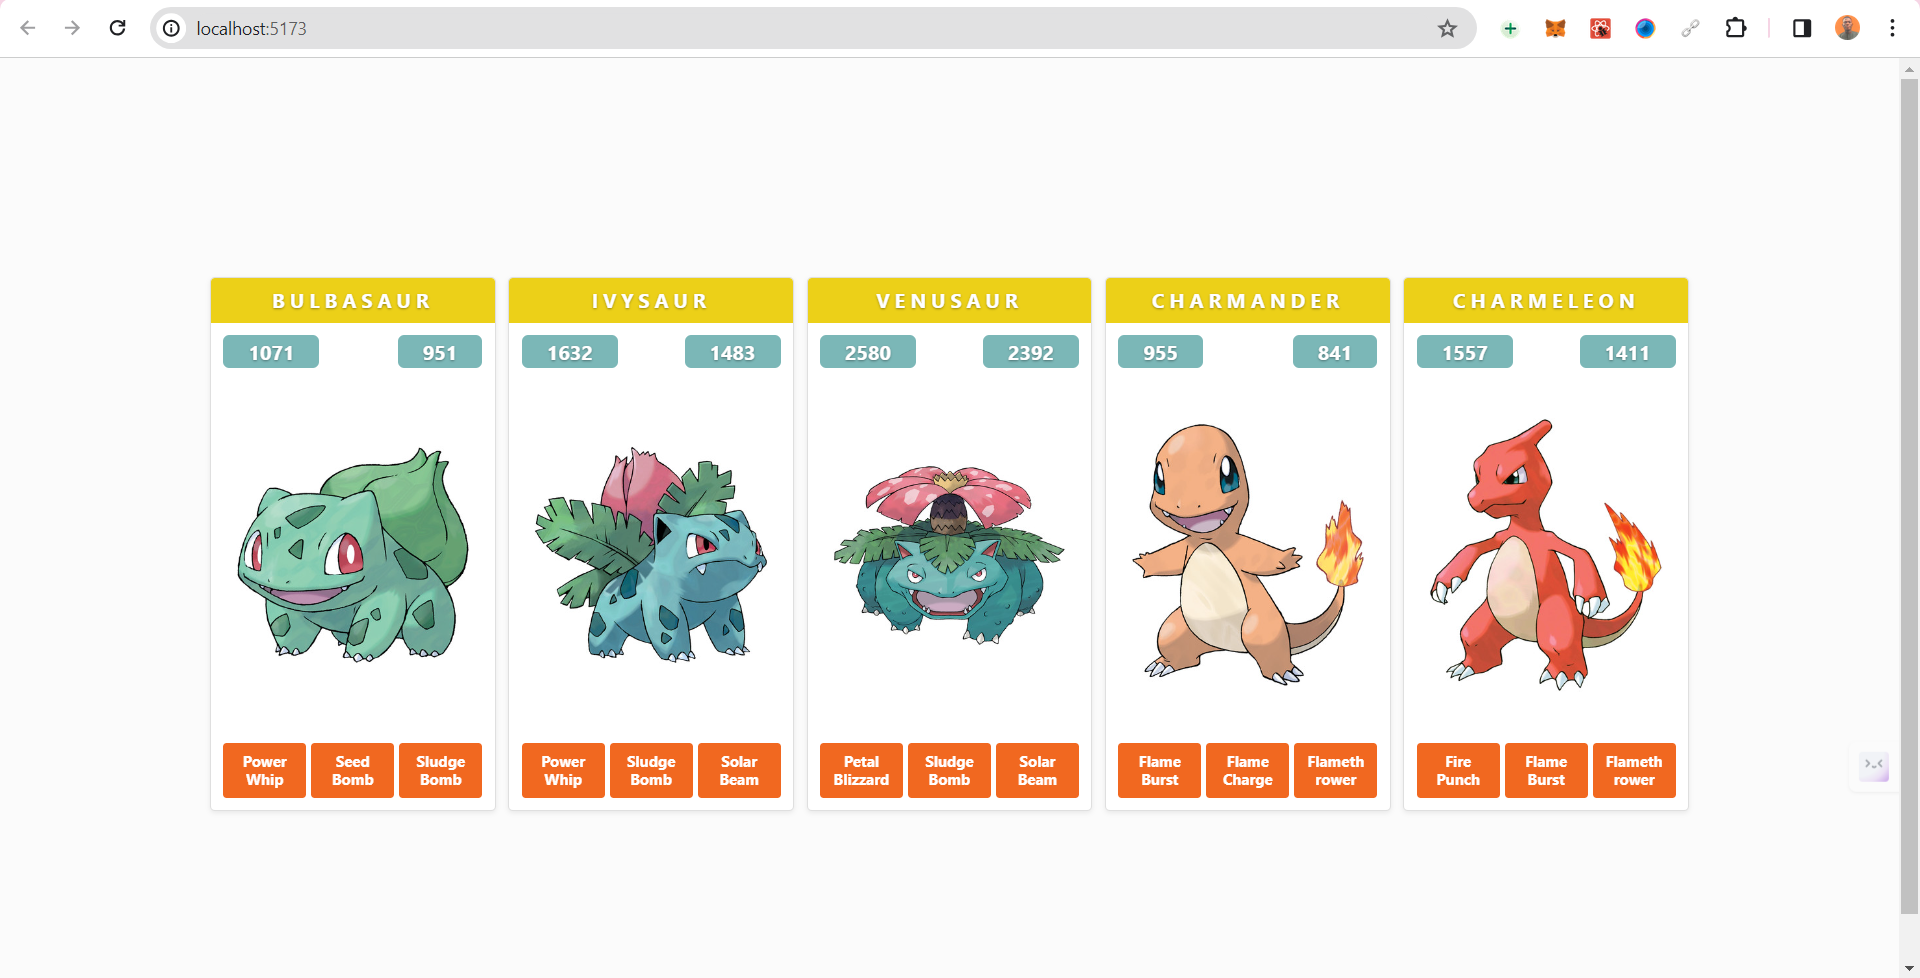 a picture showing the five pokemons data in the browser
You can get the GitHub code here: https://github.com/segunajibola/pokemon-graphql
You can also view the live site hosted on Vercel here: pokemonsapp.vercel.app
Check my portfolio of projects: segunajibola.com
Conclusion
That will be all. I hope you found value here as you learn more about the web.
If you enjoyed this article and want to see more content related to JavaScript and web development, then follow me here, Twitter (X) or connect on LinkedIn. I'd be happy to count you as one of my ever-growing group of awesome friends on the internet.
You can also join my WhatsApp developer community and OpenSource community of 330+ developers learning and building cool projects.
If you also want to support me, you can also buy me a cup of coffee.
Thanks and bye. 👋