

APIs are at the heart of modern development. They support all kinds of systems, from mobile, web, and desktop applications, to IoT devices and self-driving cars. They are a bridge between your clients and your application logic and storage.
This central access point to your application’s data raises the question: how can you provide access to the information to those who need it while denying access to unauthorized requests?
The industry has provided several protocols and best practices for securing APIs. Today we will focus on OAuth2, one of the most popular options for authorizing clients into our APIs.
But how do we implement OAuth2? There are two ways to go about it:
- Do it yourself approach
- Work with a safe 3rd party like Auth0
In this article, I will walk you through an implementation of OAuth2 for Python and Flask using Auth0 as our identity provider. But first, we are going to discuss the do-it-yourself approach.
Why Not Build Your Own Authentication and Authorization?
For a few years now, I wanted to give back to the community that helped me so much by teaching me programming and helping me progress in my search for knowledge. I always thought that a great way to contribute was by having my own blog, a thing that I tried more than a few times and failed.
But where did I fail? Instead of focusing on writing, I tried to build my own blog engine because it’s in my nature. It’s what developers do. They love to build.
But why do I mention that here? Because many fall into the same trap when building APIs. Let me explain with an example.
Bob is a great developer, and he has this great idea for a ToDo app that can be the next big thing. Bob is very aware that for a successful implementation, users can only access their own data.
Here is bob’s application timeline:
- Sprint 0: Research ideas and start prototyping
- Sprint 1: Build user table and login screen with API
- Sprint 2: Add password reset screens and build all email templates
- Sprint 3: Build, create and list ToDos screens
- Sprint 4: MVP goes live
- User feedback:
- Some users can’t log in due to a bug
- Some users feel unsafe without 2-factor authentication
- Some users don’t want to get yet another password. They prefer single sign-on with Google or Facebook.
- …
Let’s talk about what happened. Bob spent the first few sprints not building his app but building the basic blocks, like logging in and out functionality, email notifications, and so on. This valuable time could have been spent differently, but what happens next is more concerning.
Bob’s backlog starts to fill in. Now, he needs to improvise a 2-factor authentication method, add single sign-on, and more non-product-related functions that could potentially delay his product.
And there’s still a big question to be answered: did Bob implement all the security mechanisms correctly? A critical error could expose all the user’s information to outsiders.
What Bob did is what I did with my blog many times. Sometimes, it's helpful to rely on 3rd parties if we want to get things done right.
Today, hackers and attacks have become so sophisticated that security is not a trivial factor anymore. It is a complicated system on its own, and it is often best to leave its implementation to experts – not only so it’s done right, but also so we can focus on what matters: building our applications and APIs.
How to Set Up a Free Auth0 Identity Management Account
Auth0 is a leading authentication and authorization provider, but let’s see how it can help Bob (or you) build a better app:
- It saves time
- It’s secure
- It has a free plan
Time to get practical. First, make sure you have an Auth0 account. If not, you can create one here for free.
Create a New Auth0 API
There is still one more thing we have to do before we start coding. Head over to the APIs section of your Auth0 dashboard and click on the “Create API” button. After that, fill in the form with your details. However, make sure you select RS256 as the Signing Algorithm.
Your form should look like the following:

The API details page opens after successfully creating an API. Keep that tab open, as it contains information we need to set up our application. If you close it, don’t worry, you can always access it again.
How to Bootstrap our Application
Because we will focus on the security aspects only, we will take a few shortcuts when building our demo API. However, when developing actual APIs, please follow best practices for Flask APIs.
Install the dependencies
First, install the following dependencies for setting up Flask and authenticating users.
pipenv install flask python-dotenv python-jose flask-cors six
Build the endpoints
Our API will be straightforward. It will consist of only three endpoints, all of which, for now, will be publicly accessible. However, we will fix that soon. Here are our endpoints:
/(public endpoint)/user(requires a logged in user)/admin(only users of admin role)
Let’s get to it:
from flask import Flask

app = Flask(__name__)

@app.route("/")
def index_view():
    """
    Default endpoint, it is public and can be accessed by anyone
    """
    return jsonify(msg="Hello world!")

@app.route("/user")
def user_view():
    """
    User endpoint, can only be accessed by an authorized user
    """
    return jsonify(msg="Hello user!")

@app.route("/admin")
def admin_view():
    """
    Admin endpoint, can only be accessed by an admin
    """
    return jsonify(msg="Hello admin!")
Very simple right? Let’s run it:
~ pipenv run flask run
* Environment: production
   WARNING: This is a development server. Do not use it in a production deployment.
   Use a production WSGI server instead.
 * Debug mode: off
 * Running on http://127.0.0.1:5000/ (Press CTRL+C to quit)
And if we access our endpoint:
~ curl -i http://localhost:5000
HTTP/1.0 200 OK
Content-Type: application/json
Content-Length: 23
Server: Werkzeug/2.0.1 Python/3.9.1
Date: Tue, 24 Jan 2023 21:24:57 GMT

{"msg":"Hello world!"}

~ curl -i http://localhost:5000/user
HTTP/1.0 200 OK
Content-Type: application/json
Content-Length: 22
Server: Werkzeug/2.0.1 Python/3.9.1
Date: Tue, 24 Jan 2023 21:25:42 GMT

{"msg":"Hello user!"}

~ curl -i http://localhost:5000/admin
HTTP/1.0 200 OK
Content-Type: application/json
Content-Length: 23
Server: Werkzeug/2.0.1 Python/3.9.1
Date: Tue, 24 Jan 2023 21:26:18 GMT

{"msg":"Hello admin!"}
How to Secure the Endpoints
As we are using OAuth, we will authenticate requests by validating an access token in JWT format. We'll send it to the API on each request as part of the HTTP headers.
Auth0 configuration variables
As mentioned in the previous section, our API needs to be aware and will require information from our Auth0 dashboard. So head back to your API details page, and grab two different values.
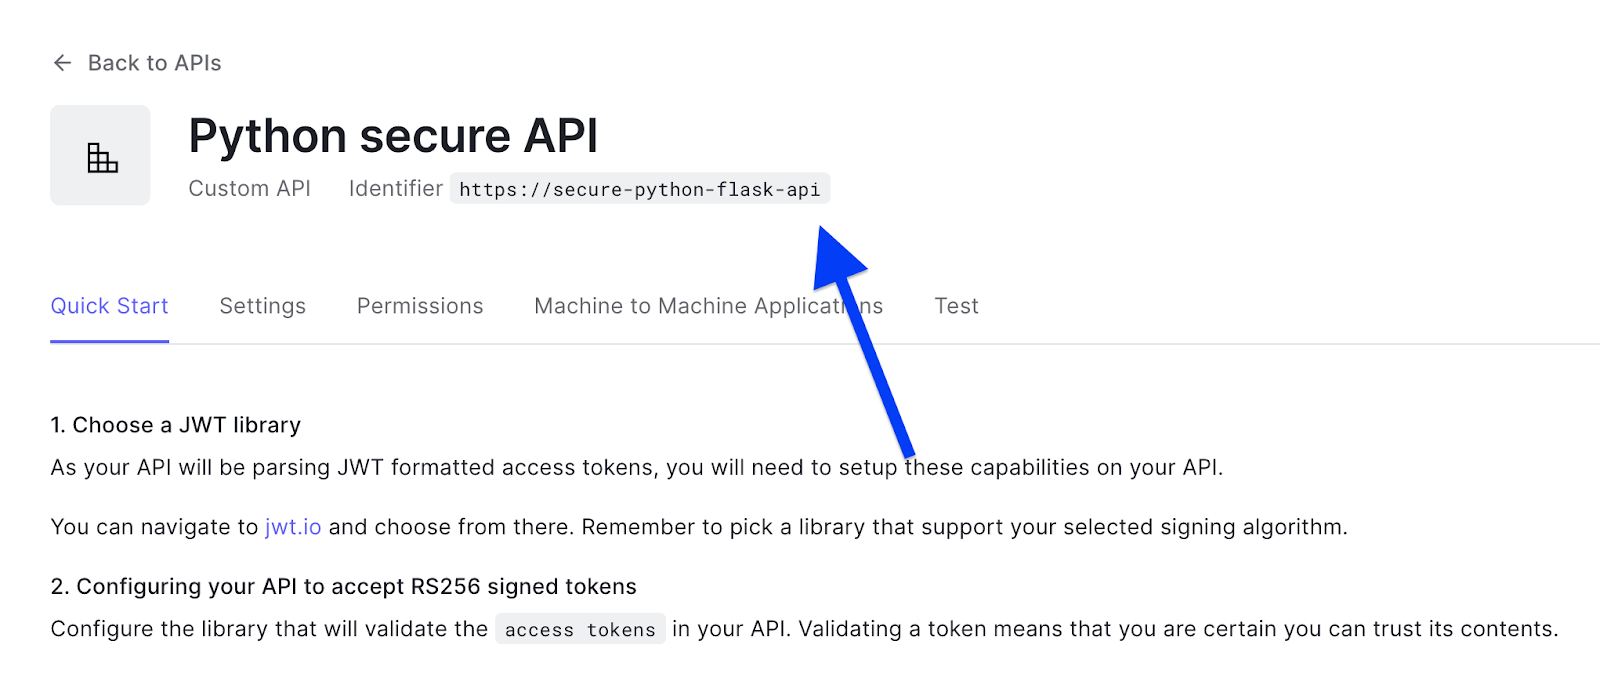
First, the API Identifier:
This is the value required when the API is created. You can also get it from your API details page:
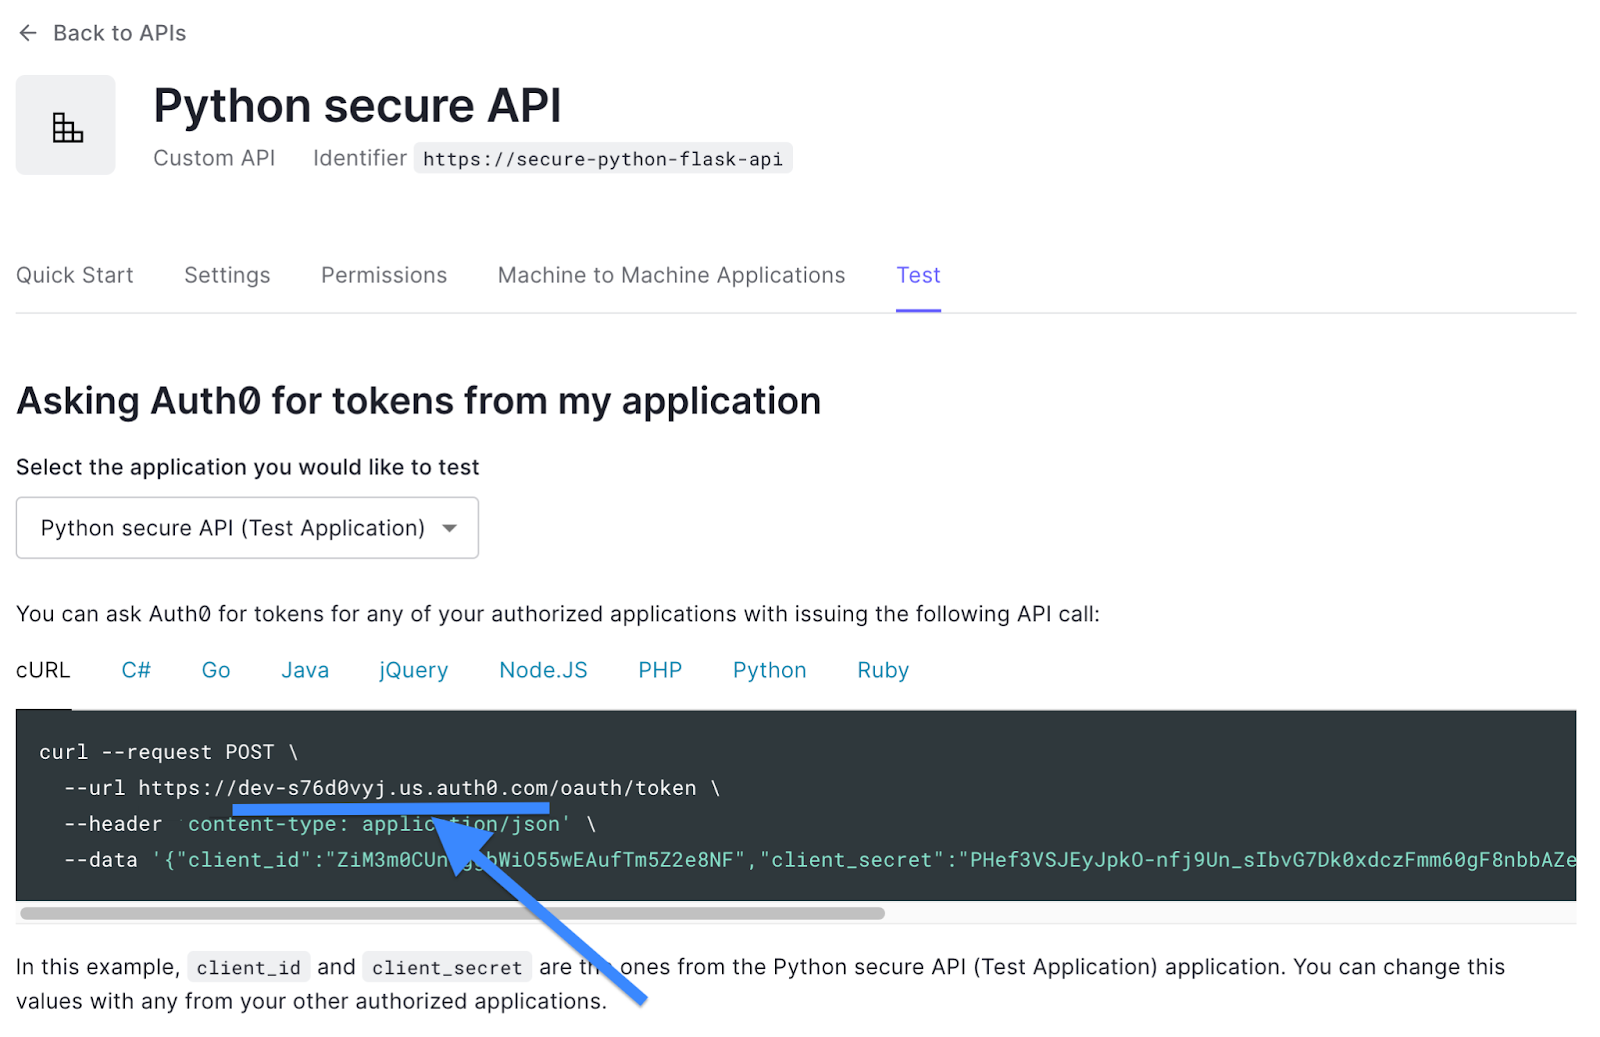
Next, Auth0 domain:
Unless you're using a custom domain, this value will be [TENANT_NAME].auth0.com, and you can grab it from the Test tab (make sure not to include https:// and the last forward slash /).
Next, pass those values into variables so they can be used in the validation functions.
AUTH0_DOMAIN = 'YOUR-AUTH0-DOMAIN'
API_IDENTIFIER = 'API-IDENTIFIER'
ALGORITHMS = ["RS256"]
Error methods
During this implementation, we will need a way to throw errors when authentication fails. So we will use the following helpers for those needs:
class AuthError(Exception):
    def __init__(self, error, status_code):
        self.error = error
        self.status_code = status_code

@app.errorhandler(AuthError)
def handle_auth_error(ex):
    response = jsonify(ex.error)
    response.status_code = ex.status_code
    return response
How to capture the JWT token
The first step to validate a user is to retrieve the JWT token from the HTTP headers. This is very simple, but there are a few things to keep in mind. Here is an example of it:
def get_token_auth_header():
    """
    Obtains the Access Token from the Authorization Header
    """
    auth = request.headers.get("Authorization", None)
    if not auth:
        raise AuthError({"code": "authorization_header_missing",
                        "description":
                            "Authorization header is expected"}, 401)

    parts = auth.split()

    if parts[0].lower() != "bearer":
        raise AuthError({"code": "invalid_header",
                        "description":
                            "Authorization header must start with"
                            " Bearer"}, 401)
    elif len(parts) == 1:
        raise AuthError({"code": "invalid_header",
                        "description": "Token not found"}, 401)
    elif len(parts) > 2:
        raise AuthError({"code": "invalid_header",
                        "description":
                            "Authorization header must be"
                            " Bearer token"}, 401)

    token = parts[1]
    return token
How to validate the token
Having a token passed to our API is a good sign, but it doesn’t mean that it is a valid client. We need to check the token signature.
Since the logic to require authentication can be used for more than one endpoint, it would be important to abstract it and make it easily accessible for developers to implement. The best way to do this is by using decorators.
def requires_auth(f):
    """
    Determines if the Access Token is valid
    """
    @wraps(f)
    def decorated(*args, **kwargs):
        token = get_token_auth_header()
        jsonurl = urlopen("https://"+AUTH0_DOMAIN+"/.well-known/jwks.json")
        jwks = json.loads(jsonurl.read())
        unverified_header = jwt.get_unverified_header(token)
        rsa_key = {}
        for key in jwks["keys"]:
            if key["kid"] == unverified_header["kid"]:
                rsa_key = {
                    "kty": key["kty"],
                    "kid": key["kid"],
                    "use": key["use"],
                    "n": key["n"],
                    "e": key["e"]
                }
        if rsa_key:
            try:
                payload = jwt.decode(
                    token,
                    rsa_key,
                    algorithms=ALGORITHMS,
                    audience=API_IDENTIFIER,
                    issuer="https://"+AUTH0_DOMAIN+"/"
                )
            except jwt.ExpiredSignatureError:
                raise AuthError({"code": "token_expired",
                                "description": "token is expired"}, 401)
            except jwt.JWTClaimsError:
                raise AuthError({"code": "invalid_claims",
                                "description":
                                    "incorrect claims,"
                                    "please check the audience and issuer"}, 401)
            except Exception:
                raise AuthError({"code": "invalid_header",
                                "description":
                                    "Unable to parse authentication"
                                    " token."}, 401)

            _request_ctx_stack.top.current_user = payload
            return f(*args, **kwargs)
        raise AuthError({"code": "invalid_header",
                        "description": "Unable to find appropriate key"}, 401)
    return decorated
The newly created requires_auth decorator, when applied to an endpoint, will automatically reject the request if no valid user can be authenticated.
How to require an authenticated request for an endpoint
We are ready to secure our endpoints, let’s update the user and admin endpoints to utilize our decorator.
@app.route("/user")
@requires_auth
def user_view():
    """
    User endpoint, can only be accessed by an authorized user
    """
    return jsonify(msg="Hello user!")

@app.route("/admin")
@requires_auth
def admin_view():
    """
    Admin endpoint, can only be accessed by an admin
    """
    return jsonify(msg="Hello admin!")
Our only change was adding @required_auth at the top of the declaration of each endpoint function, and with that we can test once again:
~ curl -i http://localhost:5000/user
HTTP/1.0 401 UNAUTHORIZED
Content-Type: application/json
Content-Length: 89
Server: Werkzeug/2.0.1 Python/3.9.1
Date: Tue, 24 Jan 2023 21:42:26 GMT

{"code":"authorization_header_missing","description":"Authorization header is expected"}

~ curl -i http://localhost:5000/admin
HTTP/1.0 401 UNAUTHORIZED
Content-Type: application/json
Content-Length: 89
Server: Werkzeug/2.0.1 Python/3.9.1
Date: Tue, 24 Jan 2023 21:42:42 GMT

{"code":"authorization_header_missing","description":"Authorization header is expected"}
As expected, we can’t access our endpoints as the authorization header is missing. But before we add one, let’s see if our public endpoint still works:
~ curl -i http://localhost:5000
HTTP/1.0 200 OK
Content-Type: application/json
Content-Length: 23
Server: Werkzeug/2.0.1 Python/3.9.1
Date: Tue, 24 Jan 2023 21:43:55 GMT

{"msg":"Hello world!"}
Awesome, it works as expected.
How to test it out
For testing our newly secured endpoints, we need to get a valid access token that we can pass to the request. We can do that directly on the Test tab on the API details page, and it’s as simple as copying a value from the screen:
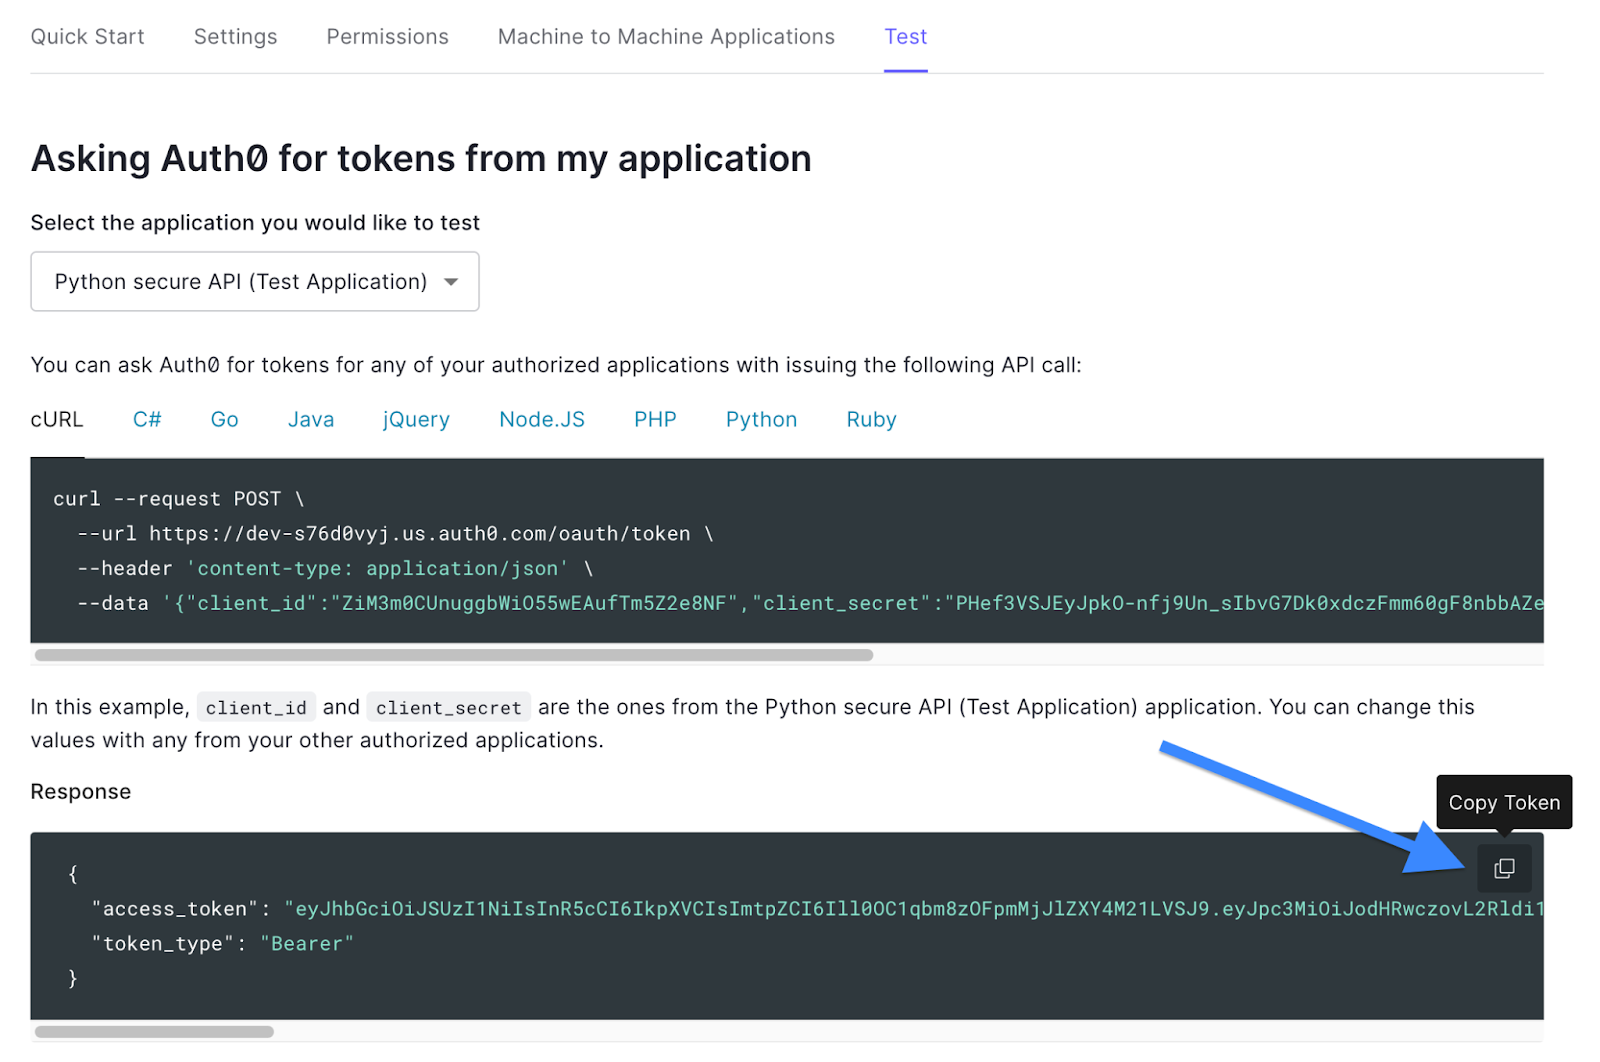
Once we have the token we can change our curl request accordingly:
~ curl -i -H "Authorization: bearer [ACCESS_TOKEN]"  http://localhost:5000/user
HTTP/1.0 200 OK
Content-Type: application/json
Content-Length: 22
Server: Werkzeug/2.0.1 Python/3.9.1
Date: Tue, 24 Jan 2023 22:17:06 GMT

{"msg":"Hello user!"}
Please remember to replace [ACCESS_TOKEN] with the value you copied from the dashboard.
It works! But we still have some work to do. Even though our /admin endpoint is secured, it can be accessed by any user:
~ curl -i -H "Authorization: bearer [ACCESS_TOKEN]"  http://localhost:5000/admin
HTTP/1.0 200 OK
Content-Type: application/json
Content-Length: 23
Server: Werkzeug/2.0.1 Python/3.9.1
Date: Tue, 24 Jan 2023 22:21:09 GMT

{"msg":"Hello admin!"}
Role-based access control
For role-based access control there’s a few things we need to do:
- Create permissions for the API
- Enable adding permissions to the JWT for the API
- Update the code
- Test with users
The first 2 points are very well explained in the Auth0 docs, so just make sure you add the corresponding permissions on your API.
Next, we need to update the code. We need a function to check if a given permission exists in the access token and return True if it does and False if it does not:
def requires_scope(required_scope):
    """
    Determines if the required scope is present in the Access Token
    Args:
        required_scope (str): The scope required to access the resource
    """
    token = get_token_auth_header()
    unverified_claims = jwt.get_unverified_claims(token)
    if unverified_claims.get("scope"):
            token_scopes = unverified_claims["scope"].split()
            for token_scope in token_scopes:
                if token_scope == required_scope:
                    return True
    return False
And lastly, it can be used as follows:
@app.route("/admin")
@requires_auth
def admin_view():
    """
    Admin endpoint, can only be accessed by an admin
    """
    if requires_scope("read:admin"):
        return jsonify(msg="Hello admin!")

    raise AuthError({
        "code": "Unauthorized",
        "description": "You don't have access to this resource"
    }, 403)
Now, only users with the permission read:admin can access our admin endpoint.
In order to test your final implementation, you can follow the steps detailed on obtaining an access token for a given user.
You can also use the Auth0 Dashboard to test permissions, but that is outside the scope of this article. If you would like to learn more about it, read here.
Conclusion
Today we learned how to secure a Flask API. We explored the do-it-yourself path, and we built a secure API with three levels of access – public access, private access and privately-scoped access.
There’s so much more that Auth0 can do for your APIs and also for your client applications. Today we just scratched the surface, and it’s up to you and your team when working with real-life scenarios to explore all the potential of their services.
The full code is available on GitHub.
Thanks for reading! If you like my teaching style, you can Subscribe to my weekly newsletter for developers and builders and get a weekly email with relevant content.