
By William Boxx
I was recently experimenting with converting one of my Angular web apps into a desktop application using Electron. I encountered a few hurdles along the way, and decided to put my experience in writing so that it may help others. If you have similar plans for your project, I hope this may be of use. The source code for this guide can be found here.
Part I: Angular
Create the Boilerplate.
For the sake of this guide, we will be creating a new Angular app from scratch. I will be using Electron-Forge to create the boilerplate. Electron-Forge offers several templates for creating boilerplate code, including one for Angular 2. First install the Electron-Forge CLI.
$ npm i -g electron-forge
Now use the CLI to create the Angular app boilerplate.
$ electron-forge init electron-angular-sqlite3 --template=angular2
$ cd electron-angular-sqlite3
The forge CLI will add the bare essentials we need to run our app. Let’s add a few additional directories to house our database files. Add an assets directory under src, and put data and model directories under it.
$ mkdir ./src/assets/data ./src/assets/model
The directory tree should now look like this:
.
+-node_modules
+-src
|  |
|  +-assets
|  |  |
|  |  +-data
|  |  +-model
|  |
|  +-app.component.ts
|  +-bootstrap.ts
|  +-index.html
|  +-index.ts
|
+-.compilerc
+-.gitignore
+-package-lock.json
+-package.json
+-tsconfig.json
+-tslint.json
Write Some Code.
As our first step, let’s add a model file that we will match our database schema. For this simple example, let’s create a class called Item. Each item will contain an id and a name property. Save the file in your project at src/assets/model/item.schema.ts.
We will be using TypeORM for our object relational mapping. First install TypeORM.
$ npm install typeorm --save
We will be following the TypeORM guide for creating schema here. When finished the file should look like this:
import { Entity, PrimaryGeneratedColumn, Column } from 'typeorm';

@Entity()
export class Item
{
    @PrimaryGeneratedColumn()
    id: number;

    @Column()
    name: string;
}
TypeORM makes use of typescript decorators. We use the Entity decorator to declare our Item class a table. The @PrimaryGeneratedColumn() decorator declares id as our unique identification and tells the database to automatically generate it. We will worry about linking to a database later on.
Create the Service.
Our next likely action would be to create an app service that handles communication from the front to the back end. Electron makes available the IpcRenderer class for just this thing. IpcRenderer is Electron’s inter process communication class that is used in the renderer process. Basically, we want to use the IpcRenderer to send messages to Electron’s main process. These messages will pass information to the main process so that it can handle the database interactions.
Implementing the IpcRenderer is where we come across our first hurdle. Electron is relying on the window.require() method, which is only available inside of Electron’s renderer process. This is a well documented issue. To get around this, we can use ThornstonHans’ ngx-electron package, which wraps all the Electron API’s exposed to the renderer process into a single Electron Service. You can read more about this here.
Before we can use ngx-electron, we need to install it.
$ npm install ngx-electron --save
Now let’s create a service to handle our IpcRenderer communication. Create src/app.service.ts .
import { Injectable } from '@angular/core';

import { Item } from './assets/model/item.schema';

import { ElectronService } from 'ngx-electron';
import { Observable } from 'rxjs/observable';
import { of } from 'rxjs/observable/of';
import { catchError } from 'rxjs/operators';

@Injectable()
export class AppService {
  constructor(private _electronService: ElectronService) {}

  getItems(): Observable<Item[]> {
    return of(this._electronService.ipcRenderer.sendSync('get-items')).pipe(
      catchError((error: any) => Observable.throw(error.json))
    );
  }

  addItem(item: Item): Observable<Item[]> {
    return of(
      this._electronService.ipcRenderer.sendSync('add-item', item)
    ).pipe(catchError((error: any) => Observable.throw(error.json)));
  }

  deleteItem(item: Item): Observable<Item[]> {
    return of(
      this._electronService.ipcRenderer.sendSync('delete-item', item)
    ).pipe(catchError((error: any) => Observable.throw(error.json)));
  }
}
In app.service.ts we create a class calledAppService and add the @Injectable() decorator. This allows us to use angular’s built in dependency injection (DI). In our constructor, we create a local variable _electronService of type ElectronService . The ElectronService class is provided to us by ngrx-electron . It allows us to use Electron’s IpcRender class without any of the aforementioned issues.
We create three functions: one that get’s all Items in the database, one to add an Item to the database, and one to delete an Item. Each function will return an Observable.
Observables are part of the RxJs Library and provide a good way of handling our database interactions asynchronously. You can read more about Observables here. Note the use of the Observable operator of to denote that we are wrapping our response from this._electronService.ipcRenderer.sendSync() as an Observable value.
Registering Services and Writing Component.
With our service complete, let’s go into src/app.component.ts and register it for DI. While in there, we will add a simple html template and functions to handle our button events.
import { NgModule } from '@angular/core';
import { BrowserModule } from '@angular/platform-browser';
import { Component, OnInit } from '@angular/core';
import { Item } from './assets/model/item.schema';
import { AppService } from './app.service';
import { ElectronService } from 'ngx-electron';
@Component({
selector: 'App',
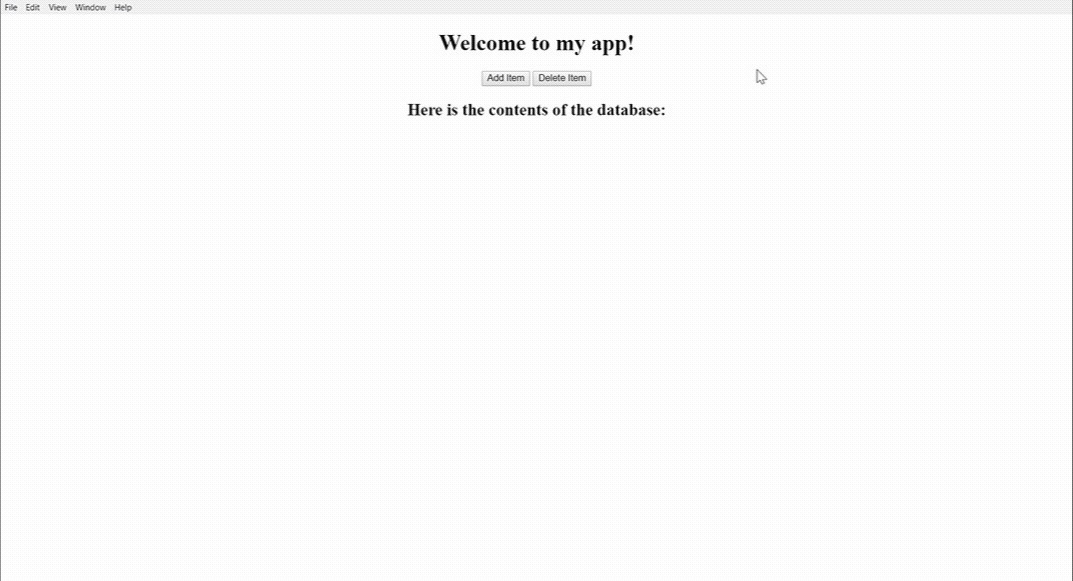
template: `<div style="text-align:center">
<h1>
Welcome to {{ title }}!
</h1>
<button (click)="addItem()" mat-raised-button>Add Item</button>
<button (click)="deleteItem()" mat-raised-button>Delete Item</button>
<h2>Here is the contents of the database: </h2>
<div>
<ul style="list-style: none">
<li *ngFor="let item of itemList">
{{ item.name }}
</li>
</ul>
</div>
</div>`,
})
export class AppComponent implements OnInit {
public readonly title = 'my app';
itemList: Item[];
constructor(private appservice: AppService) {}
ngOnInit(): void {
console.log('component initialized');
this.appservice.getItems().subscribe((items) => (this.itemList = items));
}
addItem(): void {
let item = new Item();
item.name = 'Item ' + this.itemList.length;
this.appservice.addItem(item).subscribe((items) => (this.itemList = items));
}
deleteItem(): void {
const item = this.itemList[this.itemList.length - 1];
this.appservice
.deleteItem(item)
.subscribe((items) => (this.itemList = items));
}
}
@NgModule({
imports: [ BrowserModule ],
declarations: [ AppComponent ],
bootstrap: [ AppComponent ],
providers: [ AppService, ElectronService ],
})
export class AppModule {}
Make sure to add AppService as a provider in the @NgModule decorator arguments and also as a private variable in the AppComponent constructor. We also need to add ElectronService as a provider.
On initialization of our component, we want to load all contents of our database and display it. To do this, we subscribe to the addItem() function of the service we created. If you remember, all of our service functions return Observables. To get data from our observable, we subscribe to it, passing a callback function that runs when the data is received. In the example above, (items) => (this.itemList = items) will populate our class variable itemList with the contents of the database once it is retrieved.
We follow similar tactics for adding and deleting items from the database. Each time repopulating itemList with the updated contents of the database.
Part II: Electron
Installing SQLite3.
Now that we finished up our front end, we need to create the Electron backend. The Electron backend will handle and process messages sent from the front and manage the sqlite3 database.
We will be using sqlite3 for our database and need to install it.
$ npm install sqlite3 --save
A hurdle I ran into while working with sqlite3 and Electron initially, was that sqlite’s native binaries need to be recompiled for use with Electron. Electron-Forge should take care of this for you. One thing to note, Electron-Forge will use node-gyp to compile the binaries. You may need to have it properly installed and configured prior to use, which includes installing Python. As of now, node-gyp uses python 2. If you have multiple versions on your machine, you must ensure that current build is using the proper one.
Connecting to the Database.
Now let’s open our src/index.ts file and add some code to connect to the database. The two things we need to do are, connect to the database, and add functions to handle our requests from the renderer process. The finished file looks like this:
import { app, BrowserWindow, ipcMain } from 'electron';
import { enableLiveReload } from 'electron-compile';

import { createConnection } from 'typeorm';

import { Item } from './assets/model/item.schema';

// Keep a global reference of the window object, if you don't, the window will
// be closed automatically when the JavaScript object is garbage collected.
let mainWindow: Electron.BrowserWindow | null;

const isDevMode = process.execPath.match(/[\\/]electron/);

if (isDevMode) enableLiveReload();

const createWindow = async () => {
  const connection = await createConnection({
    type: 'sqlite',
    synchronize: true,
    logging: true,
    logger: 'simple-console',
    database: './src/assets/data/database.sqlite',
    entities: [ Item ],
  });

  const itemRepo = connection.getRepository(Item);

  // Create the browser window.
  mainWindow = new BrowserWindow({
    width: 800,
    height: 600,
  });

  // and load the index.html of the app.
  mainWindow.loadURL(`file://${__dirname}/index.html`);

  // Open the DevTools.
  if (isDevMode) {
    mainWindow.webContents.openDevTools();
  }

  // Emitted when the window is closed.
  mainWindow.on('closed', () => {
    // Dereference the window object, usually you would store windows
    // in an array if your app supports multi windows, this is the time
    // when you should delete the corresponding element.
    mainWindow = null;
  });

  ipcMain.on('get-items', async (event: any, ...args: any[]) => {
    try {
      event.returnValue = await itemRepo.find();
    } catch (err) {
      throw err;
    }
  });

  ipcMain.on('add-item', async (event: any, _item: Item) => {
    try {
      const item = await itemRepo.create(_item);
      await itemRepo.save(item);
      event.returnValue = await itemRepo.find();
    } catch (err) {
      throw err;
    }
  });

  ipcMain.on('delete-item', async (event: any, _item: Item) => {
    try {
      const item = await itemRepo.create(_item);
      await itemRepo.remove(item);
      event.returnValue = await itemRepo.find();
    } catch (err) {
      throw err;
    }
  });
};

// This method will be called when Electron has finished
// initialization and is ready to create browser windows.
// Some APIs can only be used after this event occurs.
app.on('ready', createWindow);

// Quit when all windows are closed.
app.on('window-all-closed', () => {
  // On OS X it is common for applications and their menu bar
  // to stay active until the user quits explicitly with Cmd + Q
  if (process.platform !== 'darwin') {
    app.quit();
  }
});

app.on('activate', () => {
  // On OS X it's common to re-create a window in the app when the
  // dock icon is clicked and there are no other windows open.
  if (mainWindow === null) {
    createWindow();
  }
});

// In this file you can include the rest of your app's specific main process
// code. You can also put them in separate files and import them here.
An in depth explanation of TypeORM and Electron is beyond the scope of this
guide, so I will only briefly discuss the above file. First we need to import the createConnection class from the TypeORM library. We also need to import or Item schema.
As expected, the createConnection class will create a connection to our database. We pass it a constructor with parameters such as type, database, and entities. Type is a string that describes what type of database we are using. Database is a string that points to the database location. Entities is where we tell TypeORM what schemas to expect. For our purpose: type is ‘sqlite’, Database is ‘./src/assets/data/database.sqlite’, and Entities is our imported Item class.
TypeORM allows you two options when working with database transactions: EntityManager and Repository. Both will give you access to functions for querying the database, without writing the SQL. We create a Repository object with the line itemRepo = connection.getRepository(Item) . This gives us access to transaction methods for our Item table.
The last step is to create functions to handle the messages being sent from the IpcRenderer. Each function will use the itemRepo object we created to access the database. After successful completion of each transaction, the functions will pass the new state of the database back to the renderer.
Part III: Run it!
With everything complete, we can now run the app. Electron-Forge handles this process for us. All we need to do is run the command:
$ npm run start
If everything is correct, Electron will open your app and you can test it out.
Thanks for reading!