
By Tyler Hawkins
I recently published a package on npm: a data structures and algorithms library implemented in JavaScript.
The purpose of the project is to help others learn and understand data structures and algorithms from a JavaScript perspective.
Rather than containing only snippets of code with accompanying explanations, the project is meant to provide an eager learner with fully working code, good test cases, and a playground full of examples.
If you’re interested, the project can be found on npm here.
But, rather than talking about the project itself, what I want to write about today are all the neat tools I learned about and used while creating the project.
I’ve worked on tons of side projects and demos over the last six years, but each of them are very visibly just "pet projects". They in no way have the qualities that’d make them look professional or production-ready.
What I set out to create was something that could be considered a respectable open-source package. To do that, I decided my project would need proper documentation, tooling, linting, continuous integration, and unit tests.
Below are some of the tools I used. Each one serves a unique purpose. I’ve linked to the documentation for each package so you, too, can start utilizing these tools in projects of you own.
Note: This article assumes that you are already familiar with the process of creating a simple JavaScript package and publishing it on npm.
If not, the npm team has some great documentation on getting started that will walk you through the initialization of a project and the steps for publishing.
So let's get started.
Prettier
Prettier is an opinionated code formatter that automatically formats your code for you. Rather than simply using ESLint to enforce whatever formatting standards your team has agreed on, Prettier can take care of the formatting for you.
No more worrying about fixing your indentation and line widths! I’m using this specifically for my JavaScript, but it can handle many different languages.
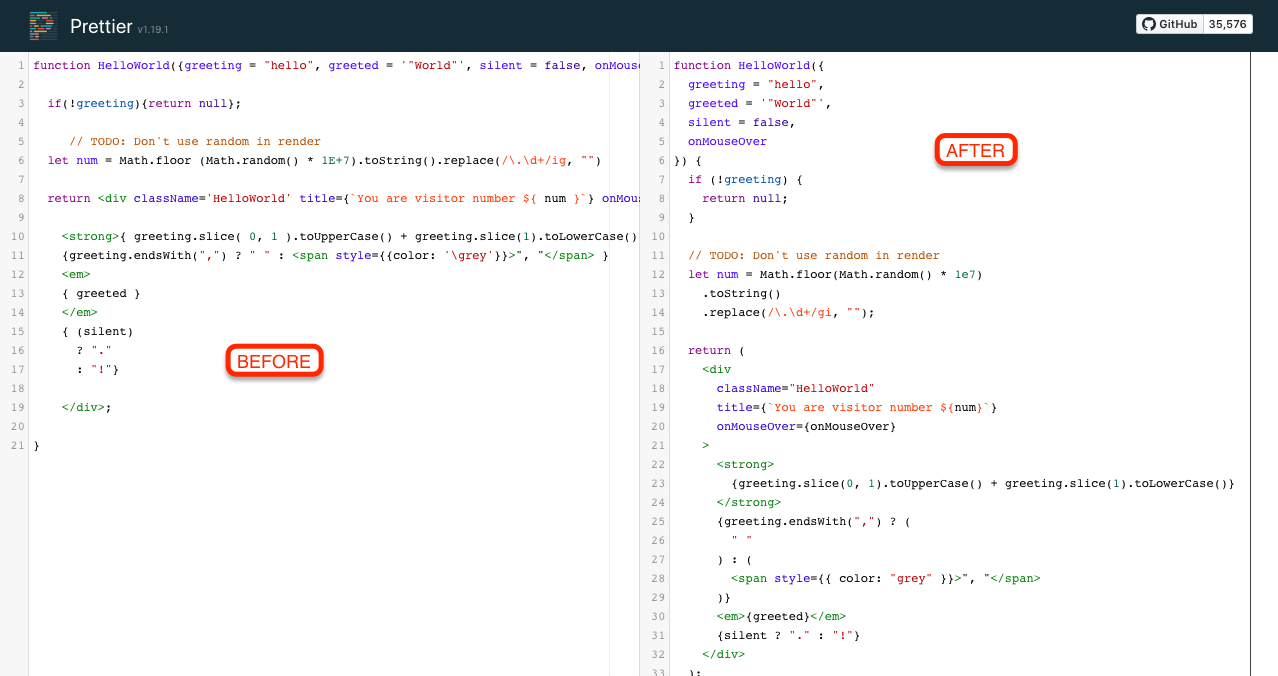 Sample JavaScript before and after running Prettier
You can check out the Prettier docs here: https://github.com/prettier/prettier
stylelint
stylelint autoformats your CSS for you. Similar to Prettier, this tool helps you keep your CSS clean while taking care of the heavy lifting for you.
 Sample output from running stylelint
You can check out the stylelint docs here: https://github.com/stylelint/stylelint
ESLint
ESLint handles all my other JavaScript linting for catching syntax errors and enforcing best practices.
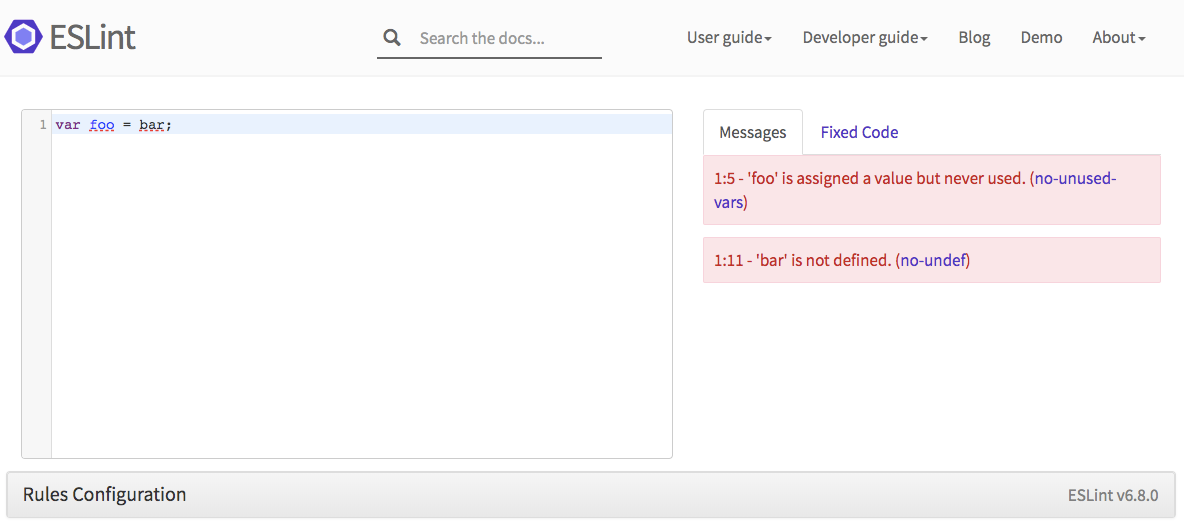 Sample output from linting with ESLint in their playground environment
You can check out the ESLint docs here: https://eslint.org/
Commitizen
Commitizen is a CLI tool that walks you through writing your commit messages. It generates the commit message for you based on your input and ensures that the resulting commit message follows the Conventional Commits standard.
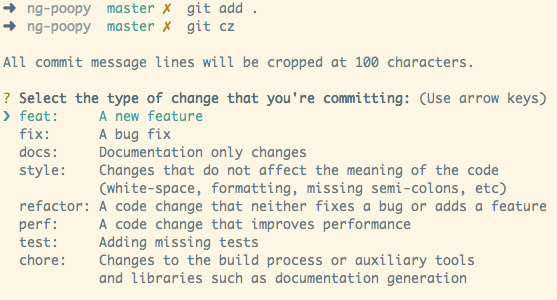 Commitizen command line interface when creating a new commit
You can check out the Commitizen docs here: https://github.com/commitizen/cz-cli
commitlint
commitlint verifies that your commit messages follow the Conventional Commits standard. As long as you use Commitizen to create your commit messages, you won’t run into any problems.
The real benefit of using commitlint is to catch commits that developers wrote on their own that don’t follow your formatting standards.
 commitlint demo to show possible error messages
You can check out the commitlint docs here: https://github.com/conventional-changelog/commitlint
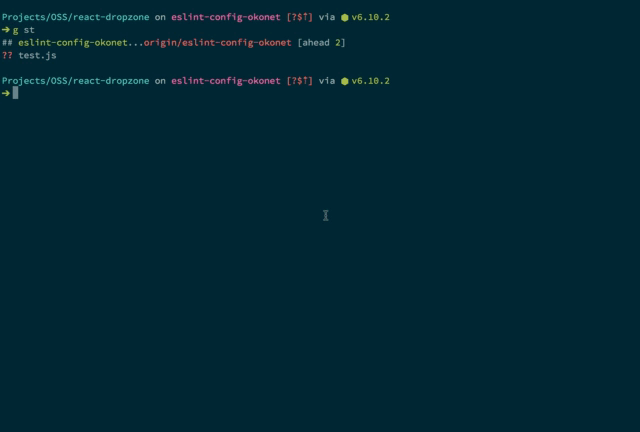
lint-staged
lint-staged runs linters against code that you’re trying to commit. This is where you can validate that your code is passing the standards being enforced by Prettier, stylelint, and ESLint.
 lint-staged example that runs ESLint on checked-in code
You can check out the lint-staged docs here: https://github.com/okonet/lint-staged
Husky
Husky makes it easy to run Git hooks.
All the previously mentioned tools can be run through Husky on Git hooks like pre-commit or commit-msg, so this is where the magic happens.
For instance, I’m running lint-staged and my unit tests during the pre-commit hook, and I’m running commitlint during the commit-msg hook. That means when I’m trying to check in my code, Husky does all the validation to make sure I’m abiding by all the rules I’m enforcing in my project.
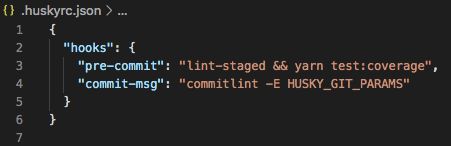 Sample Husky configuration that runs on the pre-commit and commit-msg Git hooks
You can check out the Husky docs here: https://github.com/typicode/husky
Rollup
Rollup is a module bundler for JavaScript. It takes all of your source code and bundles it into the files you actually want to distribute as part of your package.
The conventional wisdom seems to be if you’re building a web application, you should use webpack. And if you’re building a library, you should use Rollup.
In my case, I was building a data structures and algorithms library, so I chose to use Rollup. One benefit seems to be the output that Rollup generates is significantly smaller than what webpack outputs.
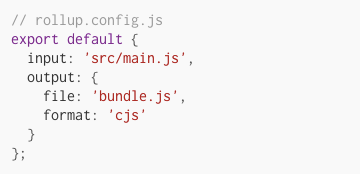 A very minimal Rollup config that creates an output bundle in the CommonJS format
You can check out the Rollup docs here: https://rollupjs.org/guide/en/
Standard Version
Standard Version helps automate your versioning and changelog generation.
Previously, I mentioned tools like Commitizen and commitlint for formatting your commits according to the Conventional Commits standard. Why, you may ask, is that helpful?
The answer, at least in part, is that by using a consistent commit message format, you can use tools that are able to understand what kind of changes your commits are making.
For example, are you fixing bugs? Adding new features? Making breaking changes people consuming your library should be aware of? Standard Version is able to understand your commit messages and then generate a changelog for you.
It’s also able to intelligently bump the version of your package according to the semantic versioning standard (major, minor, patch).
 Sample Standard Version pre-release script that runs before version bumps
You can check out the Standard Version docs here: https://github.com/conventional-changelog/standard-version
Travis CI
Travis CI is a continuous-integration (CI) tool that can be integrated with GitHub, where my code happens to be hosted.
CI tools are important because they allow your commits to be tested yet again before you merge them into your master branch. You could argue using Travis CI and a tool like Husky duplicates functionality, but it’s important to keep in mind that even Husky can be bypassed by passing a --no-verify flag to your commit command.
Through GitHub, you can specify that your Travis CI jobs must be passing before code can be merged, so this adds one more layer of protection and verifies that only passing code makes it into your repo.
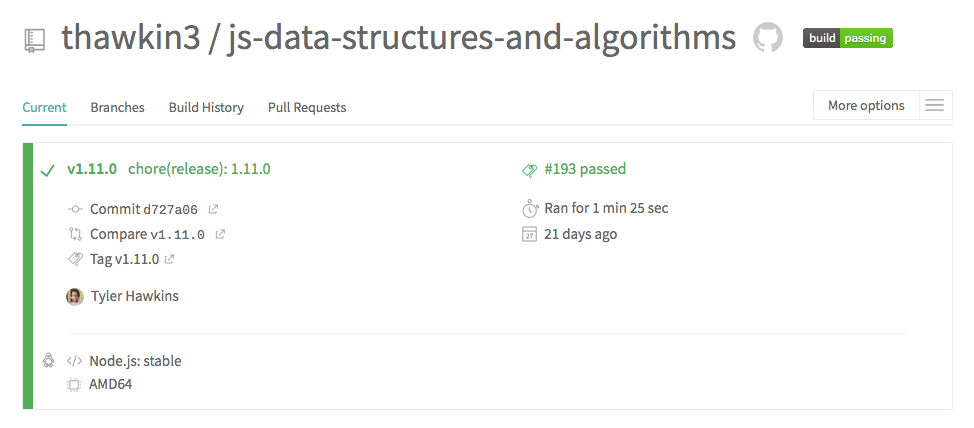 Travis CI output from a passing build
You can check out the Travis CI docs here: https://docs.travis-ci.com/
Codecov
Codecov is another CI tool that looks at your project’s code coverage.
I’m writing JavaScript unit tests using Jest. Part of my Travis CI job runs my test suite and ensures they all pass. It also pipes the code coverage output to Codecov, which then can verify if my code coverage is slipping or staying high. It also can be used in conjunction with GitHub badges, which we’ll talk about next.
 Codecov dashboard (look at that beautiful 100% code coverage!)
You can check out the Codecov docs here: https://docs.codecov.io/docs
Badges
Have you ever looked at a project in GitHub and seen little badges near the top of the README? Things like whether the build is passing, what the code coverage is, and what the latest version of the npm package is can all be shown using badges.
They’re relatively simple to add, but I think they add a really nice touch to any project. Shields.io is a great resource for finding lots of different badges that can be added to your project, and it helps you generate the markdown to include in your README.
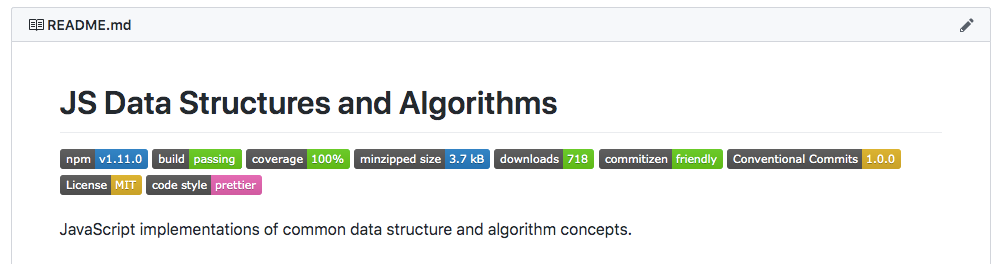 GitHub badges for my js-data-structures-and-algorithms npm package
You can check out the Shields.io docs here: https://shields.io/
Documentation
A little documentation goes a long way. In my project, I’ve added a README, CHANGELOG, contributing guidelines, code of conduct, and a license.
These docs serve to help people know what your project is, how to use it, what changes have been made with each release, how to contribute if they want to get involved, how they’re expected to interact with other members of the community, and what the legal terms are.
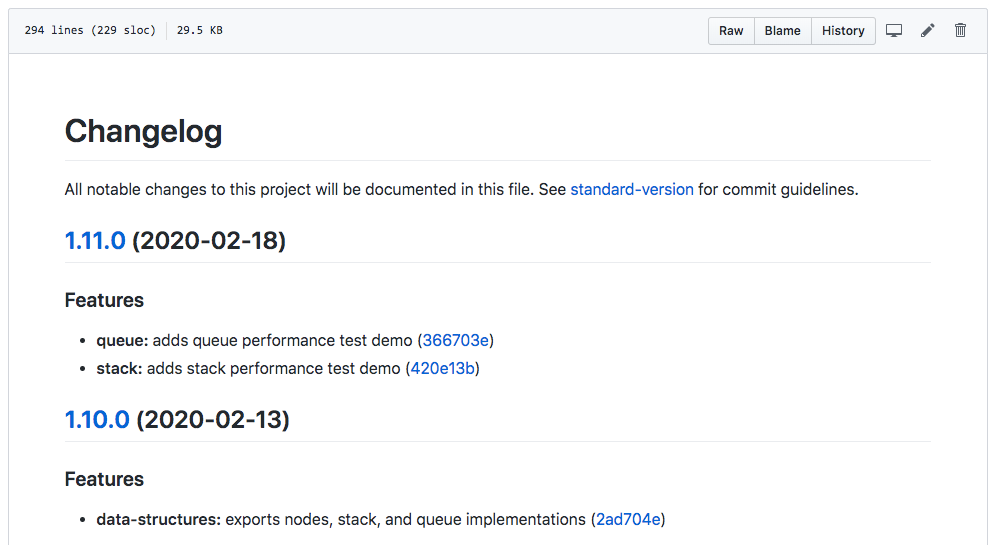 The CHANGELOG for my js-data-structures-and-algorithms npm package
You can check out the documentation for my project here: https://github.com/thawkin3/js-data-structures-and-algorithms
GitHub Templates
Did you know you can create templates in GitHub for things like bug reports, feature requests, and pull requests? Creating these templates makes it crystal clear, for example, what information someone should be expected to provide when filing a bug.
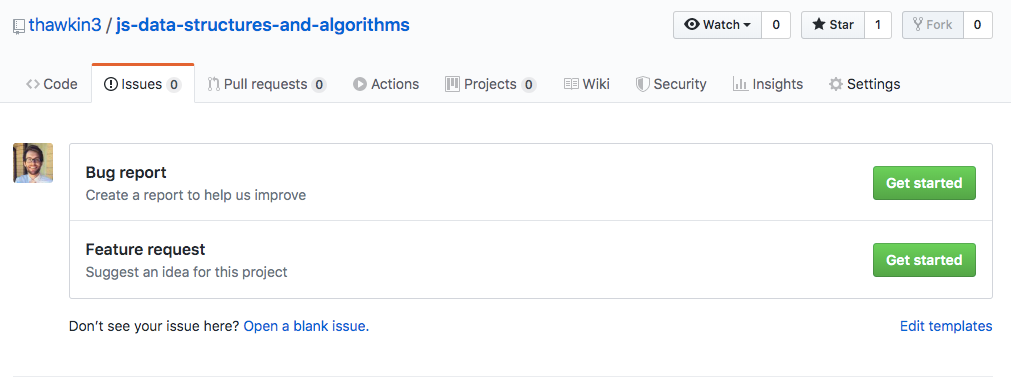 GitHub templates for bug reports and feature requests
You can check out the GitHub templates docs here: https://help.github.com/en/github/building-a-strong-community/about-issue-and-pull-request-templates
Closing
That’s it. When I first showed this project to some friends, one of them commented, “Oh my build tool soup!” And he may be right. This is a lot. But I strongly believe that adding all the tooling above is worth it. It helps automate many things and helps keep your codebase clean and in working order.
My biggest takeaway from building this project is that setting up all of the tooling above isn’t as daunting as it may seem. Each of these tools has good documentation and helpful guides for getting started. It really wasn’t that bad, and you should feel confident adopting some (if not all) of these tools in your project, too.
Happy coding!