by Marco Massenzio
Experimenting with the Apache Mesos HTTP API for Fun and Profit

Apache Mesos is a tool used in production at large-scale services like Twitter and Airbnb. Here’s its textbook description:
The Mesos kernel runs on every machine and provides applications (e.g., Hadoop, Spark, Kafka, Elasticsearch) with API’s for resource management and scheduling across entire datacenter and cloud environments. — from the Apache Mesos project site.
This is the first of a series of three articles that show how to setup a Vagrant-based Apache Mesos test/development environment on your laptop, how to run a Python notebook against the HTTP API, and how to launch Docker containers on the running Agent VM.
This series is an extended (and updated) version of the talk I gave at MesosCon Europe 2015 updated for Apache Mesos 1.0.0, which has just been released (August 2016) — you can also find the slides there.
This post is pretty jam-packed, and will require you to be familiarity with some concepts around containers, VMs, and Mesos. But I’ll take the time to show all the intermediate steps (hence, the 3-parts). It should be easy to follow, even if you’ve never used Vagrant, Mesos, or even Jupyter notebooks before.
I recommend you first have a basic familiarity with Python and handling HTTP requests and responses, as we will not be going those details there.
All the code is available on the zk-mesos git repository:
git clone git@github.com:massenz/zk-mesos.gitAnd you can also view the README.
Getting Started
In order to follow along, you will need to clone the repository (as shown above) and install Virtualbox and Vagrant. Follow the instructions on their respective sites and you’ll be up and running in no time.
I also recommend quickly scanning the Vagrant documentation. A knowledge of Vagrant beyond `vagrant up` is not really required to get the most out of this series, but it may help if you get stuck (or would like to experiment and improve on our Vagrantfile).
If you’re not familiar with Apache Mesos I recommend taking a look at the project’s site. I recommend reading Mesos in Action (note that I was one of the manuscript’s reviewers).
We will not be building Mesos from source here, but will instead use Mesosphere packages. You don’t need to download them. The Vagrantfile will automatically download and install on the VMs.
To run the Python notebook, we’ll take advantage of the Jupyter packages, and use a virtualenv to run all of our code. Virtualenv isn’t strictly necessary, but will prevent you messing up your system Python.
If you‘ve never used virtualenv before:
$ sudo pip install virtualenvAnd then create and run a virtualenv:
$ cd zk-mesos $ virtualenv mesos-demo$ source mesos-demo/bin/activate $ pip install -r requirements.txtFinally, verify that you can run and load the Jupyter notebook:
$ jupyter notebookThis should automatically open your browser and point it to http://localhost:8888. From here you can select the notebooks/Demo-API.ipynb file. Don’t run it just yet, but if it shows up, it will confirm that your Python setup is just fine.
Building and installing Apache Mesos
This is where the beauty of Vagrant shines in all its glory. Installing Apache Mesos Master and Agent are not trivial tasks, but in our case, it’s just a matter of:
$ cd vagrant $ vagrant upMake sure that you’re in the same directory as the Vagrantfile when issuing any of the Vagrant commands, or it will complain about it.
It is worth noting that we are building two Vagrant boxes, so any command will operate on both unless specified. To avoid this, you can specify the name of the VM after the command. For example, to SSH onto the Agent:
$ vagrant ssh agentThis should log you in on that box. From there, you can explore, experiment, and diagnose any issues.
The vagrant up command will take some time to execute, but it should eventually lead your Virtualbox to have two VMs, named respectively mesos-master and mesos-agent. Incidentally, you should never need to use VirtualBox to manage them. All the tasks can be undertaken via Vagrant commands. But you can manage them manually if necessary or desired.
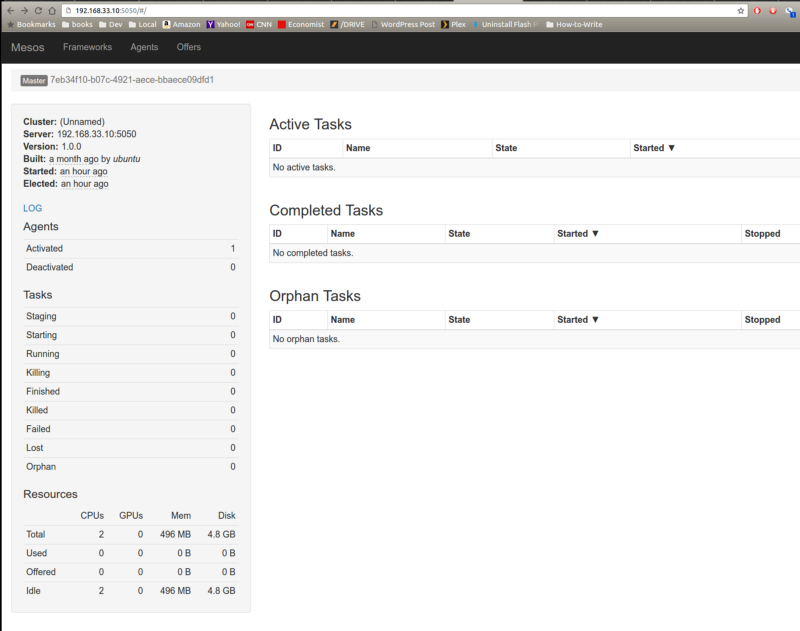
Once your VMs are built, ensure you can access Mesos HTTP UI at:
http://192.168.33.10:5050
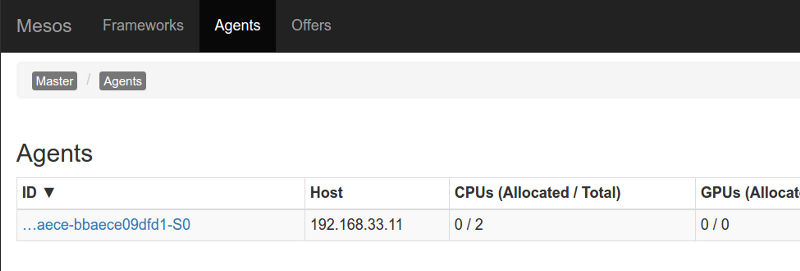
You should also see one agent running, accessible either via the Master UI.

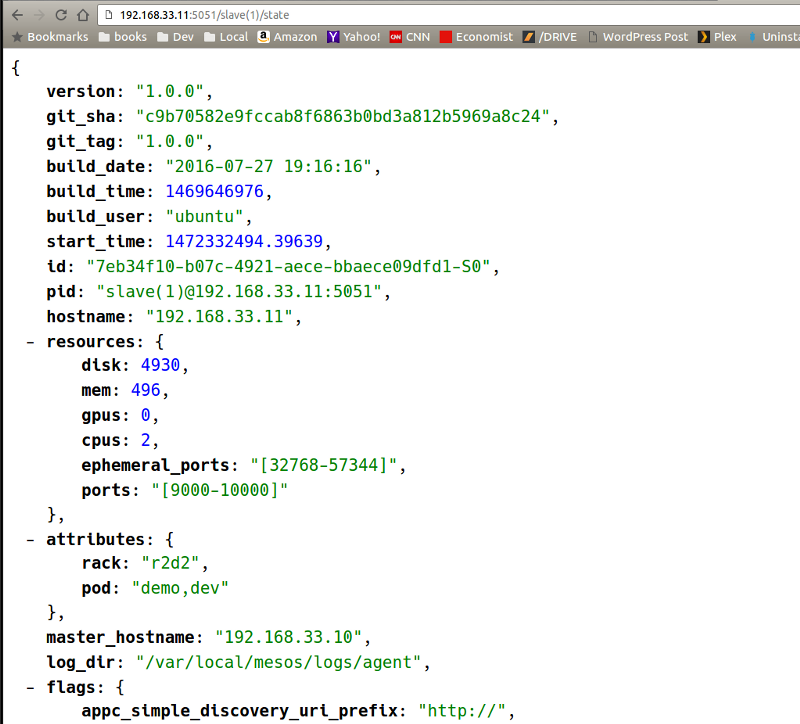
Or directly at:
http://192.168.33.11:5051/state
Note that the Agent runs not only on a different IP address than the Master, but also on a different port (5051 instead of 5050).
Look into vagrant/run-agent.sh to see a few of the command line flags that we use to run the Agent (and in run-master.sh for the Master).
Zookeeper
It’s worth noting that we are also running an instance of Zookeeper (for Leader election and Master/Agent coordination) on the mesos-master VM, inside a Docker container: partly because we can, but also to show how easy it is to do so using containers.
This one line (in run-master.sh), will give you a perfectly good ZK instance (albeit, a catastrophically unreliable one in a production environment, where you’d want to run at least 3–5 nodes, at least, on physically separate machines/racks):
docker run -d --name zookeeper -p 2181:2181 -p 2888:2888 \ -p 3888:3888 jplock/zookeeper:3.4.8And because we expose the ports (in particular, 2181) to the host VM, we can connect to it via the Zookeeper CLI utility (zkCli.sh) and explore it. From your development machine (you will need to first download Zookeeper) you can use:
$ zkCli.sh -server 192.168.33.10:2181...[zk: 192.168.33.10:2181(CONNECTED) 4] get /mesos/vagrant/json.info_0000000000# Formatted for better readability:{"address": { "hostname": "mesos-master", "ip":"192.168.33.10", "port":5050 }, "hostname":"mesos-master", "id":"7eb34f10-b07c-4921-aece-bbaece09dfd1", "ip":169978048, "pid":"master@192.168.33.10:5050", "port":5050, "version":"1.0.0"}cZxid = 0xbctime = Sat Aug 27 14:00:44 PDT 2016...This is how Agents get information about how to connect to the Master node.
The _000000 suffix gets incremented every time a new Leader gets elected, so depending on how long the ZK instance has been running and whether the Master was restarted, it may become something like _0000005. That is an “ephemeral node” in Zookeeper’s parlance.
In that record above, it is worth noting that “pid” is libprocess unique identifier and “ip” as a compressed 4-byte representation of an IPv4 octect quadruple. These legacy fields and may eventually be removed.
Wrap Up
You are now the proud owner of a Master/Agent 2-node Apache Mesos deployment. Welcome in the same league as Twitter and Airbnb production wizards.
In Part 2, we’ll run our Python notebook against the Master API and will accept the Agent’s offers to launch a Docker container.
If you’ve got time, let’s jump on in and learn how to connect to Mesos Master and accept Resource Offers.
Originally published at codetrips.com on August 27, 2016.
