In general, a headphone jack and a pair of headphones improve the sound from your PC. You'll be able to hear things more clearly, without disturbing other around you.
But sometimes, setting them up is difficult. Or they might stop working entirely. This could be due to outdated drivers, or even physical damage.
In this guide, I'll take you through three ways you can fix your headphone jack on a Windows 10 PC.
How to Fix Headphone Jack Not Working by Updating Audio Drivers
When any hardware device stops working, my first recommendation is to update its drivers.
Updating your Windows 10 OS could install the necessary drivers for you, but it doesn't happen all the time.
You can update the audio driver on Windows 10 with the steps below
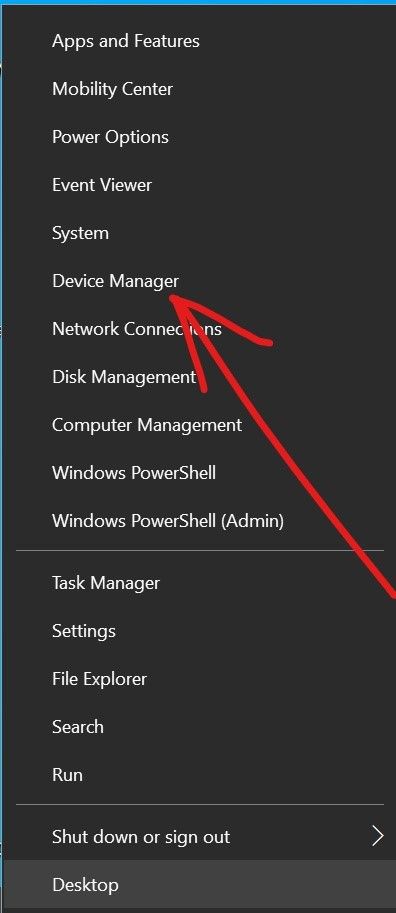
Step 1: Right-click on Start and choose Device Manager
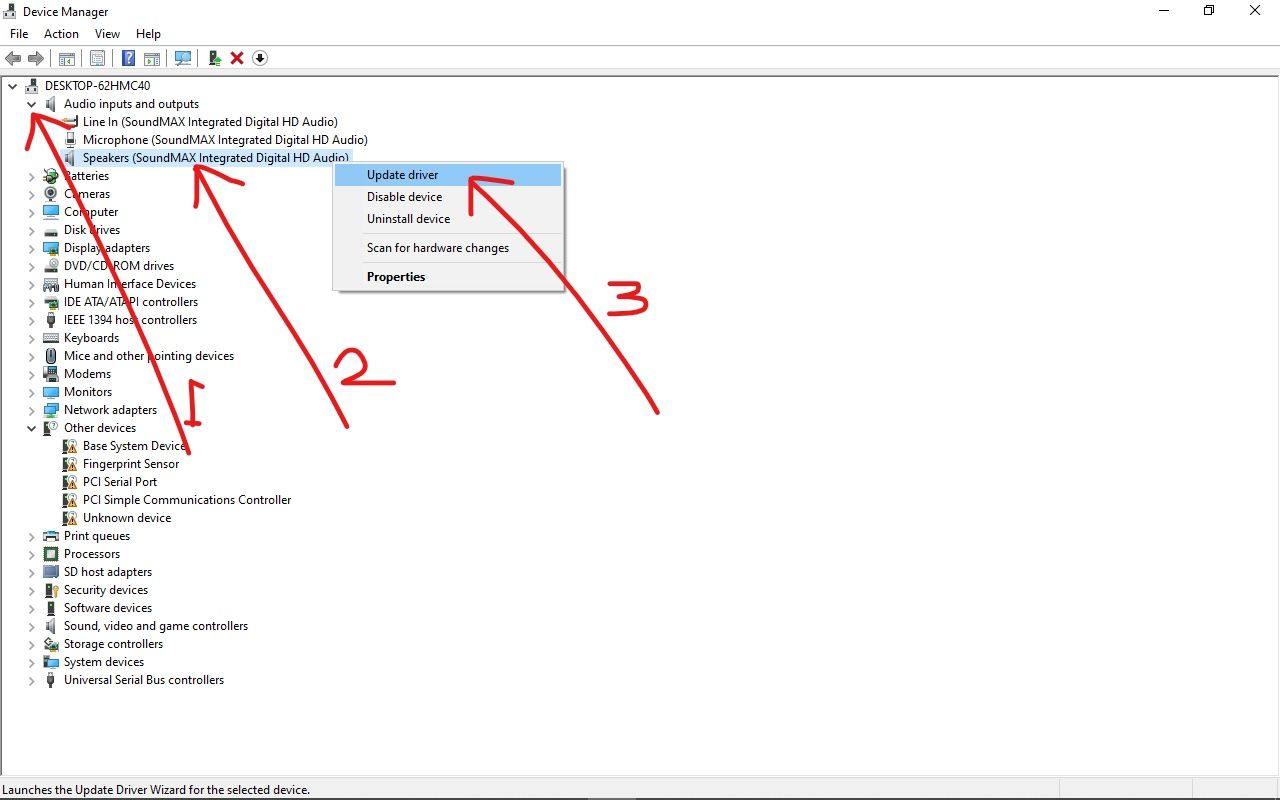
Step 2: Expand Audio inputs and outputs
Step 3: Right-click on your audio device and select Update driver
Step 4: Select "Search automatically for updated driver software"
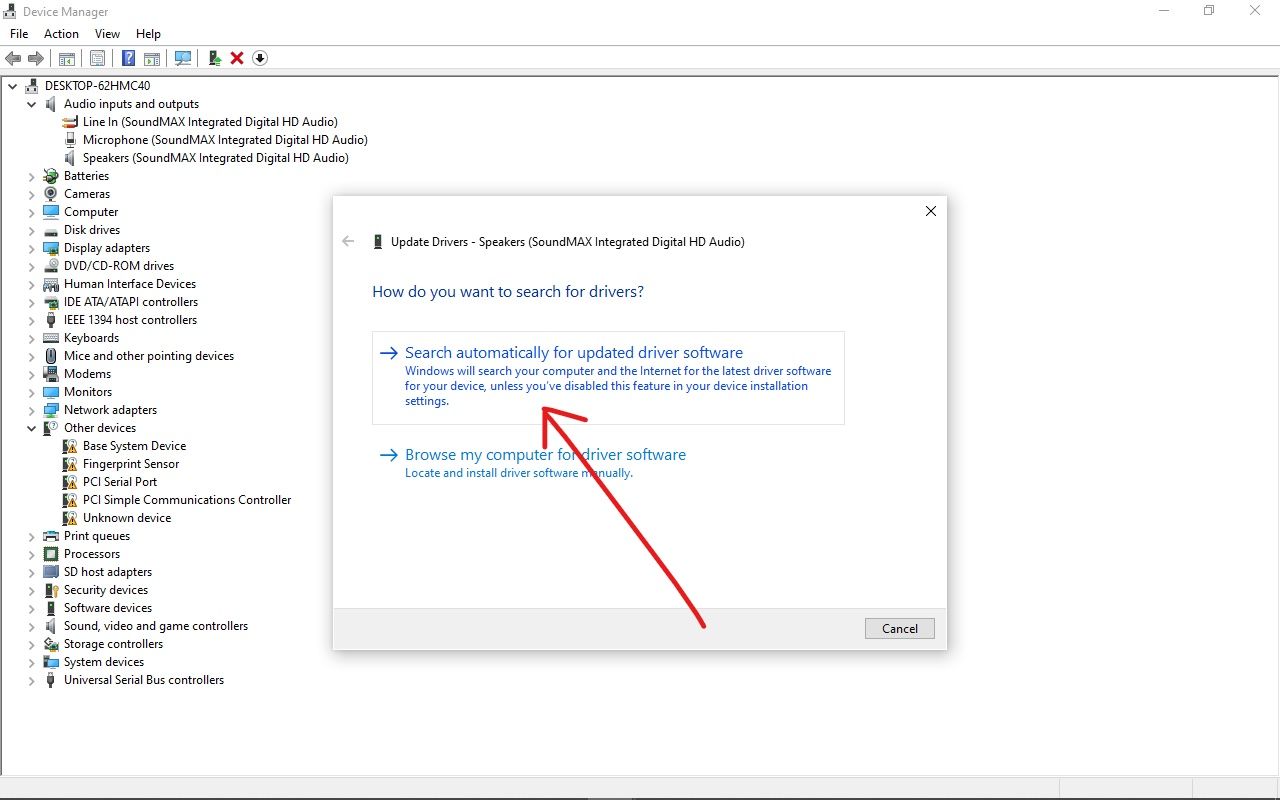
And the latest driver will be installed for your audio device.
How to Fix Headphone Jack Not Working by Running Audio Troubleshooter
When any hardware or external device doesn't work, running the appropriate troubleshooter could make it work again.
Please note that your computer must be connected to the internet to get troubleshooting recommendations.
On Windows 10, you can run audio troubleshooter with the steps below
Step 1: Press WIN (Windows logo key) + I to launch Settings
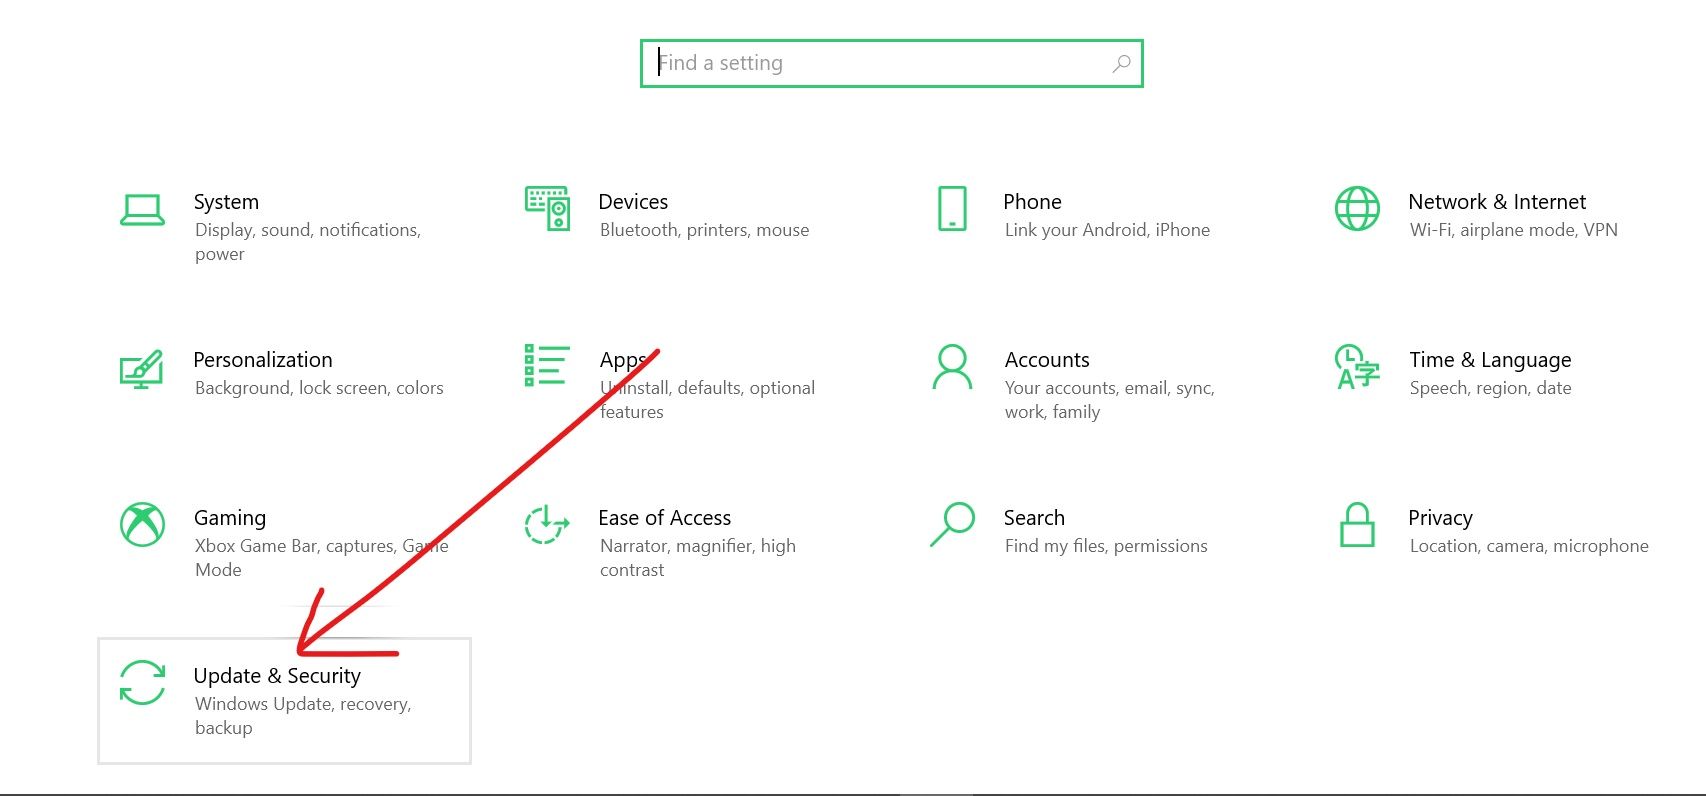
Step 2: Select Updates and Security from the menu tiles
Step 3: Switch to the Troubleshoot tab on the left
Step 4: Click the “Additional troubleshooter link”
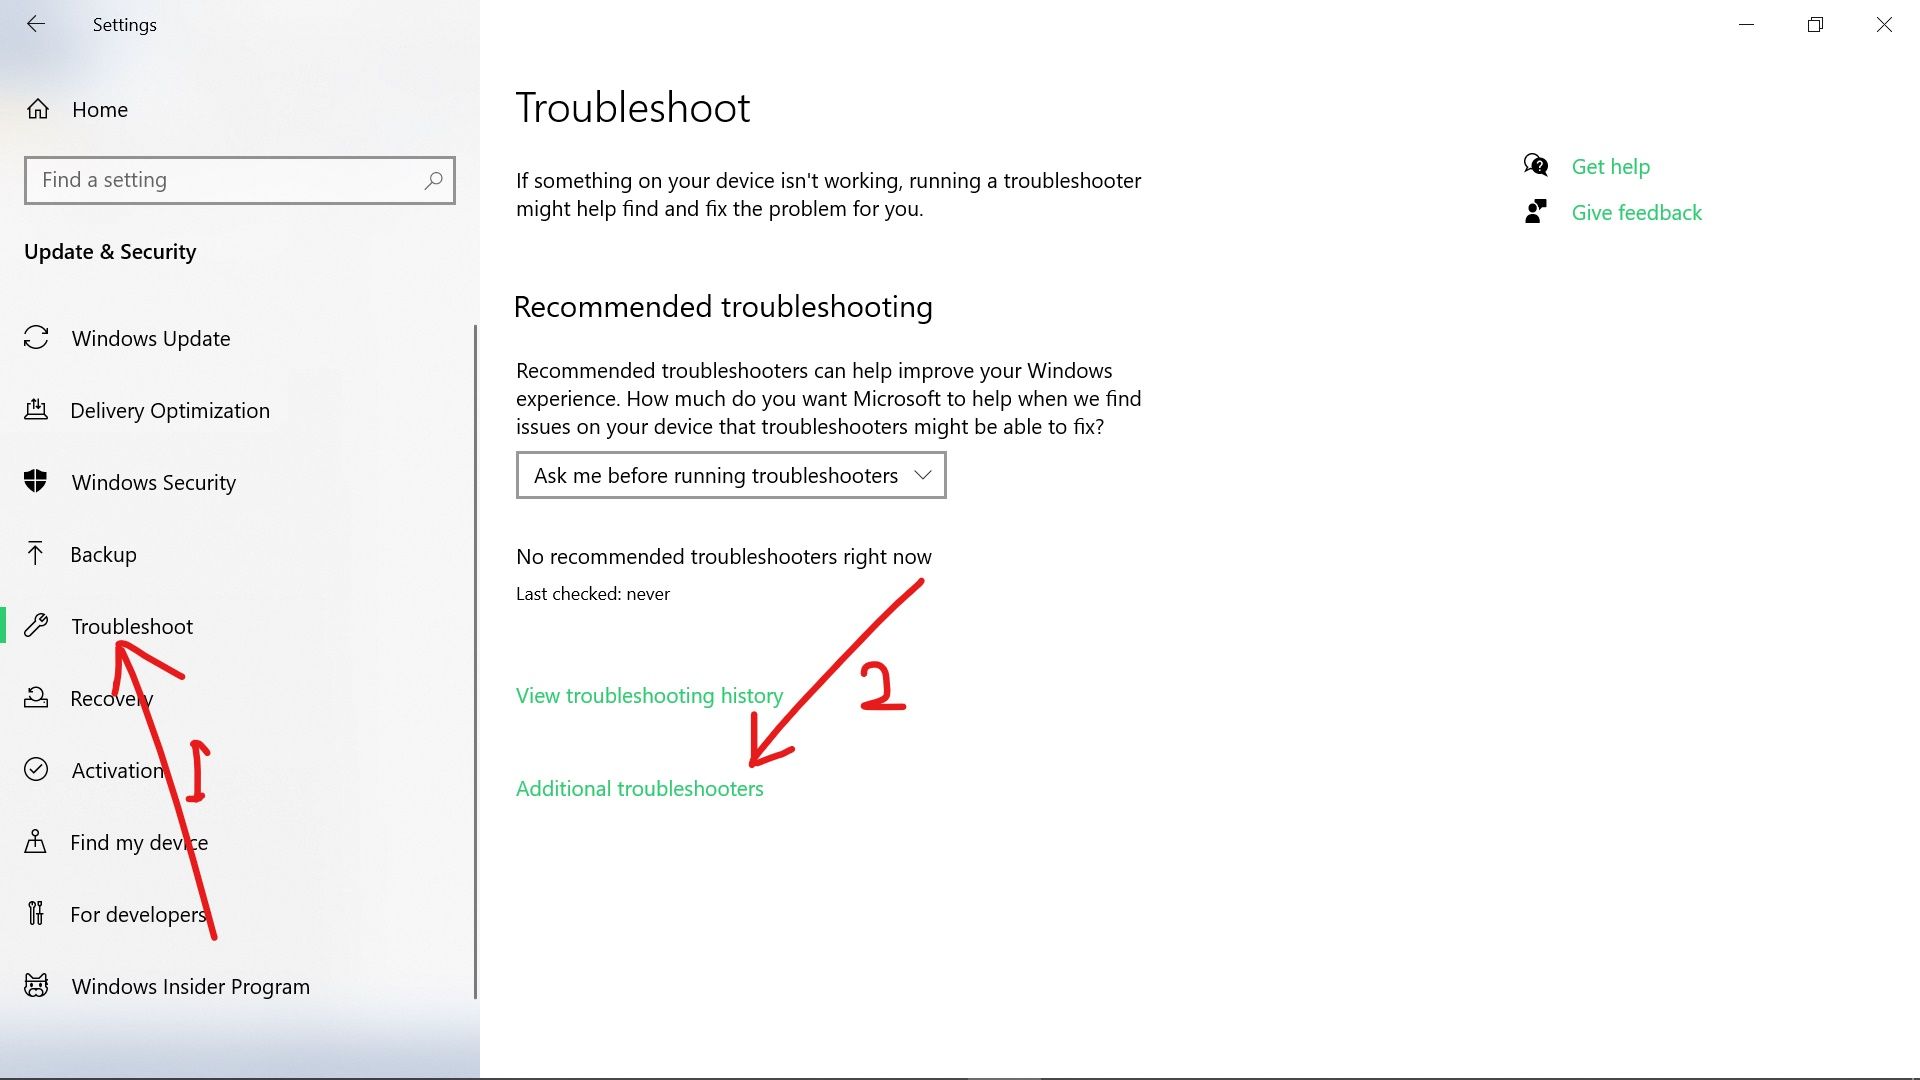
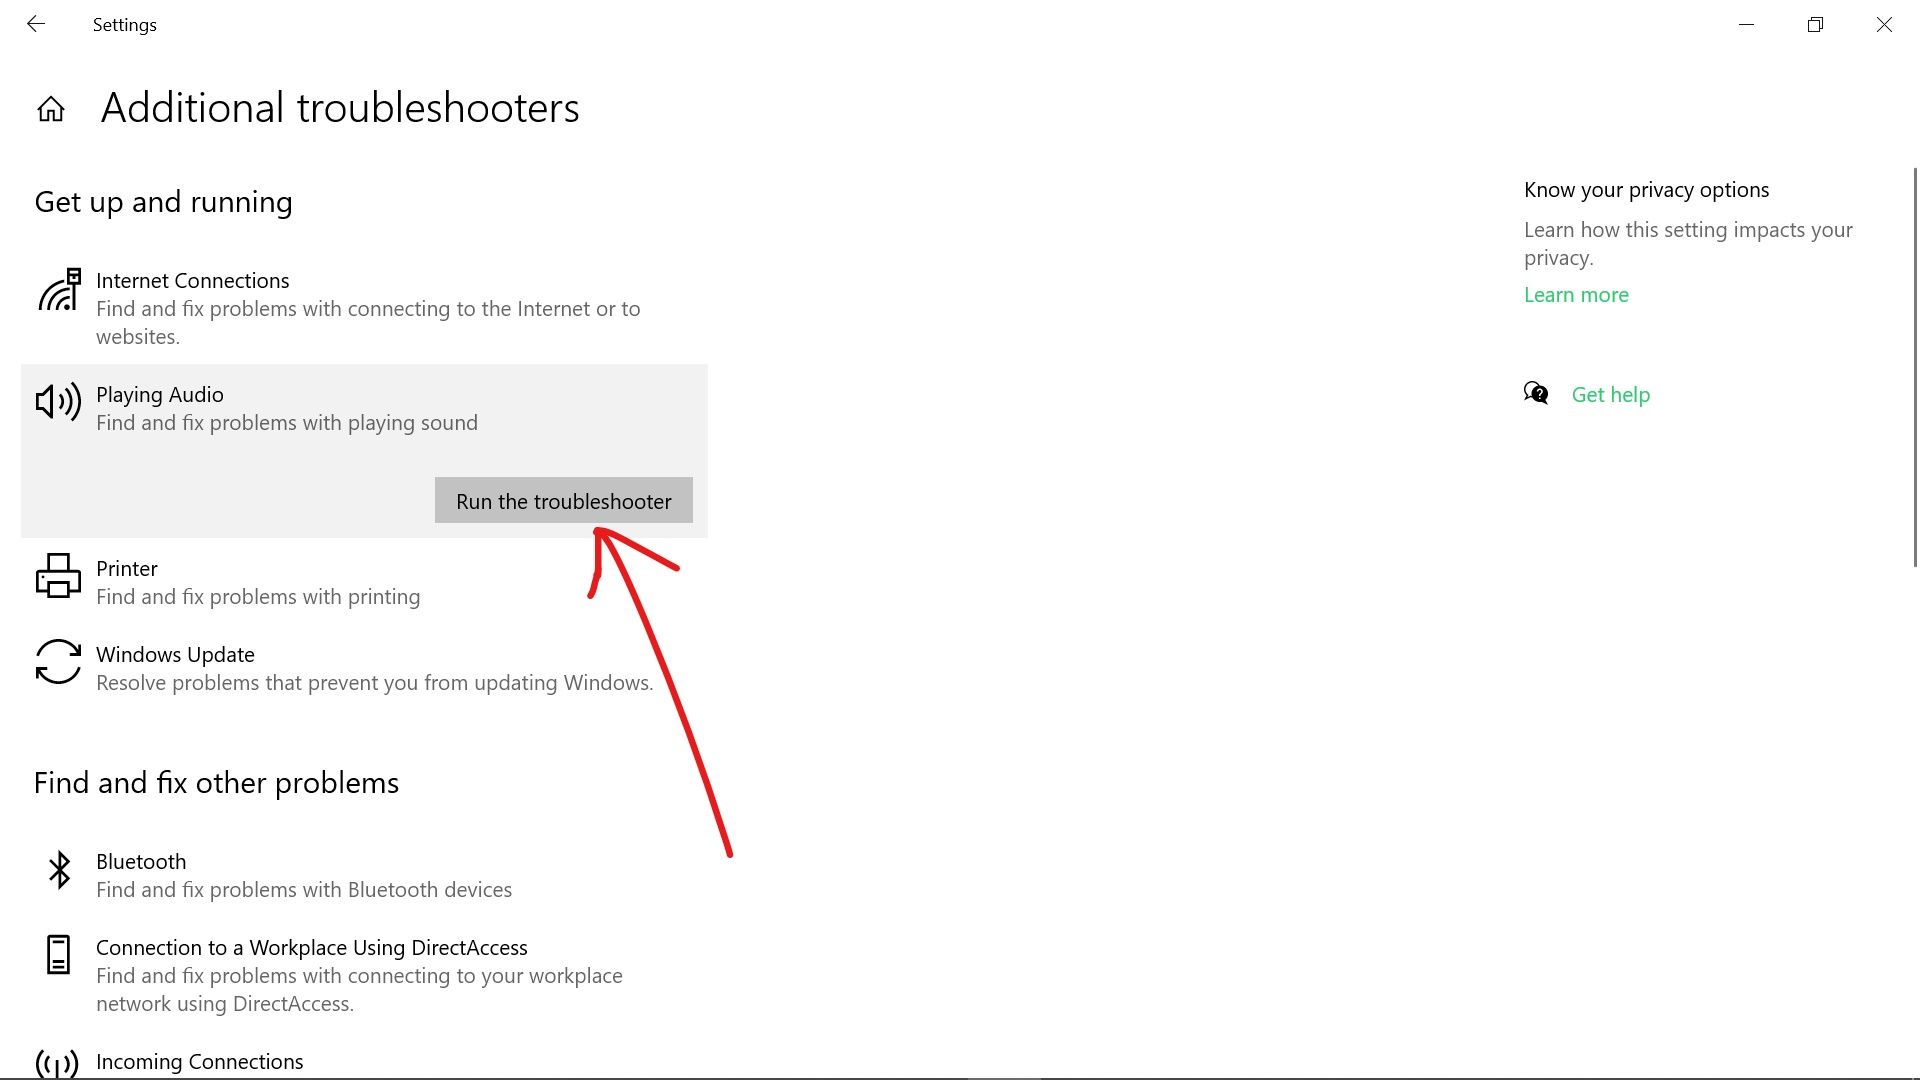
Step 5: Select “Playing Audio” and click “Run the troubleshooter”
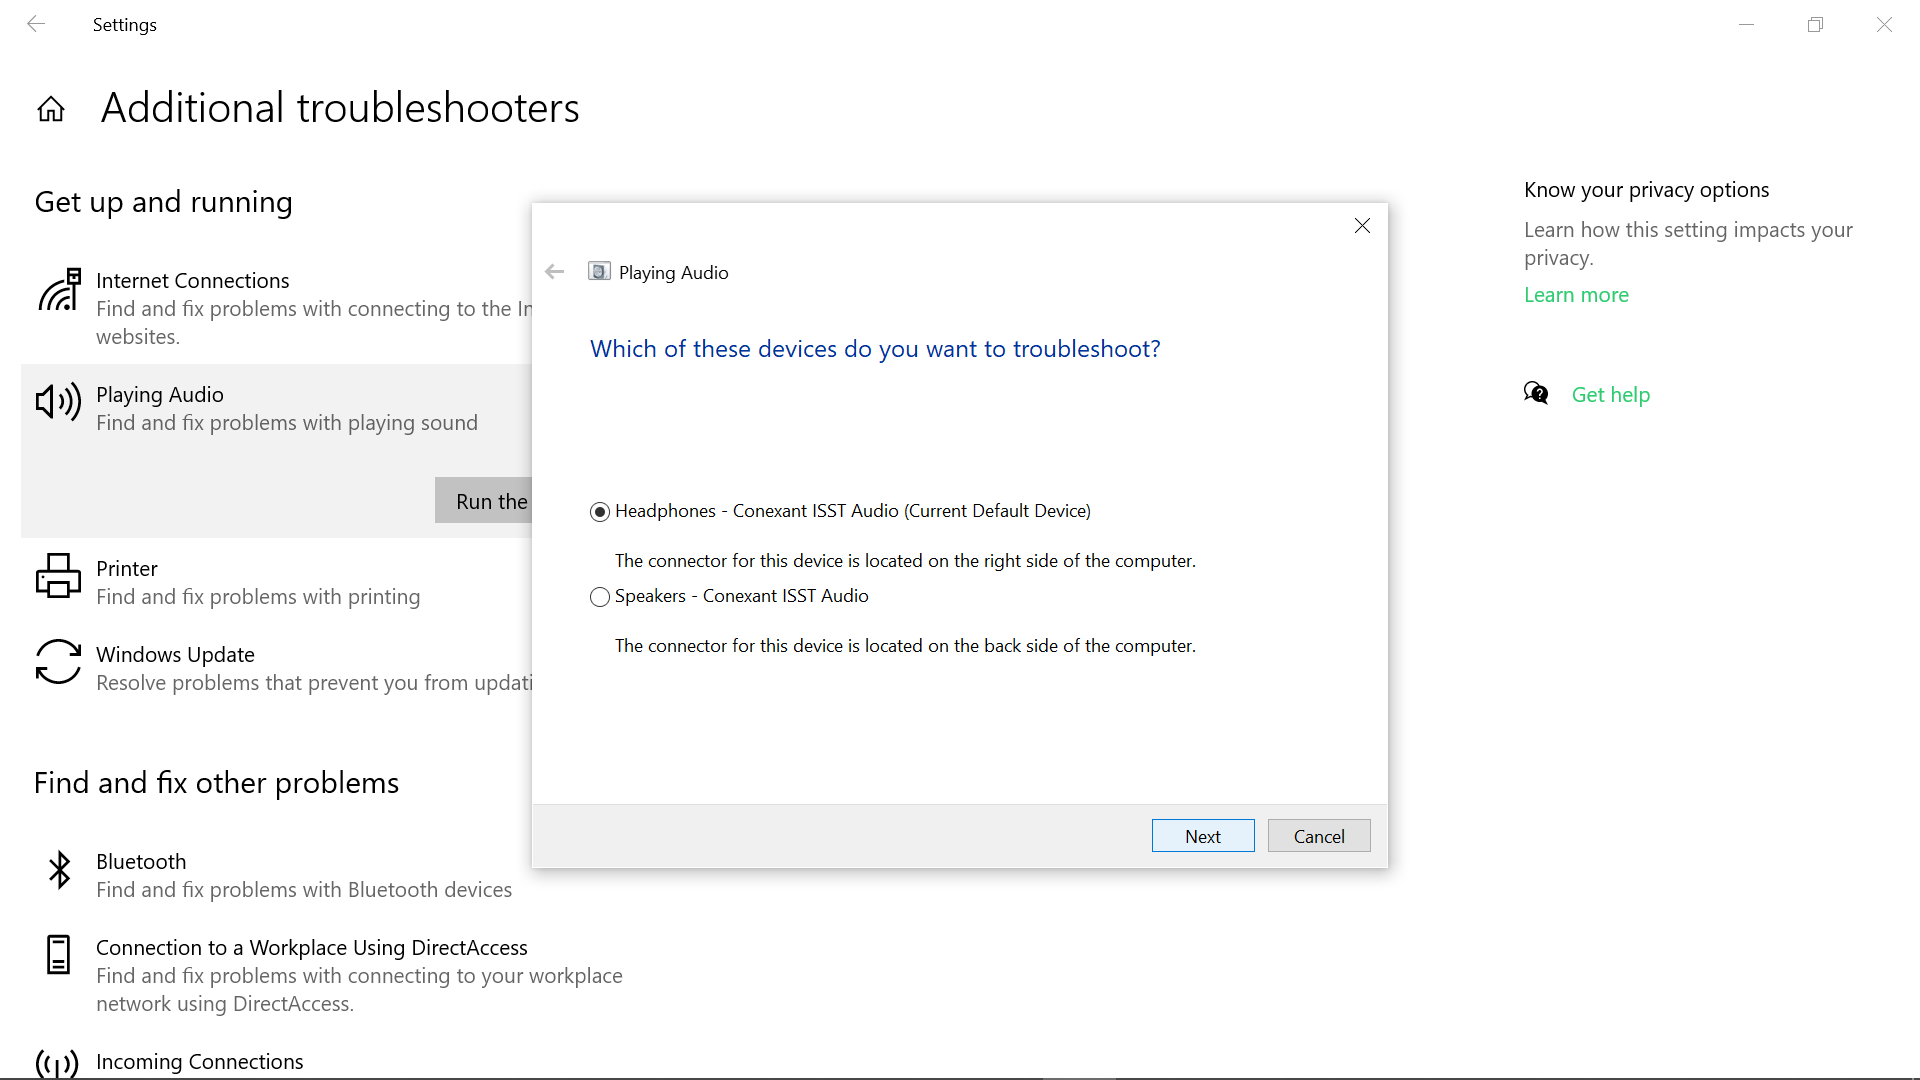
Step 6: Select which audio device you want to run the troubleshooting for
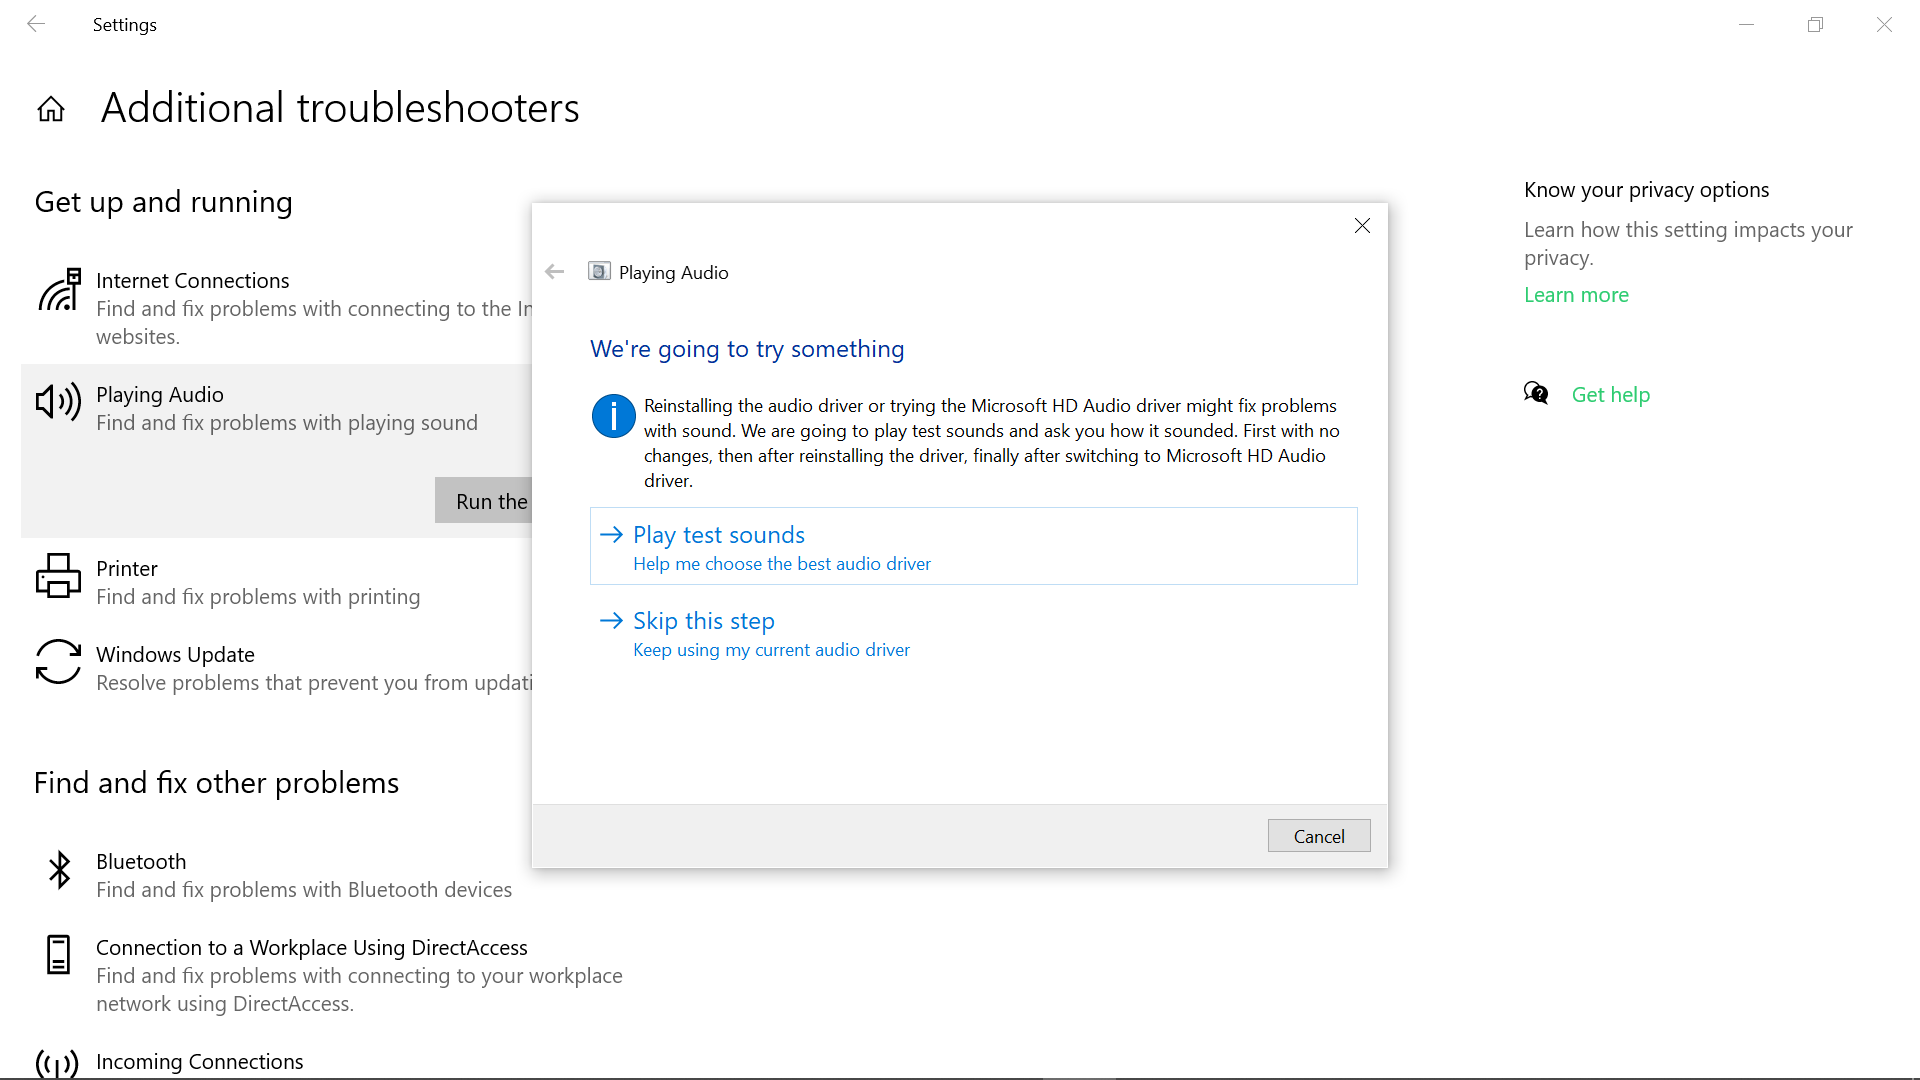
Your computer will scan through connected audio devices and make recommendations. When you apply the recommendations, you should see a screen like the one below:
How to Fix Headphone Jack Not Working by Enabling your Audio Device
Sometimes, a plugged-in headphone jack might be giving you issues because it isn't enabled.
You can enable your audio device and set it as the default with the following steps:
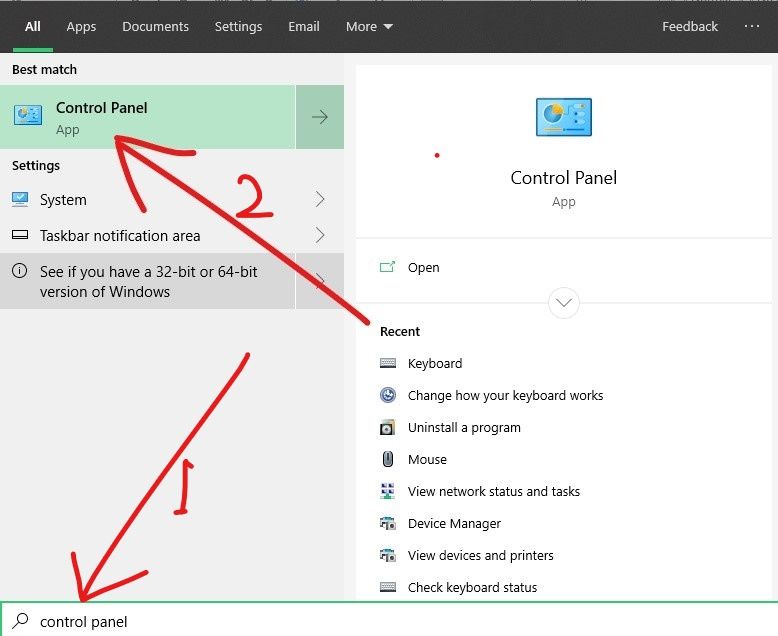
Step 1: Press the WIN key on your keyboard and search for "control panel". Hit ENTER to open the first search result, which is always Control Panel.
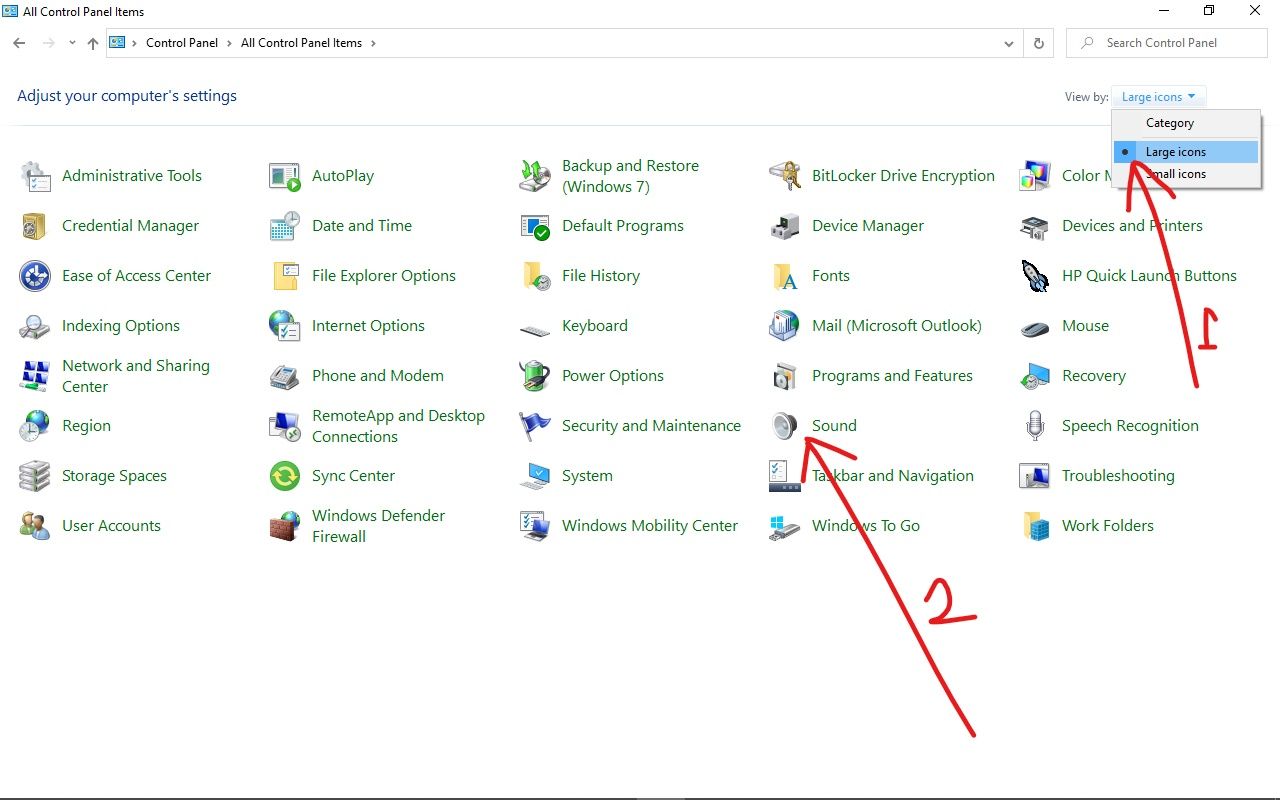
Step 2: Make sure you are viewing by large icons
Step 3: Select Sound
Step 4: If you don't see your headphone jack listed, right-click anywhere in the Playback tab and tick-mark "Show disabled devices".
Step 5: Right-click on the headphone jack that isn't working and select Enable
Step 6: The set as default button will now be available. Select it to set your headphone jack as the default audio device.
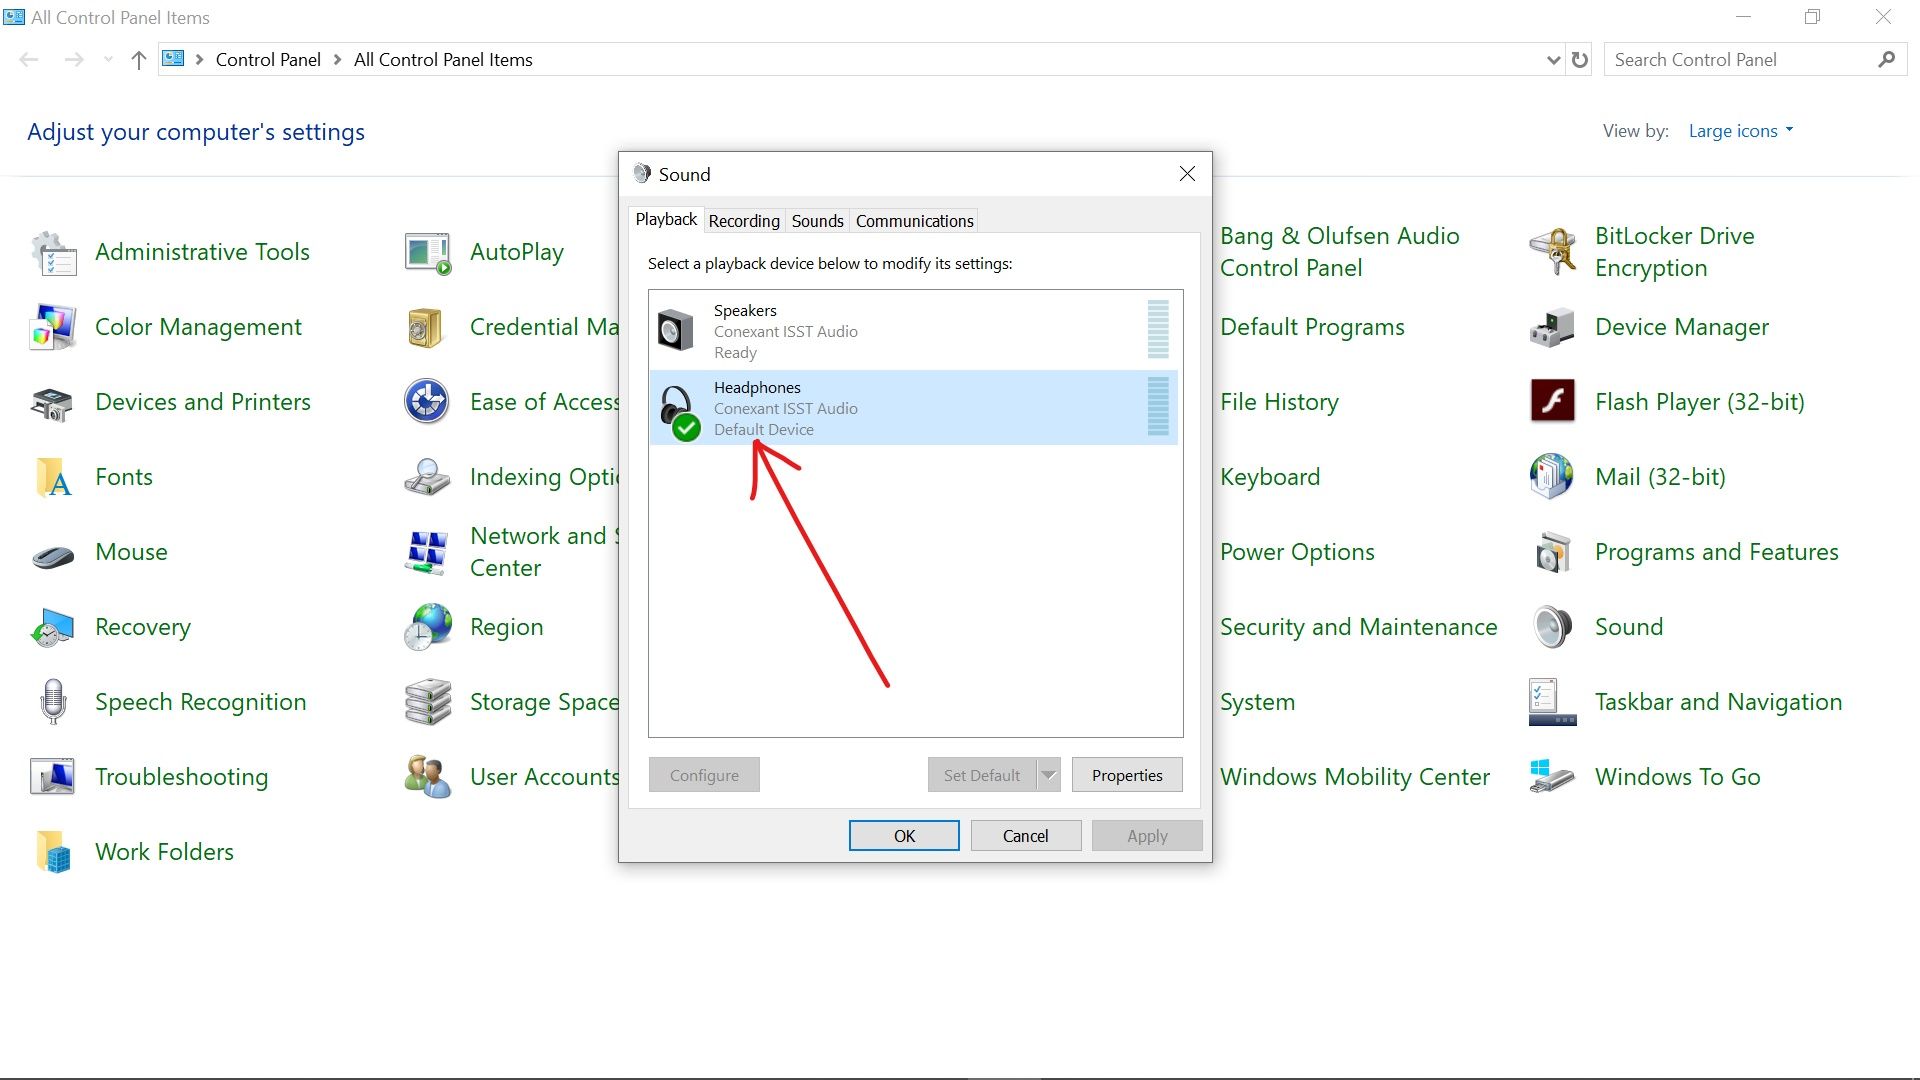
Step 7: Click Ok and restart your computer.
Conclusion
This article took you through three concise fixes for headphone jack not working on Windows 10.
Some have reported that their audio issues were fixed after they restarted their computers with their headphones plugged in. But the solutions discussed in this article should be enough for you.
Thank you for reading this article. If you find it helpful, please share it with your friends and family.

