
Everyone wants to be able to access the web from their mobile phones these days. So it's important to consider the accessibility of your web app on Android and iPhones.
The most difficult part is building the navigation – and swiping in particular can cause a lot of headaches. There are libraries you can use to help with this, but why not build it on your own?
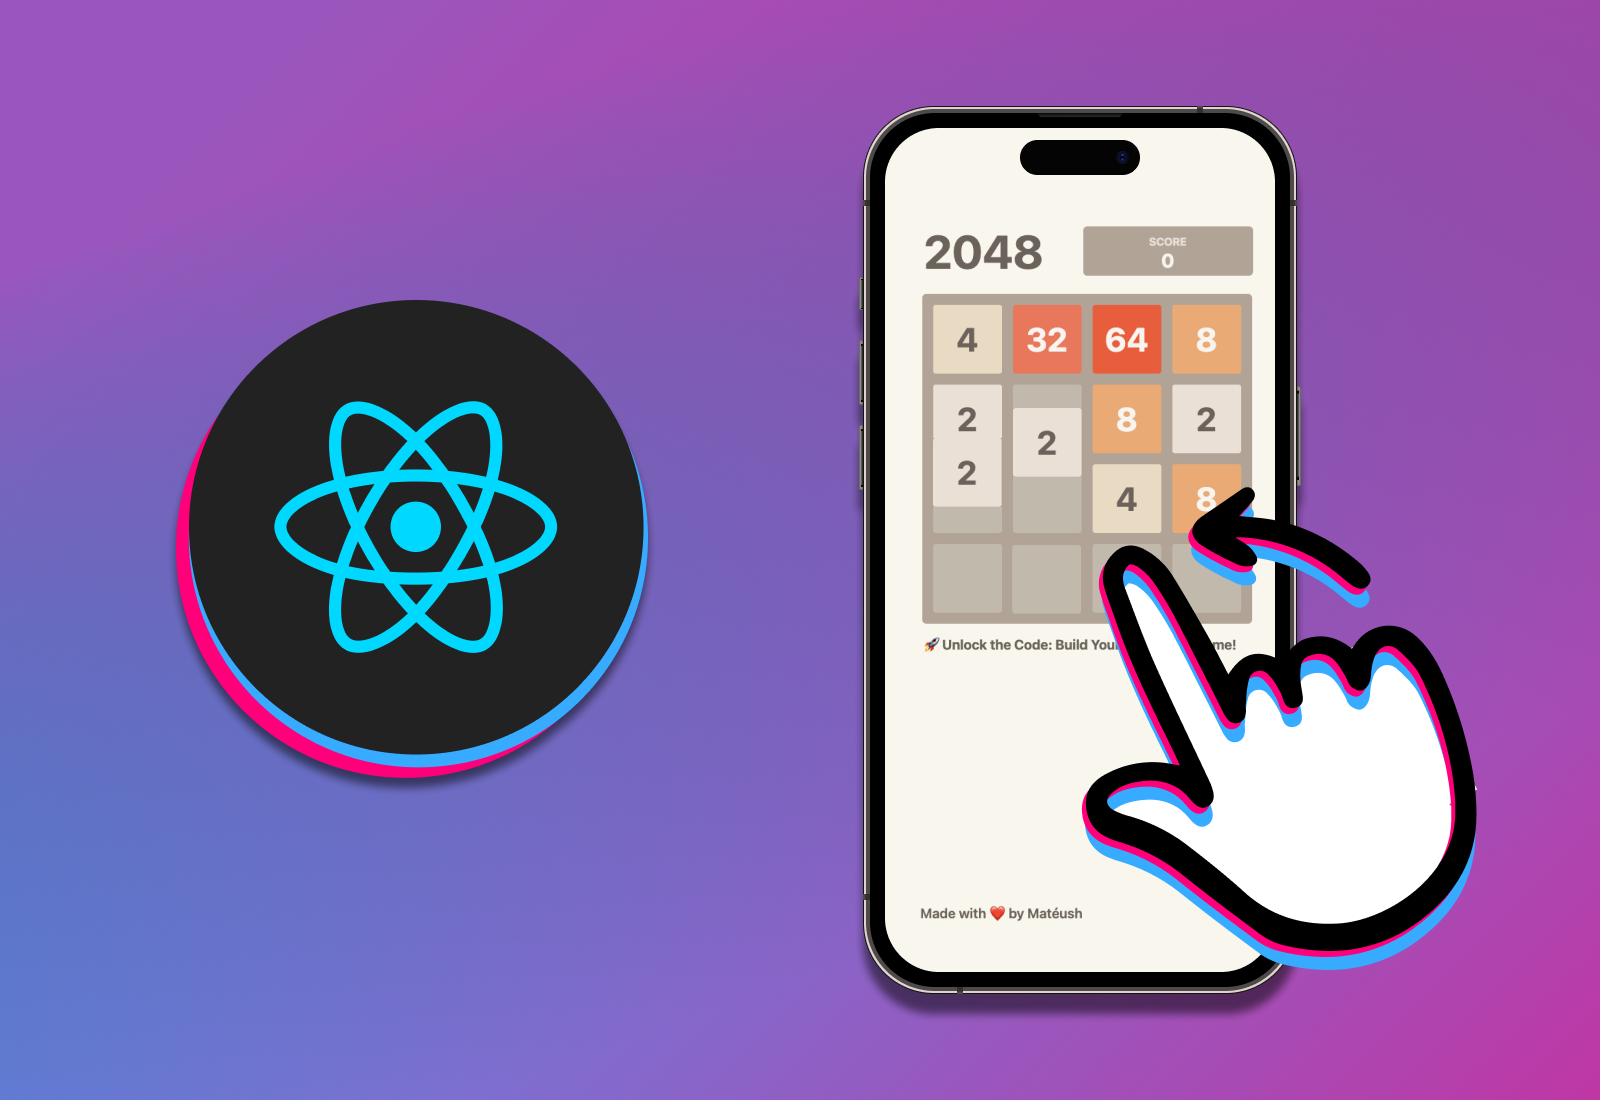
In this tutorial, I will teach you how to create your own mobile swiping component in React. You can do it in 50 lines of JavaScript.
Initially, I created this component for my pet project, the 2048 Game in React, and have now decided to share how I did it.
If you want to try it out before reading the whole article, you can play the game here (use your mobile device). In this tutorial, we will focus on mobile swiping only.
You can find the following resources on GitHub:
Here is the sneak peak (the quality isn't the best because I was trying to keep the size small):
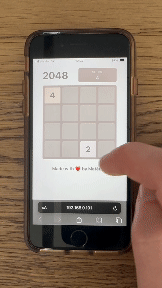 The final result in my pet project
Table of Contents:
- Prerequisites
- How to Simulate a Mobile Device in Your Browser
- The MobileSwiper Component
- Let's Make it Swipable
- Summary
🛠️ Prerequisites
Before we start, make sure you know a little bit about React and JavaScript. You don't need any sophisticated tools, but if you want to run the example project on your computer, then you will need to install Node.js first.
Also, I'm using Google Chrome to simulate a mobile device on my computer. Keep in mind that if you use any different browser, then the steps might be slightly different.
🔍 How to Simulate a Mobile Device in Your Browser
Before we start coding, I need to show you how to simulate a mobile device in Google Chrome.
Open your browser, right click on your page, and choose "Inspect" from the dropdown menu.
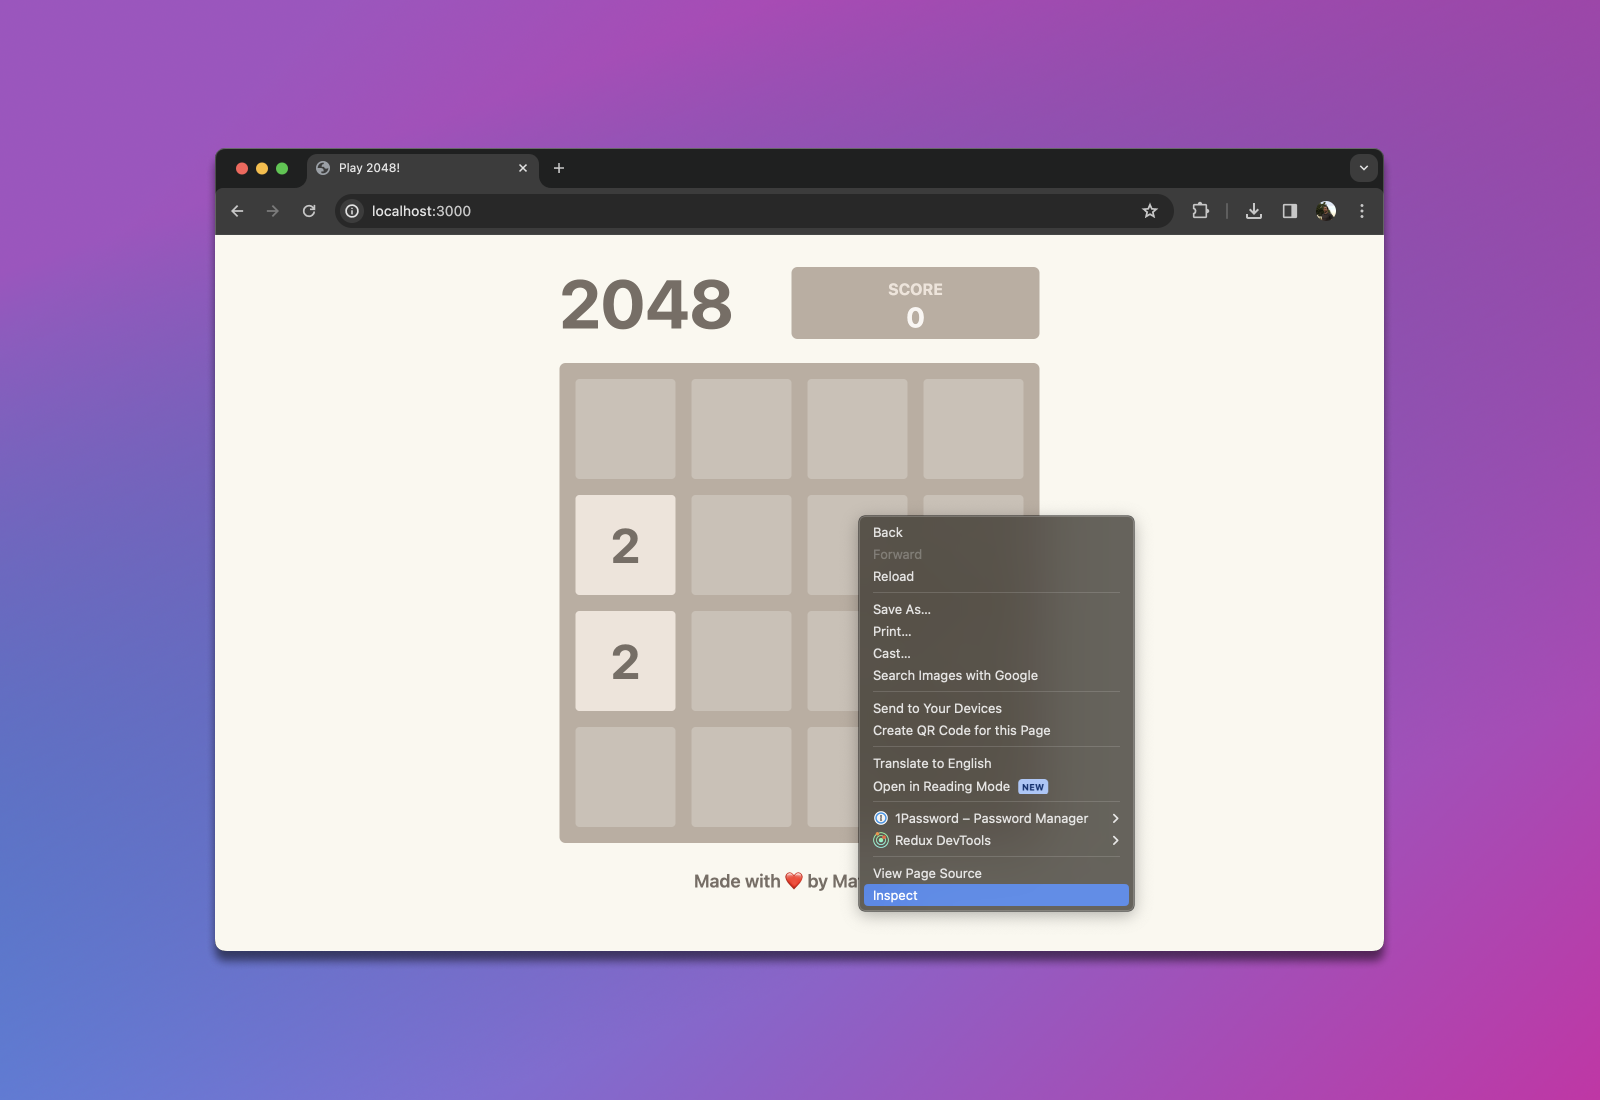 How to open Developer Tools in Google Chrome
Your browser view should now be split into two parts. The second part contains Chrome's Developer Tools.
Now, click on the "laptop & mobile" icon (1 in the image below) in top left corner of the Developer tools. Then select the "Dimensions" (2) of the device you want to simulate. I chose iPhone SE because this device has the smallest resolution supported by my game.
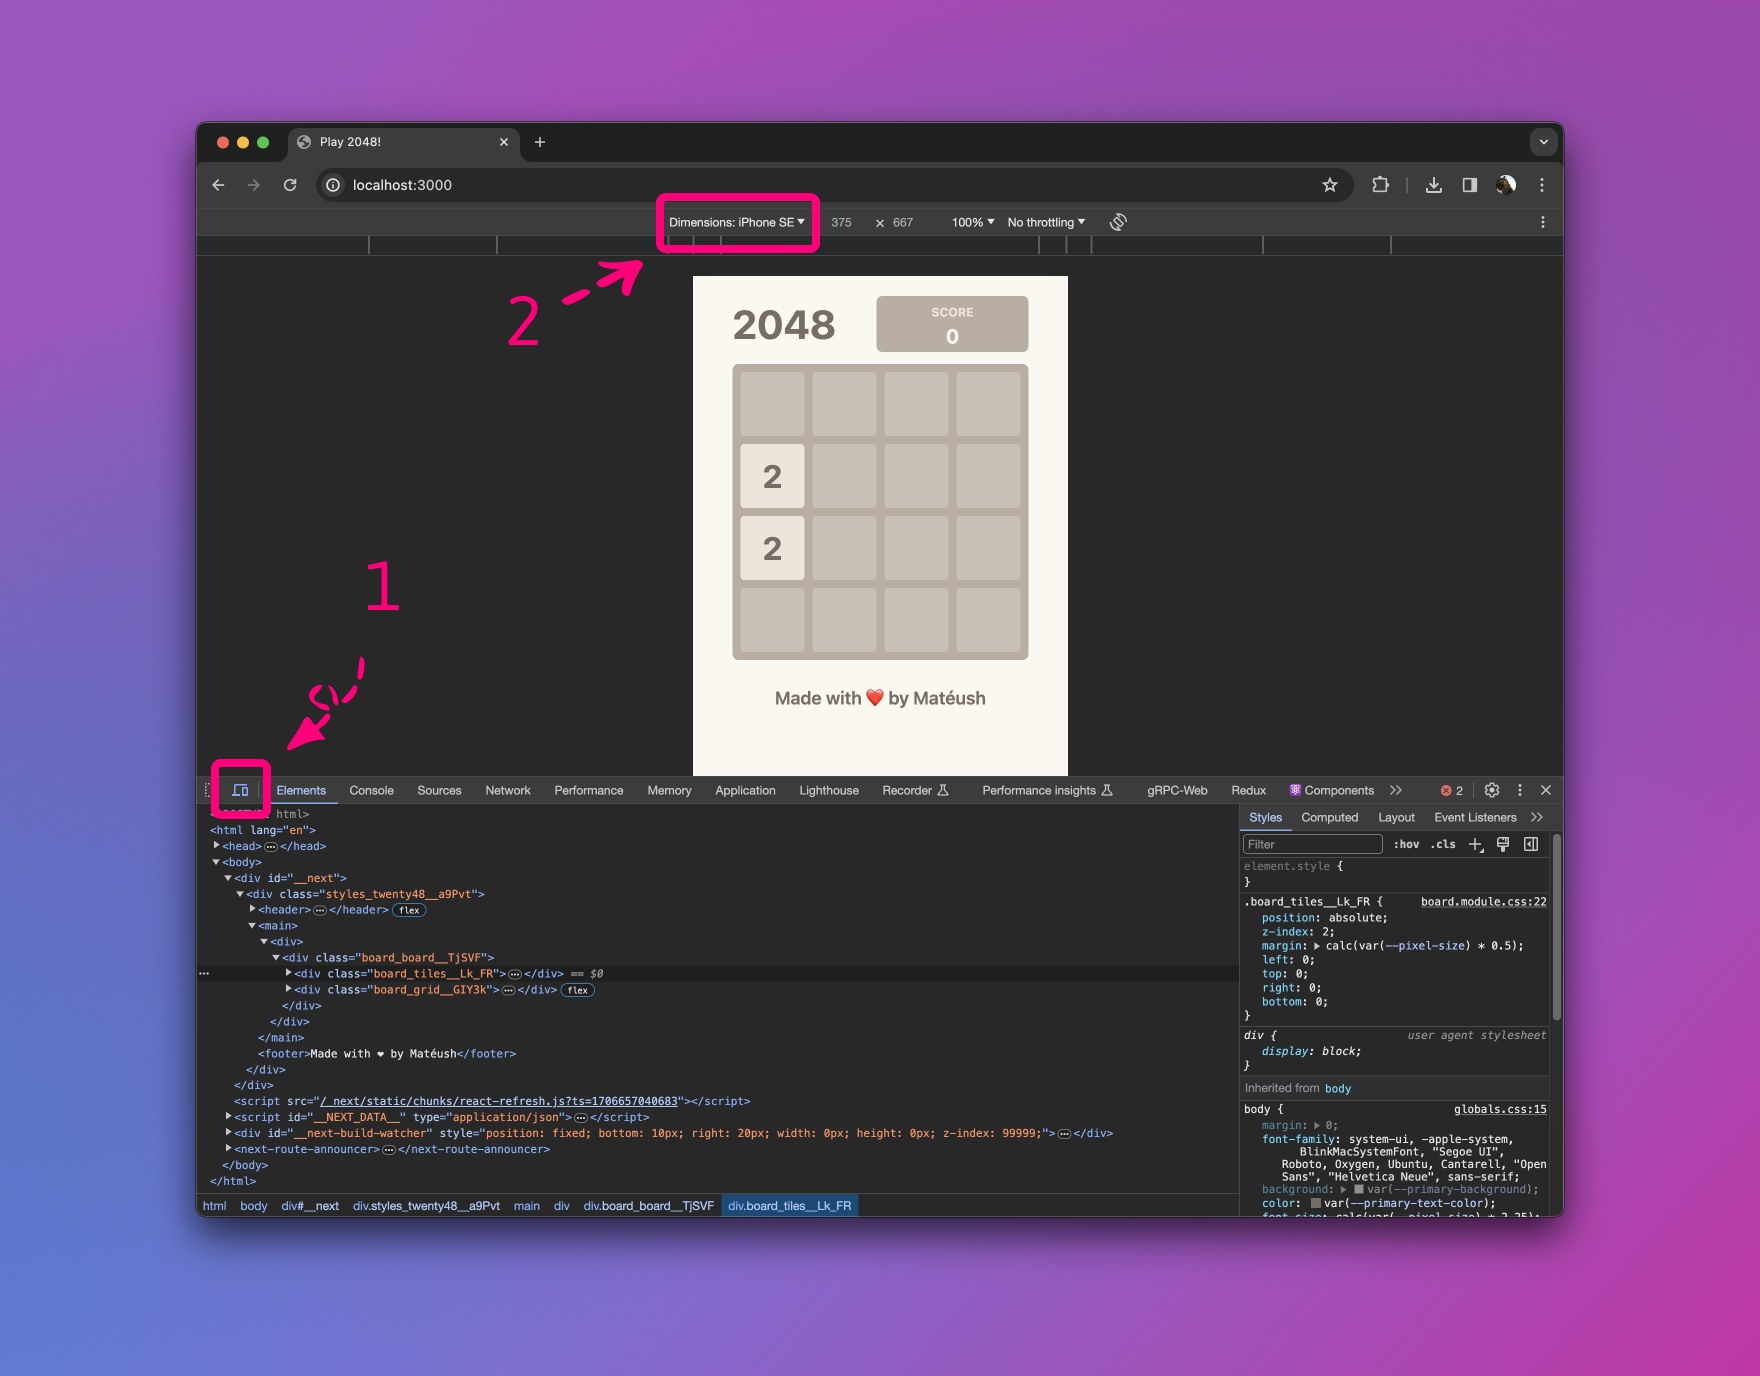 Choose device dimensions in Developer Tools (Google Chrome)
Now we are ready to simulate swiping by using our mouse or touchpad. Just pay attention to the GIF below – my cursor turned into a circle which is supposed to visualize the area covered by a person's finger.
When I try to swipe, my browser thinks I am actually scrolling through the website. In my case, this isn't an expected behavior. I would like to instead use swipes to play the game.
 By default, scrolling events are associated with swipes
🤓 The MobileSwiper Component
First, we need to create a mobile-swiper.jsx file. In this file, we declare a standard React component. Our component needs to accept two properties – children and onSwipe.
export default function MobileSwiper({ children, onSwipe }) {
    return null
}
Let me briefly explain them:
childrenallowsMobileSwiperto accept and render any content placed between its opening and closing tags. It enables you to inject the entire board inside this component – but we will get to this later.onSwipeis a callback that our component will trigger each time the user swipes within the "swipable" area.
Let's define the swipable area now. First, you need to add a reference to the DOM element in which you want to allow swiping. You can do this by using the useRef hook. So declare a constant called wrapperRef:
import { useRef } from "react"

export default function MobileSwiper({ children, onSwipe }) {
    const wrapperRef = useRef(null)

    return null

}
Side note: The useRef is a React Hook that lets you reference a value that’s not needed for rendering. It’s particularly common to use it to manipulate the DOM. React has built-in support for this.
Now you just need to return the <div /> that references the constant you created using the useRef hook.
import { useRef } from "react"

export default function MobileSwiper({ children, onSwipe }) {
    const wrapperRef = useRef(null)

    return <div ref={wrapperRef}>{children}</div>
}
Let's think for a moment how we can detect swiping. I believe the easiest way is comparing the starting and ending position of the user's finger.
This means we need to store the initial position of the user's finger in state. Basically, we will store x and y coordinates using the useState hook.
import { useState, useRef } from "react"

export default function MobileSwiper({ children, onSwipe }) {
    const wrapperRef = useRef(null)
    const [startX, setStartX] = useState(0)
    const [startY, setStartY] = useState(0)

    return <div ref={wrapperRef}>{children}</div>
}
Now we need to create two event callbacks:
handleTouchStartwill set the starting position of the user's finger.handleTouchEndwill set the final position of the user's finger and calculate the shift (delta) based on the starting point.
Let's start with the handleTouchStart event handler:
import { useCallback, useState, useRef } from "react"

export default function MobileSwiper({ children, onSwipe }) {
    const wrapperRef = useRef(null)
    const [startX, setStartX] = useState(0)
    const [startY, setStartY] = useState(0)

    const handleTouchStart = useCallback((e) => {
        if (!wrapperRef.current.contains(e.target)) {
              return
        }

        e.preventDefault()

        setStartX(e.touches[0].clientX)
        setStartY(e.touches[0].clientY)
      }, [])

    return <div ref={wrapperRef}>{children}</div>
}
Let me briefly explain it:
- I wrapped this helper into the
useCallbackhook to cache and improve its performance. If you don't know this hook, you can read about it in the official React docs. - The
ifstatement checks if the user is swiping within the swipable area. If they swipe outside of this area, we will proceed with scrolling. e.preventDefault()disables the default scrolling event.- The last two lines store
xandycoordinates in state.
Now let's implement the handleTouchEnd event handler:
import { useCallback, useState, useRef } from "react"

export default function MobileSwiper({ children, onSwipe }) {
    const wrapperRef = useRef(null)
    const [startX, setStartX] = useState(0)
    const [startY, setStartY] = useState(0)

    const handleTouchStart = useCallback((e) => {
        if (!wrapperRef.current.contains(e.target)) {
              return
        }

        e.preventDefault()

        setStartX(e.touches[0].clientX)
        setStartY(e.touches[0].clientY)
    }, [])

      const handleTouchEnd = useCallback((e) => {
        if (!wrapperRef.current.contains(e.target)) {
            return
        }

        e.preventDefault()

        const endX = e.changedTouches[0].clientX
        const endY = e.changedTouches[0].clientY
        const deltaX = endX - startX
        const deltaY = endY - startY

        onSwipe({ deltaX, deltaY })
    }, [startX, startY, onSwipe])

    return <div ref={wrapperRef}>{children}</div>
}
As you can see, steps 1-3 are exactly the same as in the handleTouchStart callback. Now, we'll take the final x and y coordinates of user's finger and deduct the initial x and y from those. Thanks to that we can calculate horizontal and vertical shift of the user's finger (deltas).
Then we pass those deltas onto the onSwipe callback. If you remember, we declared it in the component's props at the beginning.
Now we need to connect those callbacks into the event listener. To do so, we can use the useEffect hook from React.
import { useCallback, useEffect, useState, useRef } from "react"

export default function MobileSwiper({ children, onSwipe }) {
    const wrapperRef = useRef(null)
    const [startX, setStartX] = useState(0)
    const [startY, setStartY] = useState(0)

    const handleTouchStart = useCallback((e) => {
        if (!wrapperRef.current.contains(e.target)) {
              return
        }

        e.preventDefault()

        setStartX(e.touches[0].clientX)
        setStartY(e.touches[0].clientY)
      }, [])

      const handleTouchEnd = useCallback(
    (e) => {
        if (!wrapperRef.current.contains(e.target)) {
            return
        }

        e.preventDefault()

        const endX = e.changedTouches[0].clientX
        const endY = e.changedTouches[0].clientY
        const deltaX = endX - startX
        const deltaY = endY - startY

        onSwipe({ deltaX, deltaY })
    }, [startX, startY, onSwipe])

     useEffect(() => {
        window.addEventListener("touchstart", handleTouchStart)
        window.addEventListener("touchend", handleTouchEnd)

        return () => {
            window.removeEventListener("touchstart", handleTouchStart)
            window.removeEventListener("touchend", handleTouchEnd)
        }
      }, [handleTouchStart, handleTouchEnd])

    return <div ref={wrapperRef}>{children}</div>
}
You can read more about the useEffect hook in the official React docs.
The MobileSwiper component is ready now.
🔌 Let's Make It Swipable
The last thing we need to do is hook our component to the application. As I mentioned, I will be using this component in my 2048 Game (Source code). If you want to use it somewhere else, the handleSwipe helper and the MobileSwiper component will remain the same.
Let's plug it into the Board component:
import { useCallback, useContext, useEffect, useRef } from "react"
import { Tile as TileModel } from "@/models/tile"
import styles from "@/styles/board.module.css"
import Tile from "./tile"
import { GameContext } from "@/context/game-context"
import MobileSwiper from "./mobile-swiper"

export default function Board() {
    const { getTiles, moveTiles, startGame } = useContext(GameContext);

    // ... removed irrelevant parts ...

    const handleSwipe = useCallback(({ deltaX, deltaY }) => {
        if (Math.abs(deltaX) > Math.abs(deltaY)) {
            if (deltaX > 0) {
                moveTiles("move_right")
            } else {
                moveTiles("move_left")
            }
        } else {
            if (deltaY > 0) {
                moveTiles("move_down")
            } else {
                moveTiles("move_up")
            }
        }
    }, [moveTiles])

     // ... removed irrelevant parts ...

    return (
        <MobileSwiper onSwipe={handleSwipe}>
              <div className={styles.board}>
                <div className={styles.tiles}>{renderTiles()}</div>
                <div className={styles.grid}>{renderGrid()}</div>
              </div>
        </MobileSwiper>
      )
}
Let's start with the handleSwipe handler. As you can see, we're comparing if deltaX is greater than deltaY to decide if the user swiped horizontally (left / right) or vertically (top / bottom).
If it was a horizontal swipe, then:
- negative
deltaXmeans they swiped to the left. - positive
deltaXmeans they swiped to the right.
If it was a vertical swipe, then:
- negative
deltaYmeans they swiped up. - positive
deltaYmeans they swiped down.
Now, let's focus on the MobileSwiper component. You can find it in the return statement. We're passing the handleSwipe helper to the onSwipe property and wrapping the entire HTML code of the Board component to enable swiping on it.
Now when we try it out, the result isn't ideal. Scrolling events are mixed with mobile swipes, as you can see below:
 Board with duplicated events – swipes and scrolling
This is happening because modern browsers use passive event listeners to improve the scrolling experience on mobile devices. This means that the preventDefault we added to our event callbacks never happens.
To disable scrolling behavior, we need to disable passive listeners on the MobileSwiper component:
import { useCallback, useEffect, useState, useRef } from "react"

export default function MobileSwiper({ children, onSwipe }) {
    // ... removed to improve visibility ...

     useEffect(() => {
        window.addEventListener("touchstart", handleTouchStart, { passive: false })
        window.addEventListener("touchend", handleTouchEnd, { passive: false })
        // ... removed to improve visibility ...
      }, [handleTouchStart, handleTouchEnd])

    // ... removed to improve visibility ...
}
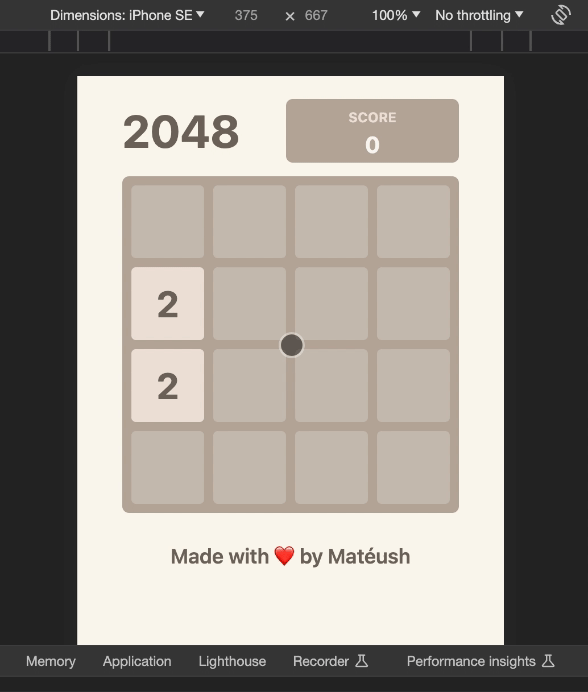
Now the scrolling behavior is gone and the 2048 Game looks just awesome:
 Final result - swiping works!
🏁 Summary
Today I showed you that you don't always need libraries to handle mobile gestures in React. Some simple events such as swiping can be implemented using basic React features. We just used a bunch of React hooks and wrote two simple event handlers.
The entire implementation has exactly 50 lines of code. I hope I inspired you to try to deal with mobile events on your own.
If this article helped you, please let me know on Twitter. Educators like me often feel like we are speaking into a vacuum and nobody cares what we teach. A simple "shoutout" shows it was worth an effort and inspires me to create more content like this.
Please share this article on your social media. Thank you!
🎥 Create Your Own 2048 Game
This article is a part of my course on Udemy where I teach how to create a fully-functional 2048 Game in Next.js from scratch.
🧑🎓 Join my Next.js course on Udemy
Use code FREECODECAMP to enroll to get a 60% discount.
I believe programming should be fun and unleash creativity. You don't have to build yet another TODO list or a shopping cart. Instead, you can build something that you can show to your friends or maybe even a hiring manager!
PS. If you prefer to watch screencasts, then this lesson is available on Udemy for free. You can find it under the "Responsive Layout and Missing Game Feature" section in the lecture called "Game layout and mobile swipes".