By Sampurna Chapagain
Django is a free and open-source Python web framework that helps you quickly develop secure and maintainable web applications.
In this tutorial, I will guide you step by step as we create a calculator app using django.
This is a beginner-friendly tutorial, so if you are new to Django, you can follow along.
How Will Our Calculator App Look?
 Calculator with add, subtract, multiply, and divide operations
You can get the full code in this GitHub repository.
How to Set Up the Django Calculator Project
Assuming that you have Django installed on your system, we will now be working on creating the project. For this, you need to open the terminal and use the following command:
django-admin startproject calculator
This command creates the project default structure with files like manage.py, and a folder with the project name which contains files like settings.py, urls.py and so on. We will go through those files as we work on our app.
After the project is created, we need to change the working directory to the project directory. In Linux, the command is cd calculator/.
The next step is to create a Django app named calculatorapp with the following command:
python manage.py startapp calculatorapp
This app contains files like models.py, views,py, admin.py, migrations, and so on.
Once the app is created, the first important thing is to register the app in the INSTALLED_APPS list in settings.py file.
For this, you will need to navigate to the settings.py file which is inside your Django project, and is the calculator in this tutorial. The settings.py file contains the INSTALLED_APPS list and you will need to add your app name to the list. So, the INSTALLED_APPS list should look like this:
```python INSTALLED_APPS = [ 'calculatorapp', 'django.contrib.admin', 'django.contrib.auth', 'django.contrib.contenttypes', 'django.contrib.sessions', 'django.contrib.messages', 'django.contrib.staticfiles', ]
Now that the app is registered, we are ready to work on the project.
How to Add Routes
Now, let's work on adding the routes. You need to create a urls.py file in the calculatorapp directory. The code is added below:
```python from django.urls import path from . import views
urlpatterns = [ path('', views.home, name='home'), ]
Here, you will need to import path from django.urls and then import views.
In the urlpatterns lists, you need to pass your view function, which we will be creating very soon.
But first, let's register this app URL file to the project urls.py file.
So, you will need to open the urls.py file inside the calculator directory and add the following code:
```python from django.contrib import admin from django.urls import path, include
urlpatterns = [ path('admin/', admin.site.urls), path('', include('calculatorapp.urls')), ]
Here, it includes the URL of calculatorapp. If you want add any new URL for your calculatorapp, you can do that from calculatorapp/urls.py file.
How to Write Views
Now, if you try visiting http://localhost:8000/ URL, you will get the error because it's looking for the home view function. The view function for / route is home and since there is no home view, it's giving an error.
 error in terminal on visiting the root page
In Django, there are two types of views: function-based views and class-based views. In this tutorial, we will be using function-based views and they start with the def keyword.
To fix the above error, you will need to go to the views.py file which is inside the calculatorapp and create a home view function.
```python def home(request): pass
How to Add Templates to the App
Now, if you try visiting the http://localhost:8000/ URL, you will get a different error. As you can see from the screenshot below, it is looking for some response to return.
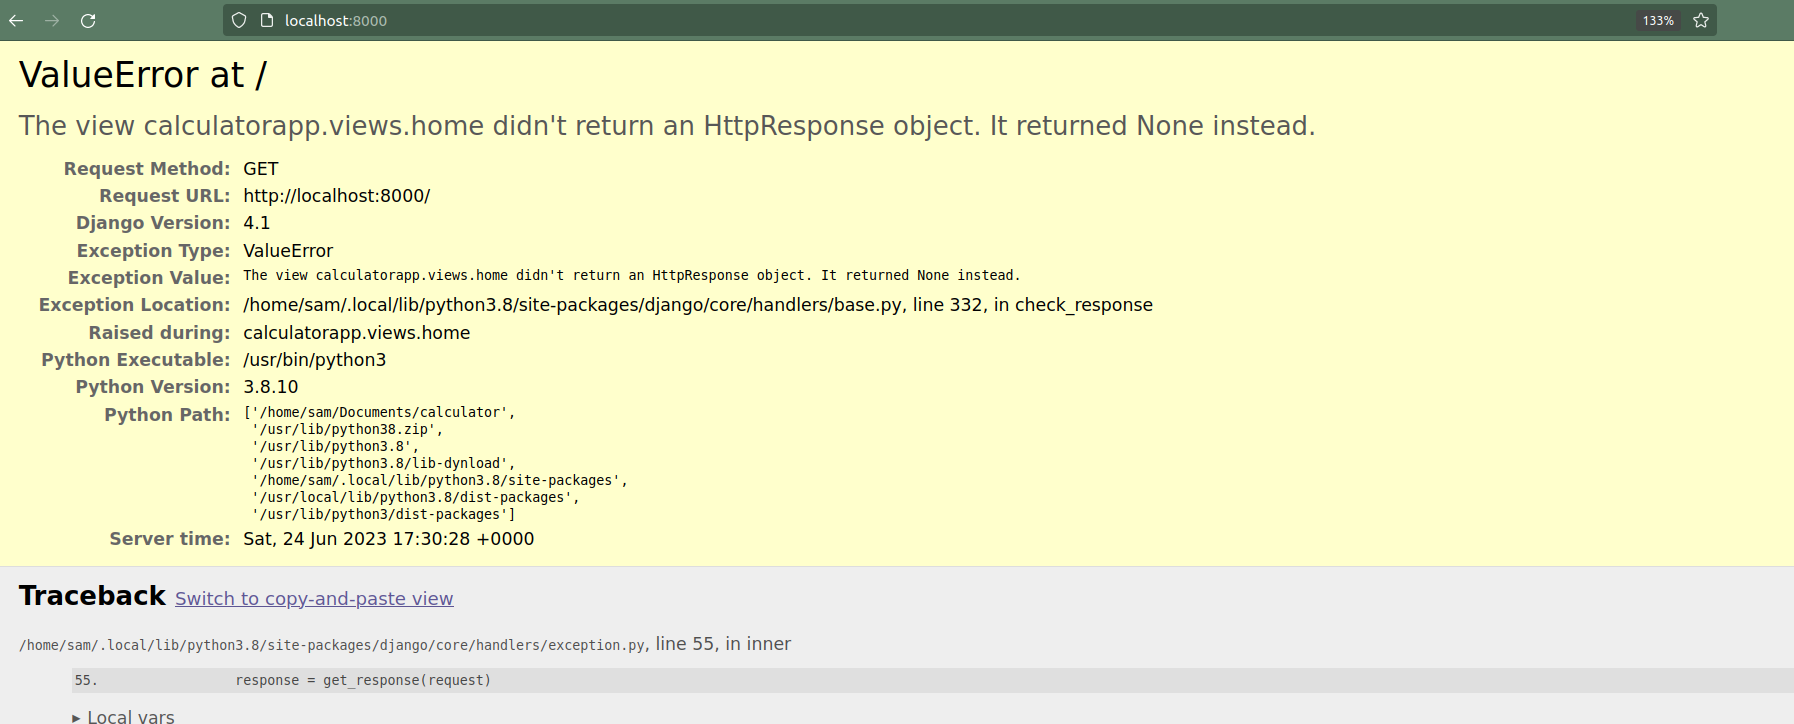 error in browser looking for views response
So instead of just using the random text like pass you will need to render an HTML template. Templates are used to render the dynamic HTML content.
```python def home(request): return render(request, 'home.html')
As you can see for the home view, it's returning the home.html template.
Now, you will need to create a templates folder in the root directory of your app, which is calculatorapp in this tutorial.
Inside this templates folder, you will need to create a home.html file.
This home.html template will contain the form with different buttons for the calculator.
The home.html will contain the following code:
```python
Basic Calculator
Add Subtract Multiply Divide
The above code contains a simple HTML form with two input fields and four buttons. There is some styling to display the code in the center with some bordering.
The important thing to notice in the above code is <form action="result">, which means that on submitting the form it will redirect to the result URL.
Now if you try to perform any operations in the browser, you will get a new error since there is no result page.
 Throwing an error after button submit since there is no result page
How to Add the URL for the Result Page
On submitting the form, it is looking for the result path. So, the next step is to create the result view and add a template and URL for it.
The updated urls.py file will be as follows:
```python from django.urls import path from . import views
urlpatterns = [ path('', views.home, name='home'), path('result/', views.result, name='result'),
]
How to Add Template Code for the Result View
The second URL from the urlpatterns lists is looking for the result view. So, let's work on it now. First, I will show you the code for the result view and then explain what each line does.
```python def result(request): num1 = int(request.GET.get('number1')) num2 = int(request.GET.get('number2'))
if request.GET.get('add') == "": ans = num1 + num2
elif request.GET.get('subtract') == "":
ans = num1 - num2
elif request.GET.get('multiply') == "":
ans = num1 * num2
else: ans = num1 / num2
return render(request, 'result.html', {'ans': ans})
Now, let's break down the above code:
- It's getting the value from the
number1andnumber2input fields which you get from the form. - Then it checks for conditions based on the buttons clicked.
- Since all buttons are given different names clicking those give the empty string value in the URL. And based on that it's adding conditions for
add,subtract,multiply, anddivide. - It renders the
result.htmltemplate with theanscontext. The context in Django is a dictionary with key-value pairs that can be passed to the template.
Now, you will need to create a result.html file inside the templates folder and add the following code:
```python
{{ans}}
Here, it's displaying the value of ans. And it also contains the home URL with some basic styling for the page.
In Django, the double curly brackets {{}} are used to display the value of variables. And variables output the value from the context.
Finally, we are done creating a calculator app with basic features like addition, subtraction, multiplication, and division in Django.
Conclusion
This is how you can create a basic calculator app in Django.
In this tutorial, you learned about handling views, templates, URLs, and the necessary configurations to make the Django app functional.
I didn't cover anything about models in this post. So, if you want to save the record in the database you can play around with that further.
I hope you found this tutorial useful.
You can find me on Twitter for daily content regarding Web development.
Enjoy Coding in Python!