
All developers like their text editor a certain way, but it can be tough to make sure all of your environments have the same configuration. How can we make sure our VS Code configuration is the same wherever we use it?
- What is VS Code?
- What will we use?
- How does it work?
- Step 1: Install Settings Sync
- Step 2: Authorize access to Github
- Step 3: Upload your current settings
- Step 4: Syncing your configuration to another environment
- Step 5: Updating your configuration
What is VS Code?
Visual Studio Code, or VS Code, is an all-inclusive code editor that takes all of the features you want out of working with code and puts them in one editor to make you ultra productive.
It’s been the “cool kid on the block” for a little while now and has been increasingly growing in popularity at least in the JavaScript community. Microsoft has put a lot of effort into making it something people want to use (and they’re doing a great job at that).
What will we use?
We’re going to use a VS Code extension called Settings Sync that makes use of Github’s Gist feature to store a private JSON configuration file in the cloud.
How does it work?
The extension uses Github’s OAuth to log in to your Github account. Once approved, VS Code obtains an access token and reaches out to both store and download your settings file to a private Github Gist.
Once it’s set up, you can then configure the extension on any other instance of VS Code and immediately download your configuration to sync up your editor.
Step 0: VS Code
We’ll assume for this walkthrough you have VS Code already installed. While you don’t need to have any special configuration, having something different than the default (like a color theme) will help you see it work.
Let’s get started!
Step 1: Install Settings Sync
The first thing we need to do is install the extension. You can do this a few ways — you can visit the webpage and hit Install which will open up VS Code or you can search for the extension in the Extensions panel.
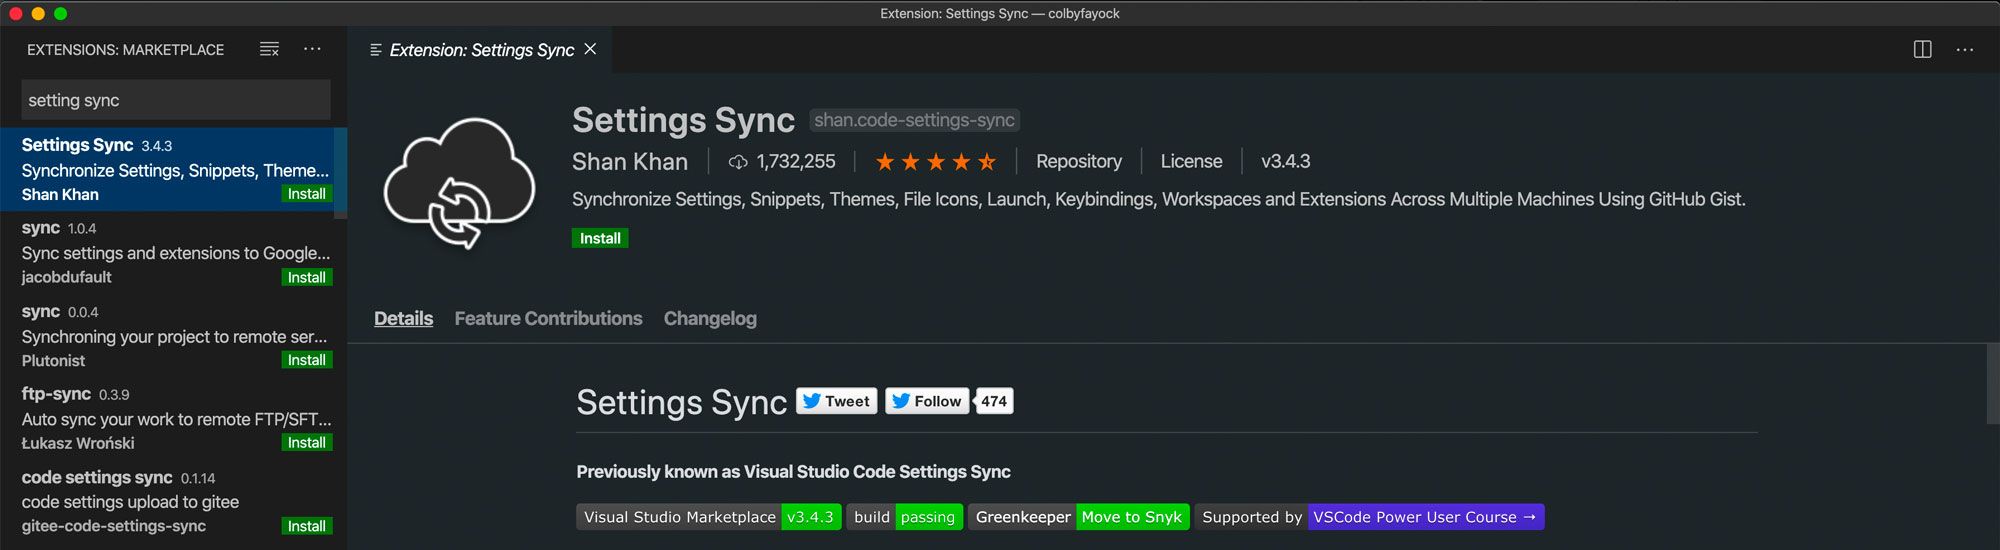
Once installed, it will open up a new tab with the Settings Sync dashboard.
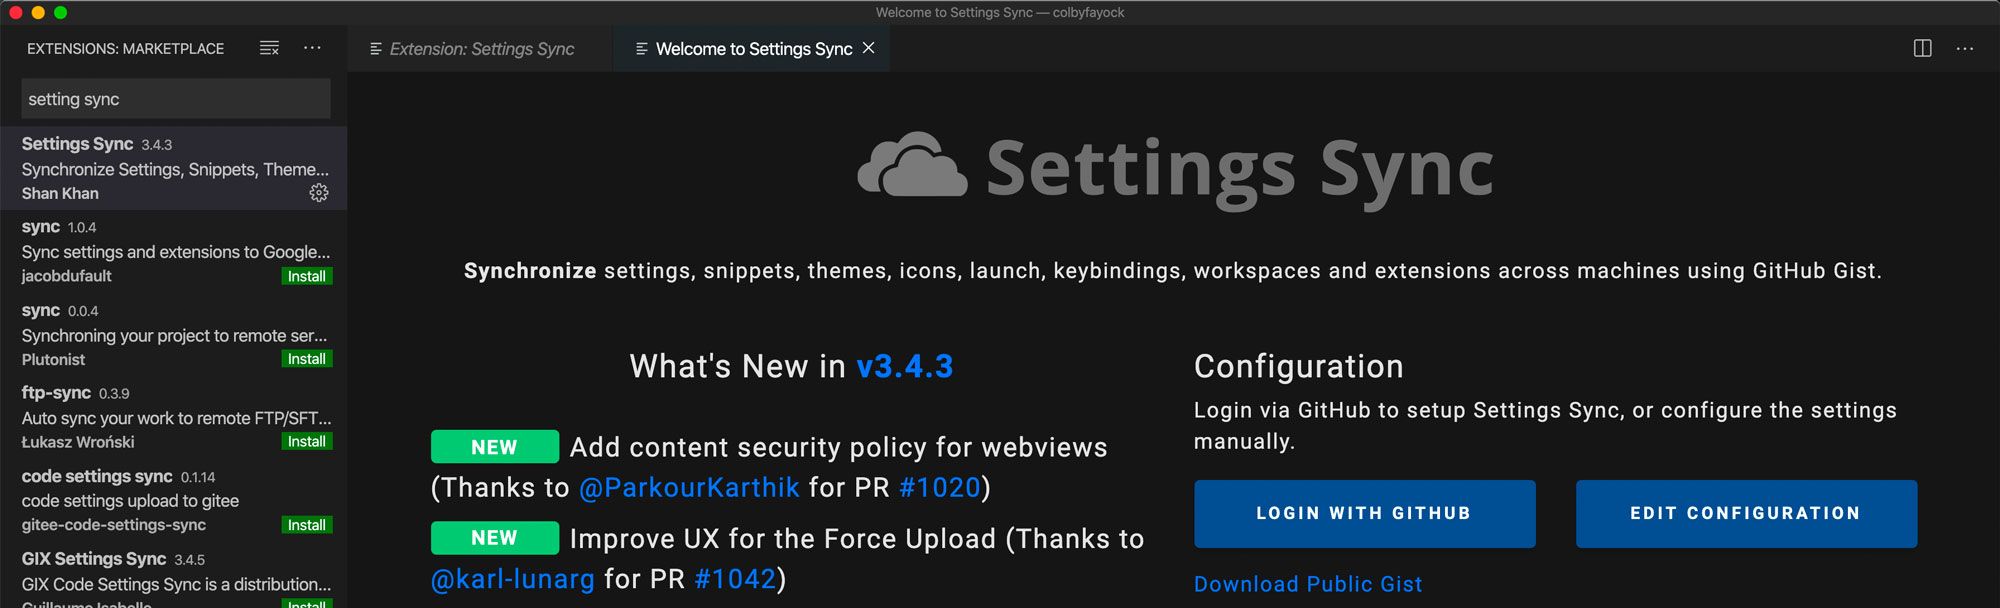
Step 2: Authorize access to Github
To get started with Github, click the Login with Github button in the Settings Sync dashboard.
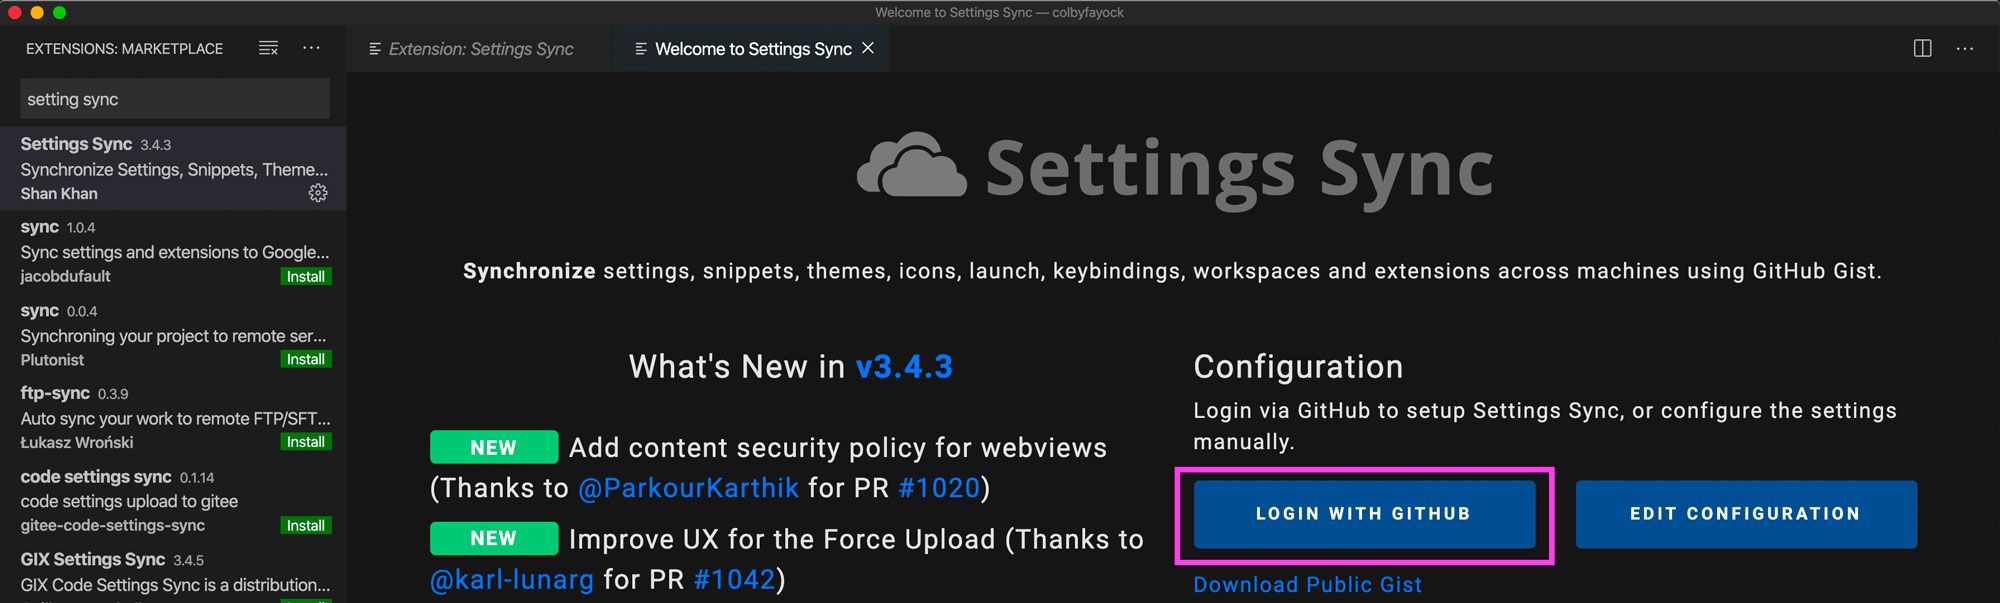
This will open up Github in your default web browser and ask you to log in. While you can use any Github account you want, it would probably make most sense to use your personal account.

Once you’re logged in, you should now see Success! in your browser.
Step 3: Upload your current settings
Now that you’re connected to Github, you’re ready to upload your settings.
Open up your Command Palette with CMD+Shift+P (on Mac) or navigate to View and Command Palette. Type “Sync Upload” which will filter the commands and hit enter once the Sync: Update/Upload Settings option is selected.

When doing this, you might be prompted with screen that asks if you want to force upload — press Yes.

At this point, Settings Sync will create a new Gist in your Github account with your configuration settings. Once it’s done you should see a success message.

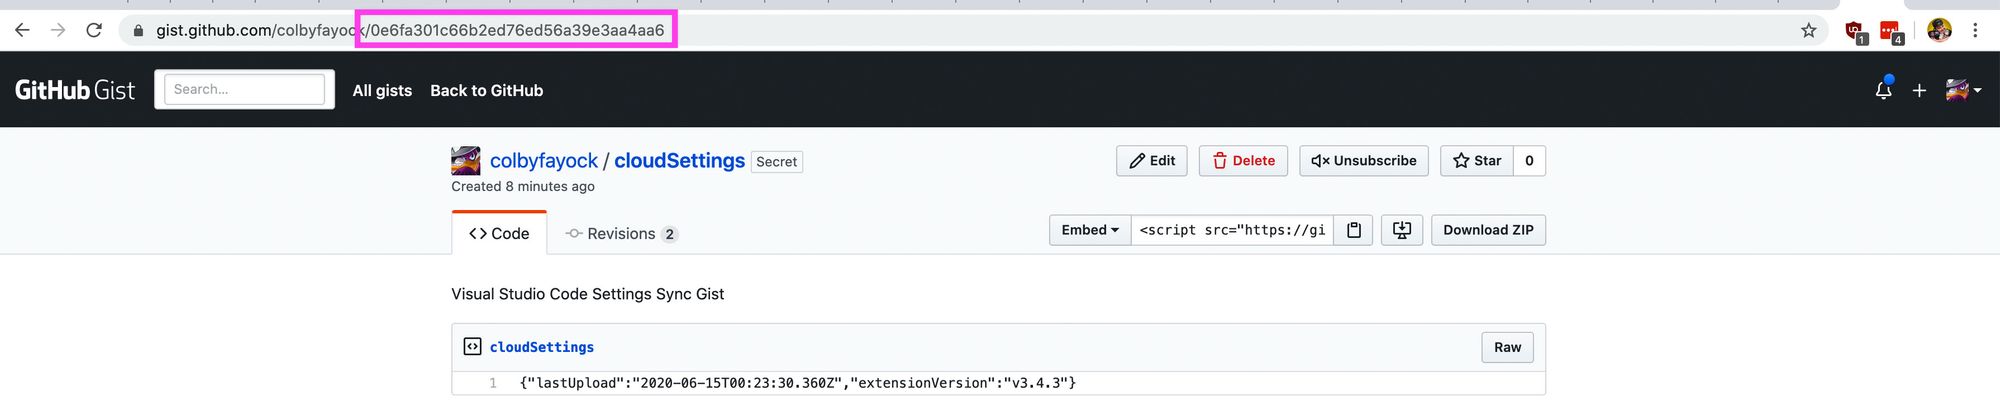
You should now be able to visit gist.github.com and find a new private cloudSettings Gist that includes all of your VS Code settings!
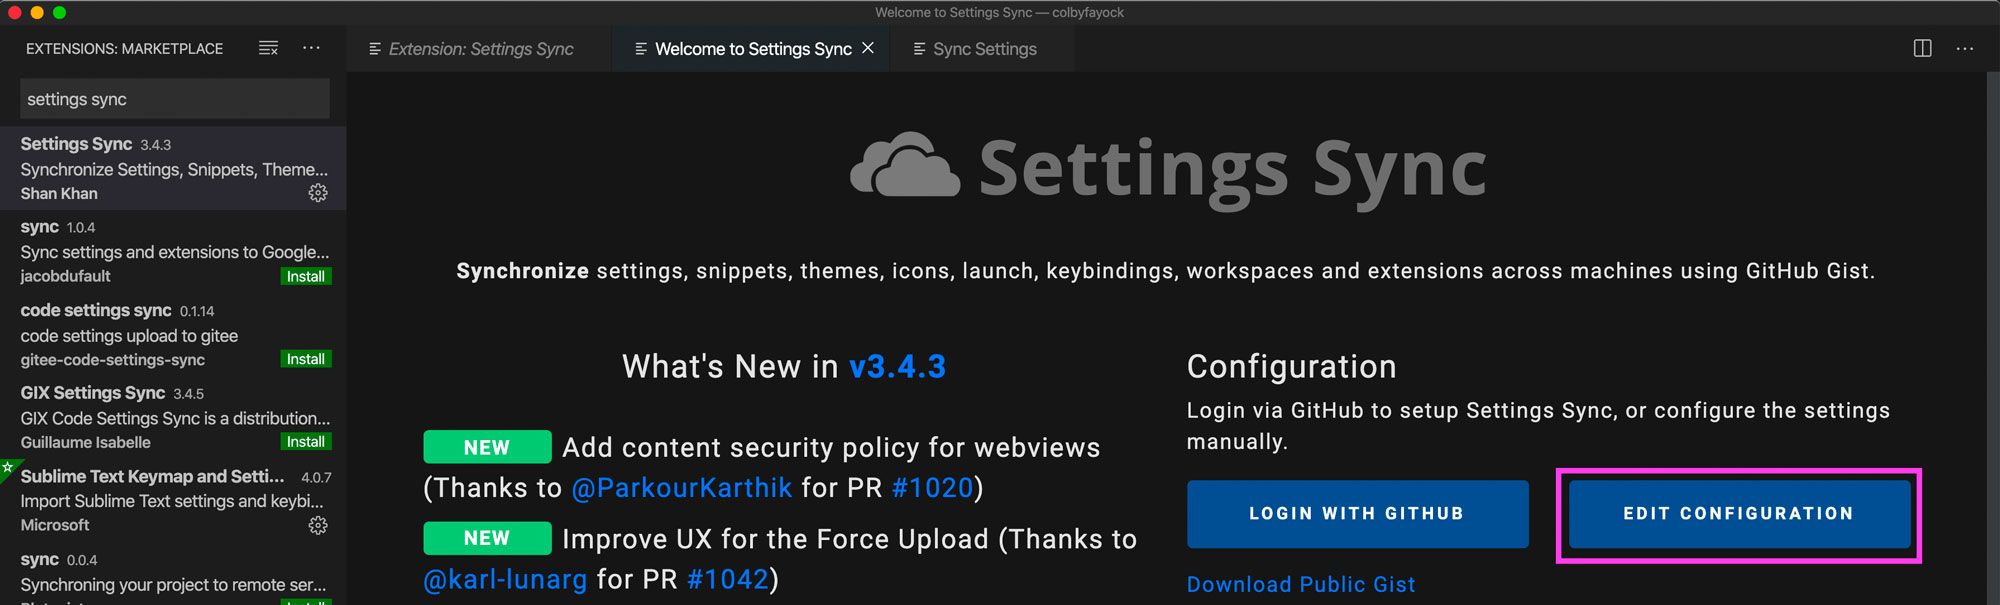
Step 4: Syncing your configuration to another environment
To sync your VS Code configuration to another computer or VS Code environment, you want to first follow steps 1 and 2 above — installing the extension and logging in to Github.
The difference is this time, you’ll want to configure VS Code to download your settings instead of upload them.
To get started, first open back up your Sync Settings dashboard. If this is a new installation like we’re assuming here, you can open up the Command Palette and type “sync download” and hit enter which will open up that dashboard. Here, click Edit Configuration this time.
On this screen, you should see your Github Access Token, but you should also see an empty field for Gist ID. Here, we want to first grab the ID from our cloudSettings Gist URL:
And then paste that value inside of our Gist ID input in VS Code.
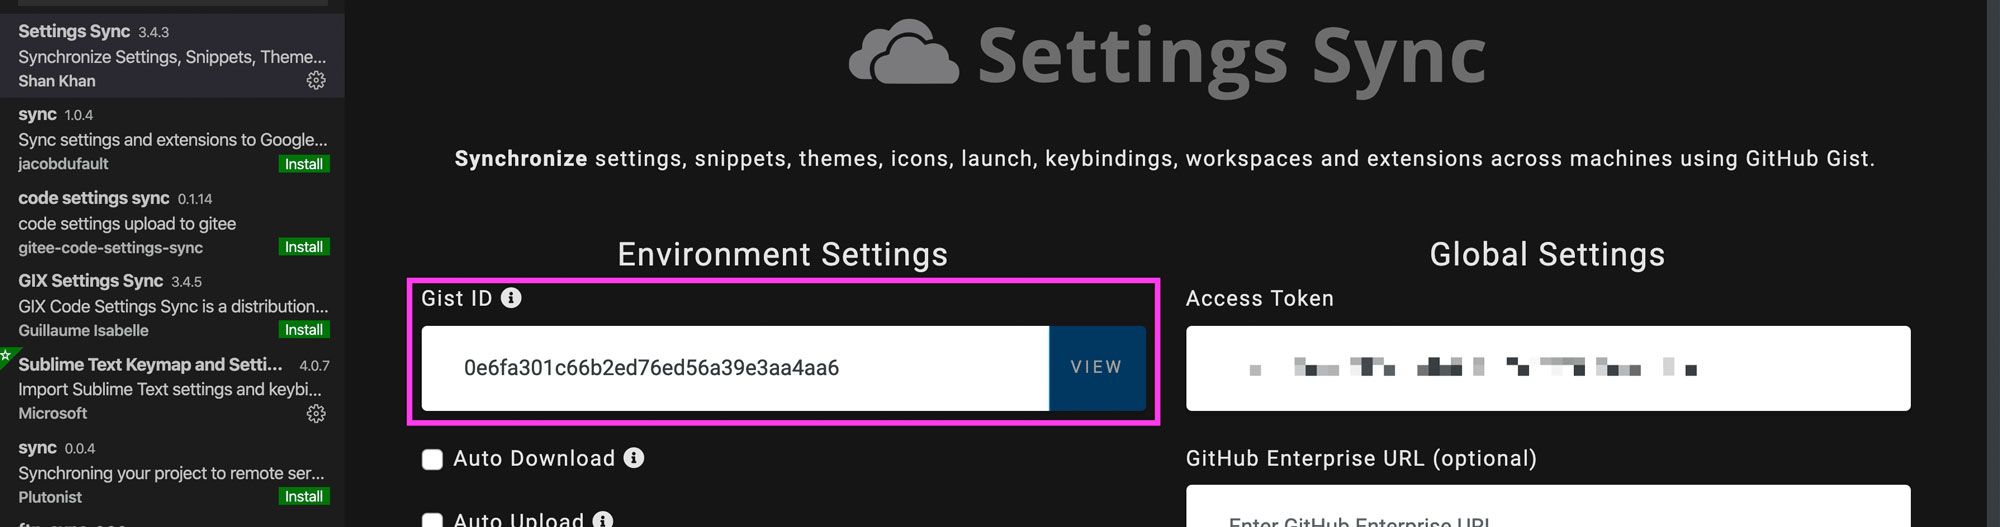
Once it’s there, you can open the Command Palette again, type “sync download”, and hit enter, and Sync Settings will fetch your VS Code configuration from the Gist and update your local settings with that configuration!
Step 5: Updating your configuration
From here on, any time you want to make a new change to your stored configuration, you’ll want to use both the Update/Upload and Download features like we used above.
To update a new tweak to your configuration, type “sync update” and hit enter:

And to download your configuration to sync up another editor, type “sync download” and hit enter:

These commands will both update your cloudSettings Gist and download from it to sync up your VS Code instances
What’s your favorite VS Code trick?
Join the conversation
If you’re like me you like your @code settings a very specific way incl your theme and extensions ??
— Colby Fayock (@colbyfayock) June 16, 2020
But if you juggle diff environments, it can be a pain to update all of them ?♂️
Here’s how to sync your VS Code settings for all the things ?#webdevhttps://t.co/RRjwiU8Sul
