

When you're building large scale web applications, speed is a major priority. Users don't want to wait long for responses anymore, and they shouldn't have to. But some processes take time, and they cannot be made any faster or eliminated.
Message queues help solve this problem by providing an additional branch to the usual request-response journey. This additional branch helps make sure users can get immediate responses, and the time-consuming processes can be done on the side. Everybody goes home happy.
This article will focus on explaining what message queues are and how to get started with them by building a very simple application. You should be familiar with the basics of Node.js, and you should have Redis installed either locally or on a cloud instance. Learn how to install Redis here.
What is a Queue?
A queue is a data structure that allows you store entities in an order. Queues use a first-in-first-out (FIFO) principle.
The concept of queues in computer science is the same as the concept of queues in everyday life where people line up to get things. You join a queue from the back, wait till it is your turn, then leave the queue from the front after you have been attended to.
In computer science, when a process like an API request is running, and you need to remove a certain task (like sending an email) from the current flow, you push it to a queue and continue the process.
The diagram below illustrates the lifecycle of a queue:
 Queue Lifecycle | https://optimalbits.github.io/bull/
What is a Job?
A job is any piece of data that is used on a queue, usually a JSON-like object.
As demonstrated in the cover image of this article, you can think of a job as each person on a queue at an airport. Each person holds a briefcase containing specific data, and other instructions (passports and maybe medical papers where required) that will help when it is their turn to be attended to.
New people joining this queue will enter from the back (as the last person), and people will be attended to from the front. That is how jobs are also processed, each job contains data that will be used for its processing. New jobs are added from the back while jobs are taken out from the front.
What is a Job Producer?
A job producer is any piece of code that adds a job to a queue. In real life, this would be the security guard at the airport that gives direction to people, telling them which queue to join for different purposes.
A job producer can exist independently of a job consumer. This means that in a microservice setup, a particular service might just be concerned with adding jobs to a queue, but not how they're processed after.
What is a Worker (Job Consumer)?
A worker, or job consumer, is a process, or function, that can execute a job. Think of a worker as a bank cashier attending to people on a queue at the bank. When the first person comes in, they join the queue as the only one on the queue. The cashier then calls for them and the queue is emptied.
The cashier requests for specific details to be used to process the transaction from the person. While the cashier attends to that customer, four more customers could have lined up. They will remain on the queue till the cashier is done with the first customer before calling for the next one. This is the same process with queue workers — they pick the first job in the queue, and process it.
What are Failed Jobs?
Often times, some jobs might fail during processing.
Here are some reasons why a job could fail:
- Invalid or missing input data: When data required for a job to be processed is missing, the job will fail. For example, a job to send an email will fail without the recipient's email address.
- Timeout: A job could be failed by the queue mechanism if it is taking longer than usual. This could be due to an issue on a dependency of the job or something else, but usually you don't want a single job running forever.
- Network or infrastructure problems: These problems are almost out of your control, but they do happen. A database connection error for example would fail a job.
- Dependency issues: Sometimes a job relies on some external resources to function well. Whenever these other resources are unavailable or unsuccessful, the job will fail.
When jobs fail, you can configure your queue mechanism to retry them. You can either retry the job immediately, or after a calculated amount of time. You can set a maximum number of attempts, which is recommended. If not, you end up running a job that will always fail infinitely.
Why Use Queues?
Queues are useful for creating robust communication channels between microservices. Multiple services can use the same queue. Different services could be tasked with different problems. When a service completes its task, it can push a job to another service that has workers waiting for that job. That service will pick it up and do whatever is needed with the data.
Queues are also useful for offloading heavy tasks from a process. As you'll see in this article, a time consuming task like sending of an email can be put on a queue to avoid slowing down response time.
Queues help avoid single points of failure. A process that has the ability to fail and can be retried is best processed using a queue where it can be retried after a while.
How to Build a Simple Application that Uses Queues
In this article, we'll build a simple project using Node.js and Redis. We'll use the Bull library as it simplifies a lot of the complexities involved in building a queue system. The project will have a single endpoint to send emails.
Create a New Node.js Project
mkdir nodejs-queue-project
cd nodejs-queue-project
npm init -y
The commands above will create a new folder named nodejs-queue-project and a package.json file in it. The package.json file should look like this:
{
  "name": "nodejs-queue-project",
  "version": "1.0.0",
  "description": "",
  "main": "index.js",
  "scripts": {
    "test": "echo \"Error: no test specified\" && exit 1"
  },
  "keywords": [],
  "author": "",
  "license": "ISC"
}
Install the Required Dependencies
npm i express @types/express @types/node body-parser ts-node ts-lint typescript nodemon nodemailer @types/nodemailer
The commands above will install the different packages and dependencies required for the project.
After installation, you can update the scripts section of your package.json to have a dev command. Your whole package.json file should look like this now:
{
  "name": "nodejs-queue-project",
  "version": "1.0.0",
  "description": "",
  "main": "index.js",
  "scripts": {
    "dev": "nodemon src/app.ts"
  },
  "keywords": [],
  "author": "",
  "license": "ISC",
  "dependencies": {
    "@types/express": "^4.17.17",
    "@types/node": "^20.3.3",
    "@types/nodemailer": "^6.4.8",
    "body-parser": "^1.20.2",
    "express": "^4.18.2",
    "nodemailer": "^6.9.3",
    "nodemon": "^2.0.22",
    "ts-lint": "^4.5.1",
    "ts-node": "^10.9.1",
    "typescript": "^5.1.6"
  }
}
The file above shows all your installed dependencies. The npm run dev command will run when you use the dev script.
How to Build the Endpoint
The first thing to do is to create a new folder named src. This folder will contain all your code files. The first file it will contain is the root file of the application — the app.ts file as defined in the package.json file.
We'll use the app.ts file to import required packages and create a simple server with a single endpoint to send a email as seen below:
import express from "express";
import bodyParser from "body-parser";
import nodemailer from "nodemailer";

const app = express();

app.use(bodyParser.json());

app.post("/send-email", async (req, res) => {
  const { from, to, subject, text } = req.body;

  // Use a test account as this is a tutorial
  const testAccount = await nodemailer.createTestAccount();

  const transporter = nodemailer.createTransport({
    host: "smtp.ethereal.email",
    port: 587,
    secure: false,
    auth: {
      user: testAccount.user,
      pass: testAccount.pass,
    },
    tls: {
      rejectUnauthorized: false,
    },
  });

  console.log("Sending mail to %s", to);

  let info = await transporter.sendMail({
    from,
    to,
    subject,
    text,
    html: `<strong>${text}</strong>`,
  });

  console.log("Message sent: %s", info.messageId);
  console.log("Preview URL: %s", nodemailer.getTestMessageUrl(info));

  res.json({
    message: "Email Sent",
  });
});

app.listen(4300, () => {
  console.log("Server started at http://localhost:4300");
});
Now, you can start your server by running npm run dev in your terminal. You should see a message saying Server started at [http://localhost:4300](http://localhost:4300) in your terminal.
 npm run dev message
You can now test the endpoint using a tool like Postman:
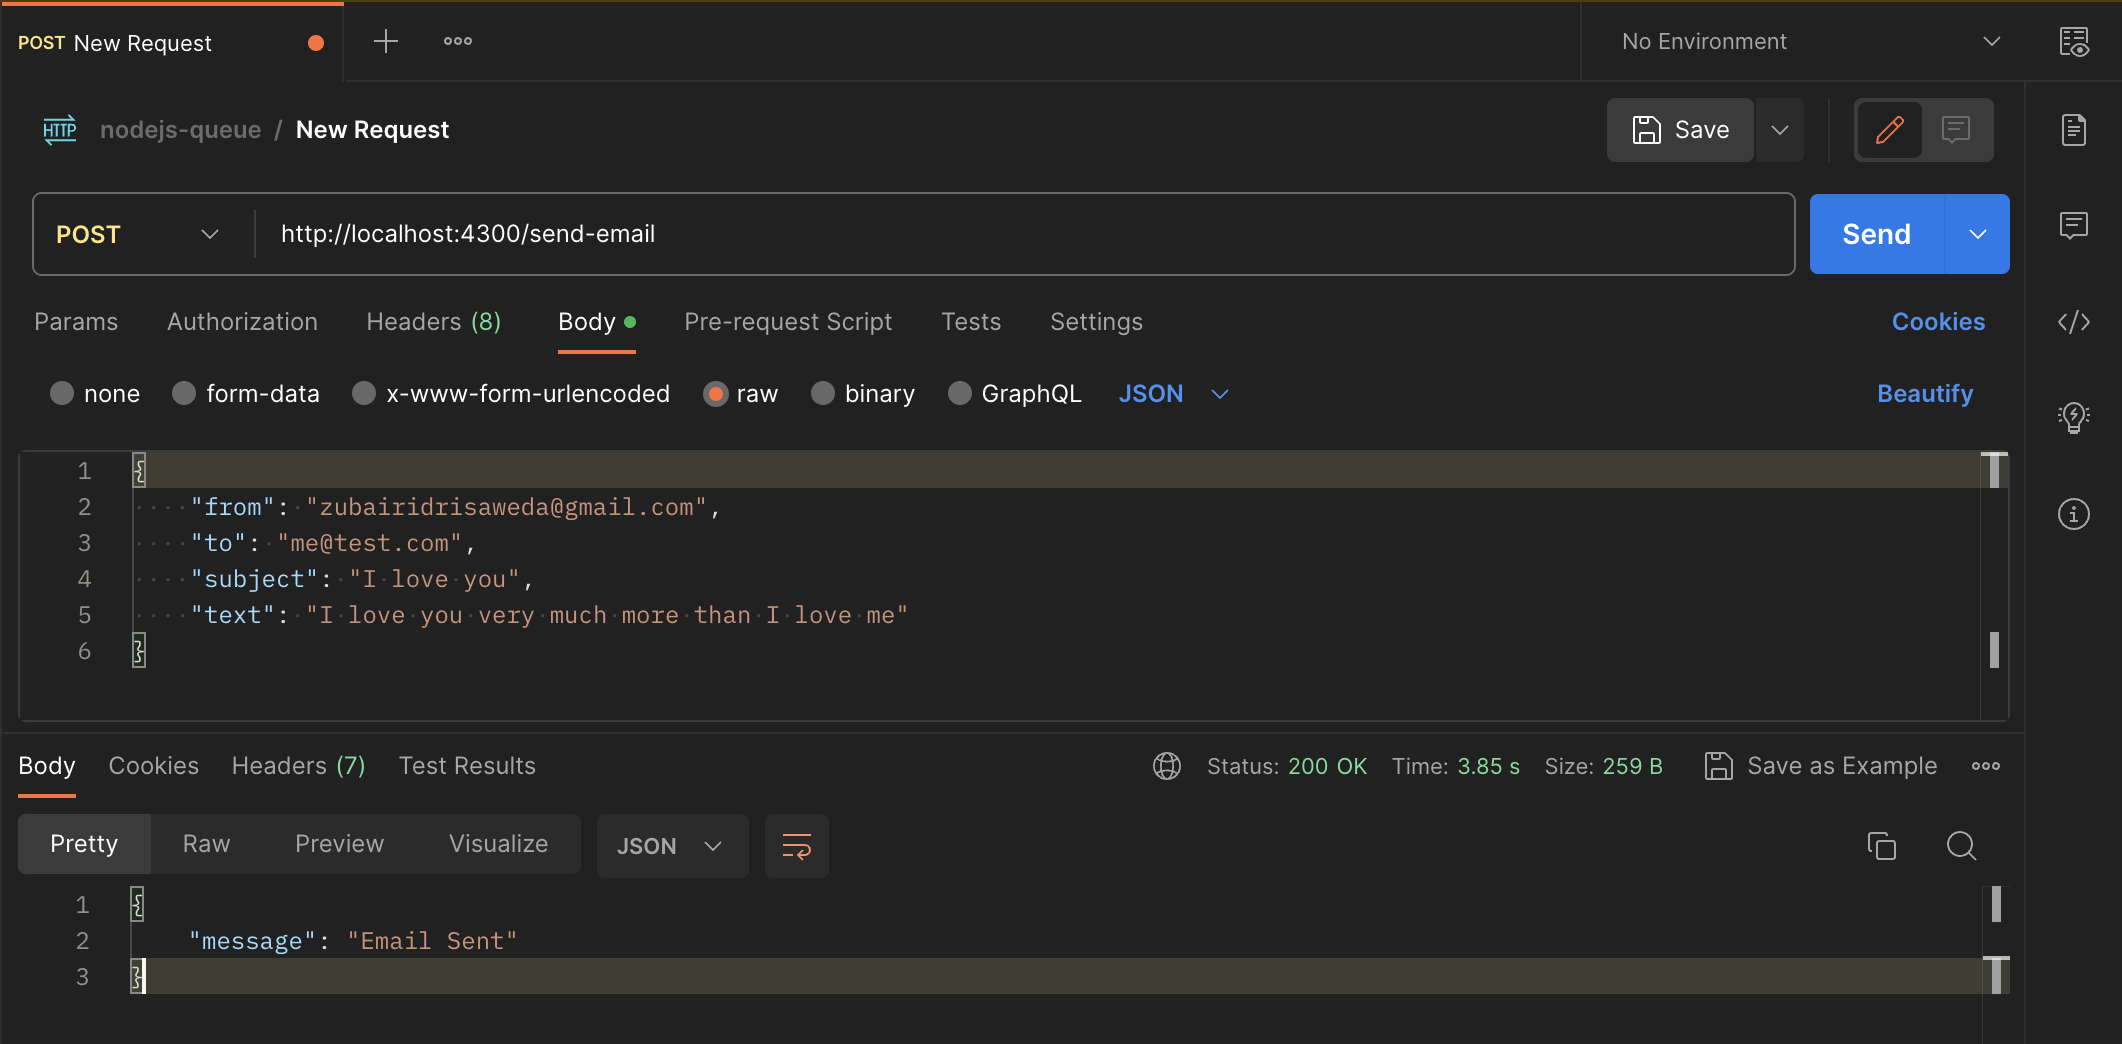 Endpoint testing on Postman
The request took almost 4 seconds as shown in the screenshot. This is very slow for an endpoint. If you take a look at your terminal, you should also see a URL where you can preview the email that was sent.

Opening the link lets you see how the email looks.
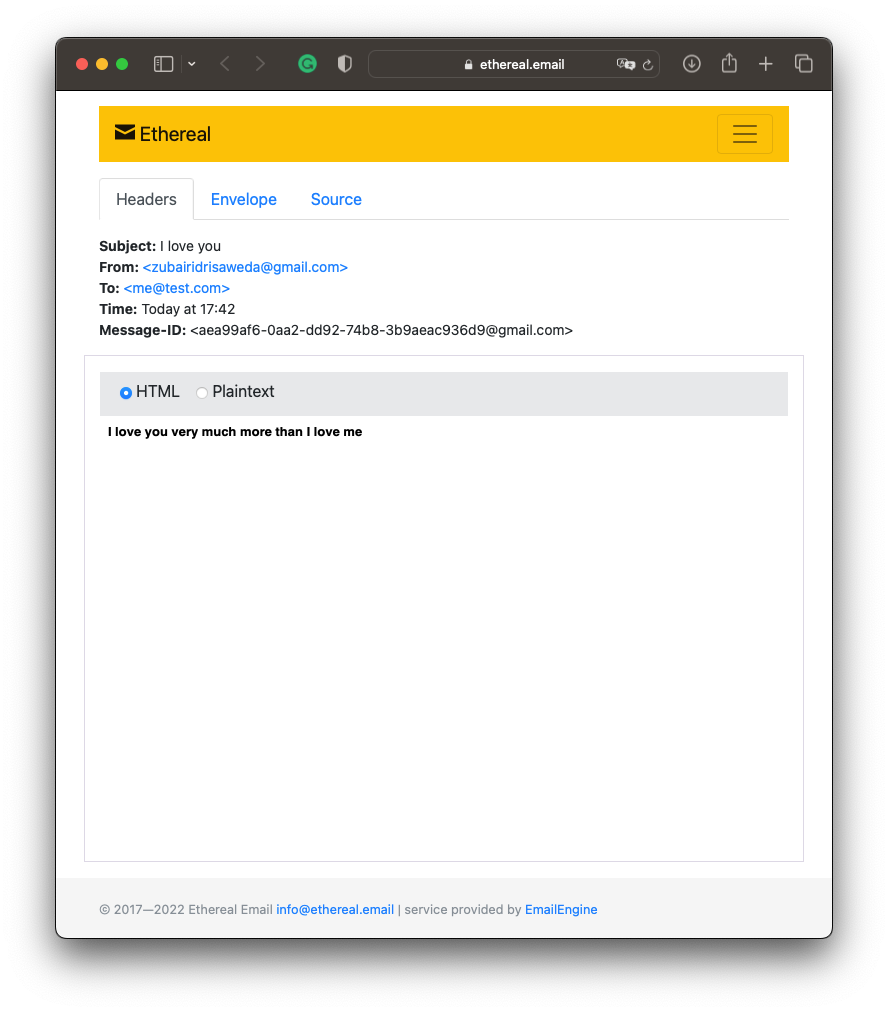 Email content
How to Create the Queue
To make the process even faster, the email can be queued to be sent later and a response sent to the user immediately.
To do this, install the bull library and its @types library as we'll use it to create a queue. That is:
npm i bull @types/bull
Creating a new queue using bull is as easy as instantiating a new Bull object with a name for the queue:
// This goes at the top of your file
import Bull from 'bull';

const emailQueue = new Bull("email");
When the queue is created with just the queue name, it tries to use the default Redis connection URL: localhost:6379. If you prefer using a different URL, simply pass in a second object to the Bull class as an options object:
const emailQueue = new Bull("email", {
  redis: "localhost:6379",
});
At this point, you can create a simple function to serve as a job producer and add a job to the queue every time a request comes in.
type EmailType = {
  from: string;
  to: string;
  subject: string;
  text: string;
};

const sendNewEmail = async (email: EmailType) => {
  emailQueue.add({ ...email });
};
This newly created function, sendNewEmail, accepts an object containing details of the new email to be sent of type EmailType. There's sender email address (from), recipient email address (to), subject of the email, and the content of the email (text). Then it pushes a new job to the queue.
You can use this function instead of sending the email during the request now. Modify the endpoint to do this:
app.post("/send-email", async (req, res) => {
  const { from, to, subject, text } = req.body;

  await sendNewEmail({ from, to, subject, text });

  console.log("Added to queue");

  res.json({
    message: "Email Sent",
  });
});
At this point, the code is simpler and the process is faster. The request only takes about 40m — about 100x faster than before.
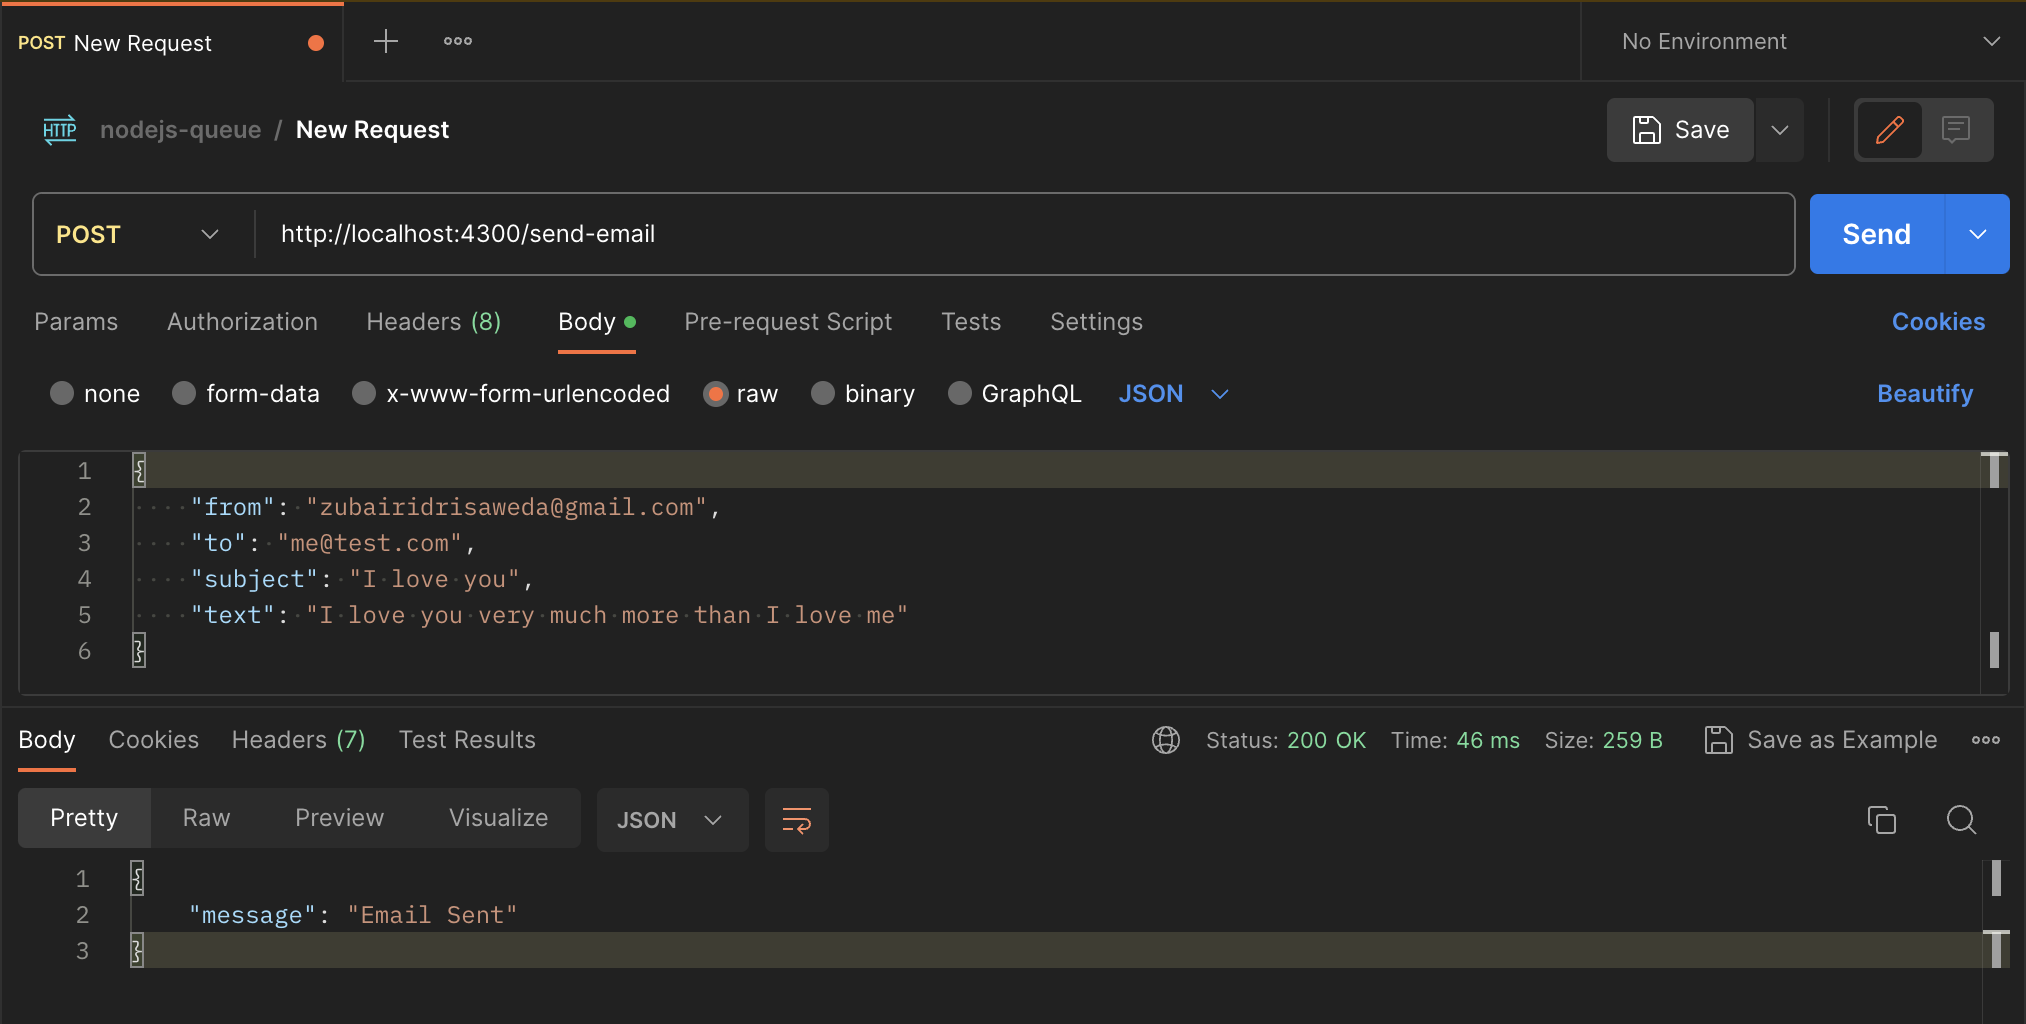 Endpoint testing with Postman
At this point, the email is added to a queue. It will remain on the queue until processed. The job can be processed by the same application or another service (if in a microservice setup).
How to Process the Jobs
The cycle is incomplete and useless if the mails never leave the queue. We'll create a job consumer to process the jobs and clear the queue.
We can do this by creating the logic for a function that accepts a Job object and sends the email:
const processEmailQueue = async (job: Job) => {
  // Use a test account as this is a tutorial
  const testAccount = await nodemailer.createTestAccount();

  const transporter = nodemailer.createTransport({
    host: "smtp.ethereal.email",
    port: 587,
    secure: false,
    auth: {
      user: testAccount.user,
      pass: testAccount.pass,
    },
    tls: {
      rejectUnauthorized: false,
    },
  });

  const { from, to, subject, text } = job.data;

  console.log("Sending mail to %s", to);

  let info = await transporter.sendMail({
    from,
    to,
    subject,
    text,
    html: `<strong>${text}</strong>`,
  });

  console.log("Message sent: %s", info.messageId);
  console.log("Preview URL: %s", nodemailer.getTestMessageUrl(info));

  return nodemailer.getTestMessageUrl(info);
};
The function above accepts a Job object. The object has useful properties that shows the status of and data in a job. Here, we use the data property.
At this point, all we have is a function. It doesn't pick up jobs automatically because it doesn't know which queue to work with.
Before connecting it to the queue, you can go on to add a few jobs to the queue by sending some requests. You can check the email jobs currently queued by running this command in your redis-cli:
LRANGE bull:email:wait 0 -1
This checks the email waitlist, and returns the ids of the waiting jobs.
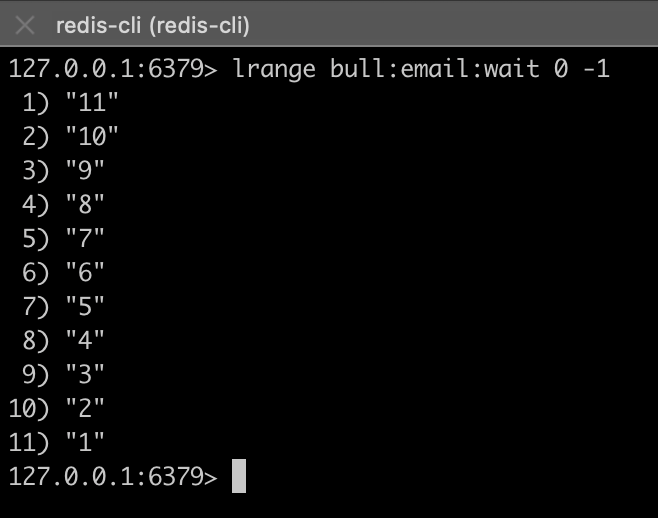 Redis CLI
I have created a few jobs just to show how workers actually work.
Now, connect the worker to the queue by adding this line of code:
emailQueue.process(processEmailQueue);
This is what your app.ts file should now look after that:
import express from "express";
import bodyParser from "body-parser";
import nodemailer from "nodemailer";
import Bull, { Job } from "bull";

const app = express();

app.use(bodyParser.json());

const emailQueue = new Bull("email", {
  redis: "localhost:6379",
});

type EmailType = {
  from: string;
  to: string;
  subject: string;
  text: string;
};

const sendNewEmail = async (email: EmailType) => {
  emailQueue.add({ ...email });
};

const processEmailQueue = async (job: Job) => {
  // Use a test account as this is a tutorial
  const testAccount = await nodemailer.createTestAccount();

  const transporter = nodemailer.createTransport({
    host: "smtp.ethereal.email",
    port: 587,
    secure: false,
    auth: {
      user: testAccount.user,
      pass: testAccount.pass,
    },
    tls: {
      rejectUnauthorized: false,
    },
  });

  const { from, to, subject, text } = job.data;

  console.log("Sending mail to %s", to);

  let info = await transporter.sendMail({
    from,
    to,
    subject,
    text,
    html: `<strong>${text}</strong>`,
  });

  console.log("Message sent: %s", info.messageId);
  console.log("Preview URL: %s", nodemailer.getTestMessageUrl(info));
};

emailQueue.process(processEmailQueue);

app.post("/send-email", async (req, res) => {
  const { from, to, subject, text } = req.body;

  await sendNewEmail({ from, to, subject, text });

  console.log("Added to queue");

  res.json({
    message: "Email Sent",
  });
});

app.listen(4300, () => {
  console.log("Server started at http://localhost:4300");
});
Once you save, you'll notice that the server restarts and immediately starts sending out mails. This is because the worker sees the queue and begins processing immediately.
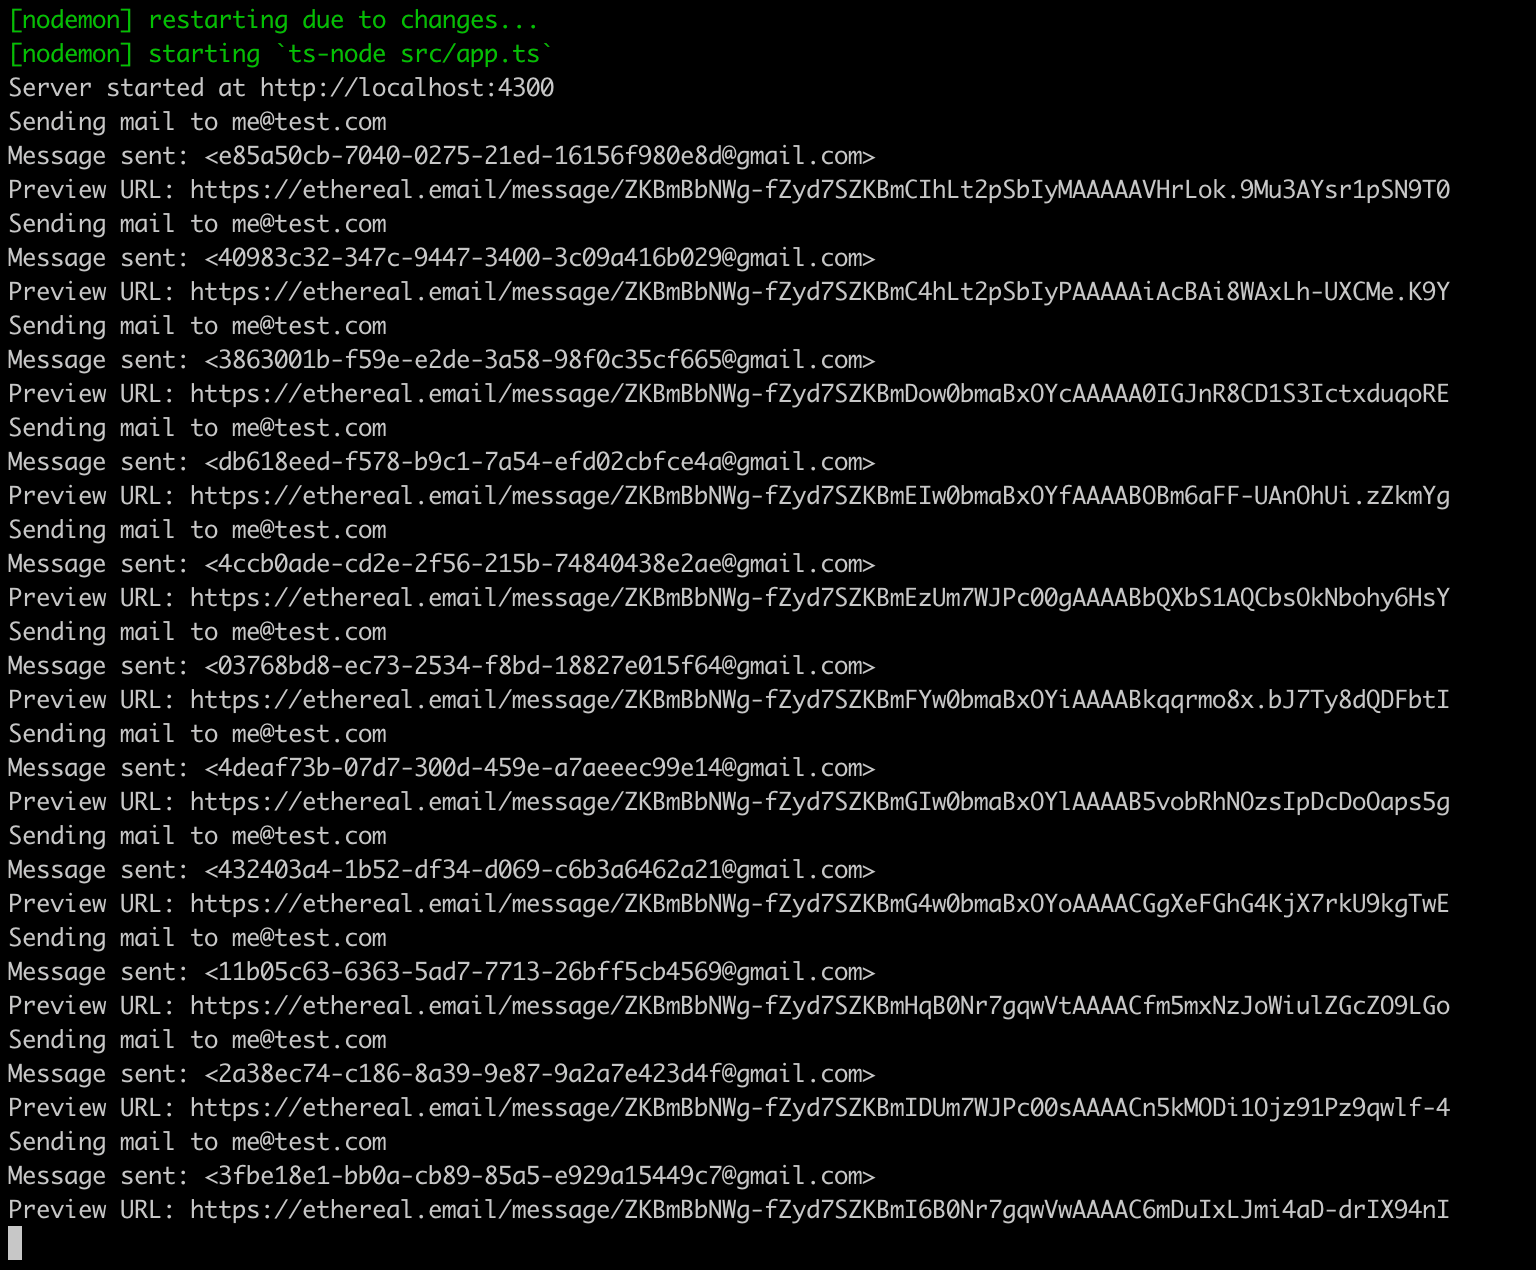 Server sending out queued emails
Now, both the producer and the worker are active. Every new API request will be pushed to the queue, and the worker will immediately process it unless there's some pending jobs already.
Summary
I hope this article helped you understand what a message queue is, how to add jobs and create processes to run them, and how you can use them to build better web applications. You can find the code files used in this article on GitHub.
If you have any questions or relevant advice, please get in touch with me to share them.
To read more of my articles or follow my work, you can connect with me on LinkedIn, Twitter, and Github. It’s quick, it’s easy, and it’s free!