
As beginners, managing state in React applications can be challenging, especially when passing and utilizing props in deeply nested components.
The usual way of passing information from a main component to its smaller parts — like a parent passing data to a child, then to a grandchild — can get complicated and tiring, especially when we need to access something deep down in the hierarchy.
In this article, we'll explore how the React Context API works, its use cases and a sample project utilizing the concept.
What is React Context?
React Context provides us a way to pass data down through the component tree to where we need it without having to manually pass props at every single level.
It acts as a global storage space for all your components in your project.
How is React Context Different from Prop Threading?
In prop threading, data is passed down from the parent component to the child component. If a child of that component needs the same prop, it is passed down until the required component gets the data.
While simple, it can become complex when traversing deeply nested structures, and this results in prop drilling.
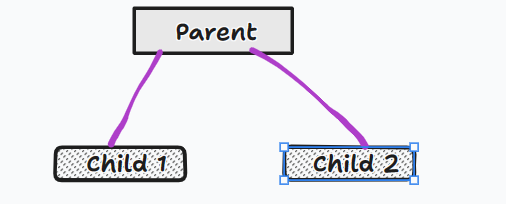 A pictural representation of prop threading
In contrast, React Context allows data to be passed from the parent component to any nested component that requires it, simplifying the process.
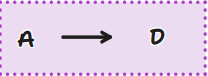 A representation of React context.
What is Prop Drilling?
Prop drilling refers to a situation where this threading of props becomes complicated due to the need to pass them through multiple layers of components.
As the data is passed down through many layers, each intermediate component needs to receive and pass the data, even if it doesn't use the data itself.
Here's an example:
// App.js

import React, { useState } from 'react';

const GrandchildComponent = ({ dataFromChild }) => {
  return (
    <div>
      <p>Username in Grandchild: {dataFromChild.username}</p>
    </div>
  );
};

const ChildComponent = ({ dataFromParent }) => {
  return (
    <div>
      <p>Your email: {dataFromParent.email}</p>
      <GrandchildComponent dataFromChild={dataFromParent} />
    </div>
  );
};

const ParentComponent = () => {
  const [userData, setUserData] = useState({
    username: 'benny_dicta',
    email: 'benedictaonyebuchi@gmail.com',
  });

  return (
    <div>
      <h1>Welcome, {userData.username}!</h1>
      <ChildComponent dataFromParent={userData} />
    </div>
  );
};

const App = () => {
  return <ParentComponent />;
};

export default App;
The code above shows a typical case of prop drilling where data is passed from the ParentComponent to the GrandChild component even when they are not needed by that component.
ParentComponentis the top-level component that holds some data (userData).ChildComponentis a child ofParentComponentand receivesdataFromParentas a prop. It also renders aGrandChildComponent, passing the received prop further down.GrandChildComponentis deeply nested and receives the propdataFromChild. It renders the data in its UI.
 A representation of a simple project structure
When to choose React Context
- For simple and straightforward projects, prop threading would be adequate.
- For complex projects requiring data to traverse multiple nested layers, React Context provides a cleaner solution.
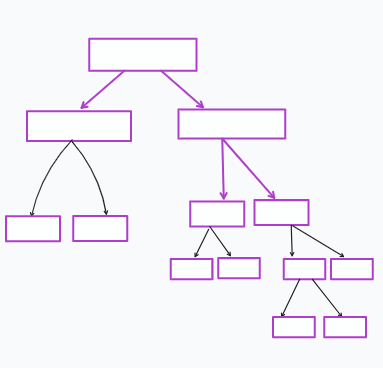 A representation of a deeply nested application
The pictural difference between both approaches can be seen here.
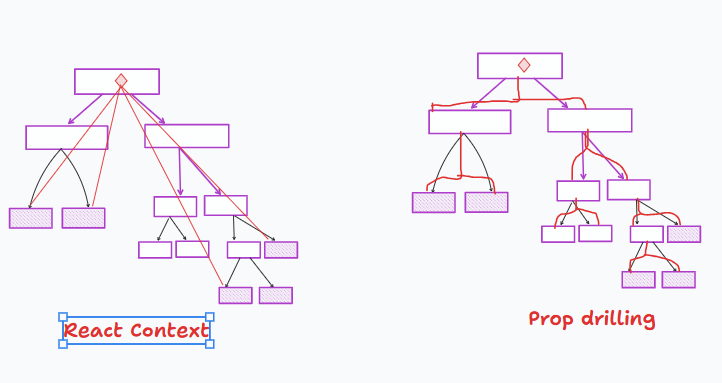 A pictural representation of the difference between react context and prop drilling.
What are the Use Cases for React Context API?
Here are some of the use cases for React Context:
- When prop drilling becomes complicated: Imagine having to pass a prop through multiple layers of components just to reach the one that needs it. Context API eliminates this prop-drilling headache.
- Global data requirement: When multiple components need access to the same data (for example: user authentication status, theme preferences, and so on), using context makes it accessible without redundant prop passing.
- Themable components: If your application requires changing themes, like light and dark modes, and you want components deep in the tree to adapt dynamically to theme changes, Context API makes this seamless.
- Multi-level nesting: In deeply nested component trees, passing props down the hierarchy becomes impractical. Context provides a cleaner solution for sharing data across various levels.
How to use React Context API
Step #1 - Create a Context
import { createContext } from 'react';

const MyContext = createContext();
export default MyContext;
Step #2 - Wrap your App with Context Provider
import React from 'react';
import MyContext from './MyContext';

const App = () => {
  const sharedValue = 'This is a shared value';

  return (
    <MyContext.Provider value={sharedValue}>
      {/* Your components go here */}
    </MyContext.Provider>
  );
};

export default App;
Step #3 - Consume the Context in Components
import React, { useContext } from 'react';
import MyContext from './MyContext';

const MyComponent = () => {
  const sharedValue = useContext(MyContext);

  return <p>{sharedValue}</p>;
};

export default MyComponent;
The three Important Parts of the React Context API.
In this section, we'll talk about the three important parts of the React Context API: Provide, Context, and Consumer.
Provider
This is a component that is used to wrap components in order to access to the context's value. This is where you pass the values that you want to share throughout the component tree using the value prop.
import React from 'react';
import MyContext from './MyContext';

const App = () => {
  const sharedValue = 'This is a shared value';

  return (
    <MyContext.Provider value={sharedValue}>
     {children} {/*all components in its subtree*/}
    </MyContext.Provider>
  );
};

export default App;
In the code above, the context is imported and the .Provider appended to the context, MyContext. This makes the prop passed to the Provider available to all of its children. That is, the components in its subtree.
Context
This acts as the storage where the data is stored. It comes with two parts:
createContext()— This creates the global object and creates the context.useContext()— This consumes the information made available by the provider.
/*MyComponent.js*/

import React, { createContext, useContext } from 'react';

export const MyContext = createContext();

const MyComponent = () => {
  const sharedValue = useContext(MyContext);

  return <p>{sharedValue}</p>;
};

export default MyComponent;
In the code above, the Context is created by assigning the imported useContext hook to the MyComponent function.
Consumer
The Consumer component is used to consume the shared data within a component. It allows components to subscribe to the context changes and access the shared value. We might not see the consumer per say but it will use the information rendered by the provider.
It must always be nested inside the Provider because the Provider will render first to pass data to the components consuming the data. In otherwords, it must exist before you can consume it.
import React, { useContext } from 'react';
import MyContext from './MyComponent';

const MyComponent = () => {
  const sharedValue = useContext(MyContext);

  return <p>{sharedValue}</p>;
};

export default MyComponent;
In the code, the MyComponent component utilizes the MyContext context created earlier by using the useContext.
How to Create a Theme-Switching App using React Context.
Let's implement a simple theme-switching application using React Context API.
Step #1
In the src folder create a context folder. Then create a new file called ThemeContext.js.
import React, { createContext, useContext, useState } from 'react';

const ThemeContext = createContext();

const ThemeProvider = ({ children }) => {
  const [theme, setTheme] = useState('light');

  const toggleTheme = () => {
    setTheme((prevTheme) => (prevTheme === 'light' ? 'dark' : 'light'));
  };

  return (
    <ThemeContext.Provider value={{ theme, toggleTheme }}>
      {children}
    </ThemeContext.Provider>
  );
};

const useTheme = () => {
  return useContext(ThemeContext);
};

export { ThemeProvider, useTheme };
Walkthrough:
- We started by creating a context (
createContext()) and assigning aThemeContextvariable to it, which will act as storage for the theme data. - In the
ThemeProvidercomponent, we used theuseStatehook to manage current theme and also create a toggle that will help with switching between light and dark mode. - The
<ThemeContext.Provider>wraps the children, making the props passed to it available to every component within its subtree. - The
useThemecomponent is a custom hook that usesuseContext()to consume theThemeContextcontext.
Step #2
In your src folder create a ThemedComponent.js file. Copy and paste the code below in the file:
import React from 'react';
import { useTheme } from './context/ThemeContext';

const ThemedComponent = () => {
  const { theme, toggleTheme } = useTheme();

  return (
    <div style={{ background: theme === 'light' ? '#fff' : '#333', color: theme === 'light' ? '#333' : '#fff' }}>
      <h2>Themed Component</h2>
      <p>Current Theme: {theme}</p>
      <button onClick={toggleTheme}>Toggle Theme</button>
    </div>
  );
};

export default ThemedComponent;
Walkthrough:
- Using the
useTheme()hook, you can get access to consume the theme context. Remember that we passedthemeand thetoggleThemefunction to theThemeContext.Provider. - The component's style dynamically changes based on the current theme. This shows how components can adapt to global state changes managed by the context.
- The button triggers the
toggleThemefunction to switch between light and dark mode.
Step #3
In your App.js file, copy and paste the code below:
import React from 'react';
import { ThemeProvider } from './context/ThemeContext';
import ThemedComponent from './ThemedComponent.js';

const App = () => {
  return (
    <ThemeProvider>
      <div>
        <h1>Themed App</h1>
        <ThemedComponent />
      </div>
    </ThemeProvider>
  );
};

export default App;
Walkthrough:
<App />is the main app component where theThemeProvideris used to wrap the whole application and give theme context access to all components within theThemeProvider.- The
ThemedComponentis rendered, showcasing the result of the components with access to the context.
After successful implementation of context, the result should be like so:
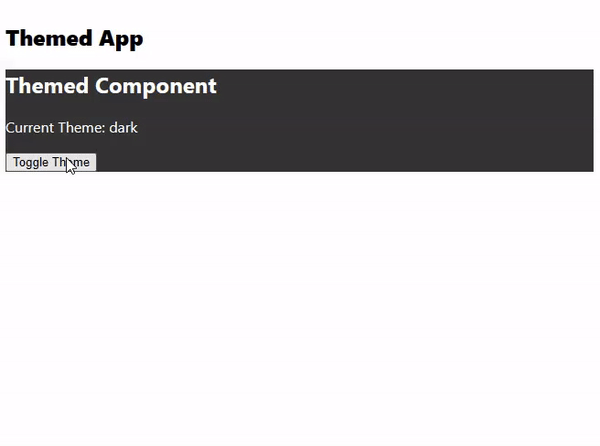 A simple theme switch using react context.
This should help you implement the React Context API in your project.
Conclusion
In this article, you learned about context, context provider, context consumer, and how to create a React provider wrapper that manages the value of a context through component state.
You also learned about prop threading, prop drilling and its disadvantage relative to React context.
Finally, you learned how to retrieve values from a context using the useContext hook by building a simple theme switcher.
Resources
Thanks for Reading!