
Buttons are an essential part of websites. You need them for various functionalities, from submitting information and getting access to more content to linking to different parts of the web page and other websites.
HTML gives you several ways to add buttons to your website – with the button tag, the anchor link, and the input types of button and submit.
In this article, I will walk you through 4 of those methods, so you can start adding buttons to your websites comfortably.
How to Add Buttons to your Website with the Button Tag
The button tag is one of the simplest ways to add buttons to your websites. To use it, all you have to do is put the text you want the button to have right between the opening and closing tag, like this:
<button>Sample Button</button>

I have put the button at the center horizontally and vertically using flexbox, margin, and height properties:
body {
        background-color: #8d8d8d;
        display: flex;
        align-items: center;
        justify-content: center;
        margin: 0 auto;
        height: 100vh;
      }
Everything on the page will be centered with this CSS as we move forward.
To make this kind of button active, you have to add some JavaScript. In the code snippet below, with some inline JavaScript, I make the button display an alert box in the browser any time it is clicked:
<button onclick="alert('Hello Campers')">Sample Button</button>

How to Add Buttons to your Websites with an Anchor Tag
You can also add buttons to your websites with the anchor tag. The anchor tag is primarily used to add links to your websites, but you can style it with CSS to look like an actual button.
The advantage of this is approach is that you can link to a page without any JavaScript.
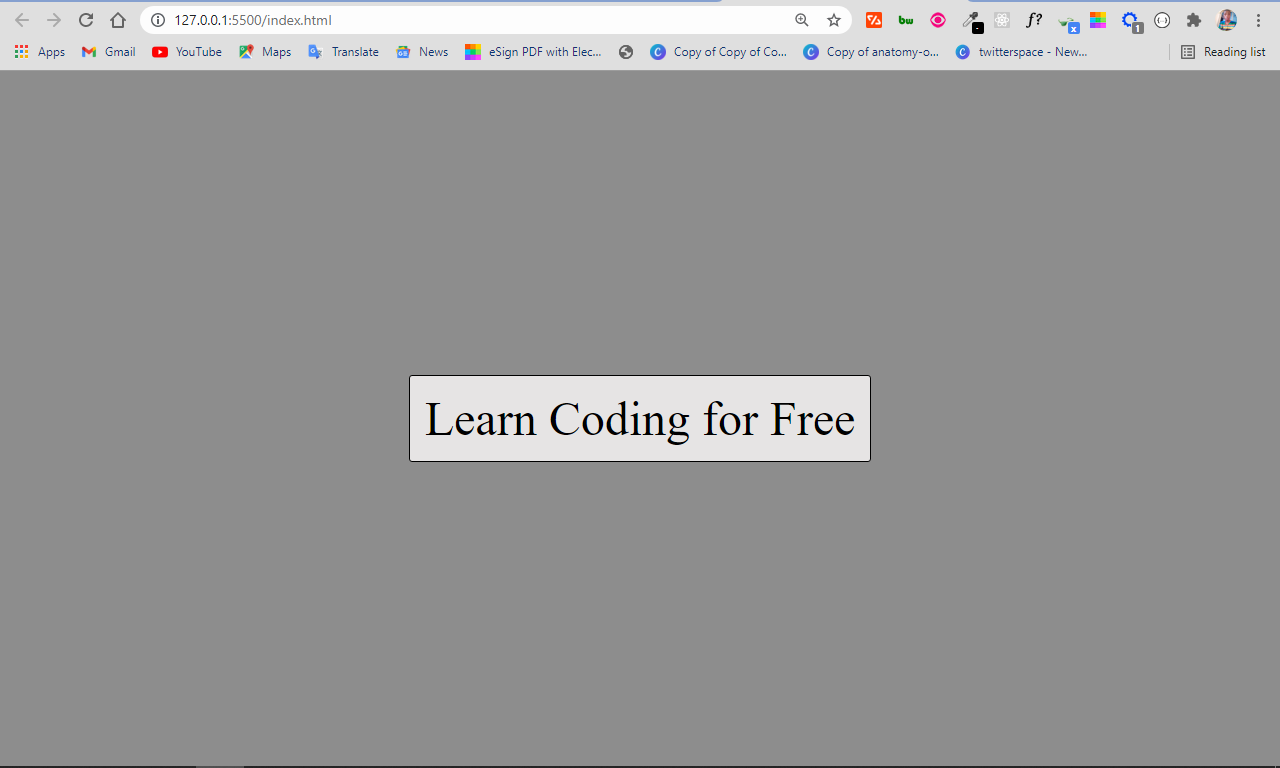
In the example below, I make a button with the anchor tag and link it to the freeCodeCamp official website:
<a href="https://freecodecamp.org">Learn Coding for Free</a>
It looks like a link in the browser:

You can make it look like a button with some CSS by removing the default underline and text color, setting a backgound color and foreground color with the color properties, and adding padding and a border radius:
 a {
        text-decoration: none;
        border: 0.2px solid #000;
        color: #000;
        background: #e6e4e4;
        padding: 5px;
        border-radius: 1px;
      }
All I did in the CSS was try to mimic the default appearance given to buttons in HTML.
The anchor tag now looks like this:
How to Add Buttons to your Websites with the Input Type Button
You can also add buttons to your website with the input type of button. It behaves exactly like the button tag.
The input tag is an empty element, meaning it doesn’t have a closing tag. So how do you display text in the button? You do it with the value attribute!
<input type="button" value="Sample Button" />

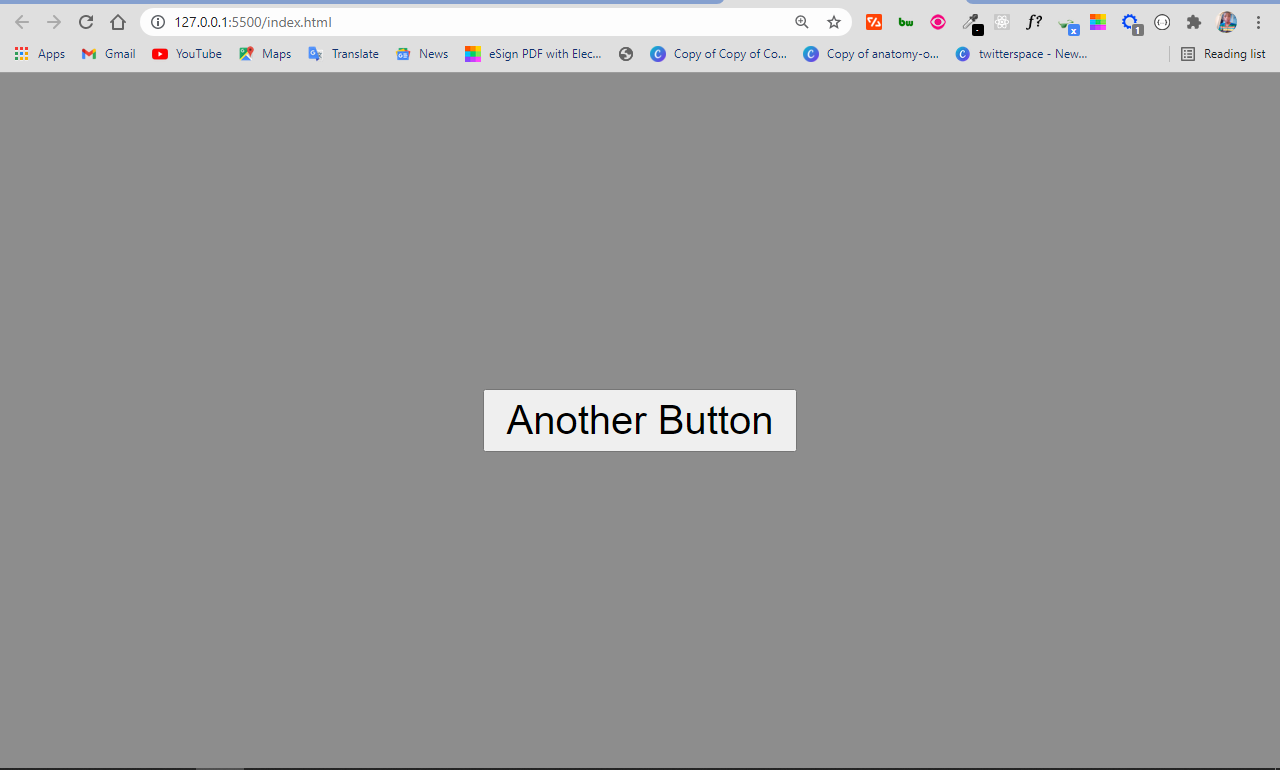
How to Add Buttons to your Websites with the Input Type Submit
You usually use the input type of submit inside a form element so that the data filled in by the user gets submitted when the button is clicked.
Just like the input type of button, it’s an empty element, so you need a value attribute to communicate to the user what the button is about.
<input type="submit" value="Another Button" />
The difference between the input type button and input type submit is that when you use the submit button type in a form, the data get submitted without any manipulation with JavaScript.
But the input type button, on the other hand, needs some manipulation with JavaScript to work. So when you use an input type of button inside a form element, the data doesn’t get submitted automatically when it is clicked.
Mini Project: How to Make a Neon Light Button with HTML and CSS
The neon light button is a design trend that's making waves because it's beautiful. With what you’ve learned in this article, you can make one with a button tag and some CSS.
Firstly, you have to change the default styles of the button:
<button>Neon Light</button>
  button {
        background-color: #000;
        border: .5px solid crimson;
        border-radius: 10px;
        color: #fff;
        padding: 8px;
      }
So far, the button looks like this:
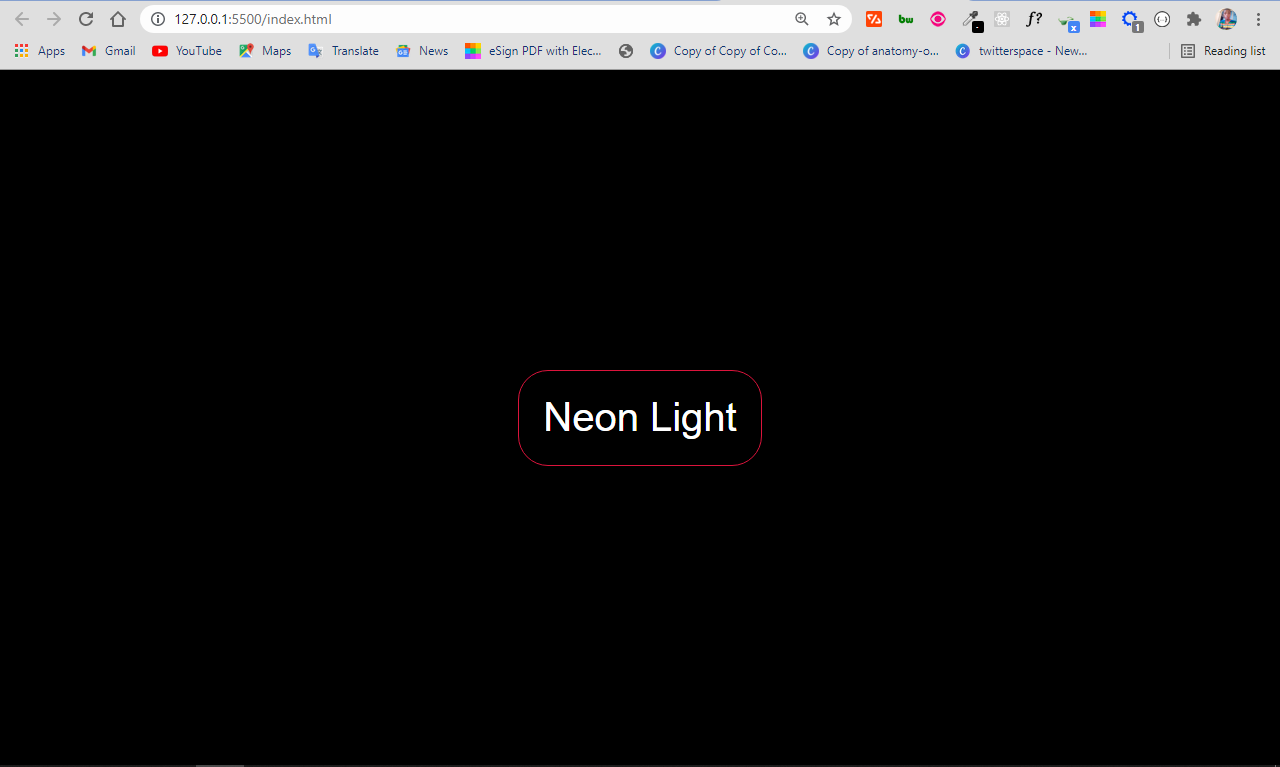
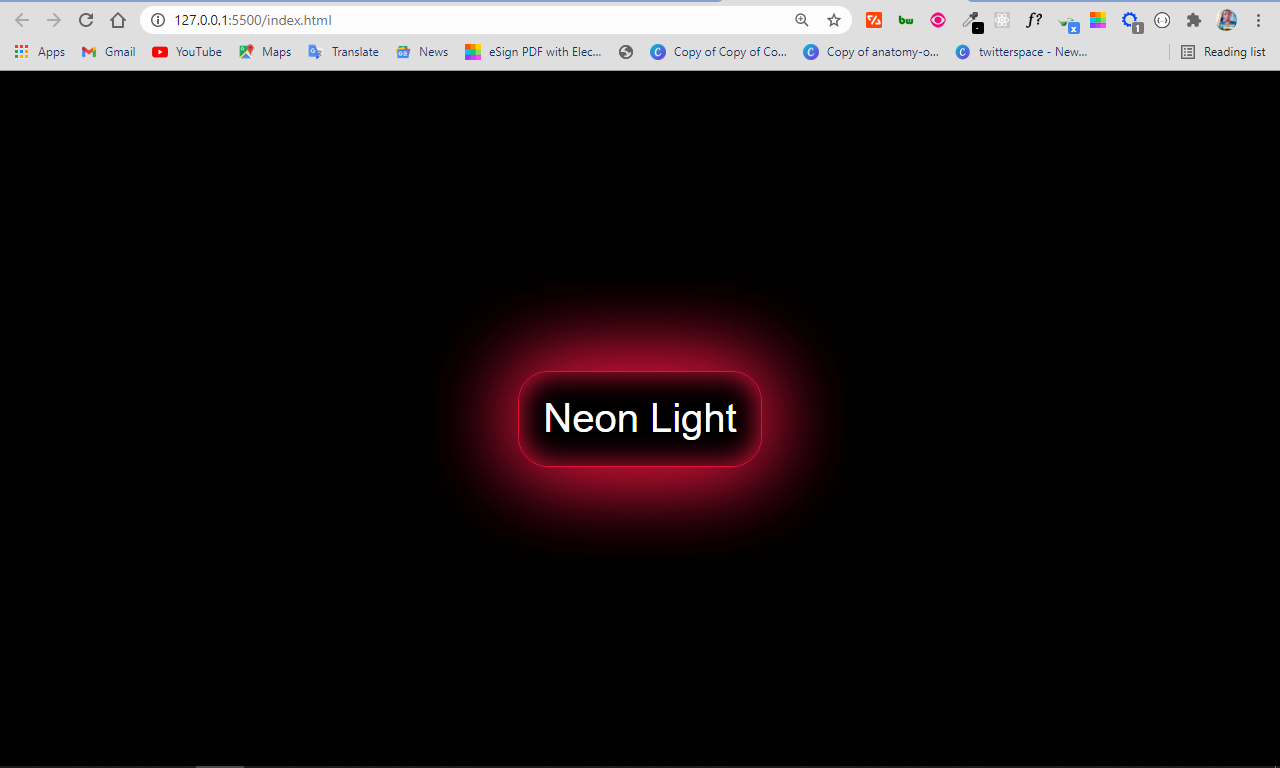
To implement the neon light effect, you can use the box-shadow property. It allows multiple values, which will be instrumental in making the neon light effect.
button {
        background-color: #000;
        border: .5px solid crimson;
        border-radius: 10px;
        color: #fff;
        padding: 8px;
        box-shadow: 0 0 30px 0 crimson,
                    0 0 30px 0 crimson,
                    0 0 10px 0 crimson inset;
      }
In the box-shadow property:
- the first value represents the offset on the x-axis
- the second value represents the offset on the y-axis
- the third value represents the blur radius
- the fourth value represents the spread radius
- the fifth value is the color to be applied to the shadow
I only wanted the spread radius and color, so I set other values to zero. Then I made the last of the box-shadow values apply to the inside of the button by attaching inset to it.
There is now a neon light effect on the button:
Conclusion
This article showed you several ways you can add buttons to a website. In HTML and CSS, there are always multiple ways of doing the same thing – that’s one of the reasons you can add buttons to a website even with an anchor tag.
You can even make a button behave like a link by wrapping an anchor tag around a button.
You can also add buttons with almost any other tag, such as div, span, and even the p tag. But you should avoid doing this for accessibility and so you don’t hurt the SEO of your website. After all, you have to make life easy for web crawlers, too.
Thank you for reading, and keep coding.