
By Yisroel Yakovson
This article follows two others about creating Full Graph Stacks. Check out How To Build A Cutting Edge Server Now for a conceptual introduction to the approach. Launch Your MVP Server In An Hour guides you through building a stack of development quality. This article explains how to convert that stack to a robust, permanent application.
What’s Wrong with the Development Stack?
The steps in the second article mirrored the GRANDstack video:
- The database is a Neo4j Sandbox
- The APIC server runs on Now.
That’s enough for an MVP or for the initial prototyping, but you’ll have to move on soon. The biggest initial limitation is the database. The sandbox will live at most ten days.
Even after you spin up a permanent database, Now would make a difficult permanent home. In theory, it would be possible if you didn’t modify your server frequently. You could set up your permanent API with a separate host and alias it to your Now endpoint. The problem is that the Now endpoint changes each time you upload a revision. That means that you have to keep updating your alias.
Security also poses a challenge. It’s common to create a white list of IPs permitted to access your database and to limit the list to your API server. So if that server IP changes frequently, you have to update the list with each revision. I don’t see a viable way to do that with Now as of this writing. (Please reach out to me if you do!)
So the question is, what’s the best approach to solve these limitations?
On the Cutting Edge
The truth is, this article has been on hold for a few weeks. The problem was that neo4j-graphql-js was not quite ready to support production. But in the past few weeks, that all changed. The team solved a few fundamental problems:
- Middleware became supportable two weeks ago. The team added to the generated reducers support for throwing middleware errors. That enables your server to run general authentication and authorization functionality as middleware.
- Modification of mutations became possible a week ago. Until then, you were stuck with the generated mutations. Now you can add necessary business logic or side effects.
- Autogenerated keys are becoming available. The team reported yesterday a new @autogenerate directive. Placing the directive after a key will result in an autogenerated UUID. Before, the front end had to pass values in for keys, which is most unusual for a production server.
This writing, on August 19, 2018, comes in the midst of many other expected fixes. Of particular interest, the team plans to release some directives to simplify auth. Also, I hope that we will soon see nested mutations. Much of what I write here will soon become outdated. But I’ve decided that it’s worth describing this package now, because it’s already useful. Please post updates or corrections below as comments.
Options
When you leave the world of sandboxes, you have choices. I think that the general rule is that today most are fine. The important thing is to move forward.
But the three basic steps that I discuss below are probably universal needs. They may be all that you need for your back end.
Two introductory observations:
- You don’t need to get things perfect from day 1. There was a time when decisions like the size of your machine or your host had long-term significance. Today any sensible team works in the cloud. Most decisions are reversible. Auth may an exception, but even that may be changing. Get something live and start pivoting!
- If you followed the steps in Launch Your MVP Server In An Hour, you have an amazingly small back end. You will need three components: your tiny server app, your database, and an auth service. You don’t even have to store them with the same host.
Contents
Set up Auth
Every project’s auth needs are different, but some basics have emerged. You need two things:
- En external authentication service. Two common choices are Cognito and Auth0.
- Most servers also need authorization, or access control. You have to decide whether a particular user is allowed to do something.
Setting up Middleware Capability
The preferred way to handle Auth is through middleware or directives. As of the current writing, auth is not included in the GRANDstack starter.
The server used in api/src/index.jx in the starter package is currently ApolloServer. But you can replace that with graphalExpress from apollo-server-express.
You will have to change 2 files:
api/src/index.jsapi/package.json
You should also add an auth.js file.
Here’s a version of index.js that currently works with middleware:
import express from 'express';import { graphqlExpress, graphiqlExpress } from 'apollo-server-express';import cors from 'cors';import { makeExecutableSchema } from 'graphql-tools'import expressPlayground from 'graphql-playground-middleware-express';import bodyParser from 'body-parser';require('dotenv').config();import { v1 as neo4j } from "neo4j-driver";import { augmentSchema } from "neo4j-graphql-js";import { typeDefs, resolvers } from "./graphql-schema";import { authenticateUser, authorize } from './auth';// augmentSchema will add autogenerated mutations based on types in schemaconst schema = makeExecutableSchema({ typeDefs, resolvers});const augmentedSchema = augmentSchema(schema);const driver = neo4j.driver( process.env.NEO4J_URI, neo4j.auth.basic( process.env.NEO4J_USER, process.env.NEO4J_PASSWORD ));const app = express();app.use(bodyParser.json()); // support json encoded bodiesapp.use(cors());app.use('/graphql i apollo-server-expressql', graphiqlExpress({ endpointURL: '/graphql'}));app.get('/', expressPlayground({ endpoint: '/graphql' }));// app.use('/', authenticateUser, authorize);app.use('/graphql', bodyParser.json(), graphqlExpress(req => { return { context: { auth: req.auth, driver }, endpointURL: '/graphql', schema: augmentedSchema }}));app.listen(process.env.GRAPHQL_LISTEN_PORT, '0.0.0.0');console.log(`GraphQL Playground at ${process.env.GRAPHQL_LISTEN_PORT}`);
Note that:
- We are using apollo-server-express, which supports middleware
- Two functions are called as middleware: authenticateUser and authorize. Both definitions appear in auth.js.
- I also added cors, which we needed to resolve some CORS issues.
The project.json file must contain the proper dependencies. As of this writing, here are the versions I’m using:
{ "name": "grand-stack-express", "version": "0.0.1", "description": "API app for GRANDstack with express", "main": "src/index.js", "license": "MIT", "dependencies": { "apollo-server-express": "^1.3.6", "babel-cli": "^6.26.0", "babel-core": "^6.26.3", "babel-polyfill": "^6.26.0", "babel-preset-env": "^1.7.0", "babel-preset-stage-0": "^6.24.1", "babel-watch": "^2.0.7", "body-parser": "^1.18.3", "cors": "^2.8.4", "dotenv": "^6.0.0", "express": "^4.16.3", "express-graphql": "^0.6.12", "graphql-playground-middleware-express": "^1.7.1", "graphql-tag": "^2.9.2", "graphql-tools": "^3.0.4", "neo4j-driver": "^1.6.3", "neo4j-graphql-js": "^0.1.32", "node-fetch": "^2.1.2", "nodemon": "^1.17.5" }, "resolutions": { "neo4j-graphql-js/graphql": "v14.0.0-rc.2" }, "scripts": { "test": "echo \"Error: no test specified\" && exit 1", "dev": "babel-watch --exec babel-node --presets env,stage-0 src/index.js", "start": "nodemon --exec babel-node --presets env,stage-0 src/index.js" }, "devDependencies": { "nodemon": "^1.17.5" }}
Here’s a starter auth.js file to add to your project and complete:
import gql from 'graphql-tag'import { v1 as neo4j } from 'neo4j-driver';import { INSPECT_MAX_BYTES } from 'buffer';require('dotenv').config();const driver = neo4j.driver( process.env.NEO4J_URI, neo4j.auth.basic( process.env.NEO4J_USER, process.env.NEO4J_PASSWORD ));const resolveUser = () => { //a placeholder return 0;}/* * middleware functions follow */export const authenticateUser = async (req, res, next) => { req.auth={}; try { const response = await resolveUser(); req.auth.user=response } catch(err) { req.error=err.message } next();}export const authorize = async (req, res, next) => { if (req.error) { console.log(req.error); next(); return; } // placeholder, allows every authenticated request next();}
- start by committing your old version to git and probably creating a new branch.
git add .thengit commit -m "works without auth"and thengit checkout -b auth. You will then see a response ofSwitched to a new branch ‘auth’ - replace your
api/src/index.jsandapi/project.jsonfiles with the versions above, and add theauth.jsfile toapi/src. - move your current node_modules:
mv node_modules node_modules.old - run
npm installagain, thennpm start. Make sure that it works by running a query.
Add Your Authentication Service
You can fill in the details based on the SDK for whatever auth software you use.
You may have to study up on using async/await functions in an express app, but it’s not too difficult to learn.
- Uncomment the line
app.use(‘/’, authenticateUser, authorize);inindex.js. - Install the proper Node js SDK for your Authentication service. Then add the needed code and rewrite the function
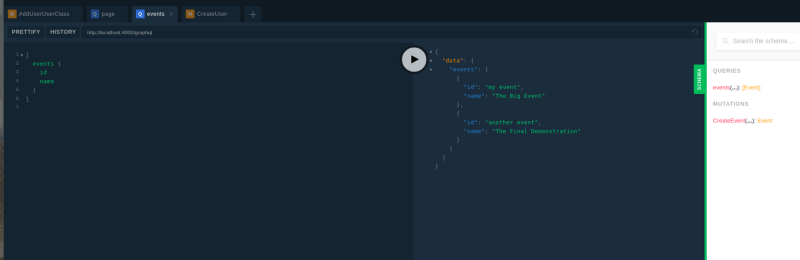
authenticateUserinauth.jsto call it. Remember to setreq.errorto an appropriate error message when authentication fails. - Practice by adding a valid token to the HTTP Header. Note that in Playground the HTTP HEADERS panel makes this quite simple.
Add Authorization
The file auth.js includes a database driver. The driver supports querying to determine a user’s access rights to specific data. For instance, your database could store read/write privileges for data. Whenever a request fails your test, you can specify what failed by setting req.error. The neo4jgraphql resolver function will return the error message.
Note that you can add more functions to the middleware. For instance, you might add a check whether the current user is fully paid.
Enhancing AugmentSchema
The call to augmentSchema in the index.js file generates the mutations in your schema. As stated above, a recent enhancement lets you add mutations. You can also overwrite the generated ones.
One simple way is with the @cypher directive in your mutation declaration:
type Mutation { UpdateFoo(id: ID, name: String): Foo @cypher(statement:”MATCH (f:Foo {id: $id}) SET f.name = $name”}
Then, for the resolver just use neo4jgraphql:
Mutation: { UpdateFoo: neo4jgraphql}
Database Hosting
You have some options. First, there are some hosting services. I wasn’t so impressed, because it’s not that hard to create a database server yourself. But, the cost is a drop in the bucket compared to your team’s time. If you pay a few hundred dollars a month to get something up and running, and you have no worries, you could do a lot worse.
Basic Hosting
I decided to spin up an AWS EC2 instance instead. I’m going to write what I did there.
- Decide your region. Might not matter much, but if you are centered somewhere then go for it.
- Get the AWS CLI working working on your computer.
- Get hold of an appropriate AMI. You can search on the AWS store, or check out what’s available.
- Do the steps (until the last one) here. Make sure to save your key file, as you’ll need it for setting up APOC.
- Then you need to go to the page, log in and change the password. But which port to go to and what password might not be the same as there. For my AMI, the password was “neo4j” (like the user name). I had to go to https://[IP]:7473/browser/ (not http as in the example given on the page, and not 7434).
- Change your code on your local to be sure that you can connect to it. Check it on your localhost:4000.
Setting up APOC
To use @cypher directives, or any of the APOC functions, you’ll have to to install the APOC jar file on the server itself. You’ll need to ssh in to your database server. As of 2 months ago, it wasn’t included in the AMIs.
- You’ll need to use the command shown at Hosting Neo4j on EC2 on AWS:
ssh -i $KEY_NAME.pem ubuntu@[PublicDnsName] - You’ll have to add the jar file to the neo4j plugins directory. Follow the manual instructions to find the latest release and figure out where to insert it.
- You also need to find your neo4j.conf file and insert into it permission to call the functions. The following works:
dbms.security.procedures.unrestricted=apoc.* - Then you’ll have to restart:
sudo systemctl restart neo4j.
API Deployment
You can deploy on any system that supports a NODE js app. I used AWS Elastic Beanstalk:
- Run the command
zip -r api.zip . -x node_modules/**\*in theapidirectory. That creates a zip without the directory itself and without the node_modules. - Go to AWS Elastic Beanstalk in the console and make sure you’re in your region of choice.
- If you can get to the welcome page, I find it the easiest. You click on Get Started, and follow the instructions. They set me up right away with what I needed. You just upload the file that you zipped above.
- nder Configuration for the Elastic Beanstalk environment, go to Modify Software. Enter Container Options, and set Node Command to
npm start. - After about 10 minutes, it’s ready. You can click on the endpoint URL to see it.
- Use Route53 to alias your own api domain to the Elastic Beanstalk endpoint, and you’re all set.
Conclusions
If you’ve followed this far, congratulations. You know more about how to build a full graph stack than many seasoned back end designers.
The process described in these articles might take an hour for someone who has done them a few times. For anyone else, these articles hopefully minimize the extra time to research. The development time should fall even more as these tools improve.
But simplicity and ease are just one benefit. The full graph stack is also technologically sound.
- The server created here is robust.
- A graph database in general scales brilliantly.
- The stack uses very few resources.
- You can port the back end to different hosts or services, reducing lock-in and fees.
Let us work together to keep this technology moving. Please leave comments or reach out with other improvements. Good luck with your own projects!