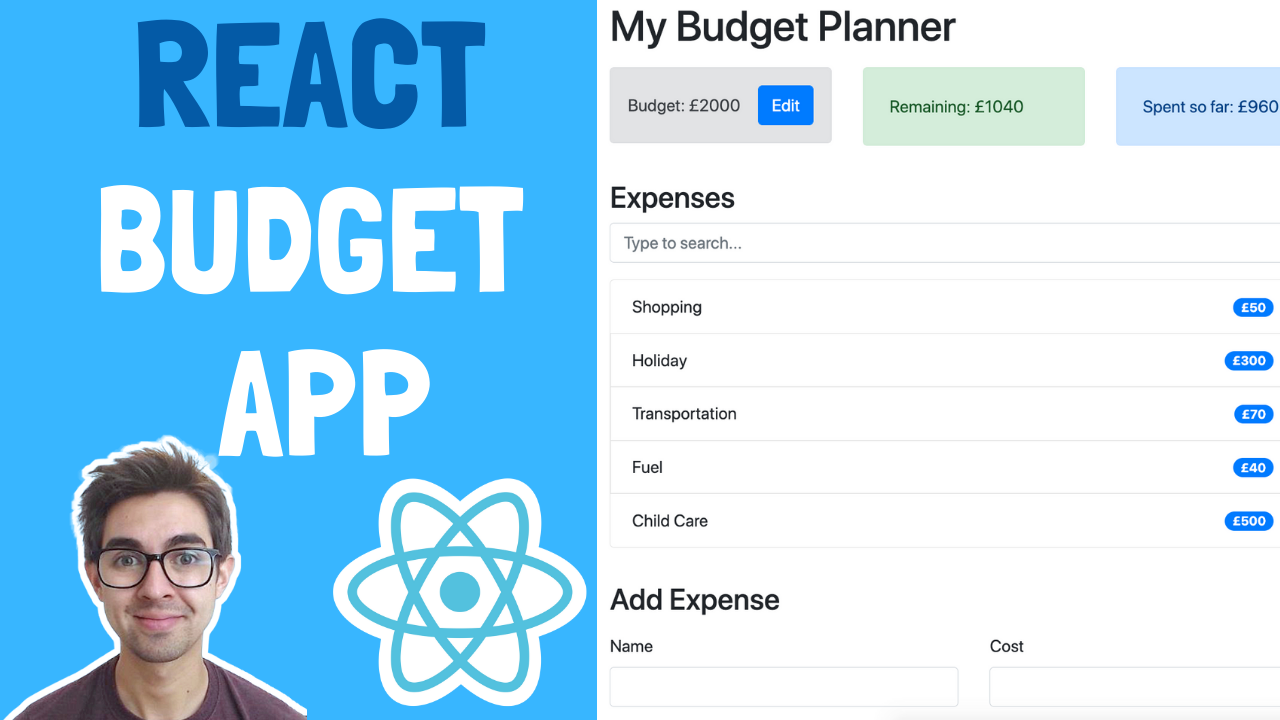
In this React Budget Tracker App tutorial we're going to:
- We’ll learn how break down a UI into React components
- Learn how to work with state using the Context API
- Learn about actions, reducers, and the dispatch function
And I’ll give you some challenges which you can try at the end!
This is what we'll build:
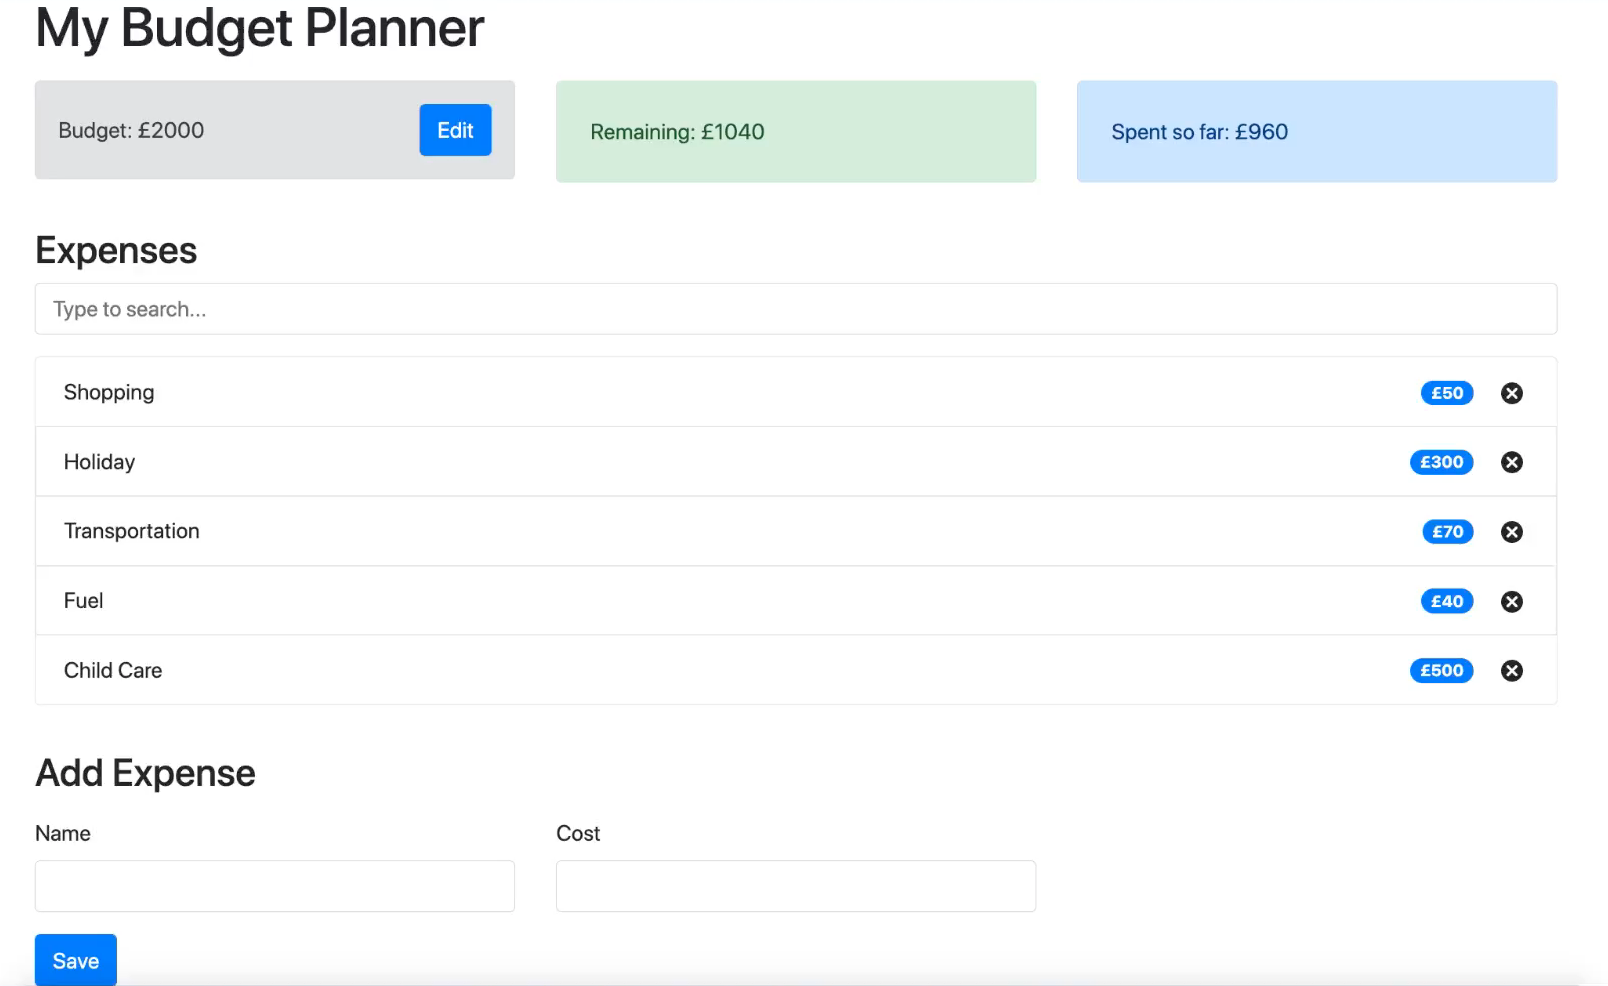
The user can:
- Add expenses which have a name and a cost
- Remove expenses
- View how much of their budget is remaining
- View how much they've spent so far
- (Challenge) Edit budget
- (Challenge) Search expenses
Video Walkthrough
Heres a video walkthrough if you want to supplement your reading (on YouTube)
Source Code
Finally, in case you get lost while following along, you can grab the finished code here (on GitHub).
Let's Go!
How to Setup a React Project
The first thing we need to do is setup a React project. For this we'll use create-react-app.
Fire up a terminal and type:
npx create-react-app budget-tracker
When that's finished doing its thing we're going to install Bootstrap. This will give us ready-made styles we can use instead of having to create our own in CSS.
In the same terminal, change to your working directory, and install Bootstrap:
cd budget-tracker
npm i bootstrap
Next we're going to install a package that allows us to generate IDs. We'll be using IDs to identify each expense in the list, so this is important.
Run the following command in your project directory:
npm i uuid
The last package we need to install gives us some icons to use, which saves us from having to create them ourselves.
Run the following command in your project directory:
npm i react-icons
Now open up the project in VS Code (or whatever IDE you use). You should see some stuff appear in the project tree (this is our empty React project).
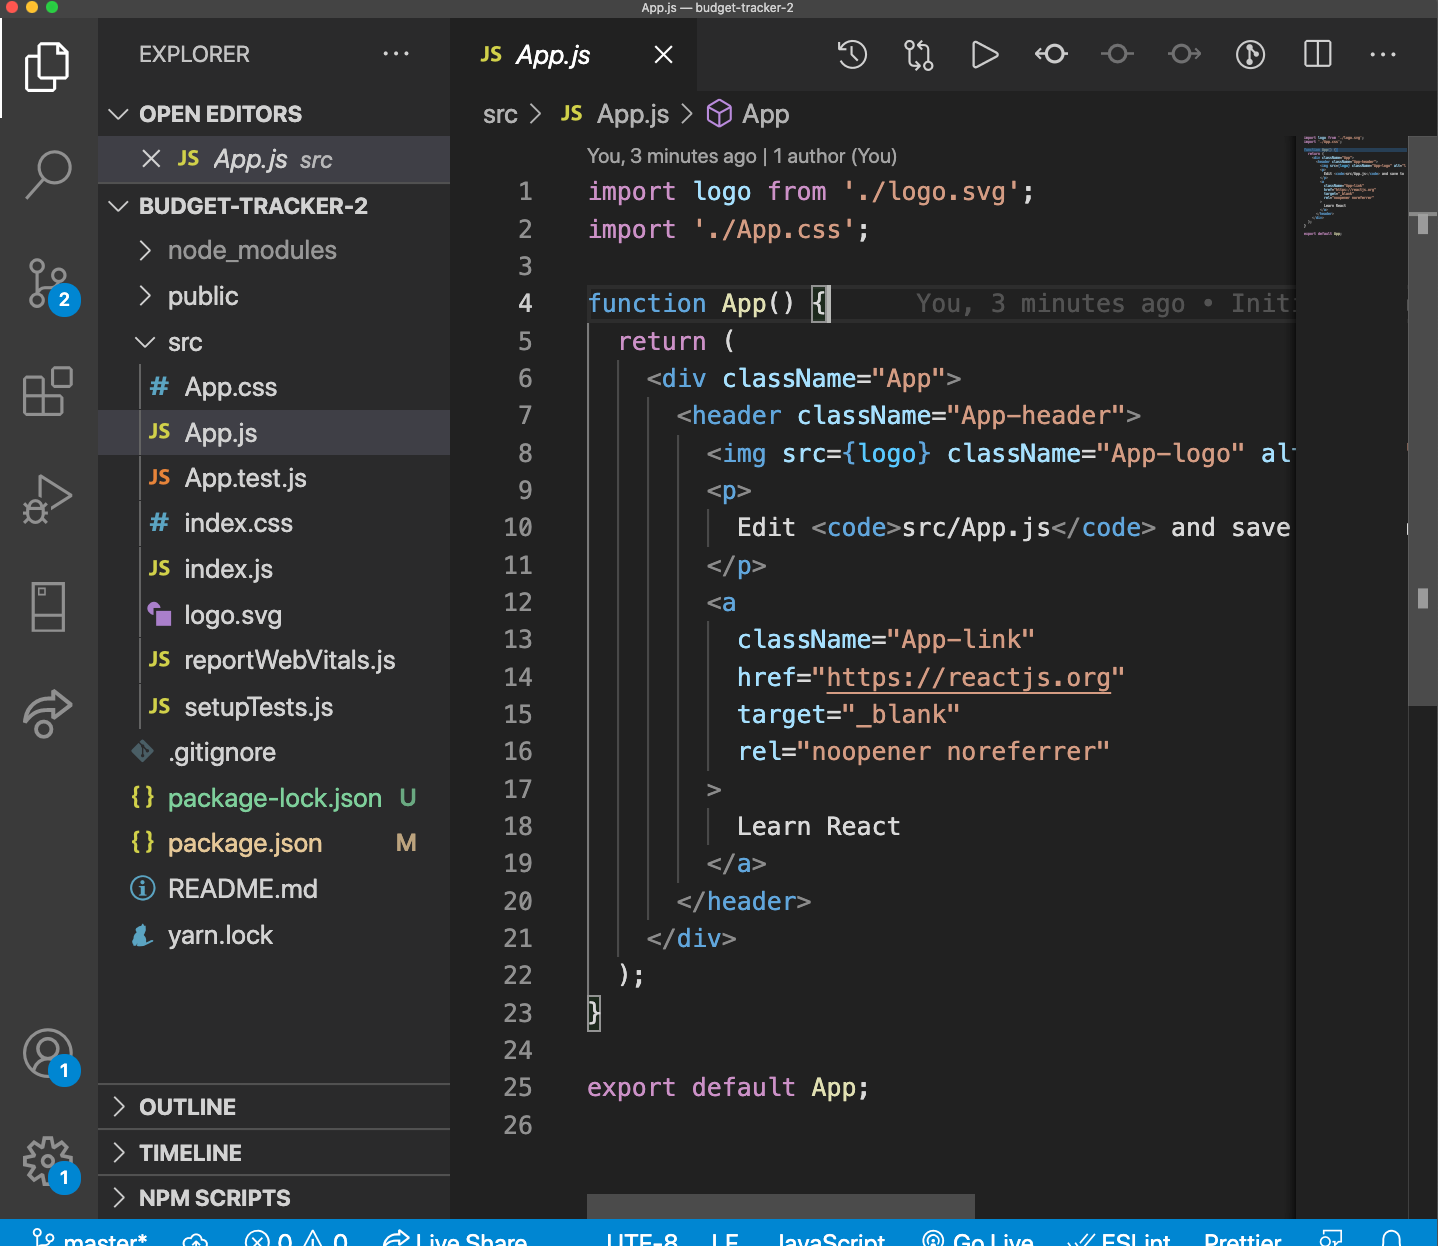
You can ignore most of this, as we'll be creating our own components. Open up App.js, delete everything, and add the following:
import React from 'react';
import 'bootstrap/dist/css/bootstrap.min.css';

const App = () => {
    return <p>Hello React!</p>;
};

export default App;
What this does:
- Imports the bootstrap CSS into our project
- Creates a component that displays "Hello React!" with paragraph tags
- Exports this component so other components can use it
Next we'll fire up the app and make sure everything is working as it should. Open a terminal (either in VS Code or otherwise) and start the app by typing the following:
npm start
All being well, the app should start and open in a browser:
 The text "Hello React" should appear on the page. This means your app is working!
Success! Now we're ready to start building out our React components.
How to Put the UI Components in Place
One approach to building apps is to start by putting the UI components in place with some dummy data. This usually helps with visualising what state objects are needed, and usually means less rework later on.
With that in mind we're going to put our UI components in place starting at the top and working down.
 We'll add a title, then add a new component for each of the "boxes" shown. We'll add some dummy data just to get things displaying correctly
How to Create the Budget Component
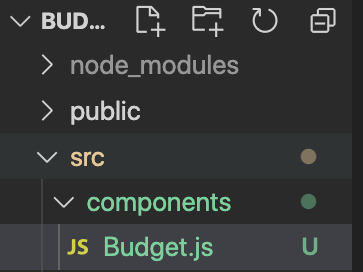
Jump into the code, in the src folder, create a new folder called components. Within this, create a file called Budget.js. Your project structure should look like this:
Open up Budget.js and add the following:
import React from 'react';

const Budget = () => {
    return (
        <div className='alert alert-secondary'>
            <span>Budget: £2000</span>
        </div>
    );
};

export default Budget;
What we're doing:
- Creating a new component called Budget (line 3)
- Using the Bootstrap Alert classes to gives us a nice gray background (line 5)
- Adding some text and hard coding a value (line 6)
How to Create the Remaining Component
Next we'll create the Remaining component, which shows how much budget the user has left.
Create a new file under src/components called Remaining.js. Open it up and add the following:
import React from 'react';

const Remaining = () => {
    return (
        <div className='alert alert-success'>
            <span>Remaining: £1000</span>
        </div>
    );
};

export default Remaining;
What we're doing:
- Creating a new component called Remaining (line 3)
- Using the Bootstrap Alert classes to gives us a green background (line 5)
- Adding some text and hard coding a value (line 6)
- Adding Spent so Far
Lastly, we'll create the Spent so Far component, which shows how much the user has spent so far.
Create a new file under src/components called ExpenseTotal.js. Open it up and add the following:
import React from 'react';

const ExpenseTotal = () => {
    return (
        <div className='alert alert-primary'>
            <span>Spent so far: £1000</span>
        </div>
    );
};

export default ExpenseTotal;
What we're doing:
- Creating a new component called ExpenseTotal (line 3)
- Using the Bootstrap Alert classes to gives us a blue background (line 5)
- Adding some text and hard coding a value (line 6)
How to Add a Title and Render our Components
At this point you might be thinking, "these components all look the same, what gives?!". This is true, although remember we're just adding some hard coded data for now. Later, each component will do different things to display the data dynamically.
Now we've created our components, we need to render them in App.js. Open App.js and add the following:
import React from 'react';
import 'bootstrap/dist/css/bootstrap.min.css';
import Budget from './components/Budget';
import Remaining from './components/Remaining';
import ExpenseTotal from './components/ExpenseTotal';

const App = () => {
    return (
            <div className='container'>
                <h1 className='mt-3'>My Budget Planner</h1>
                <div className='row mt-3'>
                    <div className='col-sm'>
                        <Budget />
                    </div>
                    <div className='col-sm'>
                        <Remaining />
                    </div>
                    <div className='col-sm'>
                        <ExpenseTotal />
                    </div>
                </div>
            </div>
    );
};

export default App;
What we're doing:
- Importing our different components (lines 3-5)
- Adding a bootstrap container that helps us center our App on the page (line 9)
- Adding a title (line 9)
- Adding a Bootstrap row (line 10)
- Adding a column within the row for each of our components so far (lines 12-20)
Now if you run the app, you should see the title, and our components rendered on the page!
How to Create the Expense List Component
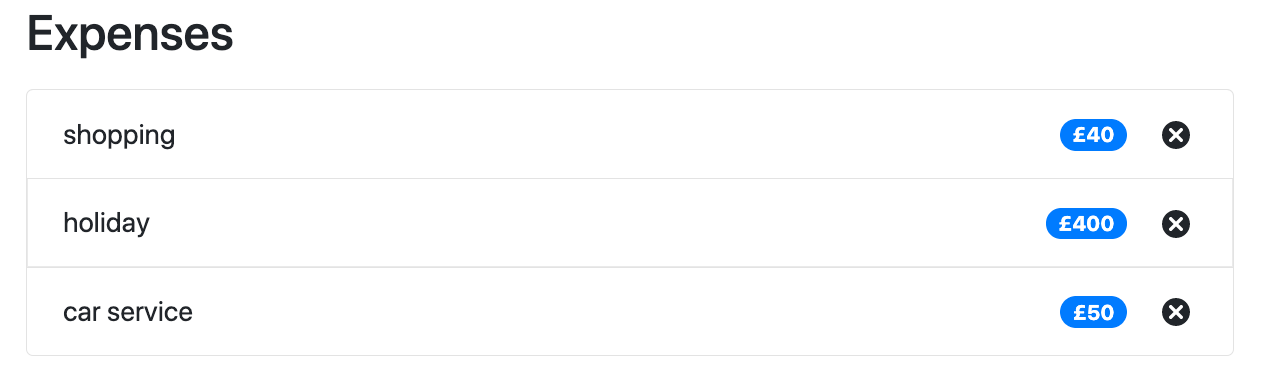 The expenses list shows the expenses the user has added so far, displaying the Name, cost, and a delete button for each
Next we'll build the ExpenseList component. This component will be in charge of taking a list of expenses, and rendering an ExpenseItem component for each item.
We'll add some dummy data, to make sure our UI looks good and things are working as intended. Later, this stuff will come from context.
Start by creating a new file under src/components called ExpenseList.js. Open up ExpenseList.js and add the following:
import React from 'react'
import ExpenseItem from './ExpenseItem';

const ExpenseList = () => {
    const expenses = [
        { id: 12, name: 'shopping', cost: 40 },
        { id: 13, name: 'holiday', cost: 400 },
        { id: 14, name: 'car service', cost: 50 },
    ];

    return (
        <ul className='list-group'>
            {expenses.map((expense) => (
                <ExpenseItem id={expense.id} name={expense.name} cost={expense.cost} />
            ))}
        </ul>
    )
}

export default ExpenseList
What we're doing:
- Adding a dummy list of expenses. For each expense we need an ID, a name, and a cost. Later, we'll take this list from context (line 4)
- Creating a list (line 11)
- Using the map function to iterate over the expenses and displaying an ExpenseItem component (we haven't created this yet! Line 12)
- Passing the ID, name, and cost to the ExpenseItem component as props
How to Create the Expense Item Component
Now we've created a component to hold our list, we need a component to render each item. Create a new file in the src/components folder called ExpenseItem.js. Open it up and add the following:
import React from 'react';
import { TiDelete } from 'react-icons/ti';

const ExpenseItem = (props) => {
    return (
        <li className='list-group-item d-flex justify-content-between align-items-center'>
            {props.name}
            <div>
                <span className='badge badge-primary badge-pill mr-3'>
                    £{props.cost}
                </span>
                <TiDelete size='1.5em'></TiDelete>
            </div>
        </li>
    );
};

export default ExpenseItem;
What we're doing:
- Creating a list item (line 6)
- Rendering the name of the expense, which we get from props (line 7)
- Rendering the cost of the expense, which we also get from props
- We're displaying a DeleteIcon (line 12) which we get from react-icons package (line 2)
How to Render the ExpenseList Component
Now we've created our components, we just have to render ExpenseList in App.js. Open up App.js and update it with the following:
import React from 'react';
import 'bootstrap/dist/css/bootstrap.min.css';
import Budget from './components/Budget';
import Remaining from './components/Remaining';
import ExpenseTotal from './components/ExpenseTotal';
import ExpenseList from './components/ExpenseList';

const App = () => {
    return (
        <div className='container'>
            <h1 className='mt-3'>My Budget Planner</h1>
            <div className='row mt-3'>
                <div className='col-sm'>
                    <Budget />
                </div>
                <div className='col-sm'>
                    <Remaining />
                </div>
                <div className='col-sm'>
                    <ExpenseTotal />
                </div>
            </div>
            <h3 className='mt-3'>Expenses</h3>
            <div className='row mt-3'>
                <div className='col-sm'>
                    <ExpenseList />
                </div>
            </div>
        </div>
    );
};

export default App;
What's new:
- We imported our ExpenseList (line 6)
- Added a new Bootstrap row (line 24)
- Rendered our ExpenseList (line 26)
Now if you save/run the App, you'll see the Expenses list has appeared!
How to create the "Add Expense" form component
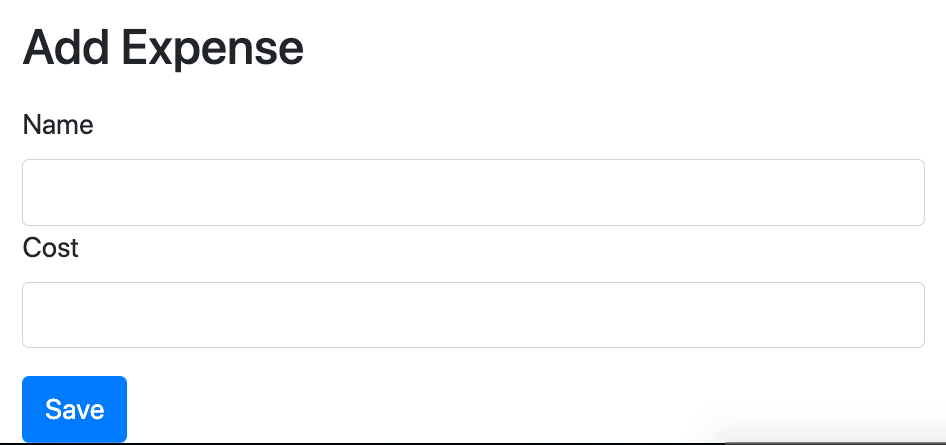
Our UI components are nearly complete! The last component we need is the "Add Expense" form component, which lets users add new expenses. We'll put the UI components for the form in place first, then come back later and add the fancy stuff.
Create a new file in src/components called AddExpenseForm.js. Fire this up and add the following:
import React from 'react';

const AddExpenseForm = () => {

    return (
        <form>
            <div className='row'>
                <div className='col-sm'>
                    <label for='name'>Name</label>
                    <input
                        required='required'
                        type='text'
                        className='form-control'
                        id='name'
                    ></input>
                </div>
                <div className='col-sm'>
                    <label for='cost'>Cost</label>
                    <input
                        required='required'
                        type='text'
                        className='form-control'
                        id='cost'
                    ></input>
                </div>

            </div>
            <div className='row'>
                <div className='col-sm'>
                    <button type='submit' className='btn btn-primary mt-3'>
                        Save
                    </button>
                </div>
            </div>
        </form>
    );
};

export default AddExpenseForm;
What we're doing:
- Adding our form tags (line 6)
- Adding a label/input for our name field (line 9)
- Adding a label/input for our cost field (line 18)
- Adding a button to submit the form (line 30)
How to Render the AddExpenseForm component
Finally in App.js, we have to render our new component. Update App.js with the following:
import React from 'react';
import 'bootstrap/dist/css/bootstrap.min.css';
import Budget from './components/Budget';
import Remaining from './components/Remaining';
import ExpenseTotal from './components/ExpenseTotal';
import ExpenseList from './components/ExpenseList';
import AddExpenseForm from './components/AddExpenseForm';

const App = () => {
    return (
        <div className='container'>
            <h1 className='mt-3'>My Budget Planner</h1>
            <div className='row mt-3'>
                <div className='col-sm'>
                    <Budget />
                </div>
                <div className='col-sm'>
                    <Remaining />
                </div>
                <div className='col-sm'>
                    <ExpenseTotal />
                </div>
            </div>
            <h3 className='mt-3'>Expenses</h3>
            <div className='row mt-3'>
                <div className='col-sm'>
                    <ExpenseList />
                </div>
            </div>
            <h3 className='mt-3'>Add Expense</h3>
            <div className='row mt-3'>
                <div className='col-sm'>
                    <AddExpenseForm />
                </div>
            </div>
        </div>
    );
};

export default App;
What's changed:
- Imported the AddExpenseForm (line 7)
- Rendered the AddExpenseForm (line 33)
How to Add the Context API
The Context API is what we'll use to store our global state. It's already part of the React library so no need to import/install anything else.
Start by creating a new folder in the src folder called context. Within this folder create a new file called AppContext.js.
How to Create the Initial State
The first thing our context needs to work is an initial state. This indicates the "shape" of our state (in other words, what properties and data we have) and can be used to initialise the app with data from an API call, for example.
For now we'll just add some initial values. In AppContext.js, add the following:
const initialState = {
    budget: 2000,
    expenses: [
        { id: 12, name: 'shopping', cost: 40 },
        { id: 13, name: 'holiday', cost: 400 },
        { id: 14, name: 'car service', cost: 50 },
    ],
};
- We're adding an initial budget
- We're adding a dummy list of expenses
NOTE: the intialState properties do not need to have values, they can be set to empty strings, empty arrays, and so on. We're adding data for visual purposes
How to Create the AppContext
Next we'll create the AppContext. This is the thing our components import and use to get the state.
Update AppContext.js with the following:
const initialState = {
    budget: 2000,
    expenses: [
        { id: 12, name: 'shopping', cost: 40 },
        { id: 13, name: 'holiday', cost: 400 },
        { id: 14, name: 'car service', cost: 50 },
    ],
};

export const AppContext = createContext();
All we've done is added a call to createContext at line (11) - thats our context object created!
How to Create the AppProvider
The provider is a component that wraps the components which we want to pass the state to. We use it in conjunction with the useReducer hook to actually store the global state.
Update the AppContext.js file like so:
const initialState = {
    budget: 2000,
    expenses: [
        { id: 12, name: 'shopping', cost: 40 },
        { id: 13, name: 'holiday', cost: 400 },
        { id: 14, name: 'car service', cost: 50 },
    ],
};

export const AppContext = createContext();

export const AppProvider = (props) => {
    const [state, dispatch] = useReducer(AppReducer, initialState);

    return (
        <AppContext.Provider
            value={{
                budget: state.budget,
                expenses: state.expenses,
                dispatch,
            }}
        >
            {props.children}
        </AppContext.Provider>
    );
};
What we're doing:
- Creating our Provider component (line 12)
- Setting up the useReducer hook which will hold our state, and allow us to update the state via dispatch (NOTE we haven't created the AppReducer yet! Line 13)
- We're returning AppContext.Provider. This has a value prop which contains the data which we allow our components to see and have access to, as well as the dispatch function that lets us update the state by dispatching actions (line 16)
How to Create the AppReducer
Next we’ll create the AppReducer. The reducer is in charge of creating the new global state object, based on an action type and a payload.
Update AppContext.js with the following:
const AppReducer = (state, action) => {
    switch (action.type) {
        default:
            return state;
    }
};

const initialState = {
    budget: 2000,
    expenses: [
        { id: 12, name: 'shopping', cost: 40 },
        { id: 13, name: 'holiday', cost: 400 },
        { id: 14, name: 'car service', cost: 50 },
    ],
};

export const AppContext = createContext();

export const AppProvider = (props) => {
    const [state, dispatch] = useReducer(AppReducer, initialState);

    return (
        <AppContext.Provider
            value={{
                budget: state.budget,
                expenses: state.expenses,
                dispatch,
            }}
        >
            {props.children}
        </AppContext.Provider>
    );
};
What we're doing:
- Creating a function which accepts the current state, and an action (line 1)
- We use a switch based on the action.type to decide how to update the state (line 2)
- For now since we’re just getting things set up we’re just going to return the default state, and add actions later as we need them (line 3)
And thats it! Our global state is now set up and ready to go.
How to Link AppContext to our App
The next step is to link our AppContext to our App component. We do this by wrapping the components which we want to pass the state to with the AppProvider.
Jump back into App.js and update the following:
import React from 'react';
import 'bootstrap/dist/css/bootstrap.min.css';
import Budget from './components/Budget';
import Remaining from './components/Remaining';
import ExpenseTotal from './components/ExpenseTotal';
import ExpenseList from './components/ExpenseList';
import AddExpenseForm from './components/AddExpenseForm';
import { AppProvider } from './context/AppContext';

const App = () => {
    return (
        <AppProvider>
            <div className='container'>
                <h1 className='mt-3'>My Budget Planner</h1>
                <div className='row mt-3'>
                    <div className='col-sm'>
                        <Budget />
                    </div>
                    <div className='col-sm'>
                        <Remaining />
                    </div>
                    <div className='col-sm'>
                        <ExpenseTotal />
                    </div>
                </div>
                <h3 className='mt-3'>Expenses</h3>
                <div className='row mt-3'>
                    <div className='col-sm'>
                        <ExpenseList />
                    </div>
                </div>
                <h3 className='mt-3'>Add Expense</h3>
                <div className='row mt-3'>
                    <div className='col-sm'>
                        <AddExpenseForm />
                    </div>
                </div>
            </div>
        </AppProvider>
    );
};

export default App;
What's changed:
- Imported our AppProvider (line 8)
- Nested our components in the AppProvider element (lines 12 / lines 39)
Now that our components are nested within the AppProvider, they have access to value object that the AppProvider exposes.
How to Connect our Components to AppContext
How to Render Budget from Context
Now we can start pulling global state values into our components. We'll start with the budget, so jump into Budget.js and add the following:
import React, { useContext } from 'react';
import { AppContext } from '../context/AppContext';

const Budget = () => {
    const { budget } = useContext(AppContext);

    return (
        <div className='alert alert-secondary'>
            <span>Budget: £{budget}</span>
        </div>
    );
};

export default Budget;
What we're doing:
- We have to import AppContext from our Context (line 2)
- We import the useContext hook, and pass our AppContext to it - this is how a component connects to the context in order to get values from global state
- We use destructuring to get the budget from context (line 5)
- We're rendering the budget in our JSX (line 9)
Now if you change the budget in AppContext and reload your browser, you will see the budget updates on the UI. This means our component is successfully pulling data from our context. Success!
How to Render Expenses from Context
Now we can do something similar with the expense list. Open up ExpenseList.js and update it with the following:
import React, { useContext } from 'react';
import ExpenseItem from './ExpenseItem';
import { AppContext } from '../context/AppContext';

const ExpenseList = () => {
    const { expenses } = useContext(AppContext);

    return (
        <ul className='list-group'>
            {expenses.map((expense) => (
                <ExpenseItem id={expense.id} name={expense.name} cost={expense.cost} />
            ))}
        </ul>
    );
};

export default ExpenseList;
What we're doing:
- Importing our AppContext and useContext hook like before
- We've removed the dummy list of expenses
- We've replaced the dummy list with the expenses list we store in context
Since we've already done the work to render the list of expenses, we don't have to do anything else! Refresh the browser and you'll see the list now comes from context rather than the dummy list.
Remember we exported expenses as part of the value object in the provider. Any component wrapped in the provider can get access to this value object, and use destructuring to get the specific value it needs.
How to Add a New Expense - Capturing Form Values
So far we've looked at how to get values from state, next we'll look at how we can dispatch actions and update the state.
Before we do that, we need to know the name and the cost of the new expense that the user has entered. Jump into AddExpenseForm.js and add the following:
import React, { useState } from 'react';

const AddExpenseForm = () => {
    const [name, setName] = useState('');
    const [cost, setCost] = useState('');

    const onSubmit = (event) => {

    };

    return (
        <form onSubmit={onSubmit}>
            <div className='row'>
                <div className='col-sm'>
                    <label for='name'>Name</label>
                    <input
                        required='required'
                        type='text'
                        className='form-control'
                        id='name'
                        value={name}
                        onChange={(event) => setName(event.target.value)}
                    ></input>
                </div>
                <div className='col-sm'>
                    <label for='cost'>Cost</label>
                    <input
                        required='required'
                        type='text'
                        className='form-control'
                        id='cost'
                        value={cost}
                        onChange={(event) => setCost(event.target.value)}
                    ></input>
                </div>
                <div className='col-sm'>
                    <button type='submit' className='btn btn-primary mt-3'>
                        Save
                    </button>
                </div>
            </div>
        </form>
    );
};

export default AddExpenseForm;
What we're doing:
- Using React to control the input values. For each input field, we have a state object (lines 7 and 8)
- When the user types into the inputs, the corresponding state values will update (lines 25 and 36)
- When the user clicks the button, it will call an onSubmit function. This function doesn't do anything right now, but this is where we'll dispatch the action from
Now we have the form values stored in state, we can dispatch an action to update the state.
How to Add a New Expense - Dispatching an action
Update the AddExpenseForm with the following:
import React, { useContext, useState } from 'react';
import { AppContext } from '../context/AppContext';
import { v4 as uuidv4 } from 'uuid';

const AddExpenseForm = () => {
    const { dispatch } = useContext(AppContext);

    const [name, setName] = useState('');
    const [cost, setCost] = useState('');

    const onSubmit = (event) => {
        event.preventDefault();

        const expense = {
            id: uuidv4(),
            name: name,
            cost: parseInt(cost),
        };

        dispatch({
            type: 'ADD_EXPENSE',
            payload: expense,
        });
    };

    return (
        <form onSubmit={onSubmit}>
            <div className='row'>
                <div className='col-sm'>
                    <label for='name'>Name</label>
                    <input
                        required='required'
                        type='text'
                        className='form-control'
                        id='name'
                        value={name}
                        onChange={(event) => setName(event.target.value)}
                    ></input>
                </div>
                <div className='col-sm'>
                    <label for='cost'>Cost</label>
                    <input
                        required='required'
                        type='text'
                        className='form-control'
                        id='cost'
                        value={cost}
                        onChange={(event) => setCost(event.target.value)}
                    ></input>
                </div>
                <div className='col-sm'>
                    <button type='submit' className='btn btn-primary mt-3'>
                        Save
                    </button>
                </div>
            </div>
        </form>
    );
};

export default AddExpenseForm;
What we're doing:
- Importing AppContext and useContext as usual
- Getting dispatch from our global state (line 6)
- Creating an expense object, containing the name and the cost. This is what will get dispatched as the payload, and what we'll use to update the state. We're also using the uuid package we imported earlier to create an ID. This is used to identify a given expense (line 14).
- We're dispatching an action, with a type and our payload. The type tells the reducer how to update the state, which we'll see in a minute (line 20)
How to Add a New Expense - Updating the reducer
That's it from the component side. You'll notice if you run this in the browser, nothing happens. Thats because we haven't updated our reducer to handle the action and update the state.
Jump into AppContext.js and update the reducer function with the following:
const AppReducer = (state, action) => {
    switch (action.type) {
        case 'ADD_EXPENSE':
            return {
                ...state,
                expenses: [...state.expenses, action.payload],
            };
        default:
            return state;
    }
};
What we're doing:
- We're checking the type of the action (which we get from the action variable) (line 2)
- Adding a new case to the switch statement called "ADD_EXPENSE" (line 3)
- Returning a new state object with the new expense taking from the payload (which we get from the action variable) (line 4)
When we return something from a case statement, the reducer automatically updates the state and re-renders the components, almost like magic.
Now if you run the code, and add a new expense, you can see it gets added to the expense list!
How to Calculate spent so far
The next thing we'll look at is calculating how much the user has spent so far. To do this, we'll take a total of all the expenses the user has spent and display it on the UI.
Open up ExpenseTotal.js and update it with the following:
import React, { useContext } from 'react';
import { AppContext } from '../context/AppContext';

const ExpenseTotal = () => {
    const { expenses } = useContext(AppContext);

    const totalExpenses = expenses.reduce((total, item) => {
        return (total += item.cost);
    }, 0);

    return (
        <div className='alert alert-primary'>
            <span>Spent so far: £{totalExpenses}</span>
        </div>
    );
};

export default ExpenseTotal;
What we're doing:
- importing our useContext and AppContext as usual
- Taking the expenses from state (line 5)
- Using the reduce function to get a total of all the costs and assigning this to a variable (line 7)
- Displaying the variable in our JSX (line 13)
Now whenever the user adds an expense, this causes the state to update, which will cause all components connected to the context to re-render and update themselves with new values.
Go ahead and try this out in the browser.
How to Calculate Remaining
Now we'll look at calculating how much budget the user has left to spend.
To do this, we'll get the total costs of the expenses, and subtract it from the budget. If the user goes over budget, i.e the expenses are more than the budget, we want to display a red background (as opposed to a green background). Luckily Bootstrap gives us these nice things already.
Open up Remaining.js and update it with the following:
import React, { useContext } from 'react';
import { AppContext } from '../context/AppContext';

const Remaining = () => {
    const { expenses, budget } = useContext(AppContext);

    const totalExpenses = expenses.reduce((total, item) => {
        return (total = total + item.cost);
    }, 0);

    const alertType = totalExpenses > budget ? 'alert-danger' : 'alert-success';

    return (
        <div className={`alert ${alertType}`}>
            <span>Remaining: £{budget - totalExpenses}</span>
        </div>
    );
};

export default Remaining;
What we're doing
- Importing expenses and budget from Context (line 5)
- Getting the total cost of the expenses using the reduce function (line 7)
- Creating a variable to store the CSS classname we want to display (depending on if the user has gone over the budget or not, line 11)
- Using a template string to create our classes (line 14)
- Rendering the remaining budget using a subtraction (line 15)
Now if you run the code in the browser, and add a bunch of expenses until the total goes over 2000, you'll see the "Remaining" component background turns to red!
How to Remove an Expense
The last thing we'll look at before getting into the challenges is to remove an expense.
When the user clicks the little cross beside an expense, we want to dispatch an action to remove it from state. When this happens, our ExpenseList will re-render with the removed expense.
Jump into ExpenseItem.js and update it with the following:
import React, { useContext } from 'react';
import { TiDelete } from 'react-icons/ti';
import { AppContext } from '../context/AppContext';

const ExpenseItem = (props) => {
    const { dispatch } = useContext(AppContext);

    const handleDeleteExpense = () => {
        dispatch({
            type: 'DELETE_EXPENSE',
            payload: props.id,
        });
    };

    return (
        <li className='list-group-item d-flex justify-content-between align-items-center'>
            {props.name}
            <div>
                <span className='badge badge-primary badge-pill mr-3'>
                    £{props.cost}
                </span>
                <TiDelete size='1.5em' onClick={handleDeleteExpense}></TiDelete>
            </div>
        </li>
    );
};

export default ExpenseItem;
What we're doing:
- Importing dispatch from Context, which allows us to dispatch a delete action (line 6)
- Creating a function that gets called when the delete icon is clicked (line 8)
- Dispatching an action. Our action contains the type (so the reducer knows how to update the state) and the payload. In this case we're passing the ID of this expense (which we get from props when we rendered the ExpenseList) (line 9)
If you try this in the browser, you'll see that nothing happens. Even though we're dispatching an action, we haven't implemented the reducer logic for this action type, so it doesn't know how to update the state.
Jump into AppContext.js and update the reducer function with the following:
const AppReducer = (state, action) => {
    switch (action.type) {
        case 'ADD_EXPENSE':
            return {
                ...state,
                expenses: [...state.expenses, action.payload],
            };
        case 'DELETE_EXPENSE':
            return {
                ...state,
                expenses: state.expenses.filter(
                    (expense) => expense.id !== action.payload
                ),
            };
        default:
            return state;
    }
};
All we're really doing here is adding a new case statement, to handle our DELETE_EXPENSE action. We're using the filter array method to remove the expense that has the ID which we received from the payload.
Now if you try this, you can remove an expense by clicking the delete icon. Notice how all the other components update as well. Nice!
Challenges to Try
Congrats on making it this far! Now its time for you to have a go at some challenges. Remember you can see how I've done it in the GitHub source code.
Allow the user to edit the budget
You'll notice that so far we have been using a hard coded value for the budget. Your first task is to add functionality that allows the user to edit the budget. Some tips to get started:
- You will need to add a text input that allows the user to enter a value for their desired budget.
- We store the budget in state, so you will need to dispatch an action with a new TYPE and a PAYLOAD that will update the state
Allow the user to search for an expense
If the user has many expenses, it will be difficult to find the one they are looking for. Add a way for the user to search for the expense by name. Some tips to get started:
- You will need to add an input field which lets the user enter a value to search for.
- You'll have to add something to the ExpenseList component that filters the list from context based on this search value.
Thanks for Reading!