
In this Redux for Beginners guide, we're going to:
- Learn about the different parts of Redux and how they work together
- Learn how to fetch data from an API using Redux
- Learn how to use Redux Toolkit to setup and work with Redux using less code
And I’ll give you some challenges which you can try at the end.
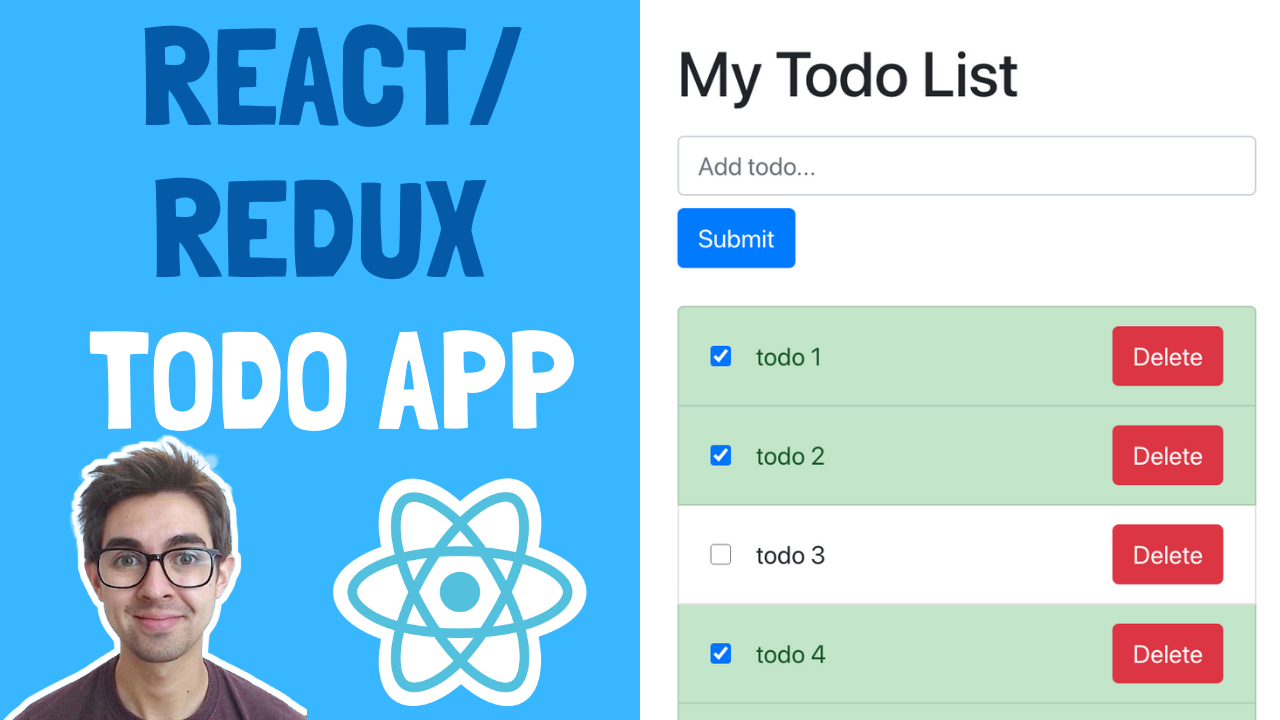
This is what we'll build
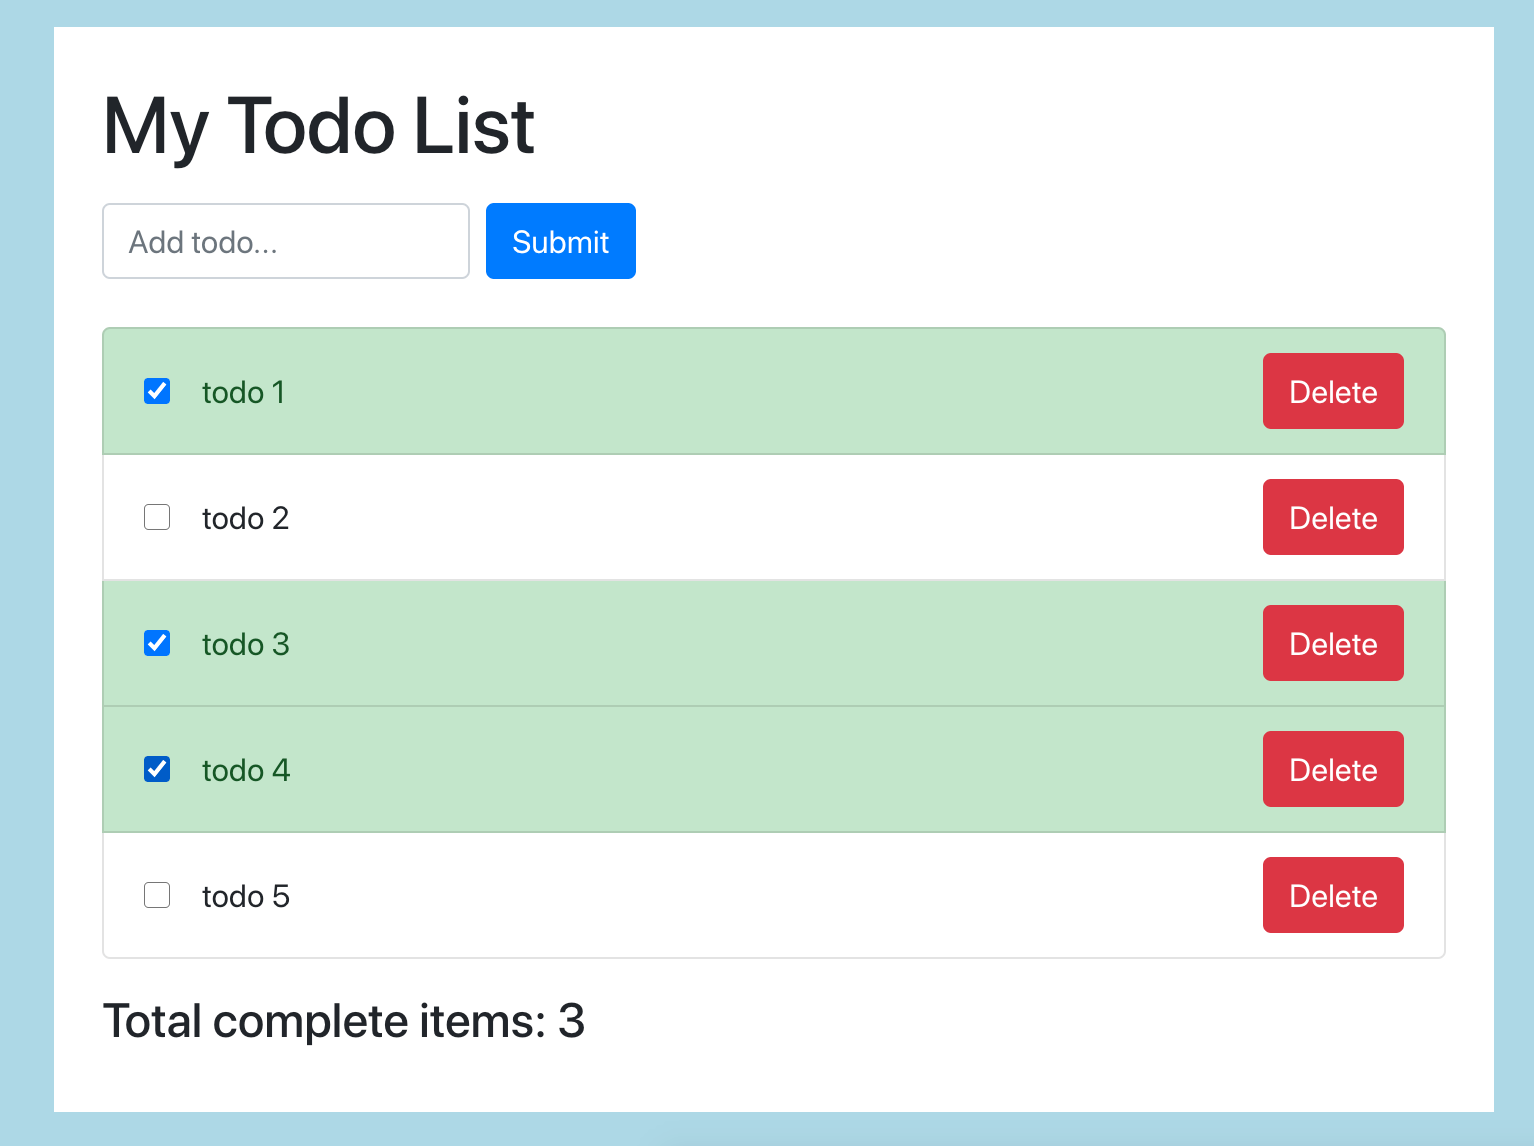 Yep, its a Todo List! But this one uses Redux which makes it a fancy todo list!
The user can:
- Add todos
- Remove todos
- Mark todos as complete
- View the number of completed todos
Video Walkthrough
Heres a video walkthrough if you want to supplement your reading (on YouTube).
Source Code
Finally, you can grab the finished code here (on GitHub).
Get the Starter Code
I've provided some starter code that gives us a basic React UI with all the components in place. This lets us focus more on the Redux side of things which is the reason we're all here!
Let's start by opening a terminal and running the following commands:
git clone https://github.com/chrisblakely01/react-redux-todo-app.git
cd react-redux-todo-app/starter
npm install
npm start
This should fire up a browser with the app started.
Next, open the react-redux-todo-app folder up in your IDE (I'll be using VS Code). The project tree should look like this:
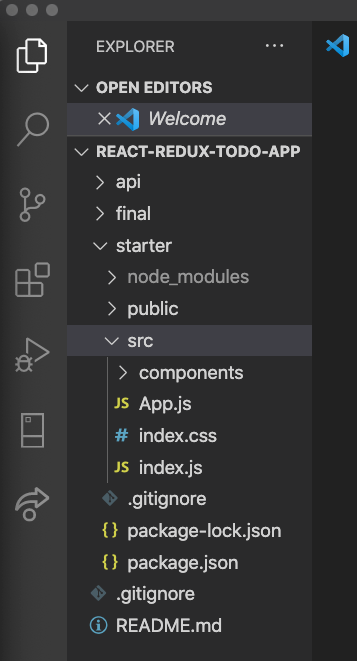
You'll notice a few folders in here:
- API: This is the API we'll use later in the project when we learn about working with API's in Redux (how exciting!)
- Final: This is the finished code. Note, if you run this, the API needs to be started as well. See the readme in the GitHub repo for how to do this
- Starter: This is the folder we'll be working in if you decide to follow along with the tutorial
Redux Overview
Before we get into the code, let's look at the different parts of Redux and how they work together.
Redux is made up of actions, reducers, state and the store. Each thing does one specific task. Lets take an example:
Let's say we have a component that lets us deposit some money with the click of a button (the "UI" box in the diagram above).
When we click a button, we usually call a function which handles this event. This is where we would dispatch an action.
Dispatch is a function given to us by Redux, and lets us trigger actions.
The action contains a type, and a payload. The type is typically just a string with the name of the action. The payload contains data we need to know about. For example, we can’t deposit any money without knowing the amount
The store receives the action, and is in charge of holding the state. Think of it like a database, in a sense that it holds all our data in one place
The store is also in charge of updating the state based on the action and the current state which it does by using reducers.
A reducer sounds fancy but its just a function that takes the current state from the store, and the action. It combines things together and returns the new state.
Think of it like a conveyor belt – it takes the old state and the action, does some work, and spits out the new state.
The store then saves this new state which is returned from the reducer and passes the state to the components. This causes them to re-render, displaying the new data.
Why do we need all this?
Imagine an app with hundreds or even thousands of components. It would become unwieldy to pass state around and remember which component is changing the state, how it's changing the state, and so on.
By breaking things up like this, we give different responsibilities to different things, and we keep all our state in one place.
This makes it easier for us to understand and easier to test. For example, you can test reducers in isolation since they’re just pure functions. We can test that our actions dispatch correctly, and that our store correctly saves the state.
How to Configure Our Store
We’re going to use Redux toolkit to set up all the things we need to make Redux work, starting with the store.
Create a new folder in the src folder called redux. Within this folder create a file called store.js, and add the following code:
import { configureStore } from '@reduxjs/toolkit';

export default configureStore({
    reducer: {},
});
The configure store function does all the hard work for us. It creates the store which holds our state, combines our reducers, and has some nice built in middleware that we’ll use later.
The configureStore function gives us back a store, which we can export (line 3). This allows us to link the store to our app which we’ll do in a second.
We need to pass our reducers to the configureStore function, which we do by passing an object.
We haven’t created any reducers yet, but we could have as many reducers as we want here.
How to Connect the Store to the App
We have a store, and we have an app, so let's join these two things up!
Open up index.js and update it with the following:
import React from 'react';
import ReactDOM from 'react-dom';
import './index.css';
import App from './App';
import store from './redux/store';
import { Provider } from 'react-redux';

ReactDOM.render(
    <React.StrictMode>
        <Provider store={store}>
            <App />
        </Provider>
    </React.StrictMode>,
    document.getElementById('root')
);
We import the store and the Provider (at the top), and then we wrap our App component in the Provider component. The Provider needs to be given a store to use, so we pass in the store we just created. This gives our components access to the state that lives in the store.
How to Create a Slice
A slice gives us a way to store a piece, or slice, of data, and gives us all the things we need to change and retrieve that data.
You can think of it like a grouping of data, similar to database tables.
In the src/redux folder, create a new file called todoSlice.js:
import { createSlice } from '@reduxjs/toolkit';

export const todoSlice = createSlice({
    name: 'todos',
    initialState: [
        { id: 1, title: 'todo1', completed: false },
        { id: 2, title: 'todo2', completed: false },
        { id: 3, title: 'todo3', completed: true },
        { id: 4, title: 'todo4', completed: false },
        { id: 5, title: 'todo5', completed: false },
    ],
    reducers: {
        addTodo: (state, action) => {
            const todo = {
                id: new Date(),
                title: action.payload.title,
                completed: false,
            };
            state.push(todo);
        },

    },
});


export const { addTodo } = todoSlice.actions;

export default todoSlice.reducer;
The createSlice function will give us back some stuff and assign it to the todoSlice variable (line 3)
This is where we get our actions and reducers which we can export.
We need to pass some properties to this function so it gives us back the right things. We do this with an object.
First, we give the slice a name. We’re in the todo’s slice so we’ll call it todos. This is also what we’ll see in the Redux dev tools (line 4).
Next we add initial state. We’re going to add some dummy data for now. This can be empty, but we’re going to add stuff so we can see what’s going on (line 5)
Now we add the reducers. The reducer responds to the action, takes the current state, and creates new state based on the action payload. The first one we are adding is the addTodo reducer (line 13)
This is just a plain function. Redux passes in the state and action behind the scenes. The state is the current state of this slice, and the action contains the type and the payload.
So when we dispatch the addTodo action, this is the reducer that handles that action.
Within the reducer, this is where we want to perform the logic to update the state (line 14).
Since we’re adding a todo, the first thing we want to do is create a new todo object. This object is going to have the same properties that our other todos have. We’ll generate a new ID based on the date to make sure it's unique, take the title from the payload, and default completed to false.
Now we just push this to the state object. At this point, redux will take this new state and update the store
This is the first one we need, but we’ll add more reducers as we go through the tutorial
When we add a reducer object like this, the createSlice function creates actions based on the reducer names.
How to export our actions and reducer
We use destructuring to get the actions and export them, so our components can access them.
So the todoSlice has created a bunch of actions for us based on our reducer names, and we just use destructuring to get the addTodo action and export it (line 26).
And we export the reducer so we can add it to our store (line 28).
How to Add the Reducers to the Store
Now we need to add our reducer to the store. In store.js, add the following:
import { configureStore } from '@reduxjs/toolkit';
import todoReducer from './todoSlice';

export default configureStore({
    reducer: {
        todos: todoReducer,
    },
});
Remember that the store holds all our reducers and manages them for us.
For example we could have another reducer called userReducer in here and the store will handle everything for us. This just makes our code more manageable to maintain.
How to Add a New Todo
We’ve created the reducer and the action to add a todo. This doesn’t do anything yet because we haven’t dispatched the action.
Dispatch the addTodo action
What we want to happen is when the user hits submit, we want to dispatch the addTodo action.
In AddTodoForm.js, when the user hits submit, we want to dispatch the addTodo action.
Update the code in AddTodoForm.js with the following:
import React, { useState } from 'react';
import { useDispatch } from 'react-redux';
import { addTodo } from '../redux/todoSlice';

const AddTodoForm = () => {
    const [value, setValue] = useState('');
    const dispatch = useDispatch();

    const onSubmit = (event) => {
        event.preventDefault();
        if (value) {
            dispatch(
                addTodo({
                    title: value,
                })
            );
        }
    };

    return (
        <form onSubmit={onSubmit} className='form-inline mt-3 mb-3'>
            <label className='sr-only'>Name</label>
            <input
                type='text'
                className='form-control mb-2 mr-sm-2'
                placeholder='Add todo...'
                value={value}
                onChange={(event) => setValue(event.target.value)}
            ></input>

            <button type='submit' className='btn btn-primary mb-2'>
                Submit
            </button>
        </form>
    );
};

export default AddTodoForm;
- We import the useDispatch hook and the addTodo action (line 2/line 3)
- Now in our function that gets called when the form is submitted, we’ll add a call to dispatch the addTodo action (line 12)
- For each todo we need to know the title, so we’ll add a new object and pass in the title. This object will get mapped to the action payload (line 13)
Now if we try this, nothing happens in our UI because we haven’t updated the TodoList to pull data from Redux, which we’ll do in a second.
If we open the Redux dev tools, you can see under the action tabs that our action has been dispatched, and the payload has our title in it:
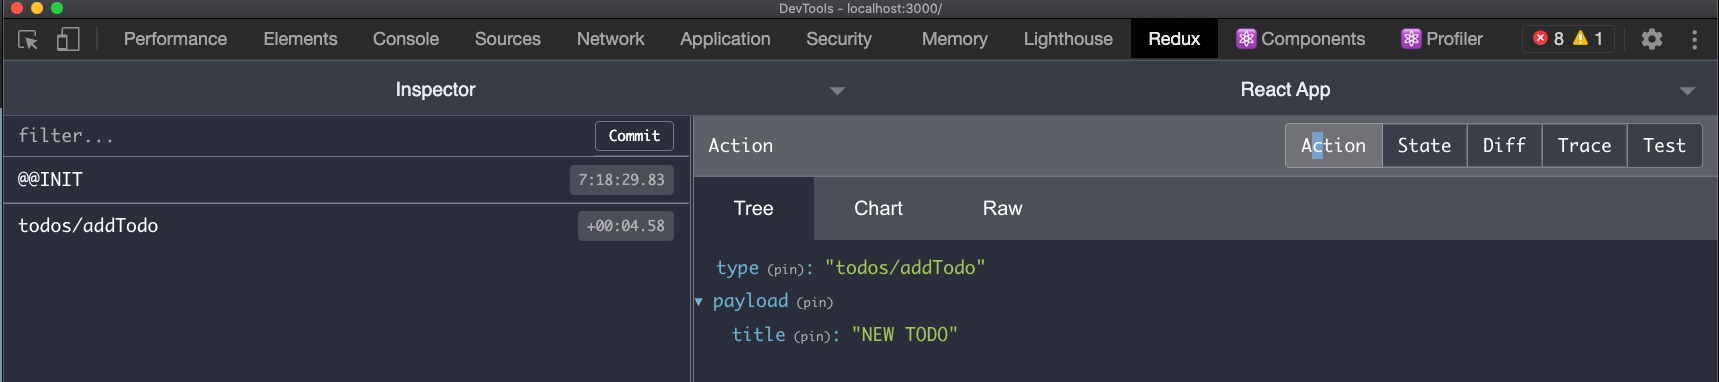 The action is being dispatched with the correct payload
You can also see that the state has updated with the new todo by clicking on the state tab.
How to Display the Todo List
Now that we’ve looked at dispatching actions and updating state, we’ll look at how to retrieve data from Redux
In our TodoList component we want to take the TODO’s from Redux, as opposed to using the dummy list
To do this we use what’s called the useSelector hook. Open up TodoList.js and update it with the following:
import React, { useEffect } from 'react';
import TodoItem from './TodoItem';
import { useSelector } from 'react-redux';

const TodoList = () => {
    const todos = useSelector((state) => state.todos);

    return (
        <ul className='list-group'>
            {todos.map((todo) => (
                <TodoItem id={todo.id} title={todo.title} completed={todo.completed} />
            ))}
        </ul>
    );
};

export default TodoList;
The useSelector hook accepts a function, and returns us the data based on that function.
So we’ll pass in our function – in this case we’ll do an arrow function. This accepts the state which is passed in by Redux. In this case, we want to do state.todos to get all the todos.
Now this is going to go to the store, pick out all the todos from state, and assign this to the todos variable which we defined ourselves
Since we’ve done the hard work already to display the list in our JSX, we just need to replace the dummy list with whatever we received from Redux.
If we try this, you can see that the todos are now being pulled from our todosSlice!
The state value that gets passed in to the useSelector hook function is the entire state tree that is stored in Redux.
So if you have multiple slices of state, this will return the whole thing. This lets us do pretty cool things – for example if we wanted to get a specific todo, or filter the list, we can do this here in this function.
How to Mark a Todo as Complete
Create the reducer/action
Next we’ll look at how to mark a todo as complete. This is interesting since it involves updating existing state. Update todoSlice.js with the following:
import { createSlice } from '@reduxjs/toolkit';

export const todoSlice = createSlice({
    name: 'todos',
    initialState: [
        { id: 1, title: 'todo1', completed: false },
        { id: 2, title: 'todo2', completed: false },
        { id: 3, title: 'todo3', completed: true },
        { id: 4, title: 'todo4', completed: false },
        { id: 5, title: 'todo5', completed: false },
    ],
    reducers: {
        addTodo: (state, action) => {
            const todo = {
                id: new Date(),
                title: action.payload.title,
                completed: false,
            };
            state.push(todo);
        },
        toggleComplete: (state, action) => {
            const index = state.findIndex((todo) => todo.id === action.payload.id);
            state[index].completed = action.payload.completed;
        },
    },
});

export const { addTodo, toggleComplete } = todoSlice.actions;

export default todoSlice.reducer;
We add our new reducer (line 21). Remember that each reducer accepts the current state and an action which gets passed in by Redux.
When our component dispatches the toggleComplete action, this reducer will handle that action.
Now that we have our reducer we need to implement the logic to update the state (line 22).
So remember that each todo in the list has an ID. Our component will pass this ID as part of the action payload and we’ll use the ID to determine which todo in the array we need to update.
We’ll use the ID to find the index of the todo in the array, so if the ID is 1, it will return index 0.
Now that we know the index, we can update the “completed” property for the given todo.
We’ll set the complete property for that todo to be whatever it is in the payload.
Lastly we export the action so that the components can dispatch it (line 30). Remember that the createSlice function automatically creates actions based on our reducer names, so since we have a toggleComplete reducer, that means we have a toggleComplete action.
Dispatch the action
Now when our checkbox is clicked, we want to trigger the toggleComplete action. Update TodoItem.js with the following:
import React from 'react';
import { useDispatch } from 'react-redux';
import { toggleComplete } from '../redux/todoSlice';

const TodoItem = ({ id, title, completed }) => {
    const dispatch = useDispatch();

    const handleCheckboxClick = () => {
        dispatch(toggleComplete({ id, completed: !completed }));
    };

    return (
        <li className={`list-group-item ${completed && 'list-group-item-success'}`}>
            <div className='d-flex justify-content-between'>
                <span className='d-flex align-items-center'>
                    <input
                        type='checkbox'
                        className='mr-3'
                        onClick={handleCheckboxClick}
                        checked={completed}
                    ></input>
                    {title}
                </span>
                <button className='btn btn-danger'>Delete</button>
            </div>
        </li>
    );
};

export default TodoItem;
Now when our checkbox is clicked, we want to trigger the toggleComplete action.
In our TodoItem component we’ll create a click handle function that dispatches an action.
First we import toggleComplete/useDispatch (line 2/ line 3)
Next, we create a click handler function called handleCompleteClick (line 8). This will be an arrow function that dispatches our action.
We’ll call the dispatch function, and pass in the action we want to dispatch (line 9).
Remember, our reducer needs to know the ID of the todo item we’re changing, and what the new completed value is, so we’ll pass this in as our payload object.
We’ll pass in the ID and pass in a completed value, which will be the opposite of what the current completed value is. So if current value if true, the new value will be false, and vice versa.
Now we just call this function from our input (line 19).
How to Delete a Todo
We’ll look at another example of using this pattern in our app with deleting a todo.
Create the reducer
Jump into TodoSlice.js and update it with the following:
import { createSlice } from '@reduxjs/toolkit';

export const todoSlice = createSlice({
    name: 'todos',
    initialState: [
        { id: 1, title: 'todo1', completed: false },
        { id: 2, title: 'todo2', completed: false },
        { id: 3, title: 'todo3', completed: true },
        { id: 4, title: 'todo4', completed: false },
        { id: 5, title: 'todo5', completed: false },
    ],
    reducers: {
        addTodo: (state, action) => {
            const todo = {
                id: new Date(),
                title: action.payload.title,
                completed: false,
            };
            state.push(todo);
        },
        toggleComplete: (state, action) => {
            const index = state.findIndex((todo) => todo.id === action.payload.id);
            state[index].completed = action.payload.completed;
        },
        deleteTodo: (state, action) => {
            return state.filter((todo) => todo.id !== action.payload.id);
        },
    },
});

export const { addTodo, toggleComplete, deleteTodo } = todoSlice.actions;

export default todoSlice.reducer;
We’ll create our reducer (line 25).
When our action is dispatched we’ll send the ID of the todo that was clicked, and then filter this TODO out of the current list in state.
Use the filter function to get all the todos that do not equal the ID in the payload (line 26). We have to return this since the filter function gives us a new array back.
Lastly, we’ll export our action which was created for us (line 31).
Dispatch the action
Now we need to dispatch our deleteTodo action when the delete button is clicked. Jump into TodoItem.js and update it with the following:
import React from 'react';
import { useDispatch } from 'react-redux';
import { toggleComplete, deleteTodo } from '../redux/todoSlice';

const TodoItem = ({ id, title, completed }) => {
    const dispatch = useDispatch();

    const handleCheckboxClick = () => {
        dispatch(toggleComplete({ id, completed: !completed }));
    };

    const handleDeleteClick = () => {
        dispatch(deleteTodo({ id }));
    };

    return (
        <li className={`list-group-item ${completed && 'list-group-item-success'}`}>
            <div className='d-flex justify-content-between'>
                <span className='d-flex align-items-center'>
                    <input
                        type='checkbox'
                        className='mr-3'
                        onClick={handleCheckboxClick}
                        checked={completed}
                    ></input>
                    {title}
                </span>
                <button onClick={handleDeleteClick} className='btn btn-danger'>
                    Delete
                </button>
            </div>
        </li>
    );
};

export default TodoItem;
We'll create the handleDeleteClick function (line 12) which will dispatch the delete action, passing the ID as an object in the payload. Remember, the reducer needs to know the ID of the todo to be removed.
How to Display Total Completed Items
Next we’ll look at displaying the number of completed items. Open up TotalCompleteItems.js and add the following:
import React from 'react';
import { useSelector } from 'react-redux';

const TotalCompleteItems = () => {
    const todos = useSelector((state) =>
        state.todos.filter((todo) => todo.completed === true)
    );

    return <h4 className='mt-3'>Total complete items: {todos.length}</h4>;
};

export default TotalCompleteItems;
First we import the useSelector hook (line 2) and assign this to a variable so we can use it (line 5).
Now we can pass a function to tell Redux what we want to return. We’ll use the filter function to return all the todos that have a completed value of true (line 6).
Remember that the state value that gets passed to the selector is the TOTAL state tree, which is why we need to specify the todos in here.
Now the result of our function gets passed to the todos variable. Since we used the filter function, the result is an array.
Now we can use this variable however we want, so we’ll output the length in our JSX (line 9).
So whenever this component mounts, it's going to go and get the todos that are completed, and output he length in the JSX.
Now if you save and run the code, you'll see every time we tick a todo, the count at the bottom gets updated!
How to Work with an API in Redux
To do API calls in Redux, we need what is called middleware.
Instead of dispatching an action that goes straight to the reducer, we dispatch an action that calls a thunk, which does the API call.
This then creates a normal action, and sends it on its way to the reducer. Let's have a look at a diagram:
 Image from redux.js.org
Instead of dispatching a plain action, our component dispatches an action that calls a thunk.
This action gets intercepted by the middleware, which does the API call.
Once the API does its thing and we get the response back, the middleware takes the data and dispatches a plain old action.
So the payload here could be whatever was returned from the API.
From here things go on as we’re used to – a reducer handles the action, accepting the current state and the action, and returns some new state.
The flow is the same as what we’ve learned so far – we’re just adding an extra step in between which handles the API call.
This is the logical place to do this, as we can’t do the API call in our components since it would be difficult to reuse the code, and we can’t do the API call in the reducer because the reducer is a pure function that creates new state only.
Setup the API
Now we’re going to connect our app to an API, so we can practice working with APIs in Redux.
I’ve included a prebuilt API that we’ll use for this.
If you haven't cloned the source code already, you do so by opening a terminal and typing:
Git clone https://github.com/chrisblakely01/react-redux-todo-app.git
Once you have the code cloned, run the following:
cd react-redux-todo-app/api
npm install
npm run server
Test it by going to localhost:7000/todos in the browser, and you should see an array of todos returned:
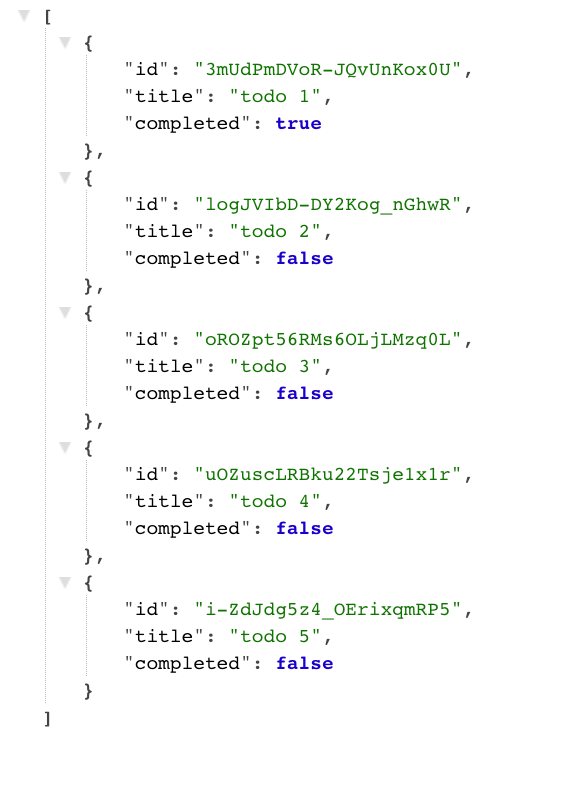
Note if you stop/start the server, any data you changed will be lost since its not connected to a database!
How to Get Todos from the API
Let's start by getting the todos from the API. Jump into todoSlice.js and update it with the following:
import { createAsyncThunk, createSlice } from '@reduxjs/toolkit';

export const getTodosAsync = createAsyncThunk(
    'todos/getTodosAsync',
    async () => {
        const resp = await fetch('http://localhost:7000/todos');
        if (resp.ok) {
            const todos = await resp.json();
            return { todos };
        }
    }
);

export const todoSlice = createSlice({
    name: 'todos',
    initialState: [
        { id: 1, title: 'todo1', completed: false },
        { id: 2, title: 'todo2', completed: false },
        { id: 3, title: 'todo3', completed: true },
        { id: 4, title: 'todo4', completed: false },
        { id: 5, title: 'todo5', completed: false },
    ],
    reducers: {
        addTodo: (state, action) => {
            const todo = {
                id: new Date(),
                title: action.payload.title,
                completed: false,
            };
            state.push(todo);
        },
        toggleComplete: (state, action) => {
            const index = state.findIndex((todo) => todo.id === action.payload.id);
            state[index].completed = action.payload.completed;
        },
        deleteTodo: (state, action) => {
            return state.filter((todo) => todo.id !== action.payload.id);
        },
    },
        extraReducers: {
        [getTodosAsync.fulfilled]: (state, action) => {
            return action.payload.todos;
        },
    },
});

export const { addTodo, toggleComplete, deleteTodo } = todoSlice.actions;

export default todoSlice.reducer;
Create the API call/Thunk
The first thing we’ll do is import the createAsyncThunk function and create our thunk (line 3). A thunk is a function that returns another function.
This thunk is the new action which we dispatch from our components.
This will in turn dispatch its own action when the response completes, with the data from the response as the payload.
We need to pass some stuff to the createAsyncThunk function, so we'll give it a name, and pass in a function that uses the fetch API to get the data (line 4 / line 5).
If the response is good, we will convert the response to JSON. The response comes back as a string so we need to convert it to an object (line 8).
Lastly we’ll return an object containing our todos. Remember that the API returns an array of todos.
Once the function returns, it will dispatch an action. Whatever we return, in this case an object containing the todo array, will be the payload of the action (line 9). All this is done behind the scenes.
Create the Reducer
Now we need to implement the reducer logic which handles this action.
We do this within the extraReducers object (line 39 in the code snippet above). This is where we specify additional reducers that our todoSlice can use.
The syntax is a bit different, as our thunk will dispatch a number of actions.
The action we care about right now is the fulfilled action. When the thunk dispatches this action, this means the API call in our thunk has completed.
These reducers work the same as our plain reducers – they are just a function that accepts the current state and the payload.
Now we’ll return the todos that came in the payload, at which point Redux will update the state for us.
We now have our new action, and our reducer, we just need to export our thunk (line 3).
Dispatch the Action
Now we have to trigger the action that fetches the todo. The best place to do this is when the TodoList component gets loaded for the first time.
Open up TodoList.js and update it with the following:
import React, { useEffect } from 'react';
import TodoItem from './TodoItem';
import { useSelector, useDispatch } from 'react-redux';
import { getTodosAsync } from '../redux/todoSlice';

const TodoList = () => {
    const dispatch = useDispatch();
    const todos = useSelector((state) => state.todos);

    useEffect(() => {
        dispatch(getTodosAsync());
    }, [dispatch]);

    return (
        <ul className='list-group'>
            {todos.map((todo) => (
                <TodoItem id={todo.id} title={todo.title} completed={todo.completed} />
            ))}
        </ul>
    );
};

export default TodoList;
First we'll import the useDispatch hook, and assign this to a variable (line 7).
Next we import the action we want to dispatch (line 4).
We want to get the Todos as soon as the component loads, so we’ll add the useEffect hook (line 10).
From here, we dispatch our action (line 11).
When the state in the store updates, the useSelector hook gets notified and updates the todos variable with the new todos taken from state.
Try this out and see it in action!
How to Add a Todo via API
Next we'll look at how to create a Todo and persist it on the API. This will be similar to what we had before, so open up TodoSlice.js and update it with the following:
import { createAsyncThunk, createSlice } from '@reduxjs/toolkit';

export const getTodosAsync = createAsyncThunk(
    'todos/getTodosAsync',
    async () => {
        const resp = await fetch('http://localhost:7000/todos');
        if (resp.ok) {
            const todos = await resp.json();
            return { todos };
        }
    }
);

export const addTodoAsync = createAsyncThunk(
    'todos/addTodoAsync',
    async (payload) => {
        const resp = await fetch('http://localhost:7000/todos', {
            method: 'POST',
            headers: {
                'Content-Type': 'application/json',
            },
            body: JSON.stringify({ title: payload.title }),
        });

        if (resp.ok) {
            const todo = await resp.json();
            return { todo };
        }
    }
);

export const todoSlice = createSlice({
    name: 'todos',
    initialState: [],
    reducers: {
        addTodo: (state, action) => {
            const todo = {
                id: new Date(),
                title: action.payload.title,
                completed: false,
            };
            state.push(todo);
        },
        toggleComplete: (state, action) => {
            const index = state.findIndex((todo) => todo.id === action.payload.id);
            state[index].completed = action.payload.completed;
        },
        deleteTodo: (state, action) => {
            return state.filter((todo) => todo.id !== action.payload.id);
        },
    },
    extraReducers: {
        [getTodosAsync.fulfilled]: (state, action) => {
            return action.payload.todos;
        },
        [addTodoAsync.fulfilled]: (state, action) => {
            state.push(action.payload.todo);
        },
    },
});

export const { addTodo, toggleComplete, deleteTodo } = todoSlice.actions;

export default todoSlice.reducer;
Create the API call/Thunk
We're creating another thunk, giving it a name, and creating our async function. This time we pass the payload parameter, as we need to know the title of the Todo. This payload contains whatever was sent to us by the component when it dispatched the action.
Use the fetch API, this time we need to pass an object with some configuration to indicate that the fetch request is a POST. We'll pass in the content-type and stringify the body (line 17).
Now if the response is OK, the API will give us back a Todo object with a title, ID, and completed value.
Similar to before if the response is ok we’ll return the data, which in this case is a single todo object.
Create the Reducer
Similar to before, add a fulfilled function, update the state by pushing this todo to the todos array (line 56).
Dispatch the Action
Now open up AddTodoForm.js and add the following:
import React, { useState } from 'react';
import { useDispatch } from 'react-redux';
import { addTodoAsync } from '../redux/todoSlice';

const AddTodoForm = () => {
    const [value, setValue] = useState('');
    const dispatch = useDispatch();

    const onSubmit = (event) => {
        event.preventDefault();
        if (value) {
            dispatch(
                addTodoAsync({
                    title: value,
                })
            );
        }
    };

    return (
        <form onSubmit={onSubmit} className='form-inline mt-3 mb-3'>
            <label className='sr-only'>Name</label>
            <input
                type='text'
                className='form-control mb-2 mr-sm-2'
                placeholder='Add todo...'
                value={value}
                onChange={(event) => setValue(event.target.value)}
            ></input>

            <button type='submit' className='btn btn-primary mb-2'>
                Submit
            </button>
        </form>
    );
};

export default AddTodoForm;
Note that all we're really doing here is changing our onSubmit function to dispatch the addTodoAsync action rather than the addTodo action (line 13).
Now if you try this in the browser by adding a todo, you'll notice the todo persists – even after you refresh the page!
How to Mark a Todo as Complete via API
So I’m hoping you’re starting to see how this all works, but we’ll go through one last example just to make sure.
We need to call the API to update the “completed” property when the user clicks the checkbox.
Jump into TodoSlice.js and add the following:
import { createAsyncThunk, createSlice } from '@reduxjs/toolkit';

export const getTodosAsync = createAsyncThunk(
    'todos/getTodosAsync',
    async () => {
        const resp = await fetch('http://localhost:7000/todos');
        if (resp.ok) {
            const todos = await resp.json();
            return { todos };
        }
    }
);

export const addTodoAsync = createAsyncThunk(
    'todos/addTodoAsync',
    async (payload) => {
        const resp = await fetch('http://localhost:7000/todos', {
            method: 'POST',
            headers: {
                'Content-Type': 'application/json',
            },
            body: JSON.stringify({ title: payload.title }),
        });

        if (resp.ok) {
            const todo = await resp.json();
            return { todo };
        }
    }
);

export const toggleCompleteAsync = createAsyncThunk(
    'todos/completeTodoAsync',
    async (payload) => {
        const resp = await fetch(`http://localhost:7000/todos/${payload.id}`, {
            method: 'PATCH',
            headers: {
                'Content-Type': 'application/json',
            },
            body: JSON.stringify({ completed: payload.completed }),
        });

        if (resp.ok) {
            const todo = await resp.json();
            return { todo };
        }
    }
);

export const todoSlice = createSlice({
    name: 'todos',
    initialState: [],
    reducers: {
        addTodo: (state, action) => {
            const todo = {
                id: new Date(),
                title: action.payload.title,
                completed: false,
            };
            state.push(todo);
        },
        toggleComplete: (state, action) => {
            const index = state.findIndex((todo) => todo.id === action.payload.id);
            state[index].completed = action.payload.completed;
        },
        deleteTodo: (state, action) => {
            return state.filter((todo) => todo.id !== action.payload.id);
        },
    },
    extraReducers: {
        [getTodosAsync.fulfilled]: (state, action) => {
            return action.payload.todos;
        },
        [addTodoAsync.fulfilled]: (state, action) => {
            state.push(action.payload.todo);
        },
        [toggleCompleteAsync.fulfilled]: (state, action) => {
            const index = state.findIndex(
                (todo) => todo.id === action.payload.todo.id
            );
            state[index].completed = action.payload.todo.completed;
        },
    },
});

export const { addTodo, toggleComplete, deleteTodo } = todoSlice.actions;

export default todoSlice.reducer;
Create the API call/Thunk
We're creating our Async thunk as usual (line 32).
This time its going to be a PATCH, as we’re updating part of an object. We’ll pass the ID via the URL, and we’ll pass the completed value taken from the payload.
The response will give us back the updated Todo object, so we’ll return that which will get passed to the reducer as part of the action.
Create the Reducer
Now we'll handle the toggleCompleteAsync.fulfilled action.
We use the ID from the payload to get the index, and update the todo at that position with whatever the new completed value is (line 77).
Dispatch the Action
Finally, we just need to dispatch our new action. Jump into TodoItem.js and update it with the following:
import React from 'react';
import { useDispatch } from 'react-redux';
import { toggleCompleteAsync, deleteTodo } from '../redux/todoSlice';

const TodoItem = ({ id, title, completed }) => {
    const dispatch = useDispatch();

    const handleCheckboxClick = () => {
        dispatch(toggleCompleteAsync({ id, completed: !completed }));
    };

    const handleDeleteClick = () => {
        dispatch(deleteTodo({ id }));
    };

    return (
        <li className={`list-group-item ${completed && 'list-group-item-success'}`}>
            <div className='d-flex justify-content-between'>
                <span className='d-flex align-items-center'>
                    <input
                        type='checkbox'
                        className='mr-3'
                        onClick={handleCheckboxClick}
                        checked={completed}
                    ></input>
                    {title}
                </span>
                <button onClick={handleDeleteClick} className='btn btn-danger'>
                    Delete
                </button>
            </div>
        </li>
    );
};

export default TodoItem;
Again, all we're doing here is dispatching the toggleCompleteAsync action from our event handler function (line 8).
Now, if you open this in the browser and toggle a few todos as complete, you'll notice the state is saved even after you refresh the page.
Challenge - How to Delete a Todo via API
One to practice yourself is to delete the todo via the API! The API I've provided has support to delete todos by passing an ID. Some tips to get started.
First, you'll need to create an async thunk/API call similar to what we did before. The request to delete a Todo will look like this:
const resp = await fetch(`http://localhost:7000/todos/${payload.id}`, {
    method: 'DELETE',
});
Next, you will need to add a reducer that updates the state when the response completes
And you will need to dispatch an action when the button is clicked which triggers the thunk you created at step 1.
You can find the solution in the final code on GitHub!
Thanks for Reading!
