

In this article, you will learn how to schedule a job in Node using node-cron.
Node-cron is a handy npm package which you can use to schedule jobs to run at specific times or intervals. It is most suitable for scheduling repetitive jobs such as email notifications, file downloads, and database backups.
Even if you are not interested in scheduling a job in Node, you may still find the knowledge you gain from this article about cron syntax very useful.
For example, Github Actions uses cron syntax when scheduling a workflow to run at a specific time. Similarly, cloud platforms such as Google Cloud require cron syntax when describing job schedules.
Node-cron is written for node in pure JavaScript and it is based on GNU crontab syntax. Though it is based on crontab, our focus in this article will be on learning node-cron and cron syntax.
For more about cron, crontab, and how they are used in Unix-like operating systems, you can take a look at this Wikipedia article on the topic (but you don't have to know it to follow along with this article).
What you will learn in this article
By the end of this article, you will be able to do the following:
Explain the cron syntax
Schedule jobs using node-cron
Prerequisites
Before proceeding, make sure you have the prerequisites completed that are outlined below.
You need to have the JavaScript runtime environment Node installed on your machine.
You should have at least a basic understanding of JavaScript and Node. If you are a total beginner with Node and JavaScript, you can ask questions on the freeCodeCamp forum if you get stuck. We shall be happy to help.
How to Use node-cron to Schedule a Job
As I already mentioned above, node-cron was written for Node and is distributed via npm. After installation using the command npm i node-cron, it must be required into the project like any other Node package:
const nodeCron = require("node-cron");
To schedule a job, you need to invoke the nodeCron.schedule method with two arguments. There is a third optional argument that you can pass to the method for additional configuration.
Below is the function signature for the nodeCron.schedule method.
nodeCron.schedule(expression, function, options);
The code snippet below is an example of how you can invoke the schedule method.
const job = nodeCron.schedule("* * * * * *", function jobYouNeedToExecute() {
  // Do whatever you want in here. Send email, Make  database backup or download data.
  console.log(new Date().toLocaleString());
});
The first argument you need to pass to nodeCron.schedule is the cron expression. You use this expression to specify the time (or times) at which the job should be executed.
This expression should be in the * * * * * * format. You can replace each * field with an appropriate number (or characters where possible) so that the expression describes the time at which the job should be executed.
If you pass "* * * * * *" without replacing any *, like in the above example, the job gets executed every second. For a detailed explanation of how to come up with a cron expression, read the "How to understand cron expressions" sub-section below.
The second argument is a function and it is the job that gets executed when the expression in the first argument ticks.
You can do whatever you want in this function. You can send an email, make a database backup, or download data. This function gets executed when the current system time is the same as the time provided in the first argument. In the above example, I am just printing the current date.
And the third argument is an optional configuration object for job scheduling. I didn't pass the third argument in the above example since it is optional.
Below is an example of what the third argument looks like.
{
   scheduled: false,
   timezone: "America/Sao_Paulo"
}
By default scheduled is true. If you set it to false, you will have to schedule the job by invoking the start method on the job object. job is the object returned by a call to the schedule method.
job.start();
The default timezone we use is for the system on which the job is scheduled. You can pass a different timezone if you wish.
How to Understand Cron Expressions
The cron expression, which is the first argument to schedule, is a string that takes the form "* * * * * *". We use it to describe the time at which the job should be executed. Each * in the expression is a field and you can see the field represented by each * in the illustration below.
"* * * * * *"
 | | | | | |
 | | | | | |
 | | | | | day of week
 | | | | month
 | | | day of month
 | | hour
 | minute
 second(optional)
As you can see from the above illustration, the first field is the second field, the second field is the minute field, and the third is the hour field, and so on.
The table below shows the fields and their corresponding allowed values:
| Field | Allowed values |
| second | 0 - 59 |
| minute | 0 - 59 |
| hour | 0 - 23 |
| day of month | 1 - 31 |
| month | 1 - 12 or names |
| day of week | 0 - 7 or names, 0 and 7 refer to sunday |
The job is executed when the second, minute, hour, and month fields match the current time, and when at least one of the two day fields (day of month, or day of week) match the current time. – crontab documentation
There are different ways to populate the fields in a cron expression. Each field in a Node expression can be populated using single integer values, a range of values, multiple values separated by commas, step values, or using names (as explained in the sub-sections below).
How to Use Single Integer Values to Populate a Chron Expression
You can replace each asterisk with a single integer value in the allowed range of values.
For example, passing "30 20 * * * *" will make node-cron run your job at the thirtieth second of the twentieth minute of each hour. Since you didn't specify a value for the hour field, node-cron interprets * to mean every hour. The same applies to the day of the month field, and so on.
const job = nodeCron.schedule("30 20 * * * *", () => {
  console.log(new Date().toLocaleString());
});
Similarly, passing "30 5 13 * * *" will run your task at 1:05:30pm every day.
const job = nodeCron.schedule("30 5 13 * * *", () => {
  console.log(new Date().toLocaleString());
});
How to Use a Range of Values to Populate Chron Expressions
You an also use ranges of numbers to populate your chron expressions. A range refers to two numbers separated by the - character. The end values are part of the range.
For example, if the hour field is set to2-4, it specifies execution at hours 2, 3, and 4.
const job = nodeCron.schedule("* 2-4 3 * *", () => {
  console.log(new Date().toLocaleString());
});
In the above code snippet, I have excluded the optional second field. It will execute your job every minute from 2 am to 4 am on the third day (because the day of the month field has a value of 3) of each month.
How to Use Multiple Values to Populate Chron Expressions
You can also pass multiple values separated by commas or a range of values separated by commas.
For example, passing 2,3,4 as the value of the minute field will execute your job at minutes 2, 3, and 4.
const job = nodeCron.schedule("2,3,4 * * * *", () => {
  console.log(new Date().toLocaleString());
});
In the above code snippet, I have again excluded the optional second field. It will execute your job at the first, second, and third minutes of each hour.
How to Use Step Values to Populate Chrone Expressions
You can use step values with ranges. Following a range with /<number> skips the number's value through the range.
For example, using 0-8/2 in the hour field will execute the code at 0,2,4,6 and 8 hours. You can also use step values with *. For example */3 executes every three hours.
const job = nodeCron.schedule("*/2 * * * *", () => {
  console.log(new Date().toLocaleString());
});
In the above code snippet, the job will be executed every two minutes. Once again I've omitted the optional second field.
How to Use Names to Populate Chron Expressions
For the month and day of the week fields, you can use names. These can be short or long names. For example January or Jan.
const job = nodeCron.schedule("* * * January,September Sunday", () => {
  console.log(new Date().toLocaleString());
});
Once again I have omitted the optional second field. The job will run every minute on Sundays in January and September. You can also use short names like Jan, Sep.
That is all you need to know about the basics of cron syntax. In the next section, you will implement what you have learned to schedule a simple job.
There is a handy tool called crontab guru which can interpret crontab expressions for you. If you enter an expression, it will validate the expression and tell you when the job will be executed. You can use it if you are not sure of the expression.
How to Schedule a Job using node-cron
In this section, you will apply what you have learned in the previous sections. You will build a simple app that scrapes world population data from worldometers site and logs it to the console.
When you navigate to the worldometers world population page, you will notice the current world population changing rapidly. You will schedule a job that will scrape the data and print it on the terminal.
In a real app, you will normally save it to a database. Follow the steps below to build the app.
Step 1 - How to Create a Directory
In this step, you will create a directory for your project and navigate to it. Open the terminal and run the command below to create a directory called learn-node-cron. The name of the directory doesn't matter. You can give it a different name if you wish.
mkdir learn-node-cron
You should see the learn-node-cron folder created after running the above command successfully. You can open the folder in your favorite text editor. In the next step, you will initialize the project.
Step 2 - How to Initialize the Project
In this step, you will initialize the project by running the command below on the terminal.
npm init -y
After successfully running the above command, you should be able to see the package.json file created at the root of the project directory.
Step 3 - How to Install Dependencies
In this step, you will install the project dependencies by running the command below on the terminal.
npm i node-cron puppeteer ora chalk
The above installation will take a bit of time, so just be patient. After successfully installing the above dependencies, you should see them in the package.json file under the dependencies field.
node-cron is the most important dependency here because it is what this article is all about.
We'll use puppeteer to scrape data from a web page. According to the documentation puppeteer is:
A Node library that provides a high-level API to control Chrome or Chromium over the DevTools Protocol. Puppeteer runs headless by default but can be configured to run full (non-headless) Chrome or Chromium - puppeteer documentation
If the above statement doesn't make sense to you, there is a nice article on toptal that explains puppeteer, headless browsers, and why they are necessary. It is still okay if you are not interested in puppeteer. This article is about node-cron and how to use it to schedule a job.
ora is a simple npm package that we will use for displaying messages and a spinner on the terminal as we scrape the data. This will provide a better user experience.
chalk is another npm package that we'll use for displaying colorful messages on the terminal.
In the next step, you will implement the cron job.
Step 4 - How to Implement the Cron Job
In this step, you will implement a simple cron job. Create a new JavaScript file by running the command below:
touch app.js
Successfully running the above command will create an app.js file at the root of the project. Copy and paste the code below in the file you have just created:
const nodeCron = require("node-cron");
const puppeteer = require("puppeteer");
const ora = require("ora");
const chalk = require("chalk");

const url = "https://www.worldometers.info/world-population/";

async function scrapeWorldPopulation() {
  // Log a message on the terminal as the scheduled job starts
  // We are using chalk to make the message on the terminal look colorful
  console.log(chalk.green("Running scheduled job"));
  // Launch a loading spinner with an appropriate message on the terminal
  // It provides a good user experience as the scraping process takes a bit of time
  const spinner = ora({
    text: "Launcing puppeteer",
    color: "blue",
    hideCursor: false,
  }).start();

  try {
    // This will help us compute the duration of the job later
    const date = Date.now();
    // Launch puppeteeer
    const browser = await puppeteer.launch();
    // Change the message on the terminal as we launch
    // a new headless browser page
    spinner.text = "Launching headless browser page";
    // Launch a new headless browser page
    const newPage = await browser.newPage();
    // Change the message on the terminal as we navigate
    // to the URL of the page we are scraping
    spinner.text = "Navigating to URL";
    // Navigate to the URL of the page we are scraping. This takes a bit of time
    // You can change the timeout to an appropriate value if you wish otherwise
    // we wait until the page loads
    await newPage.goto(url, { waitUntil: "load", timeout: 0 });

    // Change the message on the terminal as we start scraping the page
    spinner.text = "Scraping page";
    // Start scraping the page
    // If world population is 7,876,395,914 then digitGroups will be
    // ["7", "876", "395", "914"]
    const digitGroups = await newPage.evaluate(() => {
      const digitGroupsArr = [];
      // For selecting span elements containing digit groups
      const selector =
        "#maincounter-wrap .maincounter-number .rts-counter span";
      const digitSpans = document.querySelectorAll(selector);
      // Loop through the digit spans selected above
      digitSpans.forEach((span) => {
        if (!isNaN(parseInt(span.textContent))) {
          digitGroupsArr.push(span.textContent);
        }
      });
      return JSON.stringify(digitGroupsArr);
    });
    // Change the message on the terminal since we are about
    // to close the headless browser
    spinner.text = "Closing headless browser";
    // Close the headless browser
    await browser.close();
    // Print success message with duration it took to scrape the data in ms
    spinner.succeed(`Page scraping successfull after ${Date.now() - date}ms`);
    // Remove the spinner from the terminal
    spinner.clear();
    // Print world population on the terminal if scraping is successful
    console.log(
      chalk.yellow.bold(`World population on ${new Date().toISOString()}:`),
      chalk.blue.bold(JSON.parse(digitGroups).join(","))
    );
  } catch (error) {
    // Print failed on the terminal if scraping is unsuccessful
    spinner.fail({ text: "Scraping failed" });
    // Remove the spinner from the terminal
    spinner.clear();
    // Print the error message on the terminal
    console.log(error);
  }
}
// Schedule a job to run every two minutes
const job = nodeCron.schedule("*/2 * * * *", scrapeWorldPopulation);
In the above code snippet, we required all the dependencies we needed at the top of the file. They include node-cron, puppeteer, chalk, and ora. We are scraping the data from https://www.worldometers.info/world-population/, so I assigned it to the url variable.
Since our job is to scrape data from a site, I have named the function responsible for executing our job scrapeWorldPopulation.
I have tried my best to give self-explanatory variable names and commented on almost every line of code. You should be able to follow what is happening in the scrapeWorldPopulation function.
Since this article is about job scheduling, I won't dive into puppeteer. You can also implement a different job if you wish.
I scheduled the job to run every two minutes by invoking the nodeCron.schedule method at the bottom.
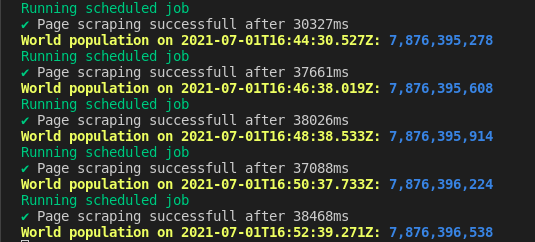
You can run the command node app.js on the terminal to schedule the job. You should see the job run every two minutes. This is what I see on my terminal after running node app.js.
Conclusion
In this article, you learned crontab syntax and how to implement a cron job in Node using node-cron.
There are several projects you can try out to learn cron syntax, for example:
scheduling a job to fetch the latest COVID-19 vaccination coverage for your country and logging the output to the console
fetching trending hashtags from Twitter (this might need an API key), or
getting the latest news headlines at intervals of time and so on.