
Angular is a TypeScript-based open source framework used to develop frontend web applications. It is the successor of AngularJS and all mentions of Angular refer to versions 2 and up. Angular has features like generics, static-typing, and also some ES6 features.
Version History
Google released the initial version of AngularJS on October 20, 2010. The stable release of AngularJS was on December 18, 2017, of version 1.6.8. The last significant release of AngularJS, version 1.7, took place on July 1, 2018, and is currently in a 3 year Long Term Support period. Angular 2.0 was first announced on September 22, 2014, at the ng-Europe conference. One new feature of Angular 2.0 is dynamic loading, and most of the core functionality was moved to modules.
After some modifications, Angular 4.0 was released in December 2016. Angular 4 is backwards compatible with Angular 2.0, and some new features are the HttpClient library and new router life cycle events. Angular 5 released on November 1, 2017, a major feature of which is support for progressive web apps. Angular 6 was released in May 2018, and Angular 7 in October 2018. The latest stable version is 7.0.0.
Installation
The easiest way to install Angular is through Angular CLI. This tool allows the creation of new projects and generating components, services, modules, and so on, to a standard the Angular team consider to be best practices.
Angular 2.x and Up
Install Angular CLI
npm install -g @angular/cli
Create a Workspace and Initial Application
You develop apps in the context of an Angular workspace. A workspace contains the files for one or more projects. A project is the set of files that comprise an app, a library, or end-to-end (e2e) tests.
ng new my-app
Serve the Application
Angular includes a server so that you can easily build and serve your app locally.
- Navigate to the workspace folder (
my-app)
Launch the server by using the CLI command ng serve with the --open option
cd my-app
ng serve --open
Hooray, you created your first angular app!!!
Components
Angular contains many schematics for building applications. Components are one such schematic. They encompass a single unit of logic concerned with a single part of the application. Components often partner with other schematics to operate more effectively.
Components simplify the application. Funneling logic into a single section of the visible interface is their primary goal. To build applications step-by-step, you must build component-by-component. Components act as Angular's building blocks after all.
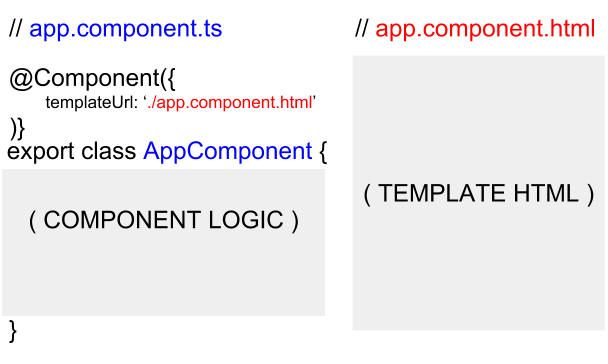
Component Class and Metadata
The CLI command ng generate component [name-of-component] yields the following.
import { Component, OnInit } from '@angular/core';

@Component({
  selector: 'app-example',
  templateUrl: './example.component.html',
  styleUrls: ['./example.component.css']
})
export class ExampleComponent implements OnInit {
  constructor() { }

  ngOnInit() { }
}
This is the basic skeleton from which all great components originate. The @Component decorator is the most important part. Without it, the above example becomes a generic class. Angular relies on decorators to discern a class' schematic type.
@Component receives metadata as a single object. Decorators are just JavaScript functions under the hood. They take in arguments as with the metadata object. The metadata object configures a component's basic dependencies. Each fields plays a role.
selector:tells Angular to associate the component with a certain element in the application’s template HTML.templateUrl:accepts the file location of the component’s template HTML (this is where data gets displayed to).styleUrls:accepts an array of style-sheet file locations (strings). These style-sheets target the component’s assigned template.
Think of metadata as a big blob of configuration. The decorator takes it so that it can generate the data specific to the component. The decorator decorates the underlying class with data necessary for its class' behavior. A component class that is.
The class' signature exports by default so that the component can be imported. ngOnInit also gets implemented. implements tells the class to define certain methods per the interface's definition. ngOnInit is a lifecycle hook.
Component Data
Data drives everything. Components are no exception. Components encapsulate all their data. To receive data externally, a component must explicitly declare it. This form of privacy keeps information from clashing across the component tree.
Data determines what gets displayed from the component class to its template. Any updates to the class’ data will (or at least should) update the template display.
Components will often initialize a set of members (or variables) that store data. They are used throughout the component class logic for convenience. This information fuels the logic resulting in the template and its behavior. See the following example.
// ./components/example/example.component.ts

import { Component, OnInit } from '@angular/core';
import { Post, DATA } from '../../data/posts.data';

@Component({
  selector: 'app-example',
  templateUrl: './example.component.html'
})
export class ExampleComponent implements OnInit {
  username: string;
  totalPosts: number;
  allPosts: Post[];

  deletePost(index: number): void {
    this.allPosts.splice(index, 1);
    this.totalPosts = this.allPosts.length;
  }

  ngOnInit(): void {
    this.username = DATA.author;
    this.totalPosts = DATA.thePosts.length;
    this.allPosts = DATA.thePosts;
  }
}
<!-- ./components/example/example.component.html -->

<h1>{{ username }}</h1>
<span>Change Name: </span><input [(ngModel)]="username">
<h3>Posts: {{ totalPosts }}</h3>
<ul>
<hr/>
<div *ngFor="let post of allPosts; let i=index">
  <button (click)="deletePost(i)">DELETE</button>
  <h6>{{ post.title }}</h6>
  <p>{{ post.body }}</p>
  <hr/>
</div>
</ul>
Note the ways the component interacts with its data. It first fetches it from ../../data/posts.data before it begins to forward it to the template for display.
The data shows up throughout the template. Inside the double curly braces, a variable’s value is mapped from the component class into the braces. The *ngFor loops across the allPosts class array. Clicking on the button removes a specific element from allPosts by its index. You can even change the topmost username by typing into the input box.
The above interactions alter the component class' data which in turn updates the component's template HTML. Components provide the backbone logic that facilitates the flow of data. The template HTML makes that data readable to the user.
Data Binding
Data often defines the look of an application. Interpreting that data into the user interface involves class logic (*.component.ts) and a template view (*.component.html) . Angular connects them through data binding. Think of data binding as a tool for component interaction.
Component and Template
The component stores most of its logic and data inside of its class decorated with @Component. This decorator defines the class as a component with template HTML. The template of the component represents the class within the application. The focus here needs to be between the component's class and the template HTML.
This is where data binding occurs. Element properties and events get assigned values. These values, defined by the component class, serve either one of two roles. One is to produce data that the template then receives. The other handles events emitted by the template element.
Element Properties
To recognize data-bound element properties, Angular uses a special bracket syntax.
// my.component.ts
@Component({
  templateUrl: './my.component.html'
})

export class MyComponent {
  value:type = /* some value of type */;
}
<!-- my.component.html -->
<any-element [property]=“value”>innerHTML</any-element>
Bear with me on this one.
[property] mirrors the property in the Domain Object Model (DOM) element's object node. Do not confuse object properties with a DOM element's attributes. Properties and attributes often share the same name and do the same thing. There is one clear distinction however.
Remember that attr (attributes) is a single property of the underlying DOM object. It gets declared at the DOM’s instantiation with attribute values matching the element's definition. It maintains the same value after that. Properties each have their own key-value field in a DOM object node. These properties are mutable post-instantiation.
Know the difference between attributes and properties. It will lead to a better understanding of how Angular binds data to properties (property binding). Angular will hardly ever bind data to an element’s attributes. Exceptions to this are very rare. One last time: Angular binds component data to properties, not attributes!
Referring back to the example, the [ … ] in the element's property assignment have special meaning. The brackets show that property is bound to “value” on the right of the assignment.
value also has special meaning within context of the brackets. value by itself is a string literal. Angular reads it and matches its value against component class members. Angular will substitute the value of the matching member attribute. This of course refers to the same component class that hosts the template HTML.
The unidirectional flow of data from component to template is complete. The member matched against right assignment of the bracketed property provides the value. Note that changes to the member's value in the component class percolate down to the template. That is Angular's change detection at work. Changes within the template's scope have no effect on the component class member.
Key take-away: the component class provides the data while the template displays it.
I failed to mention that data values can also show up in a component’s innerHTML. This last example implements double curly braces. Angular recognizes these braces and interpolates the matching component class data into the innerHTML of the div.
<div>The value of the component class member ‘value’ is {{value}}.</div>
Event Handling
If the component supplies data, then the template supplies events.
// my.component.ts
@Component({
  templateUrl: './my.component.html'
})

export class MyComponent {
  handler(event):void {
      // function does stuff
  }
}
// my.component.html
<any-element (event)=“handler($event)”>innerHTML</any-element>
This works similarly to property binding.
The (event) pertains to any valid event type. For example, one of the most common event types is click. It emits when you click your mouse. Regardless of the type, event is bound to “handler” in the example. Event handlers are usually member functions of the component class.
The ( … ) are special to Angular. Parenthesis tell Angular an event is bounded to the right assignment of handler. The event itself originates from the host element.
When the event does emit, it passes the Event object in the form of $event. The handler maps to the identically named handler function of the component class. The unidirectional exchange from the event-bound element to the component class is complete.
Emitting events from the handler, while possible, do not impact the template element. The binding is unidirectional after all.
Directives
Directives are component elements and attributes created and recognized by Angular. Angular associates the element or attribute with its corresponding class definition. @Directive or @Component decorates these classes. Both are indicative to Angular that the class performs as a directive.
Some directives modify the style of the host element. Other directives display views or insert into existing ones as embedded views. On other words, they alter the HTML layout.
In any case, directives signal the Angular compiler. They mark components for modification depending on the class logic of the directive.
Structural Directive
Here are three examples of structural directives. Each one has a logical counterpart (if, for, and switch).
- *ngIf
- *ngFor
- ngSwitchCase and ngSwitchDefault
Important note: all three are available through the CommonModule import. It is available from @angular/common for importation within the application's root module.
*ngIf
*ngIf tests a given value to see if it is truthy or falsy based off general boolean evaluation in JavaScript. If truthy, the element and its innerHTML show up. Otherwise, they never render to the Domain Object Model (DOM).
<!-- renders “<h1>Hello!</h1>” -->
<div *ngIf="true">
  <h1>Hello!</h1>
</div>

<!-- does not render -->
<div *ngIf="false">
  <h1>Hi!</h1>
</div>
This is a contrived example. Any member value from the template's component class can be substituted in for true or false.
NOTE: You also can do following thing with *ngIf to get access to observalbe value
<div *ngIf="observable$ | async as anyNameYouWant">
  {{  anyNameYouWant }}
</div>
*ngFor
*ngFor loops based off a right-assigned, microsyntactic expression. Microsyntax moves beyond the scope of this article. Know that microsyntax is a short form of logical expression. It occurs as a single string capable of referencing class member values. It can loop iterable values which makes it useful for *ngFor.
<ul>
  <li *ngFor=“let potato of [‘Russet’, ‘Sweet’, ‘Laura’]; let i=index”>
      Potato {{ i + 1 }}: {{ potato }}
  </li>
  <!-- Outputs
  <li>
      Potato 1: Russet
  </li>
  <li>
      Potato 2: Sweet
  </li>
  <li>
      Potato 3: Laura
  </li>
  -->
</ul>
[‘Russet’, ‘Sweet’, ‘Laura’] is an iterable value. Arrays are one of the most common iterables. The *ngFor spits out a new <li></li> per array element. Each array element is assigned the variable potato. This is all done utilizing microsyntax. The *ngFor defines the structural content of the ulelement. That is characteristic of a structural directive.
NOTE: You can also do following thing with *ngFor directive to get access to observalbe value (hacky)
<div *ngFor="let anyNameYouWant of [(observable$ | async)]">
  {{  anyNameYouWant }}
</div>
ngSwitchCase and ngSwitchDefault
These two structural directives work together to provide switch functionality to template HTML.
<div [ngSwitch]=“potato”>
  <h1 *ngSwitchCase=“‘Russet’”>{{ potato }} is a Russet Potato.</h1>
  <h1 *ngSwitchCase=“‘Sweet’”>{{ potato }} is a Sweet Potato.</h1>
  <h1 *ngSwitchCase=“‘Laura’”>{{ potato }} is a Laura Potato.</h1>
  <h1 *ngSwitchDefault>{{ potato }} is not a Russet, Sweet, nor Laura Potato.</h1>
</div>
Only one of the *ngSwitch… expressions renders. Notice the [ngSwitch] attribute inside of the divelement wrapping the switch. This passes the value of potato along the *ngSwitch... chain. This chain of structural directives determine which h1 element renders.
As such, [ngSwitch] is not a structural directive unlike the *ngSwitch… statements. It passes the value along whereas the switch block determines the final layout of HTML.
Remember that stylization and value passing are not the responsibility of structural directives. That concerns attribute directives. Structural directives determine only the layout.
Pipes
Output data transformations ensure data is in a desirable format by the time it loads onto the user’s screen. Normally data transforms behind the scenes. With pipes, transforming data can take place in the template HTML. Pipes transform template data directly.
Pipes look nice and are convenient. They help keep the component’s class lean of basic transformations. To put it technically, pipes encapsulate data transformation logic.
Use Cases
Angular comes prepackaged with a basic set of pipes. Working with a couple of them will develop the intuition to handle the rest. The following list provides three examples.
- AsyncPipe
- DatePipe
- TitleCasePipe
AsyncPipe
This sections requires a basic understanding of Promises or Observables to fully appreciate. The AsyncPipe operates on either of the two. AsyncPipe extracts data from Promises/Observables as output for whatever comes next.
In the case of Obervables, AsyncPipe subscribes automatically to the data source. Regardless of where the data comes from, the AsyncPipe subscribes to the source observable. async is the syntactical name of AsyncPipe as shown below.
<ul *ngFor=“let potato of (potatoSack$ | async); let i=index”>
  <li>Potatoe {{i + 1}}: {{potato}}</li>
</ul>
In the example, potatoSack$ is an Observable pending an upload of potatoes. Once the potatoes arrive, either synchronously or asynchronously, the AsyncPipe receives them as an iterable array. The list element then fills up with potatoes.
DatePipe
Formatting date strings takes a fair bit of hacking with the JavaScript Date object. The DatePipe provides a powerful way to format dates assuming the given input is a valid time format.
TitleCasePipe
Transforms text to title case. Capitalizes the first letter of each word, and transforms the rest of the word to lower case. Words are delimited by any whitespace character, such as a space, tab, or line-feed character.
// example.component.ts

@Component({
  templateUrl: './example.component.html'
})
export class ExampleComponent {
  timestamp:string = ‘2018-05-24T19:38:11.103Z’;
}
<!-- example.component.html -->

<div>Current Time: {{timestamp | date:‘short’}}</div>
The format of the above timestamp is ISO 86011—not the easiest to read. The DatePipe (date) transforms the ISO date format into a more conventional mm/dd/yy, hh:mm AM|PM. There are many other formatting options. All these options are in the official documentation.
Creating Pipes
While Angular only has a set number of pipes, the @Pipe decorator lets developers create their own. The process begins with ng generate pipe [name-of-pipe], replacing [name-of-pipe] with a preferable filename. This command yields the following:
import { Pipe, PipeTransform } from ‘@angular/core’;

@Pipe({
  name: 'example'
})
export class ExamplePipe implements PipeTransform {
  transform(value: any, args?: any): any {
      return null;
  }
}
This pipe template simplifies custom pipe creation. The @Pipe decorator tells Angular the class is a pipe. The value of name: ‘example’, in this case being example, is the value Angular recognizes when scanning template HTML for custom pipes.
On to the class logic. The PipeTransform implementation provides the instructions for the transformfunction. This function has special meaning within context of the @Pipe decorator. It receives two parameters by default.
value: any is the output that the pipe receives. Think of <div>{{ someValue | example }}</div>. The value of someValue gets passed to the transform function’s value: any parameter. This is the same transform function defined in the ExamplePipe class.
args?: any is any argument that the pipe optionally receives. Think of <div>{{ someValue | example:[some-argument] }}</div>. [some-argument] can be replace by any one value. This value gets passed to the transform function’s args?: any parameter. That is, the transform function defined in ExamplePipe's class.
Whatever the function returns (return null;) becomes the output of the pipe operation. Take a look at the next example to see a complete example of ExamplePipe. Depending on the variable the pipe receives, it either uppercases or lowercases the input as new output. An invalid or nonexistent argument will cause the pipe to return the same input as output.
// example.pipe.ts

@Pipe({
  name: 'example'
})
export class ExamplePipe implements PipeTransform {
  transform(value:string, args?:string): any {
    switch(args || null) {
      case 'uppercase':
        return value.toUpperCase();
      case 'lowercase':
        return value.toLowerCase();
      default:
        return value;
    }
  }
}
// app.component.ts

@Component({
  templateUrl: 'app.component.html'
})
export class AppComponent {
  someValue:string = "HeLlO WoRlD!";
}
<!-- app.component.html -->

<!-- Outputs “HeLlO WoRlD!” -->
<h6>{{ someValue | example }}</h6>

<!-- Outputs “HELLO WORLD!” -->
<h6>{{ someValue | example:‘uppercase’ }}</h6>

<!-- Outputs “hello world!” -->
<h6>{{ someValue | example:‘lowercase’ }}</h6>
Lifecycle Hooks
Lifecycle hooks are timed methods. They differ in when and why they execute. Change detection triggers these methods. They execute depending on the conditions of the current cycle. Angular runs change detection constantly on its data. Lifecycle hooks help manage its effects.
An important aspect of these hooks is their order of execution. It never deviates. They execute based off a predictable series of load events produced from a detection cycle. This makes them predictable. Some assets are only available after a certain hook executes. Of course, a hook only execute under certain conditions set in the current change detection cycle.
In Order of Execution:
ngOnChanges
ngOnChanges triggers following the modification of @Input bound class members. Data bound by the @Input() decorator come from an external source. When the external source alters that data in a detectable manner, it passes through the @Input property again.
With this update, ngOnChanges immediately fires. It also fires upon initialization of input data. The hook receives one optional parameter of type SimpleChanges. This value contains information on the changed input-bound properties.
ngOnInit
ngOnInit fires once upon initialization of a component’s input-bound (@Input) properties. The next example will look similar to the last one. The hook does not fire as ChildComponent receives the input data. Rather, it fires right after the data renders to the ChildComponent template.
ngDoCheck
ngDoCheck fires with every change detection cycle. Angular runs change detection frequently. Performing any action will cause it to cycle. ngDoCheck fires with these cycles. Use it with caution. It can create performance issues when implemented incorrectly.
ngDoCheck lets developers check their data manually. They can trigger a new application date conditionally. In conjunction with ChangeDetectorRef, developers can create their own checks for change detection.
ngAfterContentInit
ngAfterContentInit fires after the component's content DOM initializes (loads for the first time). Waiting on @ContentChild(ren) queries is the hook's primary use-case.
@ContentChild(ren) queries yield element references for the content DOM. As such, they are not available until after the content DOM loads. Hence why ngAfterContentInit and its counterpart ngAfterContentChecked are used.
ngAfterContentChecked
ngAfterContentChecked fires after every cycle of change detection targeting the content DOM. This lets developers facilitate how the content DOM reacts to change detection. ngAfterContentCheckedcan fire frequently and cause performance issues if poorly implemented.
ngAfterContentChecked fires during a component’s initialization stages too. It comes right after ngAfterContentInit.
ngAfterViewInit
ngAfterViewInit fires once after the view DOM finishes initializing. The view always loads right after the content. ngAfterViewInit waits on @ViewChild(ren) queries to resolve. These elements are queried from within the same view of the component.
In the example below, BComponent’s h3 header is queried. ngAfterViewInit executes as soon as the query's results are available.
ngAfterViewChecked
ngAfterViewChecked fires after any change detection cycle targeting the component’s view. The ngAfterViewChecked hook lets developers facilitate how change detection affects the view DOM.
ngOnDestroy
ngOnDestroy fires upon a component’s removal from the view and subsequent DOM. This hook provides a chance to clean up any loose ends before a component's deletion.
Views
Views are almost like their own virtual DOM. Each view contains a reference to a corresponding section of the DOM. Inside a view are nodes that mirror what is in the this section. Angular assigns one view node per DOM element. Each node holds a reference to a matching element.
When Angular checks for changes, it checks the views. Angular avoids the DOM under the hood. The views reference the DOM on its behalf. Other mechanisms are in place to ensure that view changes render to the DOM. Conversely, changes to the DOM do not affect the views.
Again, views are common across all development platforms besides the DOM. Even if developing for one platform, views are still considered best practice. They guarantee Angular has a correct interpretation of the DOM.
Views may not exist on third-party libraries. Direct DOM manipulation is an escape hatch for this kind of scenario. Granted, do not expect the application to function cross-platform.
Types of Views
There are two main types of views: embedded and host.
There also exists view containers. They hold embedded and host views and are often referred to as simple “views”.
Every @Component class registers a view container (view) with Angular. New components generate a custom selector targeting a certain DOM element. The view attaches to that element wherever it appears. Angular now knows the component exists looking at the view model.
Host Views and Containers
Host views host dynamic components. View containers (views) attach automatically to elements already in the template. Views can attach to any element beyond what is unique to component classes.
Think of the traditional method of component generation. It begins by creating a class, decorating it with @Component, and filling in metadata. This approach occurs for any pre-defined component element of the template.
Try using the Angular command-line interface (CLI) command: ng generate component [name-of-component]. It yields the following.
import { Component, OnInit } from '@angular/core';

@Component({
  selector: 'app-example',
  templateUrl: './example.component.html',
  styleUrls: ['./example.component.css']
})
export class ExampleComponent implements OnInit {
  constructor() { }

  ngOnInit() { }
}
This creates the component with the selector app-example. This attaches a view container to <app-example></app-example> in the template. If this were the root of the application, its view would encapsulate all other views. The root view marks the beginning of the application from Angular's perspective.
Creating components dynamically and registering them in the Angular view model takes a few extra steps. Structural directives help manage dynamic content (*ngIf, *ngFor, and *ngSwitch…). Directives do not scale to bigger applications however. Too many structural directives complicates the template.
This is where instantiating components from existing class logic comes in handy. These components need to create a host view that can insert into the view model. Host views holds data for components so that Angular recognizes their structural purpose.
Embedded Views
Structural directives create an ng-template surrounding a chunk of HTML content. The directive's host element has a view container attached. This make it so that the content can conditionally render into its intended layout.
The ng-template holds embedded view nodes representing each element within its innerHTML. ng-template is by no means a DOM element. It comments itself out. The tags define the extend of its embedded view.
Instantiating an embedded view requires no external resources beyond its own reference. The @ViewChild query can fetch that.
With the template reference, calling createEmbeddedView from it does the trick. The innerHTML of the reference becomes its own embedded view instance.
In the next example, <ng-container></ng-container> is a view container. ng-container gets commented out during compilation just like ng-template. Thus it provides an outlet for inserting the embedded view while keeping the DOM lean.
The embedded view template inserts at the layout location of ng-container. This newly inserted view has no additional view encapsulation besides the view container. Remember how that differs from host views (host views attach to their ng-component element wrapper).
import { Component, AfterViewInit, ViewChild,
ViewContainerRef, TemplateRef } from '@angular/core';

@Component({
  selector: 'app-example',
  template: `
  <h1>Application Content</h1>
  <ng-container #container></ng-container> <!-- embed view here -->
  <h3>End of Application</h3>

  <ng-template #template>
    <h1>Template Content</h1>
    <h3>Dynamically Generated!</h3>
  </ng-template>
  `
})
export class ExampleComponent implements AfterViewInit {
  @ViewChild("template", { read: TemplateRef }) tpl: TemplateRef<any>;
  @ViewChild("container", { read: ViewContainerRef }) ctr: ViewContainerRef;

  constructor() { }

  ngAfterViewInit() {
    const view =  this.tpl.createEmbeddedView(null);
    this.ctr.insert(view);
  }
}
@ViewChild queries for the template reference variable #template. This provides a template reference of type TemplateRef. TemplateRef holds the createEmbeddedView function. It instantiates the template as an embedded view.
The single argument of createEmbeddedView is for context. If you wanted to pass in additional metadata, you could do it here as an object. The fields should match up with the ng-template attributes (let-[context-field-key-name]=“value”). Passing null indicates no extra metadata is necessary.
A second @ViewChild query provides a reference to ng-container as a ViewContainerRef. Embedded views only attach to other views, never the DOM. The ViewContainerRef references the view that takes in the embedded view.
An embedded view may also insert into the component view of <app-example></app-example>. This approach positions the view at the very end of ExampleComponent’s view. In this example however, we want the content to show up in the very middle where ng-container sits.
The ViewContainerRef insert function inserts the embedded view into the ng-container. The view content shows ups in the intended location right in the middle of ExampleComponent's view.
Routing
Routing is essential. Many modern web applications host too much information for one page. Users should not have to scroll through an entire application’s worth of content either. An application needs to split itself into distinguishable sections.An Angular best practice is to load and configure the router in a separate, top-level module that is dedicated to routing and imported by the root AppModule.
Users prioritize necessary information. Routing helps them find the application section with such information. Any other information useful to other users may exist on an entirely separate route. With routing, both users can find what they need quickly. Irrelevant details stay obscured behind irrelevant routes.
Routing excels at sorting and restricting access to application data. Sensitive data should never display to unauthorized users. Between every route the application may intervene. It can examine a user’s session for authentication purposes. This examination determines what the route renders if it should render at all. Routing gives developers the perfect chance to verify a user before proceeding.
As for Angular, routing takes up its own entire library within the framework. All modern front-end frameworks support routing, and Angular is no different. Routing happens from the client-side using either hash or location routing. Both styles allow the client to manage its own routes. No additional assistance from the server is necessary past the initial request.
Basic Routing
Routing utilities export with RouterModule available from @angular/router. It is not part of the core library since not all applications require routing. The most conventional way to introduce routing is as its own feature module.
As route complexity grows, having it as its own module will promote the root module’s simplicity. Keeping it stupid simple without compromising functionality constitutes good design for modules.
import { NgModule } from '@angular/core';
import { RouterModule, Routes } from '@angular/router';

import { AComponent } from '../../components/a/a.component';
import { BComponent } from '../../components/b/b.component';

// an array of soon-to-be routes!
const routes: Routes = [];

@NgModule({
  imports: [ RouterModule.forRoot(routes) ],
  exports: [ RouterModule ]
})
export class AppRoutingModule { }
.forRoot(...) is a class function available from the RouterModule class. The function accepts an array of Route objects as Routes. .forRoot(...) configures routes for eager-loading while its alternative .forChild(...) configures for lazy-loading.
Eager-loading meaning the routes load their content into the application from the get-go. Lazy-loading happens on-demand. The focus of this article is eager-loading. It is the default approach for loading in an application. The RouterModule class definition looks something like the next block of code.
@NgModule({
  // … lots of metadata ...
})
export class RouterModule {
  forRoot(routes: Routes) {
    // … configuration for eagerly loaded routes …
  }

  forChild(routes: Routes) {
    // … configuration for lazily loaded routes …
  }
}
Do not worry about the configuration details the example omits with comments. Having a general understanding will do for now.
Notice how AppRoutingModule imports the RouterModule while also exporting it. This makes sense given AppRoutingModule is a feature module. It imports into the root module as a feature module. It exposes RouterModule directives, interfaces, and services to the root component tree.
This explains why AppRoutingModule must export RouterModule. It does so for the sake of the root module’s underlying component tree. It needs access to those routing utilities!
import { BrowserModule } from '@angular/platform-browser';
import { NgModule } from '@angular/core';

import { AppComponent } from './app.component';
import { AComponent } from './components/a/a.component';
import { BComponent } from './components/b/b.component';
import { AppRoutingModule } from './modules/app-routing/app-routing.module';

@NgModule({
  declarations: [
    AppComponent,
    AComponent,
    BComponent
  ],
  imports: [
    AppRoutingModule, // routing feature module
    BrowserModule
  ],
  providers: [],
  bootstrap: [ AppComponent ]
})
export class AppModule { }
The AppRoutingModule token imports from the very top. Its token inserts into the root module’s imports array. The root component tree may now utilize the RouterModule library. That includes its directives, interfaces, and services as already mentioned. Big thanks goes to AppRoutingModule for exporting RouterModule!
The RouterModule utilities will come in handy for the root’s components. The basic HTML for AppComponent makes use of one directive: router-outlet.
<!-- app.component.html -->

<ul>
  <!-- routerLink(s) here -->
</ul>
<router-outlet></router-outlet>
<!-- routed content appends here (AFTER THE ELEMENT, NOT IN IT!) -->
routerLink is an attribute directive of RouterModule. It will attach to each element of <ul></ul> once the routes are setup. router-outlet is a component directive with interesting behavior. It acts more as a marker for displaying routed content. Routed content results from navigation to a specific route. Usually that means a single component as configured in AppRoutingModule
The routed content renders right after <router-outlet></router-outlet>. Nothing renders inside of it. This does not make too much of a considerable difference. That said, do not expect router-outlet to behave like a container for routed content. It is merely a marker for appending routed content to the Document Object Model (DOM).
The first question to address is what routes will this application consume? Well, there are two components: AComponent and BComponent. Each one should have its own route. They can render from AppComponent’s router-outlet depending on the current route location.
The route location (or path) defines what appends to a website's origin (e.g. http://localhost:4200) through a series of slashes (/).
// … same imports from before …

const routes: Routes = [
  {
    path: 'A',
    component: AComponent
  },
  {
    path: 'B',
    component: BComponent
  }
];

@NgModule({
  imports: [ RouterModule.forRoot(routes) ],
  exports: [ RouterModule ]
})
export class AppRoutingModule { }
http://localhost:4200/A renders AComponent from AppComponent’s router-outlet. http://localhost:4200/B renders BComponent. You need a way to route to these locations without using the address bar though. An application should not rely upon a web browser's address bar for navigation.
The global CSS (Cascading Style-sheets) supplements the HTML below it. An application’s router link ought to have a pleasant appearance. This CSS applies to all other examples too.
/* global styles.css */

ul li {
  cursor: pointer;
  display: inline-block;
  padding: 20px;
  margin: 5px;
  background-color: whitesmoke;
  border-radius: 5px;
  border: 1px solid black;
}

ul li:hover {
  background-color: lightgrey;
}
<!-- app.component.html -->

<ul>
  <li routerLink="/A">Go to A!</li>
  <li routerLink="/B">Go to B!</li>
</ul>
<router-outlet></router-outlet>
This is basic routing! Clicking either of the routerLink elments routes the web address. It reassigns it without refreshing the web browser. Angular’s Router maps the routed address to the Routes configured in AppRoutingModule. It matches the address to the path property of a single Route object within the array. First match always wins, so match-all routes should lie at the very end of the Routes array.
Match-all routes prevent the application from crashing if it cannot match the current route. This can happen from the address bar where the user may type in any route. For this, Angular provides a wildcard path value ** that accepts all routes. This route usually renders a PageNotFoundComponent component displaying “Error 404: Page not found”.
// … PageNotFoundComponent imported along with everything else …

const routes: Routes = [
  {
    path: 'A',
    component: AComponent
  },
  {
    path: 'B',
    component: BComponent
  },
  {
    path: '',
    redirectTo: 'A',
    pathMatch: 'full'
  },
  {
    path: '**',
    component: PageNotFoundComponent
  }
];
The Route object containing redirectTo keeps the PageNotFoundComponent from rendering as a result of http://localhost:4200. This is the applications home route. To fix this, redirectTo reroutes the home route to http://localhost:4200/A. http://localhost:4200/A indirectly becomes the application’s new home route.
The pathMatch: 'full' tells the Route object to match against the home route (http://localhost:4200). It matches the empty path.
These two new Route objects go at the end of the array since first match wins. The last array element (path: '**') always matches, so it goes last.
There is one last thing worth addressing before moving on. How does the user know where he or she is in the application relative to the current route? Sure there may be content specific to the route, but how is user supposed to make that connection? There should be some form of highlighting applied to the routerLinks. That way, the user will know which route is active for the given web page.
This is an easy fix. When you click a routerLink element, Angular’s Router assigns focus to it. This focus can trigger certain styles which provide useful feedback to the user. The routerLinkActive directive can track this focus for the developer.
<!-- app.component.html -->

<ul>
  <li routerLink="/A" routerLinkActive="active">Go to A!</li>
  <li routerLink="/B" routerLinkActive="active">Go to B!</li>
</ul>
<router-outlet></router-outlet>
The right assignment of routerLinkActive represents a string of classes. This example portrays only one class (.active), but any number of space-delimited classes may apply. When the Router assigns focus to a routerLink, the space-delimited classes apply to the host element. When the focus shifts away, the classes get removed automatically.
/* global styles.css */

.active {
  background-color: lightgrey !important;
}
Users can now easily recognize how the current route and the page content coincide. lightgreyhighlighting applies to the routerLink matching the current route. !important ensures the highlighting overrides inline stylings.