
![Zoom Screen Sharing – How to Share My Screen on Zoom [Solved]](https://www.freecodecamp.org/news/content/images/size/w2000/2021/10/john-schnobrich-2FPjlAyMQTA-unsplash.jpg)
As more and more people are working remotely, online meeting services like Zoom are becoming more popular and widely-used.
And if you're in a Zoom meeting, you'll probably have to show your work to your co-workers from time to time.
Zoom offers many features that make sharing your screen fast and easy. You can share your whole desktop, just your screen, certain computer programs and applications, particular files or other content, and more.
In this article I'll show you how to share your computer screen during a live video call when you're using a desktop computer.
How to share your screen on Zoom – the basic steps
You can share your screen at any point during a Zoom meeting. But keep in mind that screen sharing abilities are available only to the meeting's host by default.
If you're not the host of the meeting, the host must allow participants to share their screens via the Security option in Zoom:

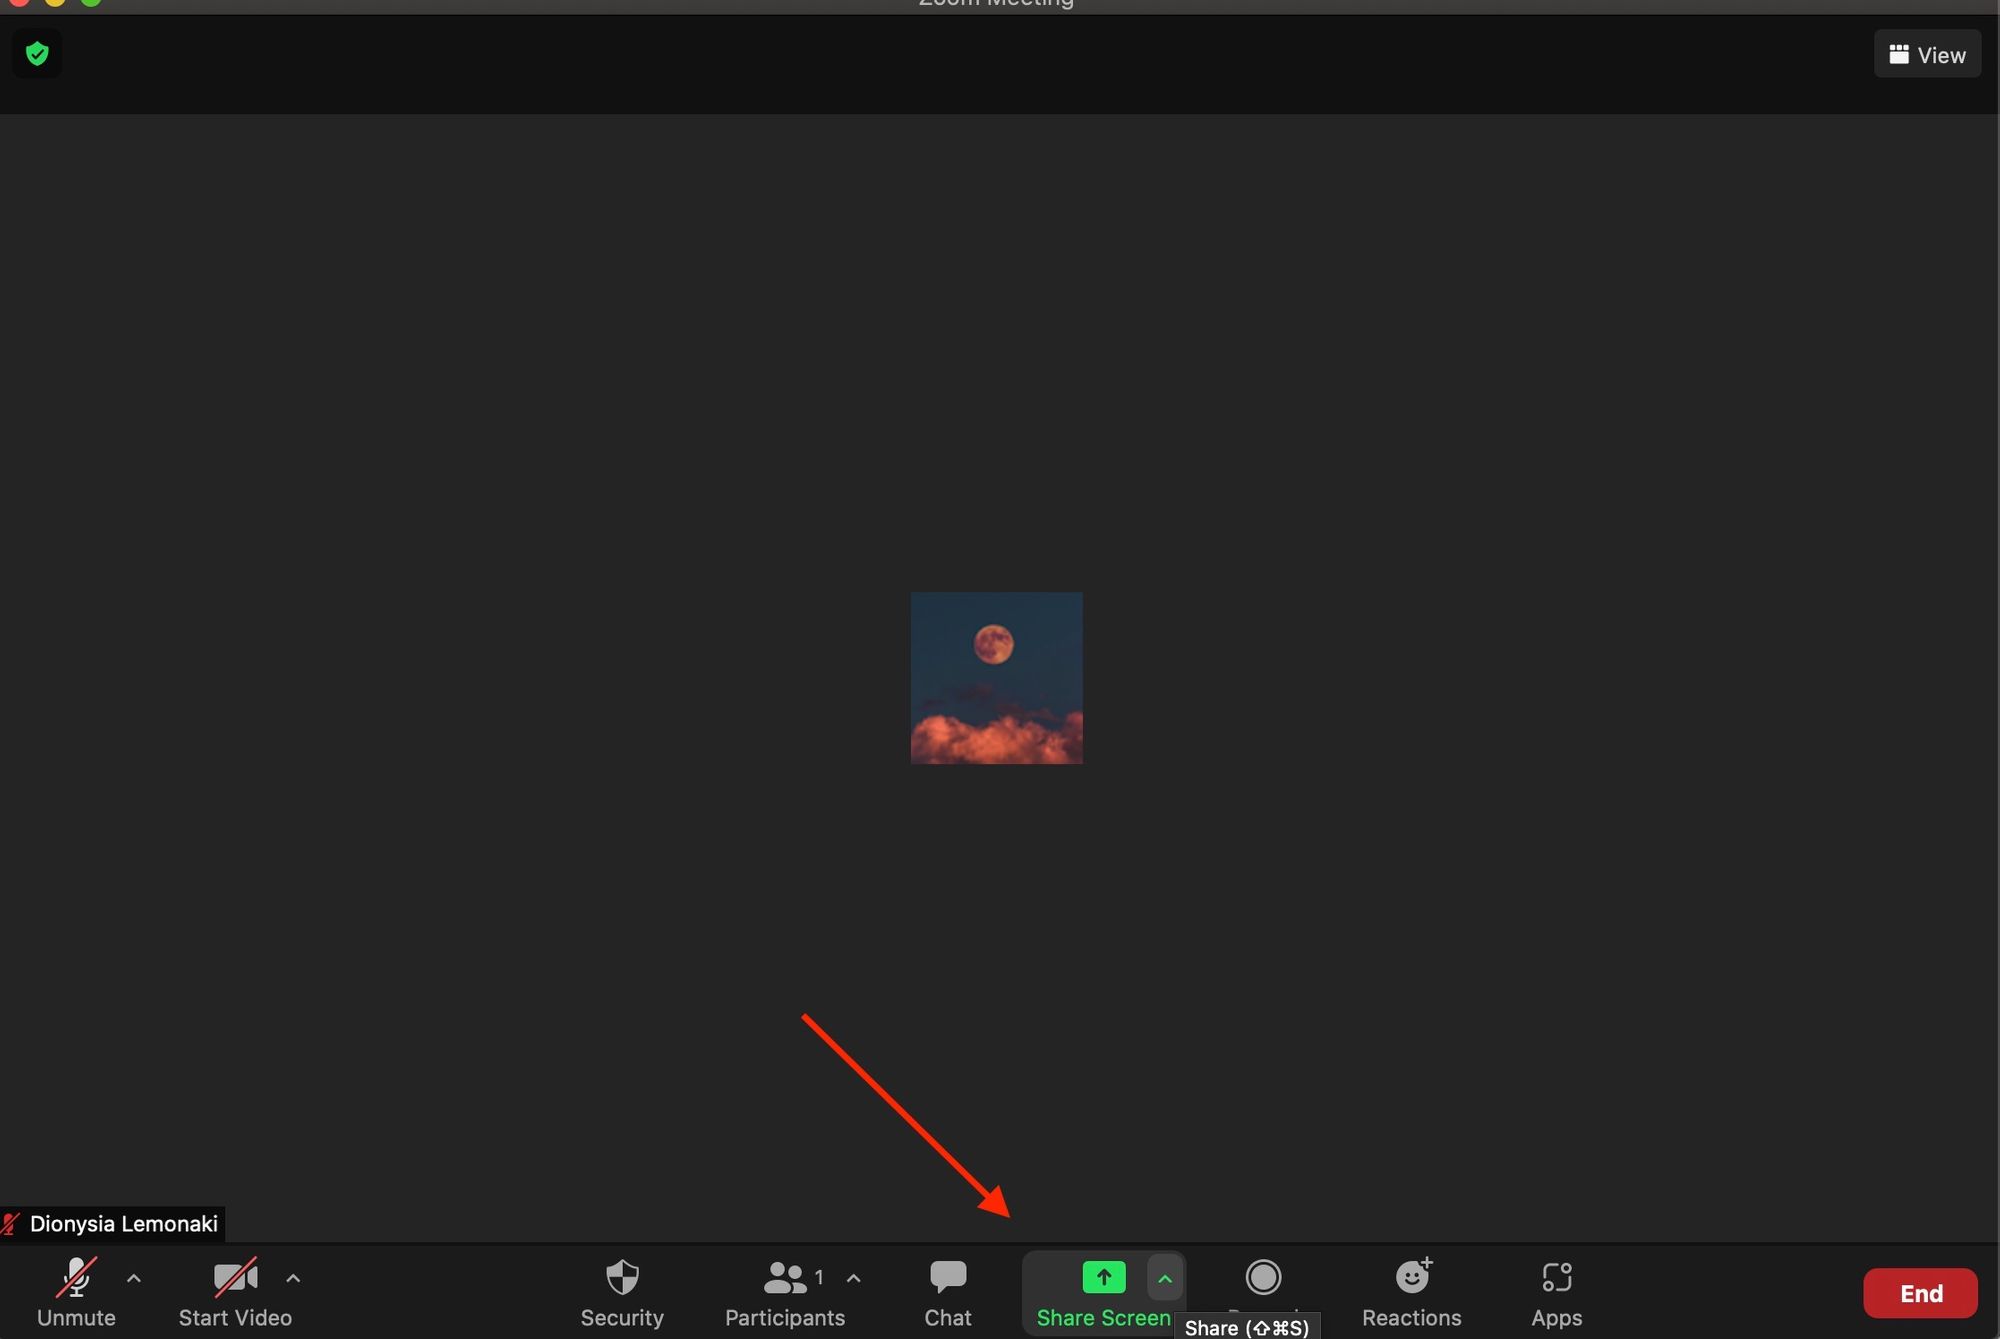
Now, the first step to sharing your screen is to click the green 'Share Screen' option at the bottom of the meeting's window.
If you can't see the bar at the bottom with the different available options, hover your mouse over the bottom of thte window and it will appear.
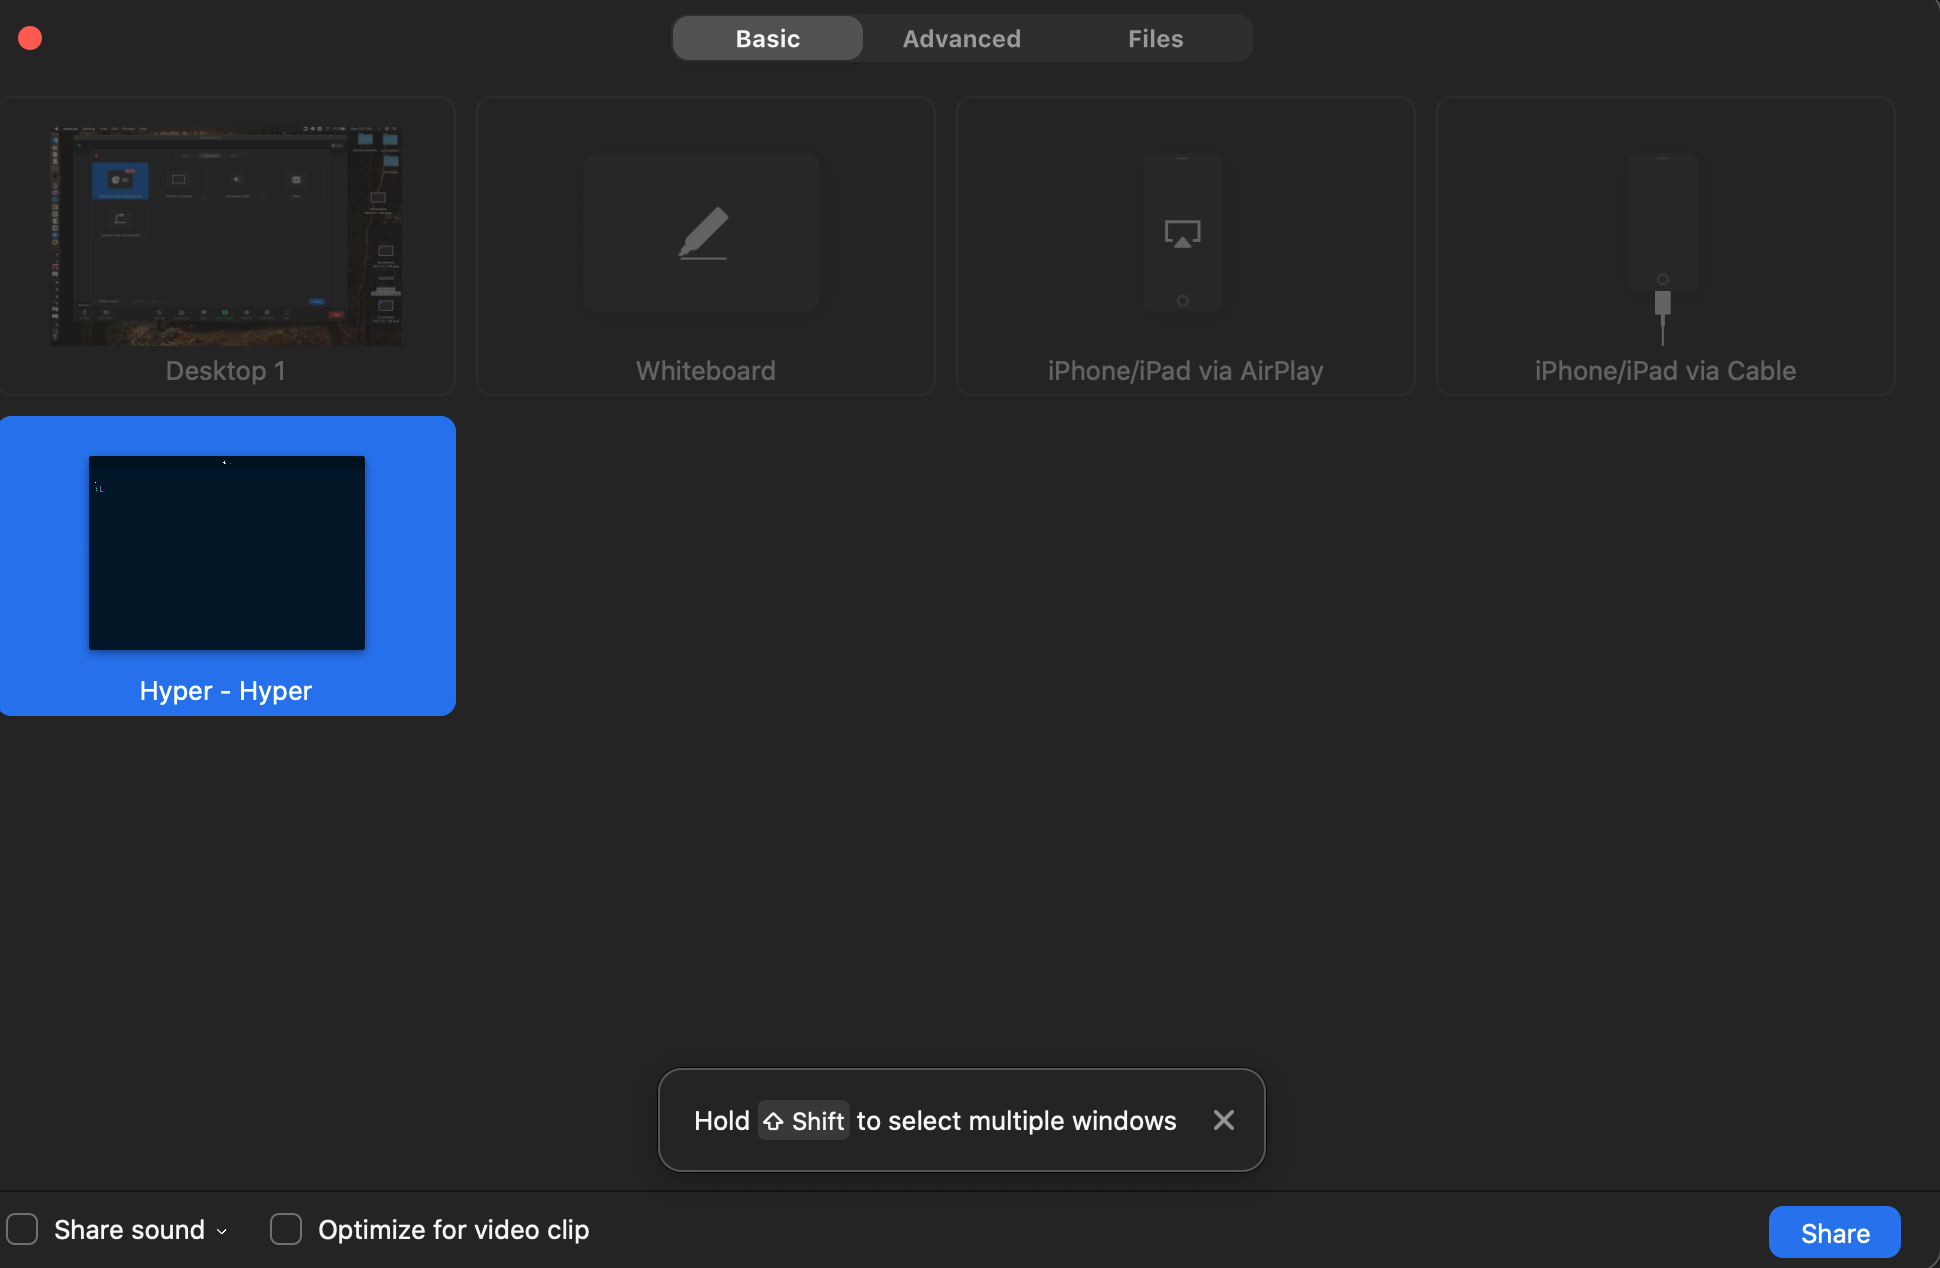
Once you've clicked 'Share Screen', the Basic panel window will pop up:
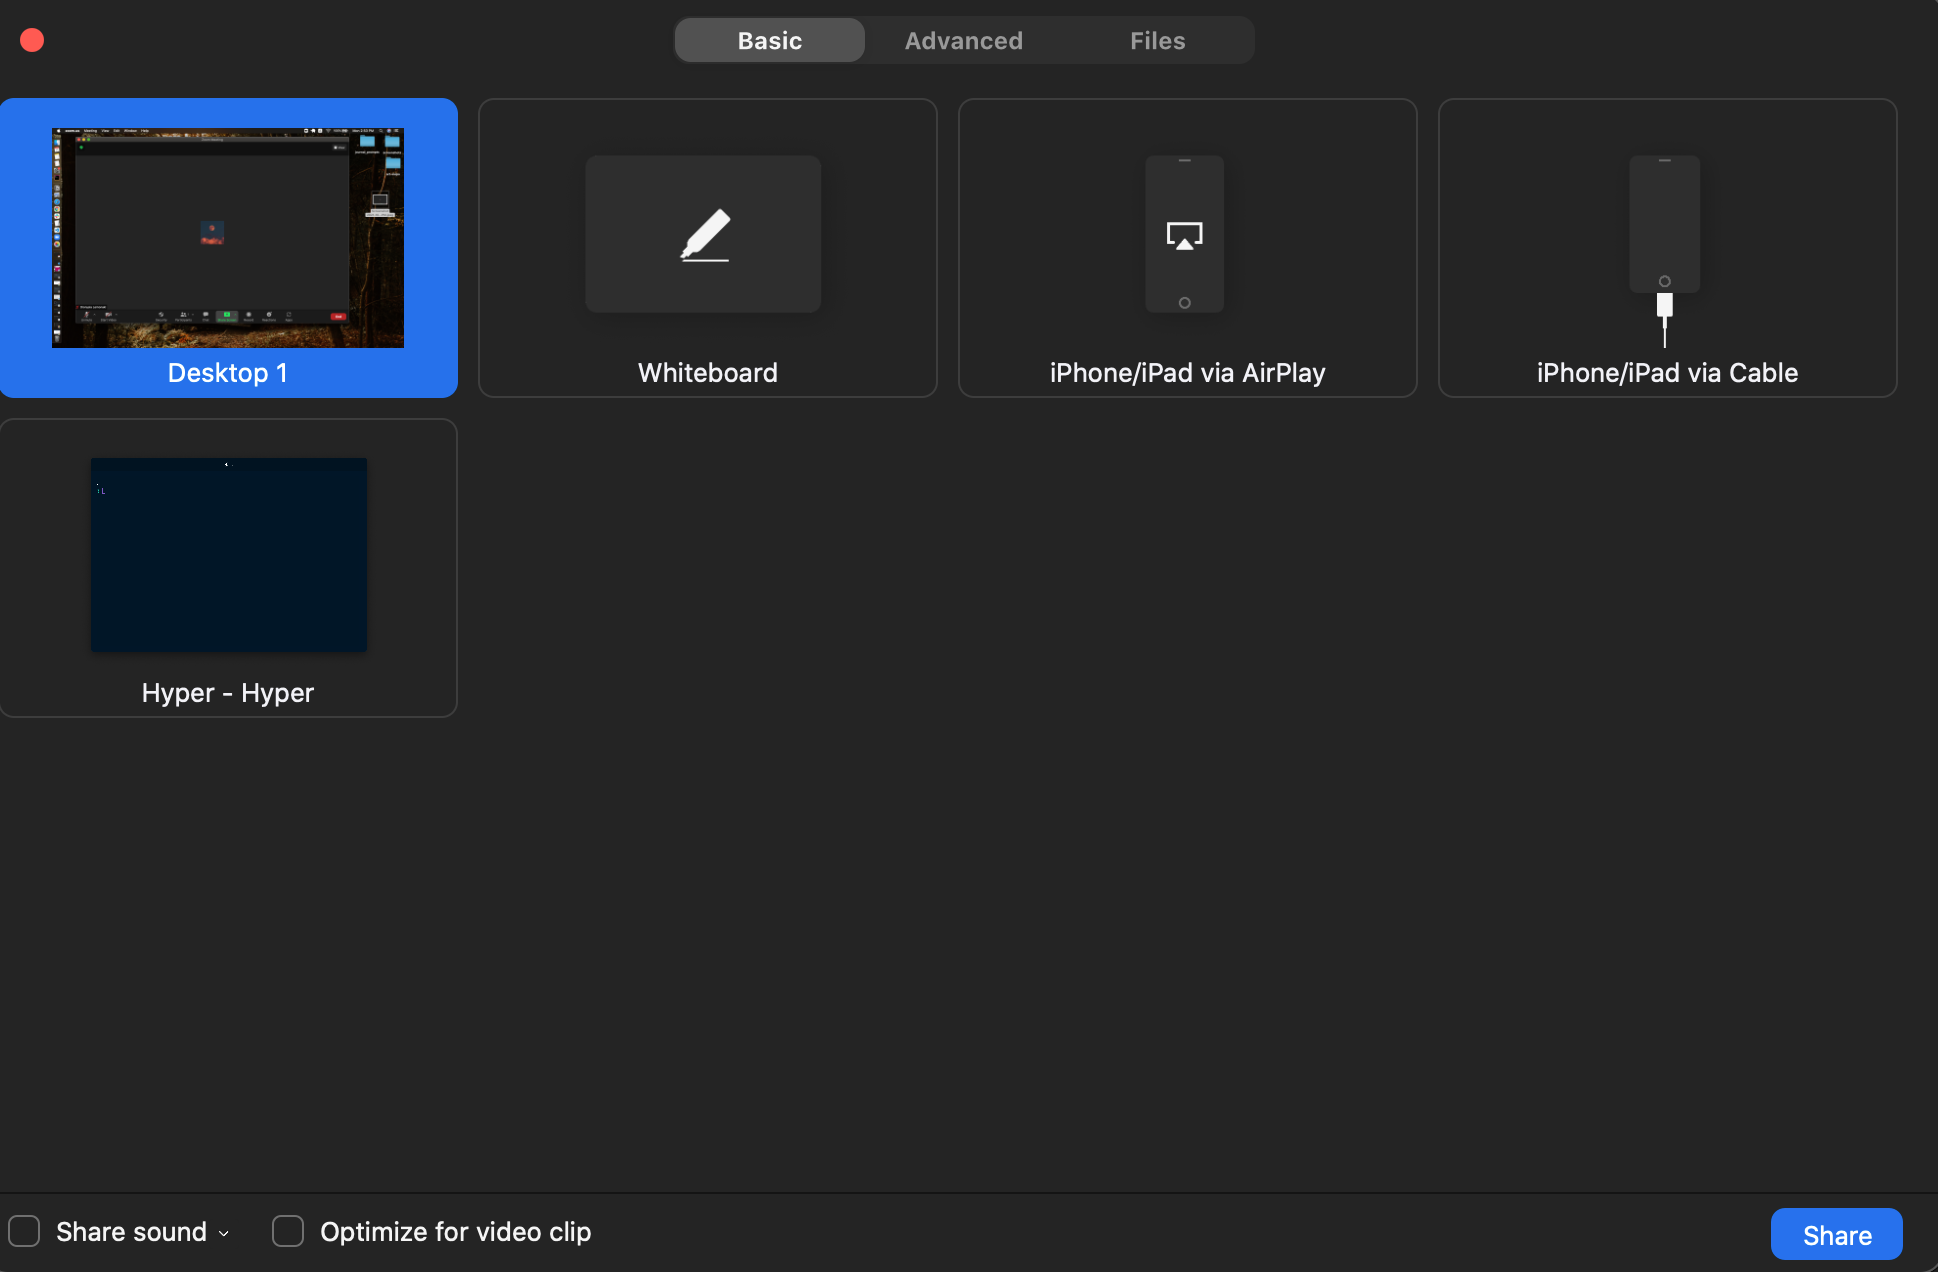
From here, you can choose to share your entire desktop screen, a whiteboard, an iPhone/iPad screen, or any other specific application or program window that is currently open on your computer.
Select what you want to share by clicking on that option, which will give the window/app you've selected a blue background.
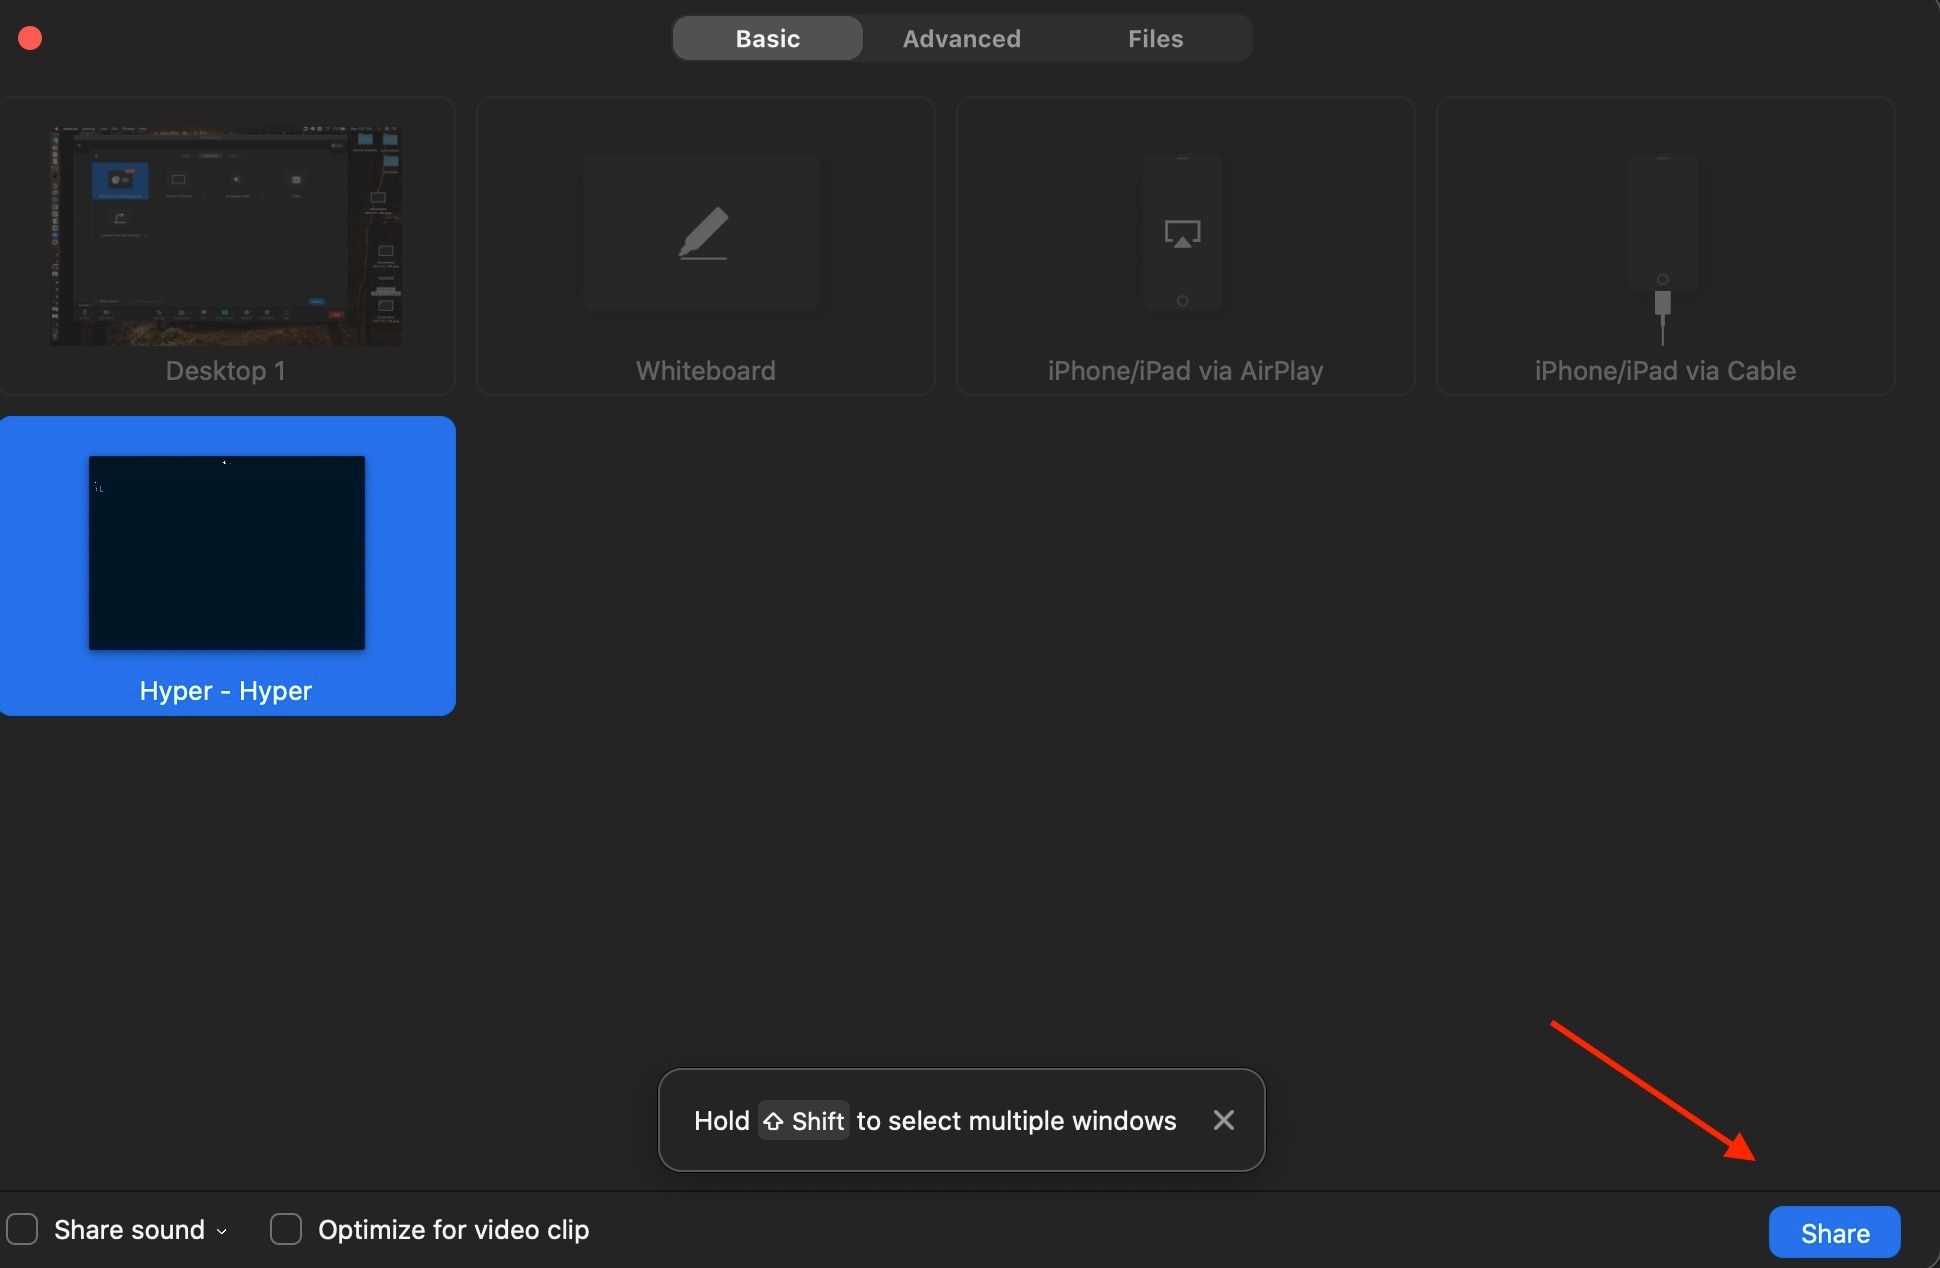
If you're sharing something with sound and you want others in the meeting to hear it, click the 'Share Sound' option at the bottom of the Window.

Finally, click 'Share' at the bottom right hand corner:
You are now broadcasting and others can see what you've chosen to share.
Screen sharing options in Zoom
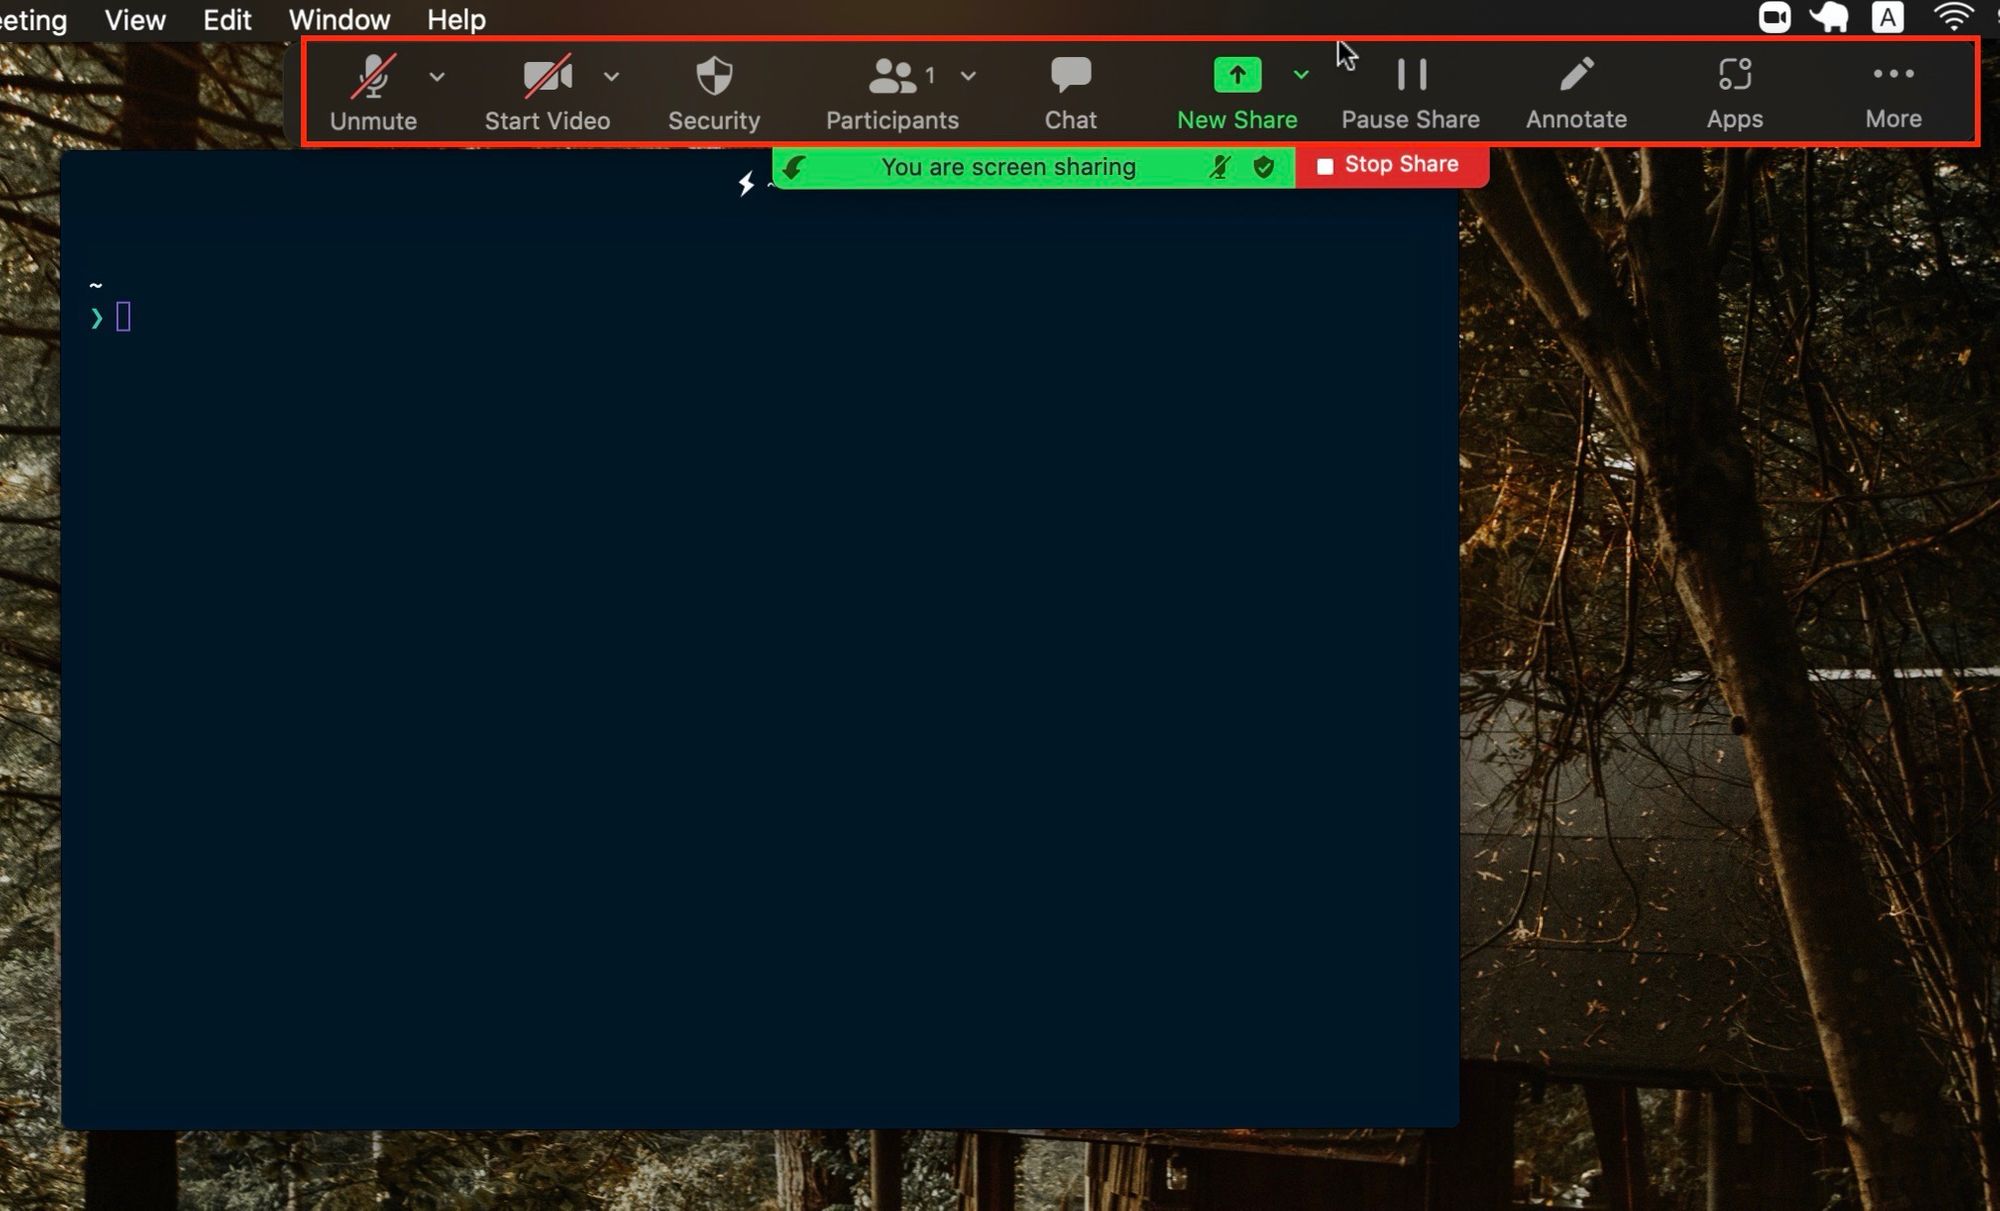
While sharing, different meeting control options will be available at the top of your screen.
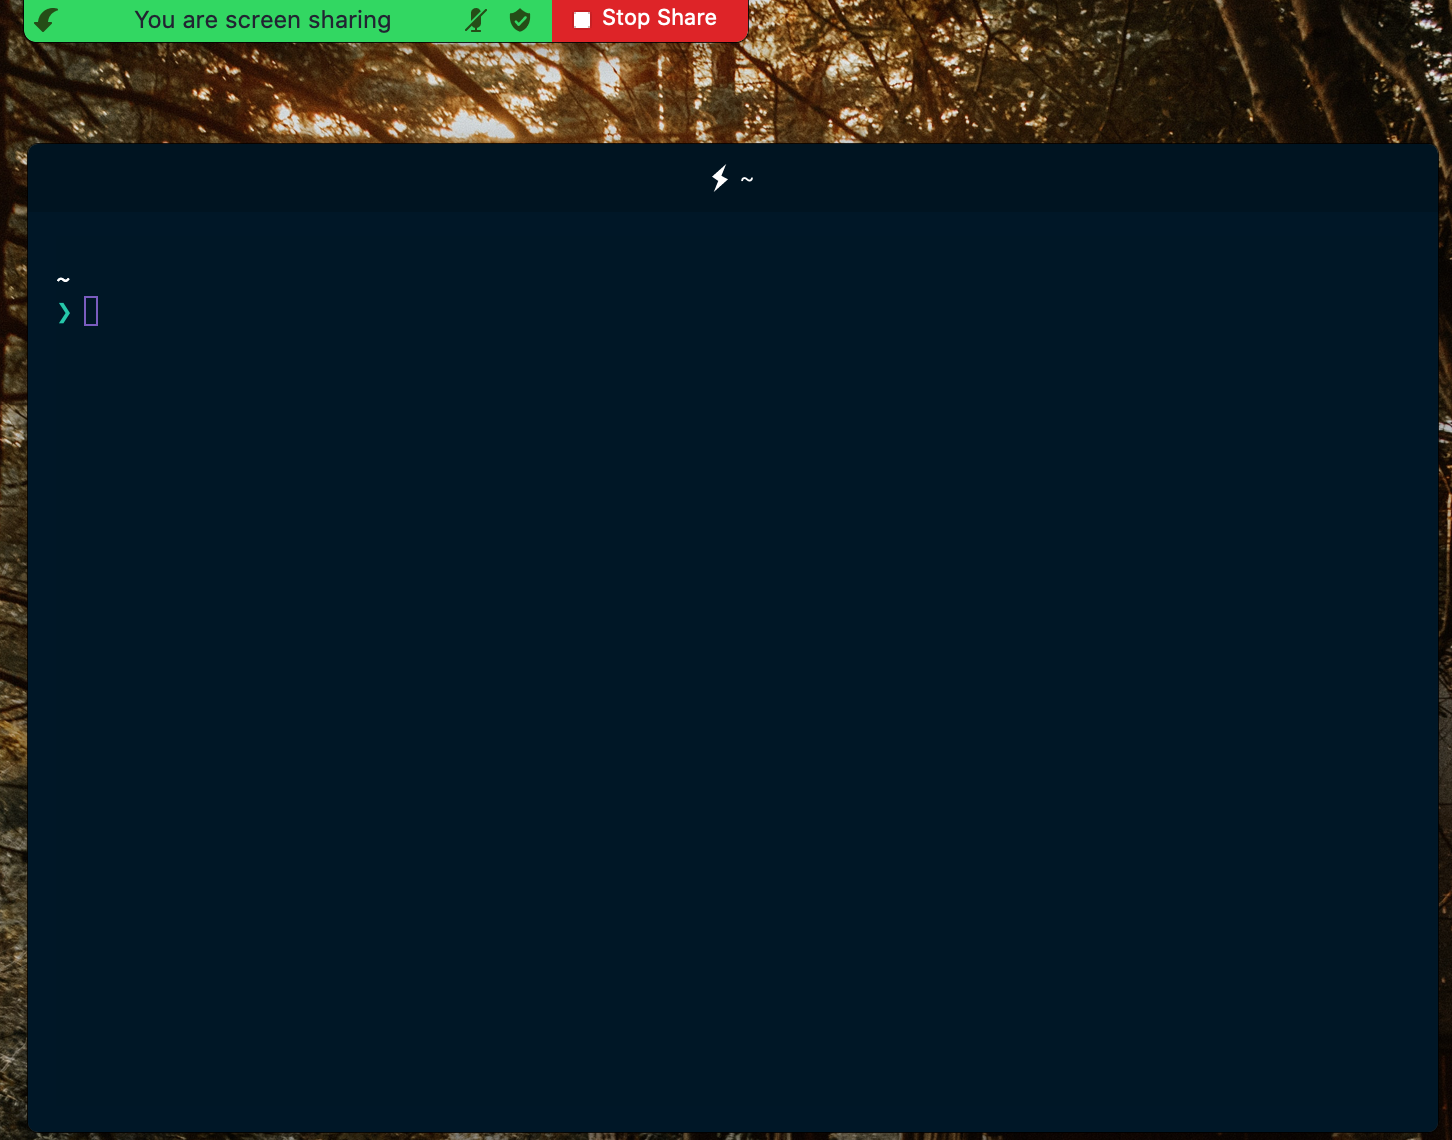
At the most basic level, you'll see a panel in green letting you know that you're screen sharing and that will show if you're muted or not.
On the right, there's a red panel that you can click to stop sharing.
When you hover over those two options, you'll also see more meeting controls at the top of the screen.
You can mute/unmute yourself, turn your camera on or off, view the meeting's participants, share something new, or pause your share for some.
How to share your screen on Zoom – advanced options
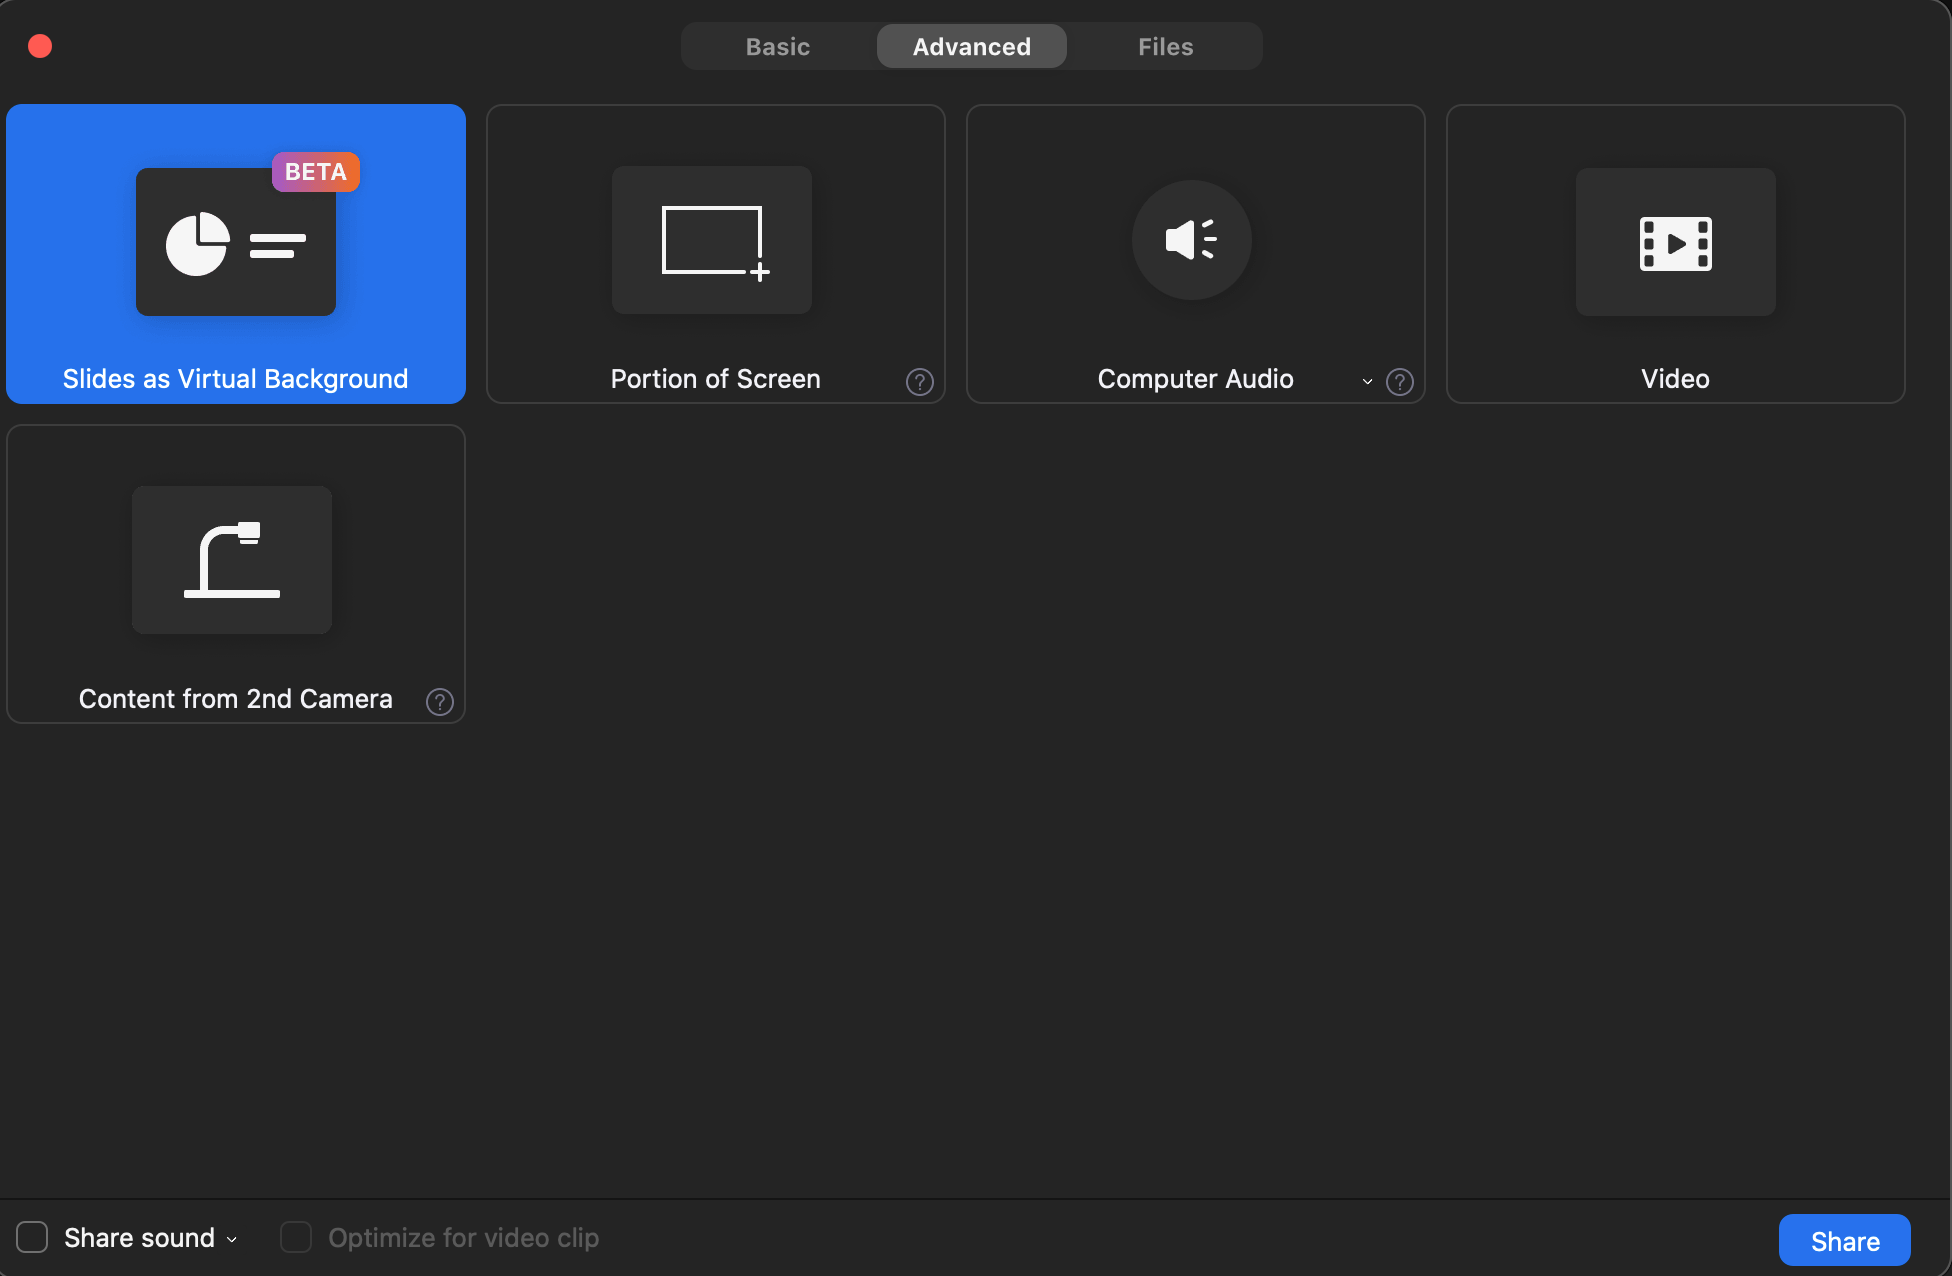
After you've clicked the green 'Share Screen' at the bottom of your meeting's window, you can choose the 'Advanced' tab from the window that pops up.
From there, you have the option to share only a portion of your screen, show slides or a powerpoint presentation as a virtual background, or share a video.
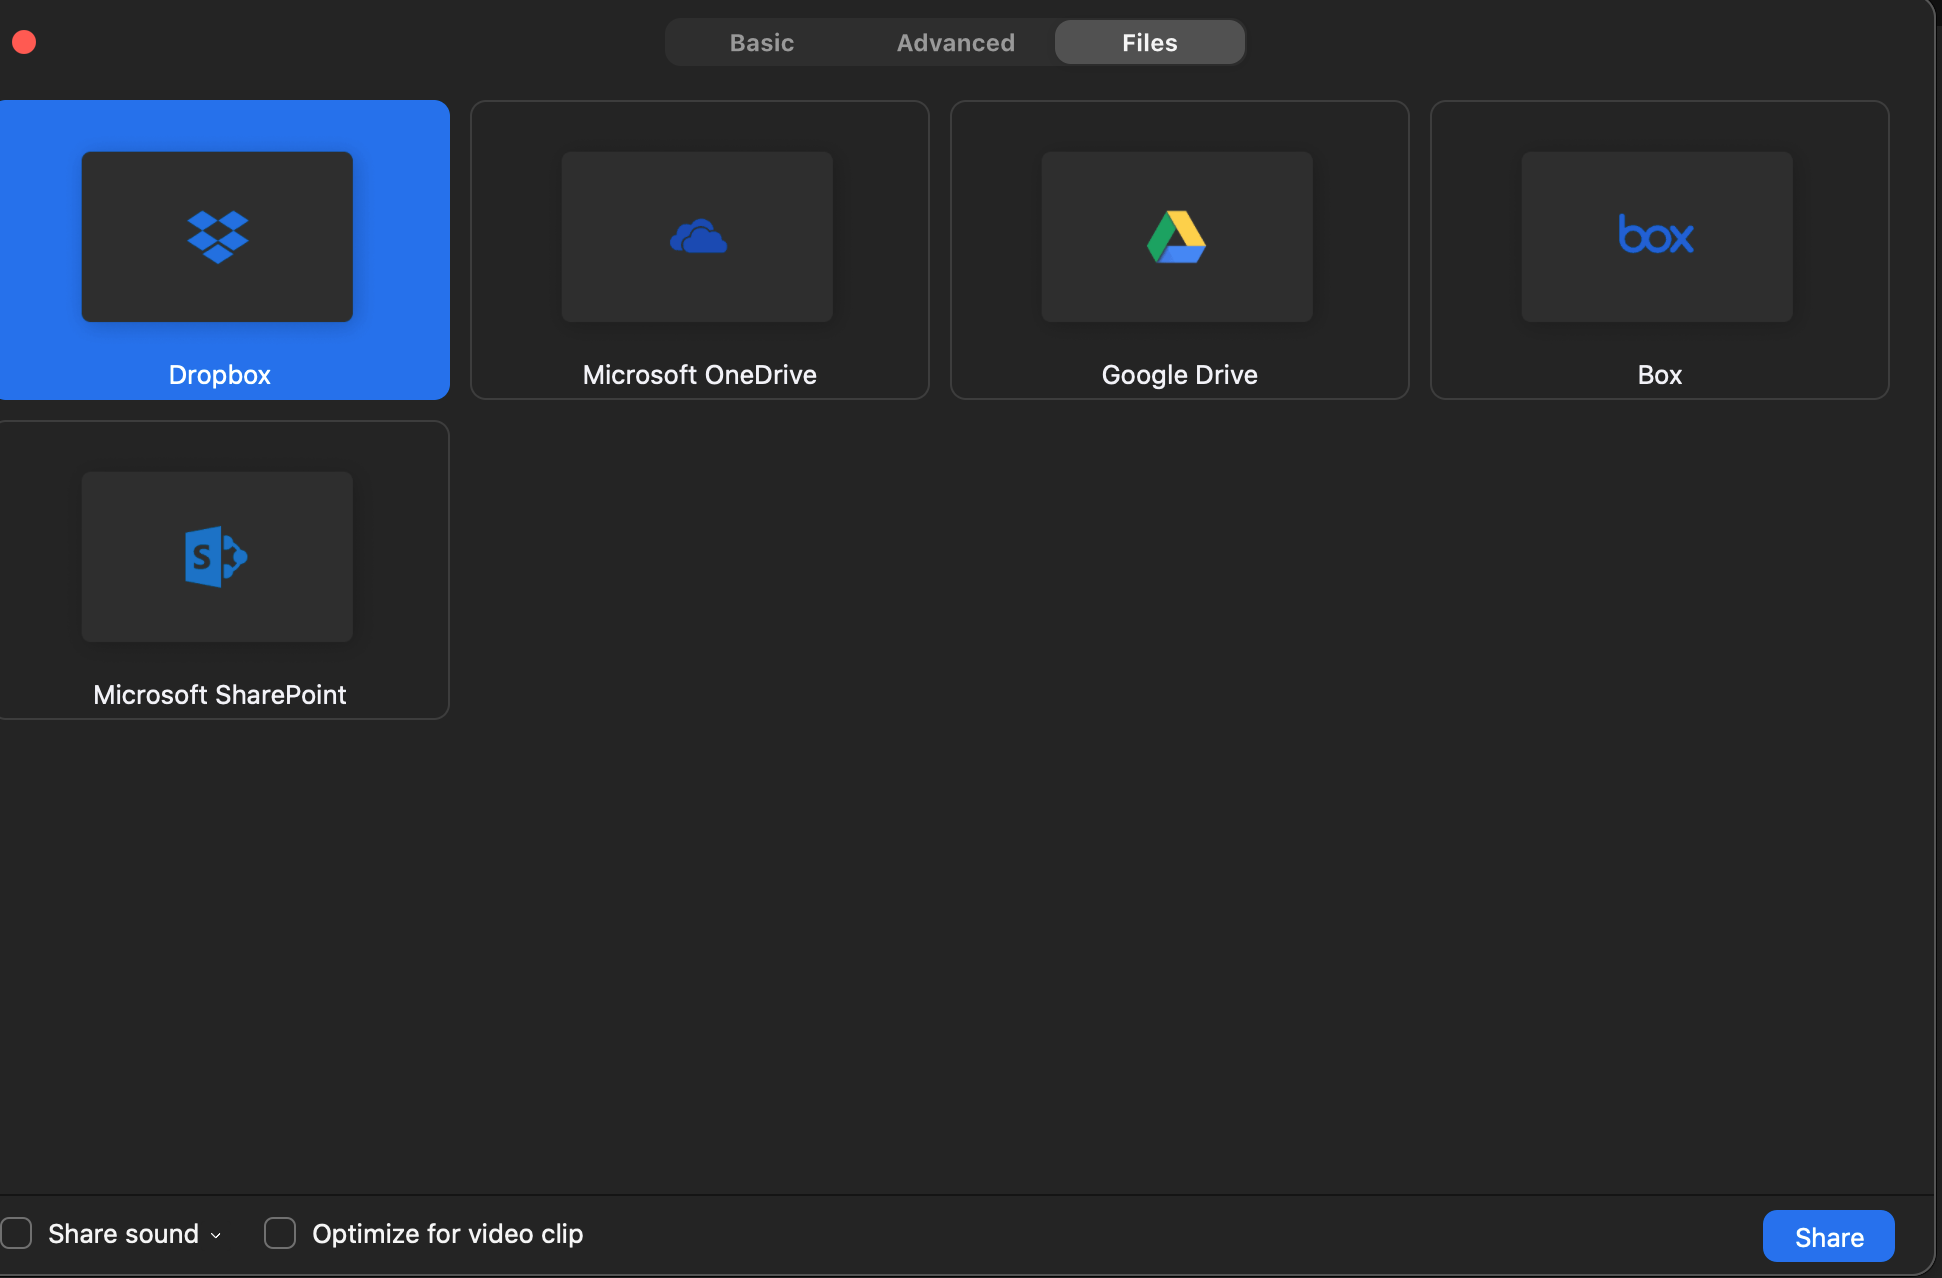
How to share your screen on Zoom – sharing files
You can also share files stored on Dropbox, Google Cloud, or Microsoft SharePoint by selecting the 'Files' tab.
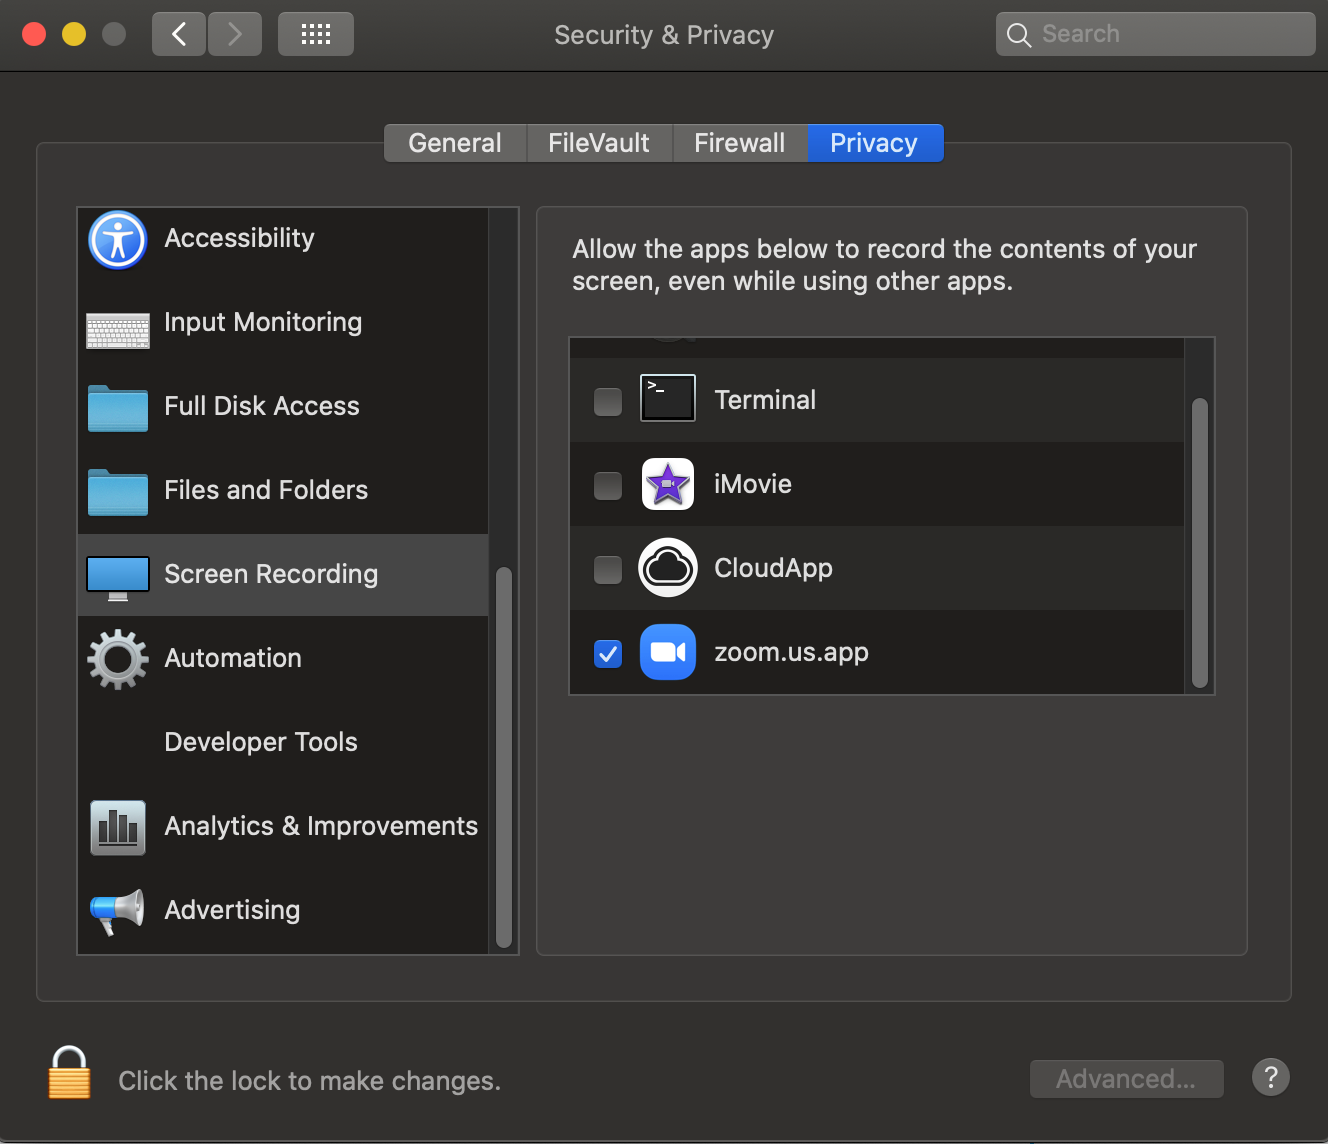
How to share your screen on zoom when using MacOS
Before attempting to share your screen on MacOS, navigate to 'System Preferences' and then 'Security and Privacy'.
In the 'Privacy' tab, on the left hand side, select 'Screen Recording'.
From there, make sure that 'zoom.us.app' is selected.
Thanks for reading! Now you should be able to share your screen in your Zoom meetings.