

Sometimes you might want to compose an email but send it later. Well, did you know that Gmail allows you to schedule up to 100 emails?
In this article, you will learn how to schedule your emails using Gmail. There's no need to install any software or plugins.
What you will learn
- How to schedule an email in Gmail
- How to view or edit a scheduled email in Gmail
- How to cancel a scheduled email in Gmail
How to Schedule an Email in Gmail
Step 1: Log in to your Gmail account.

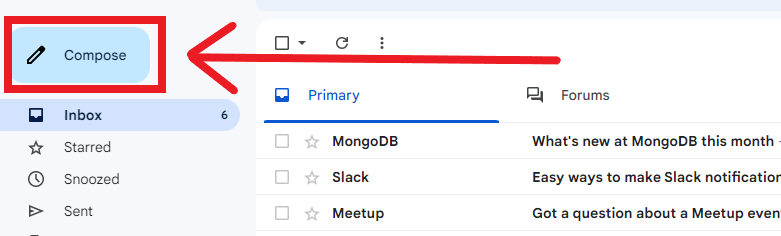
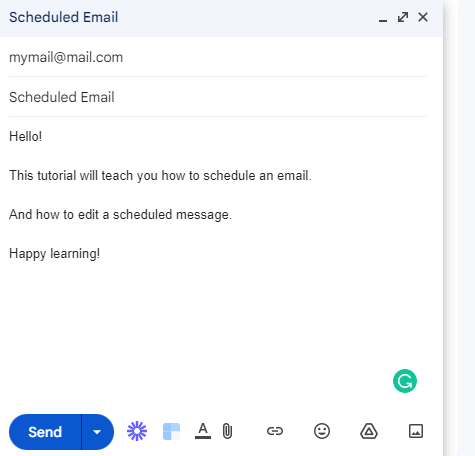
Step 2: Click compose to create your email.
Step 3: Create the email you want to schedule.
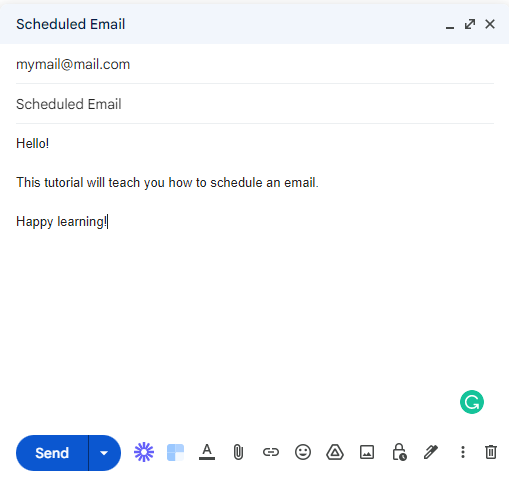
Step 4: Click the Down arrow on the Send button.
Step 5: Click Schedule send.

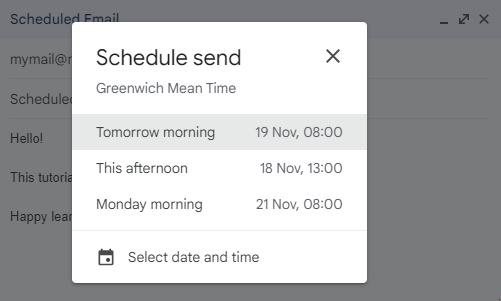
Step 6: The popup modal give you a few options. You can choose one. Or you can create a custom date/time by clicking Select date and time.
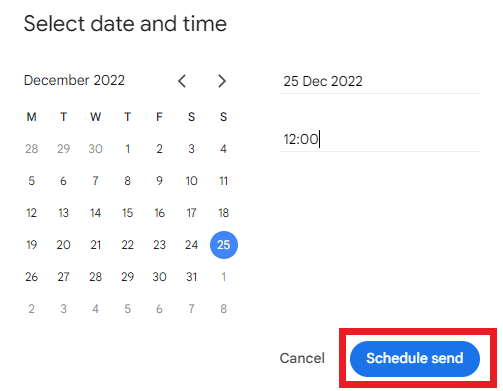
Step 7: Click the Schedule send button.
That's it! Your email is now scheduled. You will see a notification from Gmail (like the one below) confirming a successful schedule.

Next, let's see how you can edit a scheduled mail in Gmail. This can be either editing the content of the mail or changing the scheduled time.
How to Edit a Scheduled Email in Gmail
Assuming you are already logged in to your Gmail, continue with the steps below. If not, first login and then continue with the steps below.
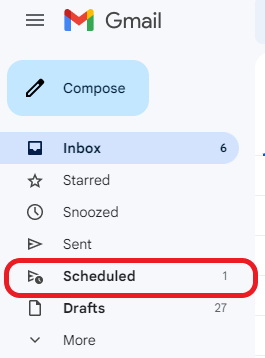
Step 1: To edit a scheduled email, click Scheduled on the left panel.
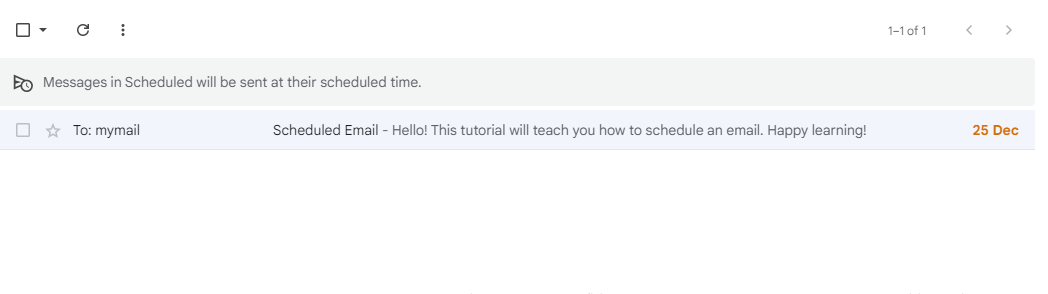
Step 2: You will be presented with a list of your scheduled emails. Select the email you want to edit.
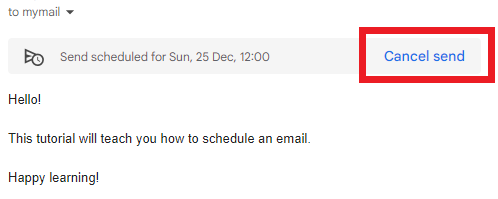
Step 3: Click Cancel send at the top right of your email.

Step 4: Make the changes if you want to edit the content of your email. If you only want to change the scheduled time, move to Step 5.
Step 5: Next, you use the same process you used for the initial schedule.
- Click the down arrow next to the
Sendbutton. - And then click
Schedule send. - Choose a new date and time.
That's it! You've successfully edited the scheduled email.
How to Cancel a Scheduled Email in Gmail
Assuming you are already logged in to your Gmail, continue with the steps below. If not, first login and then continue with the steps below.
Step 1: To cancel a scheduled email, click Scheduled on the left panel.

Step 2: You will be presented with a list of your scheduled emails. Select the email you want to cancel.

Step 3: Click Cancel send at the top right of your email.
Note that cancelling a scheduled email in Gmail does not delete it. Gmail treats it as a draft and adds it to the drafts folder. See the Gmail notification below.

Conclusion
You now know how to do the following.
- Schedule an email in Gmail.
- Edit or change the date/time for a scheduled email.
- Cancel a scheduled email.
You can also check out this freeCodeCamp article on how to batch delete Emails.
Thanks for reading!