
By Thomas Reinecke
Are you looking for a rapid start on playing around with IBMs Cloud? What about taking this opportunity and combining it with some of the latest and greatest technologies for the Web VueJS, FeathersJS and GraphQL? Well then this is a must-read for you to lift-off in less than an hour.
What we’ll do:
- Overview of the app
- create a fresh git repository on GitHub
- initialize the frontend app based on Vue CLI
- initialize the backend app based on FeathersJS CLI
- add GraphQL capabilities to the backend
- test the GraphQL API and publish/subscribe
- add dependencies to the existing frontend app
- create a simple SPA thats calling a GraphQL backend
- deployment to IBM’s Cloud
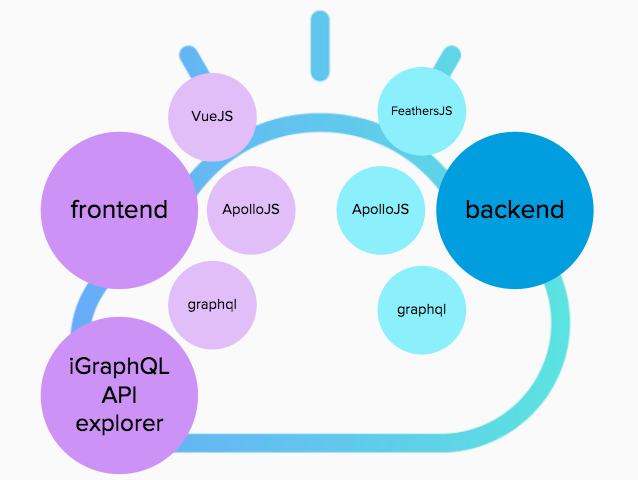
Overview of the App
Create a fresh git repository on GitHub
If you don’t yet have a GitHub account, go to github.com and create it. Create yourself a new repository called “VueAndIBMsCloud” (or whatever name you want). Assuming you’re well able to use a console, use the following code to create your first project commit:
mkdir VueAndIBMsCloud
cd VueAndIBMsCloud
echo "# VueAndIBMsCloud" >> README.md
git init
git add README.md
git commit -m "first commit"
git remote add origin https://github.com/<yourRepo>/VueAndIBMsCloud.git
git push -u origin master
Initialise the frontend app based on Vue CLI
If you need more details to install Vue CLI, work through this article and come back.
Installation - Vue.js
Vue.js - The Progressive JavaScript Framework
vuejs.org
Use the vue-cli to initialize a Progressive Web App (PWA)-based “frontend” project:
npm install -g vue-cli
vue init pwa frontend

? Project name frontend
? Project short name: fewer than 12 characters to not be truncated on homescreens (default: same as name)
? Project description A Vue.js project
? Author thomasreinecke <thomas.reinecke@de.ibm.com>
? Vue build runtime
? Install vue-router? Yes
? Use ESLint to lint your code? No
? Setup unit tests with Karma + Mocha? No
? Setup e2e tests with Nightwatch? No
Now compile the project and run it the very first time (instead of “npm” I recommend to use “yarn”):
cd frontend
yarn
yarn dev
Your frontend application is running at http://localhost:8080
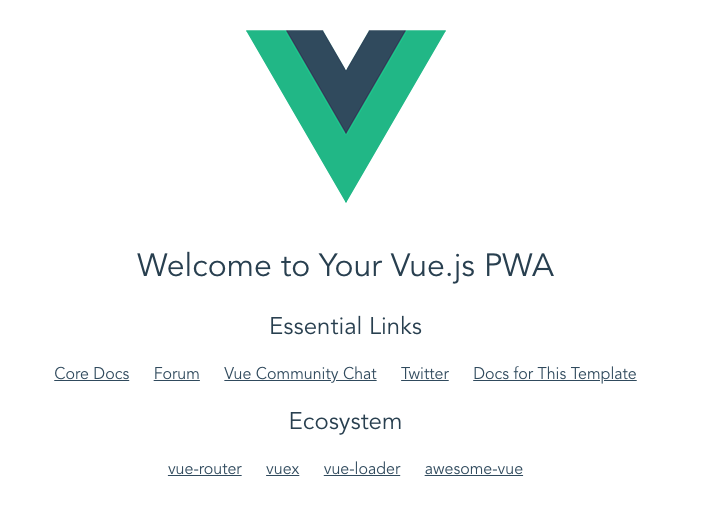
Congratulations, you’ve just created the frontend app based on VueJs.
Initialize backend app based on feathersJS CLI
Use the FeathersJS CLI to initialize the backend project. If you need more details on FeatherJS CLI, use the following link and come back:
feathersjs/cli
cli - The command line interface for scaffolding Feathers applications
github.com
npm install -g @feathersjs/cli
mkdir backend
cd backend
feathers generate app

? Project name backend
? Description
? What folder should the source files live in? src
? Which package manager are you using (has to be installed globally)? Yarn
? What type of API are you making? REST, Realtime via Socket.io

yarn start
Your backend application is running at http://localhost:3030/
Add GraphQL capabilities to the backend
Open Visual Studio Code (or your preferred IDE) > Open… > point it to the folder VueAndIBMsCloud.
Open backend/src/index.html and replace what’s there with the following code:
/* eslint-disable no-console */
const logger = require('winston');
const app = require('./app');
const port = app.get('port');

const createSubscriptionServer = app.get('createSubscriptionServer');

// create subscription server and associate it to the server
const server = app.listen(port, () => createSubscriptionServer(server));

process.on('unhandledRejection', (reason, p) =>
  logger.error('Unhandled Rejection at: Promise ', p, reason)
);

server.on('listening', () =>
  logger.info('Feathers application started on http://%s:%d',
  app.get('host'), port)
);
Into the backend/package.json, add the following additional dependencies for GraphQL:
"express-session": "1.15.6",
"graphql": "0.12.3",
"graphql-subscriptions": "0.5.6",
"graphql-tools": "2.18.0",
"subscriptions-transport-ws": "0.9.5",
"apollo-server-express": "1.3.2",
Run “yarn” on the command line to pull the additional libraries into your backend project. Now we’re ready to create the Graphql service with some more help of the feather CLI:
feathers generate service

? What kind of service is it? A custom service
? What is the name of the service? graphql
? Which path should the service be registered on? /graphql
You’ll realize a new directory was created: services/graphql.
We’re going to create the GraphQL service a little bit differently than the featherJS service template. Go ahead and delete the graphql.hooks.js and graphql.class.js.
rm services/graphql/graphql.hooks.js
rm services/graphql/graphql.class.js
Update services/graphql/graphql.service.js with the following code:
const { graphqlExpress, graphiqlExpress } = require('apollo-server-express');
const { execute, subscribe } = require('graphql');
const { SubscriptionServer } = require('subscriptions-transport-ws');
const { makeExecutableSchema } = require('graphql-tools');
const TypeDefinitions = require('./graphql.typeDefs');
const Resolvers = require('./graphql.resolvers');

module.exports = function () {
  const app = this;
  const port = app.get('port');
  const schema = makeExecutableSchema({
    typeDefs: TypeDefinitions,
    resolvers: Resolvers.call(app)
  });

  // provide endpoint to graphql for the apollo graphql client lib
  app.use('/graphql', graphqlExpress((req) => {
    return {
      schema,
      context: {}
    };
  }));

  // provide endpoint to graphiql : the API explorer module
  app.use('/graphiql', graphiqlExpress({
    endpointURL: '/graphql',
    subscriptionsEndpoint: `ws://localhost:${port}/subscriptions`
  }));

  // define the API server here
  app.set('createSubscriptionServer', function
    createSubscriptionServer(server) {
    return new SubscriptionServer({
      execute, subscribe, schema,
      onConnect: () => { console.log('Client Connected'); },
      onDisconnect: () => { console.log('Client Disconnected'); }
    },
    {
      server, path: '/subscriptions',
    });
  });
};
Now create GraphQL typedef and resolvers: create two new files under services/graphql: graphql.typeDefs.js and graphql.resolvers.js and add the following code to it:
graphql.resolvers.js
const { PubSub } = require('graphql-subscriptions');
const pubsub = new PubSub();
const ITEM_ADDED = 'ITEM_ADDED';

module.exports = function () {
  return {
    Query: {
      Welcome (root, { id }, context) {
        return 'Welcome to VueAndIBMsCLoud example';
      },
      Items (root, { id }, context) {
        return [
          {
            id: 1,
            title: 'Item 1',
            status: 'open',
            created_at: new Date()
          },
          {
            id: 2,
            title: 'Item 2',
            status: 'closed',
            created_at: new Date()
          }
        ];
      }
    },
    Mutation: {
      addItem(root, { id, title, status }, context) {
        const item = {
          id,
          title,
          status,
          created_at: new Date()
        };
        pubsub.publish(ITEM_ADDED, { itemAdded: item });
        return item;
      },
    },
    Subscription: {
      itemAdded: {
        subscribe: () => pubsub.asyncIterator(ITEM_ADDED),
      }
    }
  };
};
graphql.typeDefs.js
const typeDefinitions = `
  type Item {
    id: ID!
    title: String
    status: String
    created_at: String
  }

  type Query {
    Welcome: String,
    Items: [Item]
  }

  type Mutation {
    addItem(id: ID!, title: String!, status: String): Item
  }

  type Subscription {
    itemAdded: Item
  }

  schema {
    query: Query
    mutation: Mutation
    subscription: Subscription
  }
`;

module.exports = typeDefinitions;
Almost there. Let’s add a start script to package.json into the ‘scripts’ section:
"dev": "NODE_ENV=development node src/",
And now run ‘yarn dev’. You should see a message like:
info: Feathers application started on http://localhost:3030
Test the GraphQL API and publish/subscribe
Try graphiQL as API explorer module http://localhost:3030/graphiq and run a first test like this:
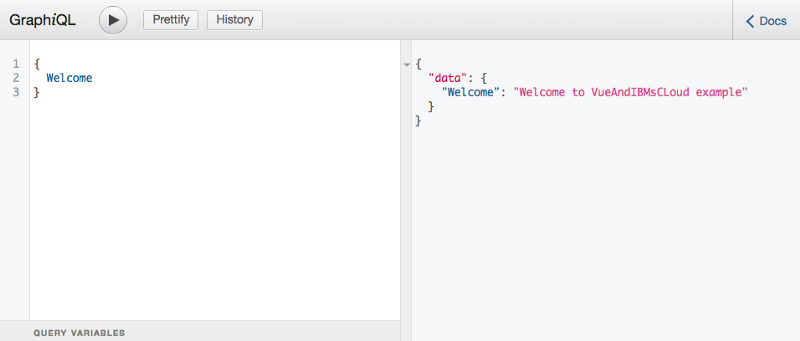
Congratulations, you have included a GraphQL API into your project!
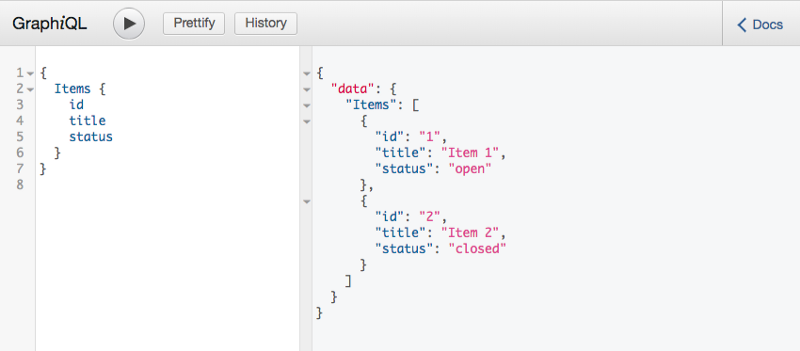
Now let’s test some more complex data fetching:
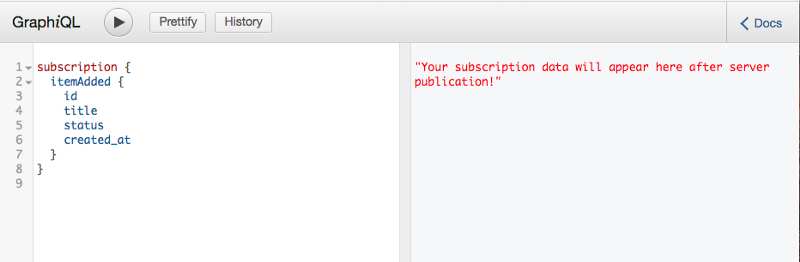
And now let’s test subscription. Open graphiql on a 2nd browser window and setup subscription like this and press the “play” button:
Now back to the first graphiql browser window, enter the following mutation which allows you to add an item to Items array. Since we’ve setup publish/subscribe, we expect to push changes to the Items array to all subscribers:
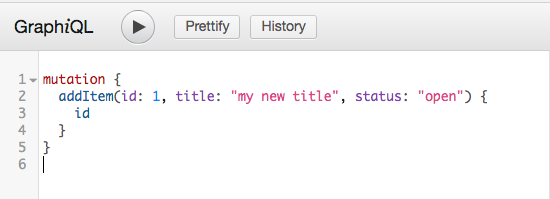
Place both browser windows next to each other and press “Play” on the first window. You’ll realize that the backend server is going to push the data change into your 2nd graphiql window:

How cool is that? Congrats, you’ve also setup publish/subscribe based on graphiql on your project.
Add dependencies to the frontend app
Into the frontend/package.json, add the following additional dependencies to include Graphql, ApolloJS and Subscription support (via Websockets):
"dependencies": {
  "apollo-cache-inmemory": "1.1.5",
  "apollo-client": "2.2.0",
  "apollo-link": "1.0.7",
  "apollo-link-http": "1.3.2",
  "apollo-link-ws": "1.0.4",
  "apollo-utilities": "1.0.4",
  "graphql": "0.12.3",
  "graphql-tag": "2.6.1",
  "subscriptions-transport-ws": "0.9.5",
  "vue": "^2.5.2",
  "vue-apollo": "3.0.0-alpha.3",
  "vue-router": "^3.0.1"
}
Run “yarn” to pull the dependencies into your frontend project.
cd frontend
yarn
Edit frontend/main.js and replace the code with the following:
import Vue from 'vue'
import App from './App'
import router from './router'

import { ApolloClient } from 'apollo-client'
import { HttpLink } from 'apollo-link-http'
import { InMemoryCache } from 'apollo-cache-inmemory'
import { split } from 'apollo-link'
import { WebSocketLink } from 'apollo-link-ws'
import { getMainDefinition } from 'apollo-utilities'

import VueApollo from 'vue-apollo'

// add unified ressource identifiers for Dev and Prod (IBM Cloud)
const uris = {
  dev: 'localhost:3030',
  prod: 'VueAndIBMsCloud.mybluemix.net'
}

// setup httpLink depending on environment
const httpLink = new HttpLink({
  uri: (window.location.hostname === 'localhost') ? `http://${uris.dev}/graphql` : `https://${uris.prod}/graphql`
  })

// setup web socket link depending on environment
const wsLink = new WebSocketLink({
  uri: (window.location.hostname === 'localhost') ? `ws://${uris.dev}/subscriptions` : `wss://${uris.prod}/subscriptions`,
  options: {
    reconnect: true
  }
})

const link = split(
  ({ query }) => {
    const { kind, operation } = getMainDefinition(query)
    return kind === 'OperationDefinition' && operation === 'subscription'
  },
  wsLink,
  httpLink
)

// define the apolloClient
const apolloClient = new ApolloClient({
  link,
  cache: new InMemoryCache(),
  connectToDevTools: true
})

Vue.use(VueApollo)

const apolloProvider = new VueApollo({
  defaultClient: apolloClient
})

Vue.config.productionTip = false

/* eslint-disable no-new */
new Vue({
  el: '#app',
  apolloProvider,
  router,
  render: h => h(App)
})
This will prepare your frontend app to use ApolloClient as Library to provide GraphQL Query, Mutation and Subscription support. On the uris object, replace VueAndIBMsCloud.mybluemix.net with your productive deployment target of the backend app.
Add UI calling the GraphQL backend
In your frontend sources, open src/App.vue and replace it with the following code:
<template>
  <div id="app">
    <h1>{{ welcome }}</h1>
    <ul>
      <li v-for="(item) of items" v-bind:key="item.id">{{item.title + ' - ' + item.status}}</li>
    </ul>
  </div>
</template>

<script>
import gql from 'graphql-tag'

export default {
  name: 'app',
  data () {
    return {
      welcome: '',
      items: []
    }
  },
  mounted () {
    this.$apollo.query({
      query: gql`query {
        Welcome
        Items {
          id
          title
          status
        }
      }`
    }).then(({data}) => {
      this.welcome = data.Welcome
      this.items = data.Items
    }).catch((error) => {
      console.error(error)
    })
  },
}
</script>

<style>
body {
  margin: 50px;
}

#app {
  font-family: 'Avenir', Helvetica, Arial, sans-serif;
  -webkit-font-smoothing: antialiased;
  -moz-osx-font-smoothing: grayscale;
  color: #2c3e50;
}

main {
  text-align: center;
  margin-top: 40px;
}

header {
  margin: 0;
  height: 56px;
  padding: 0 16px 0 24px;
  background-color: #35495E;
  color: #ffffff;
}

header span {
  display: block;
  position: relative;
  font-size: 20px;
  line-height: 1;
  letter-spacing: .02em;
  font-weight: 400;
  box-sizing: border-box;
  padding-top: 16px;
}
</style>
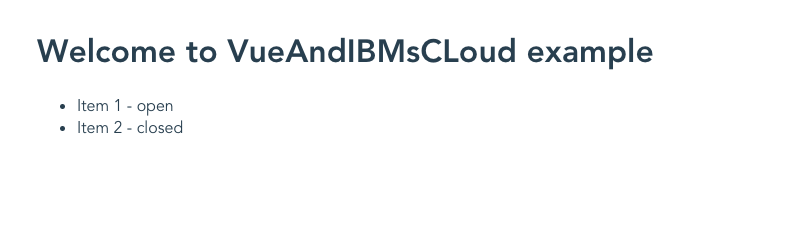
Save and run yarn dev to start it. You should now see the new landing page of your frontend app (which does not yet look super exciting, but this is the first time we see data from your graphQL backend in your frontend — isn’t that cool?)
Now since we have our e2e integration between our frontend and graphQL backend, let’s push it to IBMs cloud and run it there.
Preparing IBM Cloud for Deployment
- setup Bluemix CLI on your desktop: https://console.bluemix.net/docs/cli/reference/bluemix_cli/get_started.html#getting-started
- login to IBM’s cloud: bx login
- set target and space context in IBMs Cloud interactively (go to https://console.bluemix.net/dashboard/apps/ to inspect your options): bx target — cf
You now should see this:
API endpoint:     <your endpoint> (<API version>)
Region:           <your region>
User:             <your username>
Account:          <your account>
Resource group:   default
Org:              <your org>
Space:            <your space>
You have now set the deployment scope for your two apps.
Deployment of the Backend to Bluemix
On the backend project, create a new manifest.yml file and enter the following contents into it:
applications:
  - path: .
    memory: 1024M
    instances: 1
    domain: eu-de.mybluemix.net
    name: vueAndIbmsCloud-api
    host: vueAndIbmsCloud-api
    disk_quota: 1024M
Add the following deploy script to package.json to the “scripts” section:
"deploy": "bx cf push vueAndIbmsCloud-api"
(You have to change that app name to make it unique, e.g. append some index of your choice on manifest.yml and package.json.)
Install BlueMix CLI
https://console.bluemix.net/docs/cli/index.html
https://developer.ibm.com/courses/labs/1-install-bluemix-command-line-interface-cli-dwc020/
Run yarn deploy, and this will deploy your backend app to the IBM Cloud.
Deployment of the Frontend to Bluemix
We deploy the frontend app based on an nginx server, which provides a better performance (in responsetime and throughput) than a node server.
Depending on what name you picked as your backend deployment target, let’s make sure it’s properly reflected in frontend/src/main.js. In the uris object, replace ‘vueandibmscloud-api.eu-de.mybluemix.net’ with the URL where your backend server is. You can inspect the URL in the Bluemix console > click into your app > view App URL.
On the frontend application root folder, create the manifest.yml and include the following contents:
applications:
  - path: .
    memory: 1024M
    instances: 1
    domain: mybluemix.net
    name: vueAndIbmsCloud
    host: vueAndIbmsCloud
    disk_quota: 1024M
    buildpack: staticfile_buildpack
Add the following deploy script to package.json to the “scripts” section:
"deploy": "npm run build; cp manifest.yml dist/manifest.yml; cd dist; bx cf push vueAndIbmsCloud"
(You have to change that app name to make it unique, e.g. append some index of your choice on manifest.yml and package.json.)
Run yarn deploy, and this will deploy your frontend app to the IBM Cloud.
Congratulations :) You can now use your frontend app on IBM’s Cloud.
Find the sources at GitHub: https://github.com/thomasreinecke/VueAndIBMsCloud