

PHP is an incredibly popular programming language.
Statistics say it’s used by 80% of all websites. It’s the language that powers WordPress, the widely used content management system for websites.
And it also powers a lot of different frameworks that make Web Development easier, like Laravel. Speaking of Laravel, it may be one of the most compelling reasons to learn PHP these days.
Why Learn PHP?
PHP is quite a polarizing language. Some people love it, and some people hate it. If we move a step above the emotions and look at the language as a tool, PHP has a lot to offer.
Sure it’s not perfect. But let me tell you – no language is.
In this handbook, I’m going to help you learn PHP.
This book is a perfect introduction if you’re new to the language. It’s also perfect if you’ve done “some PHP” in the past and you want to get back to it.
I’ll explain modern PHP, version 8+.
PHP has evolved a lot in the last few years. So if the last time you tried it was PHP 5 or even PHP 4, you’ll be surprised at all the good things that PHP now offers.
Let’s go!
Here's what we'll cover in this handbook:
- Introduction to PHP
- What Kind of Language is PHP?
- How to Setup PHP
- How to Code Your First PHP Program
- PHP Language Basics
- How to Work with Strings in PHP
- How to Use Built-in Functions for Numbers in PHP
- How Arrays Work in PHP
- How Conditionals Work in PHP
- How Loops Work in PHP
- How Functions Work in PHP
- How to Loop Through Arrays with
map(),filter(), andreduce()in PHP - Object Oriented Programming in PHP
- How to Include Other PHP Files
- Useful Constants, Functions and Variables for Filesystem in PHP
- How to Handle Errors in PHP
- How to Handle Exceptions in PHP
- How to Work with Dates in PHP
- How to Use Constants and Enums in PHP
- How to Use PHP as a Web App Development Platform
- How to Use Composer and Packagist
- How to Deploy a PHP Application
- Conclusion
Note that you can get a PDF, ePub, or Mobi version of this handbook for easier reference, or for reading on your Kindle or tablet.
Introduction to PHP
PHP is a programming language that many devs use to create Web Applications, among other things.
As a language, it had a humble beginning. It was first created in 1994 by Rasmus Lerdorf to build his personal website. He didn’t know at the time it would eventually become one of the most popular programming languages in the world. It became popular later on, in 1997/8, and exploded in the 2000s when PHP 4 landed.
You can use PHP to add a little interactivity to an HTML page.
Or you can use it as a Web Application engine that creates HTML pages dynamically and sends them to the browser.
It can scale to millions of page views.
Did you know Facebook is powered by PHP? Ever heard of Wikipedia? Slack? Etsy?
What Kind of Language is PHP?
Let’s get into some technical jargon.
Programming languages are divided into groups depending on their characteristics. For example interpreted/compiled, strongly/loosely typed, dynamically/statically typed.
PHP is often called a “scripting language” and it’s an interpreted language. If you’ve used compiled languages like C or Go or Swift, the main difference is that you don’t need to compile a PHP program before you run it.
Those languages are compiled and the compiler generates an executable program that you then run. It’s a 2-steps process.
The PHP interpreter is responsible for interpreting the instructions written in a PHP program when it’s executed. It’s just one step. You tell the interpreter to run the program. It's a completely different workflow.
PHP is a dynamically typed language. The types of variables are checked at runtime, rather than before the code is executed as happens for statically typed languages. (These also happen to be compiled – the two characteristics often go hand in hand.)
PHP is also loosely (weakly) typed. Compared to strongly typed languages like Swift, Go, C or Java, you don’t need to declare the types of your variables.
Being interpreted and loosely/dynamically typed will make bugs harder to find before they happen at runtime.
In compiled languages, you can often catch errors at compile time, something that does not happen in interpreted languages.
But on the other hand, an interpreted language has more flexibility.
Fun fact: PHP is written internally in C, a compiled and statically typed language.
In its nature, PHP is similar to JavaScript, another dynamically typed, loosely typed, and interpreted language.
PHP supports object-oriented programming, and also functional programming. You can use it as you prefer.
How to Setup PHP
There are many ways to install PHP on your local machine.
The most convenient way I’ve found to install PHP locally is to use MAMP.
MAMP is a tool that’s freely available for all the Operating Systems – Mac, Windows and Linux. It is a package that gives you all the tools you need to get up and running.
PHP is run by a HTTP Server, which is responsible for responding to HTTP requests, the ones made by the browser. So you access a URL with your browser, Chrome or Firefox or Safari, and the HTTP server responds with some HTML content.
The server is typically Apache or NGINX.
Then to do anything non-trivial you’ll need a database, like MySQL.
MAMP is a package that provides all of that, and more, and gives you a nice interface to start/stop everything at once.
Of course, you can set up each piece on its own if you like, and many tutorials explain how to do that. But I like simple and practical tools, and MAMP is one of those.
You can follow this handbook with any kind of PHP installation method, not just MAMP.
That said, if you don’t have PHP installed yet and you want to use MAMP, go to https://www.mamp.info and install it.
The process will depend on your operating system, but once you’re done with the installation, you will have a “MAMP” application installed.
Start that, and you will see a window similar to this:
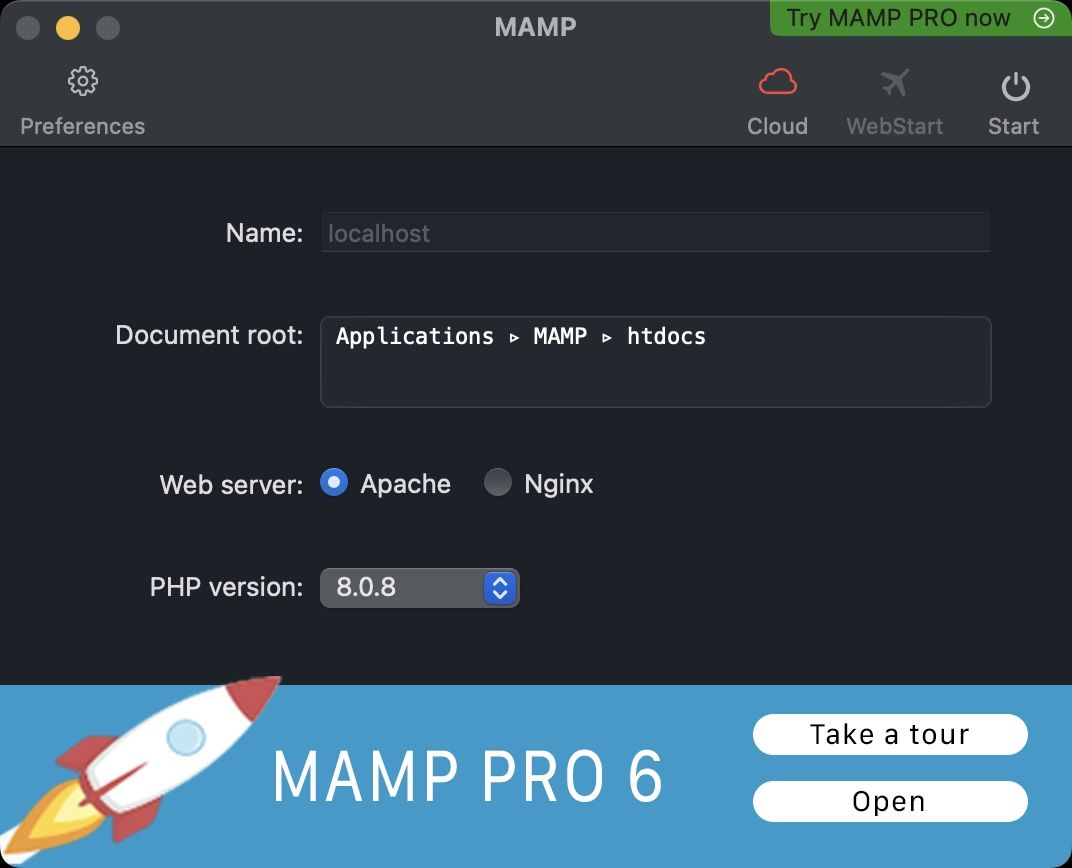
Make sure the PHP version selected is the latest available.
At the time of writing MAMP lets you pick 8.0.8.
NOTE: I noticed MAMP has a version that’s a bit behind, not the latest. You can install a more recent version of PHP by enabling the MAMP PRO Demo, then install the latest release from the MAMP PRO settings (in my case it was 8.1.0). Then close it and reopen MAMP (non-pro version). MAMP PRO has more features so you might want to use it, but it’s not necessary to follow this handbook.
Press the Start button at the top right. This will start the Apache HTTP server, with PHP enabled, and the MySQL database.
Go to the URL http://localhost:8888 and you will see a page similar to this:
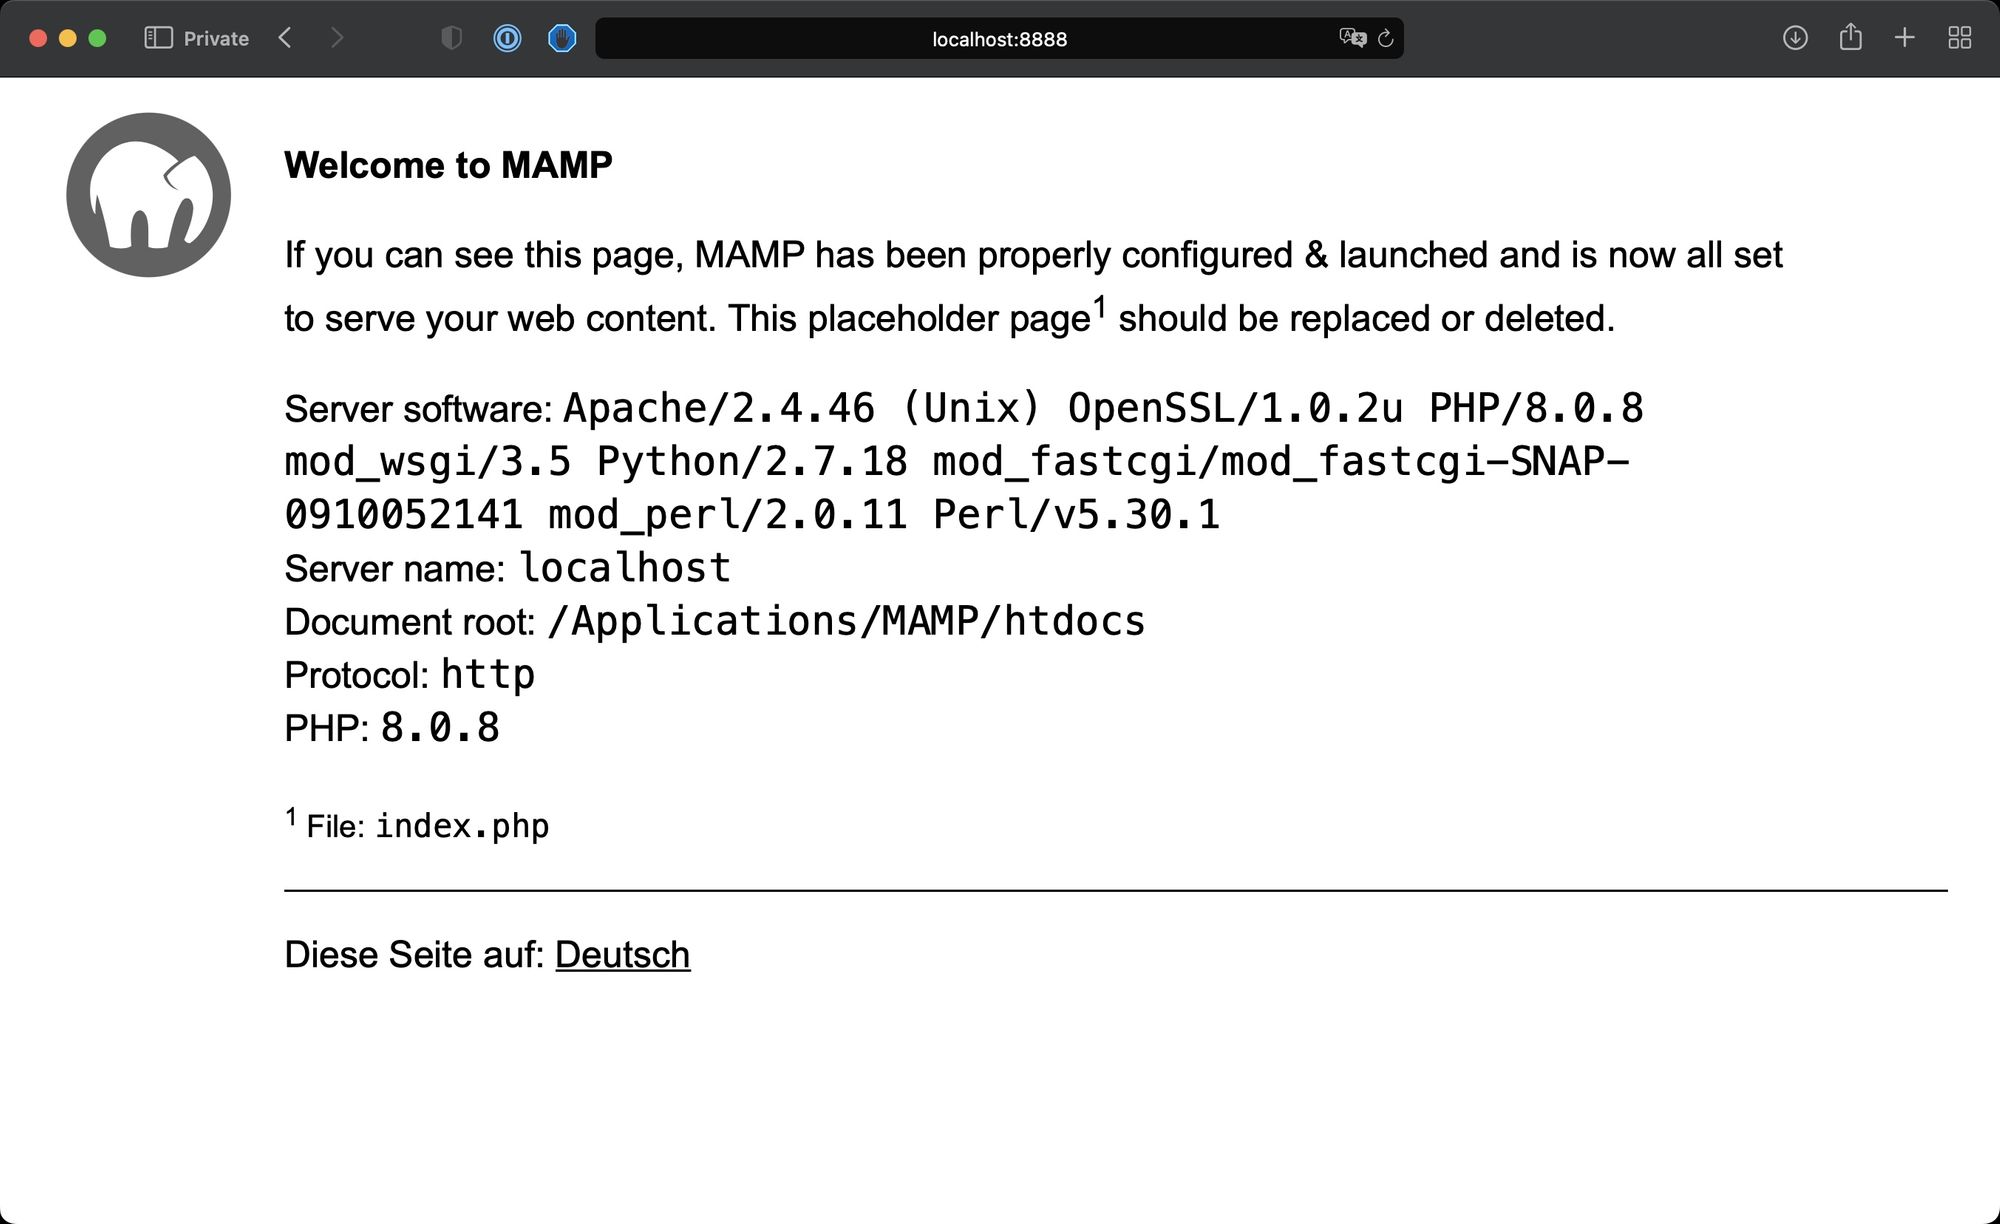
We’re ready to write some PHP!
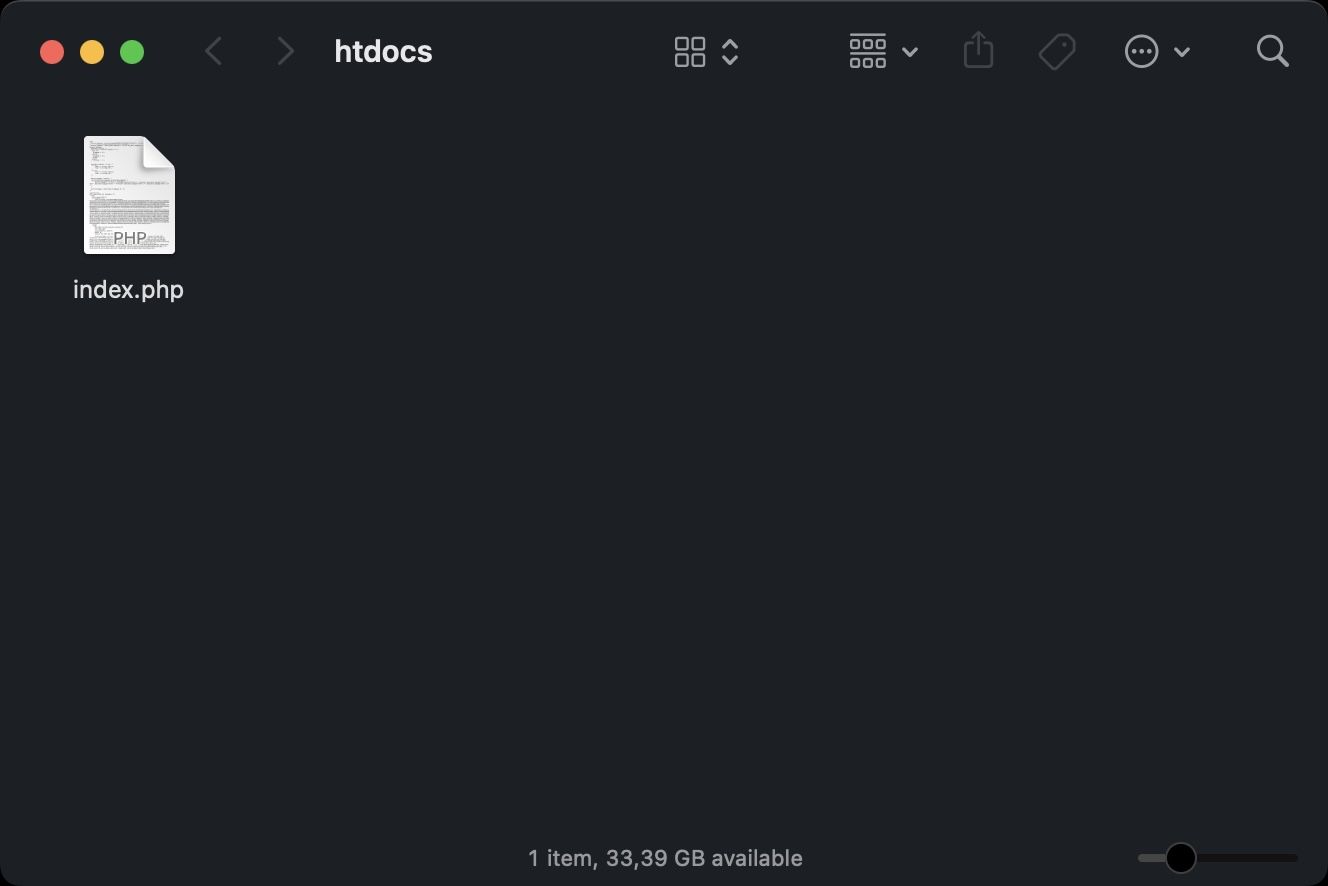
Open the folder listed as “Document root”. If you're using MAMP on a Mac it’s by default /Applications/MAMP/htdocs.
On Windows it’s C:\MAMP\htdocs.
Yours might be different depending on your configuration. Using MAMP you can find it in the user interface of the application.
In there, you will find a file named index.php.
That is responsible for printing the page shown above.
How to Code Your First PHP Program
When learning a new programming language we have this tradition of creating a “Hello, World!” application. Something that prints those strings.
Make sure MAMP is running, and open the htdocs folder as explained above.
Open the index.php file in a code editor.
I recommend using VS Code, as it’s a very simple and powerful code editor. You can check out https://flaviocopes.com/vscode/ for an introduction.
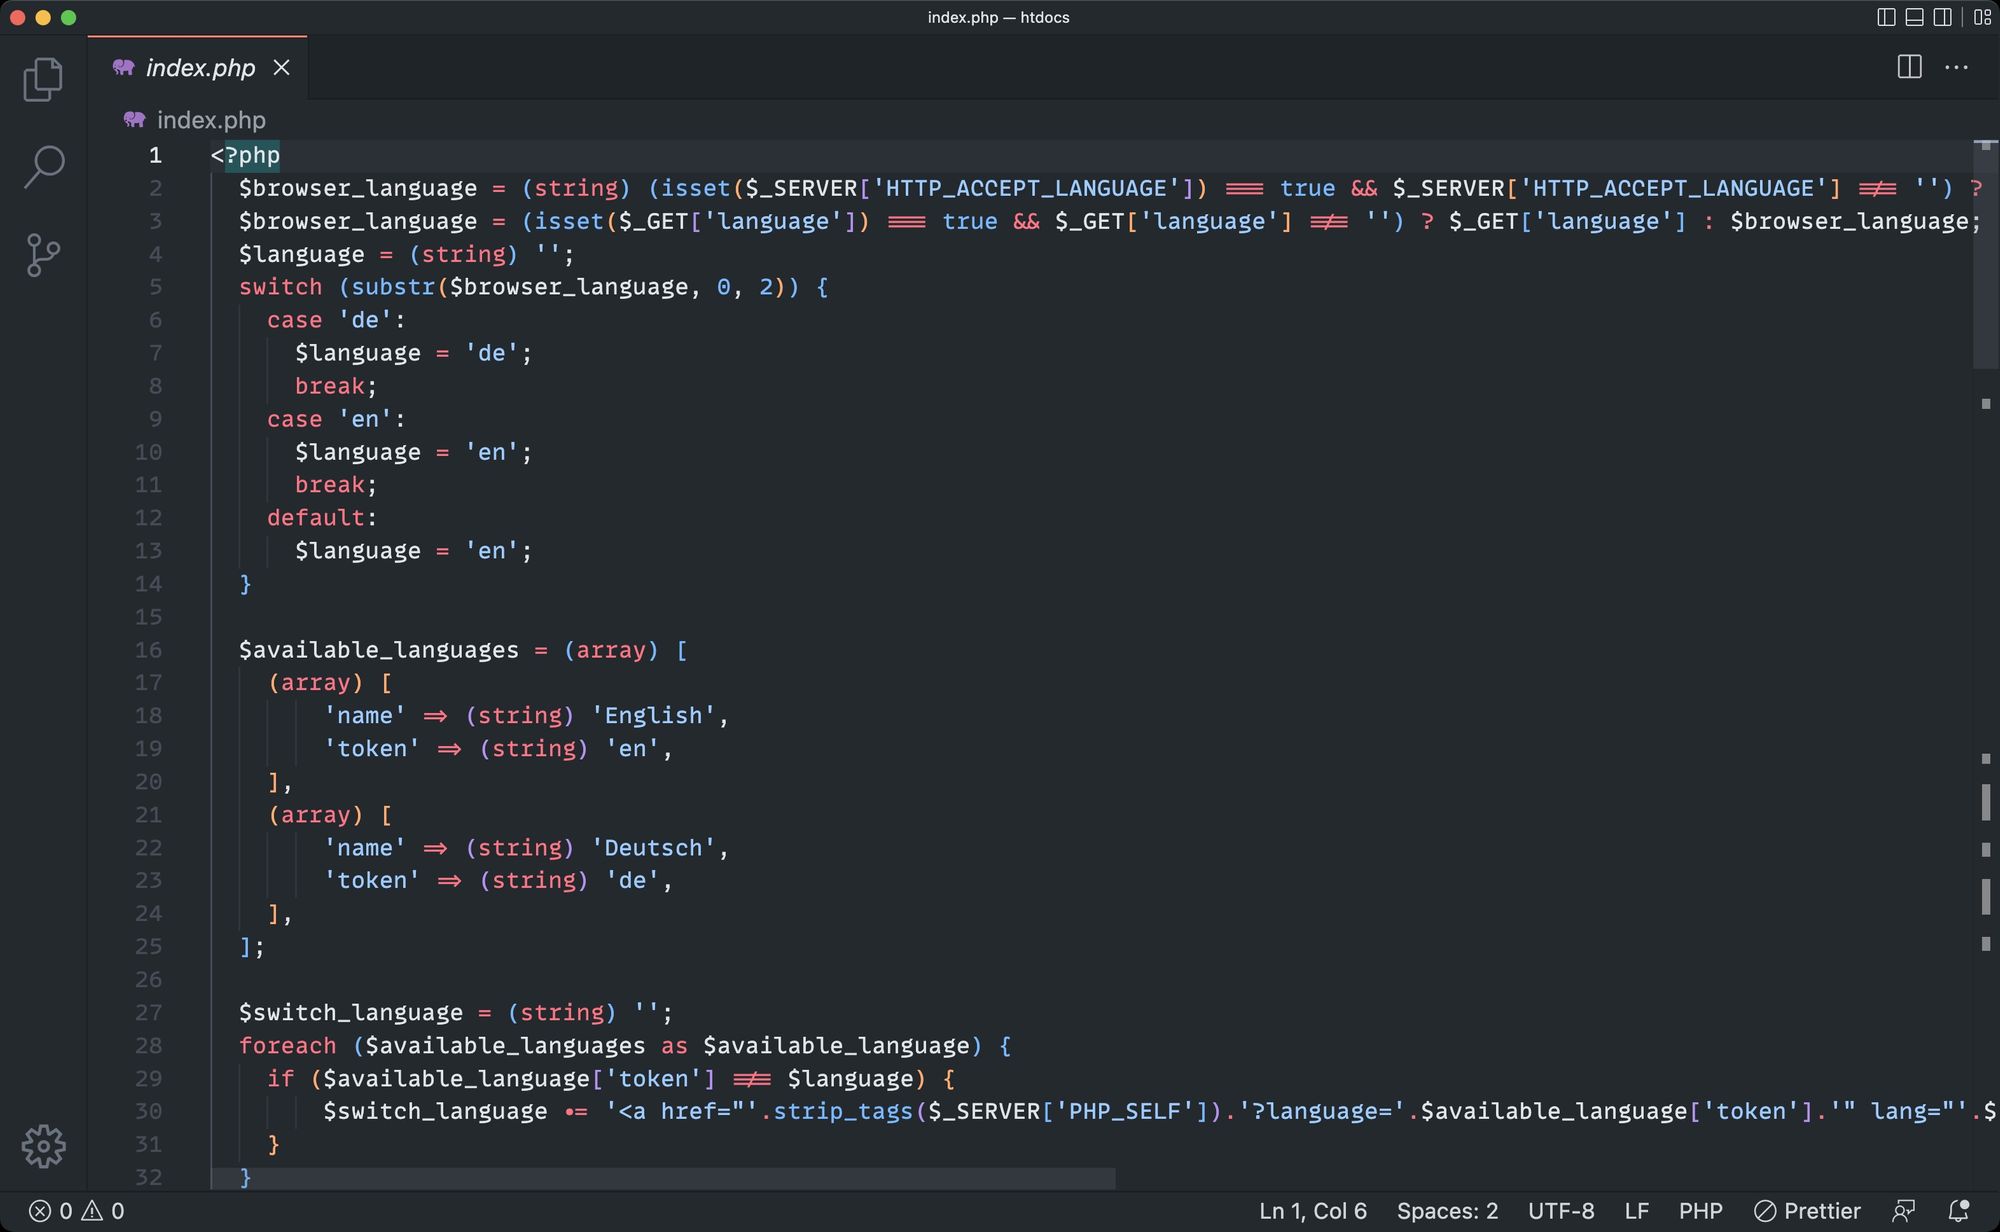
This is the code that generates the “Welcome to MAMP” page you saw in the browser.
Delete everything and replace it with:
<?php
echo 'Hello World';
?>
Save, refresh the page on http://localhost:8888, you should see this:
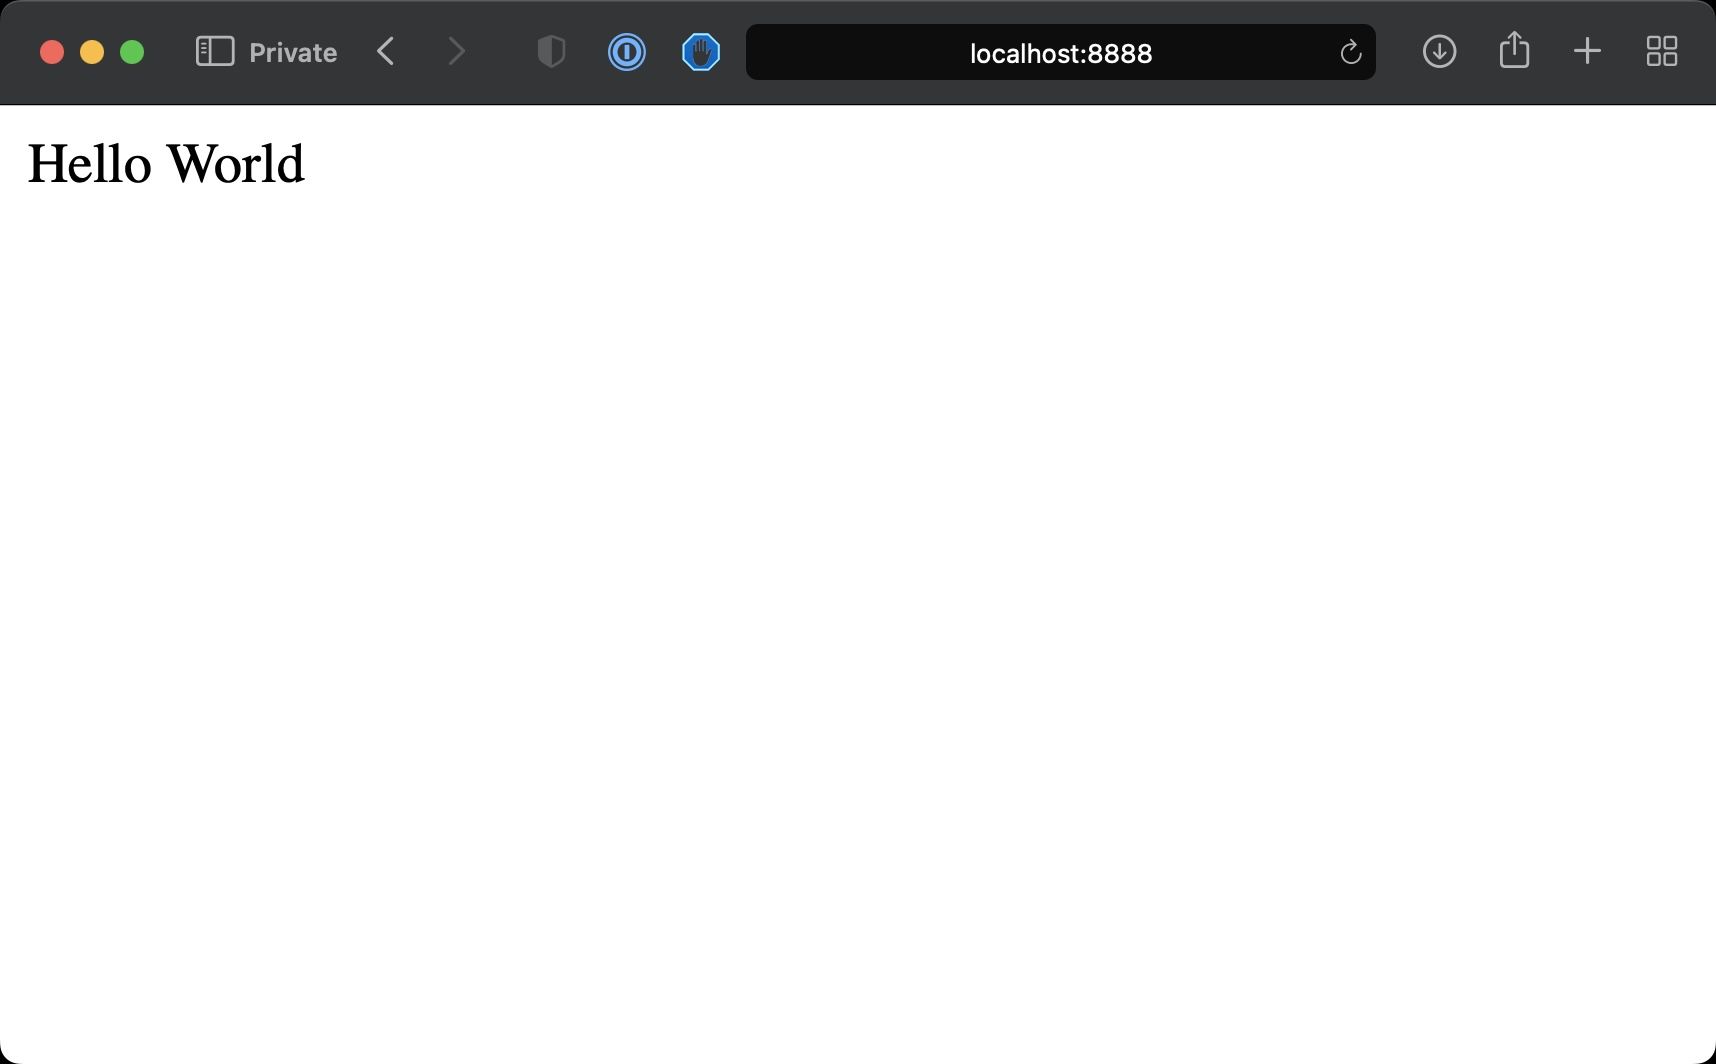
Great! That was your first PHP program.
Let’s explain what is happening here.
We have the Apache HTTP server listening on port 8888 on localhost, your computer.
When we access http://localhost:8888 with the browser, we’re making an HTTP request, asking for the content of the route /, the base URL.
Apache, by default, is configured to serve that route serving the index.html file included in the htdocs folder. That file does not exist – but as we have configured Apache to work with PHP, it will then search for an index.php file.
This file exists, and PHP code is executed server-side before Apache sends the page back to the browser.
In the PHP file, we have a <?php opening, which says “here starts some PHP code”.
We have an ending ?> that closes the PHP code snippet, and inside it, we use the echo instruction to print the string enclosed into quotes into the HTML.
A semicolon is required at the end of every statement.
We have this opening/closing structure because we can embed PHP inside HTML. PHP is a scripting language, and its goal is to be able to “decorate” an HTML page with dynamic data.
Note that with modern PHP, we generally avoid mixing PHP into the HTML. Instead, we use PHP as a “framework to generate the HTML” – for example using tools like Laravel. But we'll discuss plain PHP in this book, so it makes sense to start from the basics.
For example, something like this will give you the same result in the browser:
Hello
<?php
echo 'World';
?>
To the final user, who looks at the browser and has no idea of the code behind the scenes, there’s no difference at all.
The page is technically an HTML page, even though it does not contain HTML tags but just a Hello World string. But the browser can figure out how to display that in the window.
PHP Language Basics
After the first “Hello World”, it’s time to dive into the language features with more details.
How Variables Work in PHP
Variables in PHP start with the dollar sign $, followed by an identifier, which is a set of alphanumeric chars and the underscore _ char.
You can assign a variable any type of value, like strings (defined using single or double quotes):
$name = 'Flavio';

$name = "Flavio";
Or numbers:
$age = 20;
or any other type that PHP allows, as we’ll later see.
Once a variable is assigned a value, for example a string, we can reassign it a different type of value, like a number:
$name = 3;
PHP won’t complain that now the type is different.
Variable names are case-sensitive. $name is different from $Name.
It’s not a hard rule, but generally variable names are written in camelCase format, like this: $brandOfCar or $ageOfDog. We keep the first letter lowercase, and the letters of the subsequent words uppercase.
How to Write Comments in PHP
A very important part of any programming language is how you write comments.
You write single-line comments in PHP in this way:
// single line comment
Multi-line comments are defined in this way:
/*

this is a comment

*/

//or

/*
 *
 * this is a comment
 *
 */

//or to comment out a portion of code inside a line:

/* this is a comment */
What are Types in PHP?
I mentioned strings and numbers.
PHP has the following types:
boolboolean values (true/false)intinteger numbers (no decimals)floatfloating-point numbers (decimals)stringstringsarrayarraysobjectobjectsnulla value that means “no value assigned”
and a few other more advanced ones.
How to Print the Value of a Variable in PHP
We can use the var_dump() built-in function to get the value of a variable:
$name = 'Flavio';

var_dump($name);
The var_dump($name) instruction will print string(6) "Flavio" to the page, which tells us the variable is a string of 6 characters.
If we used this code:
$age = 20;

var_dump($age);
we’d have int(20) back, saying the value is 20 and it’s an integer.
var_dump() is one of the essential tools in your PHP debugging tool belt.
How Operators Work in PHP
Once you have a few variables you can make operations with them:
$base = 20;
$height = 10;

$area = $base * $height;
The * I used to multiply $base by $height is the multiplication operator.
We have quite a few operators – so let’s do a quick roundup of the main ones.
To start with, here are the arithmetic operators: +, -, *, / (division), % (remainder) and ** (exponential).
We have the assignment operator =, which we already used to assign a value to a variable.
Next up we have comparison operators, like <, >, <=, >=. Those work like they do in math.
2 < 1; //false
1 <= 1; // true
1 <= 2; // true
== returns true if the two operands are equal.
=== returns true if the two operands are identical.
What’s the difference?
You’ll find it with experience, but for example:
1 == '1'; //true
1 === '1'; //false
We also have != to detect if operands are not equal:
1 != 1; //false
1 != '1'; //false
1 != 2; //true

//hint: <> works in the same way as !=, 1 <> 1
and !== to detect if operands are not identical:
1 !== 1; //false
1 !== '1'; //true
Logical operators work with boolean values:
// Logical AND with && or "and"

true && true; //true
true && false; //false
false && true; //false
false && false; //false

true and true; //true
true and false; //false
false and true; //false
false and false; //false

// Logical OR with || or "or"

true || true; // true
true || false //true
false || true //true
false || false //false

true or true; // true
true or false //true
false or true //true
false or false //false

// Logical XOR (one of the two is true, but not both)

true xor true; // false
true xor false //true
false xor true //true
false xor false //false
We also have the not operator:
$test = true

!$test //false
I used the boolean values true and false here, but in practice you’ll use expressions that evaluate to either true or false, for example:
1 > 2 || 2 > 1; //true

1 !== 2 && 2 > 2; //false
All of the operators listed above are binary, meaning they involve 2 operands.
PHP also has 2 unary operators: ++ and --:
$age = 20;
$age++;
//age is now 21

$age--;
//age is now 20
How to Work with Strings in PHP
I introduced the use of strings before when we talked about variables and we defined a string using this notation:
$name = 'Flavio'; //string defined with single quotes

$name = "Flavio"; //string defined with double quotes
The big difference between using single and double quotes is that with double quotes we can expand variables in this way:
$test = 'an example';

$example = "This is $test"; //This is an example
and with double quotes we can use escape characters (think new lines \n or tabs \t):
$example = "This is a line\nThis is a line";

/*
output is:

This is a line
This is a line
*/
PHP offers you a very comprehensive functions in its standard library (the library of functionalities that the language offers by default).
First, we can concatenate two strings using the . operator:
$firstName = 'Flavio';
$lastName = 'Copes';

$fullName = $firstName . ' ' . $lastName;
We can check the length of a string using the strlen() function:
$name = 'Flavio';
strlen($name); //6
This is the first time we've used a function.
A function is composed of an identifier (strlen in this case) followed by parentheses. Inside those parentheses, we pass one or more arguments to the function. In this case, we have one argument.
The function does something and when it’s done it can return a value. In this case, it returns the number 6. If there’s no value returned, the function returns null.
We’ll see how to define our own functions later.
We can get a portion of a string using substr():
$name = 'Flavio';
substr($name, 3); //"vio" - start at position 3, get all the rest
substr($name, 2, 2); //"av" - start at position 2, get 2 items
We can replace a portion of a string using str_replace():
$name = 'Flavio';
str_replace('avio', 'ower', $name); //"Flower"
Of course we can assign the result to a new variable:
$name = 'Flavio';
$itemObserved = str_replace('avio', 'ower', $name); //"Flower"
There are a lot more built-in functions you can use to work with strings.
Here is a brief non-comprehensive list just to show you the possibilities:
trim()strips white space at the beginning and end of a stringstrtoupper()makes a string uppercasestrtolower()makes a string lowercaseucfirst()makes the first character uppercasestrpos()finds the firsts occurrence of a substring in the stringexplode()to split a string into an arrayimplode()to join array elements in a string
You can find a full list here.
How to Use Built-in Functions for Numbers in PHP
I previously listed the few functions we commonly use for strings.
Let’s make a list of the functions we use with numbers:
round()to round a decimal number, up/down depending if the value is > 0.5 or smallerceil()to round a a decimal number upfloor()to round a decimal number downrand()generates a random integermin()finds the lowest number in the numbers passed as argumentsmax()finds the highest number in the numbers passed as argumentsis_nan()returns true if the number is not a number
There are a ton of different functions for all sorts of math operations like sine, cosine, tangents, logarithms, and so on. You can find a full list here.
How Arrays Work in PHP
Arrays are lists of values grouped under a common name.
You can define an empty array in two different ways:
$list = [];

$list = array();
An array can be initialized with values:
$list = [1, 2];

$list = array(1, 2);
Arrays can hold values of any type:
$list = [1, 'test'];
Even other arrays:
$list = [1, [2, 'test']];
You can access the element in an array using this notation:
$list = ['a', 'b'];
$list[0]; //'a' --the index starts at 0
$list[1]; //'b'
Once an array is created, you can append values to it in this way:
$list = ['a', 'b'];
$list[] = 'c';

/*
$list == [
  "a",
  "b",
  "c",
]
*/
You can use array_unshift() to add the item at the beginning of the array instead:
$list = ['b', 'c'];
array_unshift($list, 'a');

/*
$list == [
  "a",
  "b",
  "c",
]
*/
Count how many items are in an array using the built-in count() function:
$list = ['a', 'b'];

count($list); //2
Check if an array contains an item using the in_array() built-in function:
$list = ['a', 'b'];

in_array('b', $list); //true
If in addition to confirming existence, you need the index, use array_search():
$list = ['a', 'b'];

array_search('b', $list) //1
Useful Functions for Arrays in PHP
As with strings and numbers, PHP provides lots of very useful functions for arrays. We’ve seen count(), in_array(), array_search() – let’s see some more:
is_array()to check if a variable is an arrayarray_unique()to remove duplicate values from an arrayarray_search()to search a value in the array and return the keyarray_reverse()to reverse an arrayarray_reduce()to reduce an array to a single value using a callback functionarray_map()to apply a callback function to each item in the array. Typically used to create a new array by modifying the values of an existing array, without altering it.array_filter()to filter an array to a single value using a callback functionmax()to get the maximum value contained in the arraymin()to get the minimum value contained in the arrayarray_rand()to get a random item from the arrayarray_count_values()to count all the values in the arrayimplode()to turn an array into a stringarray_pop()to remove the last item of the array and return its valuearray_shift()same asarray_pop()but removes the first item instead of the lastsort()to sort an arrayrsort()to sort an array in reverse orderarray_walk()similarly toarray_map()does something for every item in the array, but in addition it can change values in the existing array
How to Use Associative Arrays in PHP
So far we’ve used arrays with an incremental, numeric index: 0, 1, 2…
You can also use arrays with named indexes (keys), and we call them associative arrays:
$list = ['first' => 'a', 'second' => 'b'];

$list['first'] //'a'
$list['second'] //'b'
We have some functions that are especially useful for associative arrays:
array_key_exists()to check if a key exists in the arrayarray_keys()to get all the keys from the arrayarray_values()to get all the values from the arrayasort()to sort an associative array by valuearsort()to sort an associative array in descending order by valueksort()to sort an associative array by keykrsort()to sort an associative array in descending order by key
You can see all array-related functions here.
How Conditionals Work in PHP
I previously introduced comparison operators: <, >, <=, >=, ==, === , !=, !==... and so on.
Those operators are going to be super useful for one thing: conditionals.
Conditionals are the first control structure we see.
We can decide to do something, or something else, based on a comparison.
For example:
$age = 17;

if ($age > 18) {
  echo 'You can enter the pub';
}
The code inside the parentheses only executes if the condition evaluates to true.
Use else to do something else in case the condition is false:
$age = 17;

if ($age > 18) {
  echo 'You can enter the pub';
} else {
  echo 'You cannot enter the pub';
}
NOTE: I used cannot instead of can't because the single quote would terminate my string before it should. In this case you could escape the ' in this way: echo 'You can\'t enter the pub';
You can have multiple if statements chained using elseif:
$age = 17;

if ($age > 20) {
  echo 'You are 20+';
} elseif ($age > 18) {
  echo 'You are 18+';
} else {
  echo 'You are <18';
}
In addition to if, we have the switch statement.
We use this when we have a variable that could have a few different values, and we don’t have to have a long if / elseif block:
$age = 17

switch($age) {
  case 15:
        echo 'You are 15';
    break;
  case 16:
        echo 'You are 16';
    break;
  case 17:
        echo 'You are 17';
    break;
  case 18:
        echo 'You are 18';
    break;
  default:
    echo "You are $age";
}
I know the example does not have any logic, but I think it can help you understand how switch works.
The break; statement after each case is essential. If you don’t add that and the age is 17, you’d see this:
You are 17
You are 18
You are 17
Instead of just this:
You are 17
as you’d expect.
How Loops Work in PHP
Loops are another super useful control structure.
We have a few different kinds of loops in PHP: while, do while, for, and foreach.
Let’s see them all!
How to Use a while loop in PHP
A while loop is the simplest one. It keeps iterating while the condition evaluates to true:
while (true) {
  echo 'looping';
}
This would be an infinite loop, which is why we use variables and comparisons:
$counter = 0;

while ($counter < 10) {
  echo $counter;
  $counter++;
}
How to Use a do while loop in PHP
do while is similar, but slightly different in how the first iteration is performed:
$counter = 0;

do {
  echo $counter;
  $counter++;
} while ($counter < 10);
In the do while loop, first we do the first iteration, then we check the condition.
In the while loop, first we check the condition, then we do the iteration.
Do a simple test by setting $counter to 15 in the above examples, and see what happens.
You'll want to choose one kind of loop, or the other, depending on your use case.
How to Use a foreach Loop in PHP
You can use the foreach loop to easily iterate over an array:
$list = ['a', 'b', 'c'];

foreach ($list as $value) {
  echo $value;
}
You can also get the value of the index (or key in an associative array) in this way:
$list = ['a', 'b', 'c'];

foreach ($list as $key => $value) {
  echo $key;
}
How to Use a for Loop in PHP
The for loop is similar to while, but instead of defining the variable used in the conditional before the loop, and instead of incrementing the index variable manually, it’s all done in the first line:
for ($i = 0; $i < 10; $i++) {
  echo $i;
}

//result: 0123456789
You can use the for loop to iterate over an array in this way:
$list = ['a', 'b', 'c'];

for ($i = 0; $i < count($list); $i++) {
  echo $list[$i];
}

//result: abc
How to Use the break and continue Statements in PHP
In many cases you want the ability to stop a loop on demand.
For example you want to stop a for loop when the value of the variable in the array is 'b':
$list = ['a', 'b', 'c'];

for ($i = 0; $i < count($list); $i++) {
    if ($list[$i] == 'b') {
    break;
  }
  echo $list[$i];
}

//result: a
This makes the loop completely stop at that point, and the program execution continues at the next instruction after the loop.
If you just want to skip the current loop iteration and keep looking, use continue instead:
$list = ['a', 'b', 'c'];

for ($i = 0; $i < count($list); $i++) {
    if ($list[$i] == 'b') {
    continue;
  }
  echo $list[$i];
}

//result: ac
How Functions Work in PHP
Functions are one of the most important concepts in programming.
You can use functions to group together multiple instructions or multiple lines of code, and give them a name.
For example you can make a function that sends an email. Let’s call it sendEmail, and we'll define it like this:
function sendEmail() {
  //send an email
}
And you can call it anywhere else by using this syntax:
sendEmail();
You can also pass arguments to a function. For example when you send an email, you want to send it to someone – so you add the email as the first argument:
sendEmail('test@test.com');
Inside the function definition we get this parameter in this way (we call them parameters inside the function definition, and arguments when we call the function):
function sendEmail($to) {
  echo "send an email to $to";
}
You can send multiple arguments by separating them with commas:
sendEmail('test@test.com', 'subject', 'body of the email');
And we can get those parameters in the order they were defined:
function sendEmail($to, $subject, $body) {
  //...
}
We can optionally set the type of parameters:
function sendEmail(string $to, string $subject, string $body) {
  //...
}
Parameters can have a default value, so if they are omitted we can still have a value for them:
function sendEmail($to, $subject = 'test', $body = 'test') {
  //...
}

sendEmail('test@test.com')
A function can return a value. Only one value can be returned from a function, not more than one. You do that using the return keyword. If omitted, the function returns null.
The returned value is super useful as it tells you the result of the work done in the function, and lets you use its result after calling it:
function sendEmail($to) {
    return true;
}

$success = sendEmail('test@test.com');

if ($success) {
  echo 'email sent successfully';
} else {
  echo 'error sending the email';
}
We can optionally set the return type of a function using this syntax:
function sendEmail($to): bool {
    return true;
}
When you define a variable inside a function, that variable is local to the function, which means it’s not visible from outside. When the function ends, it just stops existing:
function sendEmail($to) {
    $test = 'a';
}

var_dump($test); //PHP Warning:  Undefined variable $test
Variables defined outside of the function are not accessible inside the function.
This enforces a good programming practice as we can be sure the function does not modify external variables and cause “side effects”.
Instead you return a value from the function, and the outside code that calls the function will take responsibility for updating the outside variable.
Like this:
$character = 'a';

function test() {
  return 'b';
}

$character = test();
You can pass the value of a variable by passing it as an argument to the function:
$character = 'a';

function test($c) {
  echo $c;
}

test($character);
But you can’t modify that value from within the function.
It’s passed by value, which means the function receives a copy of it, not the reference to the original variable.
That is still possible using this syntax (notice I used & in the parameter definition):
$character = 'a';

function test(&$c) {
  $c = 'b';
}

test($character);

echo $character; //'b'
The functions we've defined so far are named functions.
They have a name.
We also have anonymous functions, which can be useful in a lot of cases.
They don’t have a name, per se, but they are assigned to a variable. To call them, you invoke the variable with parentheses at the end:
$myfunction = function() {
  //do something here
};

$myfunction()
Note that you need a semicolon after the function definition, but then they work like named functions for return values and parameters.
Interestingly, they offer a way to access a variable defined outside the function through use():
$test = 'test';

$myfunction = function() use ($test) {
  echo $test;
  return 'ok';
};

$myfunction()
Another kind of function is an arrow function.
An arrow function is an anonymous function that’s just one expression (one line), and implicitly returns the value of that expression.
You define it in this way:
fn (arguments) => expression;
Here’s an example:
$printTest = fn() => 'test';

$printTest(); //'test'
You can pass parameters to an arrow function:
$multiply = fn($a, $b) => $a * $b;

$multiply(2, 4) //8
Note that as the next example shows, arrow functions have automatic access to the variables of the enclosing scope, without the need of use().
$a = 2;
$b = 4;

$multiply = fn() => $a * $b;

$multiply()
Arrow functions are super useful when you need to pass a callback function. We’ll see how to use them to perform some array operations later.
So we have in total 3 kinds of functions: named functions, anonymous functions, and arrow functions.
Each of them has its place, and you’ll learn how to use them properly over time, with practice.
How to Loop Through Arrays with map(), filter(), and reduce() in PHP
Another important set of looping structures, often used in functional programming, is the set of array_map() / array_filter() / array_reduce().
Those 3 built-in PHP functions take an array, and a callback function that in each iteration takes each item in the array.
array_map() returns a new array that contains the result of running the callback function on each item in the array:
$numbers = [1, 2, 3, 4];
$doubles = array_map(fn($value) => $value * 2, $numbers);

//$doubles is now [2, 4, 6, 8]
array_filter() generates a new array by only getting the items whose callback function returns true:
$numbers = [1, 2, 3, 4];
$even = array_filter($numbers, fn($value) => $value % 2 === 0)

//$even is now [2, 4]
array_reduce() is used to reduce an array to a single value.
For example we can use it to multiply all items in an array:
$numbers = [1, 2, 3, 4];

$result = array_reduce($numbers, fn($carry, $value) => $carry * $value, 1)
Notice the last parameter – it’s the initial value. If you omit that, the default value is 0 but that would not work for our multiplication example.
Note that in array_map() the order of the arguments is reversed. First you have the callback function and then the array. This is because we can pass multiple arrays using commas (array_map(fn($value) => $value * 2, $numbers, $otherNumbers, $anotherArray);). Ideally we’d like more consistency, but that’s what it is.
Object Oriented Programming in PHP
Let’s now jump head first into a big topic: object-oriented programming with PHP.
Object-oriented programming lets you create useful abstractions and make your code simpler to understand and manage.
How to Use Classes and Objects in PHP
To start with, you have classes and objects.
A class is a blueprint, or type, of object.
For example you have the class Dog, defined in this way:
class Dog {

}
Note that the class must be defined in uppercase.
Then you can create objects from this class – specific, individual dogs.
An object is assigned to a variable, and it’s instantiated using the new Classname() syntax:
$roger = new Dog();
You can create multiple objects from the same class, by assigning each object to a different variable:
$roger = new Dog();
$syd = new Dog();
How to Use Properties in PHP
Those objects will all share the same characteristics defined by the class. But once they are instantiated, they will have a life of their own.
For example, a Dog has a name, an age, and a fur color.
So we can define those as properties in the class:
class Dog {
  public $name;
  public $age;
  public $color;
}
They work like variables, but they are attached to the object, once it's instantiated from the class. The public keyword is the access modifier and sets the property to be publicly accessible.
You can assign values to those properties in this way:
class Dog {
  public $name;
  public $age;
  public $color;
}

$roger = new Dog();

$roger->name = 'Roger';
$roger->age = 10;
$roger->color = 'gray';

var_dump($roger);

/*
object(Dog)#1 (3) {
  ["name"]=> string(5) "Roger"
    ["age"]=> int(10)
    ["color"]=> string(4) "gray"
}
*/
Notice that the property is defined as public.
That is called an access modifier. You can use two other kinds of access modifiers: private and protected. Private makes the property inaccessible from outside the object. Only methods defined inside the object can access it.
We’ll see more about protected when we’ll talk about inheritance.
How to Use Methods in PHP
Did I say method? What is a method?
A method is a function defined inside the class, and it’s defined in this way:
class Dog {
  public function bark() {
    echo 'woof!';
  }
}
Methods are very useful to attach a behavior to an object. In this case we can make a dog bark.
Notice that I use the public keyword. That’s to say that you can invoke a method from outside the class. Like for properties, you can mark methods as private too, or protected, to restrict their access.
You invoke a method on the object instance like this:
class Dog {
  public function bark() {
    echo 'woof!';
  }
}

$roger = new Dog();

$roger->bark();
A method, just like a function, can define parameters and a return value, too.
Inside a method we can access the object’s properties using the special built-in $this variable, which, when referenced inside a method, points to the current object instance:
class Dog {
  public $name;

  public function bark() {
    echo $this->name . ' barked!';
  }
}

$roger = new Dog();
$roger->name = 'Roger';
$roger->bark();
Notice I used $this->name to set and access the $name property, and not $this->$name.
How to Use the Constructor Method in PHP
A special kind of method named __construct() is called a constructor.
class Dog {
    public function __construct() {

  }
}
You use this method to initialize the properties of an object when you create it, as it’s automatically invoked when calling new Classname().
class Dog {
  public $name;

    public function __construct($name) {
        $this->name = $name;
  }

  public function bark() {
    echo $this->name . ' barked!';
  }
}

$roger = new Dog('Roger');
$roger->bark();
This is such a common thing that PHP (starting in PHP 8) includes something called constructor promotion where it automatically does this thing:
class Dog {
  public $name;

    public function __construct($name) {
        $this->name = $name;
  }

  //...
By using the access modifier, the assignment from the parameter of the constructor to the local variable happens automatically:
class Dog {
    public function __construct(public $name) {
  }

  public function bark() {
    echo $this->name . ' barked!';
  }
}

$roger = new Dog('Roger');
$roger->name; //'Roger'
$roger->bark(); //'Roger barked!'
Properties can be typed.
You can require the name to be a string using public string $name:
class Dog {
  public string $name;

    public function __construct($name) {
        $this->name = $name;
  }

  public function bark() {
    echo $this->name . ' barked!';
  }
}

$roger = new Dog('Roger');
$roger->name; //'Roger'
$roger->bark(); //'Roger barked!'
Now all works fine in this example, but try changing that to public int $name to require it to be an integer.
PHP will raise an error if you initialize $name with a string:
TypeError: Dog::__construct():
Argument #1 ($name) must be of type int,
string given on line 14
Interesting, right?
We can enforce properties to have a specific type between string, int, float, string, object, array, bool and others.
What is Inheritance in PHP?
The fun in object oriented programming starts when we allow classes to inherit properties and methods from other classes.
Suppose you have an Animal class:
class Animal {

}
Every animal has an age, and every animal can eat. So we add an age property and an eat() method:
class Animal {
  public $age;

  public function eat() {
    echo 'the animal is eating';
  }
}
A dog is an animal and has an age and can eat too, so the Dog class – instead of reimplementing the same things we have in Animal – can extend that class:
class Dog extends Animal {

}
We can now instantiate a new object of class Dog and we have access to the properties and methods defined in Animal:
$roger = new Dog();
$roger->eat();
In this case we call Dog the child class and Animal the parent class.
Inside the child class we can use $this to reference any property or method defined in the parent, as if they were defined inside the child class.
It’s worth noting that while we can access the parent’s properties and methods from the child, we can’t do the reverse.
The parent class knows nothing about the child class.
protected Properties and Methods in PHP
Now that we've introduced inheritance, we can discuss protected. We already saw how we can use the public access modifier to set properties and methods callable from outside of a class, by the public.
private properties and methods can only be accessed from within the class.
protected properties and methods can be accessed from within the class and from child classes.
How to Override Methods in PHP
What happens if we have an eat() method in Animal and we want to customize it in Dog? We can override that method.
class Animal {
  public $age;

  public function eat() {
    echo 'the animal is eating';
  }
}

class Dog extends Animal {
  public function eat() {
    echo 'the dog is eating';
  }
}
Now any instance of Dog will use the Dog's implementation of the eat() method.
Static Properties and Methods in PHP
We’ve seen how to define properties and methods that belong to the instance of a class, an object.
Sometimes it’s useful to assign those to the class itself.
When this happens we call them static, and to reference or call them we don’t need to create an object from the class.
Let’s start with static properties. We define them with the static keyword:
class Utils {
  public static $version = '1.0';
}
We reference them from inside the class using the keyword self, which points to the class:
self::$version;
and from outside the class using:
Utils::version
This is what happens for static methods:
class Utils {
  public static function version() {
    return '1.0';
  }
}
From the outside of the class we can call them in this way:
Utils::version();
From inside the class, we can reference them using the self keyword, which refers to the current class:
self::version();
How to Compare Objects in PHP
When we talked about operators I mentioned we have the == operator to check if two values are equal and === to check if they are identical.
Mainly the difference is that == checks the object content, for example the '5' string is equal to the number 5, but it’s not identical to it.
When we use those operators to compare objects, == will check if the two objects have the same class and have the same values assigned to them.
=== on the other hand will check if they also refer to the same instance (object).
For example:
class Dog {
  public $name = 'Good dog';
}

$roger = new Dog();
$syd = new Dog();

echo $roger == $syd; //true

echo $roger === $syd; //false
How to Iterate over Object Properties in PHP
You can loop over all the public properties in an object using a foreach loop, like this:
class Dog {
  public $name = 'Good dog';
  public $age = 10;
  public $color = 'gray';
}

$dog = new Dog();

foreach ($dog as $key => $value) {
  echo $key . ': ' . $value . '<br>';
}
How to Clone Objects in PHP
When you have an object, you can clone it using the clone keyword:
class Dog {
  public $name;
}

$roger = new Dog();
$roger->name = 'Roger';

$syd = clone $roger;
This performs a shallow clone, which means that references to other variables will be copied as references – there will not a “recursive cloning” of them.
To do a deep clone you will need to do some more work.
What are Magic Methods in PHP?
Magic methods are special methods that we define in classes to perform some behavior when something special happens.
For example when a property is set, or accessed, or when the object is cloned.
We’ve seen __construct() before.
That’s a magic method.
There are others. For example we can set a “cloned” boolean property to true when the object is cloned:
class Dog {
  public $name;

  public function __clone() {
    $this->cloned = true;
  }
}

$roger = new Dog();
$roger->name = 'Roger';

$syd = clone $roger;
echo $syd->cloned;
Other magic methods include __call(), __get(), __set(), __isset(), __toString() and others.
You can see the full list here
How to Include Other PHP Files
We’re now done talking about the object oriented features of PHP.
Let’s now explore some other interesting topics!
Inside a PHP file you can include other PHP files. We have the following methods, all used for this use case, but they're all slightly different: include, include_once, require, and require_once.
include loads the content of another PHP file, using a relative path.
require does the same, but if there’s any error doing so, the program halts. include will only generate a warning.
You can decide to use one or the other depending on your use case. If you want your program to exit if it can’t import the file, use require.
include_once and require_once do the same thing as their corresponding functions without _once, but they make sure the file is included/required only once during the execution of the program.
This is useful if, for example, you have multiple files loading some other file, and you typically want to avoid loading that more than once.
My rule of thumb is to never use include or require because you might load the same file twice. include_once and require_once help you avoid this problem.
Use include_once when you want to conditionally load a file, for example “load this file instead of that”. In all other cases, use require_once.
Here’s an example:
require_once('test.php');

//now we have access to the functions, classes
//and variables defined in the `test.php` file
The above syntax includes the test.php file from the current folder, the file where this code is.
You can use relative paths:
require_once('../test.php');
to include a file in the parent folder or to go in a subfolder:
require_once('test/test.php');
You can use absolute paths:
require_once('/var/www/test/file.php');
In modern PHP codebases that use a framework, files are generally loaded automatically so you’ll have less need to use the above functions.
Useful Constants, Functions and Variables for Filesystem in PHP
Speaking of paths, PHP offers you several utilities to help you work with paths.
You can get the full path of the current file using:
__FILE__, a magic constant$_SERVER['SCRIPT_FILENAME'](more on$_SERVERlater!)
You can get the full path of the folder where the current file is using:
- the
getcwd()built-in function __DIR__, another magic constant- combine
__FILE__withdirname()to get the current folder full path:dirname(__FILE__) - use
$_SERVER['DOCUMENT_ROOT']
How to Handle Errors in PHP
Every programmer makes errors. We’re humans, after all.
We might forget a semicolon. Or use the wrong variable name. Or pass the wrong argument to a function.
In PHP we have:
- Warnings
- Notices
- Errors
The first two are minor errors, and they do not stop the program execution. PHP will print a message, and that’s it.
Errors terminate the execution of the program, and will print a message telling you why.
There are many different kinds of errors, like parse errors, runtime fatal errors, startup fatal errors, and more.
They’re all errors.
I said “PHP will print a message”, but.. where?
This depends on your configuration.
In development mode it’s common to log PHP errors directly into the Web page, but also in an error log.
You want to see those errors as early as possible, so you can fix them.
In production, on the other hand, you don’t want to show them in the Web page, but you still want to know about them.
So what do you do? You log them to the error log.
This is all decided in the PHP configuration.
We haven’t talked about this yet, but there’s a file in your server configuration that decides a lot of things about how PHP runs.
It’s called php.ini.
The exact location of this file depends on your setup.
To find out where is yours, the easiest way is to add this to a PHP file and run it in your browser:
<?php
phpinfo();
?>
You will then see the location under “Loaded Configuration File”:
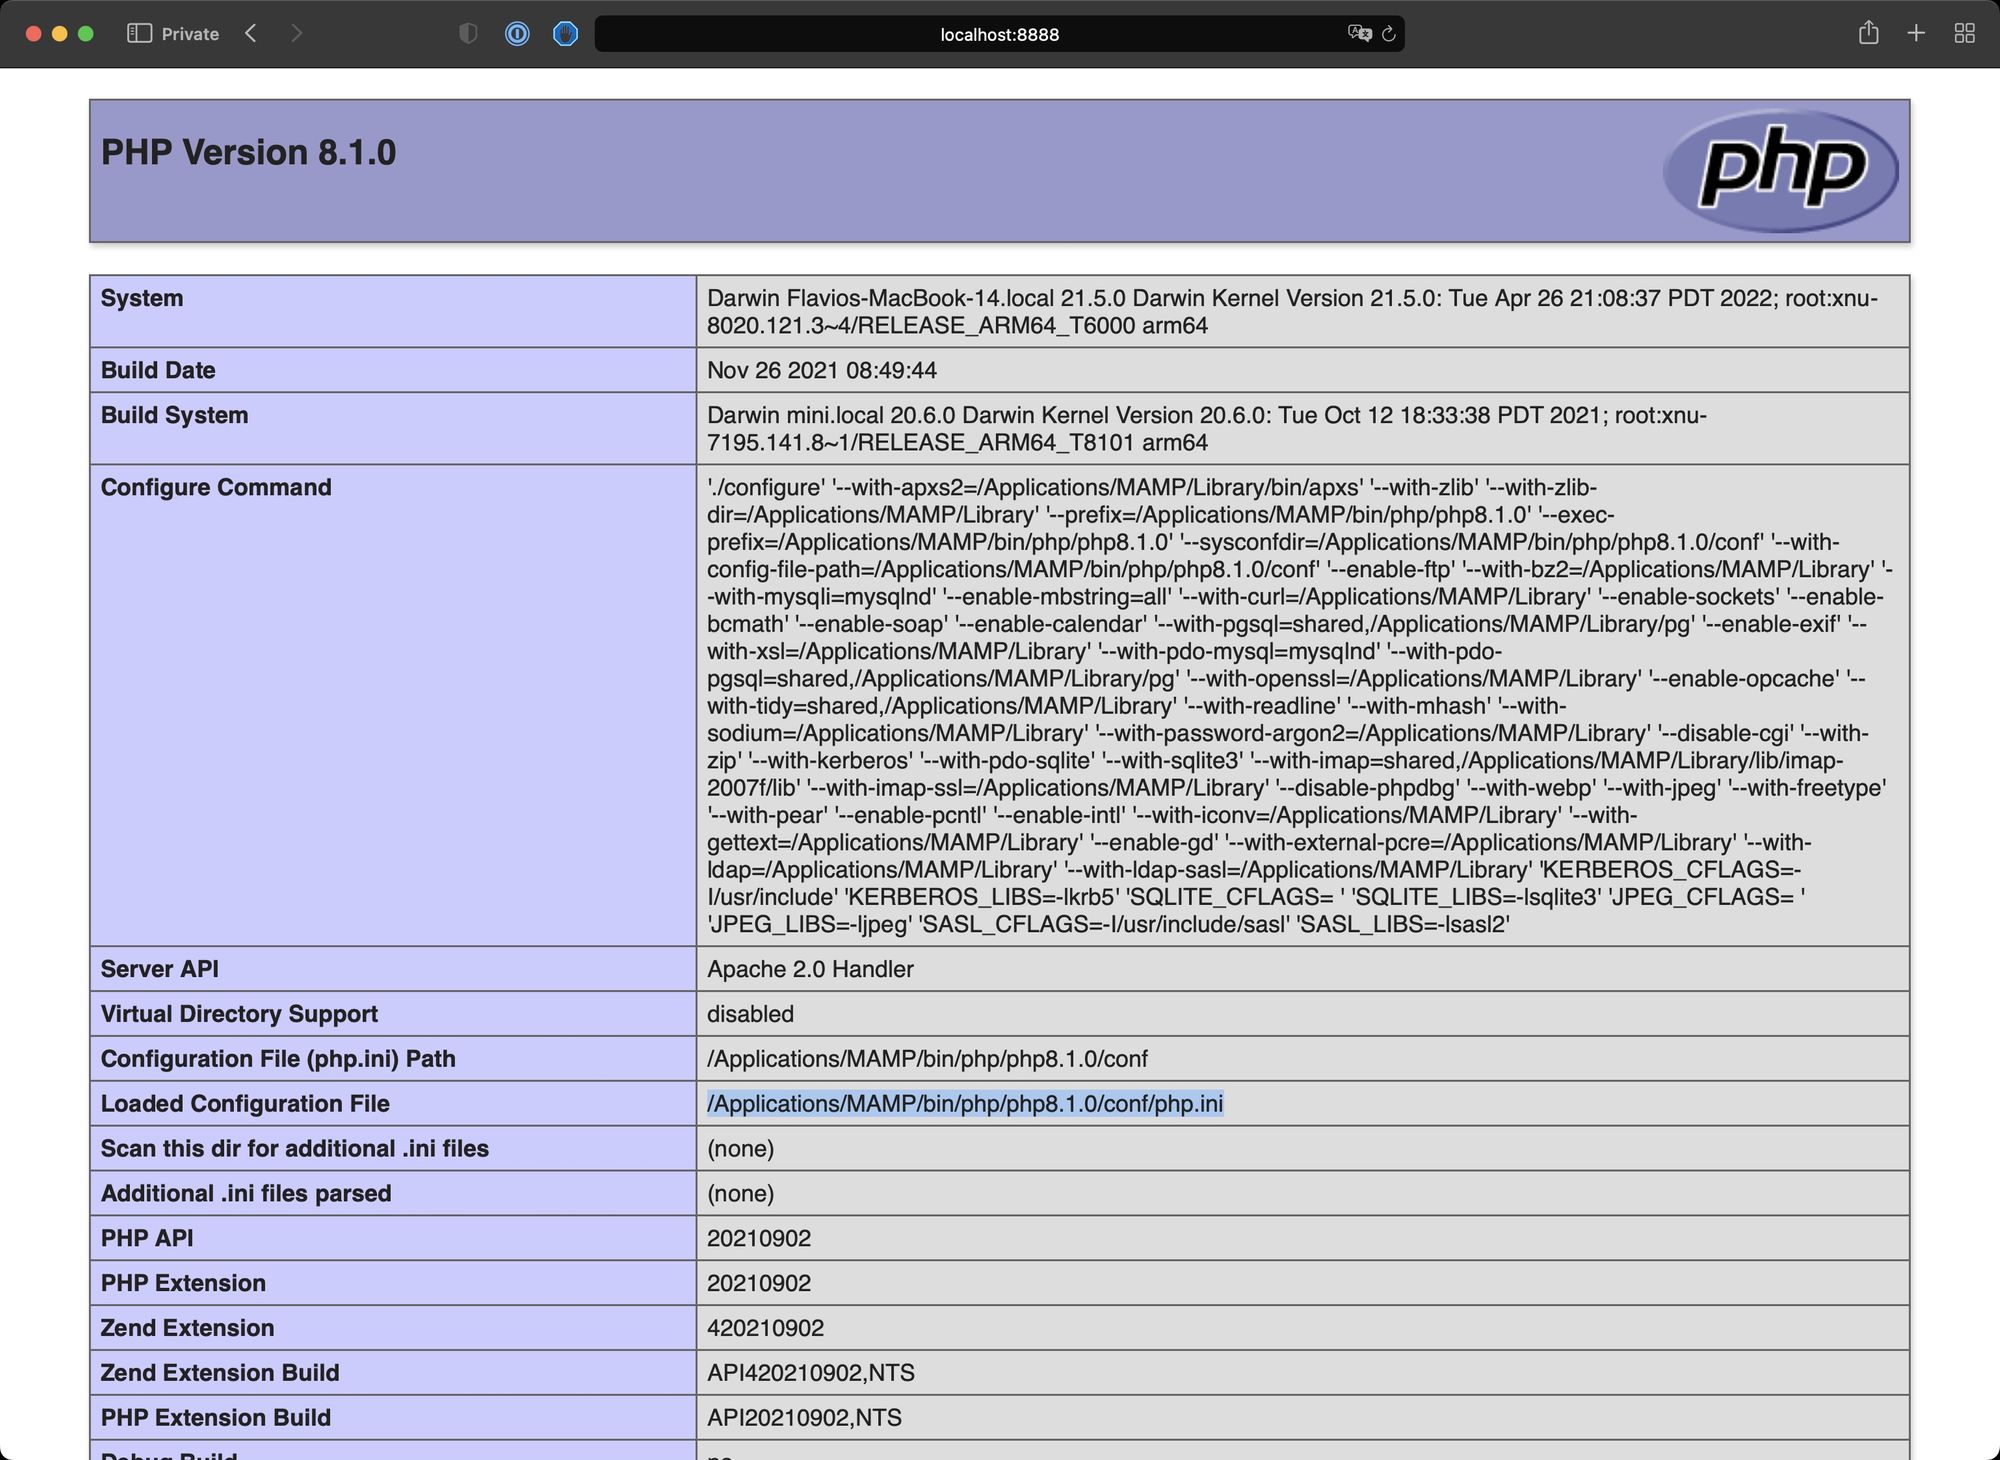
In my case it’s /Applications/MAMP/bin/php/php8.1.0/conf/php.ini.
Note that the information generated by phpinfo() contains a lot of other useful information. Remember that.
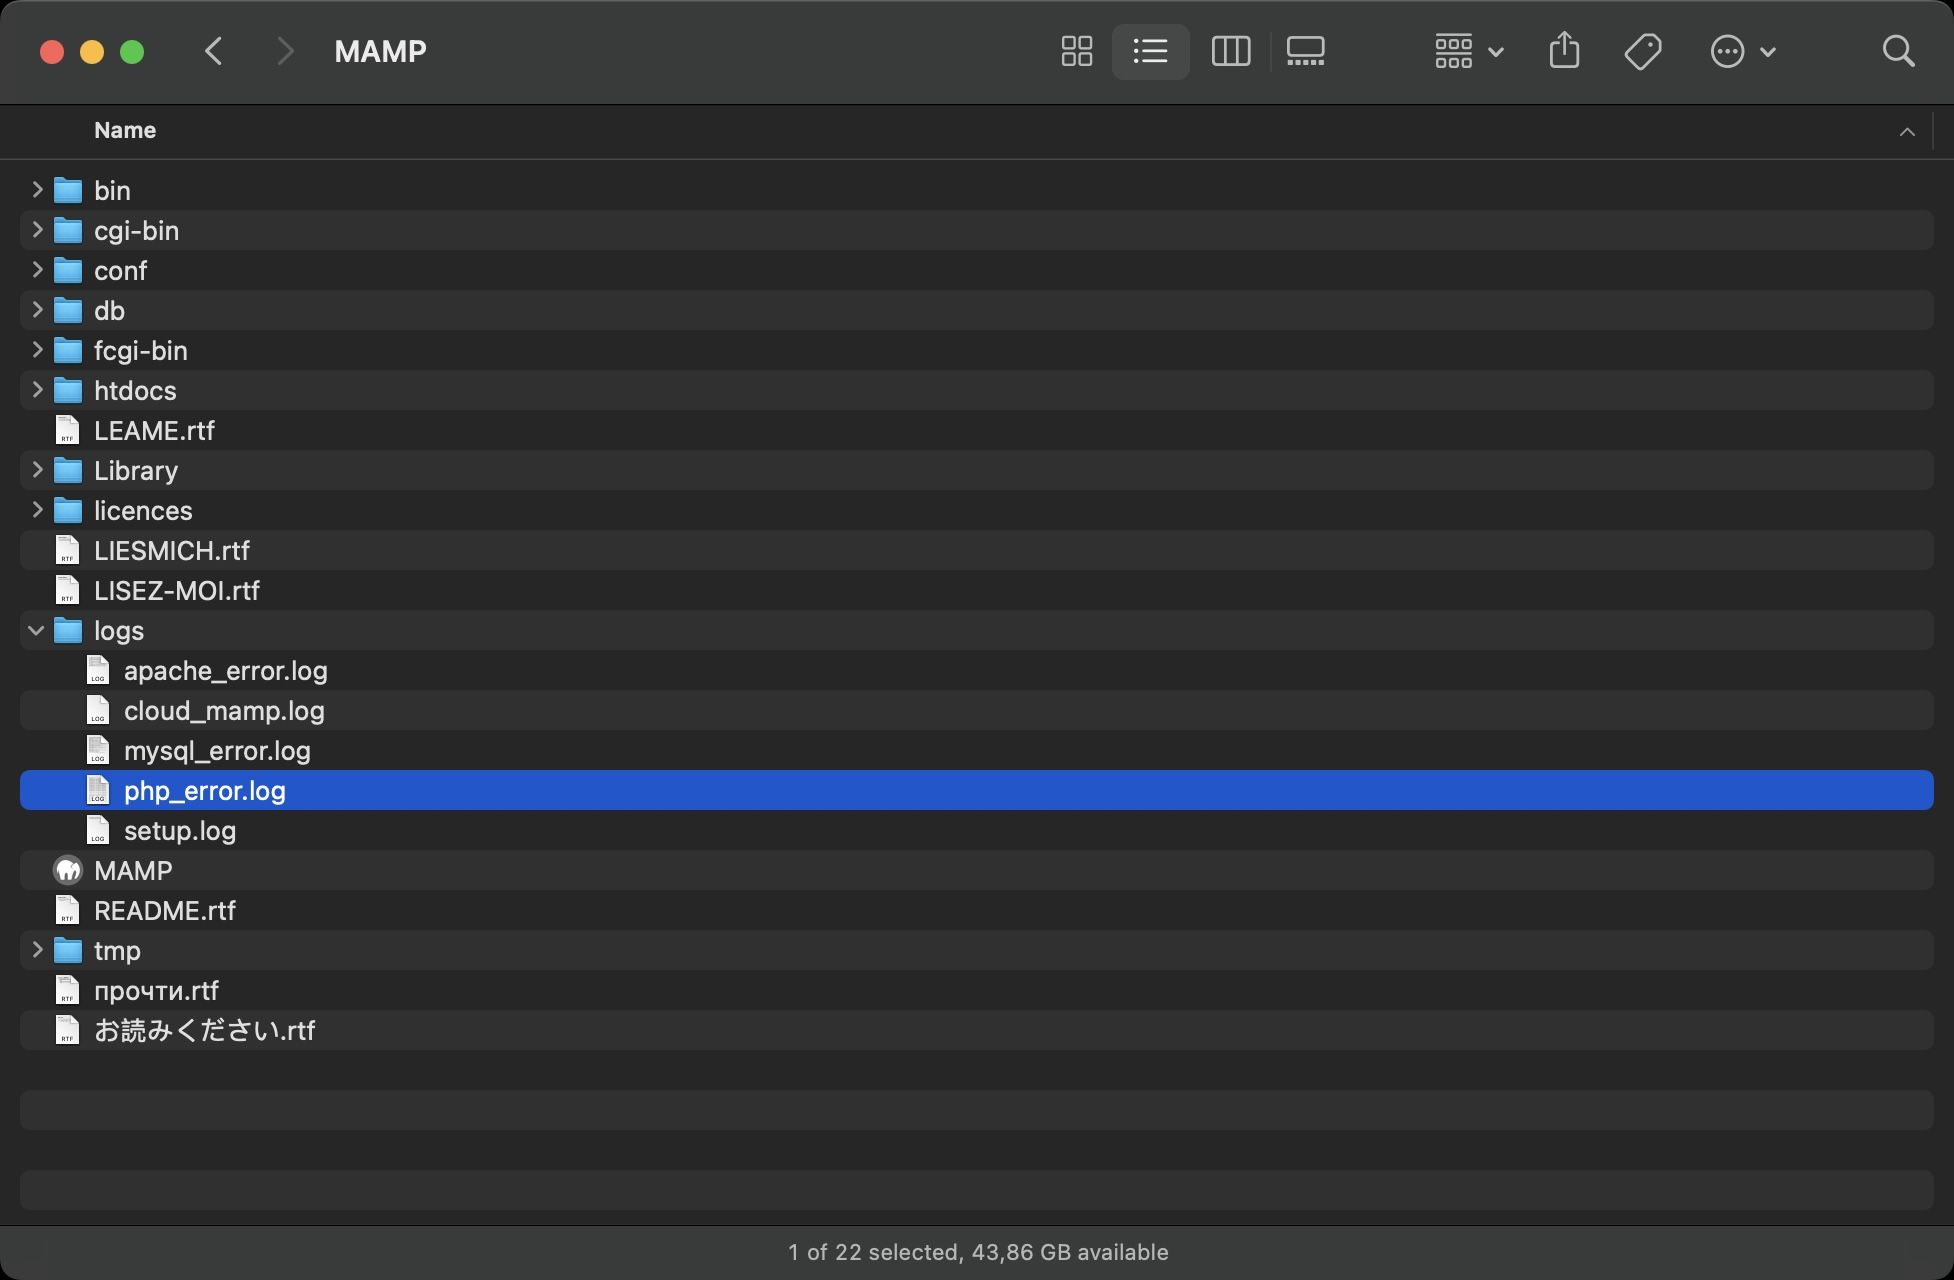
Using MAMP you can open the MAMP application folder and open bin/php. Go in your specific PHP version (8.1.0 in my case) then go in conf. In there you’ll find the php.ini file:
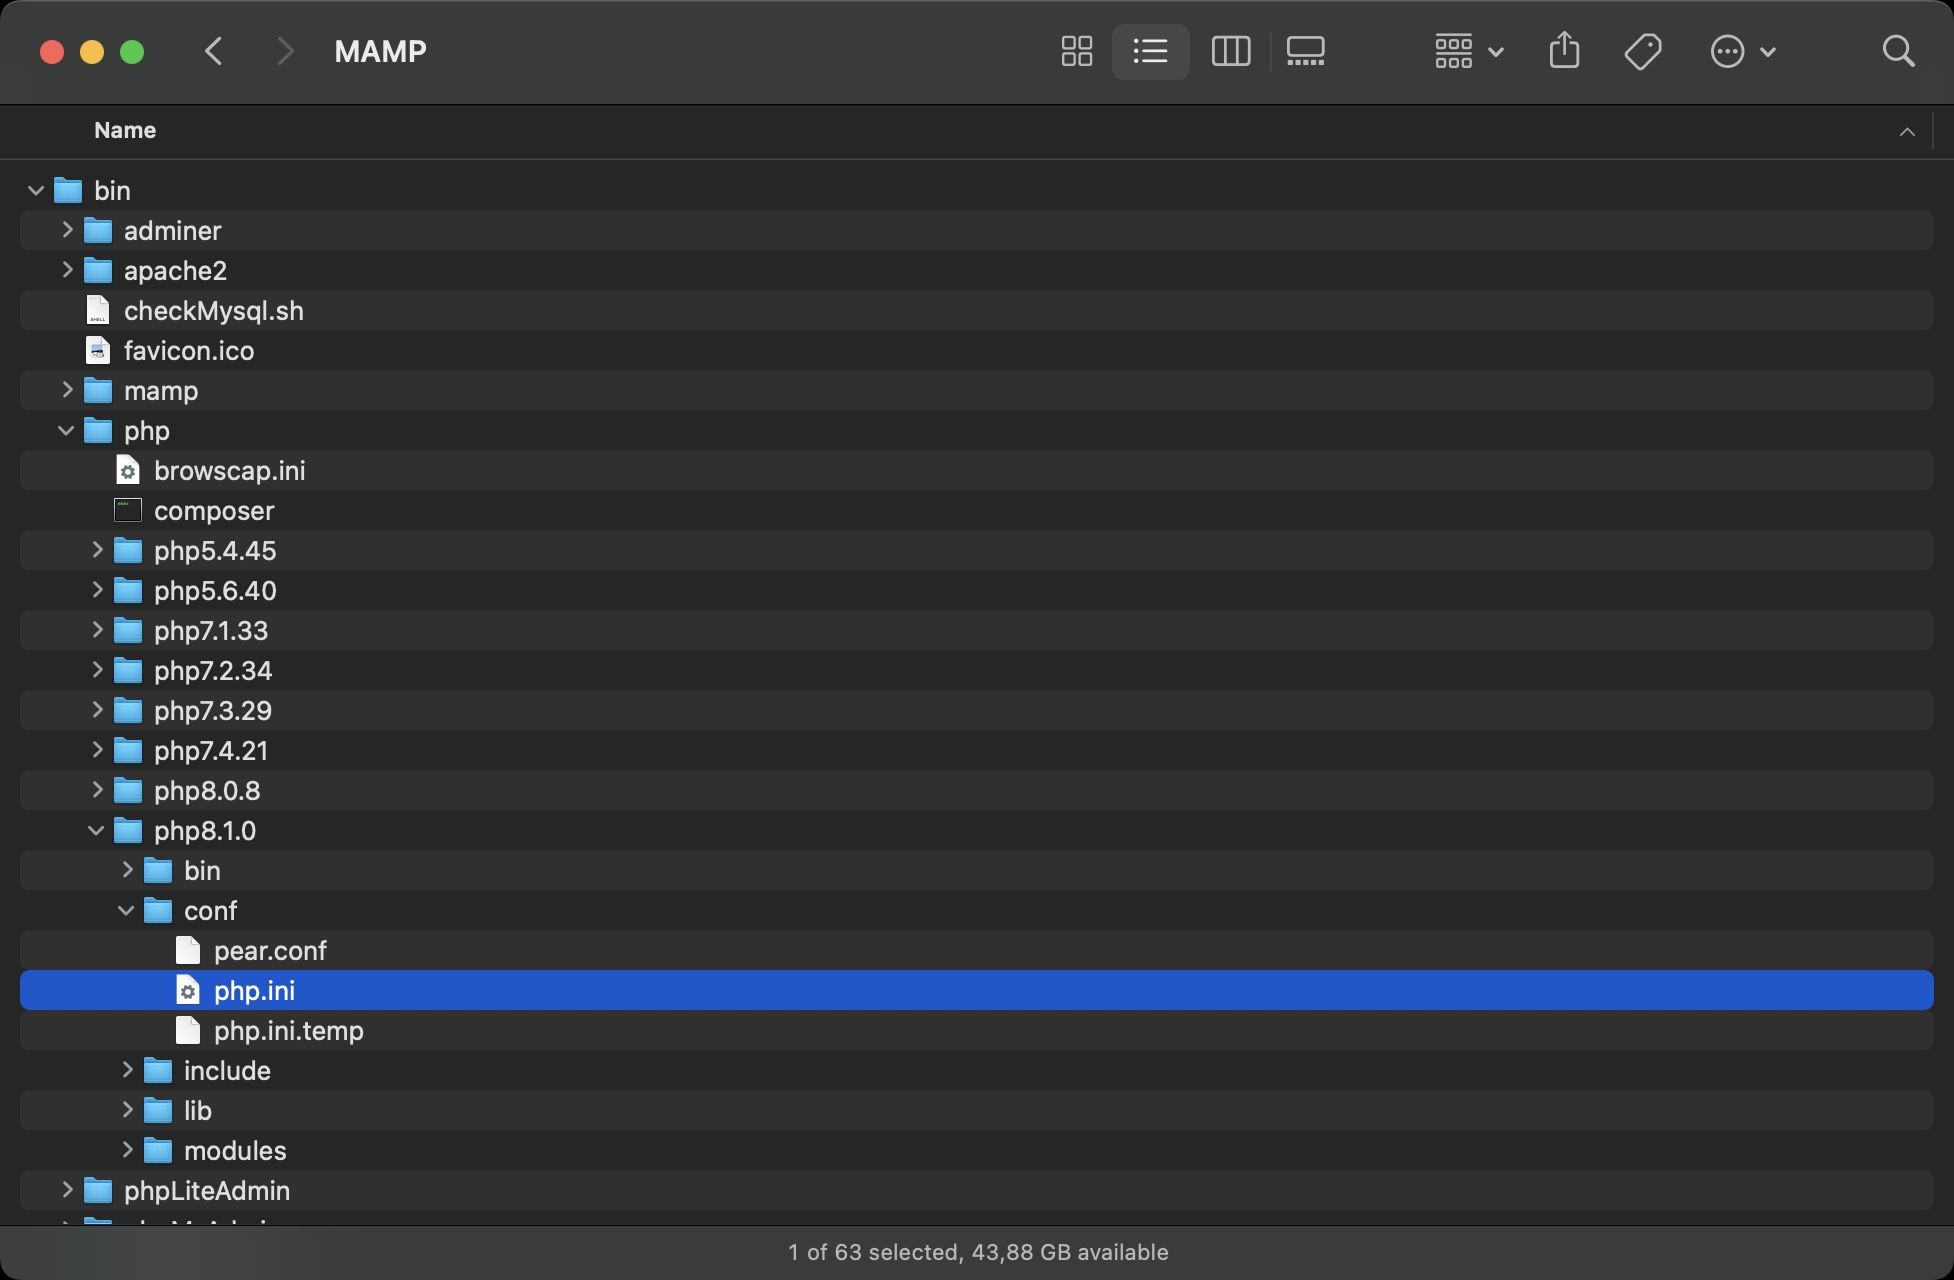
Open that file in an editor.
It contains a really long list of settings, with a great inline documentation for each one.
We’re particularly interested in display_errors:
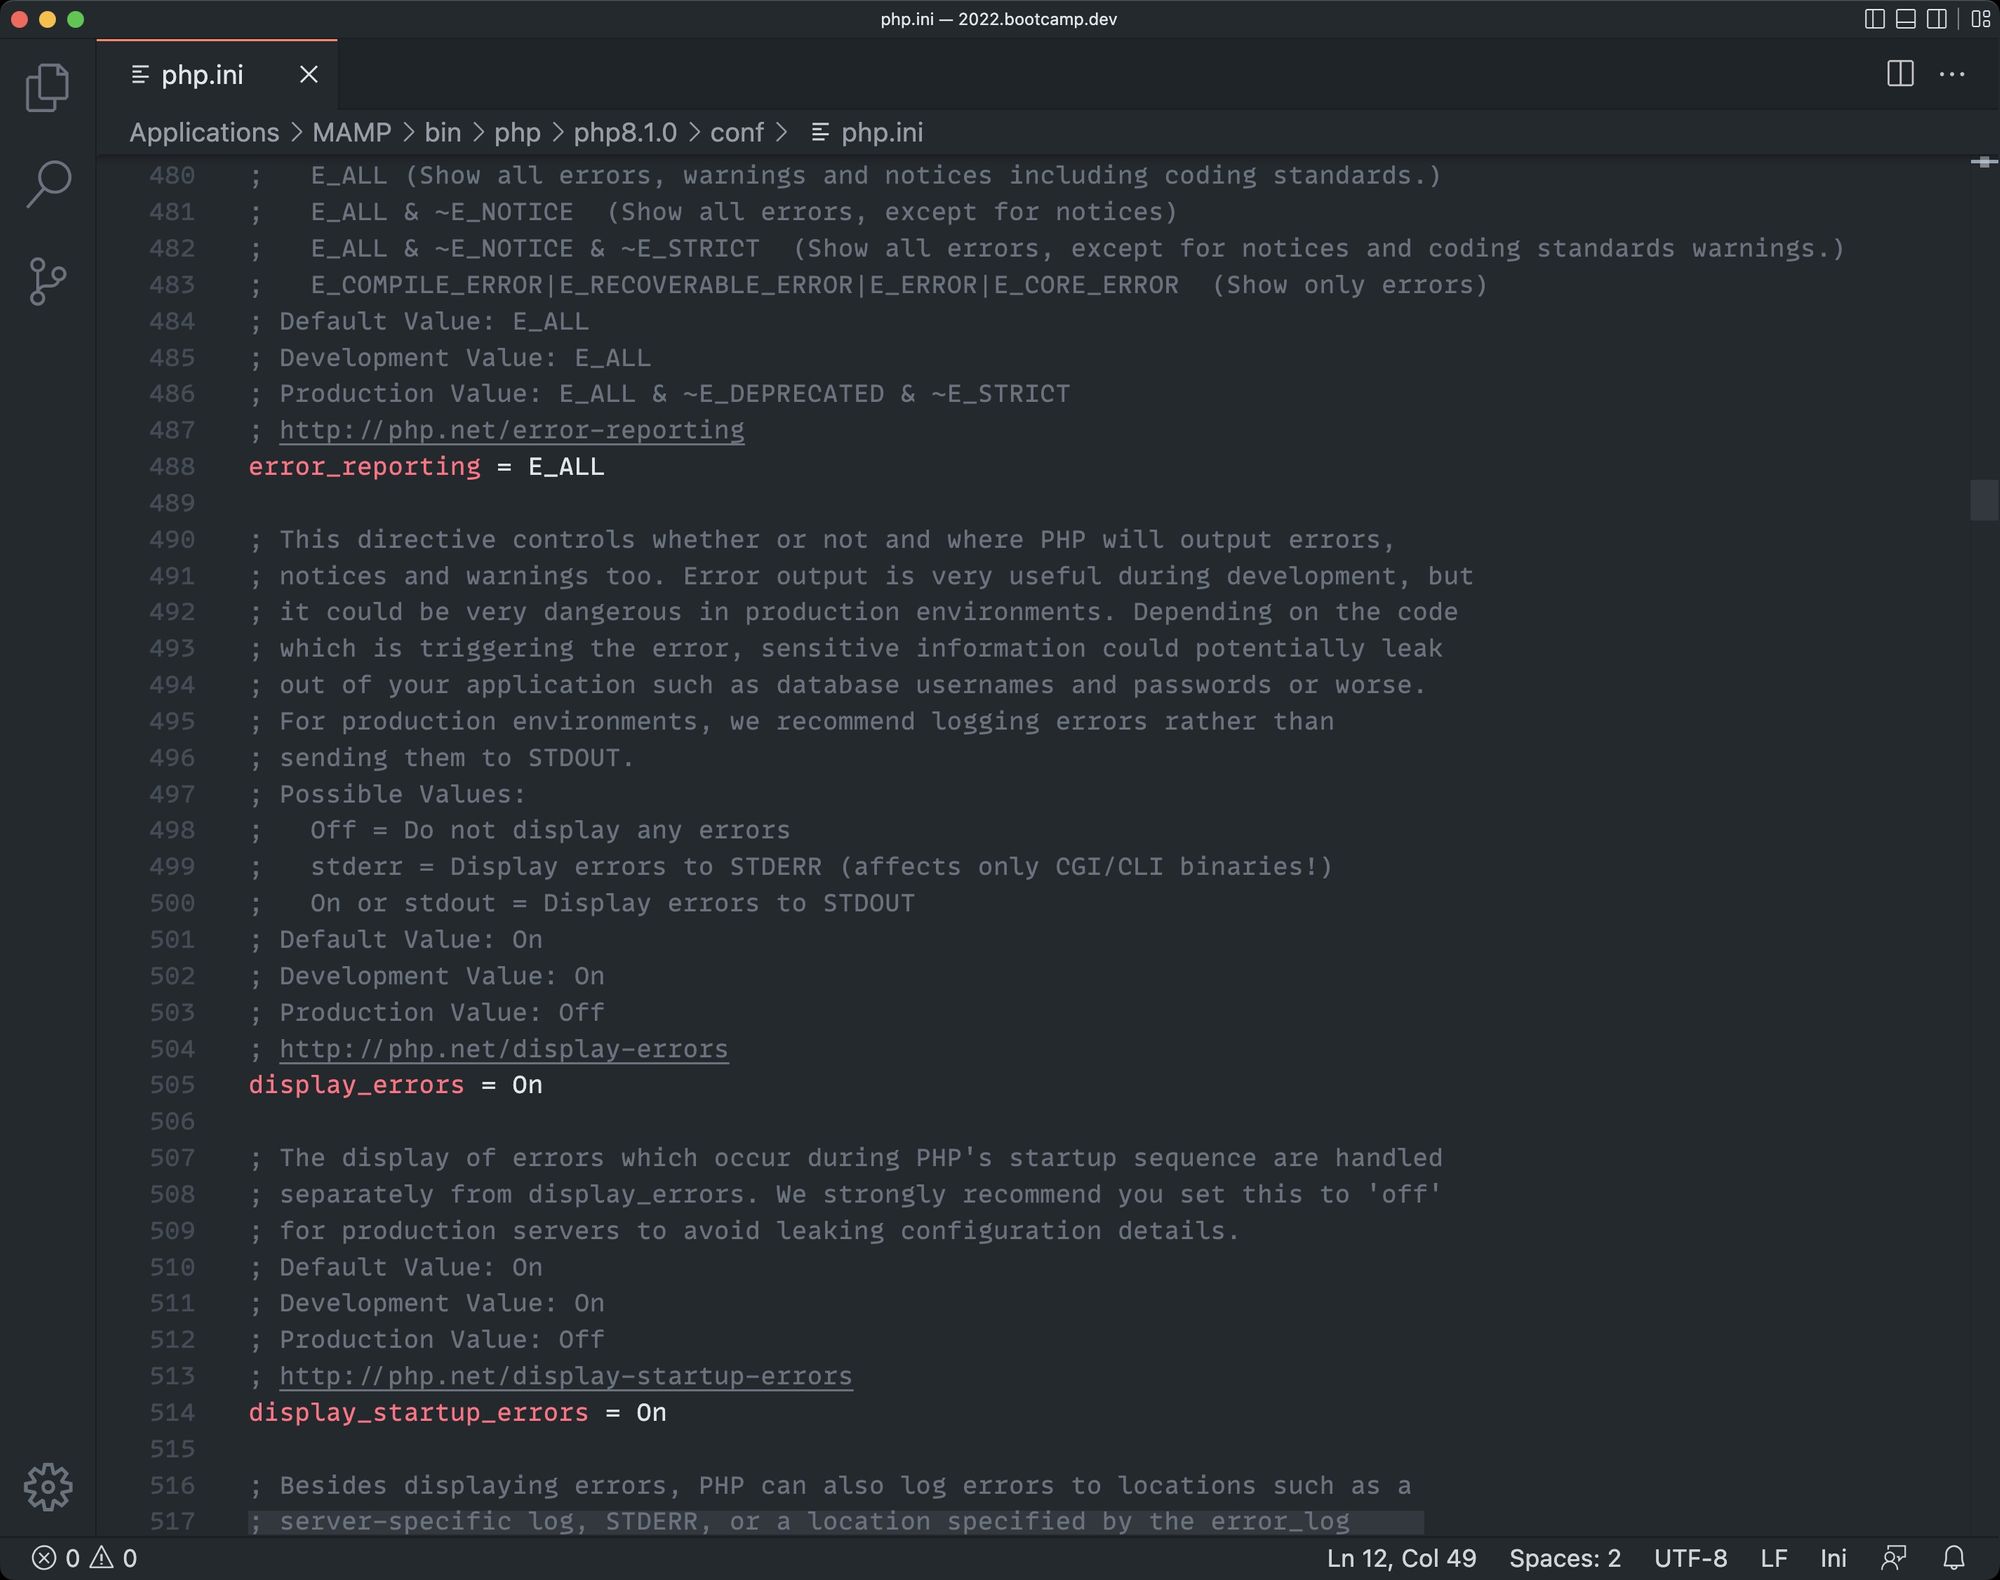
In production you want its value to be Off, as the docs above it say.
The errors will not show up anymore in the website, but you will see them in the php_error.log file in the logs folder of MAMP in this case:
This file will be in a different folder depending on your setup.
You set this location in your php.ini:
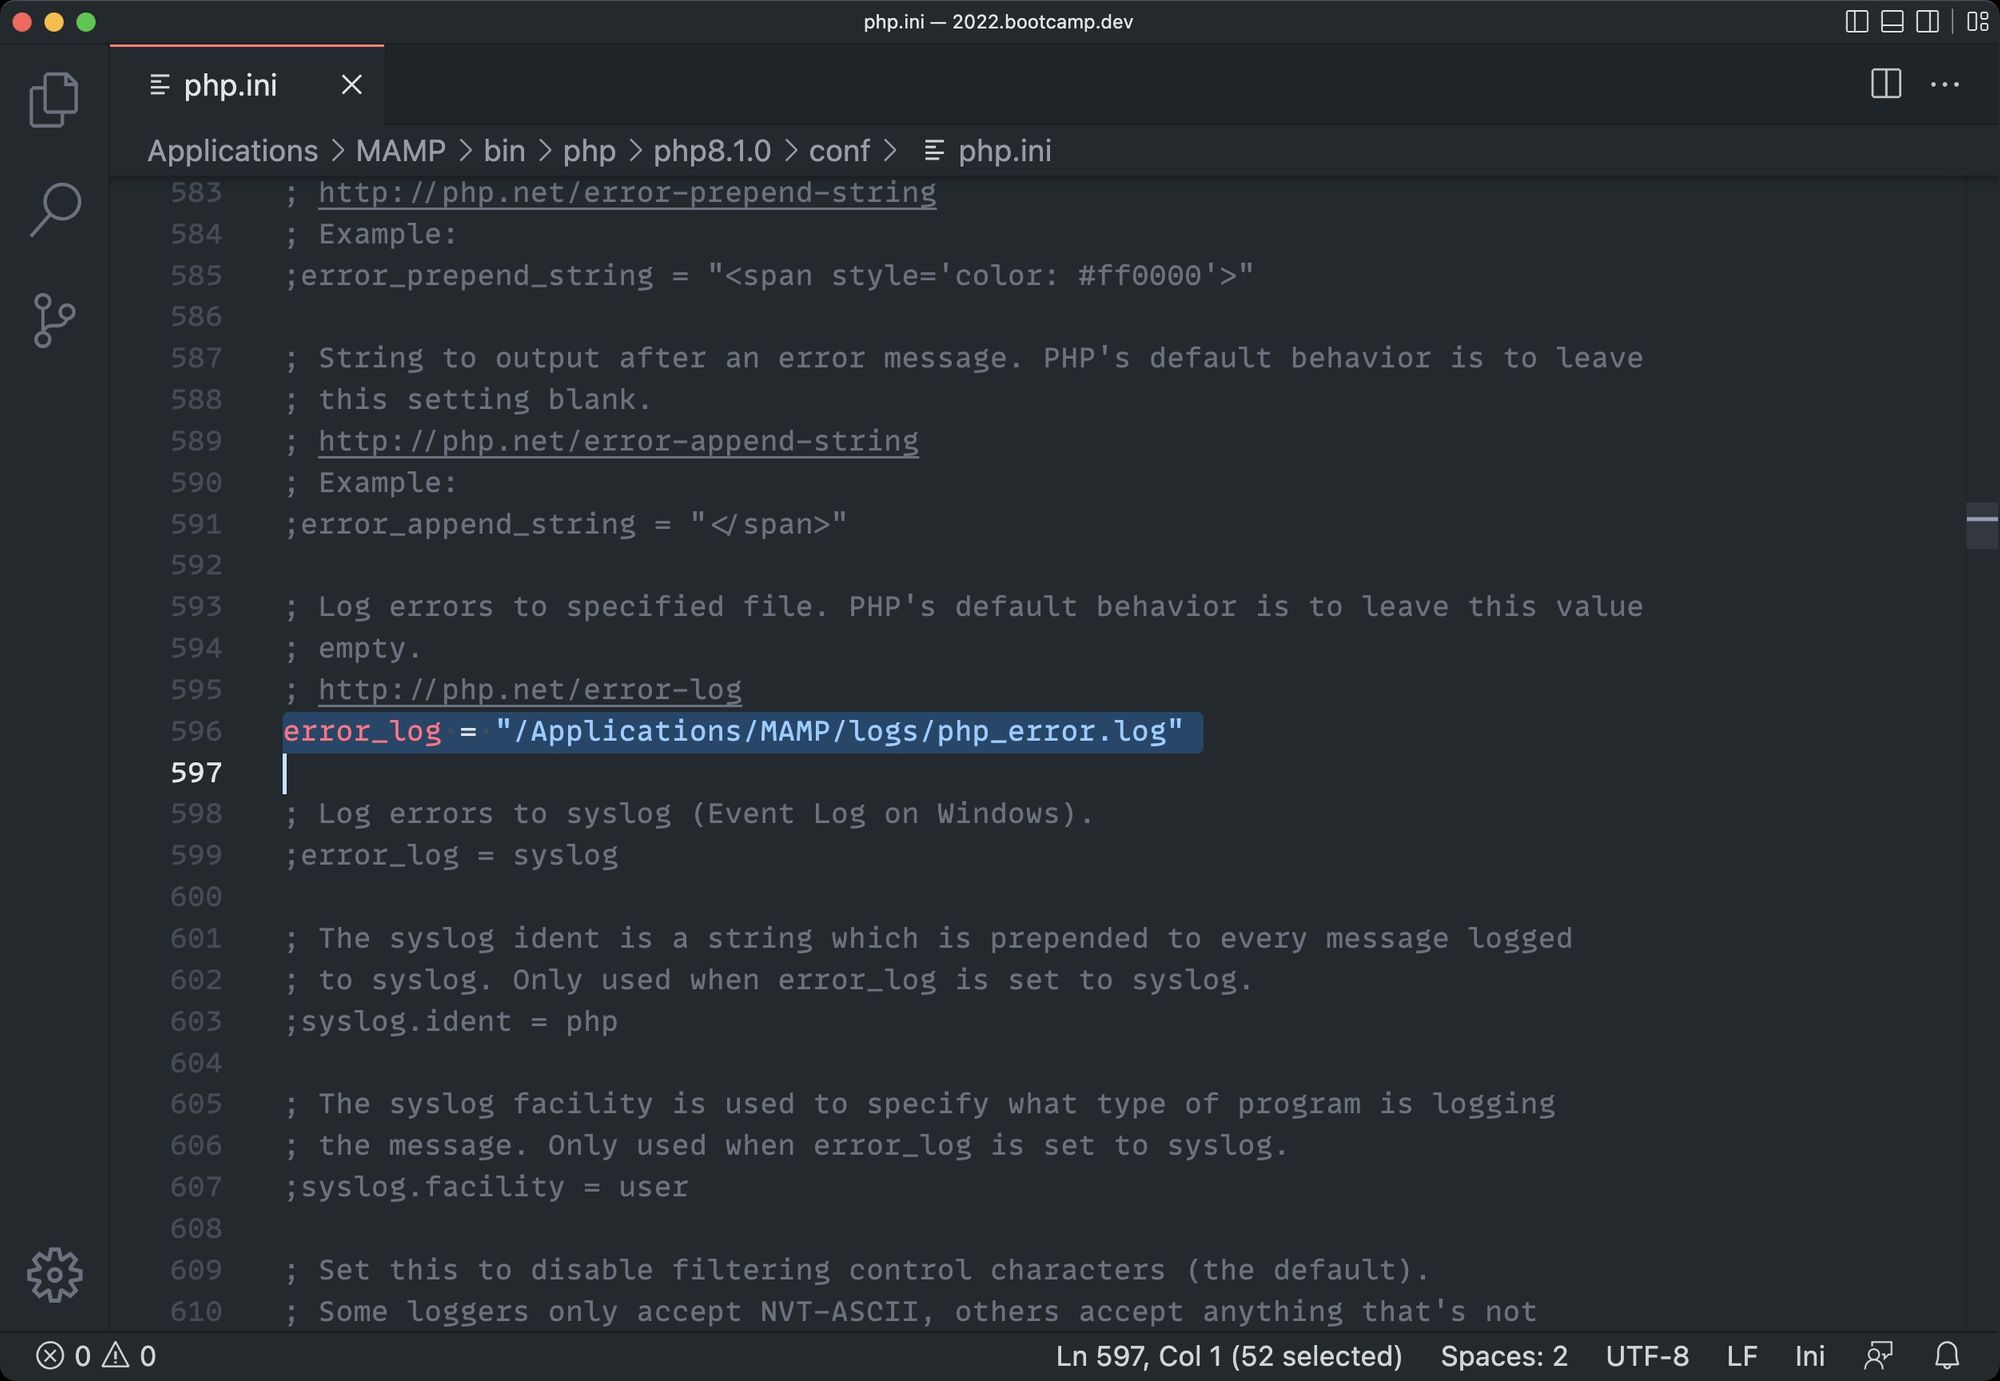
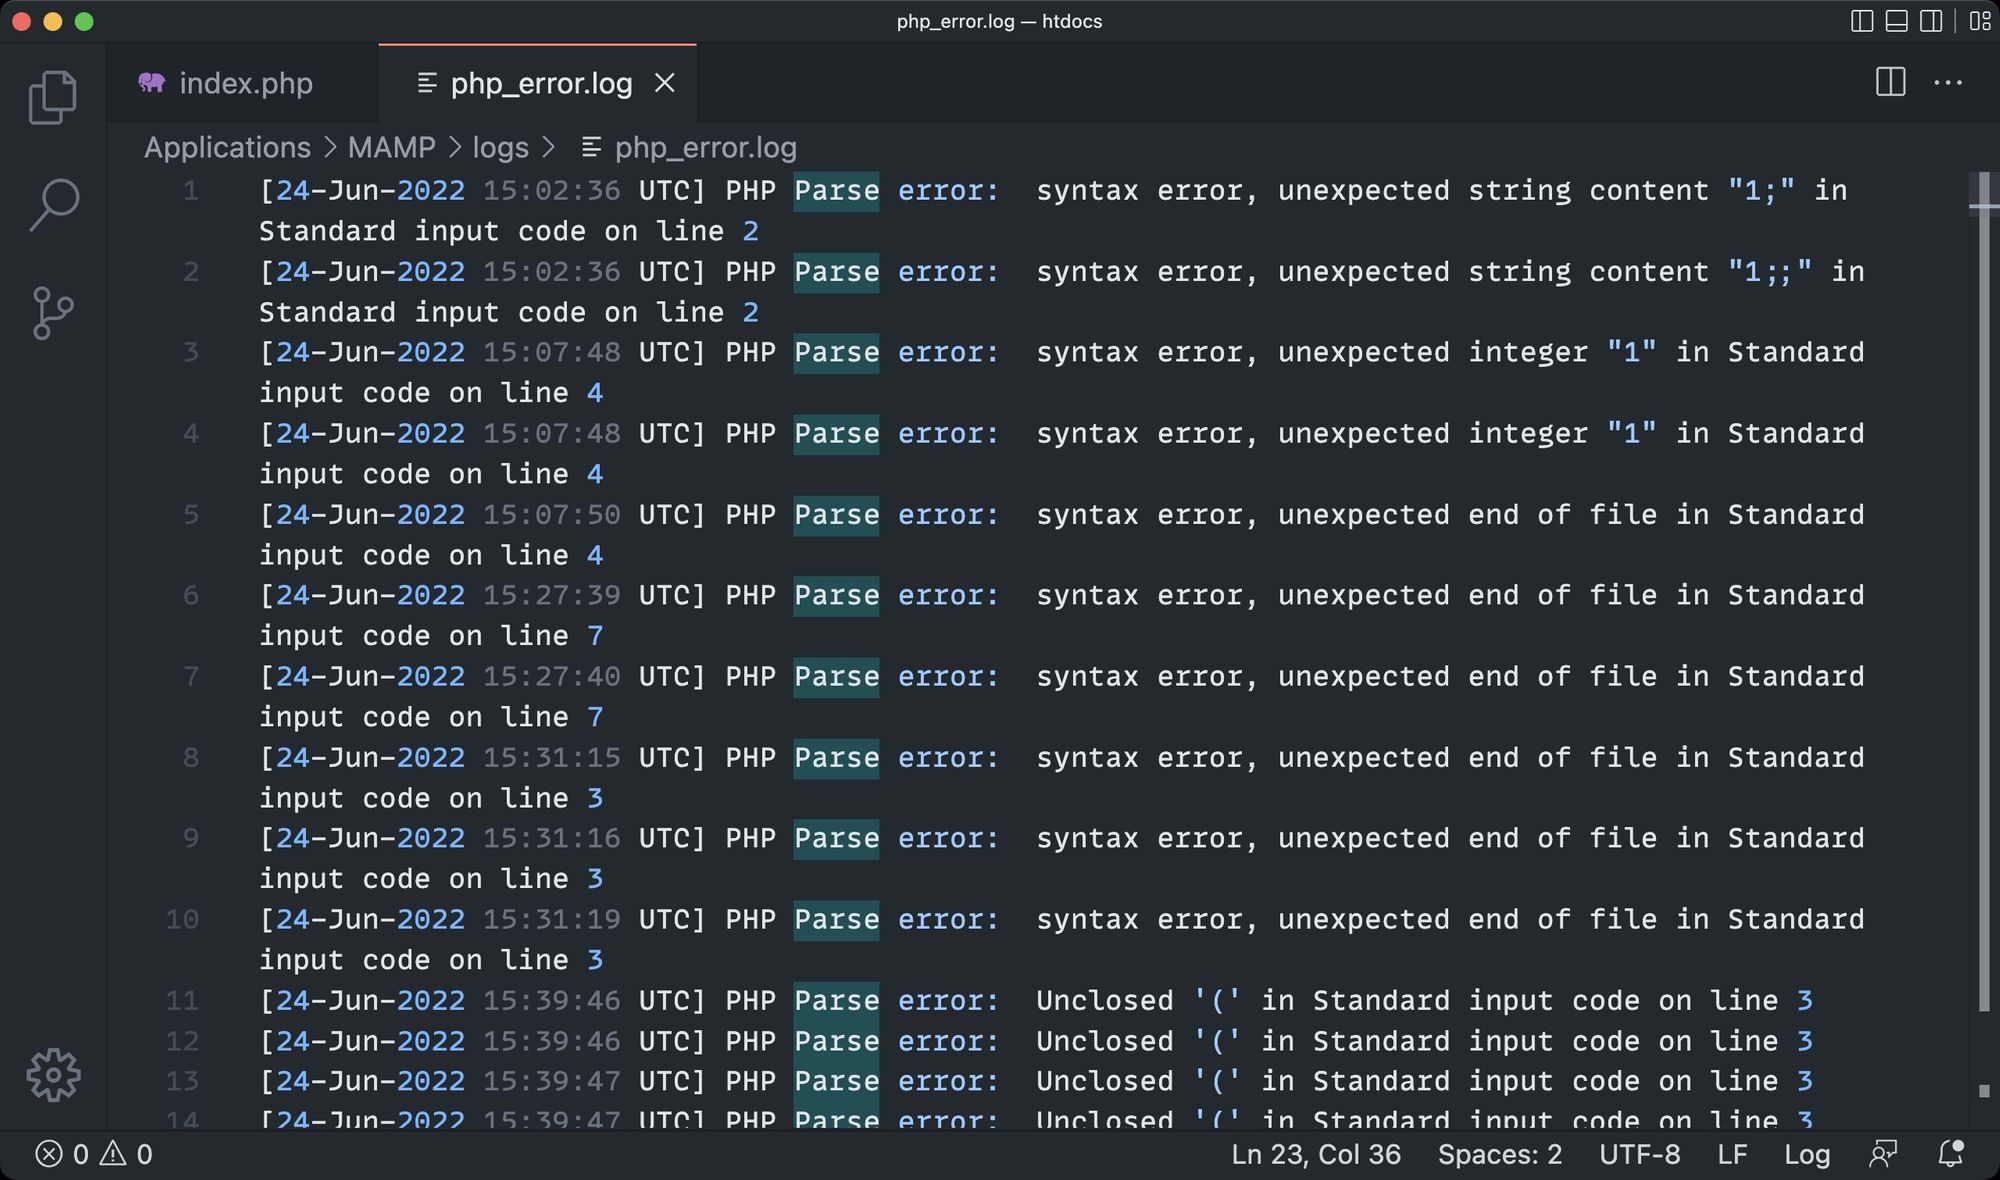
The error log will contain all the error messages your application generates:
You can add information to the error log by using the error_log() function:
error_log('test');
It’s common to use a logger service for errors, like Monolog.
How to Handle Exceptions in PHP
Sometimes errors are unavoidable. Like if something completely unpredictable happens.
But many times, we can think ahead, and write code that can intercept an error, and do something sensible when this happens. Like showing a useful error message to the user, or trying a workaround.
We do so using exceptions.
Exceptions are used to make us, developers, aware of a problem.
We wrap some code that can potentially raise an exception into a try block, and we have a catch block right after that. That catch block will be executed if there’s an exception in the try block:
try {
  //do something
} catch (Throwable $e) {
  //we can do something here if an exception happens
}
Notice that we have an Exception object $e being passed to the catch block, and we can inspect that object to get more information about the exception, like this:
try {
  //do something
} catch (Throwable $e) {
  echo $e->getMessage();
}
Let’s look at an example.
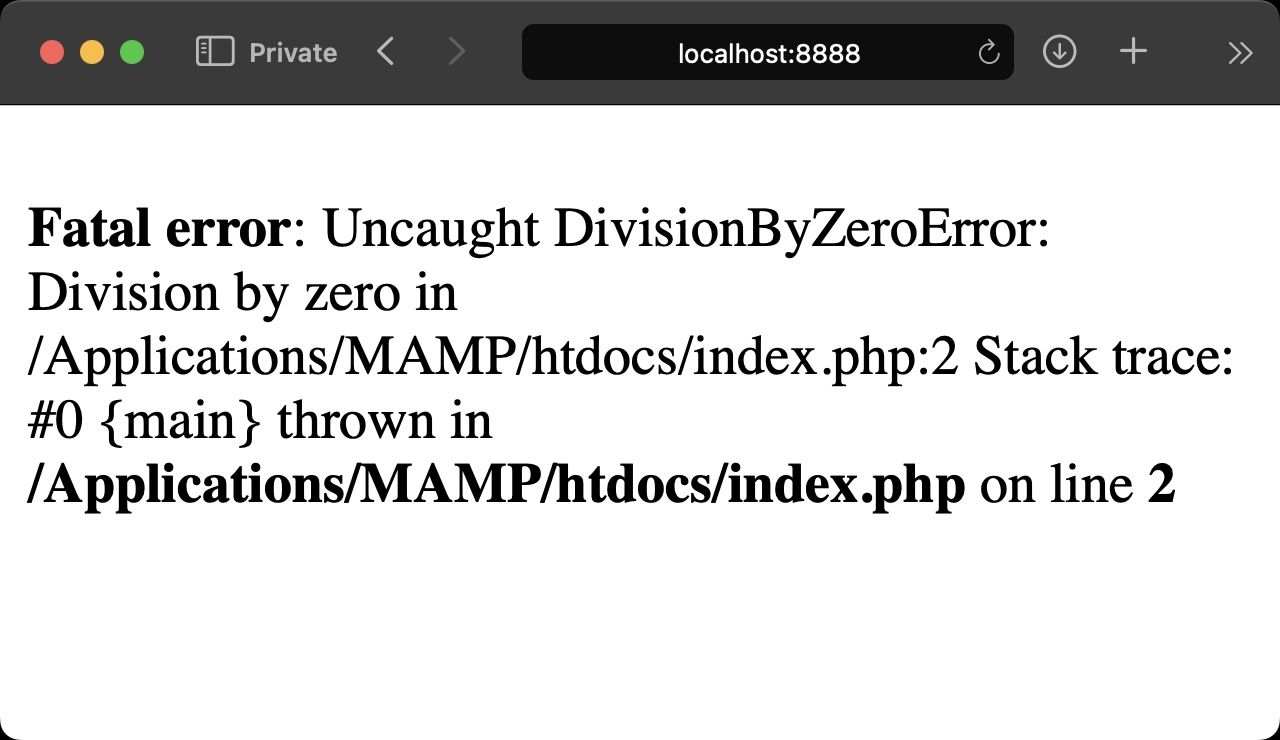
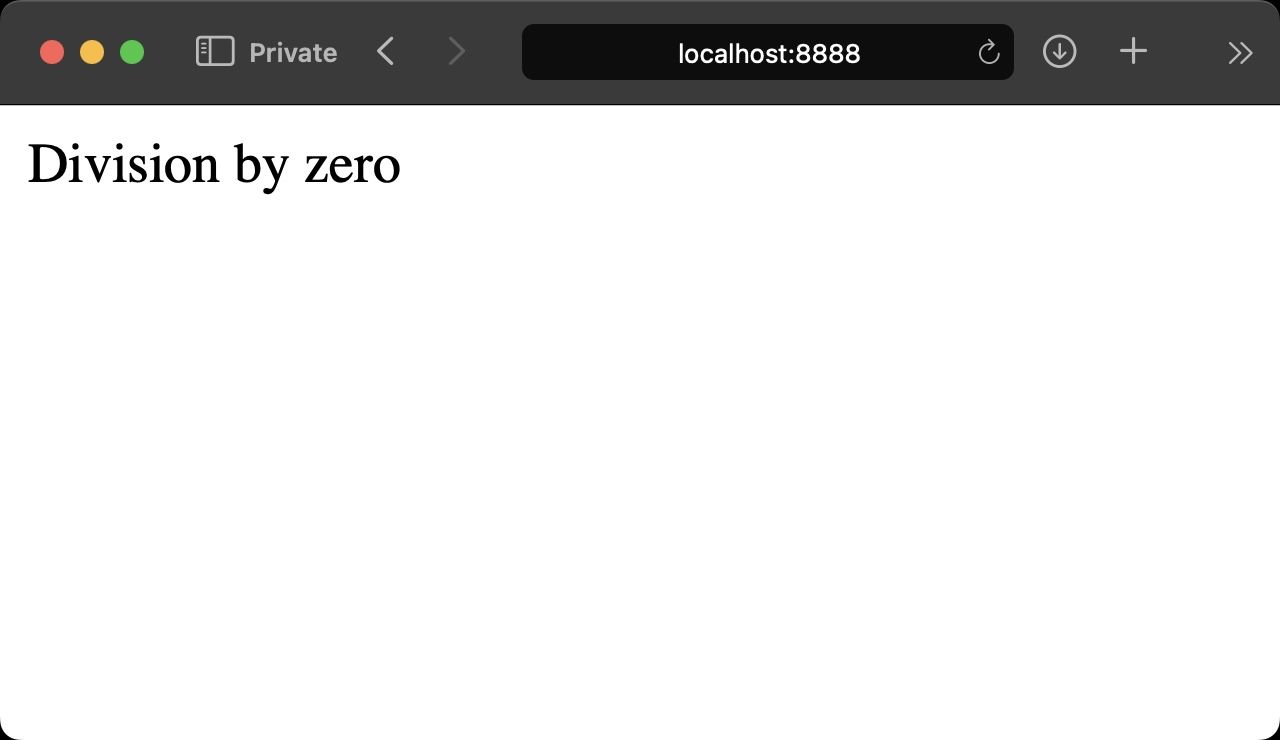
Let's say that by mistake I divide a number by zero:
echo 1 / 0;
This will trigger a fatal error and the program is halted on that line:
Wrapping the operation in a try block and printing the error message in the catch block, the program ends successfully, telling me the problem:
try {
  echo 1 / 0;
} catch (Throwable $e) {
  echo $e->getMessage();
}
Of course this is a simple example but you can see the benefit: I can intercept the issue.
Each exception has a different class. For example we can catch this as DivisionByZeroError and this lets me filter the possible problems and handle them differently.
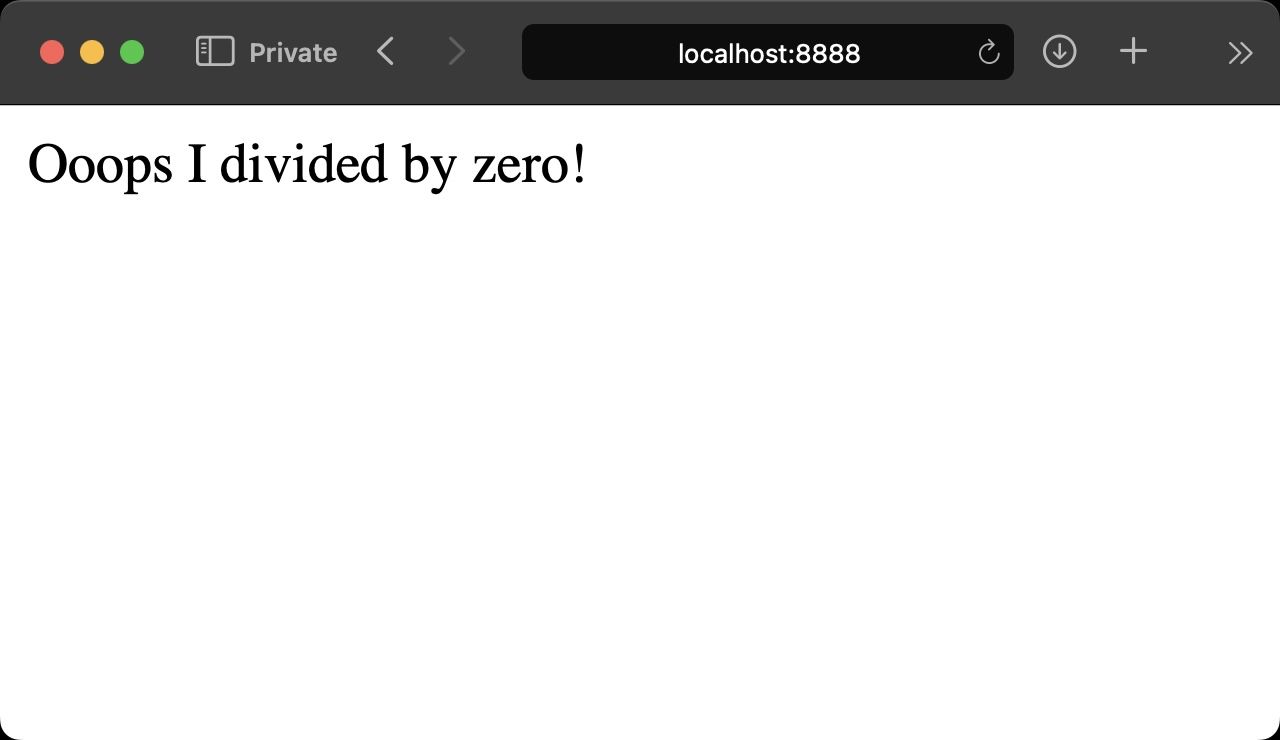
I can have a catch-all for any throwable error at the end, like this:
try {
  echo 1 / 0;
} catch (DivisionByZeroError $e) {
  echo 'Ooops I divided by zero!';
} catch (Throwable $e) {
  echo $e->getMessage();
}
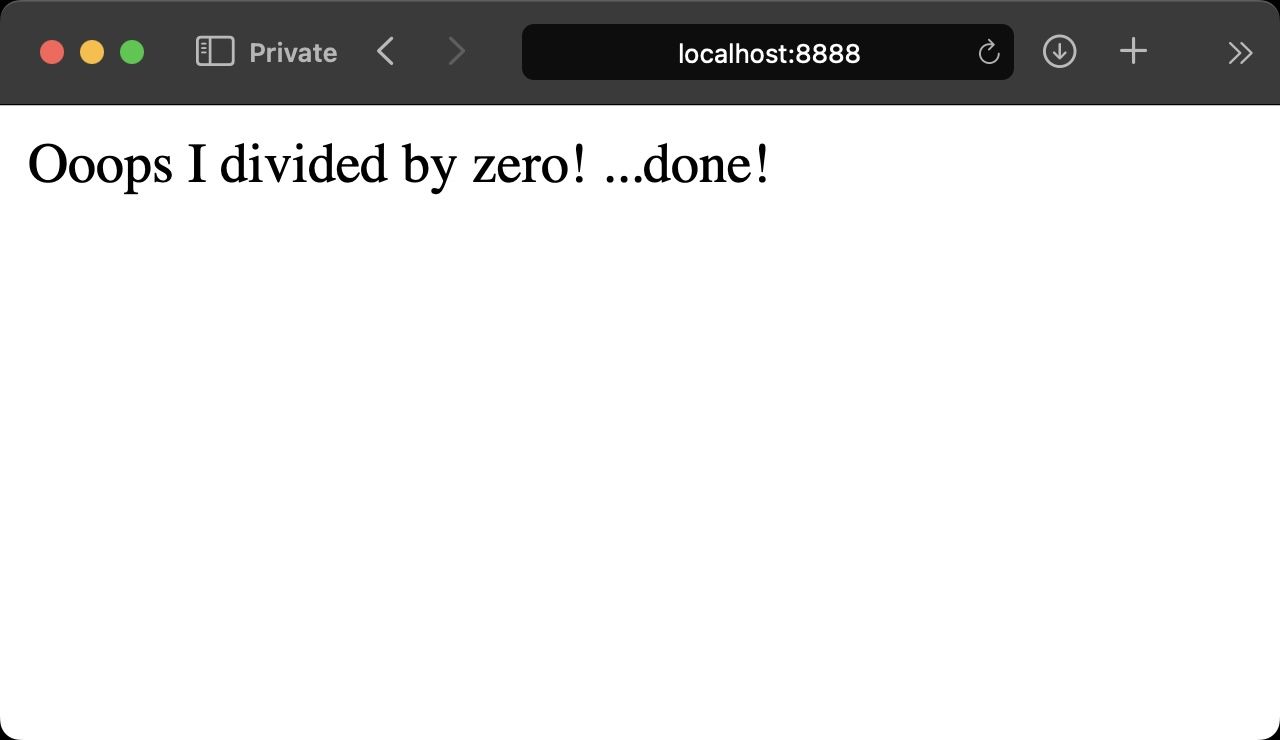
And I can also append a finally {} block at the end of this try/catch structure to execute some code after the code is either executed successfully without problems, or there was a catch:
try {
  echo 1 / 0;
} catch (DivisionByZeroError $e) {
  echo 'Ooops I divided by zero!';
} catch (Throwable $e) {
  echo $e->getMessage();
} finally {
  echo ' ...done!';
}
You can use the built-in exceptions provided by PHP but you can also create your own exceptions.
How to Work with Dates in PHP
Working with dates and times is very common in programming. Let’s see what PHP provides.
We can get the current timestamp (number of seconds since Jan 1 1970 00:00:00 GMT) using time():
$timestamp = time();
When you have a timestamp you can format that as a date using date(), in the format you prefer:
echo date('Y-m-d', $timestamp);
Y is the 4-digit representation of the year, m is the month number (with a leading zero) and d is the number of the day of the month, with a leading zero.
See the full list of characters you can use to format the date here.
We can convert any date into a timestamp using strtotime(), which takes a string with a textual representation of a date and converts it into the number of seconds since Jan 1 1970:
echo strtotime('now');
echo strtotime('4 May 2020');
echo strtotime('+1 day');
echo strtotime('+1 month');
echo strtotime('last Sunday');
...it’s pretty flexible.
For dates, it’s common to use libraries that offer a lot more functionality than what the language can. A good option is Carbon.
How to Use Constants and Enums in PHP
We can define constants in PHP using the define() built-in function:
define('TEST', 'some value');
And then we can use TEST as if it was a variable, but without the $ sign:
define('TEST', 'some value');

echo TEST;
We use uppercase identifiers as a convention for constants.
Interestingly, inside classes we can define constant properties using the const keyword:
class Dog {
  const BREED = 'Siberian Husky';
}
By default they are public but we can mark them as private or protected:
class Dog {
  private const BREED = 'Siberian Husky';
}
Enums allow you to group constants under a common “root”. For example you want to have a Status enum that has 3 states: EATING SLEEPING RUNNING, the 3 states of a dog’s day.
So you have:
enum Status {
  case EATING;
  case SLEEPING;
  case RUNNING;
}
Now we can reference those constants in this way:
class Dog {
  public Status $status;
}

$dog = new Dog();

$dog->status = Status::RUNNING;

if ($dog->status == Status::SLEEPING) {
  //...
}
Enums are objects, they can have methods and lots more features than we can get into here in this short introduction.
How to Use PHP as a Web App Development Platform
PHP is a server-side language and it is typically used in two ways.
One is within an HTML page, so PHP is used to “add” stuff to the HTML which is manually defined in the .php file. This is a perfectly fine way to use PHP.
Another way considers PHP more like the engine that is responsible for generating an “application”. You don't write the HTML in a .php file, but instead you use a templating language to generate the HTML, and everything is managed by what we call the framework.
This is what happens when you use a modern framework like Laravel.
I would consider the first way a bit “out of fashion” these days, and if you’re just starting out you should know about those two different styles of using PHP.
But also consider using a framework like “easy mode” because frameworks give you tools to handle routing, tools to access data from a database, and they make it easier to build a more secure application. And they make it all faster to develop.
That said, we’re not going to talk about using frameworks in this handbook. But I will talk about the basic, fundamental building blocks of PHP. They are essentials that any PHP developer must know.
Just know that “in the real world” you might use your favorite framework’s way of doing things rather than the lower level features offered by PHP.
This does not apply just to PHP of course – it’s an “issue” that happens with any programming language.
How to Handle HTTP Requests in PHP
Let’s start with handling HTTP requests.
PHP offers file-based routing by default. You create an index.php file and that responds on the / path.
We saw that when we made the Hello World example in the beginning.
Similarly, you can create a test.php file and automatically that will be the file that Apache serves on the /test route.
How to Use $_GET, $_POST and $_REQUEST in PHP
Files respond to all HTTP requests, including GET, POST and other verbs.
For any request you can access all the query string data using the $_GET object. It's called superglobal and is automatically available in all our PHP files.
This is of course most useful in GET requests, but also other requests can send data as a query string.
For POST, PUT and DELETE requests you’re more likely to need the data posted as URL-encoded data or using the FormData object, which PHP makes available to you using $_POST.
There is also $_REQUEST which contains all of $_GET and $_POST combined in a single variable.
How to Use the $_SERVER Object in PHP
We also have the superglobal variable $_SERVER, which you use to get a lot of useful information.
You saw how to use phpinfo() before. Let’s use it again to see what $_SERVER offers us.
In your index.php file in the root of MAMP run:
<?php
phpinfo();
?>
Then generate the page at localhost:8888 and search $_SERVER. You will see all the configuration stored and the values assigned:
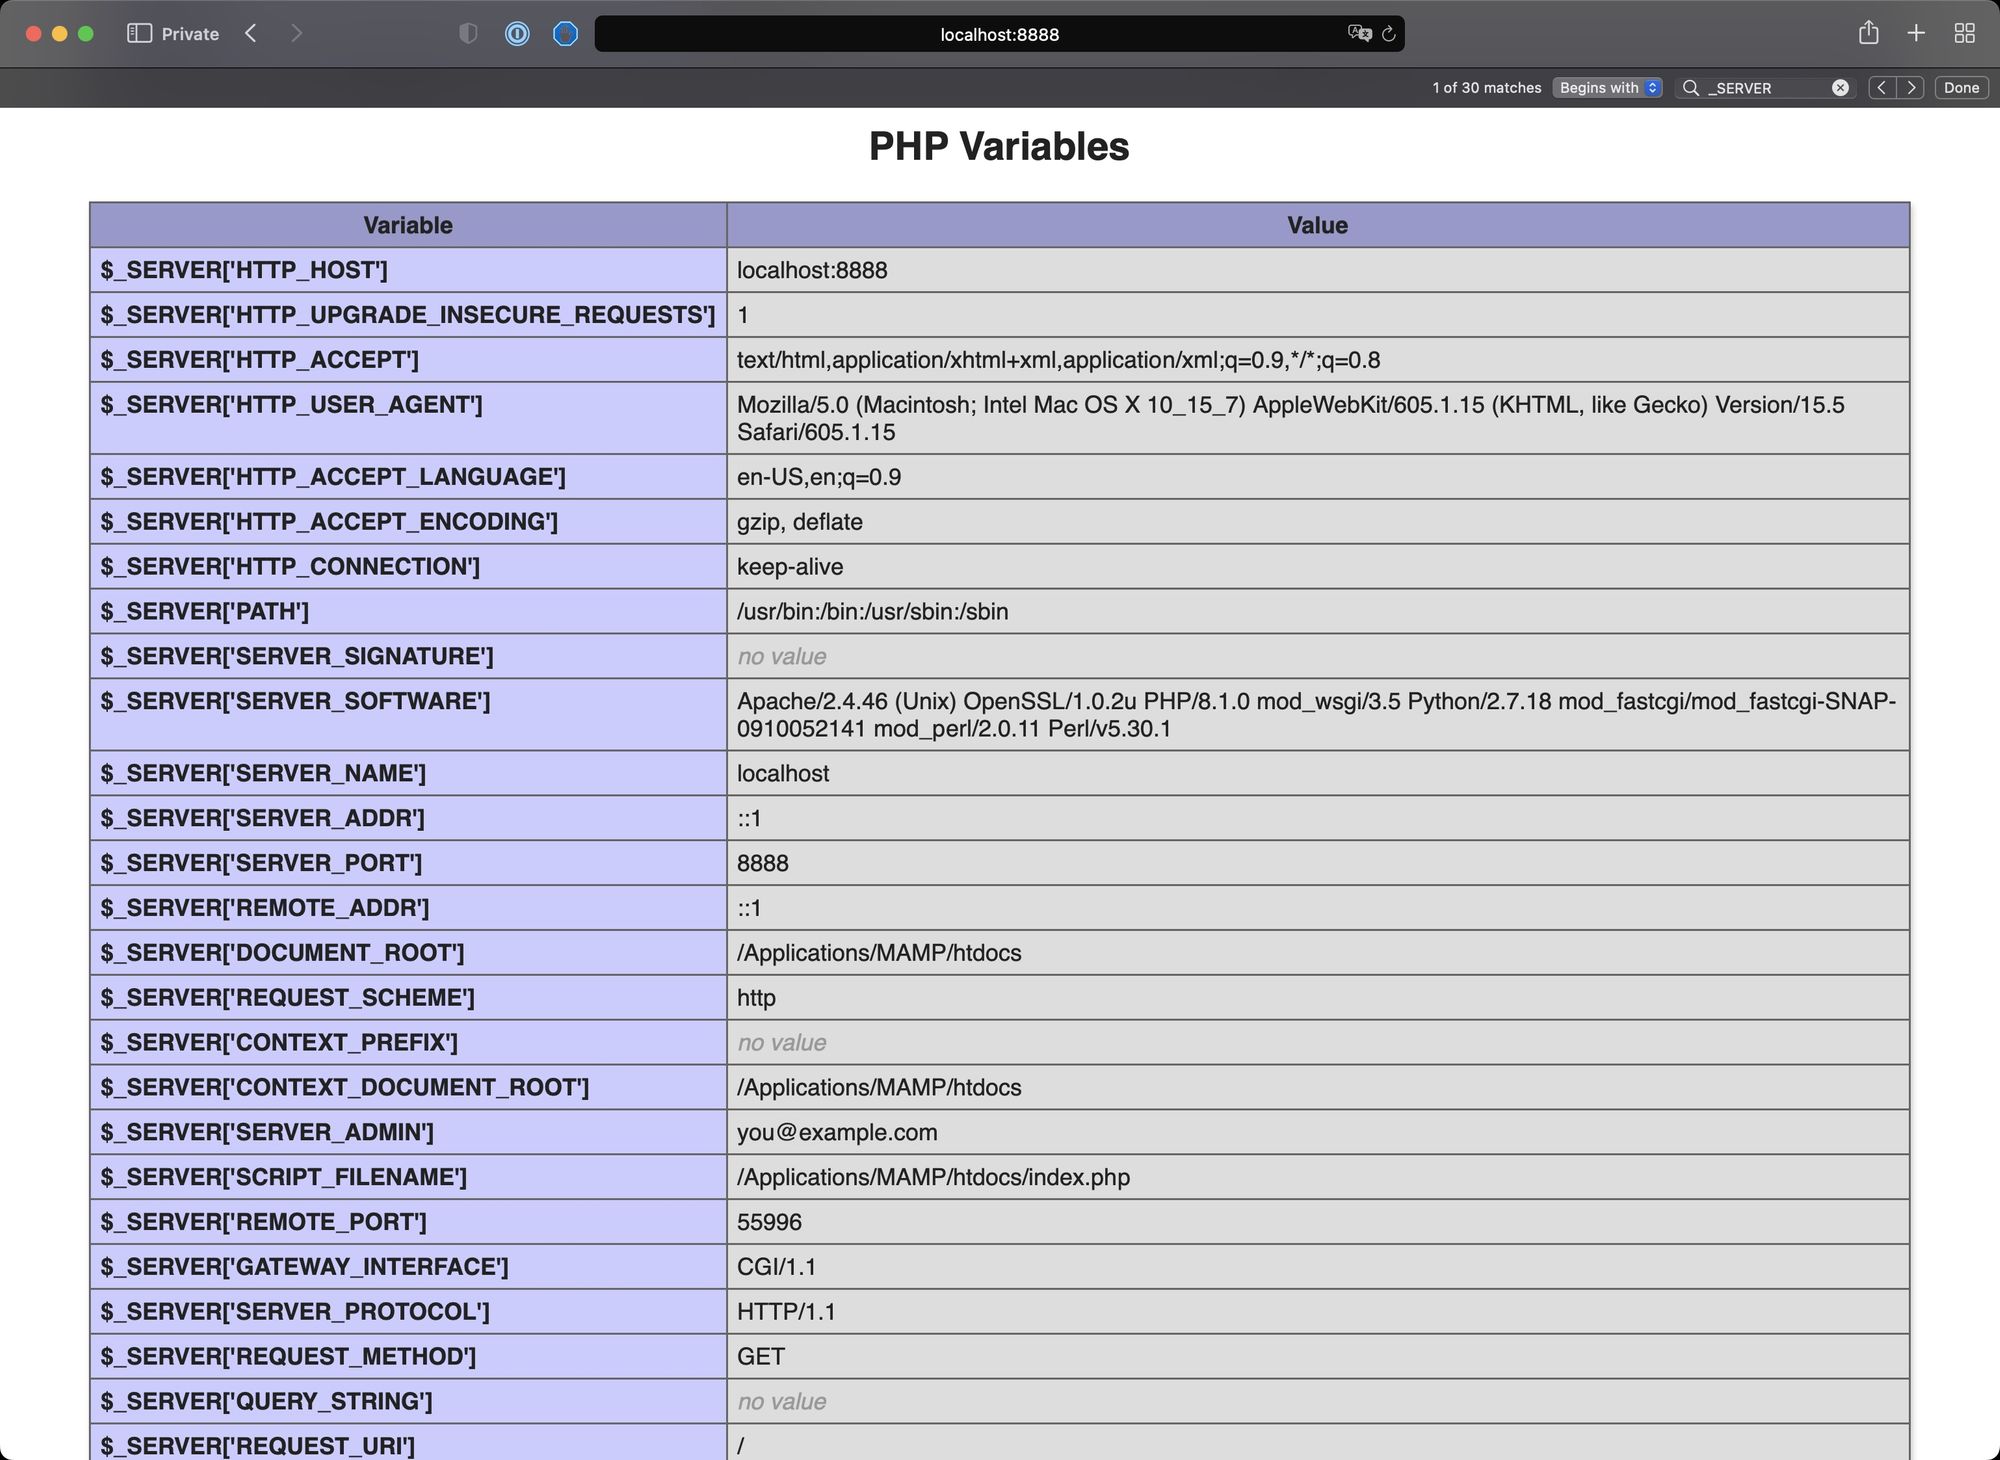
Important ones you might use are:
$_SERVER['HTTP_HOST']$_SERVER['HTTP_USER_AGENT']$_SERVER['SERVER_NAME']$_SERVER['SERVER_ADDR']$_SERVER['SERVER_PORT']$_SERVER['DOCUMENT_ROOT']$_SERVER['REQUEST_URI']$_SERVER['SCRIPT_NAME']$_SERVER['REMOTE_ADDR']
How to Use Forms in PHP
Forms are the way the Web platform allows users to interact with a page and send data to the server.
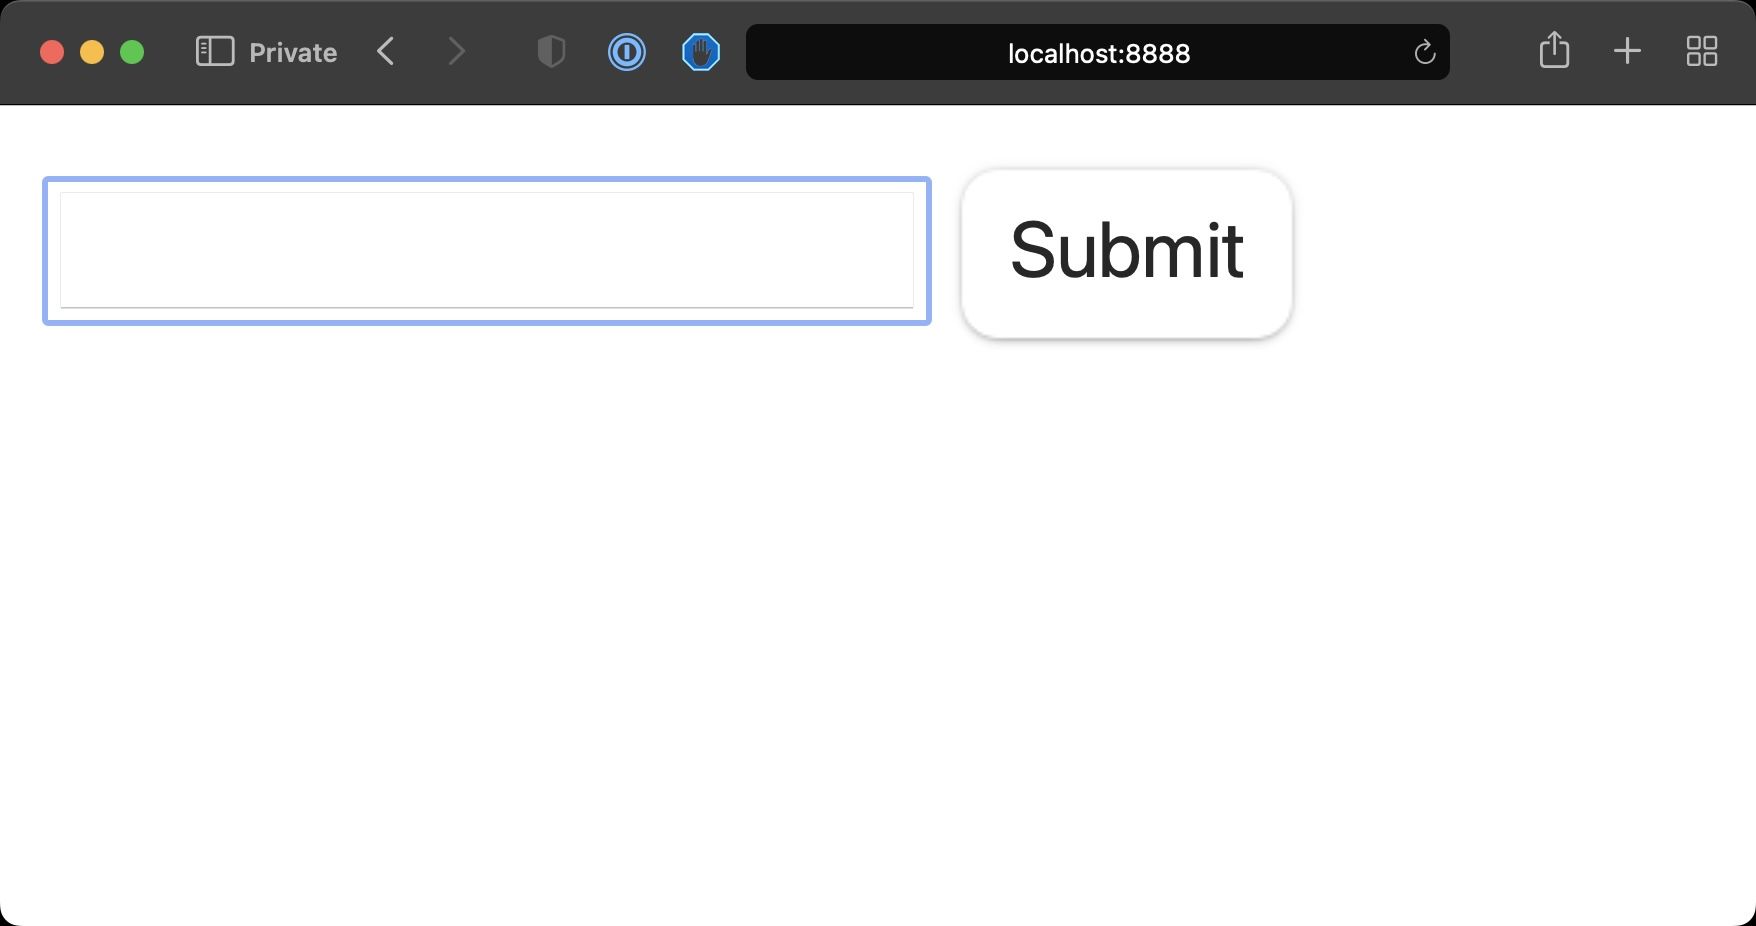
Here is a simple form in HTML:
<form>
  <input type="text" name="name" />
  <input type="submit" />
</form>
You can put this in your index.php file like it was called index.html.
A PHP file assumes you write HTML in it with some “PHP sprinkles” using <?php ?> so the Web Server can post that to the client. Sometimes the PHP part takes all of the page, and that’s when you generate all the HTML via PHP – it’s kind of the opposite of the approach we're taking here now.
So we have this index.php file that generates this form using plain HTML:
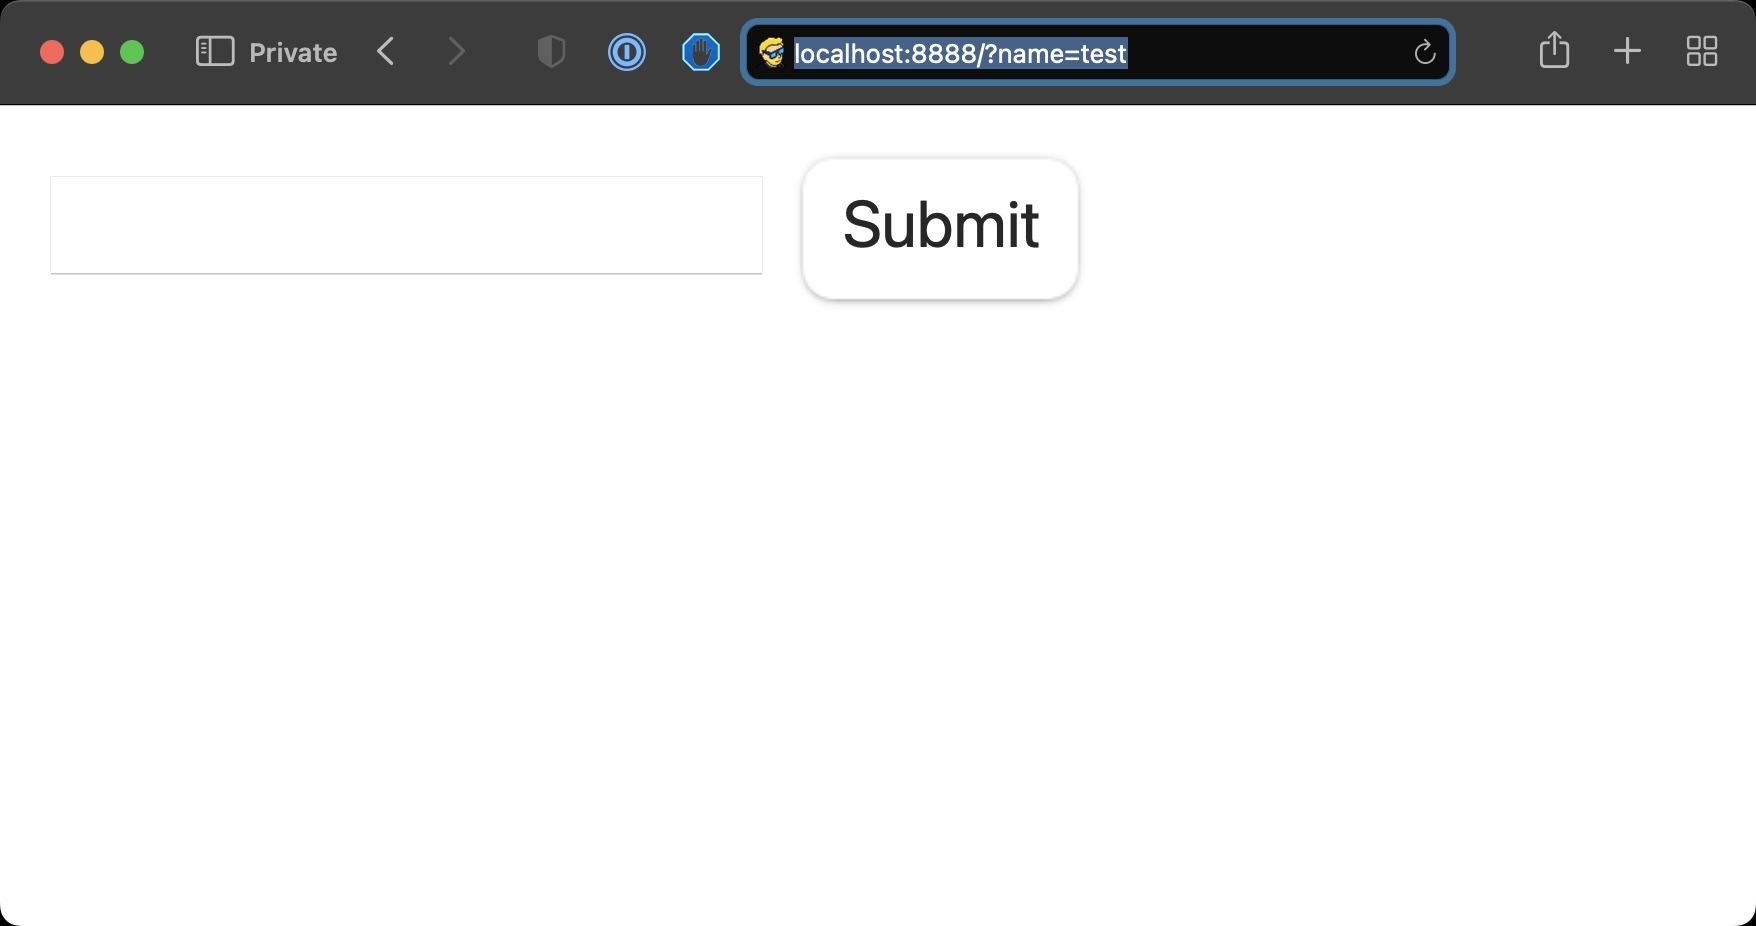
Pressing the Submit button will make a GET request to the same URL sending the data via query string. Notice that the URL changed to localhost:8888/?name=test.
We can add some code to check if that parameter is set using the isset() function:
<form>
  <input type="text" name="name" />
  <input type="submit" />
</form>

<?php
if (isset($_GET['name'])) {
  echo '<p>The name is ' . $_GET['name'];
}
?>
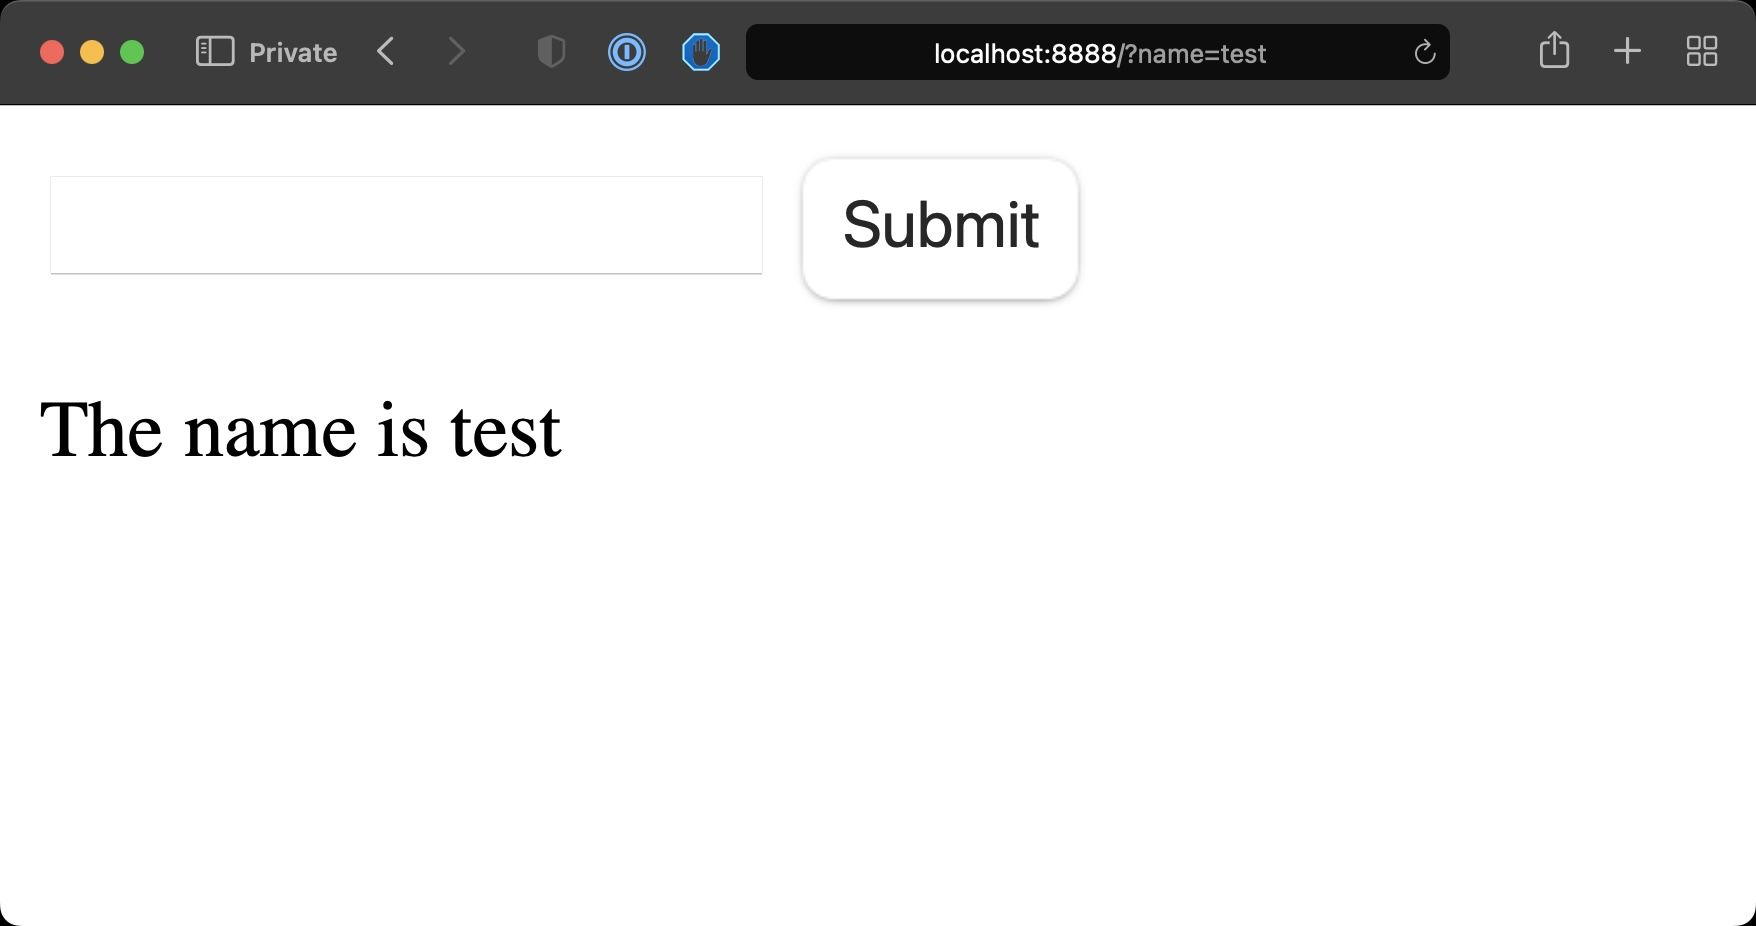
See? We can get the information from the GET request query string through $_GET.
What you usually do with forms, though is you perform a POST request:
<form **method="POST"**>
  <input type="text" name="name" />
  <input type="submit" />
</form>

<?php
if (isset($_POST['name'])) {
  echo '<p>The name is ' . $_POST['name'];
}
?>
See, now we got the same information but the URL didn’t change. The form information was not appended to the URL.
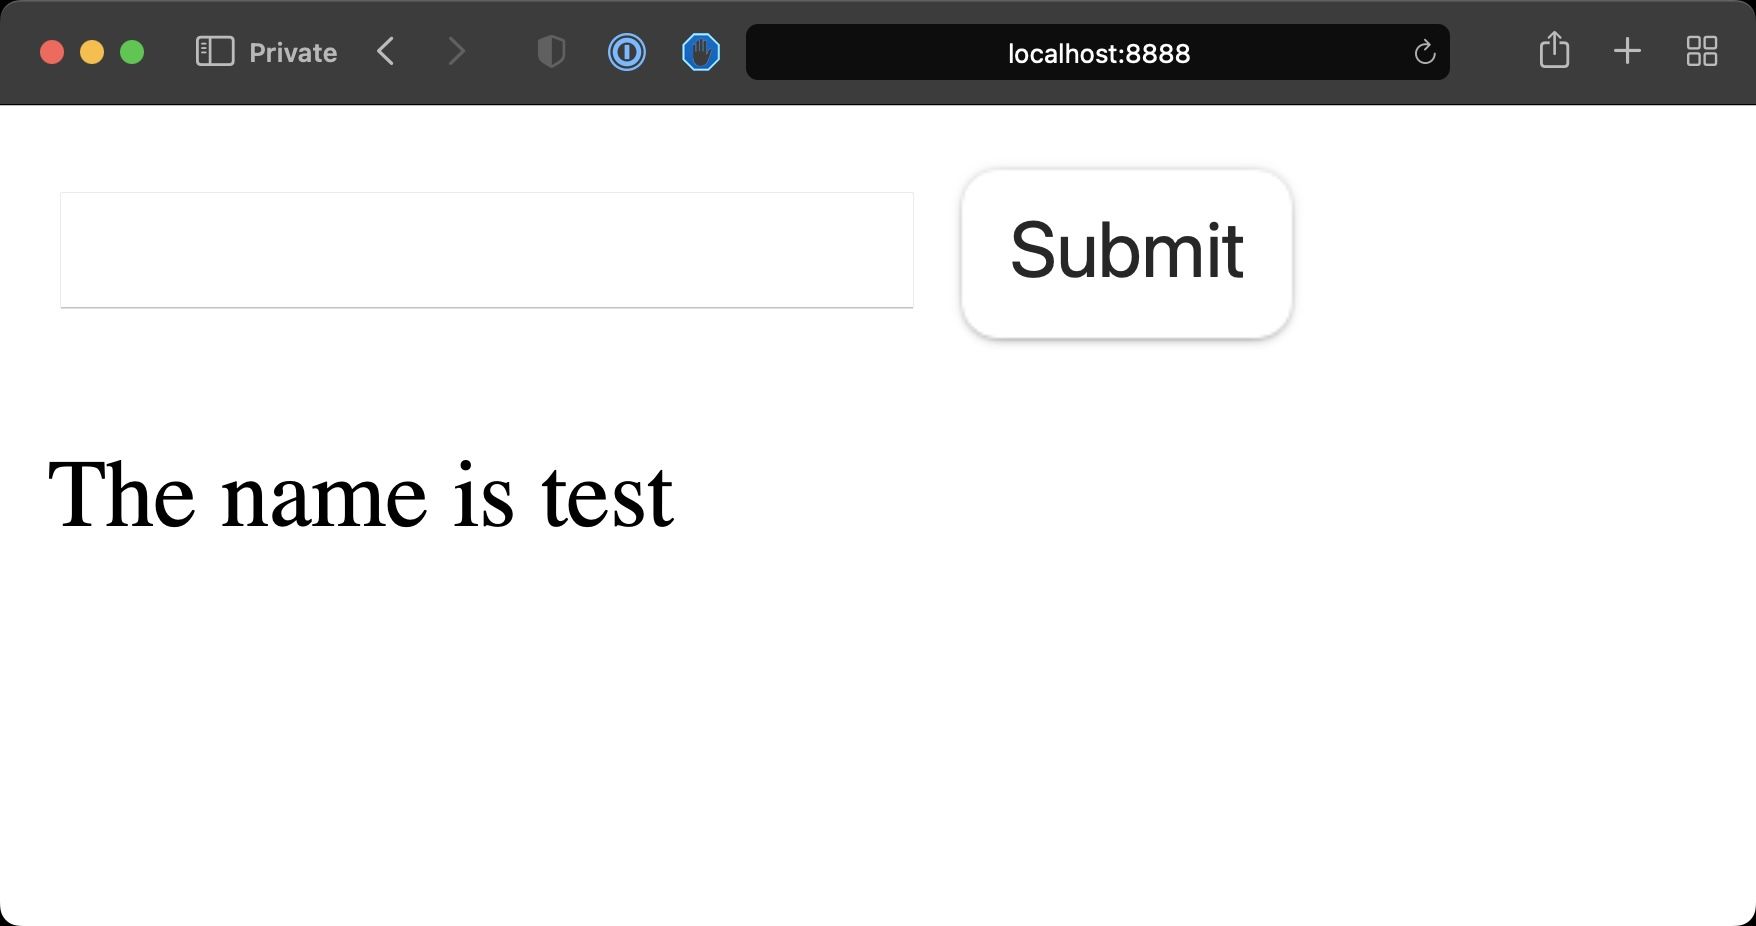
This is because we’re using a POST request, which sends the data to the server in a different way, through URL-encoded data.
As mentioned above, PHP will still serve the index.php file as we’re still sending data to the same URL the form is on.
We’re mixing a bunch of code and we could separate the form request handler from the code that generates the form.
So we can have this in index.php:
<form **method="POST" action="/post.php"**>
  <input type="text" name="name" />
  <input type="submit" />
</form>
and we can create a new post.php file with:
<?php
if (isset($_POST['name'])) {
  echo '<p>The name is ' . $_POST['name'];
}
?>
PHP will display this content now after we submit the form, because we set the action HTML attribute on the form.
This example is very simple, but the post.php file is where we could, for example, save the data to the database, or to a file.
How to Use HTTP Headers in PHP
PHP lets us set the HTTP headers of a response through the header() function.
HTTP Headers are a way to send information back to the browser.
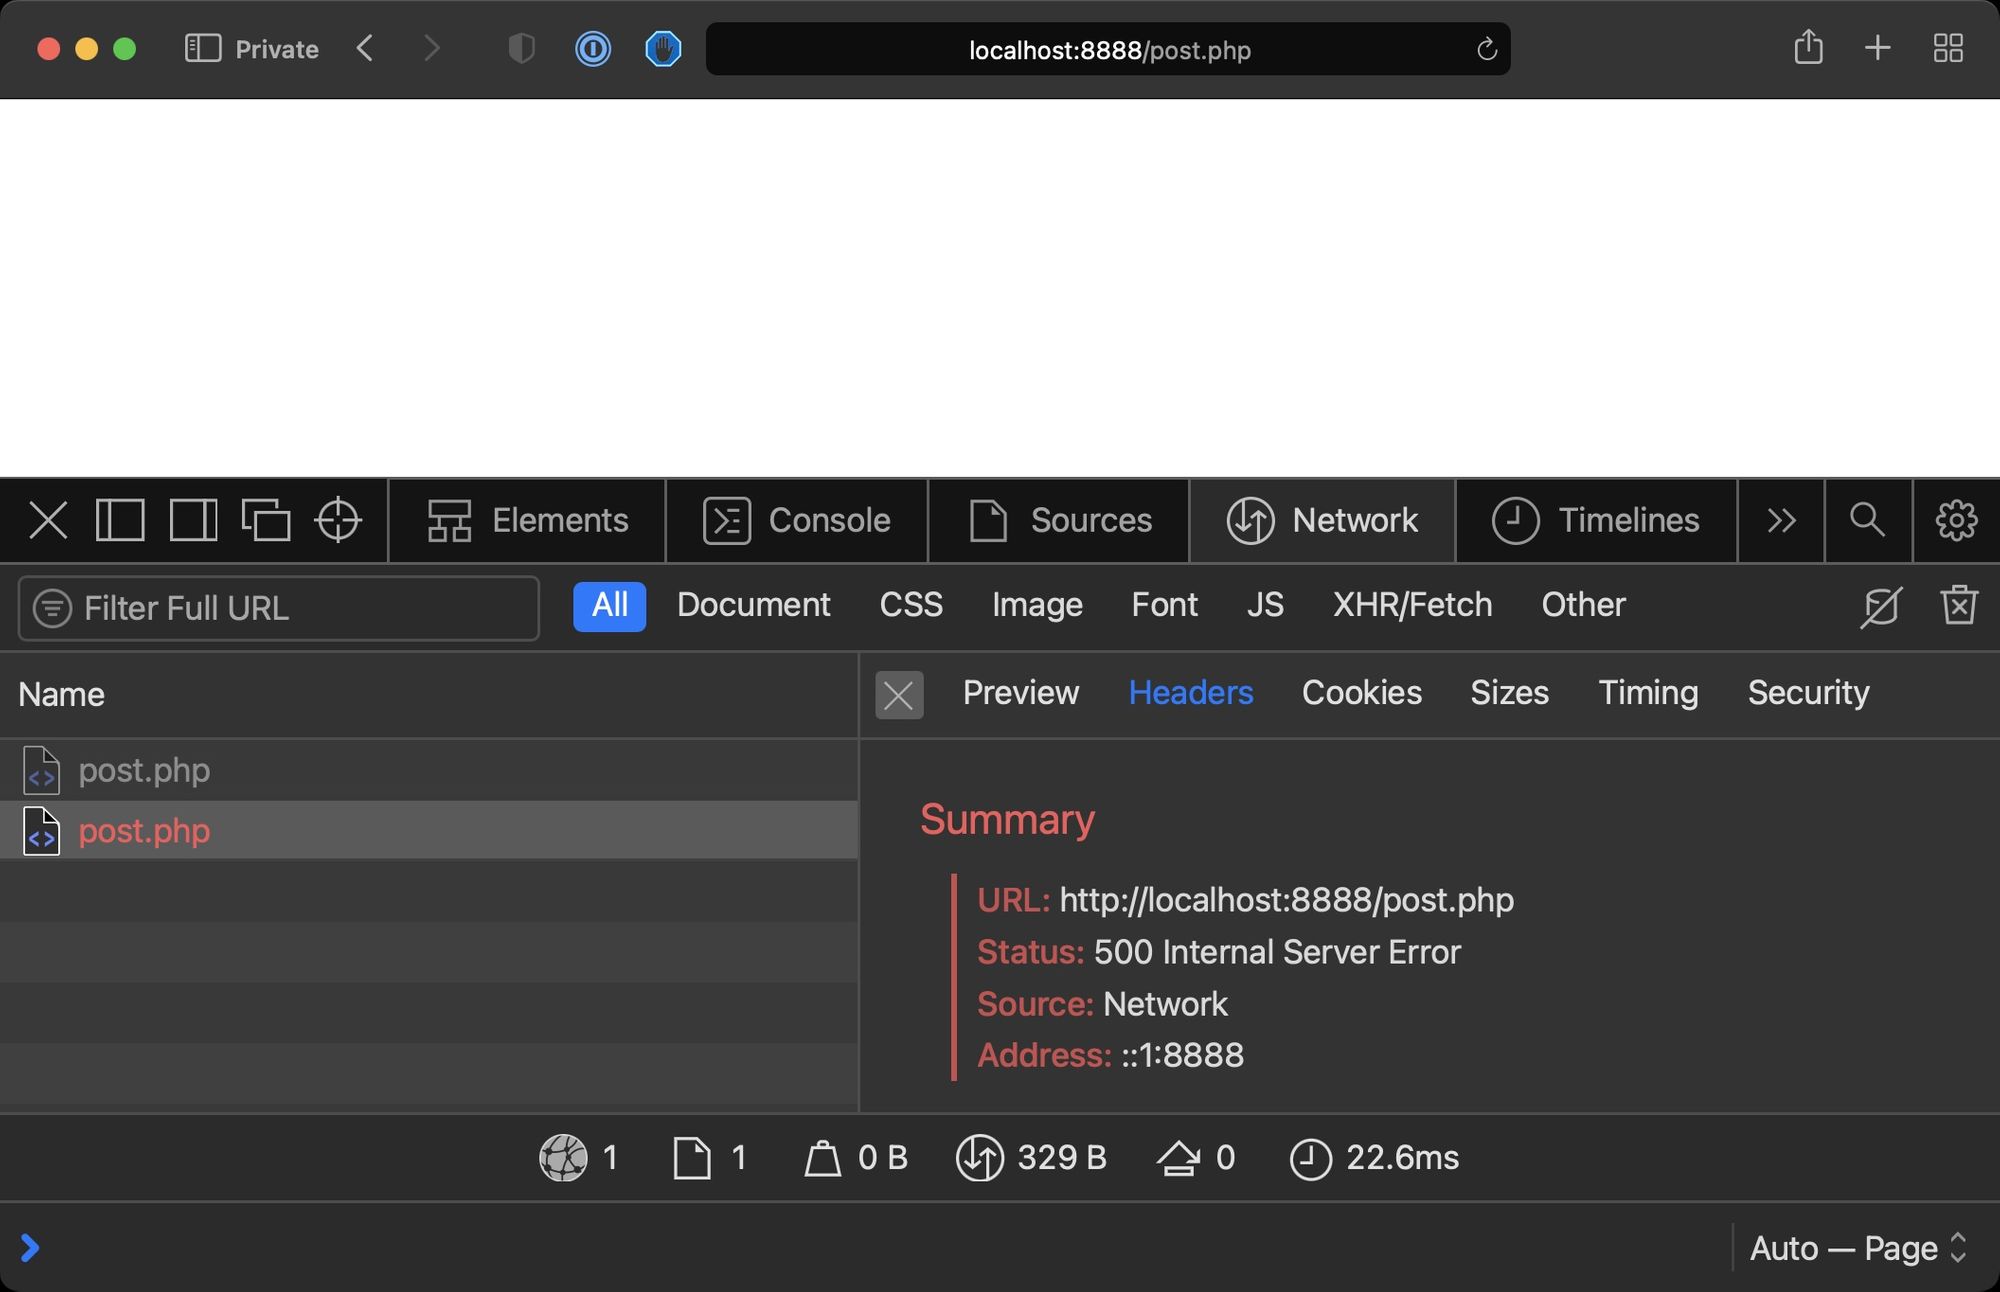
We can say the page generates a 500 Internal Server Error:
<?php
header('HTTP/1.1 500 Internal Server Error');
?>
Now you should see the status if you access the page with the Browser Developer Tools open:
We can set the content/type of a response:
header('Content-Type: text/json');
We can force a 301 redirect:
header('HTTP/1.1 301 Moved Permanently');
header('Location: https://flaviocopes.com');
We can use headers to say to the browser “cache this page”, “don’t cache this page”, and a lot more.
How to Use Cookies in PHP
Cookies are a browser feature.
When we send a response to the browser, we can set a cookie which will be stored by the browser, client-side.
Then, every request the browser makes will include the cookie back to us.
We can do many things with cookies. They are mostly used to create a personalized experience without you having to login to a service.
It’s important to note that cookies are domain-specific, so we can only read cookies we set on the current domain of our application, not other application’s cookies.
But JavaScript can read cookies (unless they are HttpOnly cookies but we’re starting to go into a rabbit hole) so cookies should not store any sensitive information.
We can use PHP to read the value of a cookie referencing the $_COOKIE superglobal:
if (isset($_COOKIE['name'])) {
  $name = $_COOKIE['name'];
}
The setcookie() function allows you to set a cookie:
setcookie('name', 'Flavio');
We can add a third parameter to say when the cookie will expire. If omitted, the cookie expires at the end of the session/when the browser is closed.
Use this code to make the cookie expire in 7 days:
setcookie('name', 'Flavio', time() + 3600 * 24 * 7);
We can only store a limited amount of data in a cookie, and users can clear the cookies client-side when they clear the browser data.
Also, they are specific to the browser / device, so we can set a cookie in the user’s browser, but if they change browser or device, the cookie will not be available.
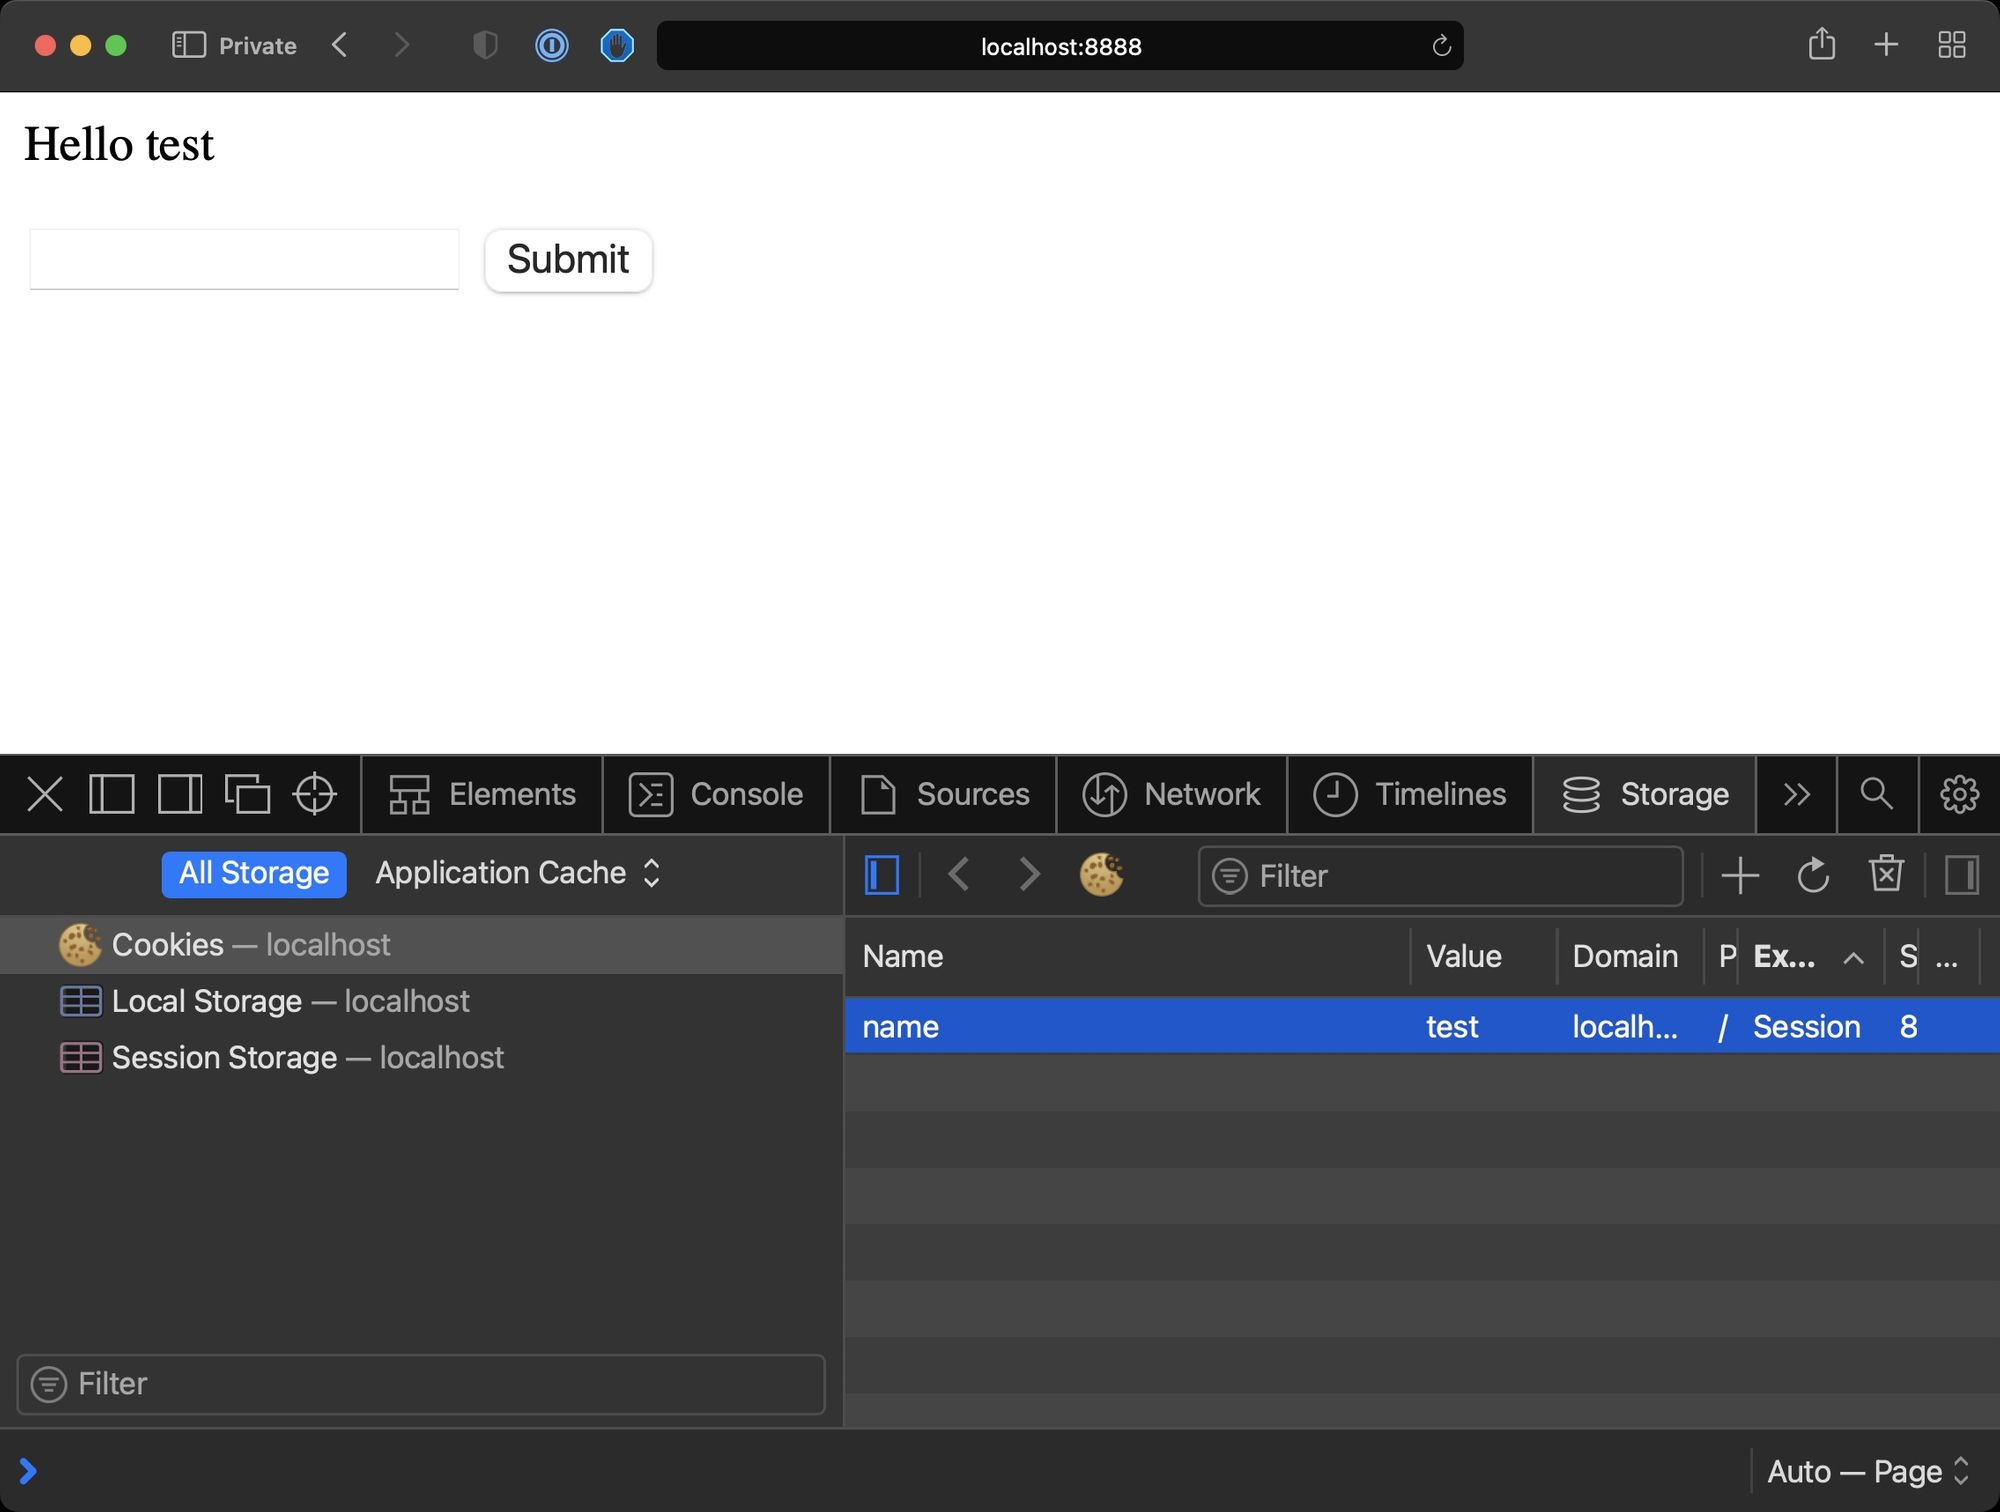
Let’s do a simple example with the form we used before. We’re going to store the name entered as a cookie:
<?php
if (isset($_POST['name'])) {
  setcookie('name', $_POST['name']);
}
if (isset($_POST['name'])) {
  echo '<p>Hello ' . $_POST['name'];
} else {
  if (isset($_COOKIE['name'])) {
    echo '<p>Hello ' . $_COOKIE['name'];
  }
}
?>

<form method="POST">
  <input type="text" name="name" />
  <input type="submit" />
</form>
I added some conditionals to handle the case where the cookie was already set, and to display the name right after the form is submitted, when the cookie is not set yet (it will only be set for the next HTTP request).
If you open the Browser Developer Tools you should see the cookie in the Storage tab.
From there you can inspect its value, and delete it if you want.
How to Use Cookie-based Sessions in PHP
One very interesting use case for cookies is cookie-based sessions.
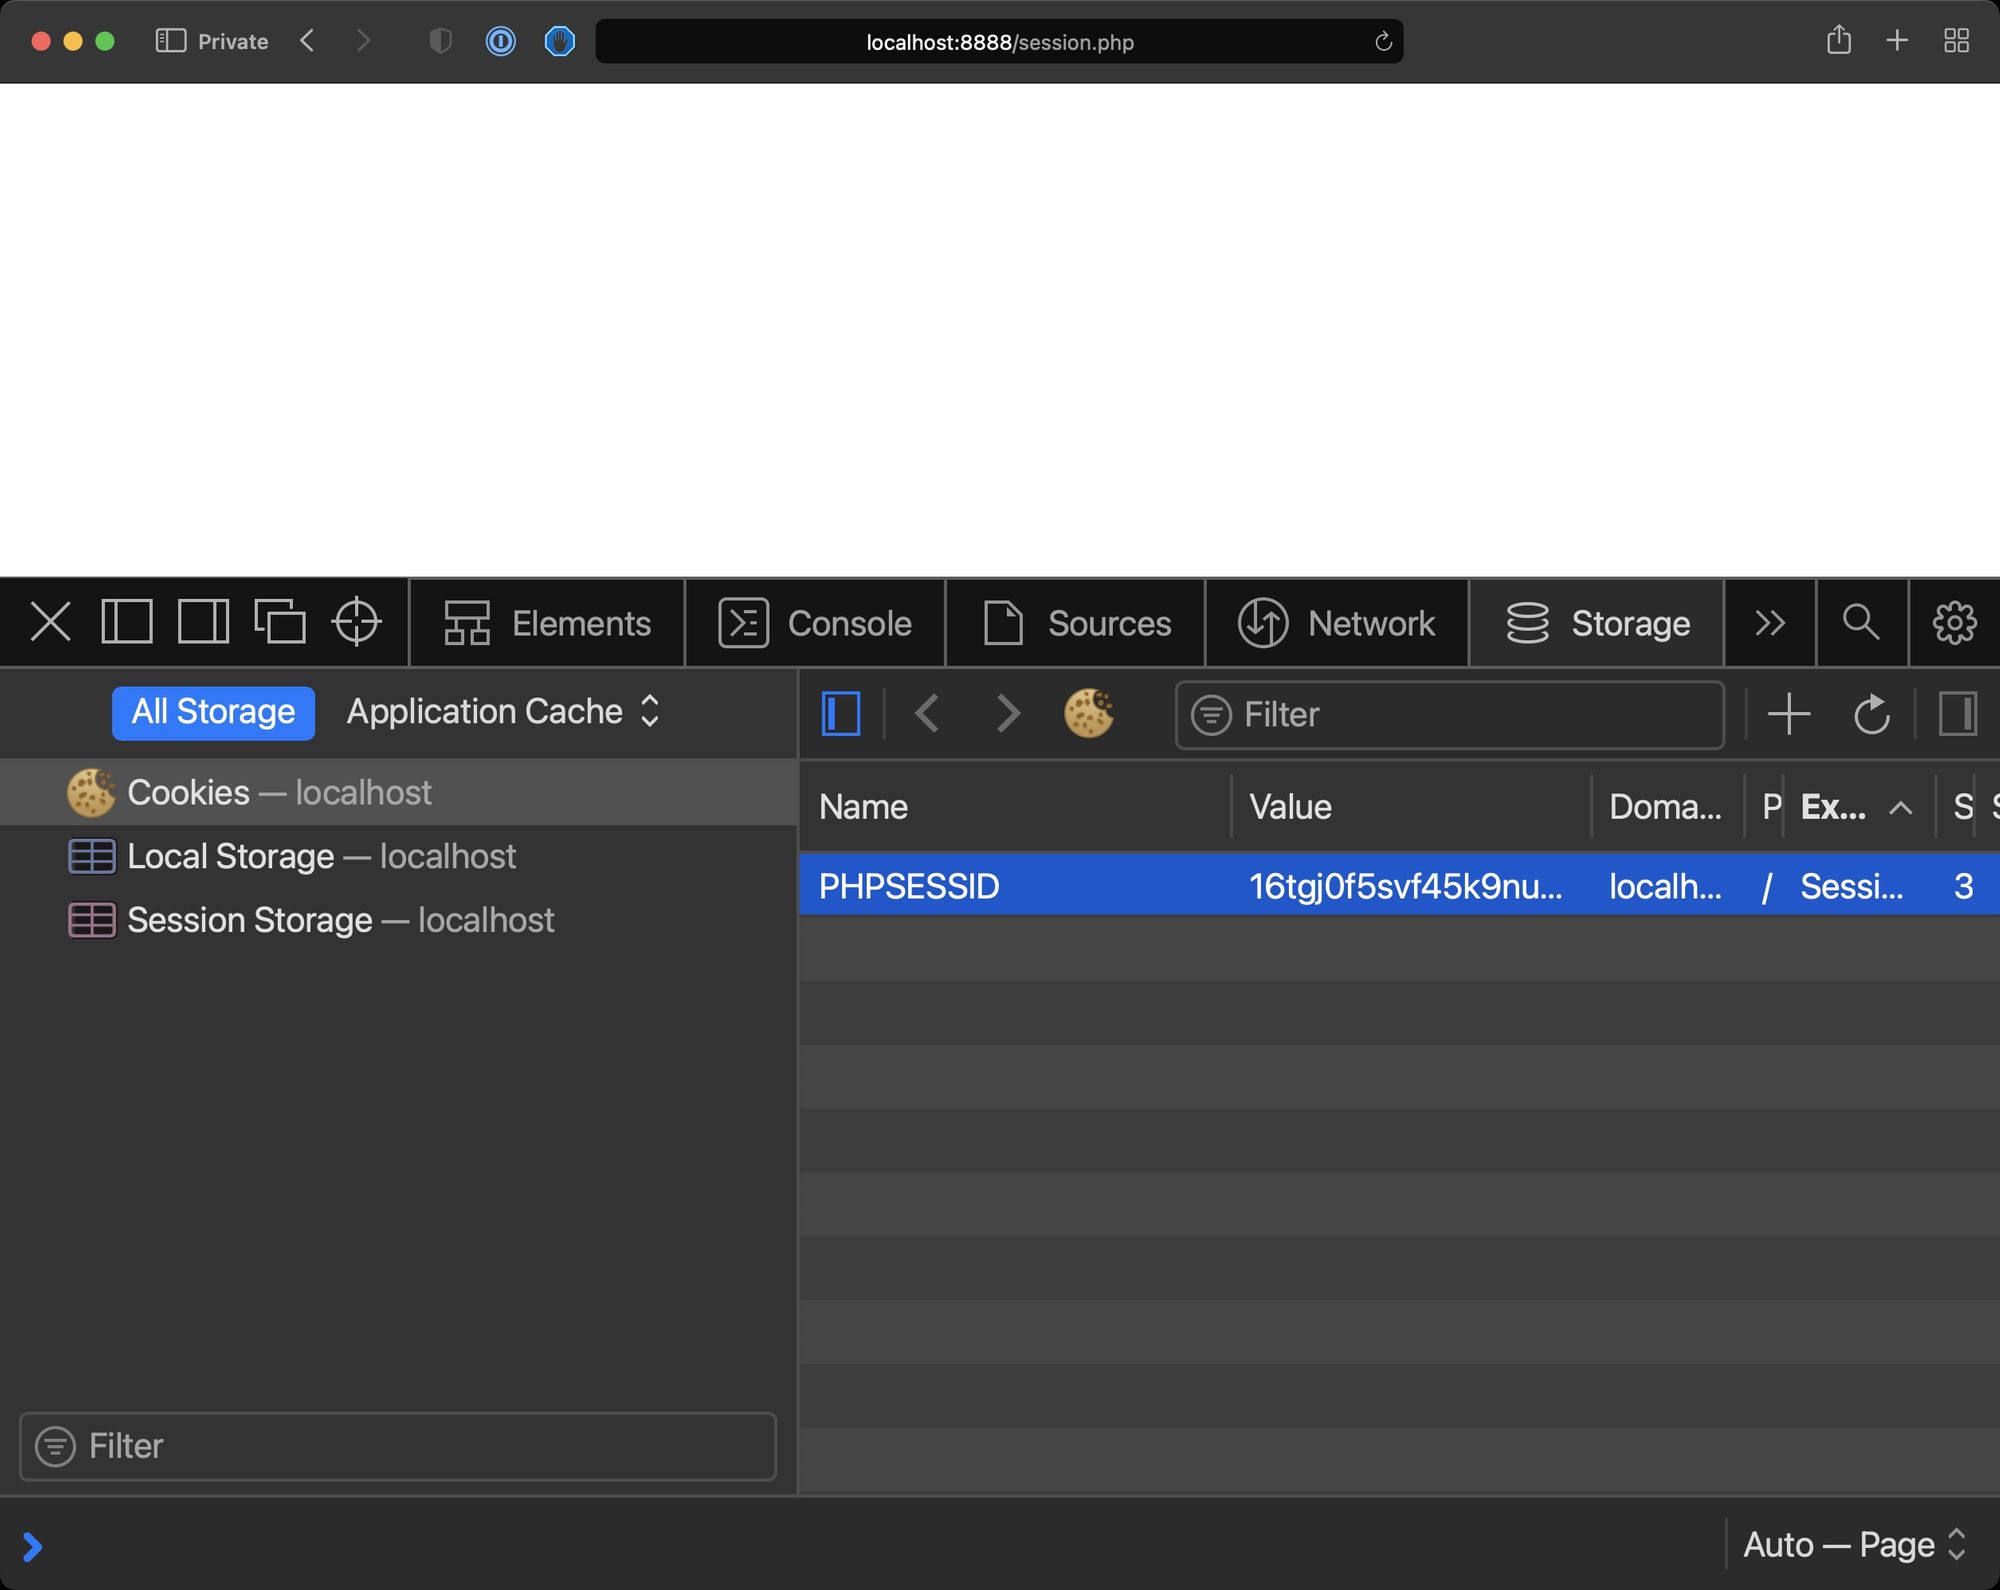
PHP offers us a very easy way to create a cookie-based session using session_start().
Try adding this:
<?php
session_start();
?>
in a PHP file, and load it in the browser.
You will see a new cookie named by default PHPSESSID with a value assigned.
That’s the session ID. This will be sent for every new request and PHP will use that to identify the session.
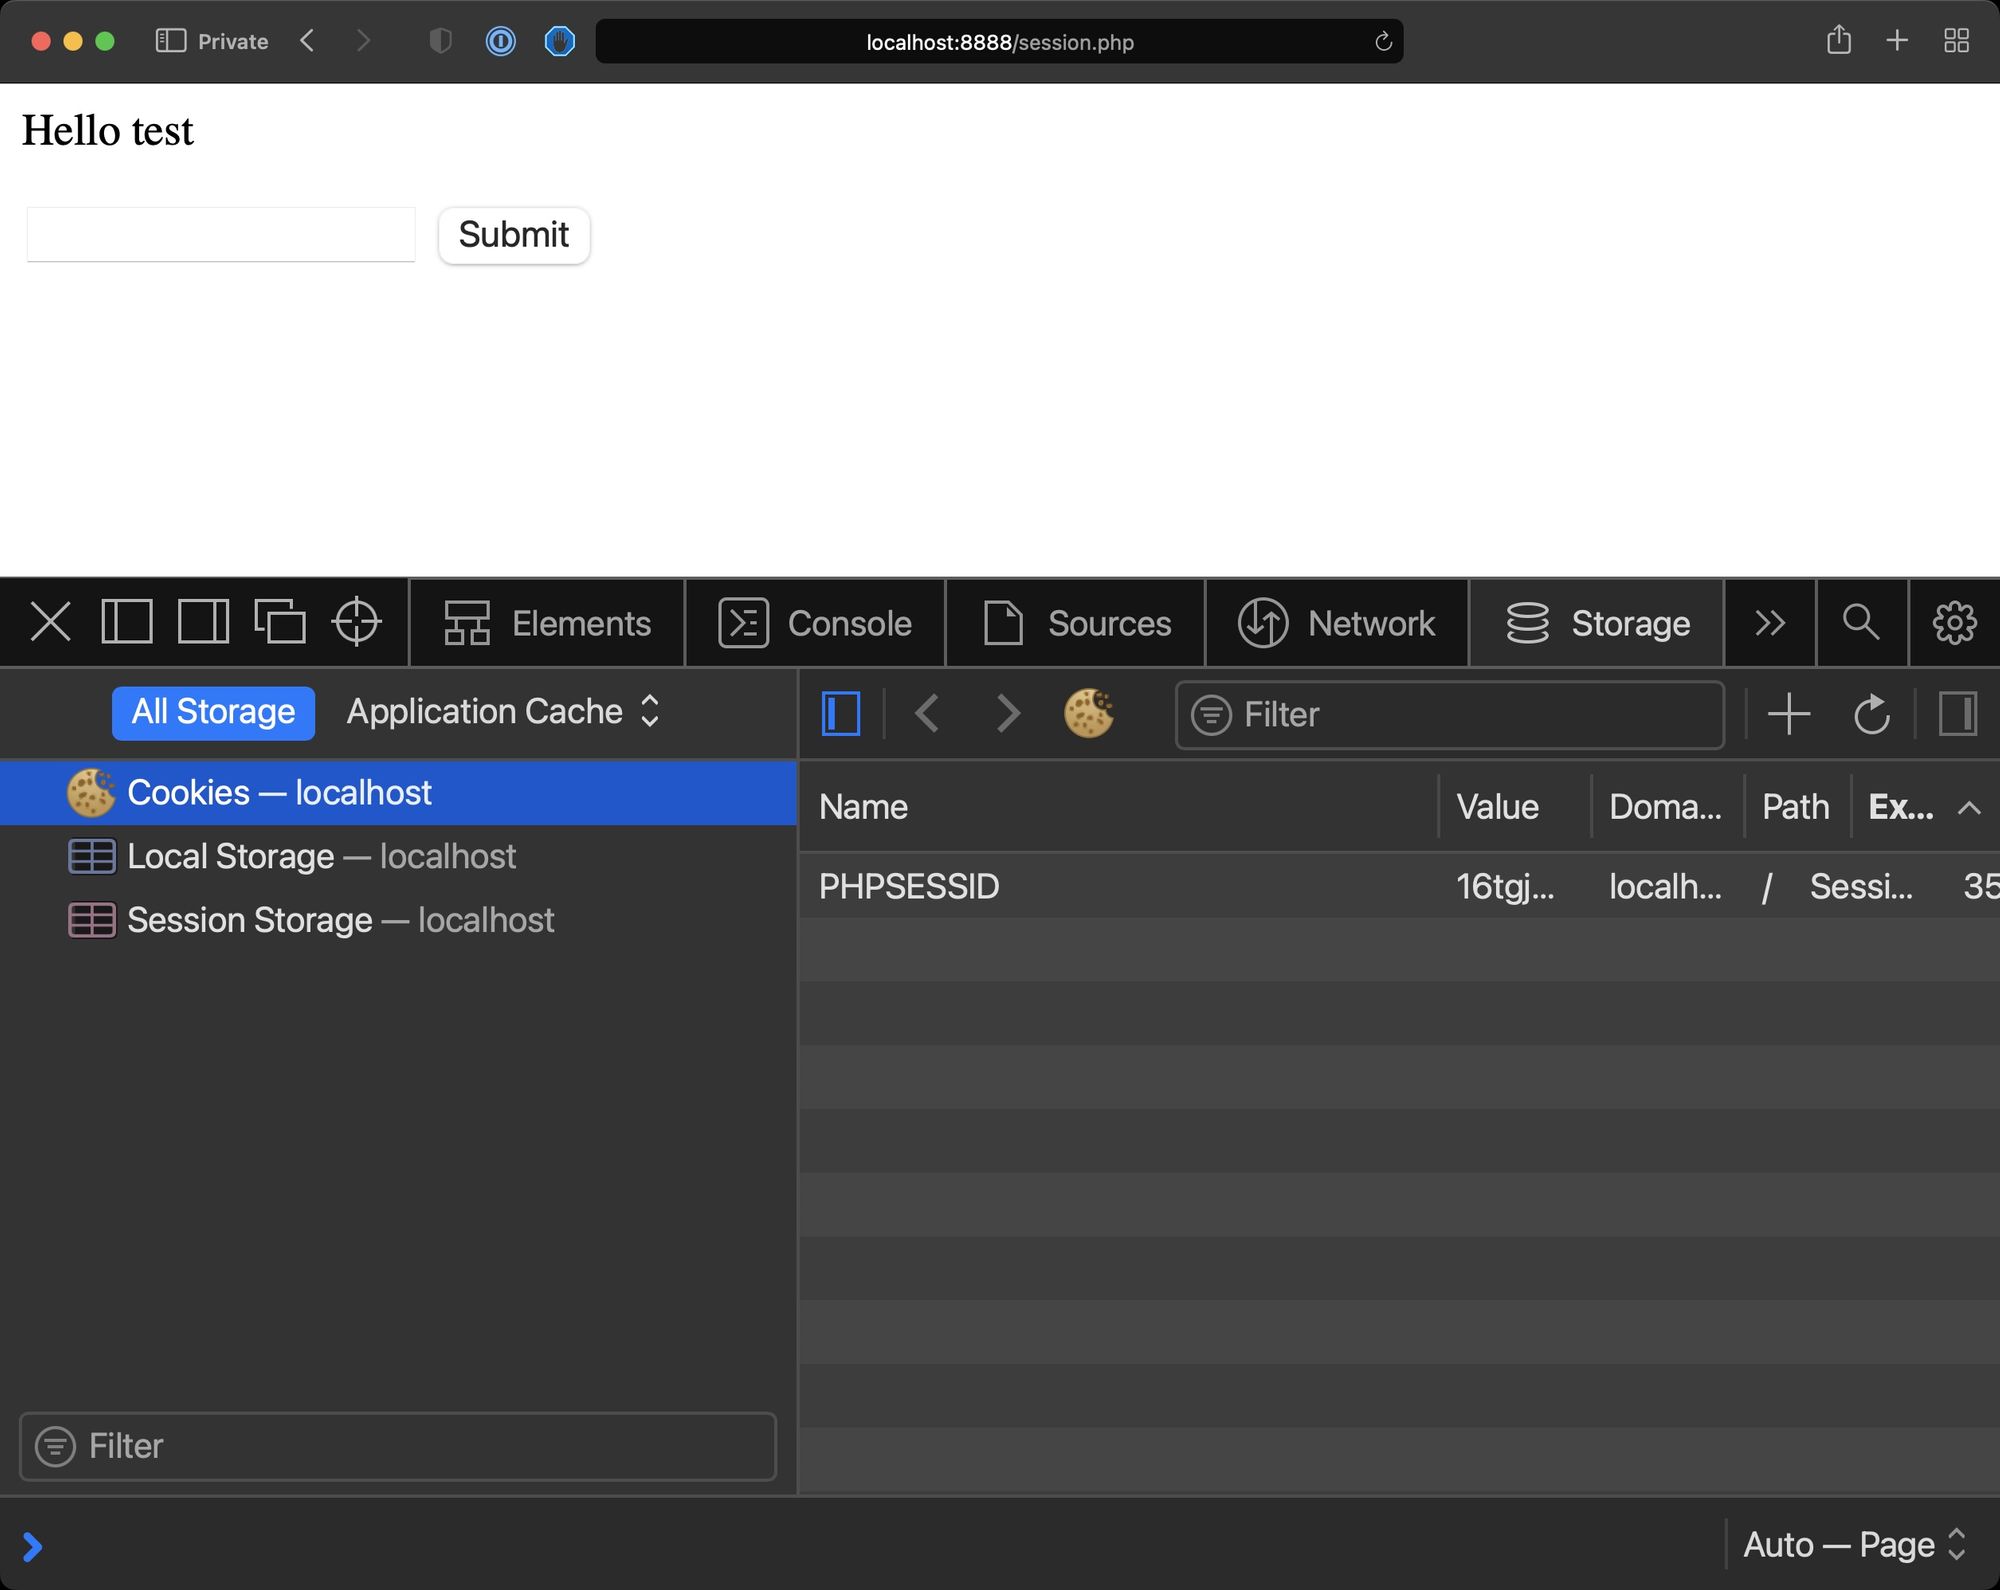
Similarly to how we used cookies, we can now use $_SESSION to store the information sent by the user – but this time it’s not stored client-side.
Only the session ID is.
The data is stored server-side by PHP.
<?php
session_start();

if (isset($_POST['name'])) {
  $_SESSION['name'] = $_POST['name'];
}
if (isset($_POST['name'])) {
  echo '<p>Hello ' . $_POST['name'];
} else {
  if (isset($_SESSION['name'])) {
    echo '<p>Hello ' . $_SESSION['name'];
  }
}
?>

<form method="POST">
  <input type="text" name="name" />
  <input type="submit" />
</form>
This works for simple use cases, but of course for intensive data you will need a database.
To clear the session data you can call session_unset().
To clear the session cookie use:
setcookie(session_name(), '');
How to Work with Files and Folders in PHP
PHP is a server-side language, and one of the handy things it provides is access to the filesystem.
You can check if a file exists using file_exists():
file_exists('test.txt') //true
Get the size of a file using filesize():
filesize('test.txt')
You can open a file using fopen(). Here we open the test.txt file in read-only mode and we get what we call a file descriptor in $file:
$file = fopen('test.txt', 'r')
We can terminate the file access by calling fclose($fd).
Read the content of a file into a variable like this:
$file = fopen('test.txt', 'r')

fread($file, filesize('test.txt'));

//or

while (!feof($file)) {
    $data .= fgets($file, 5000);
}
feof() checks that we haven’t reached the end of the file as fgets reads 5000 bytes at a time.
You can also read a file line by line using fgets():
$file = fopen('test.txt', 'r')

while(!feof($file)) {
  $line = fgets($file);
  //do something
}
To write to a file you must first open it in write mode, then use fwrite():
$data = 'test';
$file = fopen('test.txt', 'w')
fwrite($file, $data);
fclose($file);
We can delete a file using unlink():
unlink('test.txt')
Those are the basics, but of course there are more functions to work with files.
PHP and Databases
PHP offers various built-in libraries to work with databases, for example:
- PostgreSQL
- MySQL / MariaDB
- MongoDB
I won't cover this in the handbook because I think this is a big topic and one that would also require you to learn SQL.
I am also tempted to say that if you need a database you should use a framework or ORM that would save you security issues with SQL injection. Laravel’s Eloquent is a great example.
How to Work with JSON in PHP
JSON is a portable data format we use to represent data and send data from client to server.
Here’s an example of a JSON representation of an object that contains a string and a number:
{
  "name": "Flavio",
  "age": 35
}
PHP offers us two utility functions to work with JSON:
json_encode()to encode a variable into JSONjson_decode()to decode a JSON string into a data type (object, array…)
Example:
$test = ['a', 'b', 'c'];

$encoded = json_encode($test); // "["a","b","c"]" (a string)

$decoded = json_decode($encoded); // [ "a", "b", "c" ] (an array)
How to Send Emails with PHP
One of the things that I like about PHP is the conveniences, like sending an email.
Send an email using mail():
mail('test@test.com', 'this subject', 'the body');
To send emails at scale we can’t rely on this solution, as these emails tend to reach the spam folder more often than not. But for quick testing this is just helpful.
Libraries like https://github.com/PHPMailer/PHPMailer will be super helpful for more solid needs, using an SMTP server.
How to Use Composer and Packagist
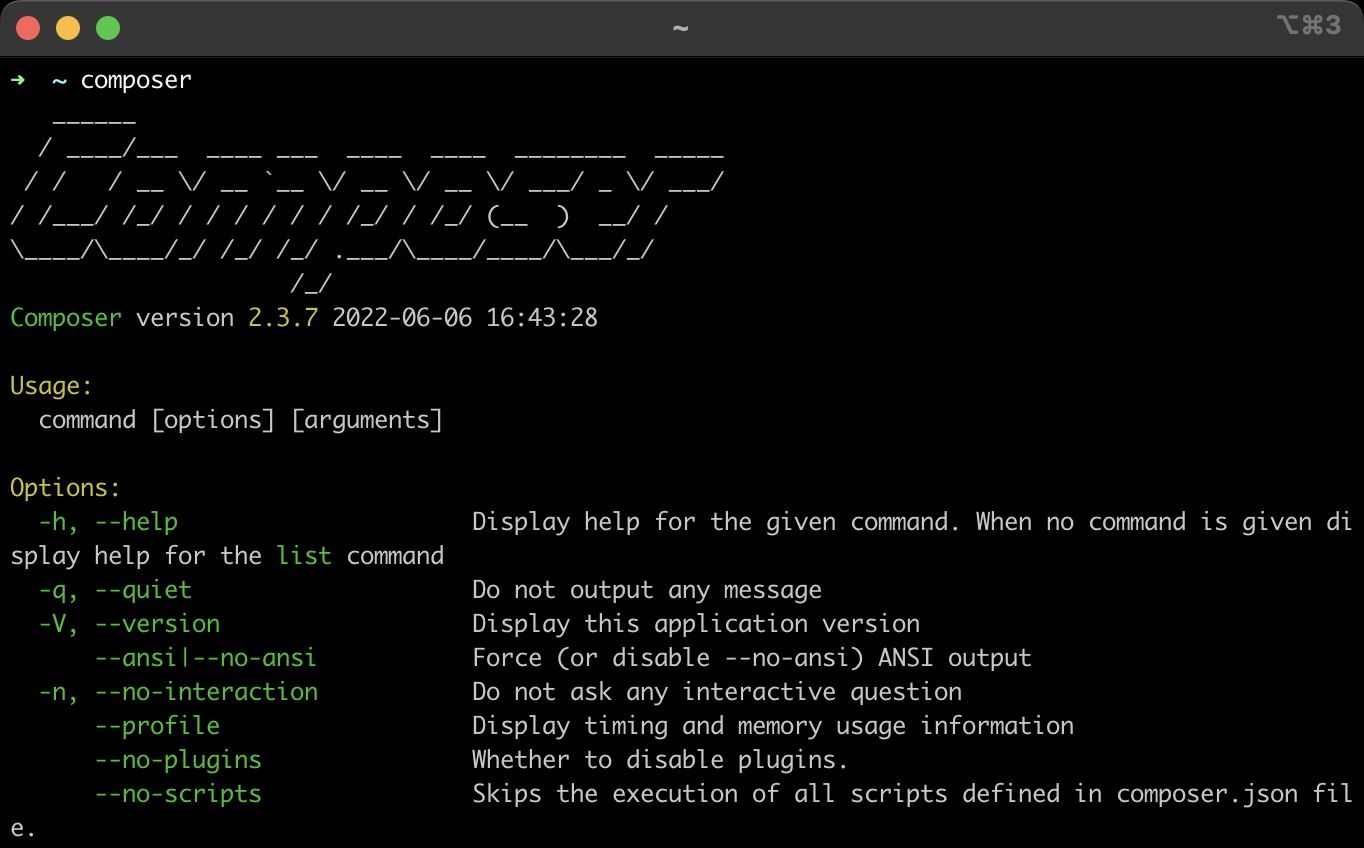
Composer is the package manager of PHP.
It allows you to easily install packages into your projects.
Install it on your machine (Linux/Mac or Windows) and once you’re done you should have a composer command available on your terminal.
Now inside your project you can run composer require <lib> and it will be installed locally. For example let's install the Carbon library that helps us work with dates in PHP
composer require nesbot/carbon
It will do some work:
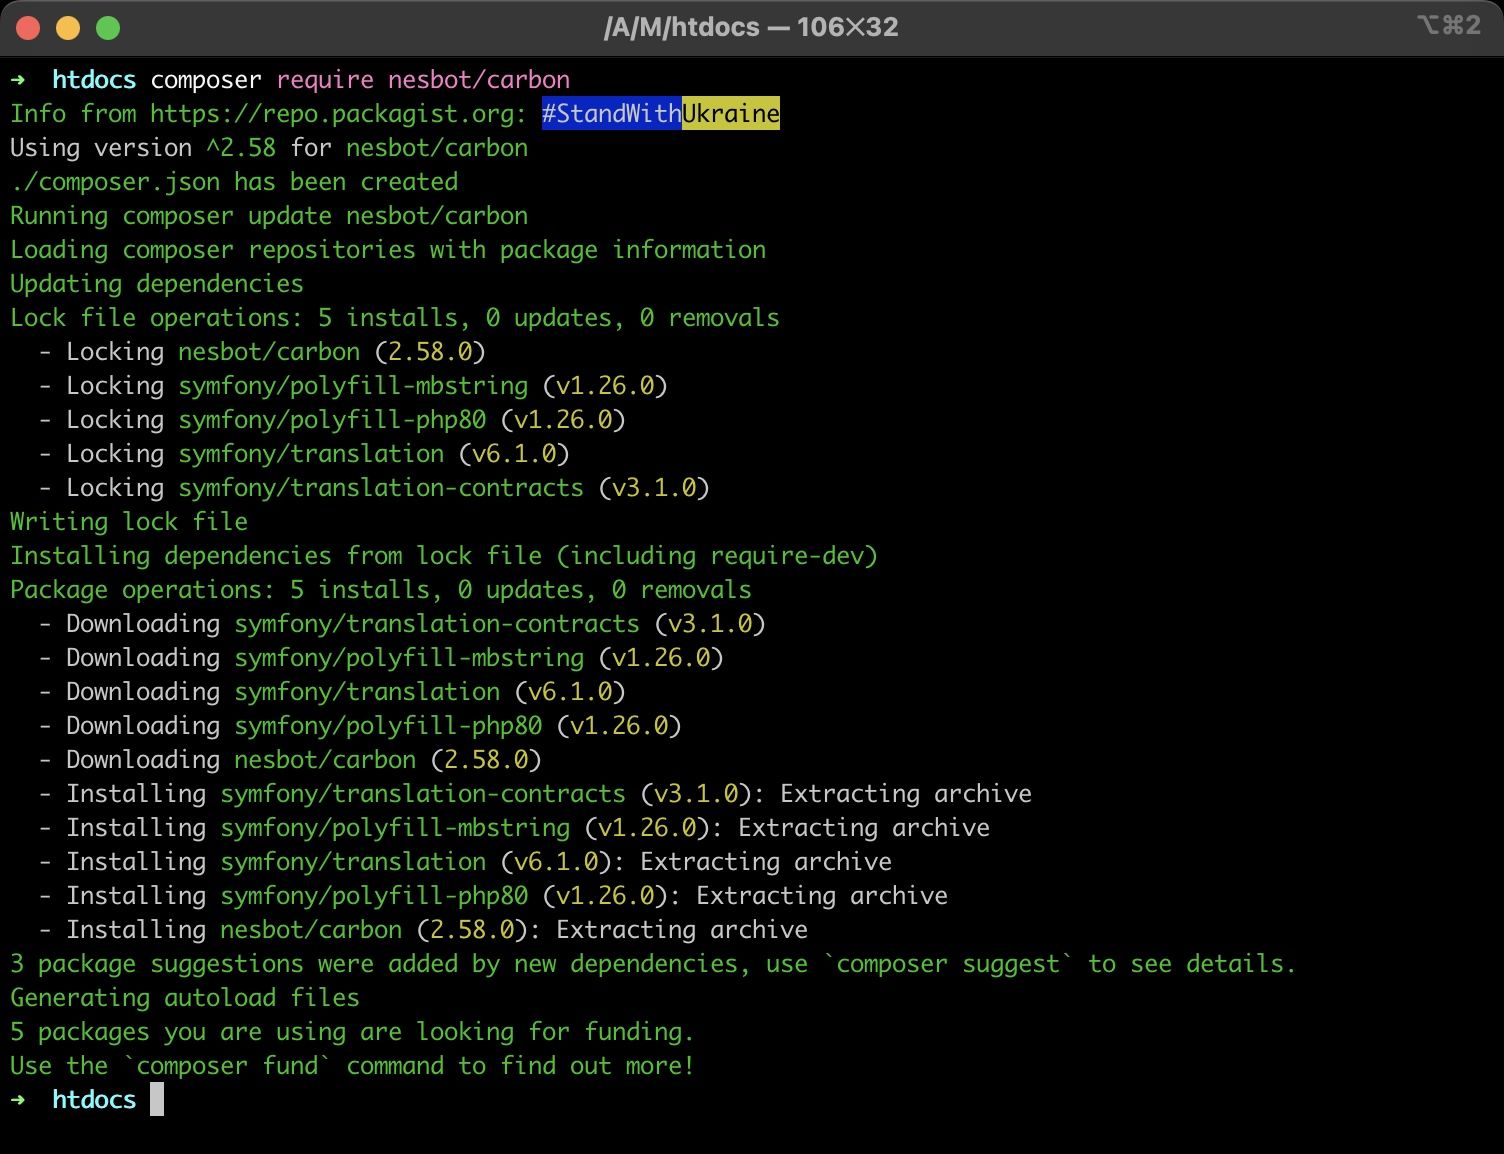
Once it’s done, you will find some new things in the folder composer.json that lists the new configuration for the dependencies:
{
    "require": {
        "nesbot/carbon": "^2.58"
    }
}
composer.lock is used to “lock” the versions of the package in time, so the exact same installation you have can be replicated on another server. The vendor folder contains the library just installed and its dependencies.
Now in the index.php file we can add this code at the top:
<?php
require 'vendor/autoload.php';

use Carbon\Carbon;
and then we can use the library!
echo Carbon::now();
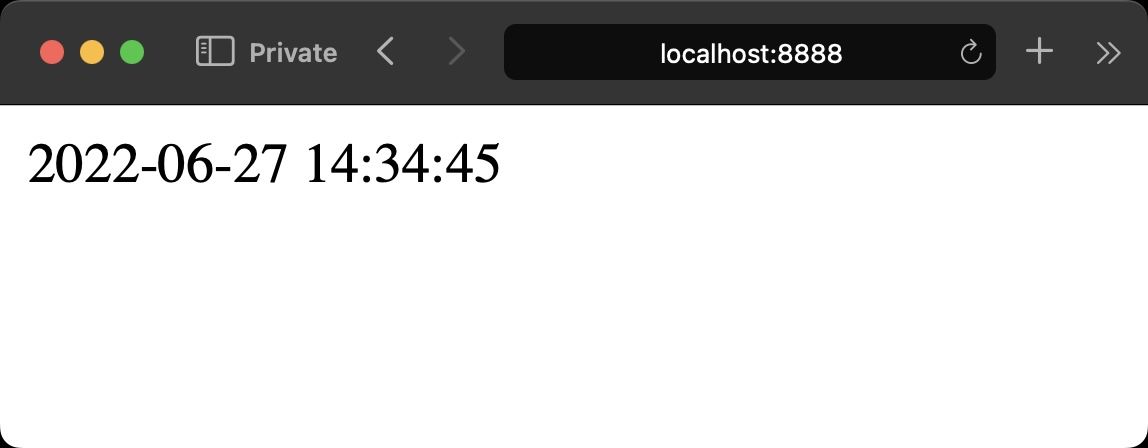
See? We didn’t have to manually download a package from the internet and install it somewhere...it was all fast, quick, and well organized.
The require 'vendor/autoload.php'; line is what enables autoloading. Remember when we talked about require_once() and include_once()? This solves all of that – we don’t need to manually search for the file to include, we just use the use keyword to import the library into our code.
How to Deploy a PHP Application
When you’ve got an application ready, it’s time to deploy it and make it accessible from anyone on the Web.
PHP is the programming language with the best deployment story across the Web.
Trust me, every single other programming language and ecosystem wishes they were as easy as PHP.
The great thing about PHP, the thing it got right and allowed it to have the incredible success it has had, is the instant deploy.
You put a PHP file on a folder served by a Web server, and voilà – it just works.
No need to restart the server, run an executable, nothing.
This is still something that a lot of people do. You get a shared hosting for $3/month, upload your files via FTP, and you're done.
These days, though, I think Git deploy is something that should be baked into every project, and shared hosting should be a thing of the past.
One solution is always having your own private VPS (Virtual Private Server), which you can get from services like DigitalOcean or Linode.
But managing your own VPS is no joke. It requires serious knowledge and time investment, and constant maintenance.
You can also use the so-called PaaS (Platform as a Service), which are platforms that focus on taking care of all the boring stuff (managing servers) and you just upload your app and it runs.
Solutions like DigitalOcean App Platform (which is different from a DigitalOcean VPS), Heroku, and many others are great for your first tests.
These services allow you to connect your GitHub account and deploy any time you push a new change to your Git repository.
You can learn how to setup Git and GitHub from zero here.
This is a much better workflow compared to FTP uploads.
Let’s do a bare bones example.
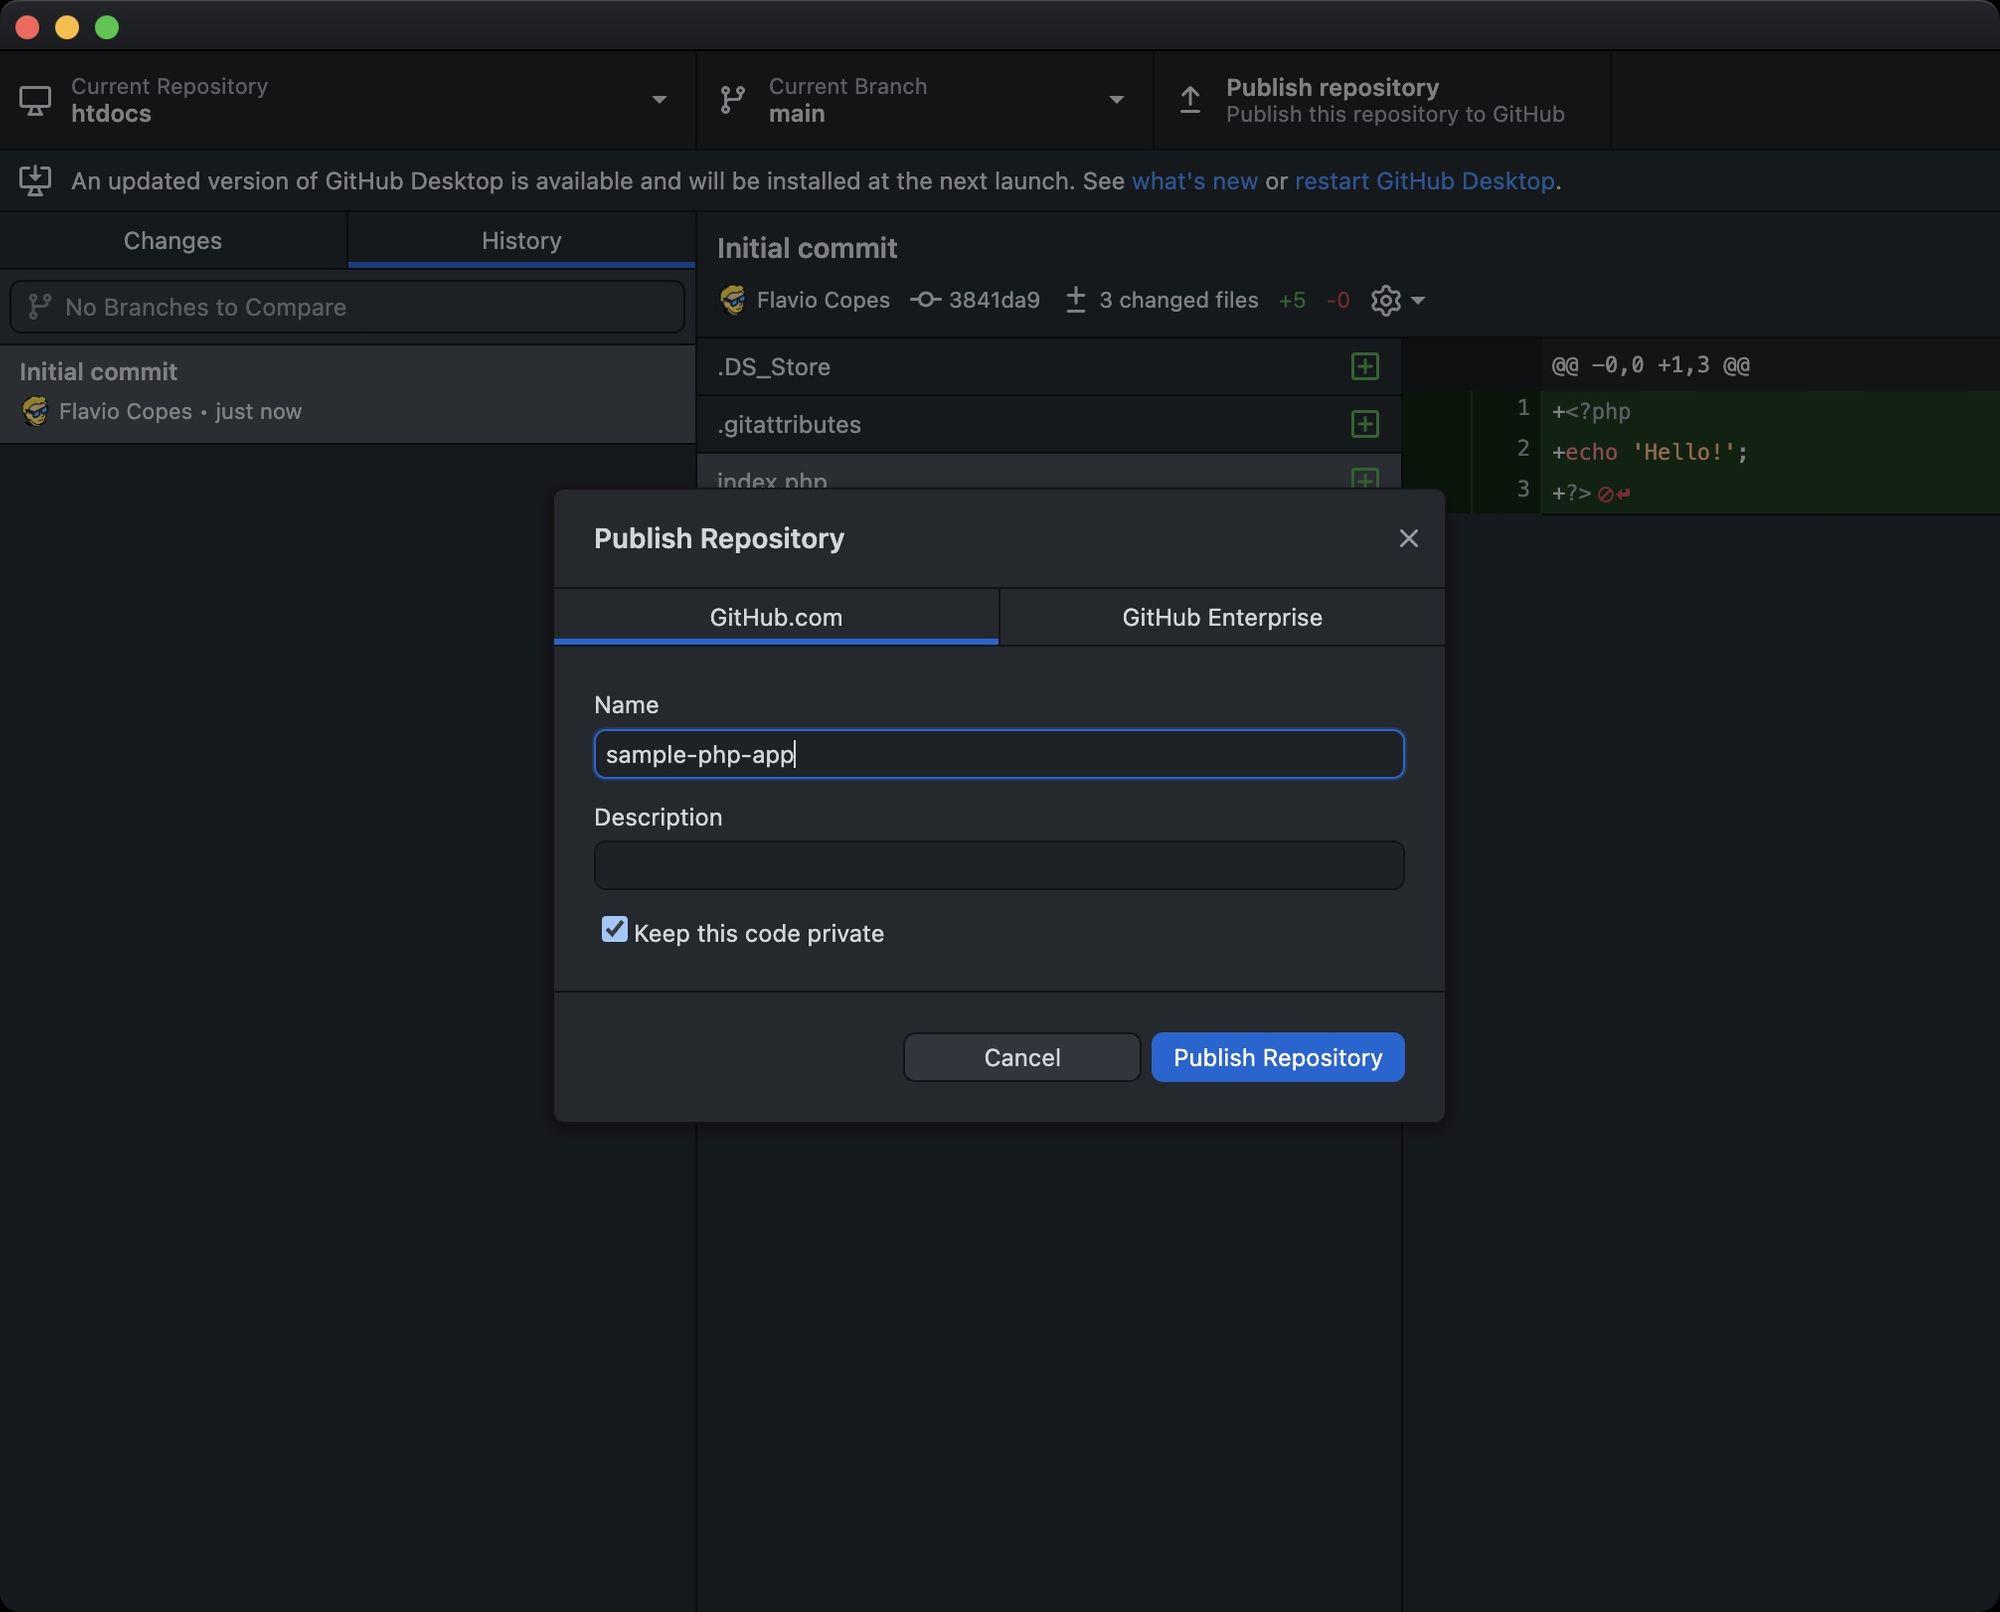
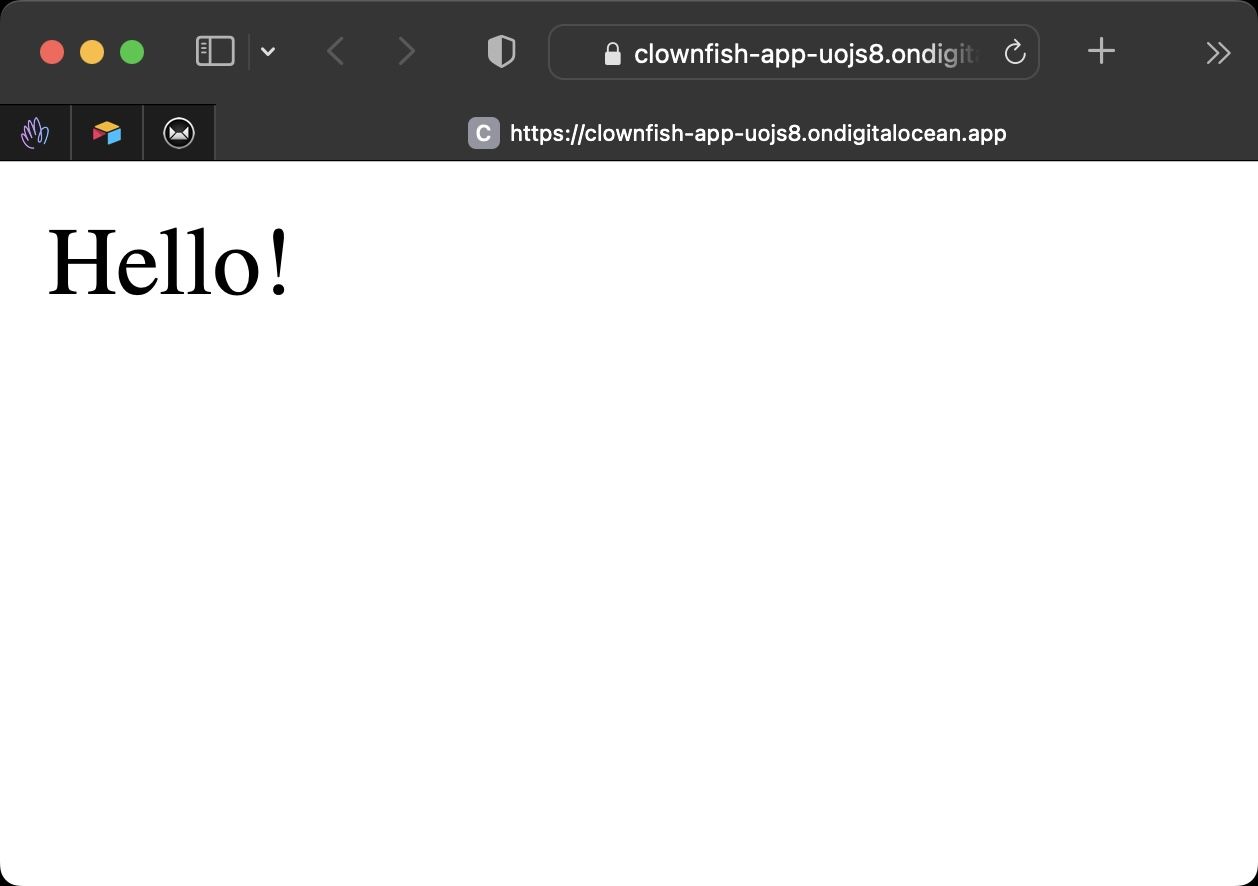
I created a simple PHP application with just an index.php file:
<?php
echo 'Hello!';
?>
I add the parent folder to my GitHub Desktop app, I initialize a Git repo, and I push it to GitHub:
Now go on digitalocean.com.
If you don’t have an account yet, use my referral code to sign up get $100 free credits over the next 60 days and you can work on your PHP app for free.
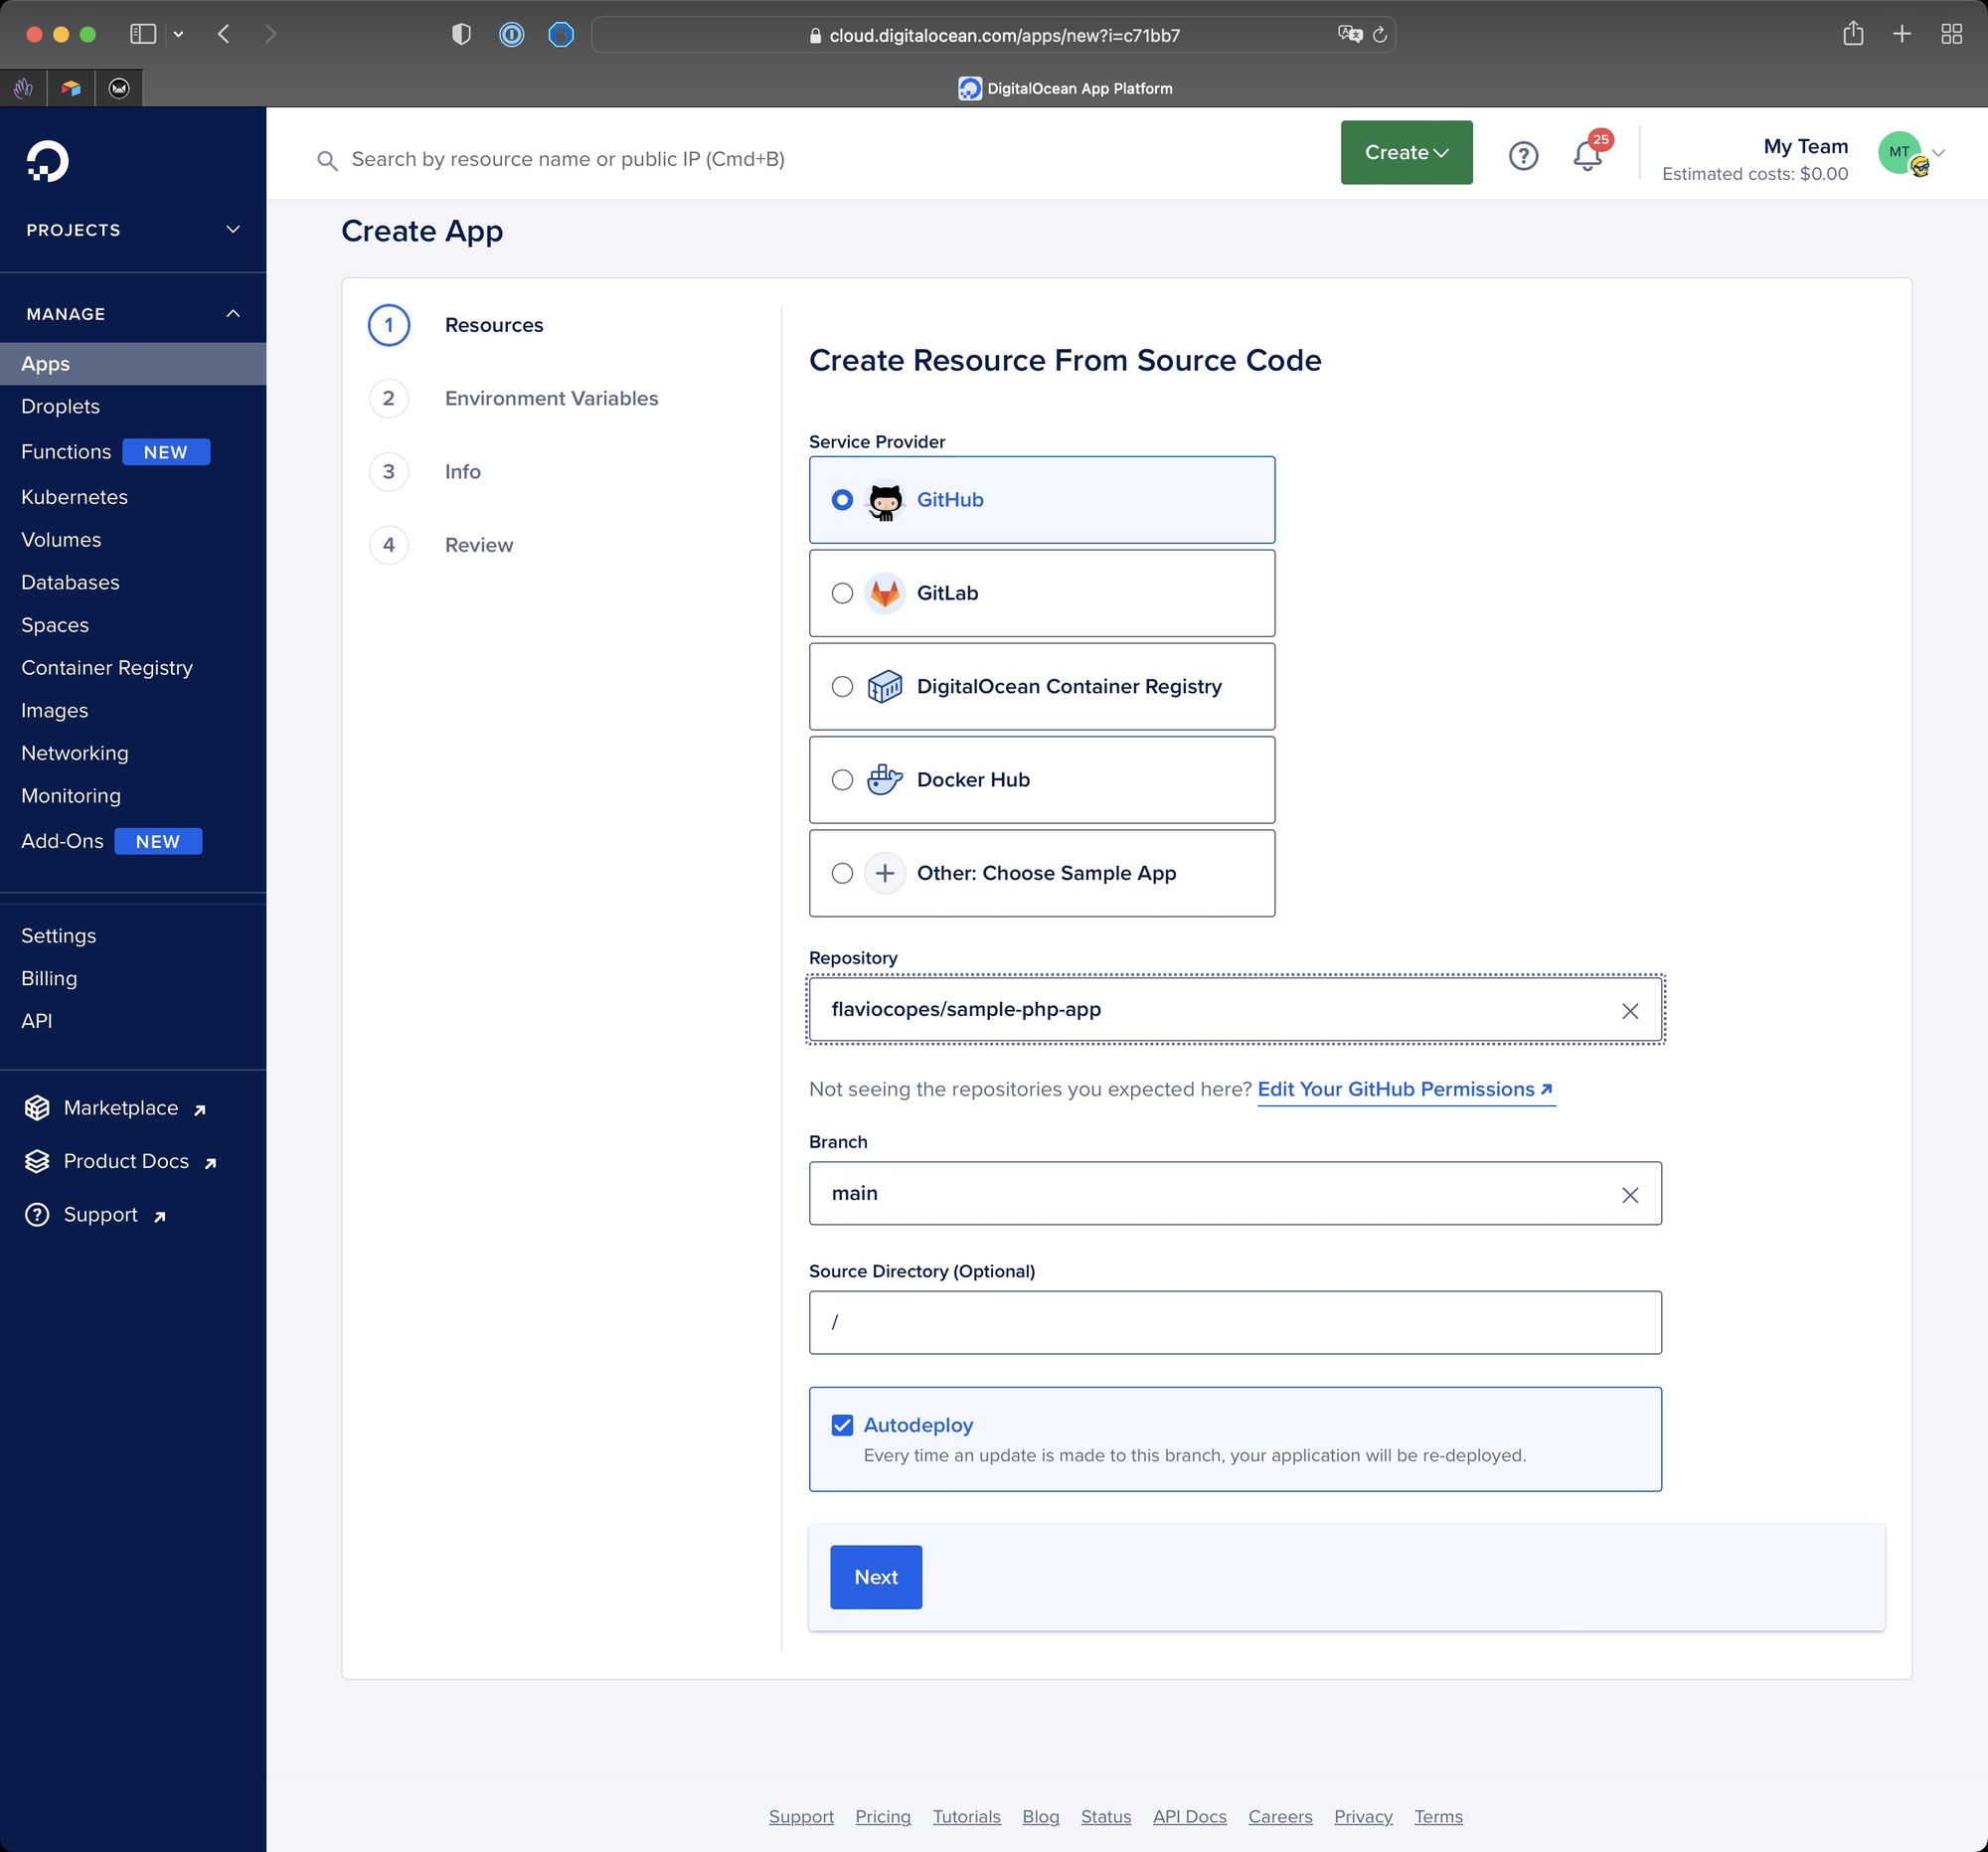
I connect to my DigitalOcean account and I go to Apps → Create App.
I connect my GitHub Account and select the repo of my app.
Make sure “Autodeploy” is checked, so the app will automatically redeploy on changes:
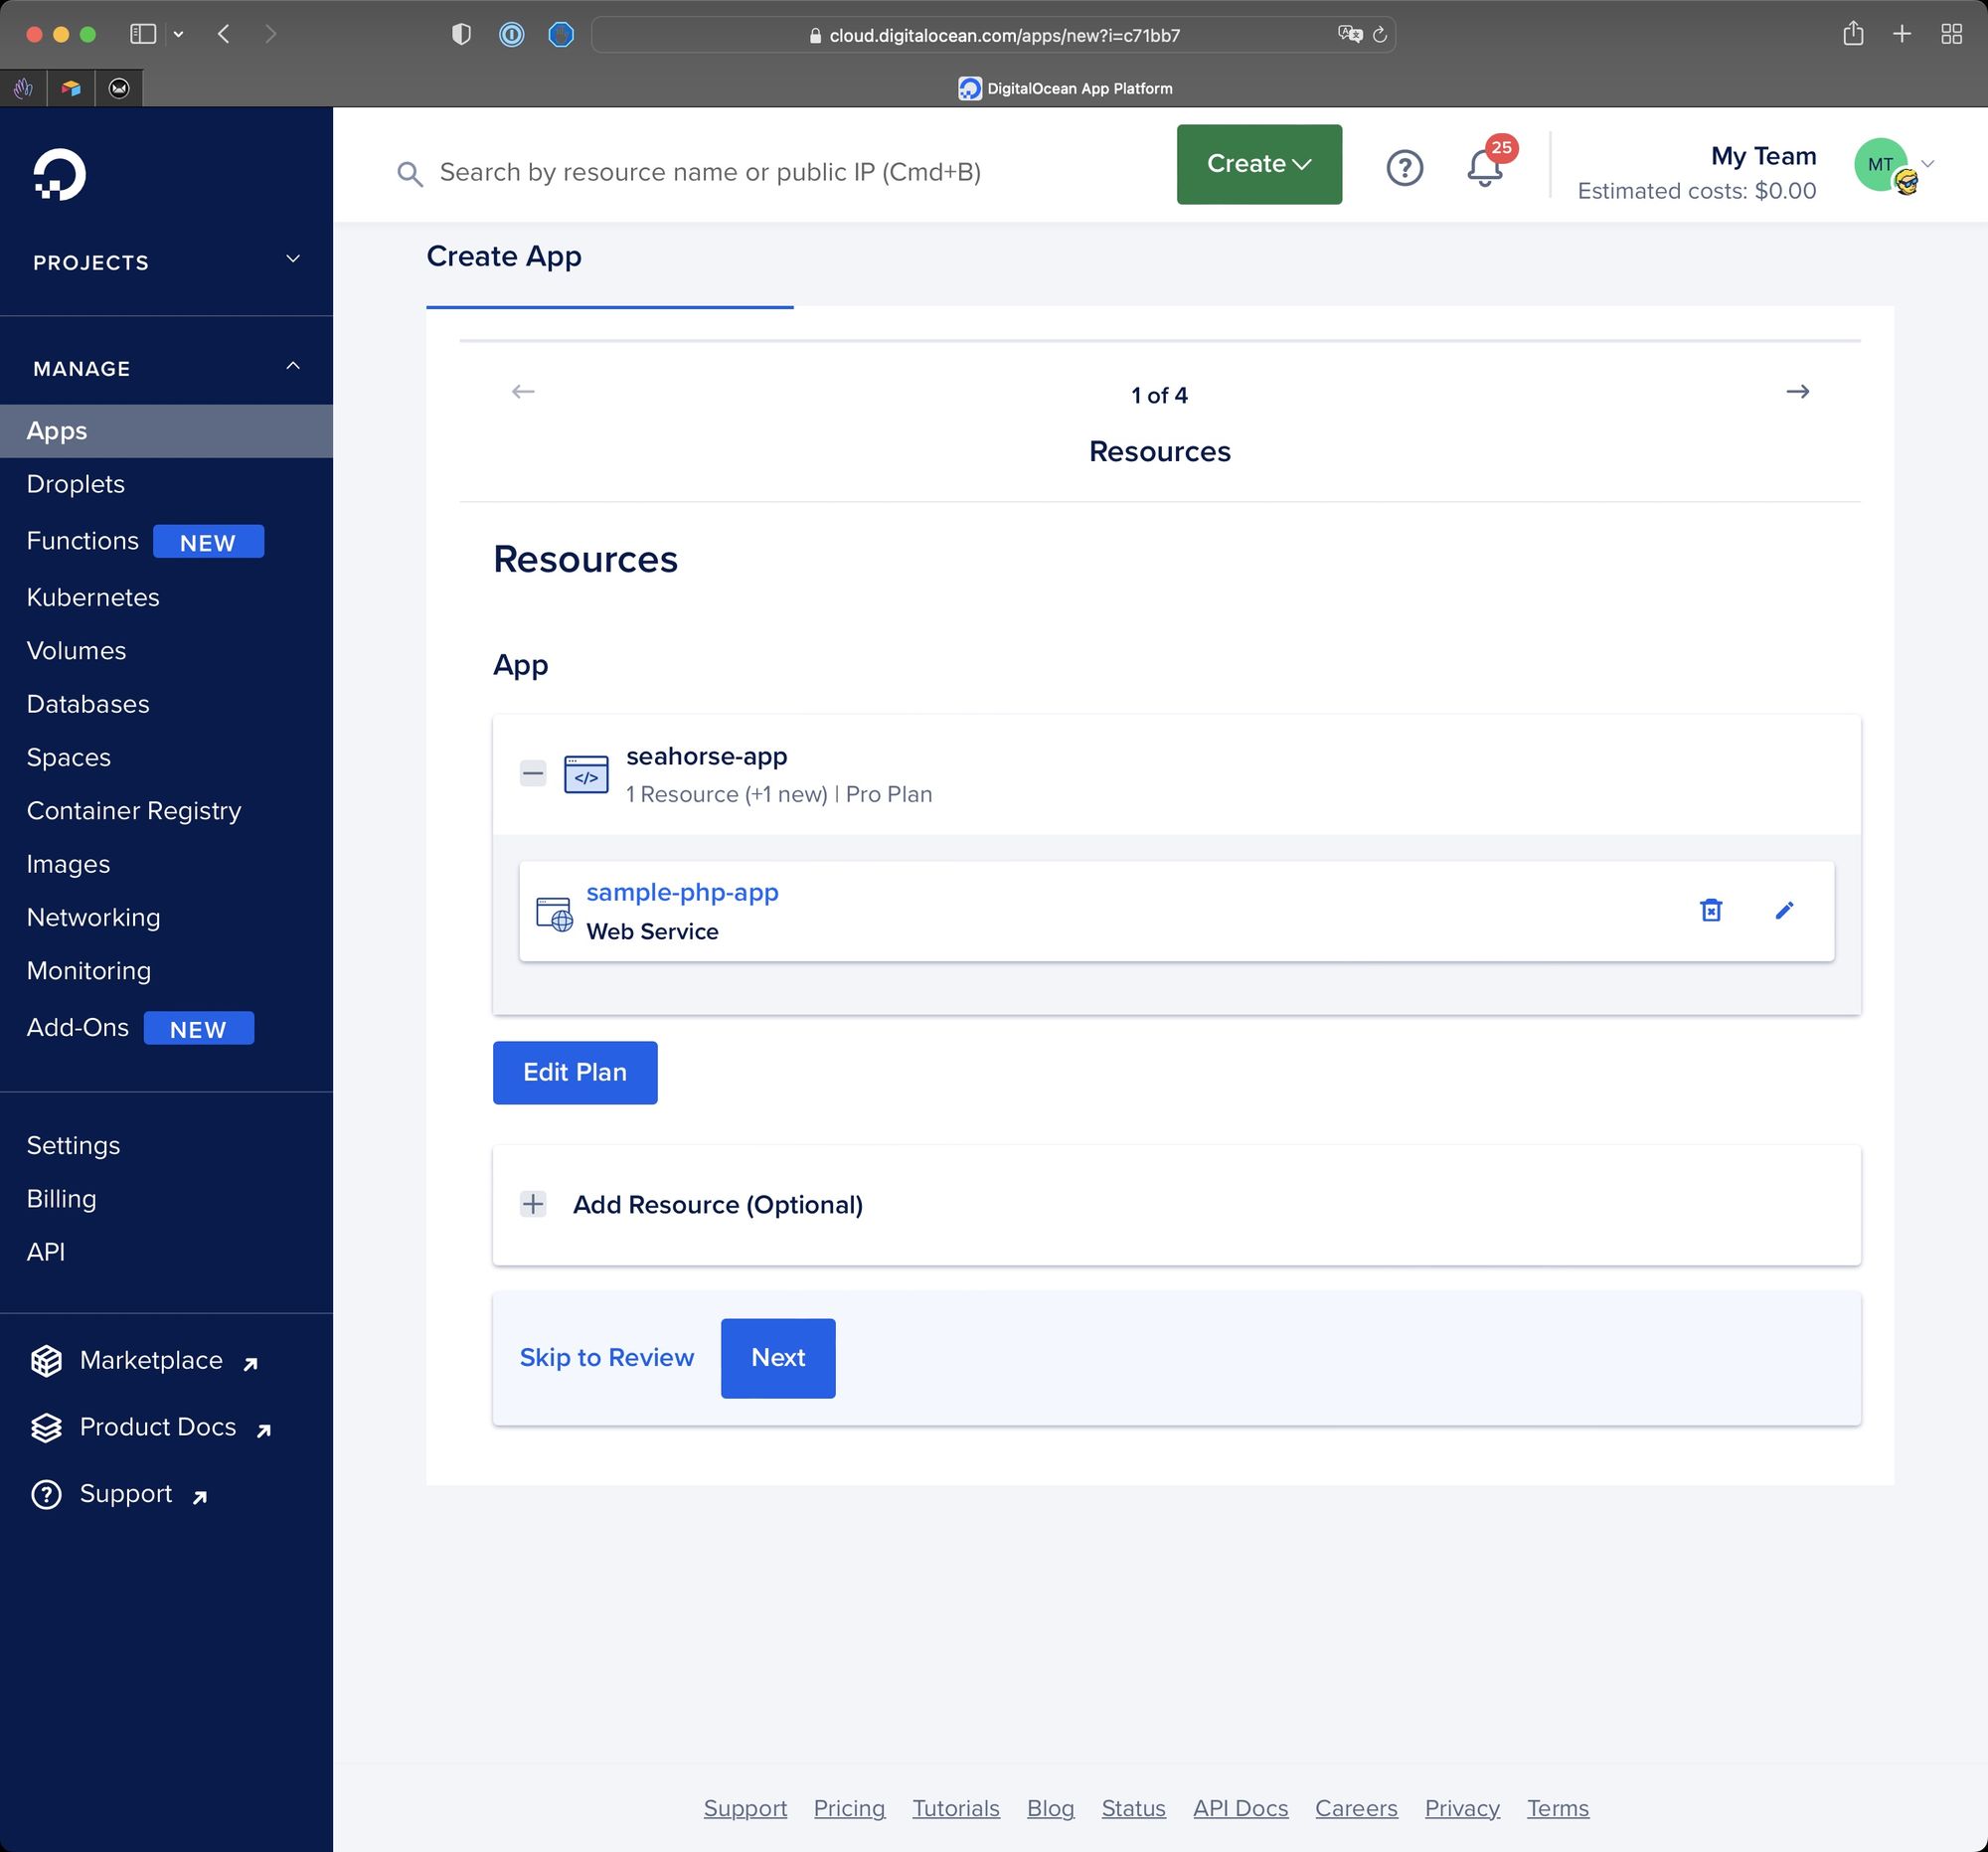
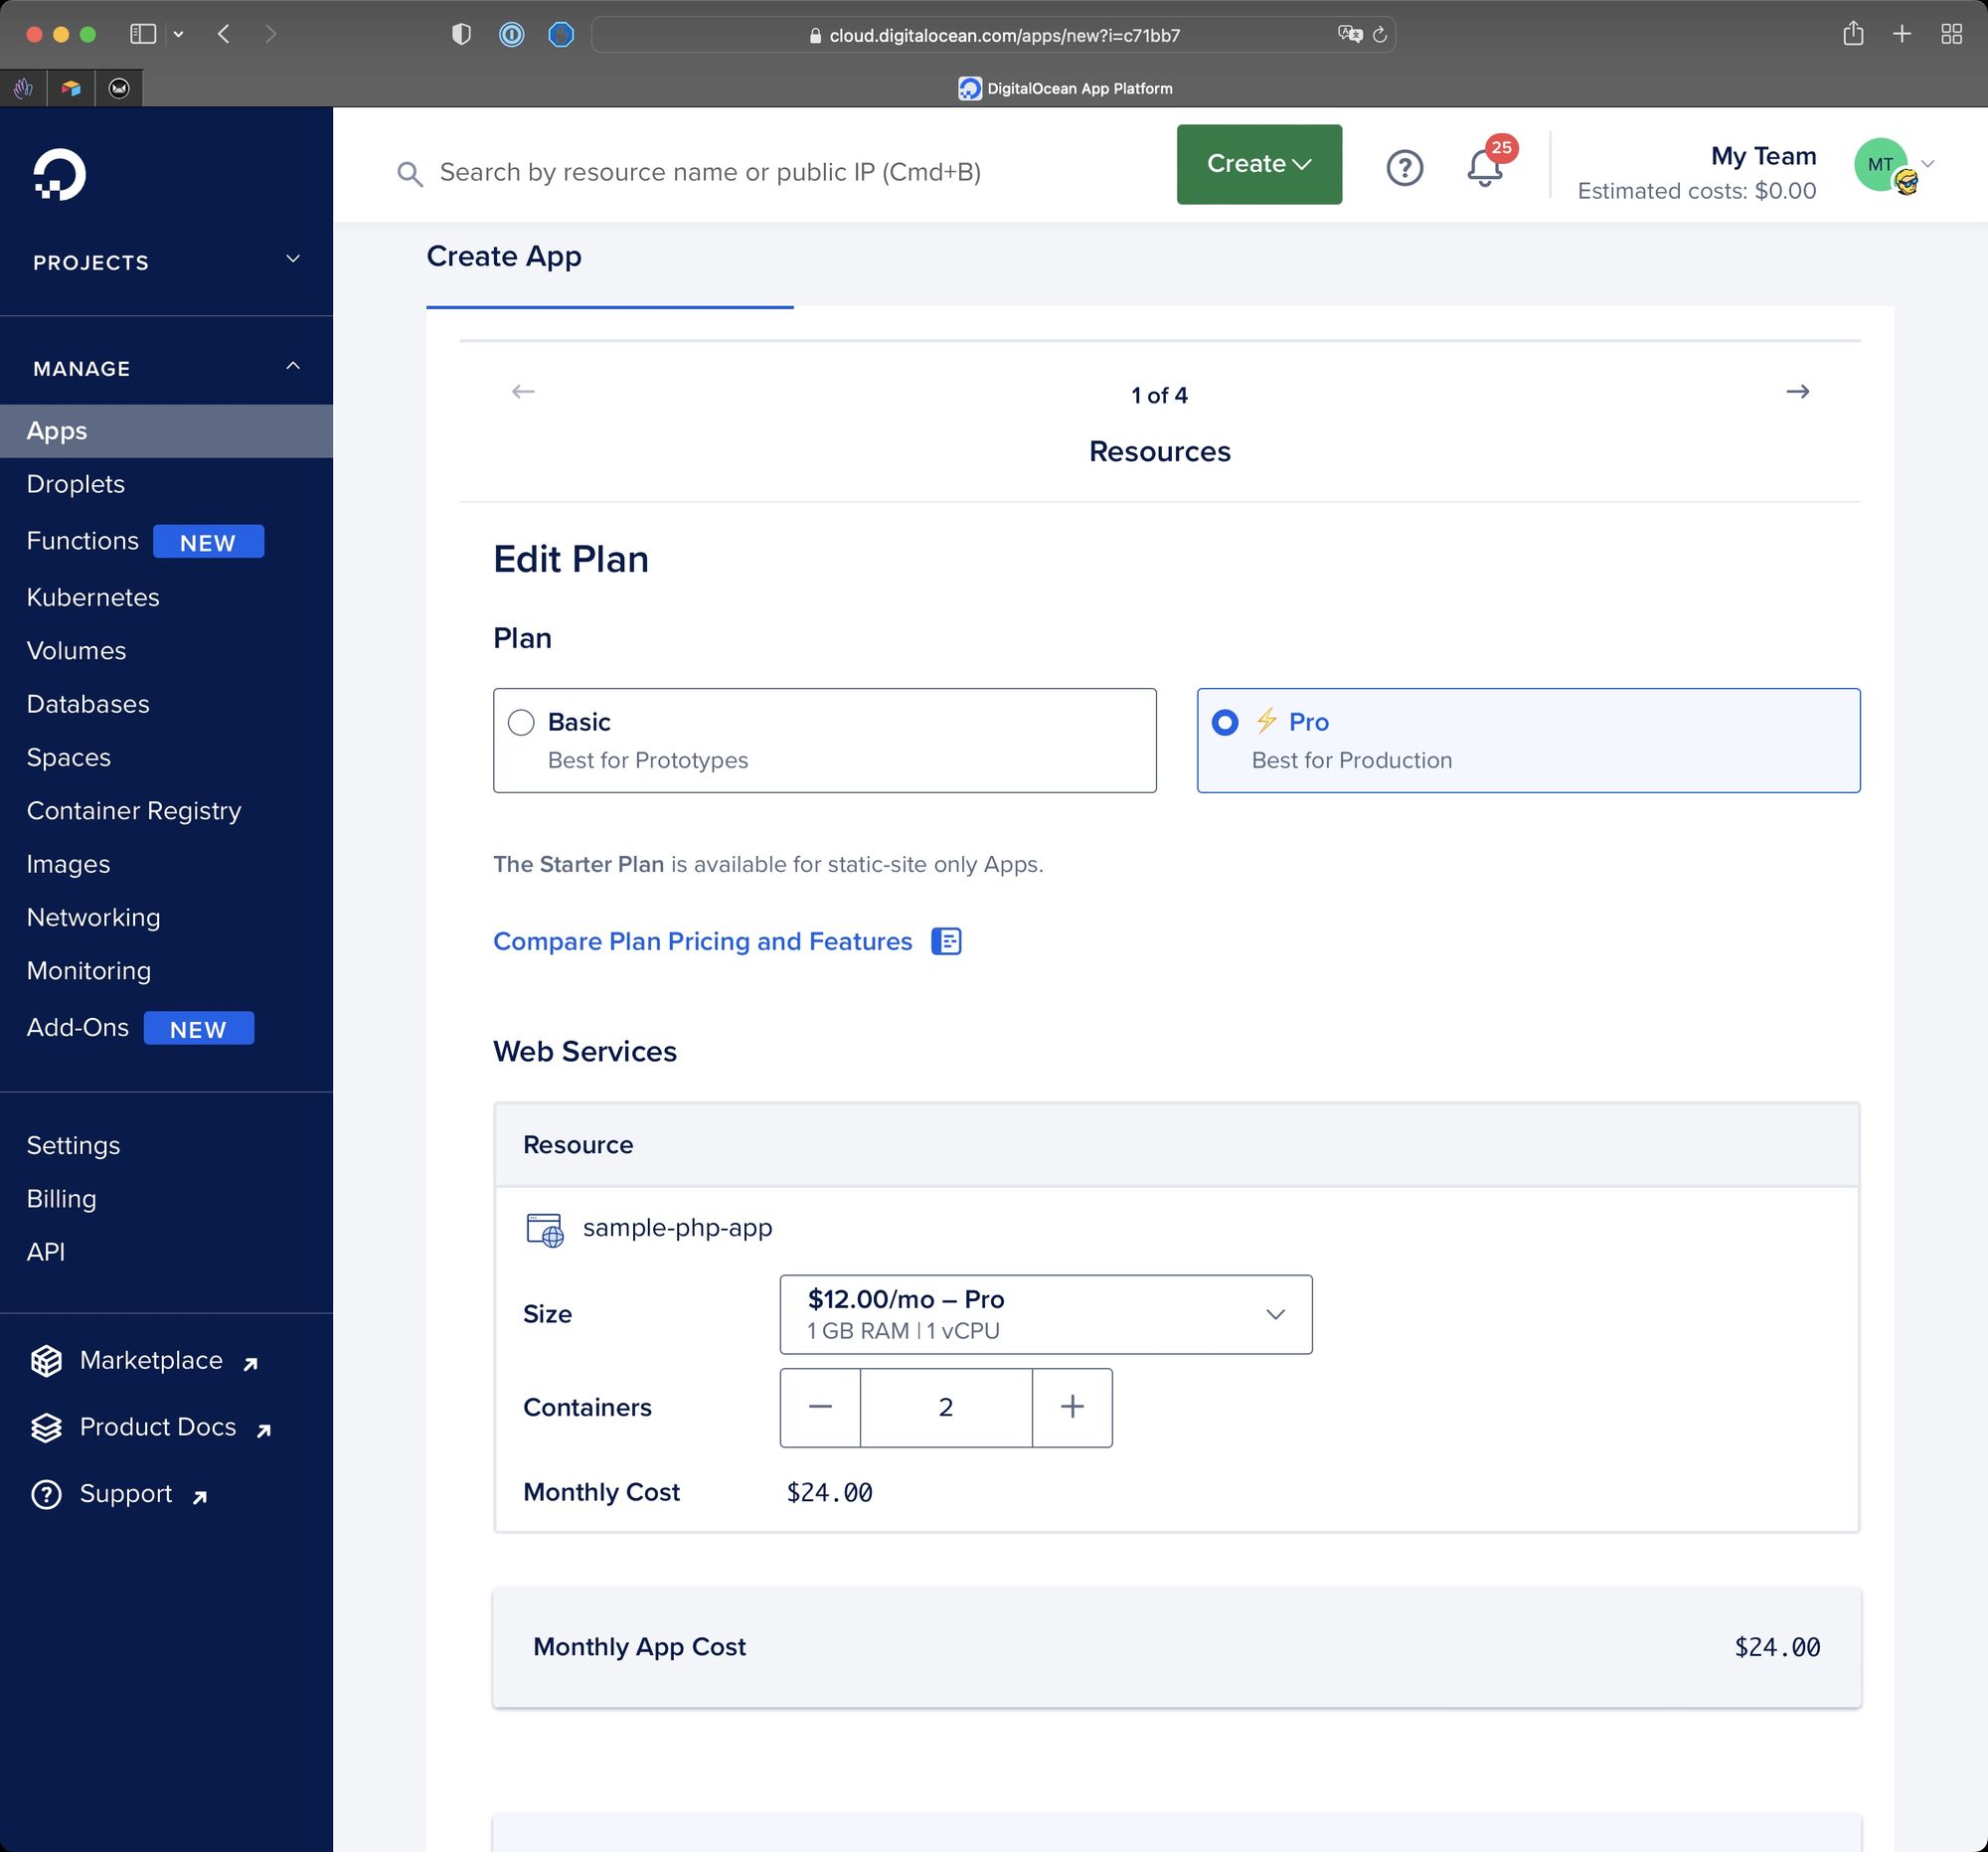
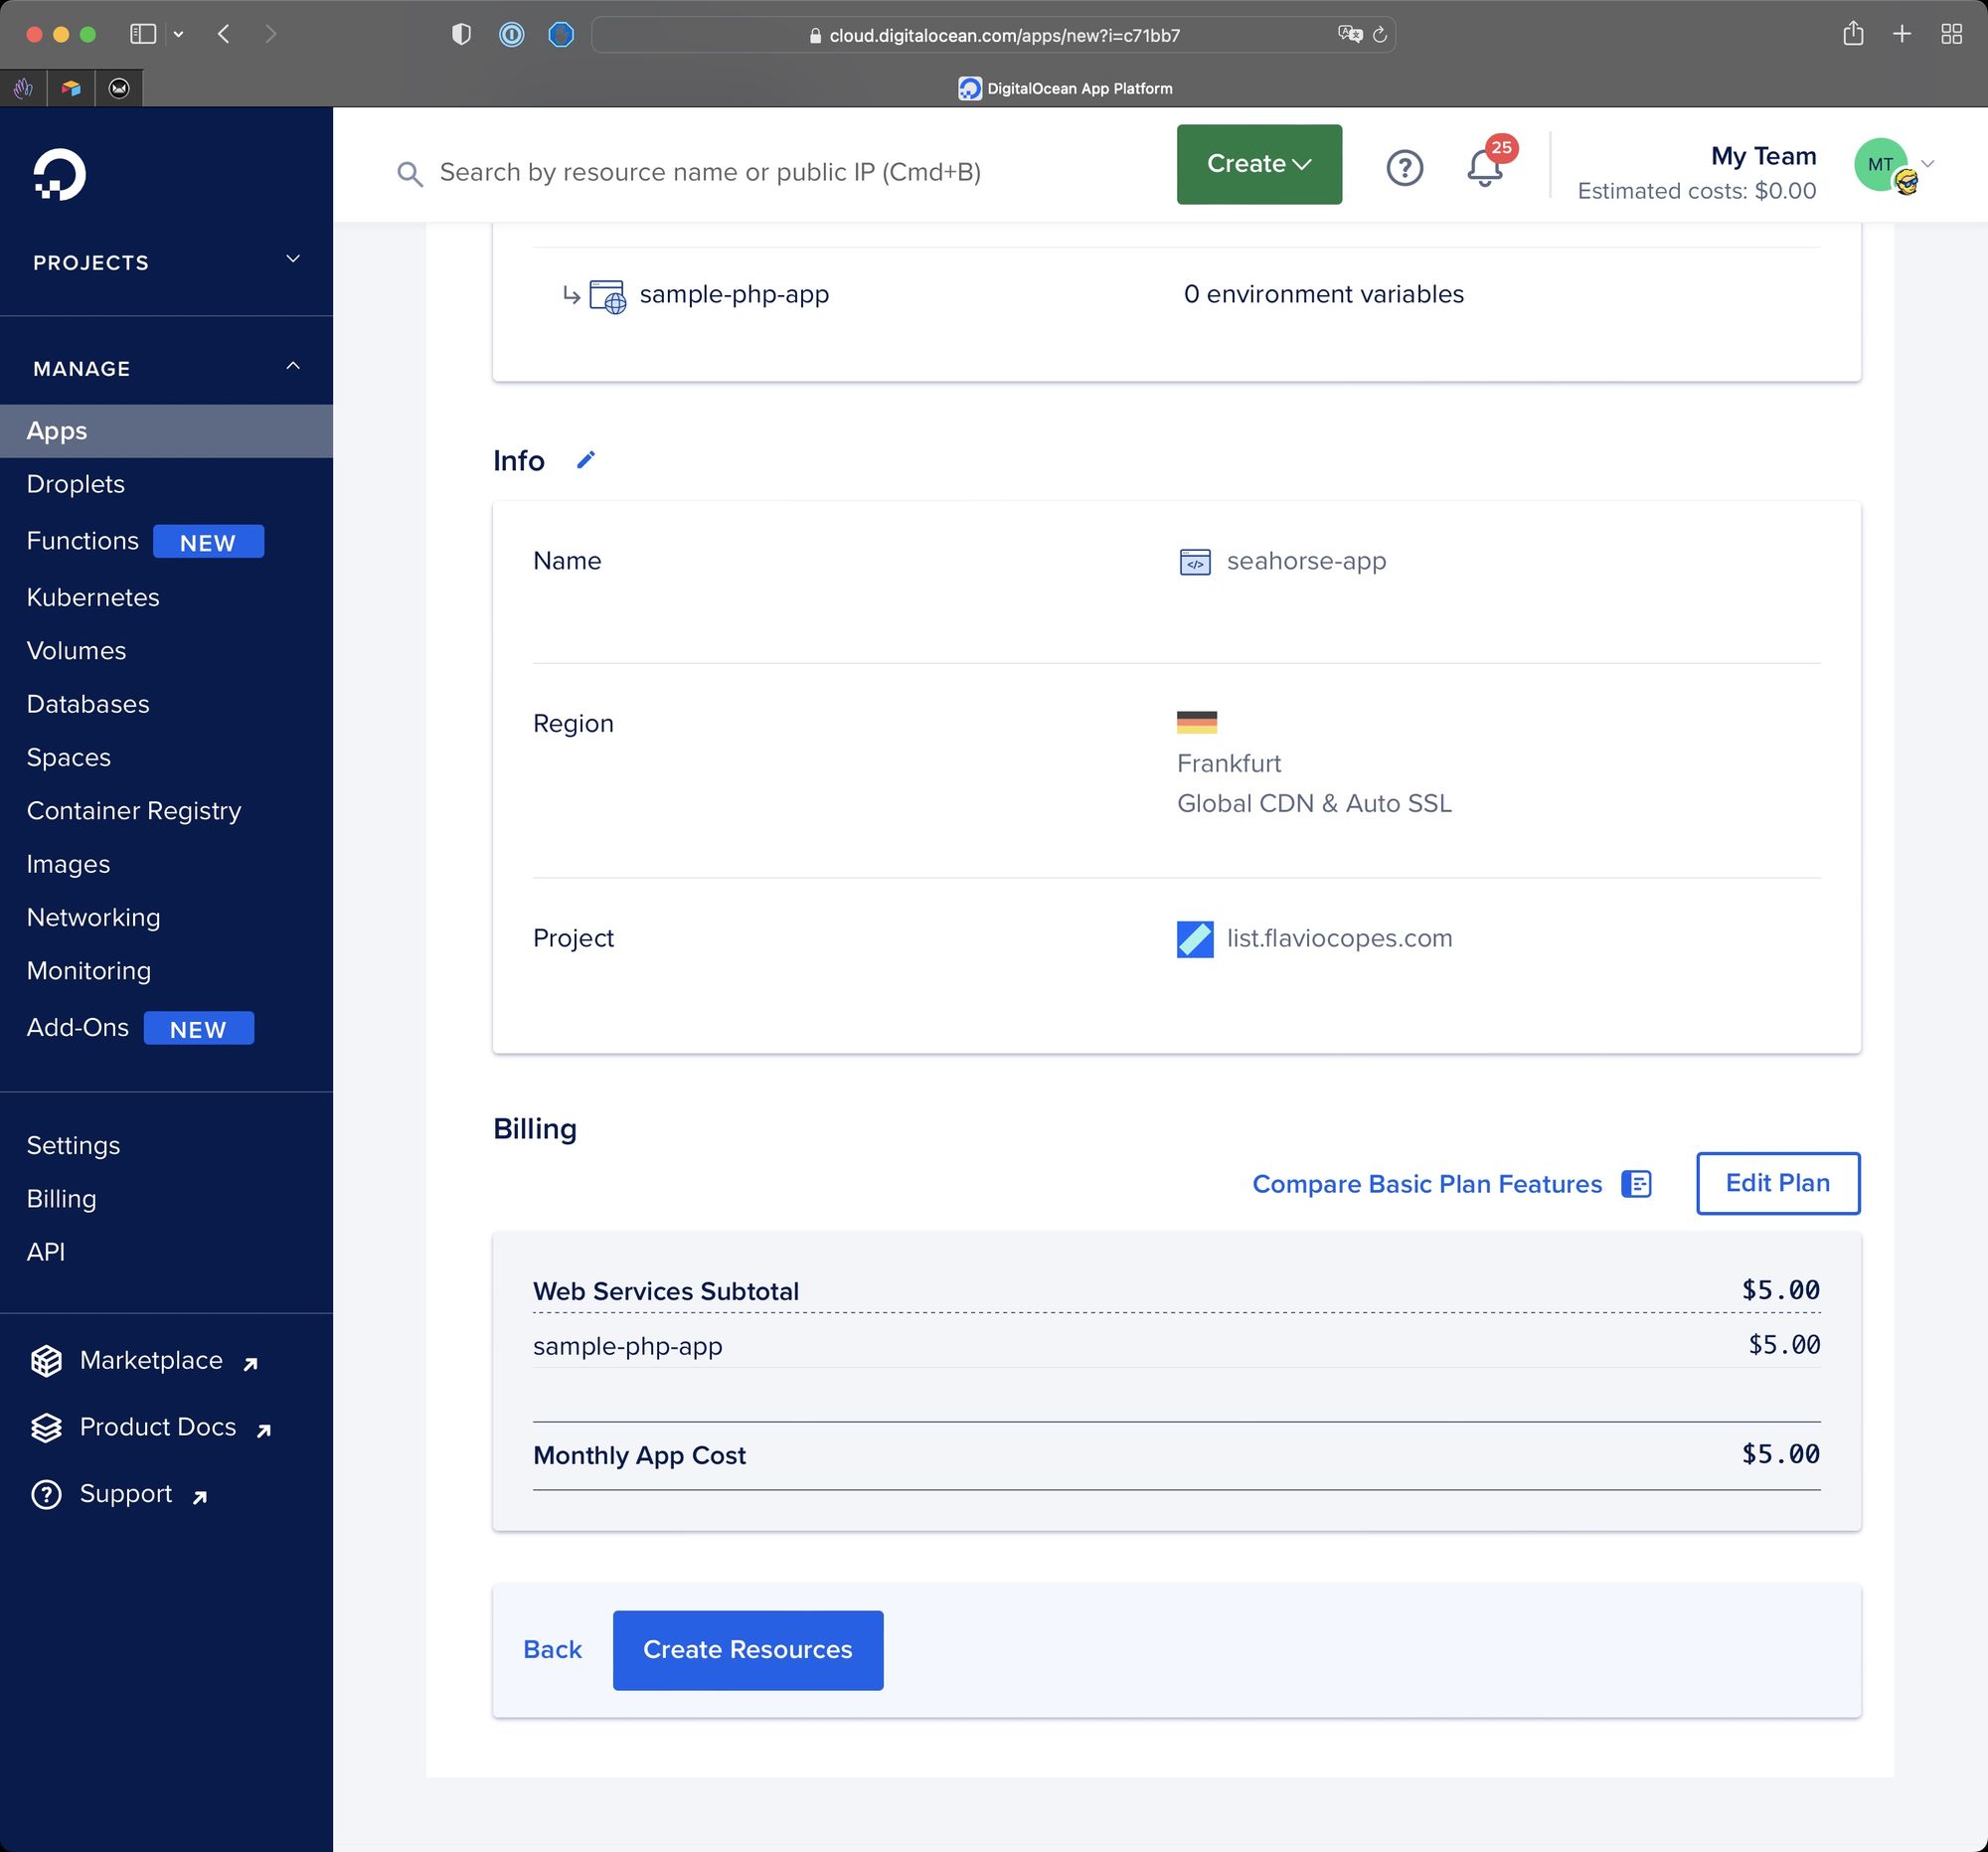
Click “Next” then Edit Plan:
By default the Pro plan is selected.
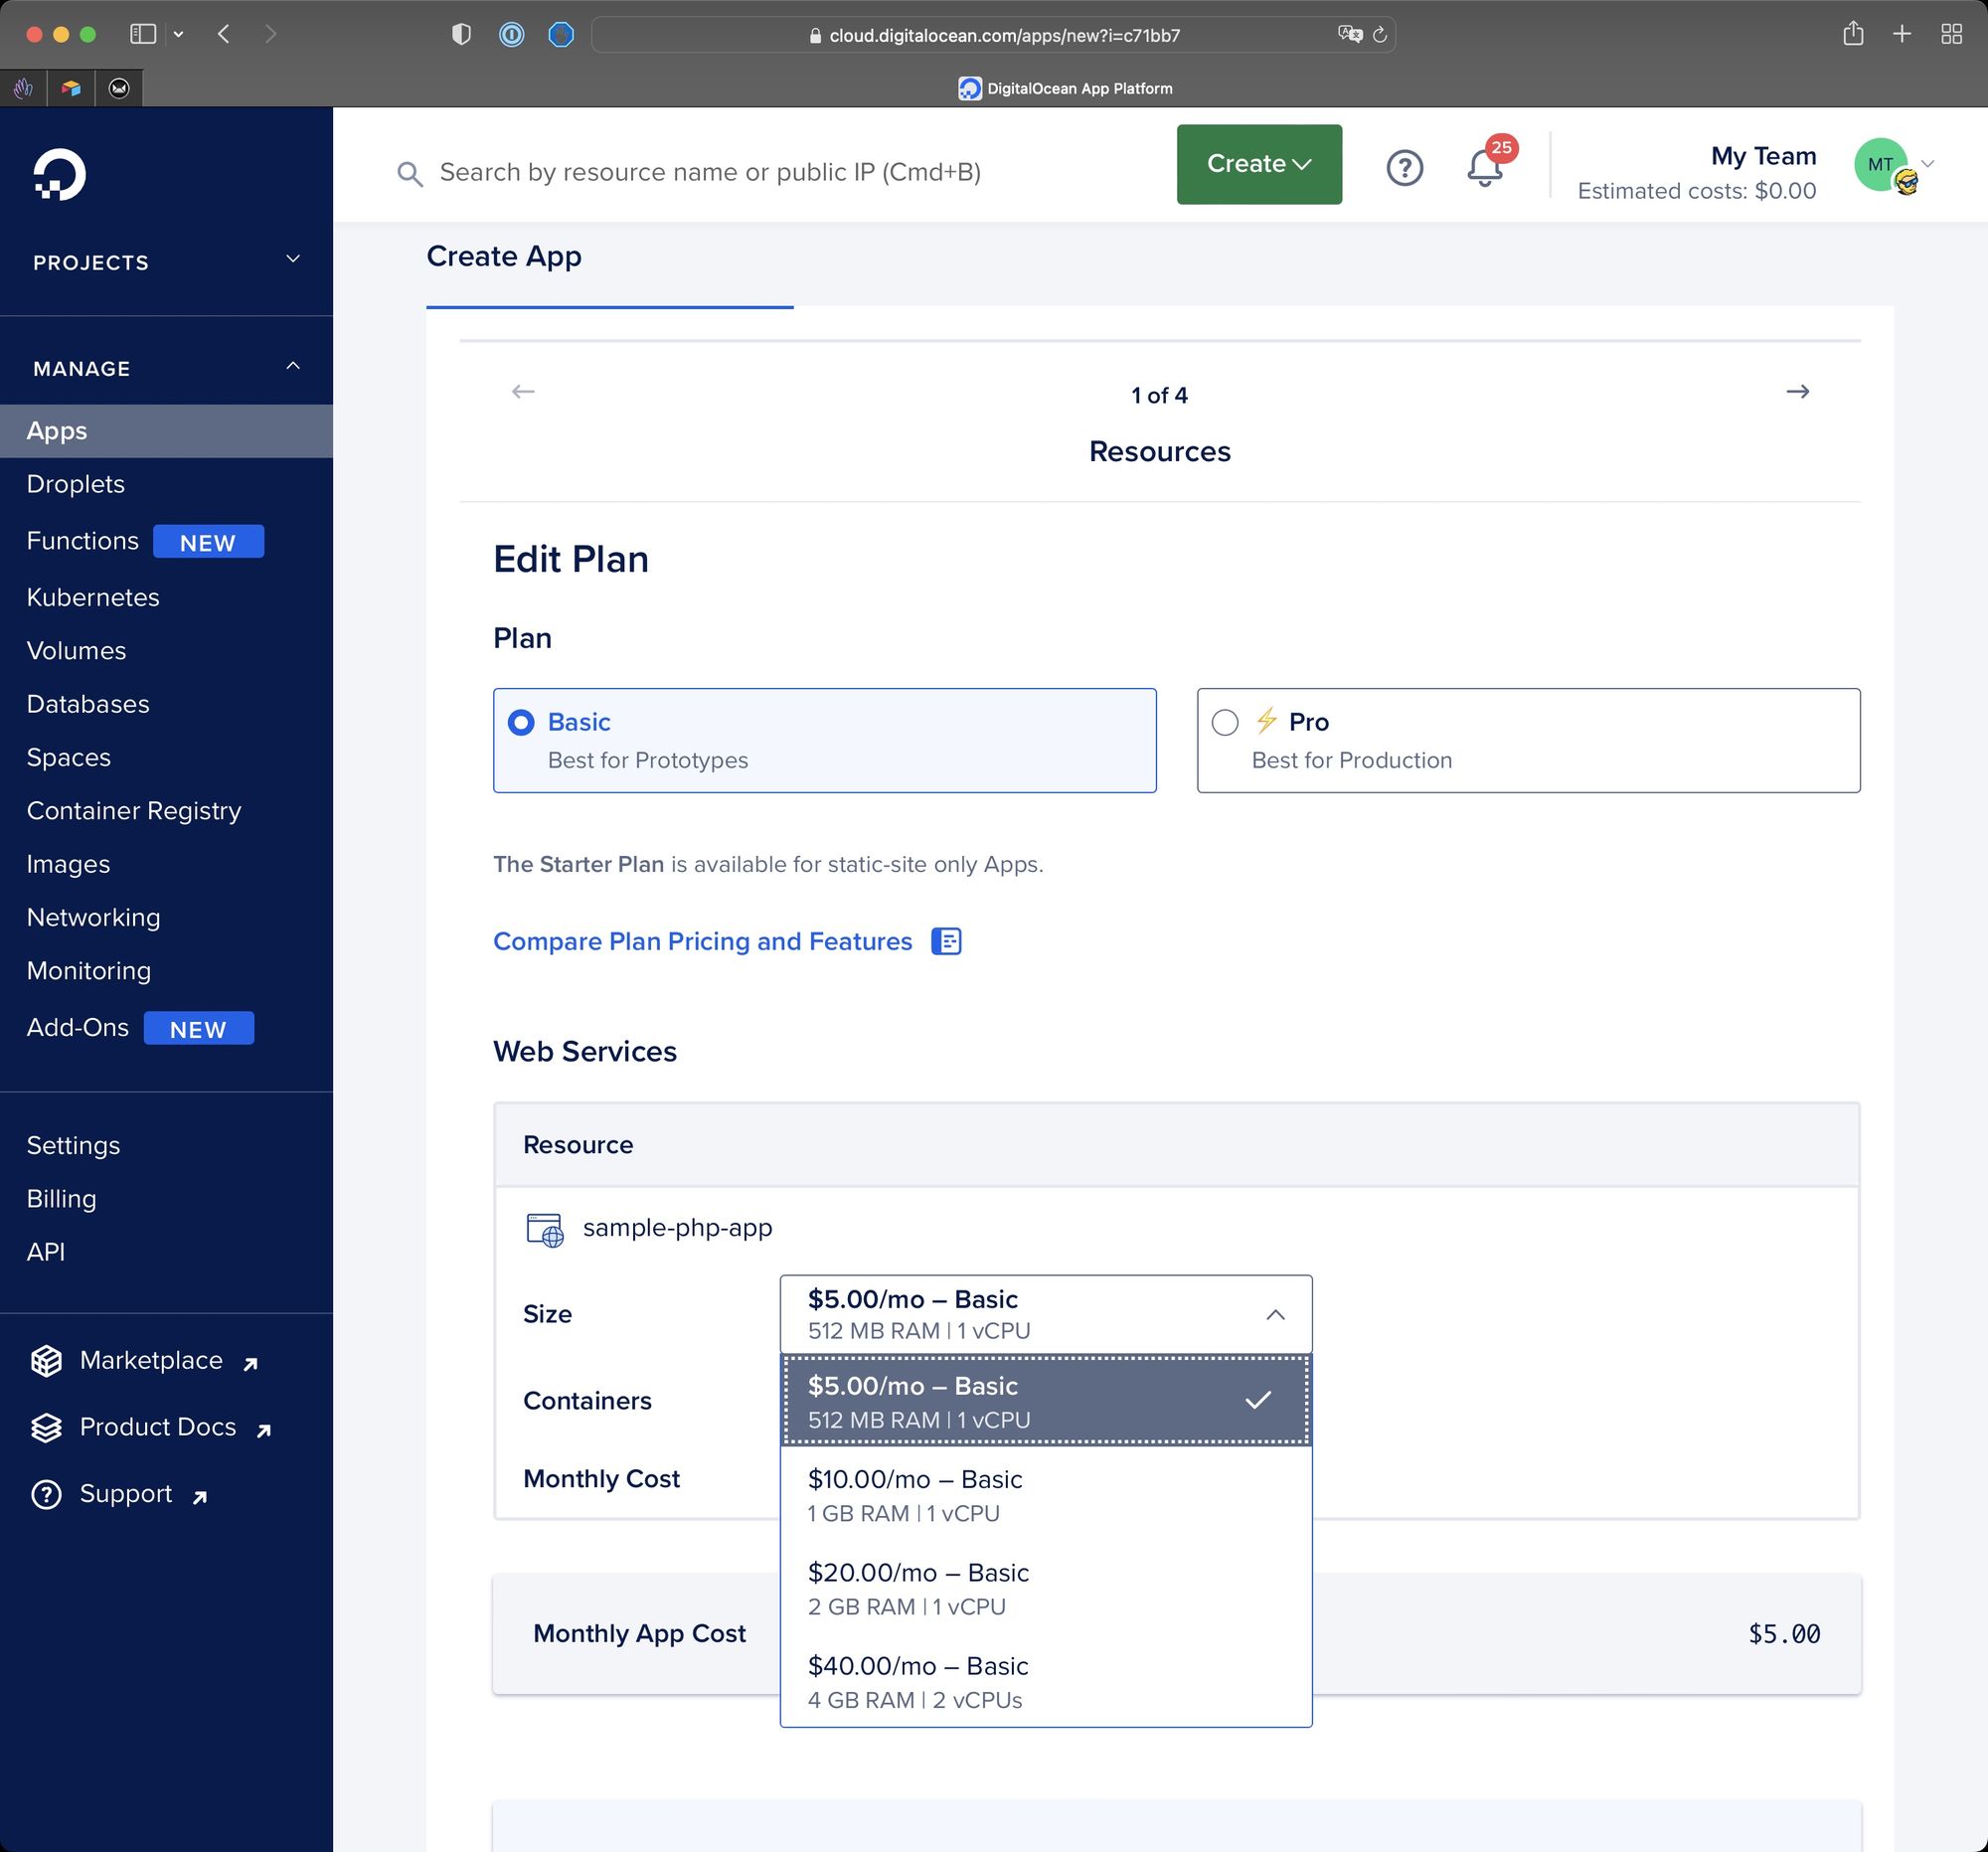
Use Basic and pick the $5/month plan.
Note that you pay $5 per month, but billing is per hour – so you can stop the app any time you want.
Then go back and press “Next” until the “Create Resources” button appears to create the app. You don’t need any database, otherwise that would be another $7/month on top.
Now wait until the deployment is ready:
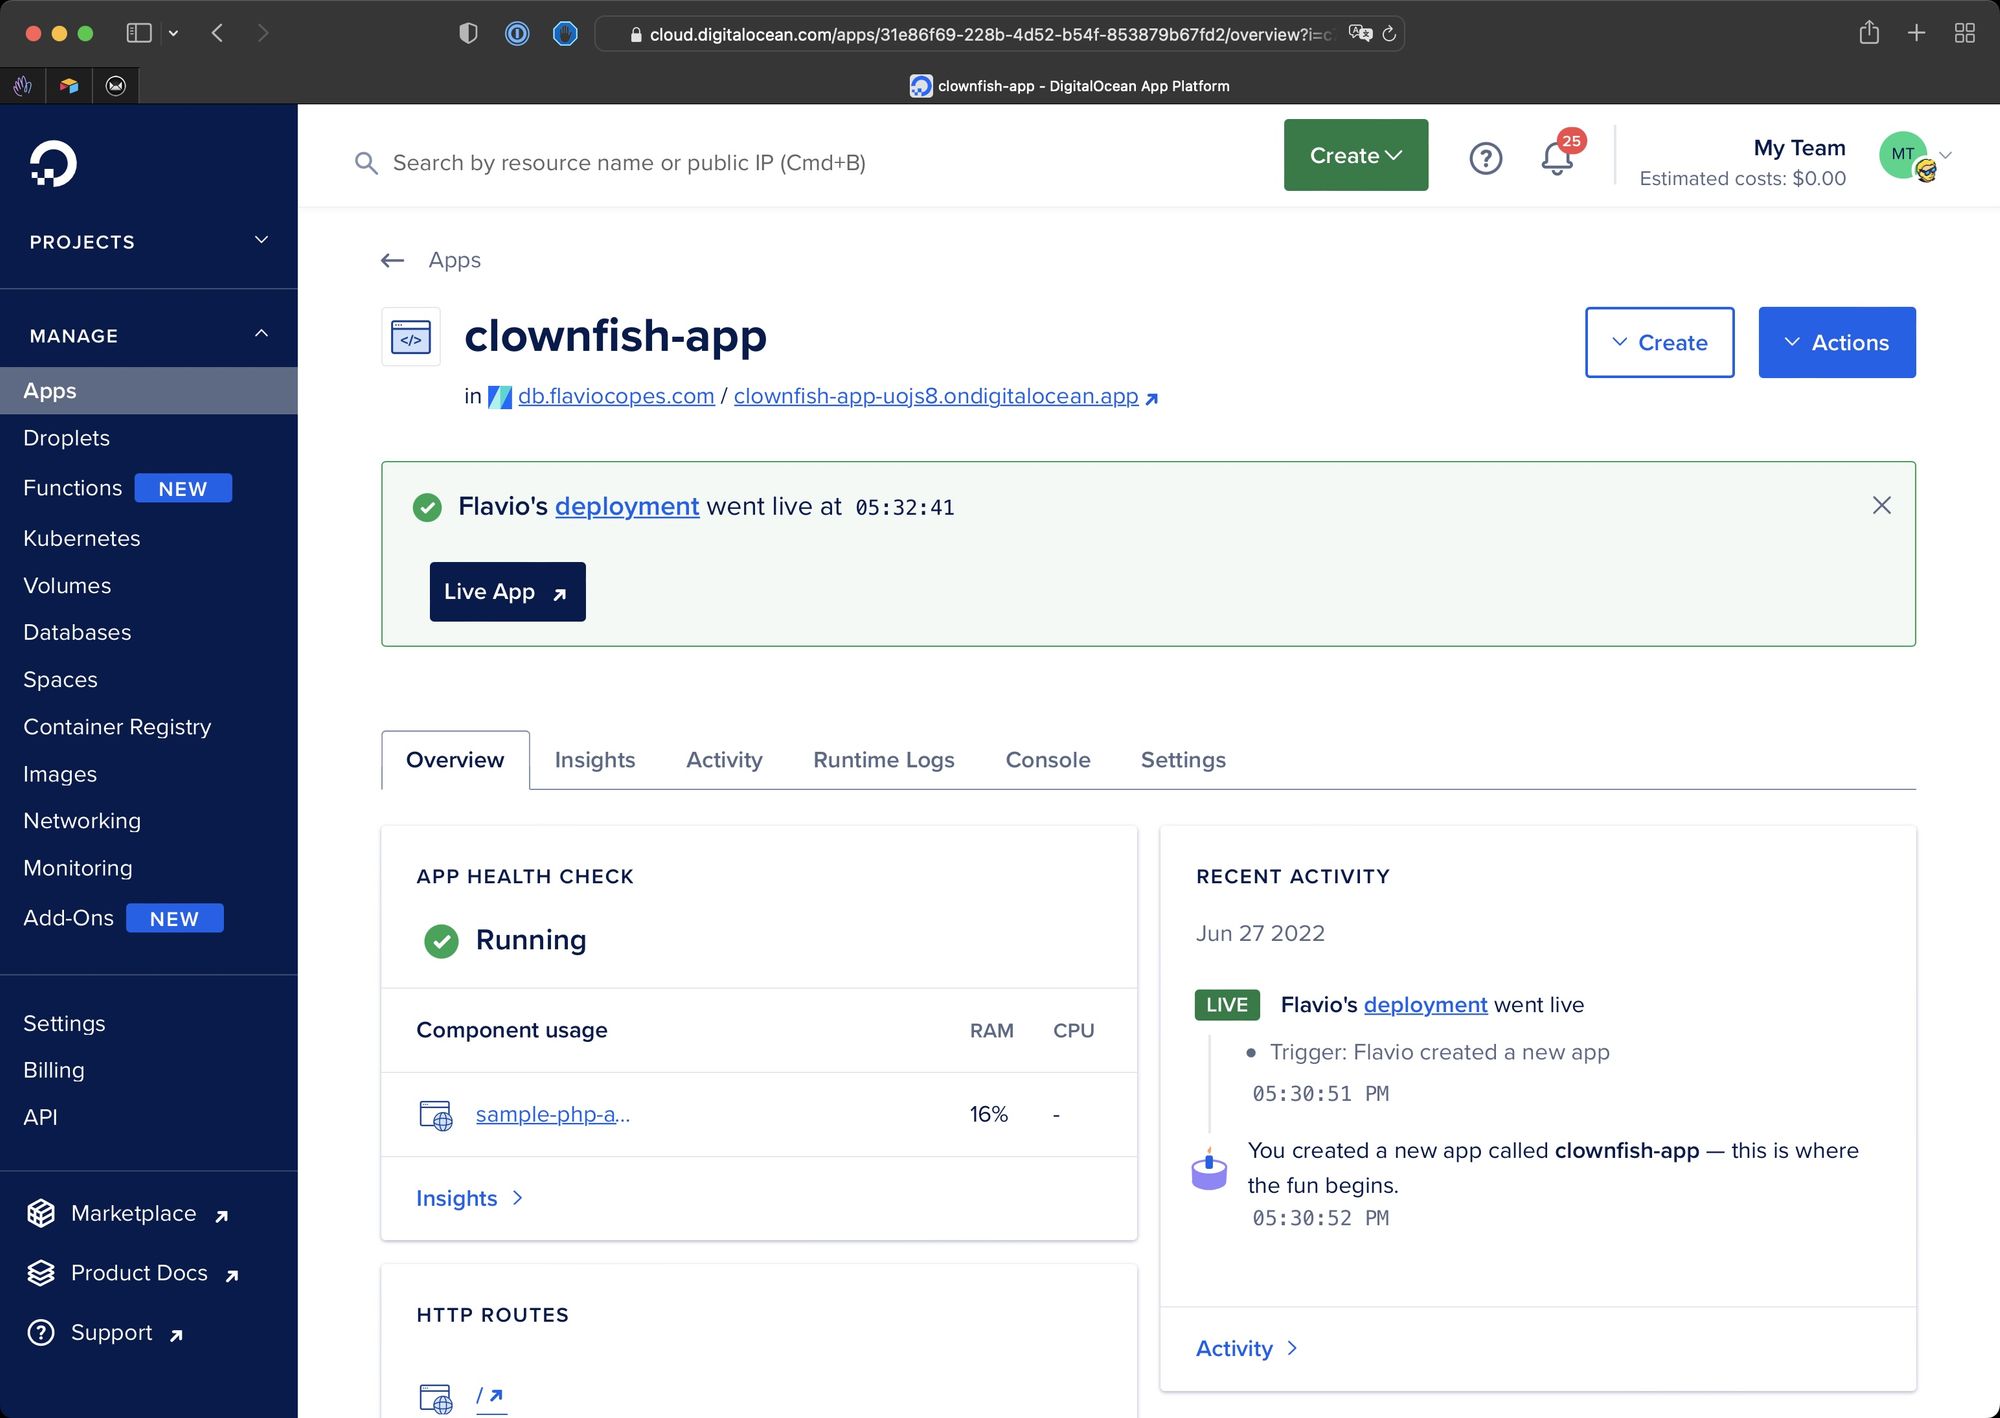
The app is now up and running!
Conclusion
You’ve reached the end of the PHP Handbook!
Thank you for reading through this introduction to the wonderful world of PHP development. I hope it will help you get your web development job, become better at your craft, and empower you to work on your next big idea.
Note: you can get a PDF, ePub, or Mobi version of this handbook for easier reference, or for reading on your Kindle or tablet.