

Frontend frameworks are indispensable in web development. They provide structured approaches and pre-defined components to streamline the coding process.
These tools can also help boost productivity by offering reusable components and abstracting complex tasks like DOM manipulation and state management. This allows developers to focus on application logic rather than writing repetitive code.
Frameworks promote code maintainability through modular development, making it easier to modify or replace individual components. They also make collaboration easier as multiple developers can work simultaneously on different parts of an application.
Benefits of Using Libraries and Frameworks
With vibrant developer communities, these frameworks offer extensive support, tutorials, and documentation. Leveraging frontend frameworks empowers developers to create beautiful and highly functional web applications that meet modern user expectations.
Frontend frameworks provide numerous benefits for beginners in web development as well. They offer a structured approach and pre-built components, simplifying the development process and saving time.
Beginners can leverage the power of these frameworks to create visually appealing and interactive user interfaces without needing to start from scratch.
The extensive community support and resources available for popular tools like React, Angular, and Vue make it easier for beginners to learn and grow their skills. By embracing frontend frameworks, beginners can accelerate their learning curve, and build impressive web applications.
Learn Vanilla JavaScript First
Before delving into JavaScript frameworks, it is crucial for you to grasp the basics of plain JavaScript. Understanding the fundamentals of JavaScript, such as variables, functions, and control structures lays a strong foundation for learning and utilizing frameworks effectively.
By learning the core concepts of JavaScript, you also gain insights into how the language works and can solve problems without relying solely on the abstractions provided by frameworks. This knowledge empowers you to write cleaner, more efficient code and arms you with the ability to customize and extend frameworks to suit their specific needs.
Understanding JavaScript also enables you to troubleshoot issues, comprehend error messages, and make informed decisions when working with frameworks. By mastering the basics, you can unlock the full potential of JavaScript frameworks and leverage their power to create dynamic, interactive web applications.
Table of Contents
What is React?
![]()
React Logo
React is a popular JavaScript library used for building user interfaces. It follows a component-based architecture, where UI elements are divided into reusable components.
React utilizes a Virtual DOM, which is a lightweight representation of the actual DOM, to efficiently update and render components. This approach allows for fast and responsive user interfaces.
React promotes a one-way data flow, making it easier to manage application state and update UI components efficiently. It provides lifecycle methods that allow developers to perform actions at different stages of a component's lifecycle, such as fetching data, handling events, and updating the UI accordingly.
It has a robust ecosystem with various libraries and tools that extend its capabilities. These include React Router for routing, Redux for state management, and React Native for building native mobile applications. This ecosystem offers solutions to common development challenges and facilitates rapid development.
React's component-based architecture, Virtual DOM, JSX syntax, and extensive ecosystem make it a powerful choice for building dynamic and reusable user interfaces. Understanding the basics of React sets the foundation for exploring its features and capabilities in more depth.
React Setup: Installation, Project Creation, and Server Start
To get started with React, you need to set up your development environment by installing React, creating a new project, and starting the development server.
Below outlines the steps to install React, create a new React project, and start the development server:
Step 1: Install Node.js and npm (if not already installed)
Step 2: Open your terminal or command prompt.
Step 3: Install the Create React App CLI globally by running the following command:
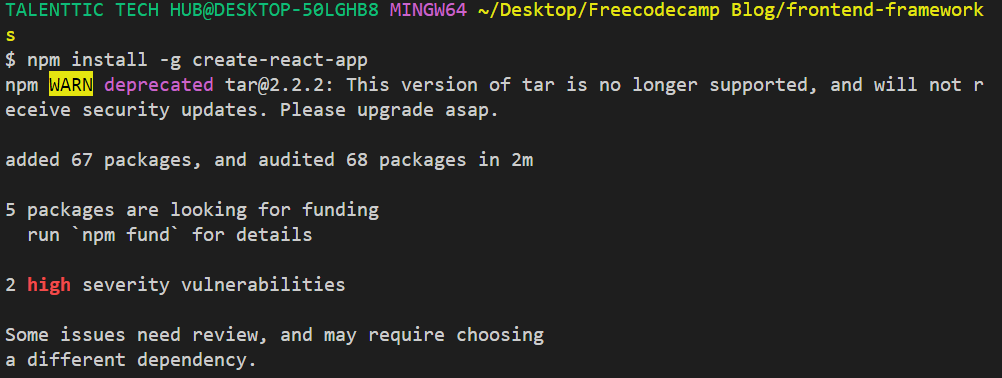
Install React App
npm install -g create-react-app
Step 4: Create a new React project by running the following command:
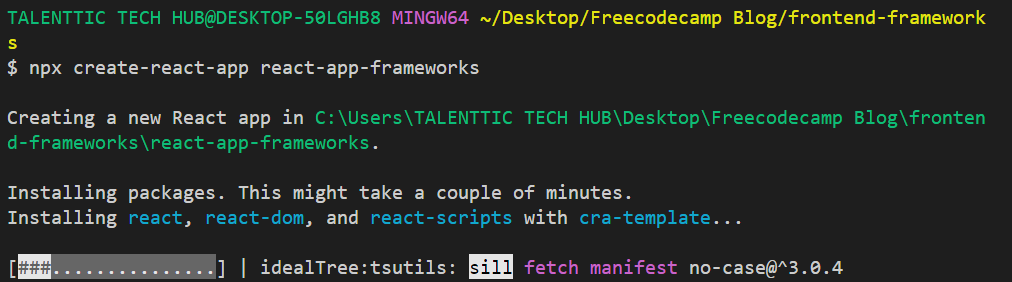
Create React app project
npx create-react-app my-react-app
Note: Replace my-react-app with the desired name of your project.
Step 5: Once the project is created, navigate to the project directory by running the following command:

Change Directory
cd my-react-app
Step 6: Start the development server by running the following command:
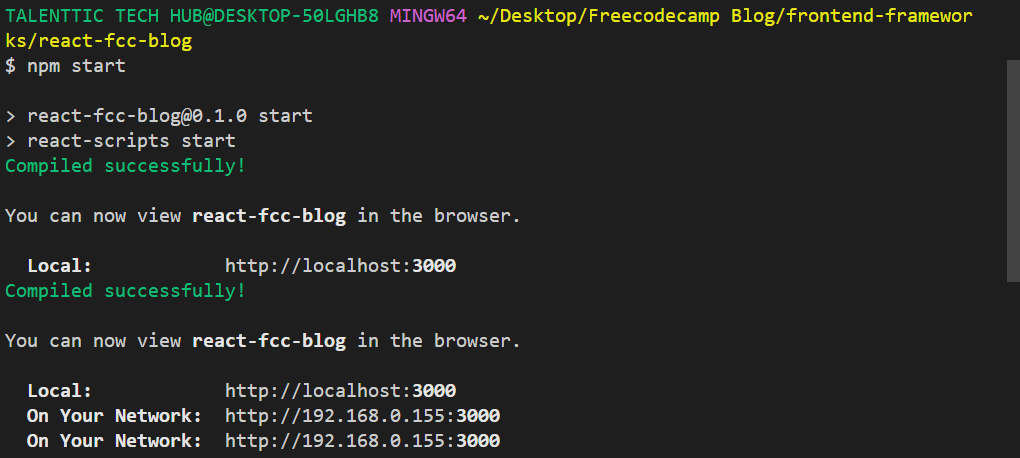
Starting React Development Server
npm start
This will start the development server, and you can view your React app by visiting http://localhost:3000 in your browser.
These steps will install React, create a new React project with Create React App, and start the development server. You can then begin building your React application.
React and its Key Features
React's many features make it one of the most popular choices among developers. Its range of powerful features empowers developers to build dynamic and interactive user interfaces in a flexible and efficient way.
Component-Based Architecture
React follows a component-based approach, where UI elements are broken down into reusable and self-contained components. This modularity promotes code reusability, maintainability, and scalability.
In React, the component-based architecture is a fundamental concept that promotes code reusability and modular development. Components are the building blocks of a React application, and they can be thought of as self-contained, reusable pieces of code that encapsulate both the UI (User Interface) and the logic.
Check out this snippet of code that exemplifies the creation of a simple functional component in React:
import React from 'react';

function Greeting(props) {
  return <h1>Hello, {props.name}!</h1>;
}

export default Greeting;
In the code snippet above, we define a functional component called Greeting. This component takes in a prop called name and renders a greeting message with the value of the name prop.
The component-based architecture allows you to break down your application into smaller, reusable components. Each component can have its own state, props, and lifecycle methods, making it easier to manage and maintain your codebase. Components can be composed and nested together to create complex user interfaces.
By separating your application into components, you can achieve better organization, code reusability, and maintainability. You can easily reuse components across different parts of your application or even in different projects. This approach also enables a more efficient development workflow, as components can be developed and tested independently.
With the component-based architecture in React, you have the flexibility to build modular, scalable, and maintainable applications, making React a powerful tool for front-end development.
Virtual DOM
React utilizes a Virtual DOM, which is a lightweight representation of the actual DOM. By using the Virtual DOM, React efficiently updates and renders components, resulting in faster and smoother user interfaces.
One of the key features of React is its use of a Virtual DOM (Document Object Model). The Virtual DOM is a lightweight representation of the actual DOM, a tree-like structure that represents the HTML elements of a web page. It acts as an intermediary layer between the application's logic and the browser's rendering engine.
Dive into this code example to understand how the Virtual DOM works in React:
import React from 'react';

class Counter extends React.Component {
  constructor(props) {
    super(props);
    this.state = {
      count: 0,
    };
  }

  handleClick() {
    this.setState({ count: this.state.count + 1 });
  }

  render() {
    return (
      <div>
        <h1>Count: {this.state.count}</h1>
        <button onClick={() => this.handleClick()}>Increment</button>
      </div>
    );
  }
}

export default Counter;
In the code snippet above, we have a Counter component that displays a count value and a button to increment the count. Whenever the button is clicked, the handleClick function updates the component's state using setState, triggering a re-render of the component.
Behind the scenes, React creates a Virtual DOM representation of the component's UI structure. When a state change occurs, React efficiently calculates the difference between the previous Virtual DOM and the updated Virtual DOM. This process is known as reconciliation.
React then applies the necessary changes to the actual DOM, updating only the specific parts that have changed. This approach helps optimize performance by minimizing DOM manipulations and updates.
By using the Virtual DOM, React provides a more efficient way of updating the user interface. It reduces the number of direct manipulations on the actual DOM, resulting in faster rendering and improved application performance.
The Virtual DOM also enables a declarative programming model, where developers specify how the UI should look based on the application's state, and React takes care of updating the actual DOM accordingly.
JSX Syntax
React introduced JSX, a syntax extension that combines JavaScript and XML-like syntax. It allows developers to write HTML-like code within JavaScript, making component templates more intuitive and readable.
JSX (JavaScript XML) is an important feature of React that allows developers to write HTML-like syntax directly within JavaScript code. It provides a concise and expressive way to define the structure and appearance of React components.
Let's explore a practical code snippet that demonstrates the usage of JSX in React:
import React from 'react';

class Greeting extends React.Component {
  render() {
    const name = 'John Doe';

    return <h1>Hello, {name}!</h1>;
  }
}

export default Greeting;
In the code snippet above, we have a Greeting component that renders a heading element with a dynamic name value. Within the JSX syntax, we can embed JavaScript expressions using curly braces {}. In this case, the name variable is dynamically inserted into the rendered output.
JSX provides several advantages:
Readability: JSX resembles HTML syntax, making it easy to read and understand the structure of the component's UI.
Expressiveness: JSX allows you to express complex UI structures and logic in a concise and declarative manner.
Component composition: JSX enables the composition of multiple components, allowing you to build reusable and modular UI elements.
Full power of JavaScript: Since JSX is essentially JavaScript, you can utilize the full power of the JavaScript language, including variables, functions, and control flow statements, within the JSX code.
Under the hood, React's JSX code is transpiled into regular JavaScript code that creates and manipulates React elements. This transpilation process is typically handled by build tools like Babel.
By leveraging JSX, developers can build dynamic and interactive user interfaces with ease, combining the power of JavaScript with the familiar syntax of HTML. It simplifies the process of creating and maintaining complex UI structures, making React development more efficient and enjoyable.
One-Way Data Flow
React implements a one-way data flow, ensuring that data flows in a single direction. This makes it easier to manage application state and predict how changes will affect the UI. It promotes better control and maintainability of the application's data flow.
Another one of the key features of React is its one-way data flow, which ensures a predictable and efficient approach to managing data within components. In React, data flows in a unidirectional manner, from parent components to child components.
Here's a code snippet that illustrates the one-way data flow in React:
import React from 'react';

class ParentComponent extends React.Component {
  constructor(props) {
    super(props);
    this.state = {
      message: 'Hello from Parent',
    };
  }

  render() {
    return (
      <div>
        <ChildComponent message={this.state.message} />
      </div>
    );
  }
}

class ChildComponent extends React.Component {
  render() {
    return <h1>{this.props.message}</h1>;
  }
}
In the code snippet above, we have a ParentComponent that holds a state variable called message. This state is then passed down to the ChildComponent as a prop. The child component simply renders the value of the message prop.
The one-way data flow ensures that changes in the parent component's state propagate down to child components, triggering re-rendering only in the affected components. This approach helps to maintain the integrity and predictability of the application's data.
By enforcing one-way data flow, React promotes better code organization and makes it easier to reason about how data changes affect the UI. It also simplifies debugging and ensures better performance by minimizing unnecessary re-renders.
React's one-way data flow ensures a clear and predictable flow of data from parent to child components. This feature helps in maintaining the application's state consistency, improving code readability, and optimizing rendering performance.
Component Lifecycle Methods
React provides lifecycle methods that allow developers to hook into different stages of a component's lifecycle. These methods enable actions like fetching data, handling events, and updating the UI based on specific triggers.
By leveraging these key features, React empowers developers to build interactive and scalable user interfaces. Its component-based architecture, efficient rendering with the Virtual DOM, JSX syntax, one-way data flow, and lifecycle methods make React a versatile and powerful tool for creating modern web applications.
To fully understand and harness the power of React, it's essential to grasp the concept of component lifecycle methods. These methods provide opportunities to perform specific actions at different stages of a component's life cycle.
Let's take a look at an example code snippet that demonstrates the usage of lifecycle methods in React:
import React from 'react';

class MyComponent extends React.Component {
  constructor(props) {
    super(props);
    this.state = {
      count: 0,
    };
  }

  componentDidMount() {
    console.log('Component has mounted!');
  }

  componentDidUpdate() {
    console.log('Component has updated!');
  }

  componentWillUnmount() {
    console.log('Component will unmount!');
  }

  handleClick = () => {
    this.setState((prevState) => ({ count: prevState.count + 1 }));
  };

  render() {
    return (
      <div>
        <h1>Count: {this.state.count}</h1>
        <button onClick={this.handleClick}>Increment</button>
      </div>
    );
  }
}
In the code snippet above, we have a MyComponent class-based component that showcases three essential lifecycle methods: componentDidMount, componentDidUpdate, and componentWillUnmount.
componentDidMount is invoked immediately after the component is mounted in the DOM. It is an ideal place to fetch data from an API, set up event listeners, or perform other initialization tasks.
componentDidUpdate is called after the component's state or props have been updated. It enables you to respond to changes and perform additional actions based on the updated data.
componentWillUnmount is invoked just before the component is unmounted and destroyed. It allows you to clean up any resources, event listeners, or subscriptions to prevent memory leaks.
These lifecycle methods provide hooks into the various stages of a component's existence, enabling you to manage side effects, handle state updates, and maintain proper resource management.
By utilizing lifecycle methods effectively, you can enhance the behavior and functionality of your React components, ensuring optimal performance and seamless user experiences.
Virtual DOM and Component-Based Architecture
React's Virtual DOM and component-based architecture are foundational concepts that contribute to its efficiency and flexibility.
Virtual DOM
React introduces the concept of the Virtual DOM, which is a lightweight representation of the actual Document Object Model (DOM). The Virtual DOM serves as a virtual copy of the real DOM, allowing React to efficiently update and render components.
When there are changes in the application's state, React compares the Virtual DOM with the real DOM and applies only the necessary updates, minimizing the number of actual DOM manipulations. This approach significantly improves performance and makes React applications highly responsive.
Imagine you have a toy block tower. Instead of disassembling and reassembling each block to make changes, you take a picture of the tower. Then, you make the necessary modifications and refer to the picture to recreate the tower with the updated changes.
The toy block tower represents the web page or user interface of your application. The original tower is the initial state, and the picture is the Virtual DOM. When you make changes, the framework (like React) creates a new Virtual DOM, a lightweight copy of the actual DOM.
Component-Based Architecture
React follows a component-based architecture, where UI elements are divided into reusable and independent components. Components are the building blocks of a React application, encapsulating their own state and behavior. This modular approach promotes reusability and maintainability.
Components can be composed together to create complex user interfaces. Changes made to one component do not affect other components unless explicitly specified. This separation of concerns simplifies development, testing, and code organization, making it easier to build and maintain large-scale applications.
Imagine you are building a LEGO house. Instead of building the entire house as one big piece, you break it down into smaller LEGO blocks, like walls, windows, and doors. Each block has its own unique features and functions.
Similarly, in component-based architecture, your web application is divided into smaller, self-contained building blocks called components. Each component represents a specific part of the user interface, such as a header, a navigation menu, or a button. These components are like the LEGO blocks that can be assembled and combined together to form the complete web application.
Just like LEGO blocks can be used in different structures, components can be reused across multiple pages or applications. This reusability saves time and effort as you don't need to recreate the same functionality or design from scratch. You can simply use the existing components and customize them as per your needs.
The combination of the Virtual DOM and component-based architecture makes React a powerful tool for building interactive and scalable user interfaces. The Virtual DOM enables efficient updates, while the component-based architecture promotes code reusability and modularity. Together, these concepts lay the foundation for creating robust and performant applications with React.
JSX Syntax and its Advantages
JSX is a syntax extension used in React that allows developers to write HTML-like code within JavaScript. JSX plays a significant role in creating React components and has several advantages.
Readability and Familiarity: JSX combines the power of JavaScript with the familiarity of HTML-like syntax. It allows developers to write component templates in a declarative manner, making the code more readable and understandable. Developers can easily visualize the structure of the UI and the interactions between components, leading to more maintainable code.
Component Composition: JSX facilitates the composition of components. Developers can nest components within each other, similar to how HTML tags are nested. This enables the creation of complex UI structures by assembling smaller, reusable components together. Component composition improves code organization, encourages reusability, and simplifies the management of application state.
Inline JavaScript Expressions: JSX seamlessly integrates JavaScript expressions within curly braces
{}. This enables dynamic content rendering and the execution of JavaScript code directly within the component template. Developers can embed variables, perform calculations, and handle conditional rendering, allowing for flexible and dynamic UI creation.Type Safety and Tooling: JSX enhances the development experience by providing improved tooling and type safety. Editors and IDEs can provide intelligent autocompletion and error checking for JSX syntax, helping to catch mistakes and improve productivity. Additionally, JSX can be statically analyzed for type checking, ensuring that the components receive the correct props and reducing runtime errors.
JSX is a powerful feature that enables developers to build intuitive and dynamic user interfaces with React. By leveraging JSX syntax, React simplifies the creation of component templates, improves code readability, promotes component composition, and provides enhanced tooling support.
What is Angular?
![]()
Angular Logo
The Angular framework has revolutionized web development by providing a comprehensive set of tools and features for building robust and scalable applications. Developed and maintained by Google, Angular has its roots in the original framework, AngularJS.
With a focus on modern web development practices, Angular has evolved into a versatile and widely adopted framework. In this section, we will explore Angular, its origins, and the key features that make it a popular choice among developers.
Whether you are new to Angular or seeking to deepen your understanding, this overview will serve as a solid foundation to navigate the world of Angular development.
Angular Framework and its Origins
The Angular framework, often referred to as Angular or Angular 2+, is a powerful front-end development platform created and maintained by Google.
It is the successor of AngularJS, which was the first version of Angular released in 2010. AngularJS introduced the concept of two-way data binding and gained popularity for its ability to build dynamic and interactive web applications.
However, AngularJS had limitations in terms of performance, scalability, and maintainability. This led the Angular team to re-envision the framework. Angular was introduced as a complete rewrite of AngularJS, incorporating modern web development practices and addressing the shortcomings of its predecessor.
Angular was built from the ground up to be more efficient, modular, and developer-friendly. It embraced a component-based architecture, where UI elements are divided into reusable components. This modular approach promotes code reusability, maintainability, and scalability, allowing developers to build complex applications with ease.
The release of Angular introduced significant changes and improvements, resulting in a more streamlined and performant framework. It incorporated features like a more efficient change detection mechanism, a powerful template syntax known as Angular Template Syntax (based on HTML with additional features), enhanced dependency injection, and a revamped command-line interface (CLI) for scaffolding and managing projects.
Over time, Angular has evolved into a comprehensive platform with a wide range of capabilities, including advanced routing, form handling, internationalization, and powerful testing tools. It has gained popularity among developers for its robustness, scalability, and the extensive ecosystem of libraries and tools that support Angular development.
Understanding the origins of Angular helps developers appreciate the design principles, improvements, and rationale behind the framework. It sets the stage for exploring Angular's key features and best practices, and leveraging its full potential to build modern web applications.
Understanding Angular's Modular Structure
One of the core strengths of Angular is its modular structure, which promotes code organization, reusability, and maintainability.
Angular applications are composed of modules, components, services, and other building blocks that work together to create a cohesive application.
Modules
In Angular, modules act as containers that group related components, services, directives, and other features. Each Angular application typically has a root module, known as the AppModule, which serves as the entry point of the application.
Modules help in organizing the application's functionality into manageable units, making it easier to maintain and understand the codebase. They also provide a way to encapsulate dependencies and provide a clean separation of concerns.
Modules in Angular can be likened to different rooms in a house. Imagine you have a big house with multiple rooms, each serving a specific purpose. The living room is for relaxing, the kitchen is for cooking, and the bedroom is for sleeping. Each room has its own unique function and contains the necessary furniture and equipment.
In Angular, modules are used to organize and encapsulate different parts of your application. If we continue with the house analogy, think of each module as a separate room in the house.
For example, you may have a living room module that handles all the components, services, and resources related to displaying and interacting with the living room features. Similarly, you can have a kitchen module that manages all the functionality related to cooking and food preparation.
Now, let's bring in the AppModule, which is the root module of an Angular application. In our house analogy, the AppModule can be compared to the main entrance or foyer of the house. Just as the main entrance connects all the rooms in a house, the AppModule serves as the entry point to your Angular application, connecting all the modules together.
The AppModule plays a crucial role in Angular applications. It imports and aggregates all the other modules, making them accessible to the application. It also bootstraps the application by specifying the root component that will be loaded initially.
Essentially, the AppModule sets the foundation for your Angular application, ensuring that all the necessary modules and components are properly connected and initialized.
By utilizing modules in Angular, including the AppModule, you can achieve better organization, separation of concerns, and maintainability in your application. Each module focuses on a specific area or functionality, making it easier to manage and extend your application as it grows.
Here's a short code snippet in Angular to demonstrate the usage of modules:
import { NgModule } from '@angular/core';
import { BrowserModule } from '@angular/platform-browser';
import { AppComponent } from './app.component';

@NgModule({
  declarations: [AppComponent],
  imports: [BrowserModule],
  providers: [],
  bootstrap: [AppComponent]
})
export class AppModule { }
In this example, we have an AppModule class decorated with the NgModule decorator. Inside the decorator, we define the metadata for our module.
The declarations array lists all the components, directives, and pipes that belong to this module. Here, we have a single component AppComponent declared.
The imports array specifies other modules that this module depends on. In this case, we're importing the BrowserModule, which provides essential features for running Angular applications in a web browser.
The providers array is used to provide any services or dependencies required by the components in this module.
The bootstrap array indicates the root component of the application, which will be instantiated when the application starts. Here, we have AppComponent specified as the bootstrap component.
Components
Components are the building blocks of Angular applications. They represent specific sections of the user interface and encapsulate their own styles, templates, and logic.
Components can be composed together to create complex UI structures. By breaking the UI into smaller, reusable components, the application becomes more modular and easier to develop and maintain.
Components in Angular are like building blocks that make up the different parts of a house, just like the React components I talked about earlier.
Imagine you are building a house using Lego bricks. Each Lego brick represents a component, and when you put them together, they form different parts of the house, such as walls, doors, and windows.
Similarly, in Angular, components are the basic building blocks of an application's user interface. They encapsulate a specific functionality or part of the user interface, just like the Lego bricks forming specific parts of a house.
For example, you can have a component for displaying a navigation menu, another component for showing a list of products, and yet another component for handling user registration.
Components consist of three main parts: the template, the class, and the styles. The template defines the structure and layout of the component, similar to how the Lego bricks come together to form a specific shape. The class contains the logic and data that the component needs to function, like the instructions that guide you on how to assemble the Lego bricks. The styles define the appearance and design of the component, just like the colors and patterns you choose for your Lego house.
When you put all the components together, just like assembling Lego bricks, you create a complete and interactive user interface for your Angular application. Each component works independently, but they can also communicate and interact with each other, allowing you to build complex and dynamic applications.
Components in Angular are the basic building blocks of an application's user interface, encapsulating specific functionalities. By combining and arranging components, you can create a complete and interactive user interface for your Angular application, just like assembling Lego bricks to build a house.
A short code snippet in Angular to demonstrate the usage of components:
import { Component } from '@angular/core';

@Component({
  selector: 'app-example',
  template: `
    <h1>Welcome to the Example Component!</h1>
    <p>This is the content of the component.</p>
  `
})
export class ExampleComponent {
  // Component logic goes here
}
In this example, we have an ExampleComponent class decorated with the @Component decorator. Inside the decorator, we define the metadata for our component.
The selector property specifies the HTML selector used to render the component. In this case, the selector is app-example, which means the component will be rendered as <app-example></app-example> in the HTML.
The template property defines the component's view or template. It contains the HTML markup that will be rendered when the component is used. In this example, we have a simple heading and paragraph.
The ExampleComponent class represents the logic and behavior of the component. Here, you can define properties and methods, and handle events related to the component.
Components are the building blocks of Angular applications. They encapsulate HTML, CSS, and JavaScript functionality into reusable and self-contained units. This makes it easier to develop and maintain complex user interfaces.
Services
Services are used for sharing data, logic, and functionality across multiple components. They encapsulate reusable business logic, data access, and communication with external APIs. Services can be injected into components or other services, enabling a clear separation of concerns and promoting code reusability.
Services in Angular can be likened to the helpers or assistants that make a house function smoothly. Imagine you are living in a house and you have different people helping you with specific tasks. For example, you might have a cleaning service to keep your house tidy, a plumber to fix any water-related issues, and an electrician to take care of electrical matters.
Same thing in Angular – services are like professionals that handle specific tasks and provide the functionality to different parts of your application. They are designed to perform common tasks or provide shared functionality that multiple components may need. Just like the helpers in a house, services can be called upon when needed and provide specialized assistance.
For example, you can have a data service that retrieves and stores data from an external source, such as a server or a database. This data service can be used by multiple components to fetch and update data, ensuring consistency across your application.
Another example is an authentication service that manages user authentication and authorization. This allows different components to verify user credentials and control access to certain features.
Services act as a central hub of functionality that can be shared and reused throughout your application. They help to organize your code and promote a modular structure, making it easier to maintain and update your application over time.
They act as centralized helpers, allowing different parts of your application to access and utilize their specialized capabilities. By using services, you can create a modular and efficient application structure, just like having dedicated helpers in a house to ensure everything runs smoothly.
Here's a short code snippet in Angular to demonstrate the usage of services:
import { Injectable } from '@angular/core';

@Injectable()
export class DataService {
  getData(): string {
    return 'This is data retrieved from the DataService!';
  }
}
In this example, we have a DataService class decorated with the @Injectable decorator. This decorator marks the class as an injectable service, allowing it to be injected into other components or services.
Inside the DataService class, we define a getData method that returns a string. This method can be used to fetch data from an API, perform calculations, or any other logic related to data retrieval.
Services in Angular are responsible for handling data, business logic, and other shared functionality across components. They promote code reusability, separation of concerns, and provide a way to centralize common operations and data access within your application.
Directives
Directives are used to extend the behavior of HTML elements or create reusable custom elements. They allow developers to manipulate the DOM, add event listeners, apply dynamic styling, and perform other tasks to enhance the functionality and appearance of the application.
They can be compared to instructions or rules that you give to objects in your house. Imagine you have a set of toys or objects, and you want to assign certain behaviors or actions to them. You might use stickers or labels to indicate what each object should do.
Likewise, in Angular, directives are used to give instructions or behaviors to elements in your application's user interface. They are like special stickers that you can attach to HTML elements to define how they should behave or appear. Directives can control the visibility, style, and behavior of elements, allowing you to customize their functionality.
For example, you can have a highlight directive that adds a special effect to a specific HTML element, making it stand out with a different color or animation. This directive can be used to highlight important information or interactive elements on a web page.
Another example is the if directive, which conditionally shows or hides an element based on certain conditions. This can be used to dynamically display content based on user input or application state.
Directives help you create interactive and dynamic user interfaces by providing instructions to HTML elements. They are like labels that tell the elements how to behave and what to look like. By using directives, you can customize and control the behavior of elements in your application, making it more engaging and user-friendly.
In simple terms, directives in Angular are like special stickers that you can attach to objects in your house (HTML elements) to tell them how to behave or look. They allow you to add interactive features and customize the appearance of elements, making your application more engaging and enjoyable for users.
Here's a short code snippet in Angular to demonstrate the usage of a custom directive:
import { Directive, ElementRef, HostListener } from '@angular/core';

@Directive({
  selector: '[appHighlight]'
})
export class HighlightDirective {
  constructor(private elementRef: ElementRef) {}

  @HostListener('mouseenter')
  onMouseEnter() {
    this.highlight('yellow');
  }

  @HostListener('mouseleave')
  onMouseLeave() {
    this.highlight(null);
  }

  private highlight(color: string | null) {
    this.elementRef.nativeElement.style.backgroundColor = color;
  }
}
In this example, we're creating a custom directive called appHighlight. This directive is applied to an HTML element using the selector [appHighlight].
When the user hovers over the element, the onMouseEnter event listener is triggered, and it calls the highlight method to set the background color of the element to yellow.
Similarly, when the user moves the mouse away from the element, the onMouseLeave event listener is triggered, and it removes the highlight effect by setting the background color back to the default.
By attaching the appHighlight directive to an HTML element, we can dynamically control its appearance and behavior. This demonstrates the concept of directives in Angular, where you can define custom behaviors or instructions that can be applied to HTML elements to enhance their functionality and visual representation.
Here's an example of how you can apply the appHighlight directive to an HTML element in your template:
<div appHighlight>
  This is a highlighted element. Move your mouse over it to see the effect!
</div>
In this case, we have a <div> element to which we apply the appHighlight directive using the directive selector [appHighlight]. When the user hovers over this <div> element, the directive's behavior is triggered, and the background color of the element will be set to yellow, as defined in the directive's code.
Understanding Angular's modular structure is crucial for building scalable and maintainable applications. By organizing functionality into modules, and leveraging reusable components, services, and directives, developers can create applications that are easier to develop, test, and extend.
This modular approach also facilitates collaboration among team members and enables better code organization. This leads to more efficient development workflows and better overall application architecture.
Angular CLI and TypeScript Integration
Angular CLI (Command Line Interface) is a powerful tool that simplifies the development process of Angular applications. It provides a command-line interface for creating, building, testing, and deploying Angular projects.
Additionally, Angular CLI seamlessly integrates with TypeScript, a statically typed superset of JavaScript, to enhance the development experience and enable advanced features.
Creating Projects
With Angular CLI, creating a new Angular project is as simple as running a single command. The CLI generates a basic project structure, including configuration files, boilerplate code, and a development server. This saves time and eliminates the need for manual project setup, ensuring that developers can start coding right away.
To create a new project in Angular, you can use the Angular CLI (Command Line Interface). Follow these steps:
Open your terminal or command prompt.
Navigate to the directory where you want to create your Angular project.
Run the following command:
ng new project-name
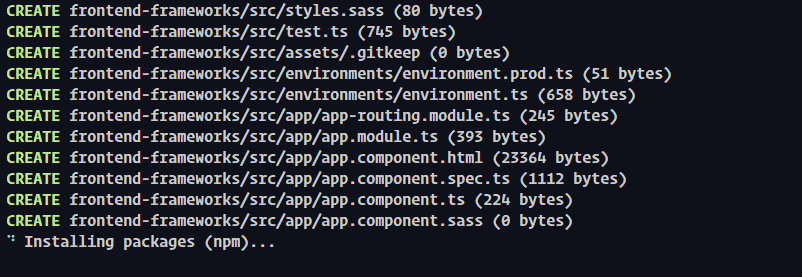
Replace project-name with the desired name for your project (I choose frontend-frameworks). Make sure to avoid spaces or special characters.
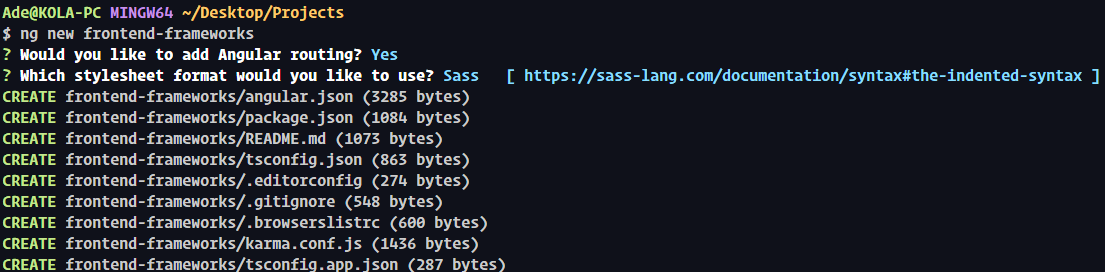
Selecting options for Angular project
Creating Project
The Angular CLI will prompt you to choose additional options for your project, such as the stylesheet format (CSS, SCSS, Sass etc.) and whether you want to enable routing. Make your selections and press Enter.
Wait for the CLI to create the project. It will install the necessary dependencies and set up the basic structure.
Once the process is complete, navigate into the project directory:
cd project-name
You can now start working on your Angular project. Use the ng serve command to run the development server and view your application in the browser:
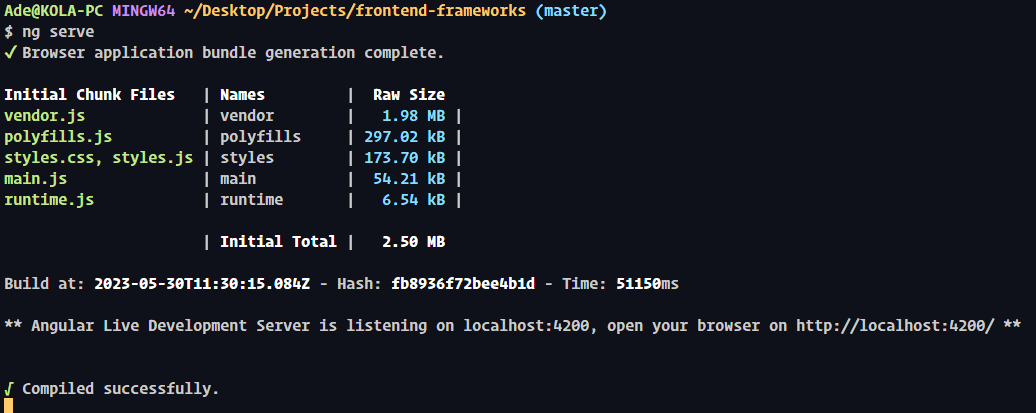
ng serve
ng serve
Your Angular project will be accessible at http://localhost:4200.
The ng new command is used to generate a new Angular project with the specified name. It sets up the initial project structure, installs the necessary dependencies, and configures the project files.
Using the Angular CLI simplifies the process of creating and managing Angular projects, allowing you to focus on development rather than boilerplate setup.
Code Generation
Angular CLI offers a variety of powerful code generation commands that help streamline the development process.
Developers can easily generate components, services, modules, and other Angular elements using the CLI, reducing the amount of manual coding required. This accelerates development speed and ensures consistent code patterns throughout the project.
Here are the commands for generating different Angular elements using the Angular CLI:

Generating a component
- Generating a Component:
ng generate component component-name
This command creates a new component with the specified name. It generates the component files, including the HTML template, CSS styles, TypeScript code, and the necessary component tests.

Generating a service
- Generating a Service:
ng generate service service-name
This command generates a new service with the specified name. Services are used for handling data, implementing business logic, and sharing functionality across components.

Generating a module
- Generating a Module:
ng generate module module-name
Use this command to create a new module with the specified name. Modules help organize and structure your Angular application by grouping related components, services, and other Angular elements.

Generating a directive
- Generating a Directive:
ng generate directive directive-name
This command generates a new directive with the specified name. Directives allow you to modify the behavior or appearance of HTML elements in your Angular application.

Generating a pipe
- Generating a Pipe:
ng generate pipe pipe-name
Use this command to create a new pipe with the specified name. Pipes are used for transforming data in your Angular templates, such as formatting dates, applying custom filters, or truncating or shortening an input text to a specified length.
These commands are executed in the terminal or command prompt, and Angular CLI will automatically generate the corresponding files and folder structure based on the specified name. Make sure to replace component-name, service-name, module-name, directive-name, or pipe-name with your desired names when using these commands.
Development Server
Angular CLI includes a built-in development server that allows developers to run and test their applications locally.
The server automatically reloads the application whenever changes are made, providing a smooth development experience. It also offers features like hot module replacement, allowing developers to see the immediate effect of their code changes without the need for a full application reload.
TypeScript Integration
Angular is built using TypeScript, a statically typed superset of JavaScript. TypeScript brings powerful features like static type checking, enhanced IDE support, better code navigation, and advanced refactoring tools.
Angular CLI seamlessly integrates with TypeScript, providing out-of-the-box support for compiling TypeScript code into JavaScript and handling TypeScript-specific configuration options.
By leveraging Angular CLI and TypeScript integration, developers can streamline their development workflow, enhance productivity, and benefit from the robustness and scalability of the Angular framework.
Angular CLI simplifies common tasks, automates repetitive processes, and provides a seamless TypeScript development experience, allowing developers to focus on building high-quality applications.
What is Vue.js?
![]()
Vue.js logo
Vue.js is a progressive JavaScript framework for building user interfaces. It is designed to be approachable, versatile, and easy to integrate into existing projects. Whether you're a beginner or an experienced developer, Vue.js offers a smooth learning curve and a flexible architecture that makes it a popular choice for web application development.
In this section, I'll teach you the fundamentals of Vue.js and help you get started with building your own Vue.js applications. We'll explore the core concepts, syntax, and key features that make Vue.js a powerful and intuitive framework.
If you're new to Vue.js, don't worry! I'll guide you step by step, starting from the basics and gradually diving into more advanced topics. By the end of this guide, you'll have a solid understanding of Vue.js and be well-equipped to start building your own dynamic and interactive web applications.
So, let's embark on this Vue.js journey together and unlock the full potential of this powerful JavaScript framework. Whether you're building a small personal project or a large-scale application, Vue.js has the tools and capabilities to bring your ideas to life.
Vue.js and its Philosophy
Vue.js is built upon a set of guiding principles that shape its design and philosophy. Understanding these principles is crucial for effectively utilizing the framework and developing high-quality Vue.js applications.
Approachability: Vue.js prides itself on being an approachable framework, making it easy for beginners to get started. Its syntax is simple and intuitive, resembling plain HTML templates, which lowers the learning curve. Vue.js allows developers to gradually adopt its features, enabling them to integrate it into existing projects or start small and scale as needed.
Versatility: Vue.js is a versatile framework that you can use for a wide range of applications. It offers a flexible architecture, allowing developers to choose the tools and libraries they prefer. Whether you want to build a single-page application (SPA), a progressive web app (PWA), or integrate Vue.js into a larger project, the framework provides the necessary flexibility to meet your specific needs.
Component-Based Development: Vue.js promotes a component-based approach to development. Components are self-contained and reusable building blocks that encapsulate their own logic, styles, and templates. This modular structure facilitates code reuse, simplifies maintenance, and enables better collaboration among team members. Vue.js provides a clear and intuitive syntax for defining and using components, making it straightforward to create complex user interfaces.
Reactivity: Vue.js leverages a reactive data model, which means that changes to the underlying data automatically update the corresponding views. This reactivity makes it easier to build interactive and responsive applications without the need for manual DOM manipulation. Vue.js tracks dependencies between data and views, ensuring efficient updates and optimized rendering performance.
By embracing these principles, Vue.js empowers developers to build elegant, maintainable, and scalable applications. The philosophy of approachability, versatility, component-based development, and reactivity sets the foundation for creating exceptional user interfaces with Vue.js.
Vue's Reactivity System and Component Composition
Vue.js employs a powerful reactivity system that enables efficient and automatic updates to the user interface based on changes in the underlying data. This reactivity is achieved through Vue's reactive data model and makes it easy to create dynamic and responsive applications.
Reactive Data Model
Vue.js uses a reactive data model, where data properties are automatically tracked for changes. When the data changes, Vue.js automatically updates the associated views, ensuring a synchronized and reactive user interface. This reactivity simplifies the development process as developers do not need to manually manipulate the DOM to reflect data changes.
In Vue.js, the reactive data model is like a magical connection between your data and the user interface. Imagine you have a magic box where you can put your data. Whenever the data inside the box changes, the UI automatically updates to reflect those changes. It's like having a real-time mirror of your data!
In this magical world of Vue.js, you define your data properties inside a Vue component, and Vue takes care of tracking those properties for you. Whenever a property changes, Vue automatically detects it and updates the corresponding parts of the UI. This means you don't have to manually update the UI elements every time the data changes. Vue does all the heavy lifting for you.
So, let's say you have a counter in your app. When you click a button to increase the counter value, Vue will instantly update the value in the UI without you having to write any extra code. It's as simple as that! The reactive data model in Vue.js makes it easy to keep your UI in sync with your data, saving you time and effort.
By embracing the reactive data model in Vue.js, you can build dynamic and interactive user interfaces with ease. It allows you to focus on manipulating the data, and Vue takes care of updating the UI accordingly. It's like having a superpower that simplifies your development process and brings your app to life.
So, remember, with Vue.js, you can harness the power of the reactive data model to create engaging and responsive user interfaces effortlessly.
Computed Properties and Watchers
Vue.js provides computed properties and watchers to handle more complex logic and reactivity requirements.
Computed properties allow developers to define properties that are computed based on other reactive data properties. These computed properties are cached and updated only when their dependencies change, optimizing performance.
Watchers, on the other hand, allow developers to react to specific data changes and perform custom logic when those changes occur.
Computed properties and watchers are like special helpers that assist you in handling data transformations and reacting to changes. Imagine you have a friend who always keeps an eye on things for you and gives you updates whenever something changes. That's exactly what computed properties and watchers do in Vue.
Computed properties are like smart calculators that automatically compute and update values based on other data properties. It's like having a helper who can perform complex calculations for you.
For example, let's say you have the length and width of a rectangle, and you want to calculate its area. With computed properties, you can define a property called area that dynamically computes the area value whenever the length or width changes. This way, you always have the correct area value without manually recalculating it.
On the other hand, watchers are like attentive observers who keep an eye on specific data properties and perform actions when they change. It's like having a friend who notifies you whenever something important happens.
For example, let's say you have a form input field, and you want to perform some validation or execute a function whenever the input value changes. With watchers, you can define a watcher that watches the input value and triggers a function whenever it changes. This allows you to take immediate action and respond to user inputs or data changes.
By using computed properties and watchers in Vue.js, you can simplify complex data manipulations and react to changes effectively. They provide you with powerful tools to automate calculations, perform validations, and execute custom logic whenever necessary. It's like having reliable assistants who handle the heavy lifting for you, making your coding experience more efficient and enjoyable.
With computed properties and watchers in Vue.js, you have the power to automatically compute values and respond to changes effortlessly. They are your trusted companions in managing data transformations and handling dynamic behaviors in your Vue components.
Component Composition
Vue.js promotes component-based development and encourages the composition of smaller, reusable components to build larger and more complex user interfaces.
Components can be easily created, registered, and used throughout the application. Vue's reactivity system allows data to flow seamlessly between parent and child components, enabling a hierarchical and reactive structure.
Component composition, in Vue.js, is like playing with building blocks to create something amazing. Let's say you have different LEGO bricks, and each brick represents a specific part of your website or web app. With component composition in Vue, you can easily combine these bricks to build something much bigger and more powerful.
Think of each Vue component as a LEGO brick that has its own unique functionality and appearance. You can create components for a navigation bar, a button, an image gallery, or any other part of your web page. Now, when you want to build a complete web page, you can assemble these components together, just like stacking LEGO bricks on top of each other.
Component composition allows you to reuse components and nest them within each other to create complex and interactive web pages. It's like building a LEGO spaceship by combining different bricks, adding wings, a cockpit, and other parts.
Similarly, in Vue, you can nest components inside one another, passing data and interacting with each other to create dynamic and interactive user interfaces.
By using component composition in Vue.js, you can easily break down your web page into smaller, manageable parts, and then assemble them together to create a cohesive and functional whole. It's like having a box of LEGO bricks that you can use to build anything you imagine.
Component composition lets you create individual components for different parts of your web page and then combine them together to create a complete and interactive experience. It's a fun and creative way to build awesome websites and web apps.
Props and Events
Vue.js facilitates communication between components through the use of props and events. Props allow data to be passed from parent components to child components, enabling a unidirectional flow of data. Events, on the other hand, allow child components to emit events and notify parent components about specific actions or changes.
In Vue.js, props and events are like passing messages between components, just like friends talking to each other. Think of it as you having two friends who want to share information with each other. One friend can send a message (prop) to the other friend, and the other friend can respond with a message (event) back.
In Vue, components can communicate with each other using props and events. Think of a prop as a message that a parent component sends to its child component. It's like a note passed from one friend to another, containing important information. The child component can receive the prop and use that information to display or modify its behavior. It's a way for components to share data with each other.
Now, events are like the response from the child component back to the parent component. It's the other friend replying to the message they received. The child component can emit an event to let the parent component know that something happened or that it needs to take action. It's like raising your hand and saying, "Hey, something important just happened!"
With props and events in Vue.js, components can talk to each other, share information, and work together as a team. This communication between components allows you to build dynamic and interactive web pages where different parts can exchange data and work together seamlessly.
So, just like friends passing notes and responding with actions, props and events in Vue.js help components share information and work together as a team. It's a fun way to create interactive and collaborative web applications.
Vue's reactivity system and component composition provide a solid foundation for building flexible and modular applications. By leveraging the reactivity system, developers can create dynamic and responsive user interfaces, while component composition promotes code reuse, maintainability, and scalability.
With Vue.js, developers can easily manage complex application states and achieve a seamless and interactive user experience.
Single-File Components and Vue CLI
Vue.js offers a convenient way to structure and organize components using Single-File Components (SFCs). SFCs encapsulate the template, script, and styles of a component into a single file, promoting better separation of concerns and improving code readability.
Structure and Organization
With Single-File Components, each component is contained within a single file, which makes it easier to understand and manage.
The template section holds the HTML markup, the script section contains the component's logic written in JavaScript, and the style section holds the component's styles using CSS or pre-processors like SASS or LESS. This modular structure allows developers to work on different aspects of a component without navigating through multiple files.
Here's a short code snippet that demonstrates the structure and organization of a Vue single-file component:
<template>
  <div class="my-component">
    <!-- Component HTML template -->
    <h1>{{ message }}</h1>
    <button @click="increment">Click Me!</button>
  </div>
</template>

<script>
export default {
  name: 'MyComponent',
  data() {
    return {
      message: 'Hello, Vue!',
      count: 0,
    };
  },
  methods: {
    increment() {
      this.count++;
    },
  },
};
</script>

<style scoped>
.my-component {
  /* Component-specific styles */
}
</style>
In this code snippet, you can see the structure of a Vue single-file component. It consists of three main sections: <template>, <script>, and <style>.
The <template> section contains the HTML template of the component. It defines the structure and layout of the component's content.
The <script> section contains the JavaScript code for the component. It includes the component's definition, which includes the component's name, data, and methods.
In this example, we have a data object that holds the component's state, including a message property and a count property. We also have a methods object that defines the increment method, which increments the count property when the button is clicked.
The <style> section contains the component-specific styles. By using the scoped attribute, the styles are only applied to the component's elements, ensuring encapsulation and preventing conflicts with styles from other components.
This structure helps in organizing and managing the code for your Vue components. It keeps the HTML, JavaScript, and styles related to a component in a single file, making it easier to understand and maintain your codebase.
Scoped Styles
Single-File Components provide built-in support for scoped styles. By default, styles defined within a component only apply to that component's template, preventing style conflicts with other components. This encapsulation makes it easier to style components without worrying about global style pollution.
Take a look at this code snippet that demonstrates the use of scoped styles in a Vue single-file component:
<template>
  <div class="my-component">
    <!-- Component content -->
  </div>
</template>

<script>
export default {
  name: 'MyComponent',
};
</script>

<style scoped>
.my-component {
  background-color: #f1f1f1;
  padding: 20px;
  border-radius: 5px;
}
</style>
In this code snippet, you can see the use of scoped styles in Vue single-file components. The <style> section includes the component-specific styles, and the scoped attribute is added to the <style> tag.
Scoped styles mean that the styles defined within the component's <style> section only apply to the elements within that component.
In the example, the .my-component class is used to style the component's <div> element. The background color is set to #f1f1f1, there's padding around the component, and the border radius is set to 5px.
The scoped styles ensure that these styles only affect the specific component they are defined in. This helps prevent style conflicts and allows for better encapsulation of styles within the component. It allows you to write component-specific styles without worrying about affecting other components or elements on the page.
Using scoped styles in Vue single-file components promotes code organization and separation of concerns, making it easier to manage and maintain your styles within your Vue project.
Vue CLI
Vue CLI (Command Line Interface) is a powerful tool that simplifies the development of Vue.js applications. It provides a command-line interface for creating, configuring, and managing Vue projects.
Vue CLI includes features like project scaffolding, code generation, and an integrated development server, making it easy to set up and start building Vue applications.

Installing Vue CLI
# Install Vue CLI globally (if not already installed)
npm install -g @vue/cli

# Create a new Vue project
vue create my-project
Create Vue Project
As you can see in code snippet above, we first install Vue CLI globally using the npm install command. This step is required only if you haven't installed Vue CLI before.
Once Vue CLI is installed, you can create a new Vue project using the vue create command. In the example, we're creating a project named "my-project". Vue CLI will prompt you to select a preset configuration for your project. You can choose from various options like default, manually select features, or use a saved preset.
After selecting the preset, Vue CLI will set up the project structure, install the necessary dependencies, and generate the initial files for your Vue project.
Using Vue CLI simplifies the process of setting up a new Vue project by providing a command-line interface and project scaffolding. It automates many common tasks, such as project configuration, dependency installation, and build setup.
Vue CLI also provides additional features like hot-reloading during development, ready-to-use templates, and easy project customization.
With Vue CLI, you can quickly start working on your Vue projects without worrying about the initial setup, allowing you to focus on writing code and building your application.

npm run build
Build and Deployment
Vue CLI offers a streamlined build process that optimizes the application for production. It generates optimized bundles, minifies the code, and applies various optimizations to improve performance.
Additionally, Vue CLI supports easy deployment of Vue applications to various hosting platforms or content delivery networks (CDNs), simplifying the deployment process.
When it comes to building and deploying your Vue.js application, Vue CLI provides a simple and efficient way to handle this process. After you've developed your application locally, you'll need to generate a production-ready build that can be deployed to a web server.
Vue CLI offers a command called npm run build that compiles your Vue components, bundles your assets, and optimizes your code for production. It generates a dist directory containing all the necessary files for deployment. This process ensures that your application is optimized for performance and ready to be served to users.
Once you have your production build, you can deploy it to a web server or a hosting platform of your choice. You can simply upload the contents of the dist directory to your server, and your Vue.js application will be accessible to users over the internet.
Deploying your Vue.js application typically involves configuring your server to serve the static files correctly, setting up any necessary server-side routing or configurations, and ensuring that your server has the required dependencies installed.
It's important to choose a reliable and secure hosting solution that fits your application's requirements. Popular hosting options for Vue.js applications include platforms like Netlify, Vercel, and GitHub Pages, which offer seamless deployment workflows and robust infrastructure.
By leveraging the build and deployment features provided by Vue CLI, you can easily package and deploy your Vue.js application, making it accessible to users worldwide.
By utilizing Single-File Components (SFCs) and Vue CLI, developers can efficiently structure their Vue.js projects, enhance code organization, and leverage powerful development tools. This approach not only improves code maintainability but also allows for better collaboration among team members.
Vue's ecosystem provides a seamless development experience that empowers developers to build robust and scalable applications with ease.
Comparing JavaScript Frameworks
When it comes to choosing a frontend framework for web development, you'll need to consider your use case, the features you need, and your skillset, among other things.
React, Angular, and Vue are all widely adopted frameworks that offer different approaches and features. They call them "The Big Three". Understanding the similarities and differences between these frameworks can help you make an informed decision based on your project requirements and personal preferences.
In this section, we will compare React, Angular, and Vue across various aspects such as learning curve, performance, community support, ecosystem, and more. We will explore their strengths and weaknesses, highlighting the unique features and benefits they bring to the table.
By examining these frameworks side by side, you can gain a better understanding of their key characteristics and determine which one aligns best with your needs. Remember, there is no one-size-fits-all solution, and the right choice ultimately depends on the specific demands of your project.
So, let's dive into the comparison and discover the similarities and differences among the big three. This knowledge will equip you with the necessary insights to choose the frontend framework that will enhance your development workflow and enable you to create exceptional web applications.
Similarities and Differences between React, Angular, and Vue
React, Angular, and Vue are all powerful frontend frameworks, but they differ in their approach, syntax, and ecosystem. Let's explore the key similarities and differences between these frameworks:
Component-Based Architecture: React, Angular, and Vue all follow a component-based architecture, where applications are built by composing reusable components. This promotes code reusability, modularity, and scalability.
Virtual DOM: React and Vue utilize a Virtual DOM, a lightweight representation of the actual DOM. This allows for efficient updates and ensures optimal rendering performance. Angular, on the other hand, uses a different change detection mechanism based on zones.
Learning Curve: React and Vue are known for their gentle learning curves, making them more beginner-friendly. Angular, on the other hand, has a steeper learning curve due to its extensive feature set and complex concepts.
Language and Syntax: React uses JavaScript, while Angular employs TypeScript, a superset of JavaScript. Vue supports both JavaScript and TypeScript, offering flexibility in language choice. The syntax and coding styles also differ across the frameworks, with React using JSX, Angular using a template-driven approach, and Vue utilizing a combination of template syntax and JavaScript.
Ecosystem and Community Support: React, Angular, and Vue have vibrant ecosystems with active communities. React has a large and mature ecosystem with numerous libraries and tools available. Angular has strong corporate backing from Google, which ensures robust development and support. Vue has gained popularity in recent years, and although its ecosystem is smaller, it continues to grow rapidly.
Popularity and Adoption: React has gained significant popularity and is widely adopted by large tech companies. Angular, being a full-fledged framework, is commonly used for enterprise-level applications. Vue has experienced rapid growth and has gained a strong following in the developer community.
While these frameworks share some similarities, their differences in syntax, learning curve, and ecosystem can influence your choice. It's essential to evaluate your project requirements, team expertise, and personal preferences to determine which framework suits your needs best.
Performance Considerations and Scalability
Performance is a crucial aspect to consider when choosing a frontend framework for your web application. Let's explore the performance considerations and scalability of React, Angular, and Vue:
Rendering Performance: React, Angular, and Vue all employ different rendering approaches. React utilizes a Virtual DOM, which efficiently updates and renders only the necessary components. Angular uses its own change detection mechanism, while Vue leverages a combination of Virtual DOM and a reactive data model. These approaches aim to minimize unnecessary re-renders and enhance performance.
Bundle Size: The size of the framework's bundle can impact the initial load time of your application. React and Vue have smaller footprints, allowing for faster initial loading. Angular, being a full-fledged framework, has a larger bundle size, which may require additional optimization techniques to improve load times.
Optimization Techniques: All three frameworks offer various optimization techniques to improve performance. These include code splitting, lazy loading, tree shaking (also known as dead code elimination, it's a process used by modern JavaScript bundlers to remove unused code from a project), and caching strategies. By implementing these techniques correctly, you can minimize the overall bundle size, reduce network requests, and optimize the runtime performance of your application.
Scalability: When it comes to scalability, all three frameworks can handle large-scale applications. However, Angular, with its opinionated structure and extensive features, is particularly suited for enterprise-level applications that require complex architecture and scalability. React and Vue, being more lightweight and flexible, can also scale well, but they may require additional setup and architectural decisions as the application grows.
It's important to note that performance considerations and scalability depend on various factors, including the size and complexity of your application, the specific optimization techniques implemented, and the efficiency of your code.
Conducting performance testing, utilizing best practices, and staying updated with the latest optimizations can help ensure optimal performance and scalability regardless of the chosen framework.
Keep in mind that while performance is important, it should be balanced with other considerations such as developer productivity, community support, and project requirements. Evaluating these factors holistically will enable you to make an informed decision regarding the performance and scalability needs of your web application.
Learning Curve and Community Support
The learning curve and community support are essential considerations when choosing a frontend framework like React, Angular, or Vue. Let's explore these aspects in more detail:
- Learning Curve: The learning curve refers to the time and effort required to become proficient in a particular framework. React, Angular, and Vue have different learning curves based on their concepts, syntax, and ecosystem.
React: React has a relatively gentle learning curve, especially for developers familiar with JavaScript. Its core concepts like components, state management, and JSX syntax are easy to grasp. But mastering advanced topics like React Hooks and state management libraries may require additional effort.
Angular: Angular has a steeper learning curve (especially a difficult initial learning process) compared to React and Vue. It is a full-fledged framework with a comprehensive set of features and a specific way of doing things. Angular's learning curve stems from its powerful dependency injection system, TypeScript integration, and the extensive use of decorators.
Vue: Vue strikes a balance between React and Angular in terms of learning curve. Its straightforward API, clear documentation, and gradual adoption approach make it beginner-friendly. Vue's simplicity and intuitive syntax make it relatively easy to get started with, even for developers new to frontend frameworks.
- Community Support: The strength of the community around a framework can greatly impact your learning experience and development journey. React, Angular, and Vue all have vibrant communities with active support channels, forums, and online resources.
React: React has a large and robust community, with countless tutorials, documentation, and third-party libraries available. The React community is known for its responsiveness and continuous innovation, making it easier to find solutions to common problems.
Angular: Angular has solid community support, backed by Google. It has extensive documentation, official guides, and a dedicated team maintaining the framework. The Angular community is known for its focus on best practices, architectural patterns, and enterprise-level support.
Vue: Although Vue's community is relatively smaller compared to React and Angular, it is rapidly growing and gaining momentum. Vue has a friendly and supportive community that actively contributes to its development. The Vue community is known for its inclusivity, helpfulness, and emphasis on simplicity.
Considering the learning curve and community support is crucial, especially for beginners. It's important to choose a framework with a learning curve that aligns with your current skill level and project requirements. Plus, a strong and active community can provide valuable resources, guidance, and collaboration opportunities, helping you overcome challenges and stay up-to-date with the latest trends and best practices.
How to Choose the Right Framework for Your Project
Selecting the most suitable frontend framework for your project requires careful consideration of several factors. Here are some key points to keep in mind when making your decision:
Project Requirements
Start by evaluating your project's specific requirements. Consider factors such as the complexity of the application, the size of the development team, scalability needs, and performance requirements. You should also think about any existing technical constraints such as the technology stack being used, integration with existing systems or libraries, and compatibility with specific platforms or frameworks.
Understanding these requirements will help you determine which framework aligns best with your project goals.
Learning Curve
Assess your team's skillset and experience level. If you have a team of developers who are already proficient in a particular framework, it may be more efficient to leverage their existing expertise.
On the other hand, if you have a team of beginners or developers with a broad range of skills, opting for a framework with a gentler learning curve can facilitate a smoother onboarding process.
Community and Ecosystem
Consider the size and vibrancy of the framework's community and ecosystem. A robust community provides access to a wealth of resources, tutorials, libraries, and support channels.
A thriving ecosystem ensures that you have a wide range of tools, plugins, and extensions to enhance your development process. It also indicates the long-term viability and sustainability of the framework.
Compatibility and Integration
Evaluate how well the framework integrates with your existing technology stack. Consider factors such as compatibility with backend frameworks, support for APIs, and the availability of plugins or packages that can facilitate integration with other tools and services you may be using.
Flexibility and Customization
Each framework has its own conventions and patterns. Assess whether the framework's structure and design principles align with your development preferences and project requirements.
Consider the flexibility and extensibility of the framework, as well as the ease with which you can customize and adapt it to suit your specific needs.
By carefully evaluating these factors, you can make an informed decision and select the right frontend framework that will empower you to build scalable, performant, and maintainable web applications that meet your project requirements and developer team's expertise.
Resources for Learning and Getting Started
When embarking on your journey to learn and master frontend frameworks like React, Angular, or Vue, it's important to have access to high-quality learning resources.
Here are some recommended resources to help you get started:
Official Documentation
The official documentation of each framework is an invaluable resource. It provides comprehensive guides, tutorials, and examples that cover the core concepts, features, and best practices.
Start by exploring the official documentation of React (react.dev), Angular (angular.io), and Vue (vuejs.org) to gain a solid foundation.
Online Courses and Tutorials
Online courses and tutorials offer structured learning paths and hands-on exercises that can accelerate your understanding of frontend frameworks.
Platforms like Udemy, Coursera, Udacity, and Pluralsight offer a wide range of courses taught by industry experts. Look for courses that cater to beginners and offer practical projects to apply your knowledge.
YouTube Channels and Video Series
YouTube is a treasure trove of tutorial videos and in-depth explanations of frontend frameworks. Channels like Traversy Media, The Net Ninja, freeCodeCamp, and Academind provide comprehensive video series that cover various aspects of React, Angular, and Vue, from basics to advanced topics. These videos offer a visual and interactive learning experience.
Online Communities and Forums
Joining online communities and forums dedicated to frontend development can greatly enhance your learning experience.
Platforms like Stack Overflow, Reddit, freeCodeCamp, Hashnode, Hackernoon, and Dev.to have active communities where you can ask questions, seek guidance, and engage in discussions with fellow developers. The supportive nature of these communities can help you overcome challenges and expand your knowledge.
Books and eBooks
Books are another valuable resource for in-depth learning. Look for recommended books on React, Angular, and Vue that cater to beginners and cover the fundamental concepts.
Some popular titles include React Up and Running by Stoyan Stefanov, Angular: Up and Running by Shyam Seshadri and Brad Green, and Vue.js 2 Cookbook by Andrea Passaglia.
By utilizing these resources, you can access a variety of learning materials that cater to different learning styles and preferences.
Remember to combine theory with hands-on practice to reinforce your understanding of the frameworks. As you progress, keep exploring additional resources, attending workshops, and contributing to the community to further enhance your skills and stay up-to-date with the latest developments in frontend development.
Conclusion
Frontend frameworks such as React, Angular, and Vue play a crucial role in modern web development. They provide powerful tools and abstractions that simplify the creation of interactive and dynamic user interfaces. Throughout this guide, we've explored the key features and benefits of these frameworks, as well as their similarities and differences.
Understanding the core concepts of each framework, such as React's component-based architecture, Angular's modular structure, and Vue's reactivity system will allow to make informed decisions on which framework suits your project requirements and personal preferences.
It's important to consider factors like performance, scalability, learning curve, and community support when choosing the right framework for your development endeavors.
Remember, learning a frontend framework is an ongoing process. It's essential to continuously expand your knowledge, stay updated with the latest trends and best practices, and keep honing your skills.
Explore the abundance of resources available, such as official documentation, online courses, tutorials, and community forums, to deepen your understanding and proficiency in using these frameworks.
As you delve deeper into the world of frontend development, don't limit yourself to just one framework. Familiarize yourself with multiple frameworks to broaden your skill set and adapt to different project requirements. Embrace the opportunities for collaboration and learning from other developers within the vibrant communities surrounding these frameworks.
Frontend frameworks have revolutionized web development, empowering developers to create immersive, responsive, and highly interactive web applications. By harnessing the power of React, Angular, Vue, or other frameworks, you can unlock endless possibilities and bring your ideas to life on the web. So, continue exploring, experimenting, and pushing the boundaries of frontend development to achieve remarkable results.