By Amir Off
This post is a sequel to my previous Advanced Web Development and Deployment Workflow tutorial. In that tutorial, I showed how I automated my development and deployment workflow. A lot has changed since then due to the rapid development of web tools and technologies — and of course due to my need to improve my workflow as a web developer.
My Use Case
I use a shared hosting service for my personal portfolio website and most of the code is comprised of front-end static assets:
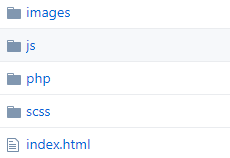 My website’s files structure
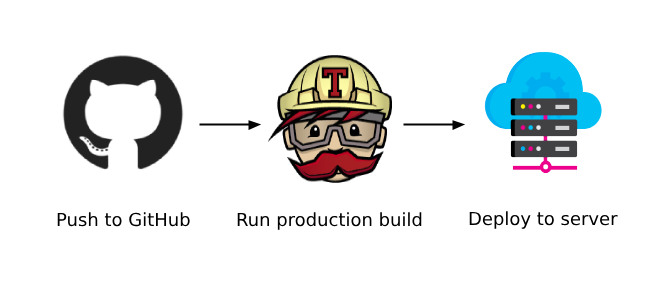
In the past, I had to run a Gulp.js task to minify, uglify and process all of the source code. It outputs it in a bundle folder along with the index.html file that is ready to be deployed to my hosting service via FTP.
To automate the process, I used DeployBot. It is a service which allows you to use your existing repositories and deploy to a number of locations like FTP, SFTP, Amazon etc.
Where DeployBot falls short for me is that it only operates like a tunnel that deploys my GitHub repository whenever a change was committed to the repository. This meant that it would require me to upload my bundled code to a separate branch — I called it “deployment” in my case — and it uploaded all the files from that branch to the hosting server via FTP.
I saw this as a bad practice and a temporary comfort solution. My code on GitHub should a be “source” code and not a bunch of minified and uglified JavaScript and CSS assets and other processed files.
The Solution
To eliminate the problem I had with DeployBot, I had to ditch it for Travis CI — a continuous integration and delivery service that integrates with GitHub. This way I was able to remove the “deployment” branch that I had in my repository and let Travis CI do all the work of running the Gulp.js tasks for me and further deploy it to my hosting server via FTP. All I had to do was push my source code and Travis CI would do the rest. No more running the Gulp.js tasks manually then checking out the “deployment” branch and pushing it manually to Github.
In the code below I am defining the script file “.travis.yml” that is required for Travis CI to run:
// Setting environment language
language: node_js

// Using the lastest version of Node.js
node_js:
- node

// Script to install dependencies
before_script:
- npm install -g --silent

// The actual build script for Gulp.js
script:
- gulp build --prod

// Deploying to hosting server via FTP
after_script:
- gulp deploy --user $FTP_USER --password $FTP_PASSWORD
💡 On line 18 the FTP credentials are extracted from Travis CI
This is a great feature since it allows me to set protected environment variables, the FTP login credentials “$FTP_USER” and “$FTP_PASSWORD” in this case. These variables are encrypted and embedded in the “.travis.yml” script file at runtime. This way I can commit my source code to GitHub without exposing any sensitive data.
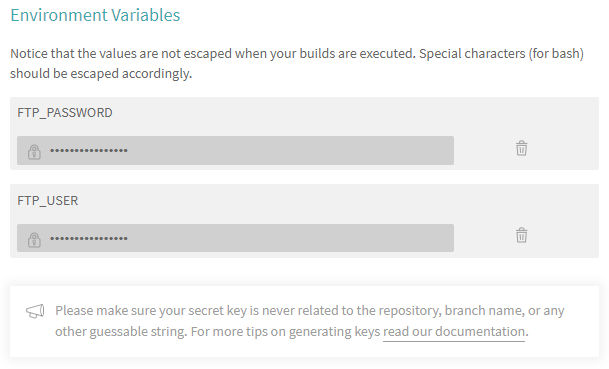 Setting environment variables on the Travis CI build settings page
For them to work I had to use a package called vinyl-ftp. It’s described as,
A vinyl adapter for FTP. Supports parallel transfers, conditional transfers, buffered or streamed files, and more. Often performs better than your favorite desktop FTP client.
const ftp = require('vinyl-ftp');
const minimist = require('minimist');
const args = minimist(process.argv.slice(2));

gulp.task('deploy', () => {
    const remotePath = '/amiroffme/';
    const conn = ftp.create({
        host: 'ftp.amiroff.me',
        user: args.user,
        password: args.password
    });
    console.log('FTP connection successful!');
    gulp.src('build/**/*.*')
        .pipe(conn.dest(remotePath));
});
💡 On line 9 and 10, the deploy task parses the user and password from the argument options that the Travis CI script runs:
$ gulp deploy --user $FTP_USER --password $FTP_PASSWORD
I had to install another popular npm package called minimist to be able to parse the “user” and “password ” arguments like in the CLI above.
In addition to installing the previous two npm packages, I had to refactor my Gulp.js tasks file to allow me to run a development build so that I could work on code locally. Continuous production deployment is great, but I still wanted to be able to run my code locally and still have an actual development environment with an actual development build. 😊
// Main build task
gulp.task('build', ['html', 'images', 'sass', 'js', (args.prod ? 'production' : 'development')], () => {
    // Print build info
    console.log(packageFile.name + ' "' + packageFile.description + '" v' + packageFile.version);
});

// Runs only for production build
gulp.task('production', () => {
    console.log('This is a production build');
    console.log('Please run the following script for deployment:');
    console.log('gulp deploy --user $FTP_USER --password $FTP_PASSWORD');
});

// Runs only for development build
gulp.task('development', () => {
    browsersync(browserSyncConfig);
    console.log('This is a development build');
    console.log('File changes will be watched and trigger a page reload');
    gulp.watch(html.watch, ['html', browsersync.reload]);
    gulp.watch(images.src, ['images', browsersync.reload]);
    gulp.watch(css.watch, ['sass', browsersync.reload]);
    gulp.watch(js.src, ['js', browsersync.reload]);
});
💡 On line 2, I check for build arguments then run the build task accordingly.
If the task detects the “prod” argument like in the Travis CI build script:
$ gulp build --prod
it skips the development task which is designed for local development builds and runs the production task instead.
Executing the build without the “prod” argument will trigger the development task that watches for file changes and reloads the page —very much like any development environment.
$ gulp build
Conclusion
No more switching between branches and manually copying and pushing bundled assets to GitHub. I can just work locally and push to GitHub and Travis CI takes care of the rest.
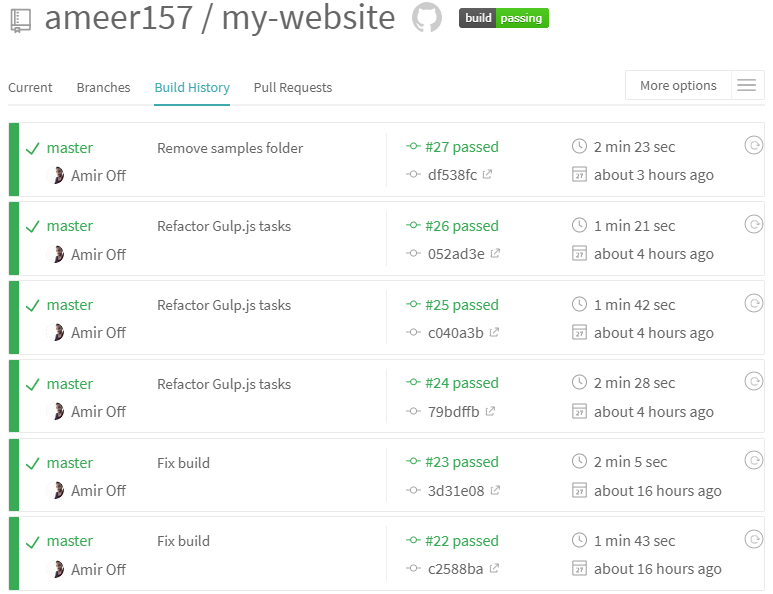 My Travis CI build history log
I hope you enjoyed reading! Please followand share for more tech stuff 🤖💖