
By Ankit Sharma
Introduction
Sometimes, we want our users to log in using their existing credentials from third-party applications, such as Facebook, Twitter, Google, and so on. In this article, we are going to look into authentication of an ASP.NET Core app using a Google account.
Prerequisites
- Install .NET Core 2.0.0 or above SDK from here.
- Install the latest version of Visual Studio 2017 from here.
Create MVC Web Application
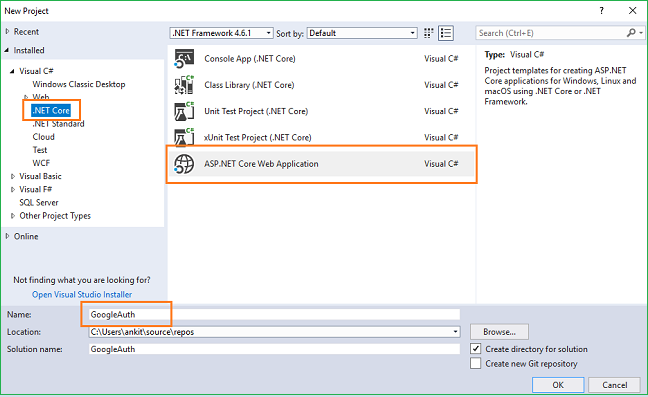
Open Visual Studio and select File >> New >> Project. After selecting the project, a “New Project” dialog will open. Select .NET Core inside the Visual C# menu from the left panel. Then, select “ASP.NET Core Web Application” from the available project types. Put the name of the project as GoogleAuth and press OK. Refer to this image.
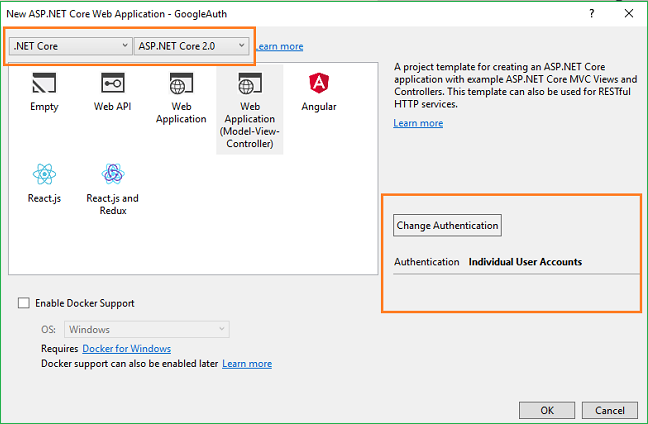
After clicking OK, a new dialog will open asking you to select the project template. You can observe two drop-down menus at the top left of the template window. Select “.NET Core” and “ASP.NET Core 2.0” from these dropdowns. Then, select the “Web application(Model-View-Controller)” template. Click on the Change Authentication button, and a “Change Authentication” dialog box will open. Select “Individual User Account” and click OK. Now, click OK again to create our web app.
Before running the application, we need to apply migrations to our app.
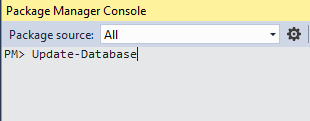
Navigate to Tools >> Nuget Package Manager >> Package Manager Console.
It will open the Package Manager Console. Put in the Update-Database command and hit enter. This will update the database using Entity Framework Code First Migrations.
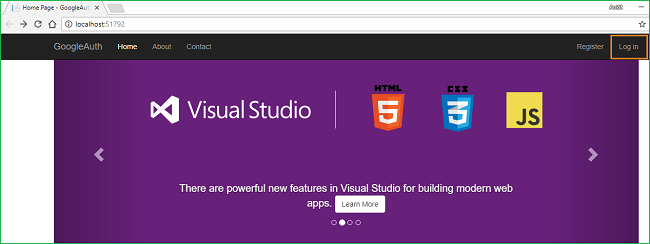
Press F5 to run the application. You will see a homepage, as shown below.
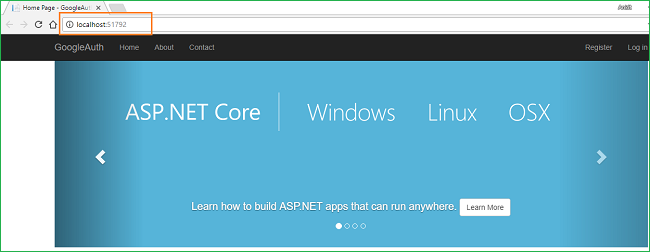
Note the URL from the browser’s address bar. In this case, the URL is http://localhost:51792/. We need this URL to configure our Google app, which we will be doing in the next section.
Create the Google app
We need to create a new Google app on the Google API console. Navigate to https://console.developers.google.com/projectselector/apis/library and log in using your Google account. If you do not have a Google account, you need to create one. You cannot proceed without a Google account. Once you have logged in, you will be redirected to the API Manager Library page, similar to the one shown below.

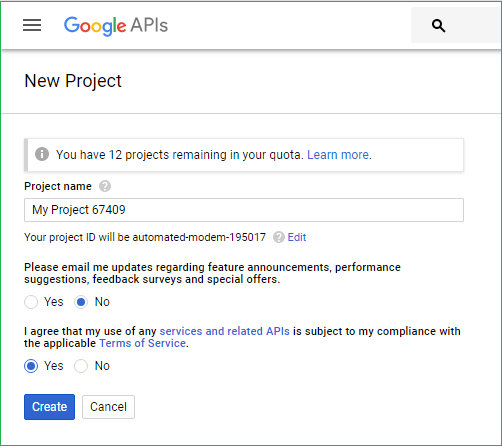
Click on the Create button to move to the “New Project” page where you need to create a new project. The “Project name” field will be populated automatically with a default name provided by Google. If you want, you can override that with your own custom name. For this tutorial, we will be using the default name. Accept the terms of service and then click on the Create button.
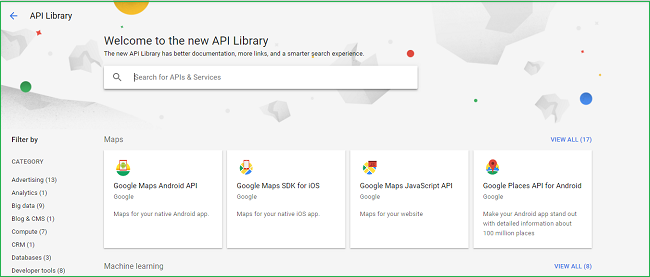
Your project will be created successfully and you will be redirected to the API Library page similar to the one shown below.
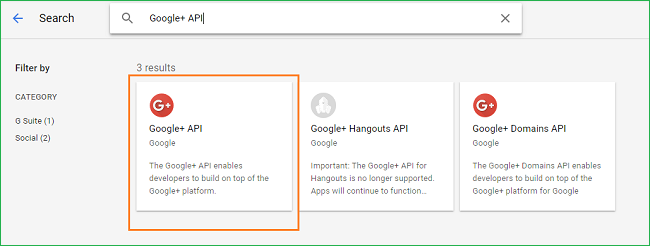
Search for the Google+ API in the search bar and select the Google+ API from the search results. Refer to the below image.
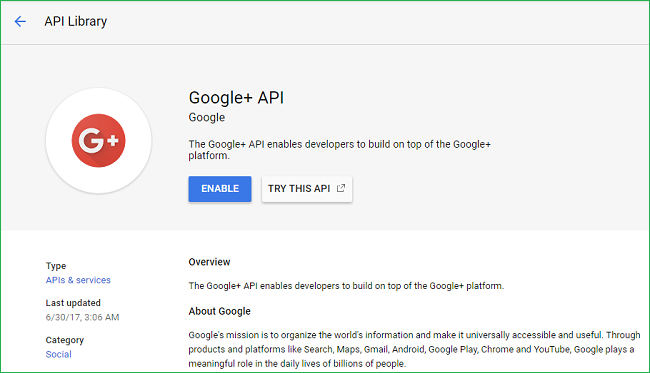
After selecting the Google+ API option, you will be redirected to a page as shown below, where you need to click on the Enable button.
After this, the Google+ API will be enabled and you will be redirected to the API home page. Click on Create credentials button on the right side of the page to configure the secrets for your API.

You will see an “Add credentials to your project” form.
This form has three sections.
Fill in the details of the sections as described below.
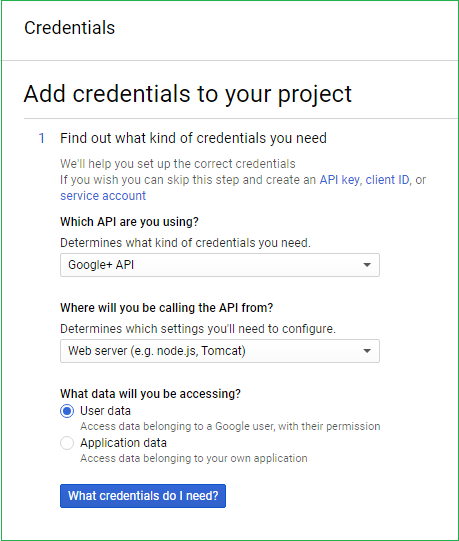
Section 1 — Find out what kind of credentials you need
- Which API are you using? — Google+ API
- Where will you be calling the API from? — Web server (for example, Node.js, Tomcat)
- What data will you be accessing? — User data
And click on the What credentials do I need button. You will be redirected to section 2
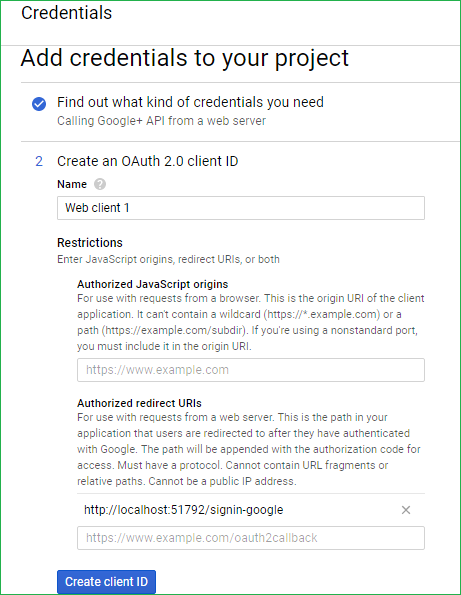
Section 2 — Create an OAuth 2.0 client ID
- Name — The default value provided by Google.
- Authorized JavaScript origins — Leave it blank.
- Authorized redirect URIs — Give the base URL of your application with /signin-google appended to it. For this tutorial, the URL will be http://localhost:51792/signin-google. After entering the URL, press TAB to add the value.
After this, click on the Create client ID button. You will be redirected to section 3.
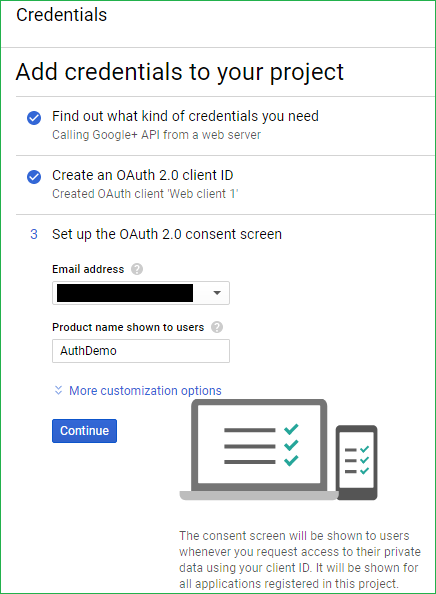
Section 3 — Set up the OAuth 2.0 consent screen
- Email address — Select your email address from the dropdown. This value is masked in the above image for privacy.
- Product name shown to users — Enter any product name. Here we are using “AuthDemo” as the Product name.
Note: Do not use the word “Google” in your product name. You will be prompted with an error and you won’t be allowed to create the app. This means “GoogleAuthDemo” is an invalid name.
Click on continue.
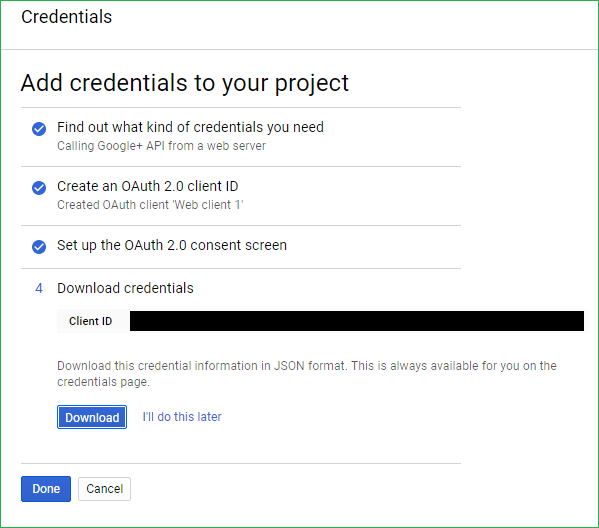
Your credentials have been created successfully. Click Download to download a JSON file to your local machine with all your application secrets, and then click Done to complete the process.
Open the just downloaded client_id.json file and make a note of the ClientId and ClientSecret fields. We will need these values to configure Google authentication in our web app.
Configure your Web App to use Google authentication
We need to store the ClientId and ClientSecret field values in our application. We will use the Secret Manager tool for this purpose. The Secret Manager tool is a project tool that can be used to store secrets such as password, API Key, etc. for a .NET Core project during the development process. With the Secret Manager tool, we can associate app secrets with a specific project and can share them across multiple projects.
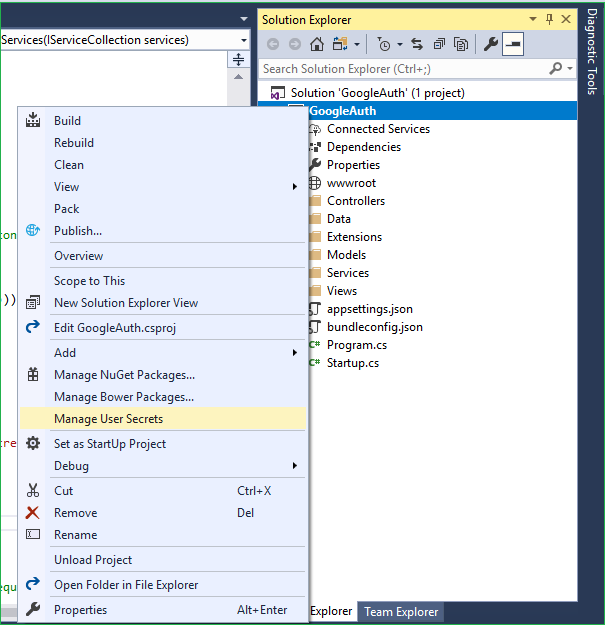
Open your web application once again and Right-click the project in Solution Explorer. Select Manage User Secrets from the context menu.
A secrets.json file will open. Put the following code in it:
{
  "Authentication:Google:ClientId": "Your Google ClientId here",
  "Authentication:Google:ClientSecret": "Your Google ClientSecret here"
}
Now open the Startup.cs file and put the following code into the ConfigureServices method:
services.AddAuthentication().AddGoogle(googleOptions =>
{
    googleOptions.ClientId = Configuration["Authentication:Google:ClientId"];
    googleOptions.ClientSecret = Configuration["Authentication:Google:ClientSecret"];
});
In this code section, we are reading ClientId and ClientSecret for authentication purposes. So finally, Startup.cs will look like this:
using System;
using System.Collections.Generic;
using System.Linq;
using System.Threading.Tasks;
using Microsoft.AspNetCore.Builder;
using Microsoft.AspNetCore.Identity;
using Microsoft.EntityFrameworkCore;
using Microsoft.AspNetCore.Hosting;
using Microsoft.Extensions.Configuration;
using Microsoft.Extensions.DependencyInjection;
using GoogleAuth.Data;
using GoogleAuth.Models;
using GoogleAuth.Services;

namespace GoogleAuth
{
    public class Startup
    {
        public Startup(IConfiguration configuration)
        {
            Configuration = configuration;
        }

        public IConfiguration Configuration { get; }

        // This method gets called by the runtime. Use this method to add services to the container.
        public void ConfigureServices(IServiceCollection services)
        {
            services.AddDbContext<ApplicationDbContext>(options =>
                options.UseSqlServer(Configuration.GetConnectionString("DefaultConnection")));

            services.AddIdentity<ApplicationUser, IdentityRole>()
                .AddEntityFrameworkStores<ApplicationDbContext>()
                .AddDefaultTokenProviders();

            services.AddAuthentication().AddGoogle(googleOptions =>
            {
                googleOptions.ClientId = Configuration["Authentication:Google:ClientId"];
                googleOptions.ClientSecret = Configuration["Authentication:Google:ClientSecret"];
            });

            // Add application services.
            services.AddTransient<IEmailSender, EmailSender>();

            services.AddMvc();
        }

        // This method gets called by the runtime. Use this method to configure the HTTP request pipeline.
        public void Configure(IApplicationBuilder app, IHostingEnvironment env)
        {
            if (env.IsDevelopment())
            {
                app.UseBrowserLink();
                app.UseDeveloperExceptionPage();
                app.UseDatabaseErrorPage();
            }
            else
            {
                app.UseExceptionHandler("/Home/Error");
            }

            app.UseStaticFiles();

            app.UseAuthentication();

            app.UseMvc(routes =>
            {
                routes.MapRoute(
                    name: "default",
                    template: "{controller=Home}/{action=Index}/{id?}");
            });
        }
    }
}
And with this, our application is ready.
Execution Demo
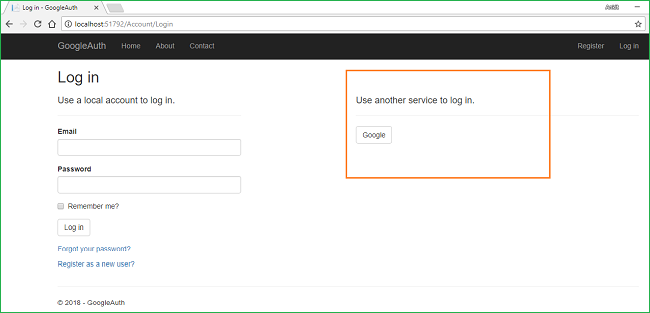
Launch the application and click Login on the top right corner of the home page.
You will be redirected to http://localhost:51792/Account/Login page, where you can see the option to login using Google on the right side of the page.
Clicking on the Google button will take you to the Google login page. There, you will be asked to fill in your Google credentials and authorize the Google app to use your Google account.
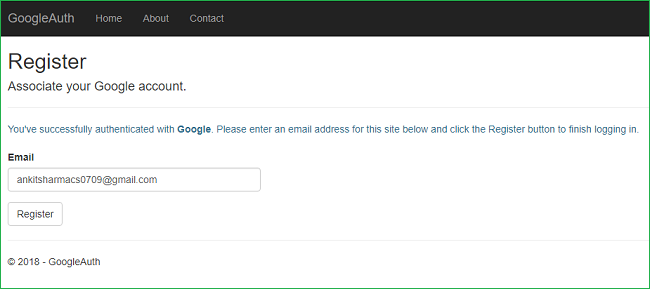
After successful authentication from Google, you will be redirected to a registration page inside your application where you need to fill in an email id to tag with your account. The Gmail id that you have used to login will already be populated in the Email id field. If you want to use another mail id, you can change it here.
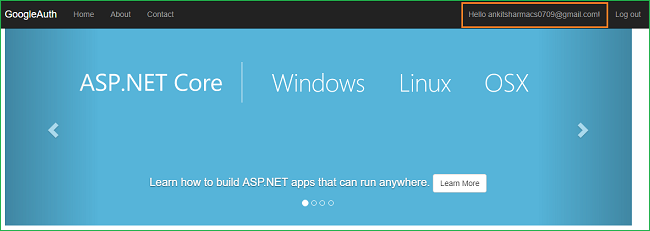
Click register, you will be redirected to the home page again. But this time you can also see that your registered email is on the top right corner.
Conclusion
We have successfully created and configured a Google+ app and used it to authenticate our ASP.NET Core application.
You can get the source code from GitHub.
Please note that the secrets.json file contains dummy values. You’ll need to replace the values with the keys of your Google app before executing it.
You can also find this article at C# Corner.
You can check my other articles on ASP .NET Core here
See Also
- Authentication Using LinkedIn In ASP.NET Core 2.0
- Authentication Using Twitter In ASP.NET Core 2.0
- Authentication Using Facebook In ASP.NET Core 2.0
- Cookie Authentication With ASP.NET Core 2.0
- ASP.NET Core — Two Factor Authentication Using Google Authenticator
Originally published at ankitsharmablogs.com