
An online image-to-PDF converter is a website that helps you convert your images to PDFs. This tool is useful because it provides an efficient way to store your images.
In this tutorial, you'll learn how you can create your online image-to-pdf converter with HTML, CSS, JavaScript, and NodeJS.
Table of Contents
- Prerequisites
- Project setup
- Steps to Follow
- How to Create the Root URL Route
- How to Upload Images to the Server
- How to Sort the Images and Convert them to PDF
- Starting over
- Conclusion
Prerequisites
Before starting this project, you should have or know the following languages/libraries/frameworks:
HTML, CSS, and JavaScript: You must have a basic knowledge of using HTML, CSS, and JavaScript to follow along with this tutorial. You should know how to create these files and link them together. You should know about fundamental HTML elements, core CSS selectors, JavaScript concepts, and the DOM.
NodeJS and npm: You need to have npm and Node.js installed because we'll use them for installing the necessary packages for your project. Specifically, you must have a basic knowledge of how to import and use Nodejs built-in modules.
Nodemon: Nodemon is an important Node package that’ll help you develop your project faster. It helps in restarting your server when you make changes to the project.
Express.js and express-generator: Express.js is the Node framework you’ll use to build the web server. Express-generator is a library that'll help you create the necessary files and folders for Express.js to run efficiently. You should know how to create a basic Express application.
Express-session: This is an Express middleware library that'll help you manage the application sessions. You should know about the configurations of this library.
Jade/Pug: This is a JavaScript templating engine that'll help you render the address of the uploaded images in an HTML file. You should know the basics of this library.
PDFkit: This is a JavaScript library that we'll use to convert the images to PDF.
Multer: This is a Node library that'll handle the file uploads.
Sortablejs: This is a JavaScript drag-and-drop library that we'll use in the frontend for rearranging our images before they are converted to PDF.
Finally, you must know how to create folders and files (with their appropriate extensions). You should know how to edit these files with a text editor.
Project Setup
First, you need to create a folder and navigate to it with the CLI:
mkdir img2pdf
cd img2pdf
Next, initialize it as a npm package so that you’ll be able to install all the necessary libraries you need.
npm init –y
If everything goes well, there'll be a package.json file in your folder.
The package.json should look like this:
{
  "name": "img2pdf",
  "version": "1.0.0",
  "description": "",
  "main": "index.js",
  "scripts": {
    "test": "echo \"Error: no test specified\" && exit 1"
  },
  "keywords": [],
  "author": "",
  "license": "ISC"
}
Next, we'll install express-generator like this:
npx express-generator
npm install
We'll choose jade as the default templating engine.
The command above will set up all the necessary folders and libraries needed for Express.js to run efficiently.
At the end of the installation, your project folder will look like this:
/img2pdf
  /bin
    www
  /node_modules
    /public
      /images
      /javascripts
      /stylesheets
  /routes
  /views
  app.js
  package.json
  package-lock.json
bin/wwwis the entry point of your application.node_modulesfolder stores the packages needed for our project.publicfolder will store the static files that'll be returned and stored by the server.routesfolder stores all the routes for the application.viewsfolder stores the Jade files that'll be used for server-side rendering.app.jsis the root JavaScript file.
When you check your package.json file, you'll see that Express.js, Jade, and some other libraries have been installed.
Next, we'll install the Nodemon package globally.
npm install -g nodemon
Finally, we'll install PDFkit, Multer, Sortablejs, and Express-session.
npm i multer pdfkit sortablejs express-session
Next, add a devstart script in your package.json. It'll allow Nodemon to restart your application when you make any changes to your JavaScript files.
"devstart": "nodemon ./bin/www"
At the end of your installation, your package.json file should look like this:
{
  "name": "img2pdf",
  "version": "0.0.0",
  "private": true,
  "scripts": {
    "start": "node ./bin/www",
    "devstart": "nodemon ./bin/www"
  },
  "dependencies": {
    "cookie-parser": "~1.4.4",
    "debug": "~2.6.9",
    "express": "~4.16.1",
    "express-session": "^1.17.3",
    "http-errors": "~1.6.3",
    "jade": "~1.11.0",
    "morgan": "~1.9.1",
    "multer": "^1.4.5-lts.1",
    "pdfkit": "^0.31.0",
    "sortablejs": "^1.15.0"
  }
}
Next, you'll navigate to the project folder and start the application server.
cd img2pdf
set DEBUG=img2pdf:* & npm run devstart
Once you get a success message, it means the server is already running.
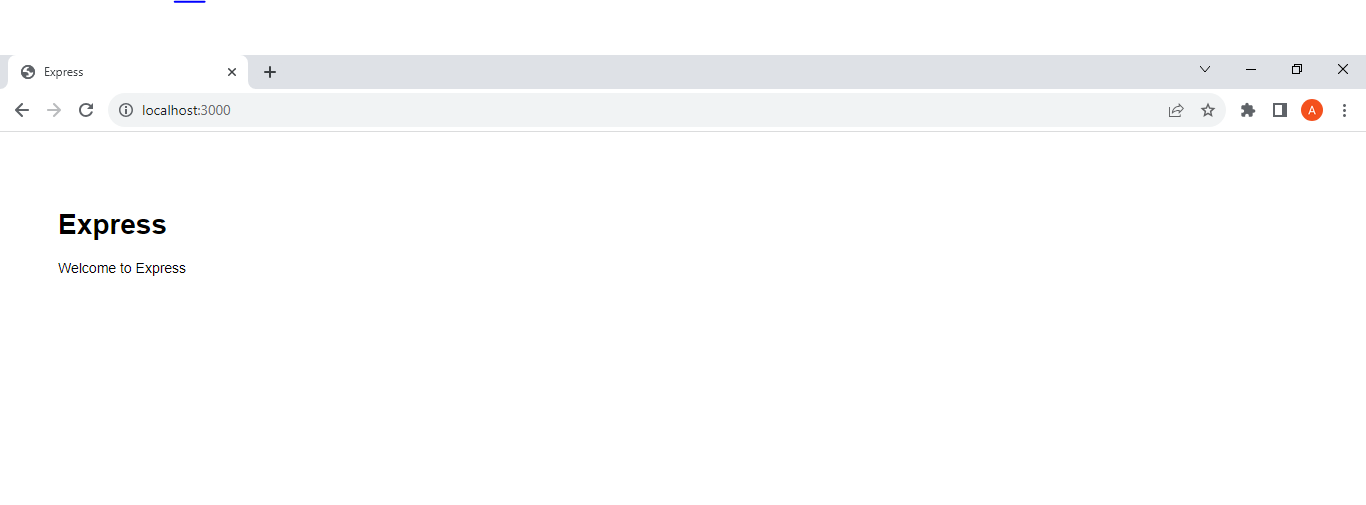
Open your web browser and type http://localhost:3000/ in the search bar.
If everything goes well, this should be your result:
Steps to Follow
Before writing the code, let's go through an overview of the steps that we'll follow to build this project:
First you'll define a route that returns the
indexHTML file when the root URL/is reached.Within your
indexHTML file, you'll create a form that accepts only image files (png, jpg) and then send it to the server at a defined route.When the server receives the images with
Multer, it'll store them in a folder, store the address in a session store, and redirect the request to the root URL route which will render aJadefile containing the address of the uploaded images.Within the
Jadefile, you'll activateSortablejsso that the user can rearrange the images before converting to PDF. There'll also be a 'convert to PDF' button which will send the address of the sorted image to the server/pdfroute.When the
/pdfroute receives the images, you'll usePDFkitto convert the images to PDF. Then you'll send the address of the converted PDF.When the user clicks on the PDF link, the file will be downloaded to the user's device.
How to Create the Root URL Route
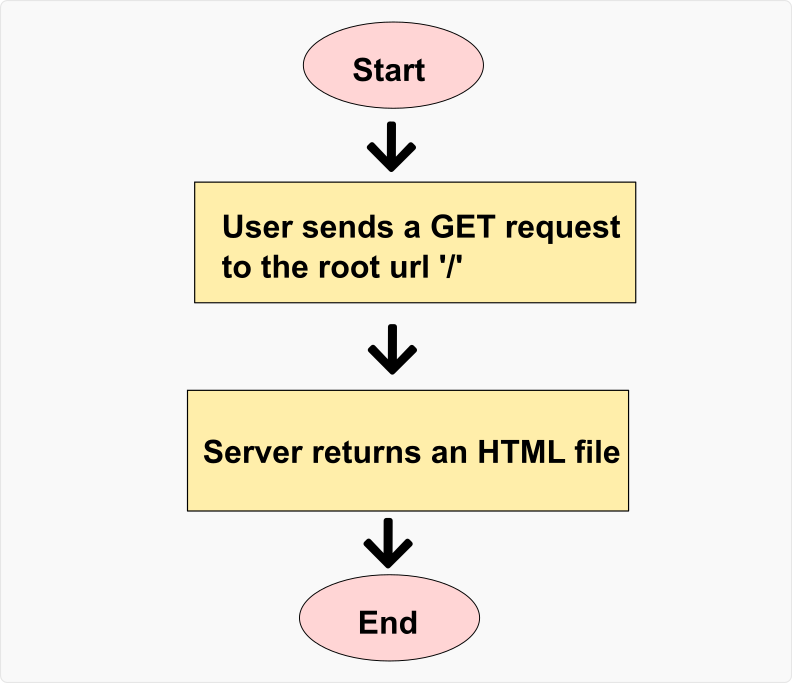
First, we'll be creating a route that sends an index.html file when the root URL (/) is reached.
Here is the simple flowchart of this operation:
First, open your routes/index.js file and create a route that returns an HTML file.
Replace all the code in the routes/index.js file with this:
var express = require('express');
var router = express.Router();

var path = require('path');

//create a '/' GET route that'll return the index.html file stored in the public/html folder
router.get('/', function(req, res, next) {
  res.sendFile(path.join(__dirname, '..','/public/html/index.html'));
});

module.exports = router;
From the code above, we included the express library and activated the express.Router() function. The path module was also included because it'll be used for describing the file paths.
Then we defined a route method that'll handle all the GET requests directed at the root URL /. Anytime the route method receives a request it'll use the res.sendFile() method to send an index.html file back to the user.
The __dirname variable and path.join() method used within res.sendFile(...) method helps us precisely specify the address of the index.html file.
Next, create an html folder within the public folder and add an index.html page to it.
This is how your public folder should look like:
/public
  /html
  /images
  /javascripts
  /stylesheets
Next, create an index.html file in your public/html folder and add this code to it:
<DOCTYPE HTML>
<html>
  <head>
    <title>IMG-to-PDF Converter</title>
    <meta charset="UTF-8">
    <meta name="author" content="YOUR NAME">
    <meta name="description" content="Easily convert any set of images to PDFs">
    <meta name="viewport" content="width=device-width, initial-scale=1.0">
  </head>
  <body>
    <h1>Image to PDF converter</h1>
  </body>
</html>
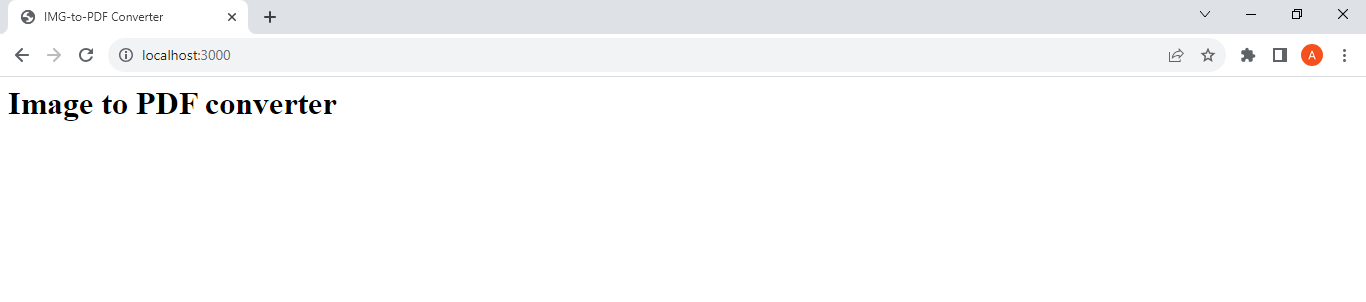
If your server is still running, go to https://localhost:3000/ in your web browser.
This should be the result:
If you haven't started your server, navigate to your project's directory (cd img2pdf) and run this command:
set DEBUG=img2pdf:* & npm run devstart
How to Upload Images to the Server
In this section, I'll be explaining how to upload images to the server.
Here is the simple flowchart for this operation:
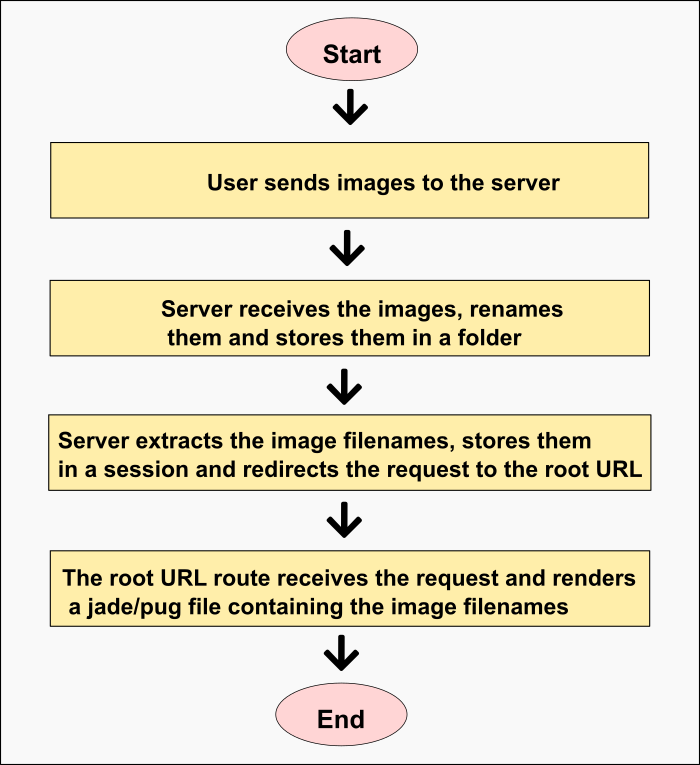
Here's what's going on:
- User sends images to server
- Server receives images, renames them, and stores in folder
- Server extracts the image filenames, stores them in a session, redirects request to root URL
- Root URL route receives the request and renders a Jade/pug file containing the image filenames
- End
While your server is still running, replace the content in your public/html/index.html file with this:
<DOCTYPE HTML>
<html>
<head>
<title>IMG-to-PDF Converter</title>
<meta charset="UTF-8">
<meta name="author" content="Gideon Akinsanmi">
<meta name="description" content="Easily convert any set of images to PDFs">
<meta name="viewport" content="width=device-width, initial-scale=1.0">
<link rel='stylesheet' href='/stylesheets/style.css' />
<link rel='stylesheet' href='/stylesheets/index.css' />
</head>
<body>
<main>
<header>
<h1><a href='/'>IMG2PDF</a></h1>
</header>
<article>
<p class='title'>Easily convert your PNG and JPG images </p>
<form method='post' action='/upload' enctype='multipart/form-data'>
<input id='file-upload' type='file' name='images' accept='.png, .jpg' multiple/>
<p><label for='file-upload'>Select files</label></p>
<p id='selected-files'><code> </code> </p>
<p><input type='submit' value='upload' /></p>
</form>
</article>
<footer>
<p><code>copyright © IMG2PDF 2023</code></p>
</footer>
<script>
let fileUpload = document.getElementById('file-upload');
let selectedFiles = document.querySelector('#selected-files code');
let submitButton = document.querySelector('input[type=submit]');
let filenames = ''
fileUpload.onchange = function (){
filenames = ''
for(let file of this.files){
filenames += file.name
filenames += ','
}
selectedFiles.parentElement.style.display = 'block'
selectedFiles.textContent = filenames
submitButton.style.display = 'inline-block';
}
</script>
</main>
</body>
</html>
In the code above, we linked some CSS files (styles.css and index.css) to the document. We also created a form element that sends a POST request to the /upload route. The form element has an enctype of multipart/form-data (without it, our server can't receive the images).
Within the form element, there's an input element that'll help us get the files from the device. The input has a name attribute with the value of images (which will be used by multer to identify the images). It has been configured to accept multiple image files (with .png or .jpg extensions).
There's also an input element that acts as the submit button. It'll be used to trigger the file upload request.
Then there's the script element that contains some JavaScript code that adds interactivity to the HTML document.
Create a style.css file in your public/stylesheets folder and add this CSS code to it:
* {margin: 0;padding: 0;box-sizing: border-box;font-family:Poppins;transition: all 0.5s ease;}
main {display: flex;flex-direction:column;height:100vh;}

h1 a {color: #ff6600;text-decoration:none;}
h1 {background-color: white;font-size:25pt;padding:5px;text-align: center;}

p {font-size:20pt;text-align: center;margin-bottom: 25px;}

header, footer {border: 2px solid #ececec;}

article {padding:20px;flex-grow: 1;background-color: #fff7f0;}
footer p {margin-bottom: 0;font-size: 16pt;}

@media screen and (max-width: 380px) {
    footer p {font-size: 12pt;}
}

@media screen and (max-width: 300px) {
    h1 {font-size: 17pt;}
}
The CSS code above defines the overall layout of your website.
Next, create an index.css file in your public/stylesheets folder and add this code to it:
p.title {font-size:30pt;}
p#selected-files {display:none;white-space: nowrap;overflow:hidden;text-overflow: ellipsis;}

label {display: inline-block;font-size:25pt;cursor:pointer;padding: 5px 45px;border-radius:25px;color:white;background-color: #ff9955;}
label:hover {background-color: #ff6600;}

input[type=file] {display: none;}
input[type=submit] {display: none;font-size:16pt;cursor:pointer;padding: 5px 25px;border-radius:25px;color:white;background-color:black;}

@media screen and (max-width: 380px) {
    p.title {font-size: 25pt;}
}

@media screen and (max-width: 300px) {
    p.title {font-size: 22pt;}
    label {font-size: 20pt;}
}

@media screen and (max-width: 250px) {
    label {padding: 5px 35px;}
}
The CSS code above defines the specific styling of the index.html elements.
Next, you'll open your routes/index.js file and create an /upload route that'll receive the image files, store them in a folder, store the filenames in the session store, and redirect the request to the root URL.
First, we need to edit the app.js file and activate express-session.
Add this code to your app.js file:
//include the express-session module
var session = require('express-session');

//activate it as an express.js middleware
app.use( session({secret: 'YOUR_SECRET'}) )
This is how your app.js file should look like:
var createError = require('http-errors');
var express = require('express');
var path = require('path');
var logger = require('morgan');
var session = require('express-session');

var indexRouter = require('./routes/index');


var app = express();

// view engine setup
app.set('views', path.join(__dirname, 'views'));
app.set('view engine', 'jade');

app.use(logger('dev'));
app.use(express.json());
app.use(express.urlencoded({ extended: false }));
app.use(express.static(path.join(__dirname, 'public')));
//activate express-session
app.use( session({secret: 'YOUR_SECRET'}) )

app.use('/', indexRouter);


// catch 404 and forward to error handler
app.use(function(req, res, next) {
  next(createError(404));
});

// error handler
app.use(function(err, req, res, next) {
  // set locals, only providing error in development
  res.locals.message = err.message;
  res.locals.error = req.app.get('env') === 'development' ? err : {};

  // render the error page if there's any error occurs
  res.status(err.status || 500);
  res.render('error');
});

module.exports = app;
Open your routes/index.js file and create a route that'll receive the image filenames, store them in a session and redirect to the root URL:
/import the multer library
var multer = require('multer');
var path = require('path');

//multer file storage configuration
let storage = multer.diskStorage({
    //store the images in the public/images folder
    destination: function(req, file, cb){
        cb(null, 'public/images')
    },
    //rename the images
    filename: function(req, file, cb){
        cb(null, file.fieldname + '-' + Date.now() + '.' + file.mimetype.split('/')[1] )
    }
})

//configuration for file filter
let fileFilter = (req, file, callback) => {
    let ext = path.extname(file.originalname);
    //if the file extension isn't '.png' or '.jpg' return an error page else return true
    if (ext !== '.png' && ext !== '.jpg'){
        return callback(new Error('Only png and jpg files are accepted'))
    } else {
        return callback(null, true)
    }
}

//initialize Multer with the configurations for storage and file filter
var upload = multer({ storage, fileFilter: fileFilter});

router.post('/upload', upload.array('images'), function (req, res){
    let files = req.files;
    let imgNames = [];

    //extract the filenames
    for( i of files){
        let index = Object.keys(i).findIndex( function (e){return e === 'filename'})
        imgNames.push( Object.values(i)[index] )
    }
    //store the image filenames in a session
    req.session.imagefiles = imgNames

    //redirect the request to the root URL route
    res.redirect('/')
})
From the code above, we included the Multer library. Then we used the multer.diskStorge() method to describe where the image files will be stored and how they should be renamed.
Also, we created a fileFilter function to ensure that only png and jpg files are stored by the server. If the user sends any file that isn't PNG or JPG, an error page will be displayed with the message "Only png and jpg files are accepted".
Next, we created a route method that listens to POST requests directed at the /upload route.
Within this route method, we included the upload.array('images') method which tells mutler to only store files whose name is images (according to HTML input element <input id='file-upload' type='file' name='images' accept='.png, .jpg' multiple/>).
After that, we extracted the filenames from the req.files property and stored them in the session store. Finally we redirect the request to the root URL route.
In the routes/index.js file, edit the root URL route so that it'll render an index.jade file if the session stores the image filenames.
router.get('/', function(req, res, next) {
    //if there are no image filenames in a session, return the normal HTML page
    if (req.session.imagefiles === undefined){
        res.sendFile(path.join(__dirname, '..','/public/html/index.html'));
    } else {
    //if there are image filenames stored in a session, render them in an index.jade file
        res.render('index', {images: req.session.imagefiles} )
    }
});
From the code above, whenn the route URL route receives any request, it first checks if there is an imagefiles property stored in the session store. If there isn't, it sends the index.html file. But if there is, an index.jade file containing the image filenames will be sent.
Finally, go to the views/index.jade file and edit it so that it'll render the uploaded images in HTML:
doctype html
html
  head
    title IMG-to-PDF Converter
    meta(charset='UTF-8')
  body
    h1 Images
    each image in images
      img(src=`/images/${image}` width='200' height='200')
The code above is written in Jade syntax, when the server renders it, it'll be in form of an HTML document.
Note: make sure to do the indentation of your content in Jade/Pug with either the space key or tab key, not both.
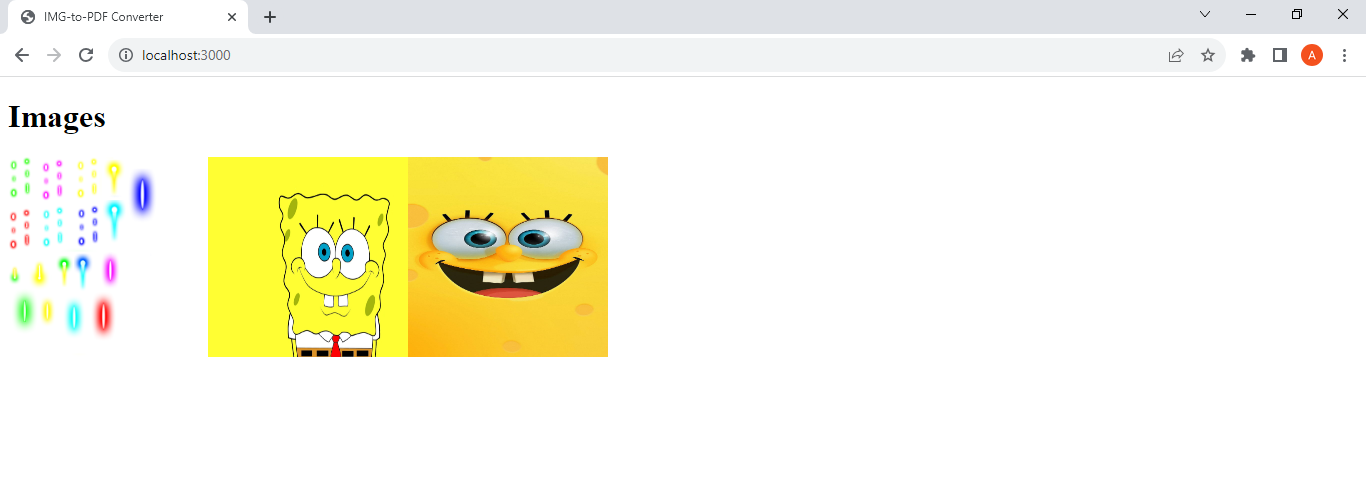
When you run or restart your server (rs with Nodemon), go to http://localhost:3000/ and restart the upload process (from selecting the files to clicking the upload button).
You should see an HTML page containing the images you uploaded.
Here's my result:
How to Sort the Images and Convert them to PDF
In this section, I'll be explaining how you can allow the user to rearrange their images and convert them to a PDF.
Here is the simple flowchart for this operation:
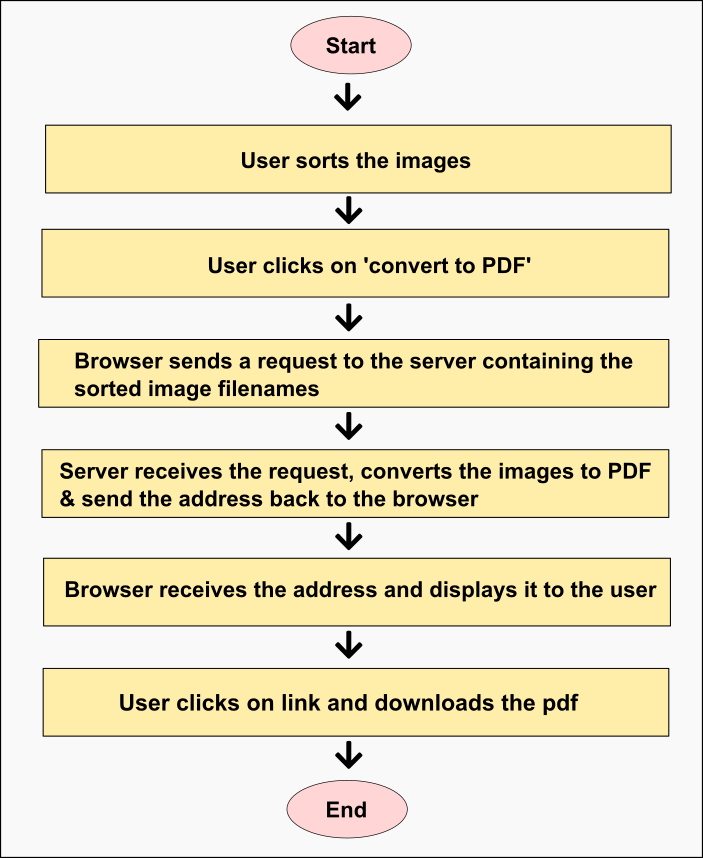
Here's what's going on:
- User clicks on "covert to PDF"
- Browser sends request to server containing the sorted image filenames
- Server receives the request, converts the images to PDF, and sends the address back to the browser
- Browser receives the address and displays it to the user
- User clicks on the link and downloads the PDF
- End
In the views/index.jade file, we'll be using Sortablejs to sort the images.
Replace the content in your index.jade file with this:
doctype html
html
  head
    title IMG-to-PDF Converter
    meta(charset='UTF-8')
    link(rel='stylesheet' href='/stylesheets/style.css')
    link(rel='stylesheet' href='/stylesheets/index-view.css')
    script(type='module' src='/javascripts/sort.js' defer)
  body
    main
      header
        h1
          a(href='/') IMG2PDF
      article
        p
          a(href='/new') New +
        div
          each image in images
           img(src=`/images/${image}` data-name=image width='200' height='200')
        p
          a(class='convert')
            span(class='text') Convert to PDF →
            span(class='loader')
        p
          a(class='download' download) Download ↓
      footer
        p
          code copyright © IMG2PDF 2023
The code above is a Jade file that'll be rendered as an HTML document. It contains the document metadata (including the link and style elements that connects to CSS and Javscript files), the image elements, the hyperlinks, and some other HTML elements.
Next, create a public/stylesheets/index-view.css file and add this code to it:
p a {font-size:20pt;text-decoration: none;color: white;display: inline-block;padding: 5px 20px;margin-bottom:15px;background-color: #ff6600;cursor: pointer;}

div {margin:auto;margin-bottom: 15px;padding:10px;display: flex;flex-direction:row;flex-wrap:wrap;width:80%;background-color: rgba(255,255,255,0.9);}

div img {width: 200px;height:200px;object-fit: contain;padding: 10px;background-color: #ffe6d5;margin-right:10px;margin-bottom: 10px;cursor:pointer;}

p a.download {background-color: black;display:none;}

span.loader {display:none;border: 5px solid black;border-top: 5px solid white;border-radius:50%;width: 25px;height: 25px;animation: spin 0.5s linear infinite;}


@keyframes spin{
    0% {transform: rotate(0deg);}
    100% {transform: rotate(360deg);}
}

@media screen and (max-width: 620px) {
    div img {width: 45%;height: 150px;}
}

@media screen and (max-width: 415px) {
    p a {font-size: 16pt;}
    div img {height: 120px;}
}

@media screen and (max-width: 330px) {
    p a {font-size: 14pt;}
    div {width: 100%;}
    div img {width:100%;margin-right: 0px;margin-bottom: 5px;}
}

@media screen and (max-width: 260px) {
    p a {font-size: 13pt;padding: 5px 10px;}
}
Next, navigate to the node_modules/sortablejs/modular folder and copy the sortable.core.esm.js file to the public/javascripts folder.
Then create a public/javascripts/sort.js file.
You'll add some code that'll activate Sortablejs and send the sorted filenames to the server for conversion:
import Sortable from '/javascripts/sortable.core.esm.js';

//use sortablejs on the container element for the image tags
let list = document.querySelector('div');
let sort = Sortable.create(list);

let convertButton = document.querySelector('a.convert');

//When the convert button is clicked
convertButton.onclick = function(){
    let images = document.querySelectorAll('img');
    let loader = document.querySelector('span.loader');
    let convertText = document.querySelector('span.text');
    let downloadButton = document.querySelector('a.download');

    let filenames = [];
    //extract the image names into an array
    for(let image of images){
        filenames.push(image.dataset.name)
    }
    //activate loading animation
    loader.style.display = 'inline-block';
    convertText.style.display = 'none'

    //Create a post request that'll send the image filenames to the '/pdf' route and receive the link to the PDF file
    fetch('/pdf', {
        method: 'POST',
        headers: {
            "Content-Type": "application/json"
        },
        body: JSON.stringify(filenames)
    })
    .then( (resp)=> {
        return resp.text()
    })
    .then( (data) => {
        //stop the loading animation
        loader.style.display = 'none';

        //display the convert and download button
        convertText.style.display = 'inline-block'
        downloadButton.style.display = 'inline-block'

        //attach the address to the download button
        downloadButton.href = data
    })
    .catch( (error) => {
        console.error(error.message)
    })
}
From the code above, we imported Sortablejs core JavaScript file and activated it on the parent element of the img elements.
When the Convert to PDF button is clicked, we extracted the image filenames from the img elements and sent it as a POST request to the server.
When the browser receives the server response, we attached the link to the download button so that when the user clicks on it, the PDF document will be downloaded on the user's device.
Next, in your routes/index.js file, you'll create a /pdf route that'll receive the sorted filenames and convert them to PDF.
First create a pdf folder in the public folder and add these code to your routes/index.js file:
var path = require('path');
var fs = require('fs');

//import PDFkit
var PDFDocument = require('pdfkit');

router.post('/pdf', function(req, res, next) {
    let body = req.body

    //Create a new pdf
    let doc = new PDFDocument({size: 'A4', autoFirstPage: false});
    let pdfName = 'pdf-' + Date.now() + '.pdf';

    //store the pdf in the public/pdf folder
    doc.pipe( fs.createWriteStream( path.join(__dirname, '..',`/public/pdf/${pdfName}` ) ) );

    //create the pdf pages and add the images
    for(let name of body){
        doc.addPage()
        doc.image(path.join(__dirname, '..',`/public/images/${name}`),20, 20, {width: 555.28, align: 'center', valign: 'center'} )
    }
    //end the process
    doc.end();

    //send the address back to the browser
    res.send(`/pdf/${pdfName}`)
})
From the code above, we included pdfkit and created a route method that responds to POST requests directed at the /pdf URL. Within this route method, we used pdfkit to convert all the images to PDF. Finally, we sent the address of the PDF document back to the document.
When you restart the server, navigate to http://localhost:3000/ in your web browser, and restart the file upload process. You'll able to convert your images to PDF.
Here's a YouTube video describing the entire process:
How to Cancel and Restart Image Uploads
In this section, we'll be creating a functionality that allows the user to cancel the existing file upload project and create a new one.
Remember that there's a New + button in our views/index.jade that points to the /new route.
...
article
  p
    a(href='/new') New +
...
Now we'll be writing the route in our routes/index.js file.
Here is the simple flowchart for this operation:
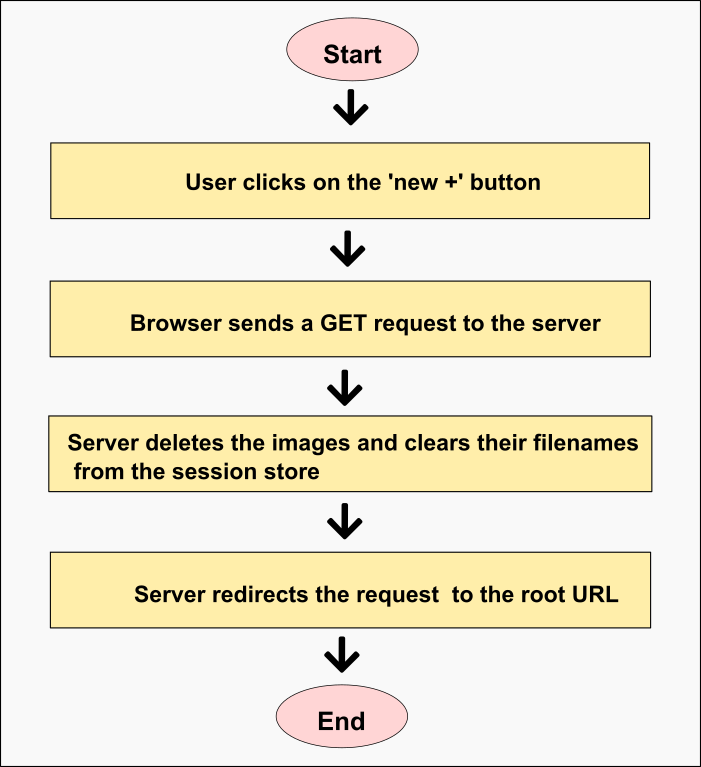
Here's what's going on:
- User clicks on the 'New +' button
- Browser sends a GET request to the server
- Server deletes the images and clears their filenames from the session store
- Server redirects the request to the root URL
- End
Add this code to your routes/index.js file:
router.get('/new', function(req, res, next) {
    //delete the files stored in the session
    let filenames = req.session.imagefiles;

    let deleteFiles = async (paths) => {
        let deleting = paths.map( (file) => unlink(path.join(__dirname, '..', `/public/images/${file}`) ) )
        await Promise.all(deleting)
    }
    deleteFiles(filenames)

    //remove the data from the session
    req.session.imagefiles = undefined

    //redirect to the root URL
    res.redirect('/')
})
From the code above, when the /new route receives a GET request, it'll delete the images stored in folder and session store. After that, it'll redirect the request to the root URL.
When you navigate to http://localhost:3000/, upload some images, and cancel the existing file upload process, you'll see that the images were deleted from the folder and you were redirected to the homepage.
Conclusion
With the code above, you've been able to create an online Image-to-PDF converter. Congrats!
As you know, software development is a continuous process. So you can try implementing some additional functionalities (such as security, input validation, and so on) to the project.
You can check out my GitHub repo for the complete source code.
If you have any questions for me, you can check my freeCodeCamp profile for my contact details. I'll reply as quick as possible!
Bye for now.