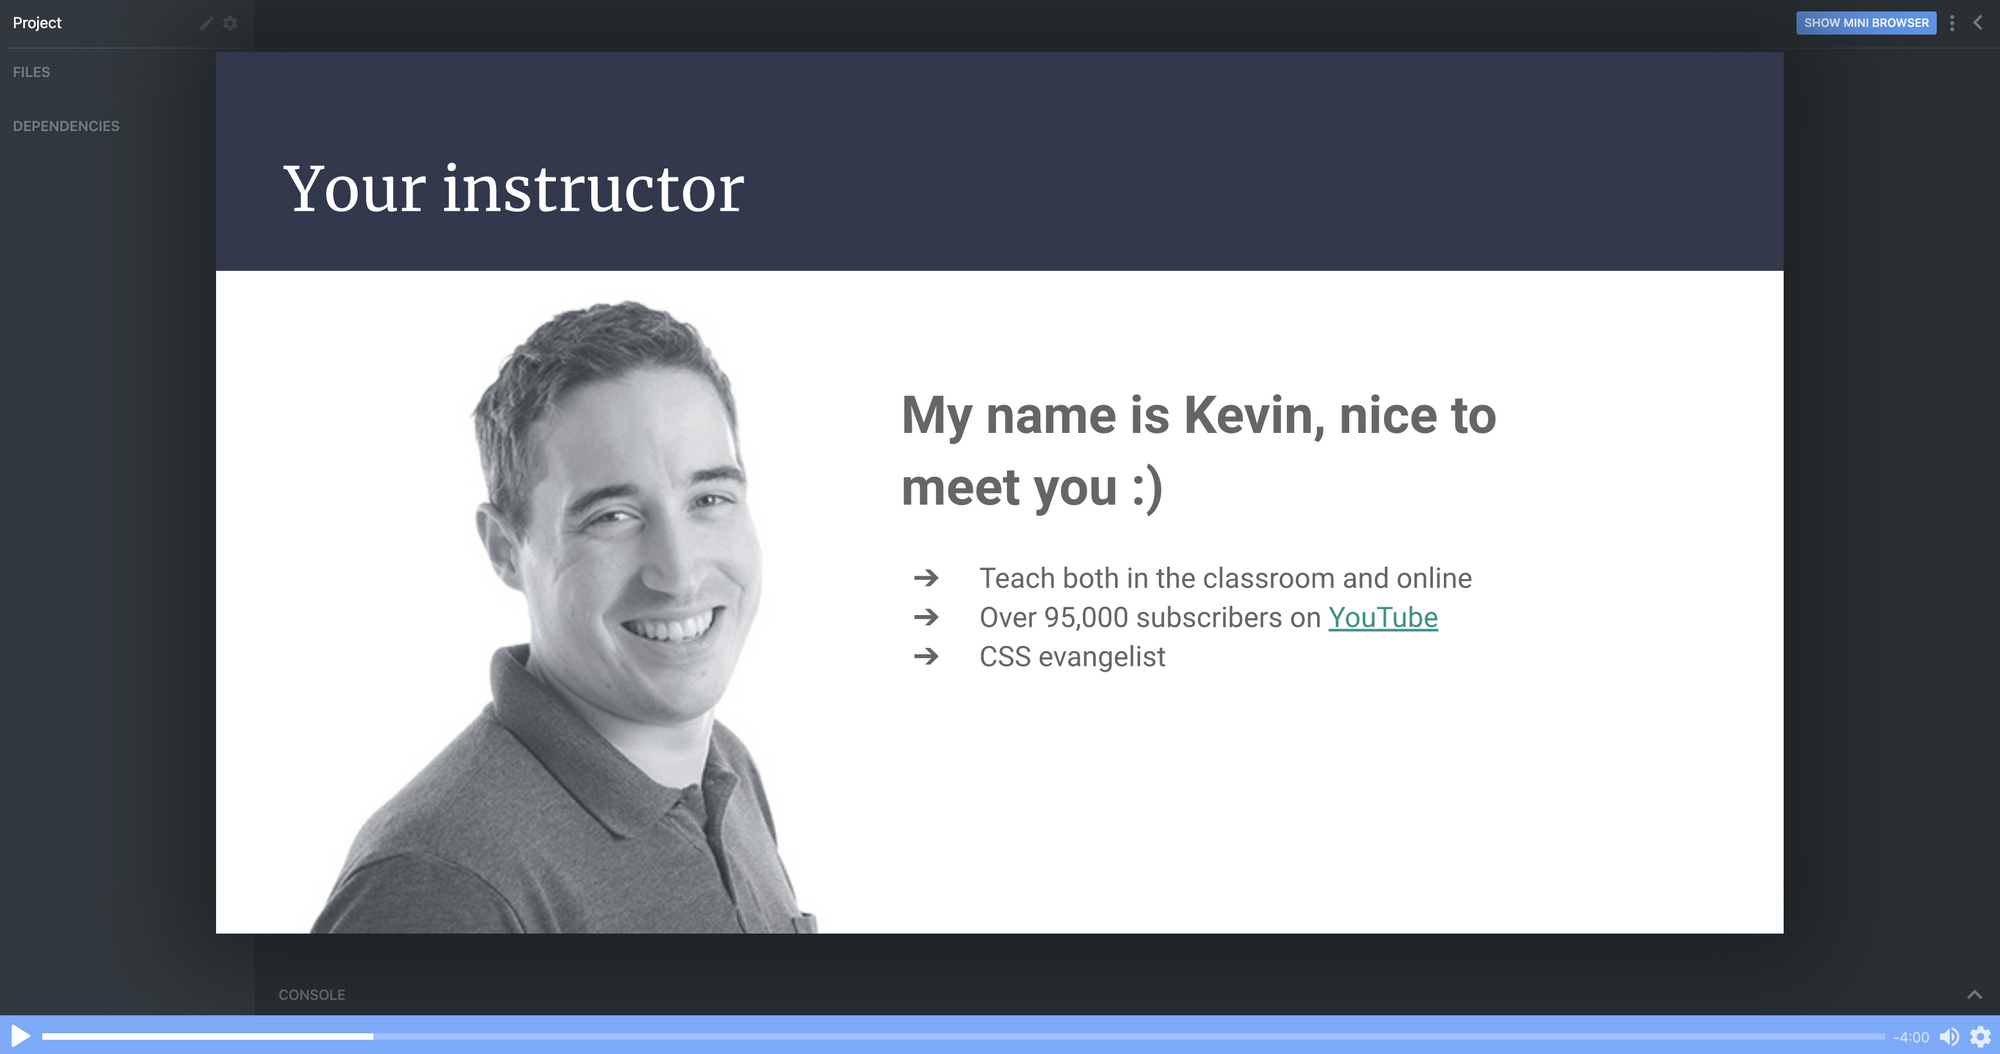
By Kevin Powell
Hello! My name is Kevin Powell. I love to teach people how to build the web and how to make it look good while they’re at it.
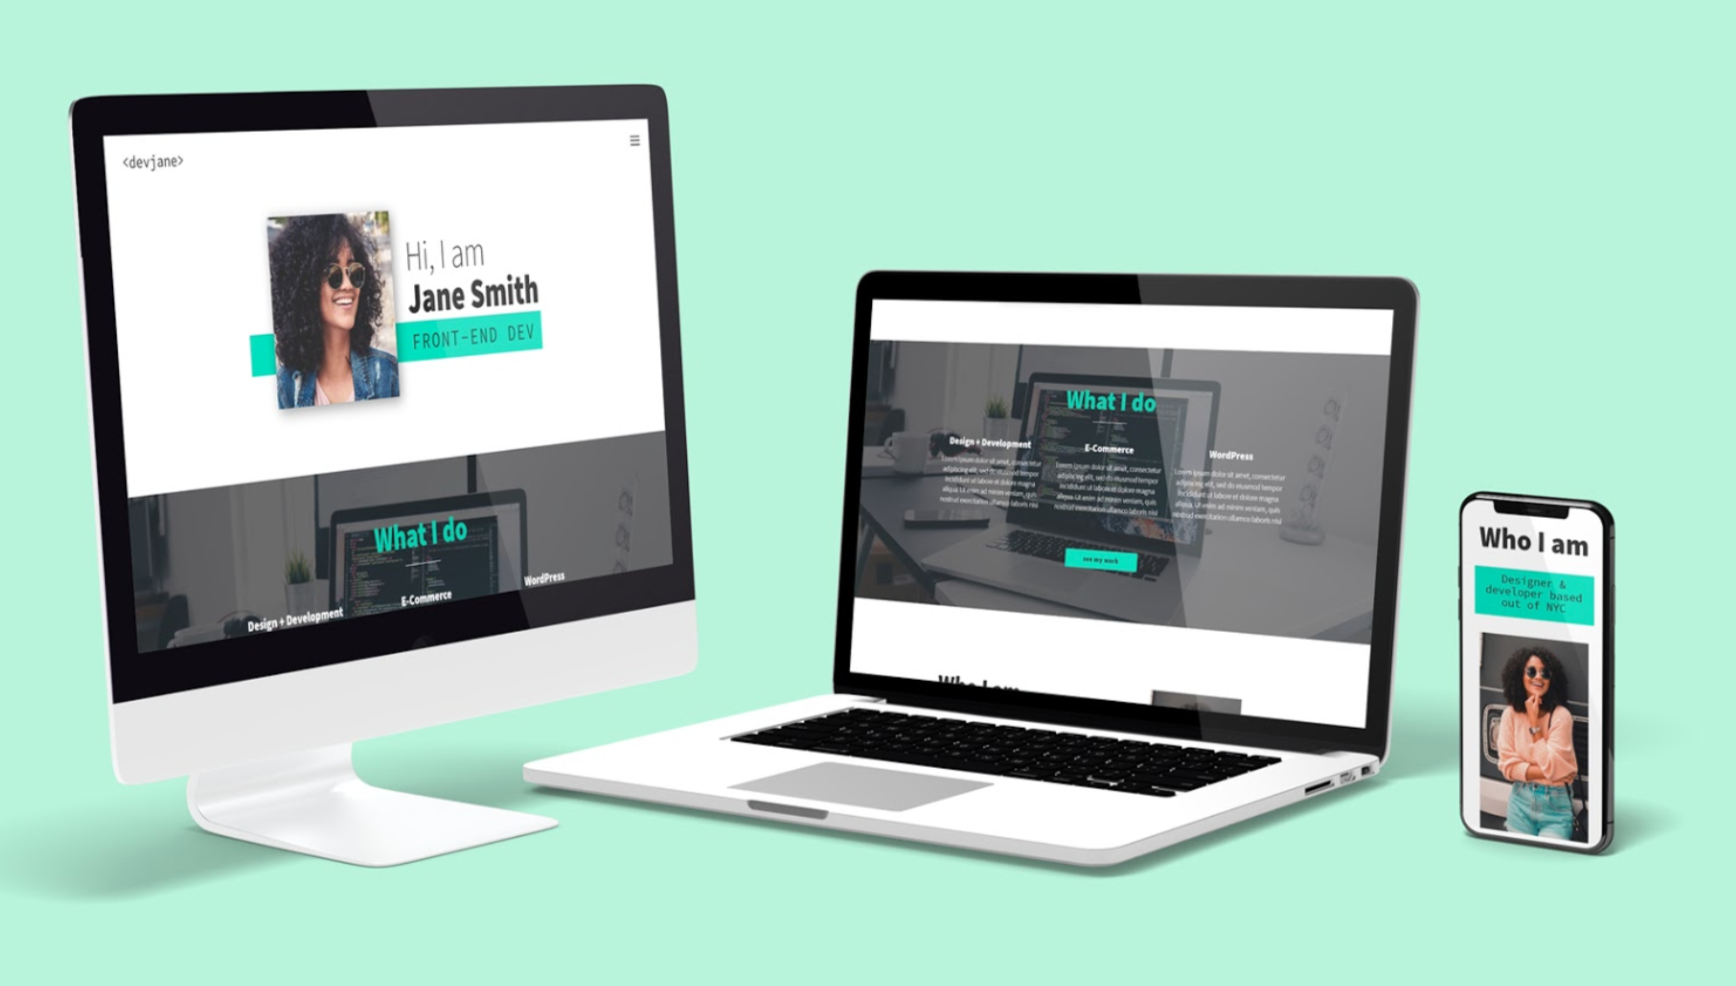
I’m excited to announce that I’ve just launched a free course that teaches you to create your very own fully responsive portfolio website.
After you’ve finished this course you will have a neat-looking portfolio site that will help you land job interviews and freelance gigs. It’s also a cool thing to show to your friends and family.
We’re going to build the portfolio using Scrimba’s interactive code-learning platform, and then deploy it using DigitalOcean’s cloud services.
Also, DigitalOcean has been generous to give everyone who enrolls a free credit, so it won’t cost you anything to get it up and running.
This post is a breakdown of the course itself, giving you an idea of what's included in all the lessons. If you like what you see, make sure to check it out over on Scrimba!
Lesson 1: Introduction
In the first lesson, you’ll get an overview of the course so that you know what to expect, what you should know before taking it, and what you’ll end up with once you're finished. I also give you a quick intro to myself.
Lesson 2: Setting things up - HTML
In part two, I’m going to show you around in the Scrimba environment and we’ll also set up the project.
All the images are supplied, so you won’t need to worry about looking for the perfect photo just yet. We can focus on building the portfolio!
Don’t forget that you can access everything you need from text and colors to fonts and much more at our dedicated design page.
Lesson 3: The header area - HTML
It’s finally time to start building out the portfolio. In this lecture, we will create the header section. We will brush up on the BEM methodology for setting class names in CSS, and I think you’ll find that this makes the navigation simple and straightforward to create.
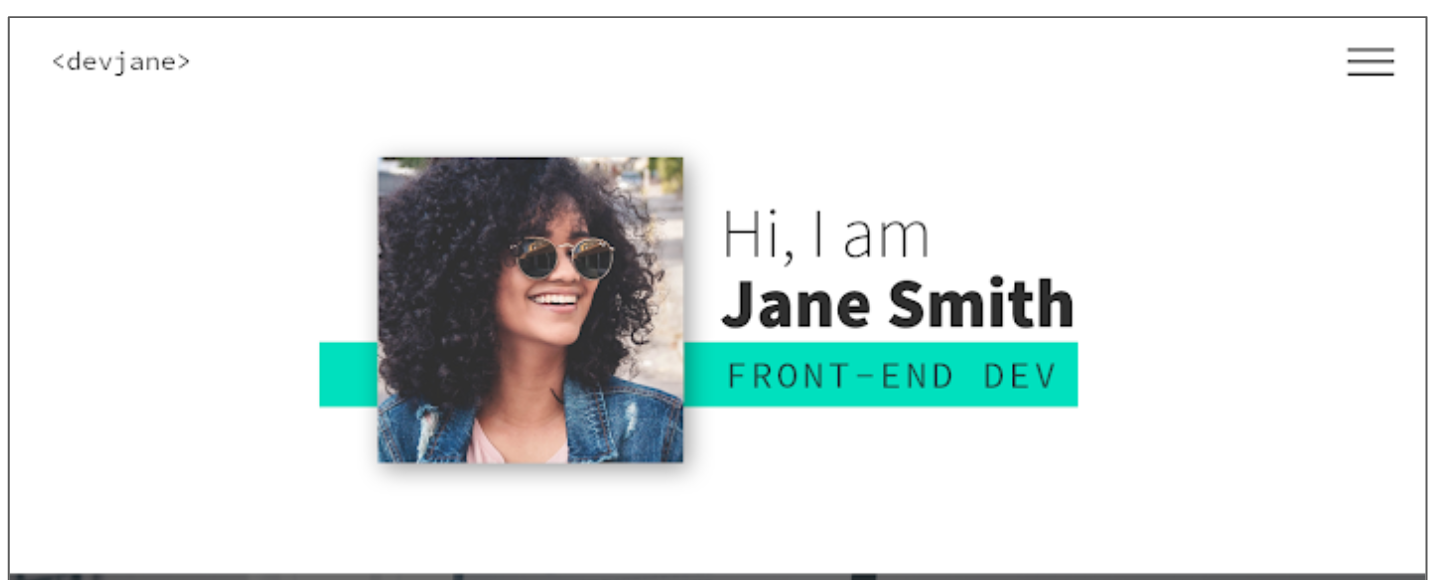
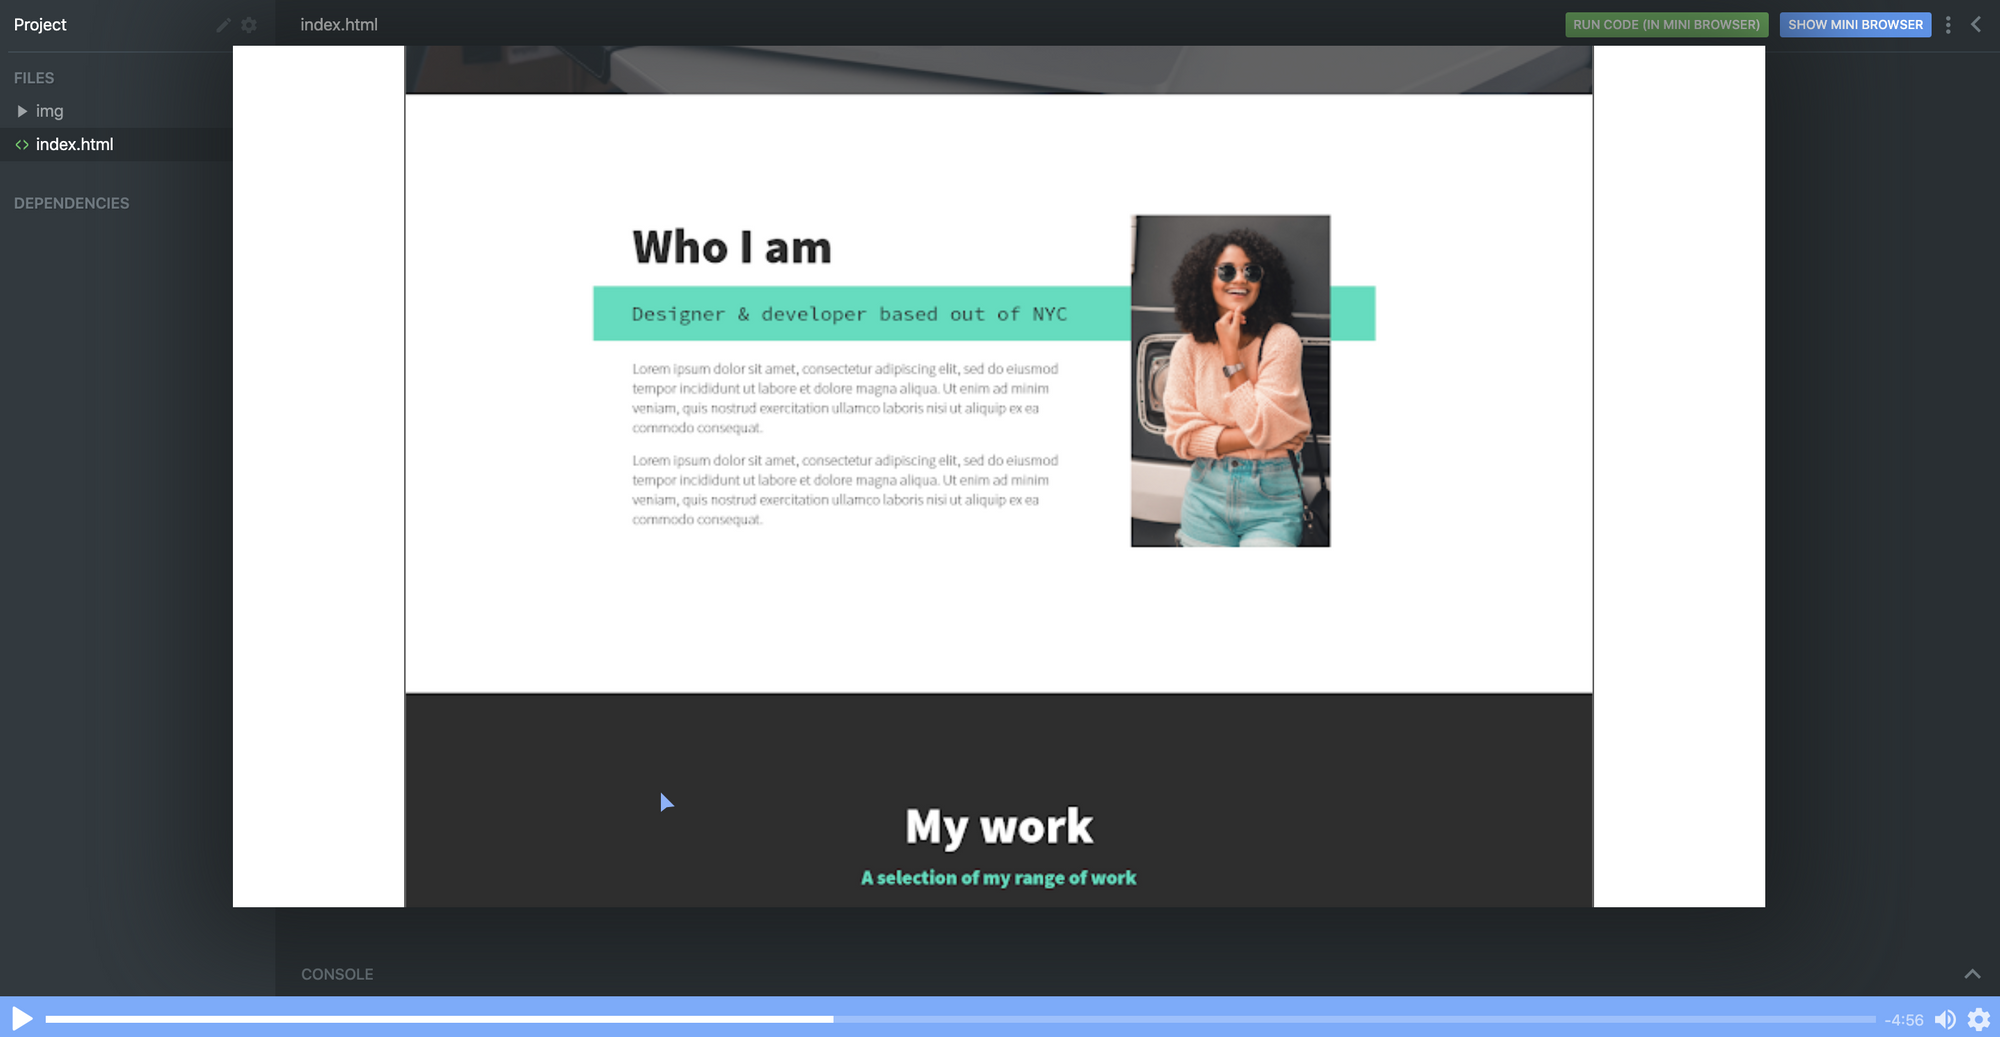
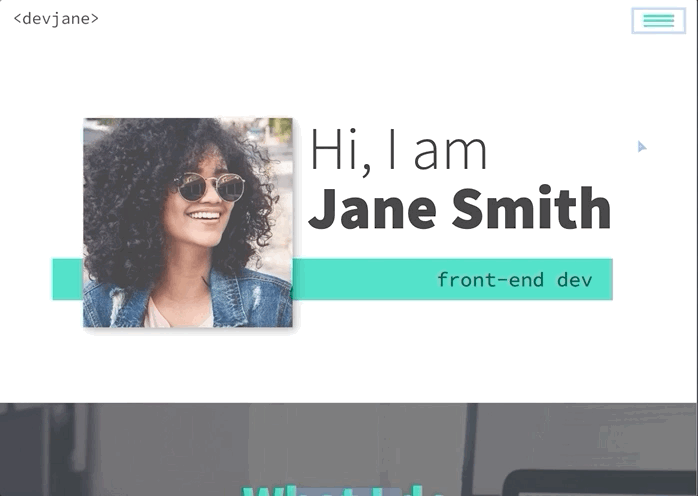
Lesson 4: Intro section
Next up is the Intro section of the portfolio. This is where we will introduce ourselves and put a picture of ourselves.
In the end, we add a section about the main skills/services we can do. For the moment we can just fill it all in with “Lorem ipsum” text as a placeholder, until you're ready to fill it in with your own text.
Lesson 5: About me, Work and Footer - HTML
In this chapter, we’re finishing off the rest of our HTML with the last 3 sections: About me, where we’re going to introduce ourselves in greater detail; Work, where we’re going to add some of our portfolio examples, and our footer.
Footers are ideal for linking to email addresses and I will show you how to do that with an <a> tag. We can also add our social media links there too.
For now, it all looks a bit raw and all the CSS fun is ahead of us.
Lesson 6: Setting up the custom properties and general styles
Alright, time to get make that page look amazing!
In this part, we’re going to learn how to add custom properties.
While setting up CSS variables can take some time, it really pays off as the site comes together. They're also perfect for allowing you to customize the site's colors and fonts in just a few seconds, which I take a look at how to do once we wrap up the site.
Lesson 7: Styling the titles and subtitles
Having set all the needed typography, I will walk you through the subtitles of designing and styling the titles and subtitles in our sections.
Lesson 8: Setting up the intro section
Over the next few chapters it’s going to be quite hands-on, so no worries if you feel like rewatching the screencasts a couple of times.
We're keeping everything responsive, using CSS Grid and taking a little dive into using em units as well.
This is the perfect example where CSS Grid shines through and we’re going to learn how to use properties like grid-column-gap, grid-template-areas and grid-template-columns.
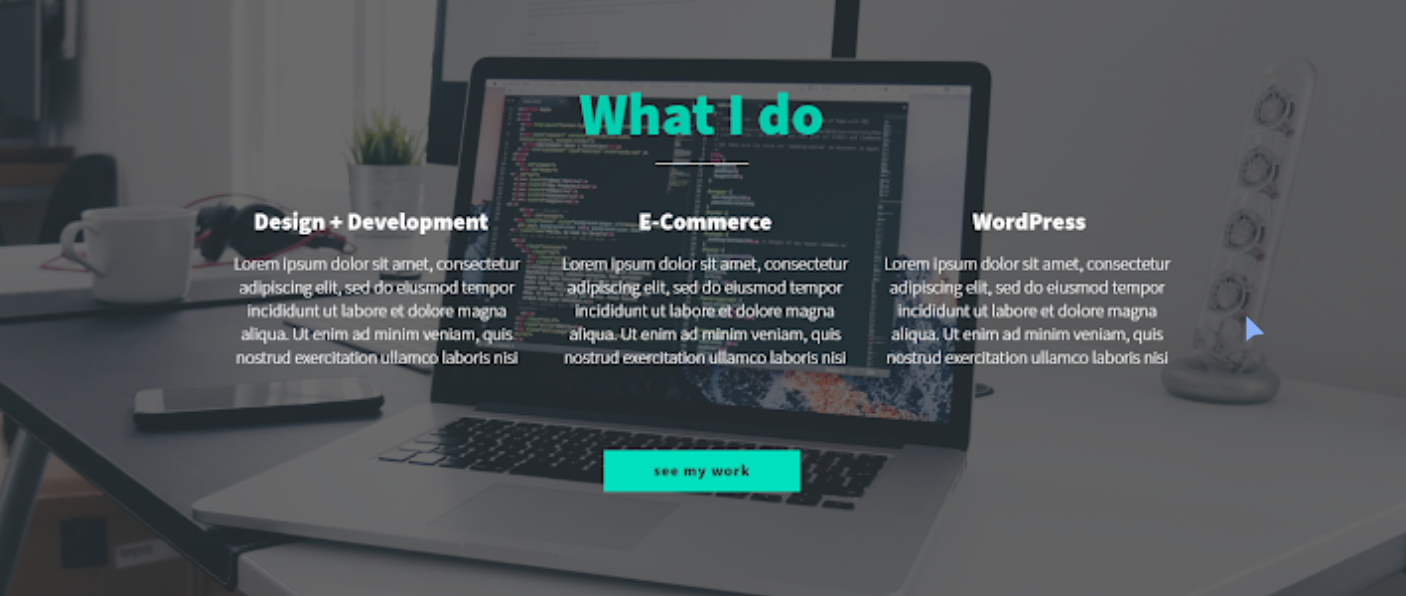
Lesson 9: Styling the services section
To add a little bit of interest, I look at how we can add a background-image to this section of the site. It's a nice way to break up the second and avoid just having solid color backgrounds everywhere, and I also look at how you could use background-blend-mode to change the color of the image to help keep the look of your site consistent.
As a bonus, we’re also going to learn how to style out buttons when they are hovered over or selected when we tab through the page.
Lesson 10: The About me section
Great progress! So this is the all-important About me section. This one is pretty similar to the Intro because we’re going to use CSS Grid, but move the picture to the right side and find a useful example for CSS fr unit.
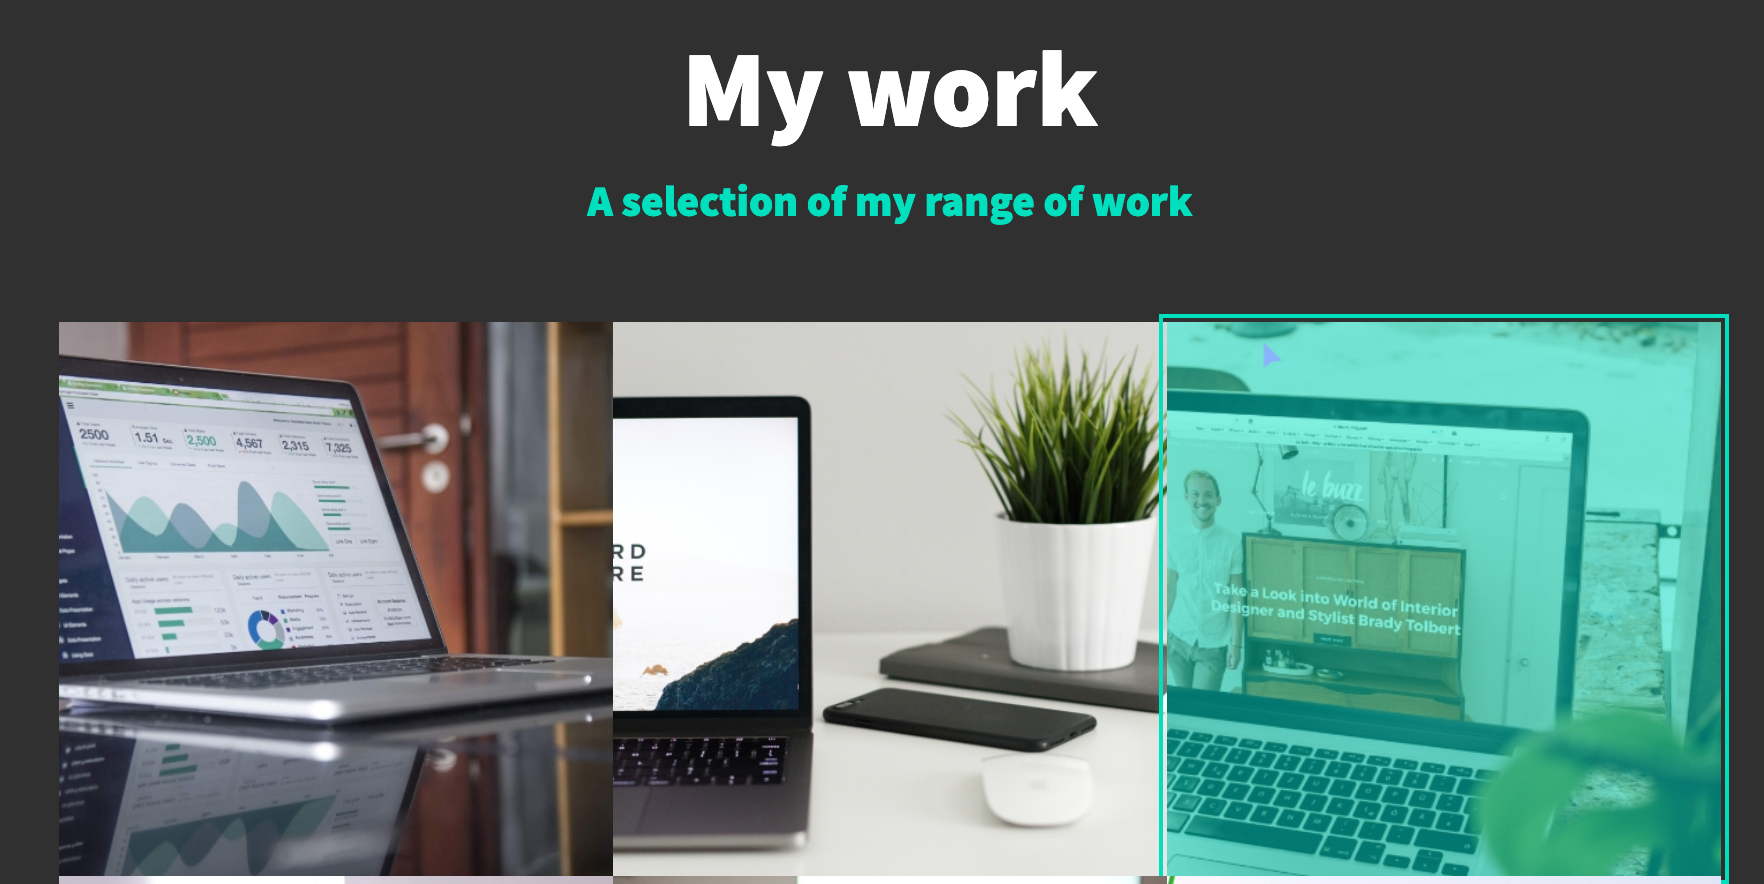
Lesson 11: The portfolio
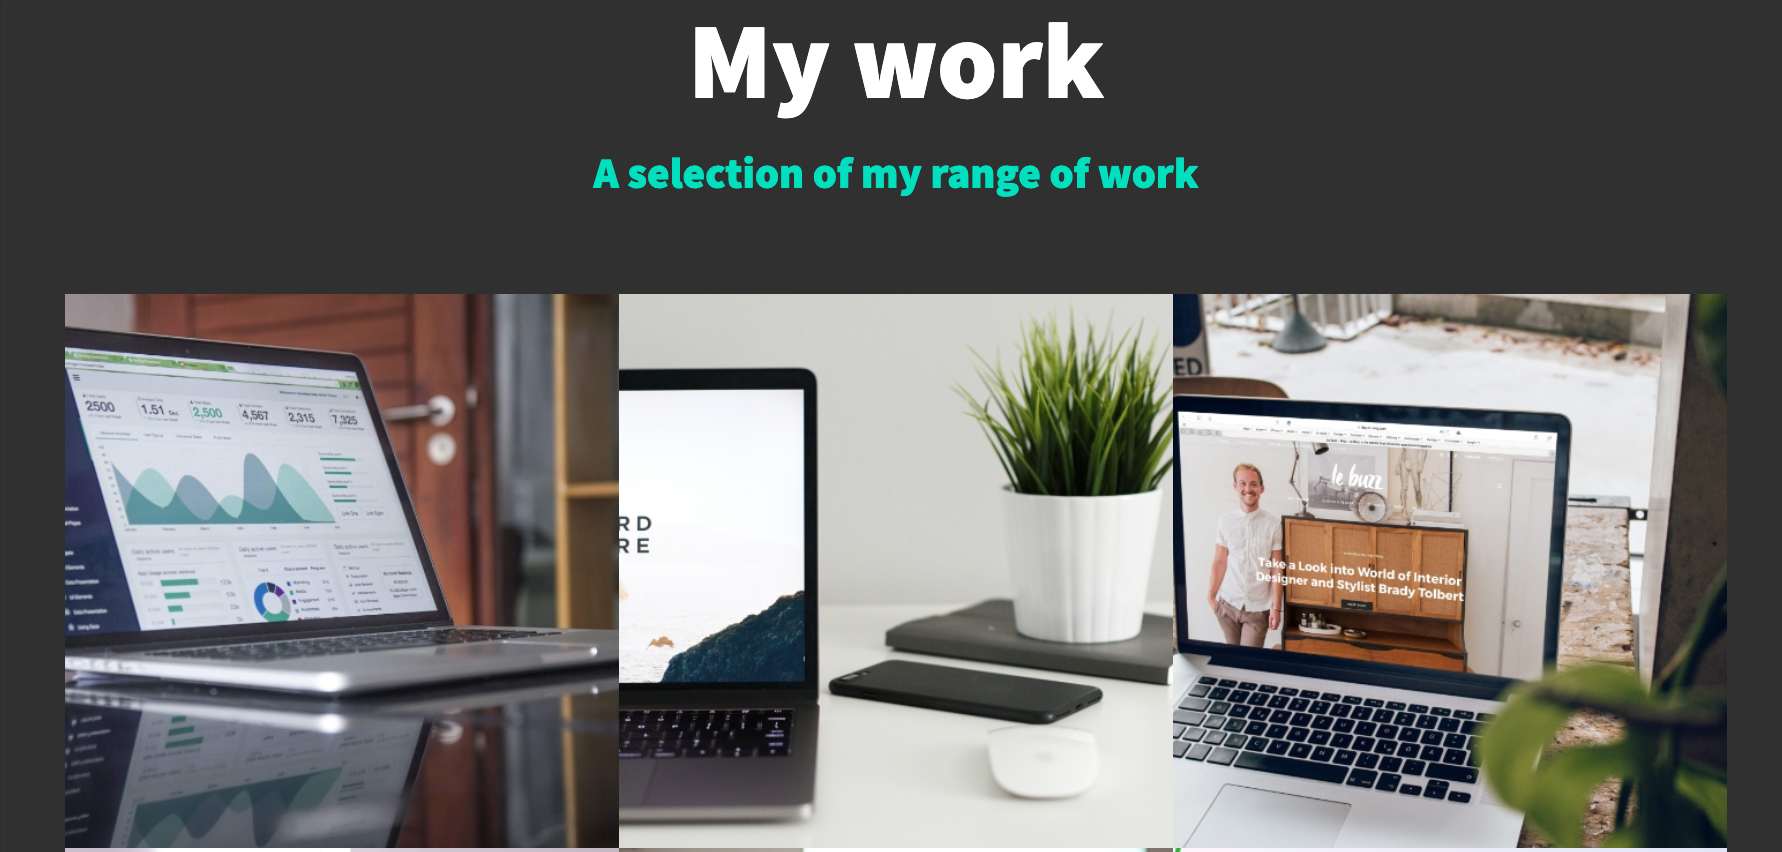
In this screencast, I will show how to build our portfolio section to display some of our great work. And we’re even going to learn how to use cubic-bezier() to a great and impressive effect with some hover styling!
Lesson 12: Adding the social icons with Font Awesome
This cast will be sweet and short, so you can rest a bit and learn some quick tips and tricks.
Adding social media links with Font Awesome icons is a breeze. We can do it with an <i> tag and then adding a class name of an icon you wish to add.
As an example, here’s how to add an icon for GitHub once you have Font Awesome linked in your markup.
<i class="fab fa-github"></i>
Lesson 13: Styling the footer

While the icons are in place, we do need at add more styling here to get them to be set up the way we need them to be.
With a little use of flexbox and removing the styling from the list with list-style: none it's relatively straight forward.
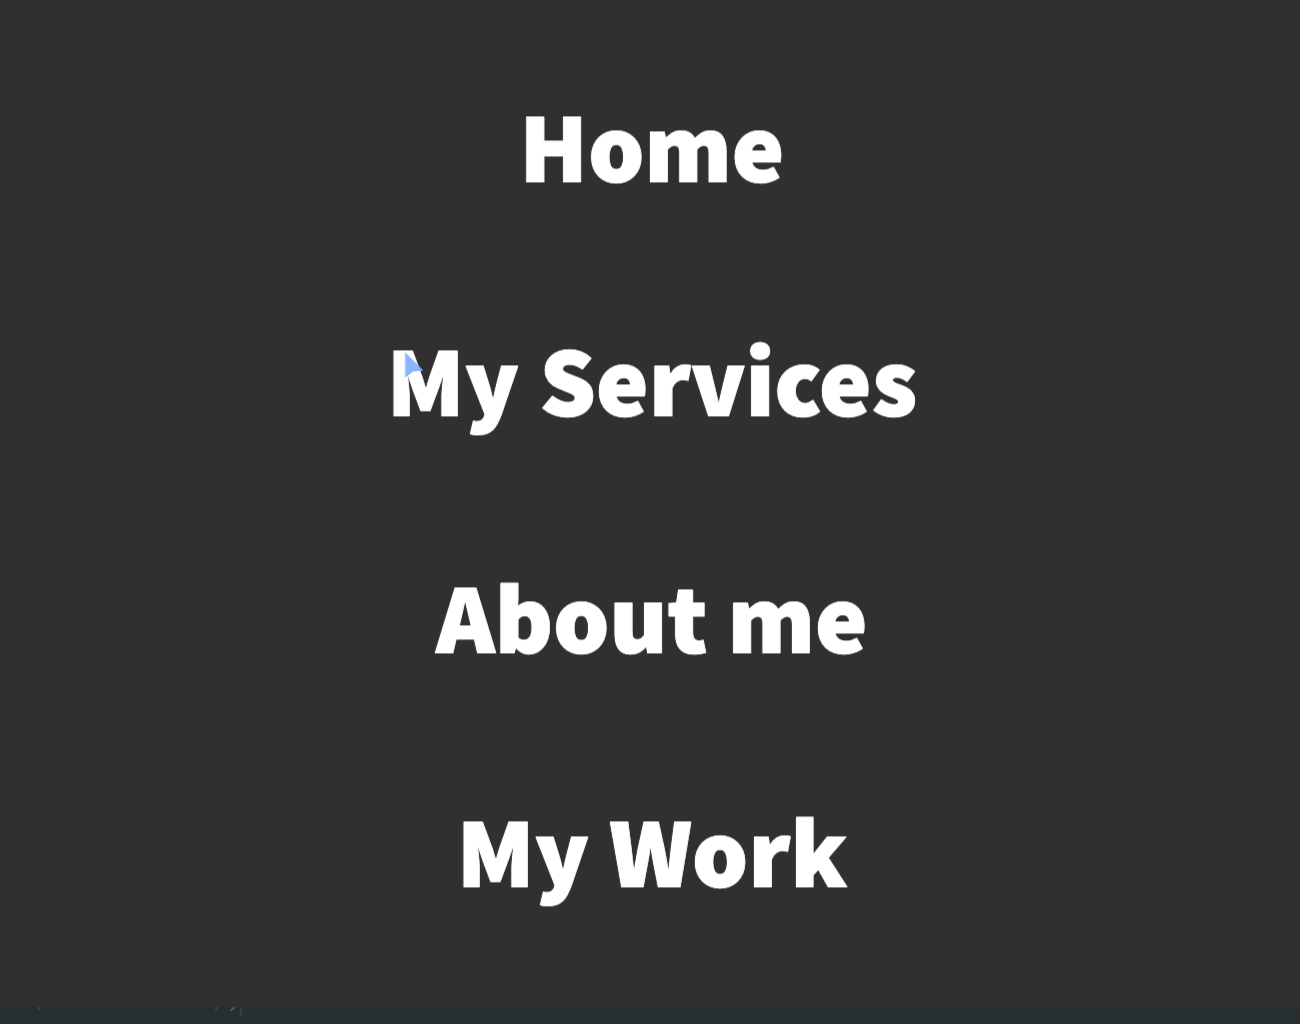
Lesson 14: Setting up the navigation styles
We have left the navigation to the last because very often it’s one of those simple things that can take the longest to set up and do correctly.
Once completed, the navigation will be off-screen, but slide in when a user clicks on the hamburger icon. The first step though, is to get it styled the way we want it to look, then we can worry about actually making it work!
Lesson 14: Creating the hamburger
![]()
In this screencast, you’ll learn how to add a hamburger menu to transition to the navigation view. It’s not an icon or an svg, but pure CSS.
We’re going to have a chance practice ::before and ::after pseudo-selectors, transition, and, since it's not a link but a button, we also need to define the different cursor when we hover over the hamburger icon to indicate that it can be clicked with cursor: pointer.
Lesson 15: Adding the JS
With a little bit of JavaScript, I will walk you through the implementation of a really nice and smooth transition from our main screen to the navigation window on click of the hamburger menu.
I also take a look at how we can add in smooth-scrolling with CSS only by using scroll-behavior: smooth. Yes, it really is that simple! It also makes a great tweet for Today I Learned (TIL). Feel free to send you TILs to @scrimba and I’m sure they will be really happy to retweet them!
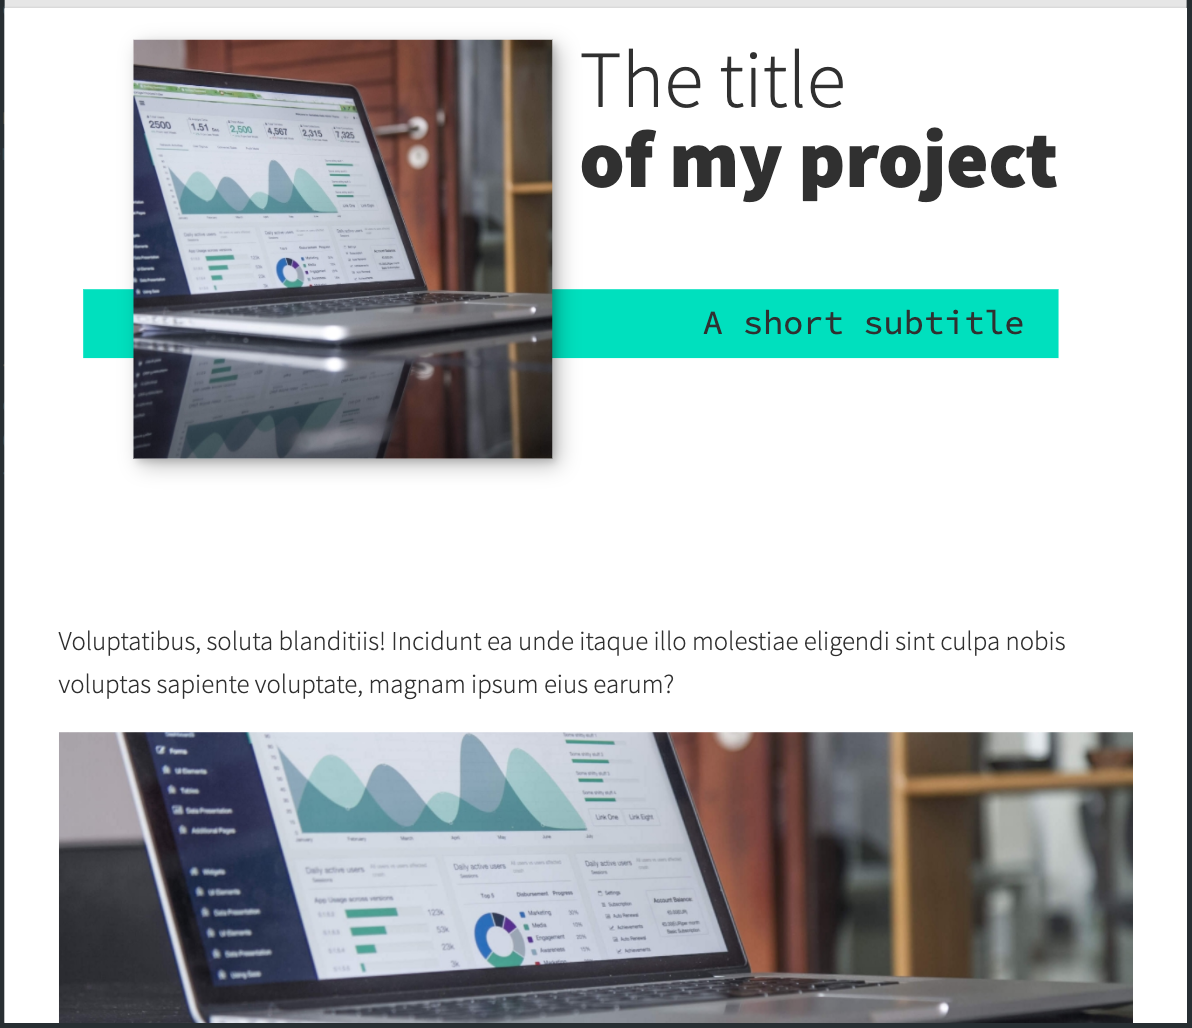
Lesson 16: Creating the portfolio item page
With the homepage wrapped up, it's time to work on a template portfolio page that can be used to give more details on each of the projects that you are putting in your portfolio.
We're also going to learn how to link it seamlessly with our main page for a nice user experience.
Lesson 17: Customizing your page
This is where the magic of CSS custom properties comes in!
In this video I look at how we can customize the custom properties that we set up to change the color scheme of your site within seconds, and how we can update the fonts quickly and easily as well in order to make the site your own!
Lesson 18: DigitalOcean Droplets - What they are and how to set one up
In this screencast, we're going to explore DigitalOcean droplets. They are Linux-based virtual machines and that each droplet is a new server you can use.
It can seem daunting, but they are super easy to set up, very customizable and come with a lot of useful features, like a firewall automatically.
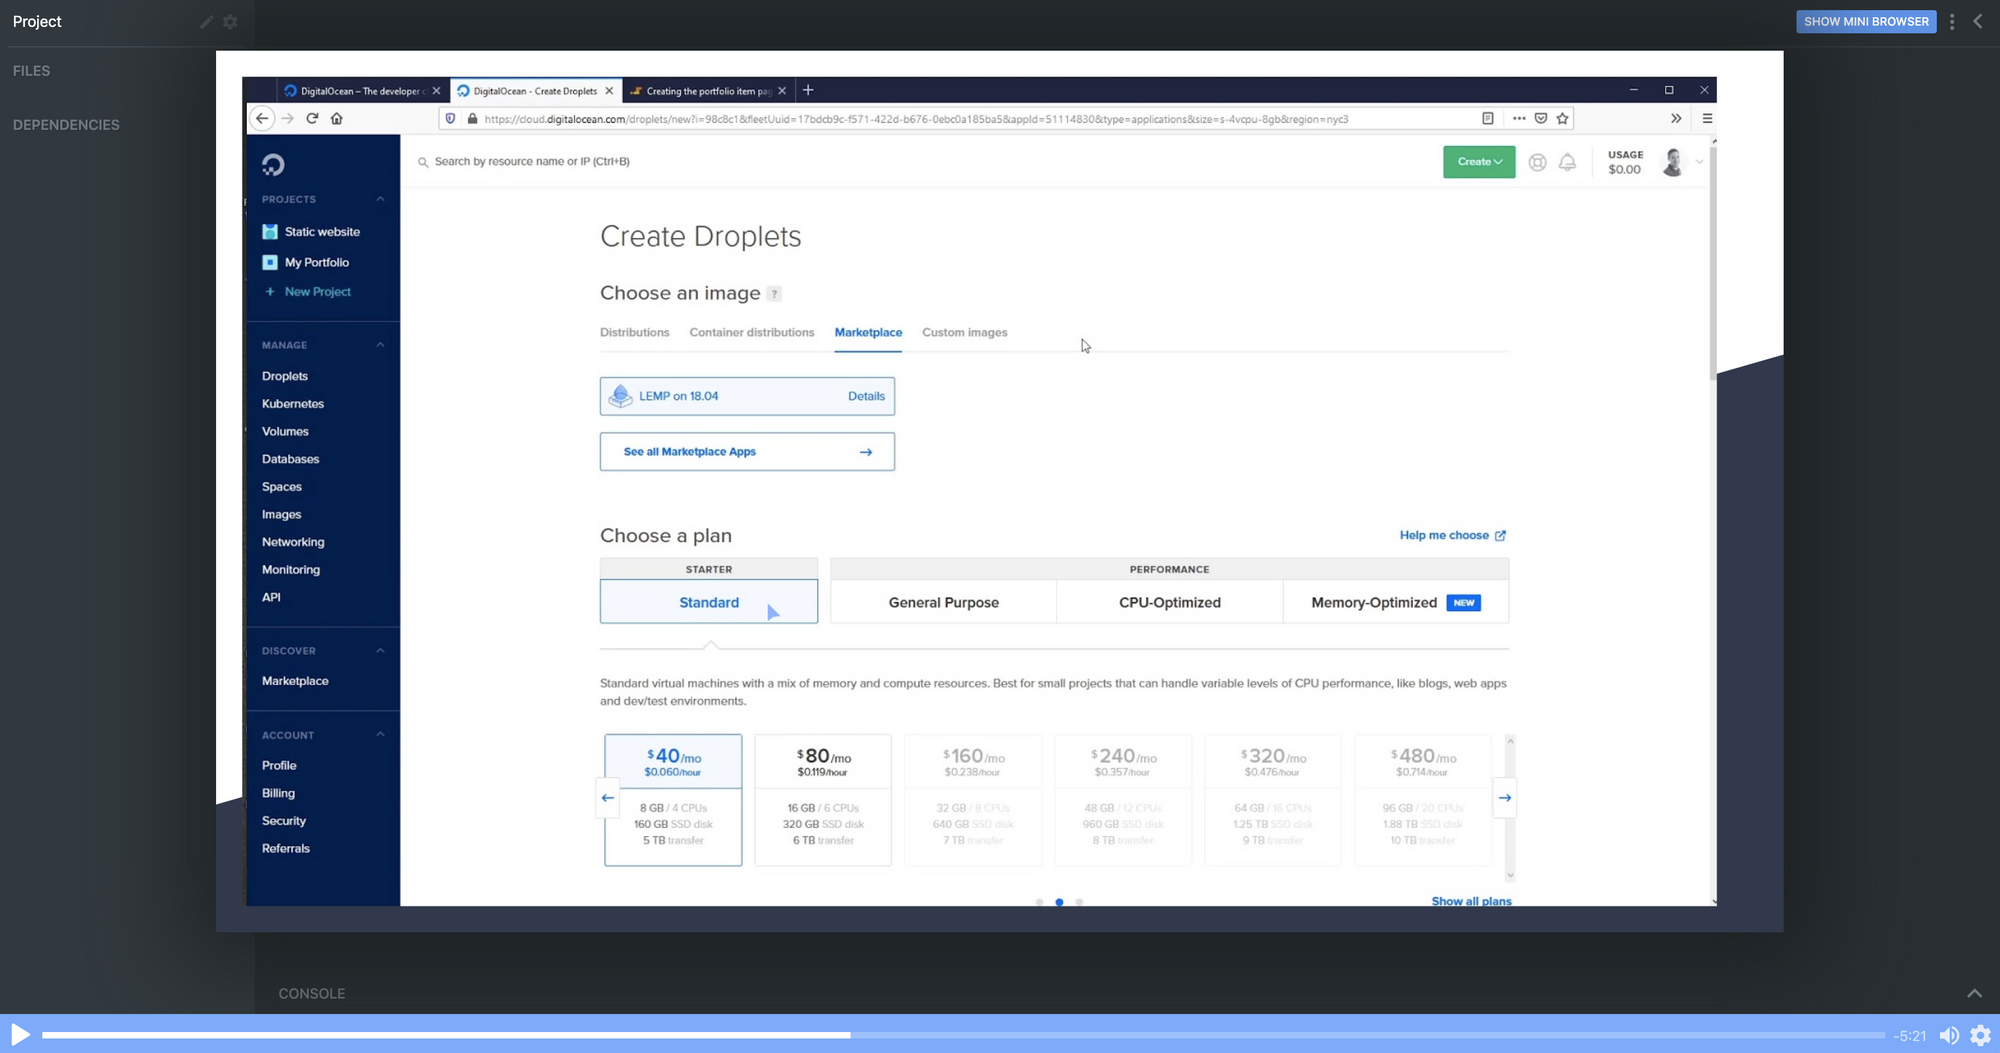
I'll talk you through every single step of the way so that you know exactly how to set a droplet up.
Lesson 19: DigitalOcean Droplets - Uploading files via FTP
To finish the whole process off, let me show you how we can upload our portfolio to the droplet we've created in the previous chapter and now it's online for others to see!
Lesson 20: Wrap up
And that's it! Your next step can be to make this page all about you, add all the relevant examples, tell us about you and make it live in a DigitalOcean droplet.
Once you've put yours together and got it online, please share your portfolio with Me and the team at Scrimba! You can find us at @KevinJPowell and @scrimba on Twitter, and we would be really happy to share what you're up to!
Check out the full course
Remember, this course is completely free. Head on over to Scrimba now and you can follow along with it and build out a fantastic looking site!