By Kurt
An introduction to HTML 5 canvas animations
Out of all the great things HTML 5 brought us, I love the canvas element the most. I hope that once you see how powerful it is, you’ll want to put in the time to master canvas animations yourself.
What is a canvas?
A canvas is exactly what its name implies. It is a blank canvas that you can paint as you wish and then render in your browser as an image. The real beauty is that it not only allows you to create images, but also to continuously redraw & render them — hence creating an animation.
The power of canvas is limited only by your imagination. I’ve used the canvas element to create everything from static images on-the-fly to games, graphical user interfaces. and even a MailChimp-style email builder. You can even render the canvas in 3D!
For me, the canvas element changed everything. I was no longer limited to using the default HTML tags. I could create everything I wanted in the browser. And you’d better believe this pushed my JavaScript skills to a whole new level.
Getting Started
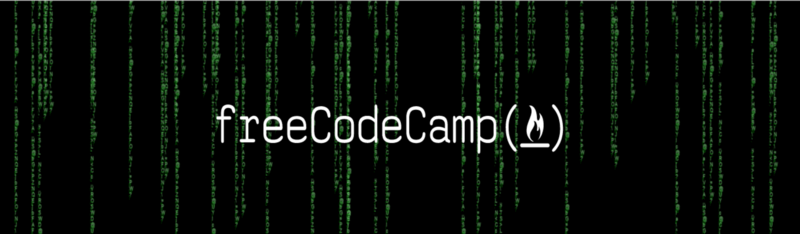
Instead of demonstrating how to simply draw on a canvas, I want to give you a glimpse of what you can create with it. If you haven’t seen The Matrix yet, stop reading now and go watch it. If you have seen it, you’ll recognize the famous “falling code” from the title. Let’s create this with canvas!
Instead of doing a step by step tutorial, to save time I will post the code below and walk you through it explaining what each piece is doing as we move along.
The HTML:
<canvas id=”canvas” width=”600px” height=”400px”></canvas><img id=”logo” width=”400px;” src=”https://s3.amazonaws.com/freecodecamp/freecodecamp_logo.svg"/>
The CSS:
body{ background-color:#d2d2d2;}#canvas{ background-color:#000; display:block; margin:auto;}#logo{ display:none;}
The JavaScript:
var canvas = document.getElementById(‘canvas’);var ctx = canvas.getContext(‘2d’);var t = text();var logo = document.getElementById(‘logo’);var lines = [];window.setInterval(draw, 100);
function draw() { if (Math.floor(Math.random() * 2) === 0 && lines.length < 100) { lines.push(new textLine()); } ctx.clearRect(0, 0, canvas.width, canvas.height); lines.forEach(function(tl) {
ctx.drawImage(tl.text, tl.posX, tl.animate(), 20, 1000); }); ctx.drawImage(logo, 100, 155, 400, 70);
}
function textLine() { this.text = t; this.posX = (function() { return Math.floor(Math.random() * canvas.width); })(); this.offsetY = -1000; this.animate = function() { if (this.offsetY >= 0) { this.offsetY = -1000; } this.offsetY += 10; return this.offsetY; };}
function text() { var offscreenCanvas = document.createElement(‘canvas’); offscreenCanvas.width = “30”; offscreenCanvas.height = “1000”; offscreenCanvas.style.display = “none”; document.body.appendChild(offscreenCanvas); var octx = offscreenCanvas.getContext(‘2d’); octx.textAlign = “center”; octx.shadowColor = “lightgreen”; octx.shadowOffsetX = 2; octx.shadowOffsetY = -5; octx.shadowBlur = 1; octx.fillStyle = ‘darkgreen’; octx.textAlign = “left”; var step = 10; for (i = 0; i < 100; i++) { var charCode = 0; while (charCode < 60) { charCode = Math.floor(Math.random() * 100); } octx.fillText(String.fromCharCode(charCode), 0, step); step += 10; } return offscreenCanvas;}
How does it work?
On line #1 we grab the canvas element by its id. Every canvas element has its own context — an interface to manipulate its contents. This is what the ctx variable on line 2 refers to.
To create the animated background, we will need a vertical line of random text, which we will then redraw multiple times over the X-axis and animate incrementally on the Y-axis to give us the end effect.
Since text is always rendered horizontally, we will render the text on another invisible canvas and draw it as an image on our original canvas.
On line #3 we set the variable t to the result of the text() function which generates and returns our invisible canvas element.
In this function we create a new canvas, set its width and height and set its display property to none to hide it and then append it to the document body. Then we set the color, shadow and offset for the text that we will draw.
To generate vertical random characters we loop and draw a new random character 100 times and increment it by 10px on the Y-axis on each interval. To generate a random character I use Math.random() to get a number between 60 and 100 and then convert it into a character using String.fromCharCode().
This draws our vertical text with a shadow and returns the canvas to the t variable.
The animation loop
Over the next 3 line of code, I retrieve the FreeCodeCamp logo, declare an array that will hold the separate lines that make up the background, and use window.setInterval to run the draw() function every 100 milliseconds.
When animating a canvas, it’s good practice to rather use window.requestAnimationFrame(), but I felt this is too confusing for beginners, since its a bit tricky setting the frame rate.
The first thing the draw() function does is generate a random number between 1 and 0. If the number is 0 and there are less than 100 individual lines of text being animated on the background it pushes a new textLine() into the lines array.
The textLine() function returns an object which contains
- The resulting vertical text held in the t variable.
- The offset amount that it will be rendered on the X-axis (generated randomly on each instance of the object).
- An initial offset of -1000px on the Y-axis which places it just above the canvas.
- An animate method which adds 10px to the Y-axis each time it is called and returns the result making the text move downwards. If the Y-axis offset reaches 0 it is reset to -1000px providing a continual animation.
The canvas is cleared, and then the draw() function loops through each line of text in the lines array and draws it on the canvas calling its animate method each time a line is drawn to move it downwards.
Since each line has a random offset on the X-axis and a newline is added at random intervals the lines of text fall at different rates across the canvas creating the raining code effect!
Lastly the FreeCodeCamp logo is drawn over the background, giving us our final animation.
Where to now?
If canvas is something that interests you, you can learn more about it in the Mozilla Docs.
I plan like create a series of more basic step by step tutorials walking through canvas animations as I find the time.
If you didn’t find the above code too difficult and would like to mess with it, here are a few cool ideas:
- Make the dimensions dynamic so that the canvas scales and continues animating as you resize your browser.
- Instead of randomly generating characters, grab a file of your own code from GitHub and animate that instead.
- Render your name in place of the FreeCodeCamp logo, and make it look like the Matrix poster.
- Instead of generating each line at random, bind a click event to the canvas and render a new line at the X coordinates of your mouse click.
I hope you enjoyed this intro, if you did feel free to check out some of the other articles that I’ve written.
Turning code to cash — How to make money as a Web Developer and live to tell the tale.
_So you just learnt to code. You’re eager and anyone who can’t code thinks you’re a genius, word gets out and all of a…_medium.comHow to write a jQuery like library in 71 lines of code — Learn about the DOM
_JavaScript frameworks are all the rage. Chances are that any JavaScript related news feed you open will be littered…_medium.com5 Things to Remember When You’re Learning to Program
_Learning to program is challenging. Aside from choosing a language or setting up a development environment that you…_medium.comHow I Became a Programmer. And When I Started Calling Myself One
_I’ve wanted to start blogging about programming for months now and like so many others before me I set off full of…_medium.comPreventative Programming — how fix to bugs before they happen
_…and why Sherlock Holmes would have been a brilliant programmer_medium.com