
By Gautam Arora
Google Cloud Platform (GCP) provides a host of options for Node developers to easily deploy our apps. Want a managed hosting solution like Heroku? App Engine, check! Want to host a containerized app? Kubernetes Engine, check! Want to deploy serverless app? Cloud Functions, check!
Recently at work, I’ve been enjoying using our in-house continuous deployment service that quickly builds, tests, and deploys new commits pushed to GitHub. So when I read about Google’s new Cloud Build service, I wanted to take it for a spin and see if I could recreate a similar seamless deployment experience for myself. Further, in a conversation with Fransizka from the Google Cloud team, she identified this as an area where a tutorial would be helpful. So here we go…
But wait, what is Cloud Build?
Cloud Build is a managed build service in GCP that can pull code from a variety of sources, run a series of build steps to create a build image for the application, and then deploy this image to a fleet of servers.
Cloud Build works well with Google’s own source code repository, Bit Bucket or GitHub. It can create a build image using a Docker configuration file (Dockerfile) or Cloud Build’s own configuration file (cloudconfig.yaml). It can deploy applications (and APIs) to App Engine, Kubernetes Engine, and Cloud Functions. A really cool feature is Build Triggers. These can be setup to watch for a new commit in the code repository and trigger a new build and deploy.
Before we jump into the deep end…
This post shares the detailed steps and code to setup the continuous deployment for Node apps on GCP. It assumes that you’re familiar with developing simple Node applications, working with the command line, and have some high level understanding of deploying apps to cloud services like Heroku, AWS, Azure or GCP.
For each of the sections, a companion GitHub code repository is provided for you to follow along. Don’t sweat it though — feel free to skim over the article to learn about the high level ideas, and you can bookmark it and come to it later if you plan to set this up. The real fun of having a setup like this is that you get to deploy applications quickly.
Continuous Deployment for App Engine Standard
Deploying a Node app to App Engine is quite simple. Create a new project in Google Cloud Console, add an app.yaml configuration file in our code directory (which describes the node runtime we want to use — I’ve used Node 8), and run gcloud app deploy on our terminal — and done!
If you want to try this out for yourself, here are a couple of resources:
So, what we’ve done so far by following the quickstart guide above:
- Created a new project in Google Cloud Console
- Deployed our Node app to App Engine using gcloud app deploy
….now how can we automate setup such that code changes get deployed automatically on push to GitHub?
Here is what we need to do:
Put our code on GitHub
Head over to GitHub to create a new repository
Then follow the instructions to push code from your machine to GitHub
Enable Cloud Build
Enable the Cloud Build API for our project
- Enable the App Engine API for for our project.
Grant App Engine IAM to Cloud Build Service account by going to the IAM page, find this service account
<project-id>@cloudbuild.gserviceaccount.com, edit it and give it the App Engine Admin role.Create a Cloud Build configuration file
Create a new file
cloudbuild.yamlthat looks like this:
steps:- name: 'gcr.io/cloud-builders/npm' args: ['install']- name: 'gcr.io/cloud-builders/npm' args: ['test']- name: "gcr.io/cloud-builders/gcloud" args: ["app", "deploy"]timeout: "1600s"
This configuration has three build steps (each line starting with a hyphen is a build step) that will run npm install, then npm test and if all looks good then deploy our code to App Engine.
Each build step is just like a command we run on our machine. But in this case, since this file is in yaml and each step is split over 2 lines of name and args, it can look like a bit of a mind-bender.
Let’s try this: for the line starting with “name”, read its last word and then read the values in the “args” line. I hope this file makes more sense now!
Run a Build manually (optional, just for verification)
We can now deploy our application from our machine using Cloud Build
- Run the cloud build command on your terminal:
gcloud builds submit — config cloudbuild.yaml .This command starts a build on Cloud Build using the configuration file we created above. - Head over to the Cloud Builds page to see the build being kicked off.
- Wait for the build to end, and then test out your Node application using the App Engine URL for this app.
You can make changes to your Node app and call this command again and to start more builds if you would like.
Create a Build Trigger
Head over to the Cloud Build Triggers page and select Create Trigger
- On the Build Trigger setup page, choose GitHub as the Source Code Repository. This will require you to authorize GCP to access your GitHub repositories, which you will need to approve. Once done, select the GitHub repository for your Node app that you had pushed to GitHub earlier.
- Create a trigger named
continuous deployment, and for the trigger type choose Branch with regex for branch name asmaster. This will ensure that the builds, test, and deploy will only run for push to the master branch and not any branch. - For the build configuration file, select
cloudbuild.yaml Now click the Build Trigger button
Run a Build automatically by pushing a commit to GitHub
With our build trigger created, make a simple commit to your node application, like change “Hello, World!” to “Hello, GCP!” and commit and push this code to GitHub
- Head back the the Cloud Builds page and you will notice that a build was automatically triggered (if it isn’t, give it a few more seconds or click the refresh button on the page)
- Once the build is complete and you see a green check, you can visit your application using its App Engine URL and see that your changes are now live!
Here is a screenshot for builds being triggered through a GitHub push for our app:
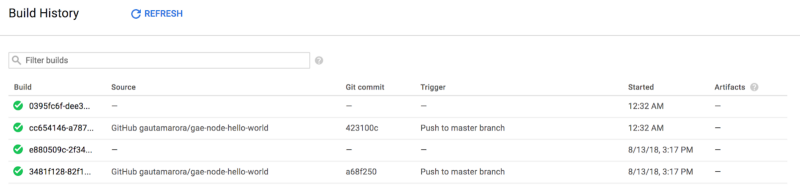
Too good to be true?? Run this last step a few times times to test it out a few more times. Our first application now gets deployed to App Engine on every commit to master ?

Continuous Deployment for Kubernetes Engine
Great, so we’ve setup our application to deploy to App Engine on GitHub push, but what if we wanted the same setup for our containerized applications? Let’s give it a spin!
At a high level, deploying a Node app to Kubernetes engine has two main tasks. First, get our app ready: Containerize the application with Docker, build it, and push the Docker image to Google Container Registry. Then, setup things on the GCP end: create a Kubernetes Cluster, create a Deployment with your application image, and then create a Service to allow access to your running application.
If you want to try this out for yourself, here are a few resources:
- Sample App for Kubernetes Engine
- Containerize a Node App with Docker
- Deploy a Containerized Hello World App to Kubernetes Engine
So, what we’ve done so far by using the guides above:
- Created another new project in Google Cloud Console
- Created a Kubernetes Cluster, Deployment, and Service
- Deployed our Containerized Node app to Kubernetes Engine using kubectl
…but what we want is an continuous deployment setup such that a new commit kicks off a build and deployment.
Here is what we need to do:
Put our code on GitHub
We will follow the same steps as we did in the section earlier on App Engine. Create a new repository and push code from our machine to GitHub.
Enable Cloud Build
Enable the Cloud Build API for our project
- Enable the Kubernetes Engine API for our project
Grant Kubernetes Engine IAM to Cloud Service account by going to the IAM page for this service account
<project-id>@cloudbuild.gserviceaccount.com, edit it, and give it the Kubernetes Engine Admin roleCreate a Cloud Build Configuration file
Create a new file
cloudbuild.yamlthat looks like this:
steps:- name: 'gcr.io/cloud-builders/npm' args: ['install']- name: 'gcr.io/cloud-builders/npm' args: ['test']- name: 'gcr.io/cloud-builders/docker' args: ["build", "-t", "gcr.io/$PROJECT_ID/my-image:$REVISION_ID", "."]- name: 'gcr.io/cloud-builders/docker' args: ["push", "gcr.io/$PROJECT_ID/image:$REVISION_ID"]- name: 'gcr.io/cloud-builders/kubectl' args: - 'set' - 'image' - 'deployment/my-deployment' - 'my-container=gcr.io/$PROJECT_ID/image:$REVISION_ID' env: - 'CLOUDSDK_COMPUTE_ZONE=us-east1-b' - 'CLOUDSDK_CONTAINER_CLUSTER=my-cluster'
This configuration has five build steps that will run npm install and then npm test to make sure our application works, then it will create a Docker image and push to GCR and then deploy our application to our Kubernetes cluster. The values _my-cluster, my-deployment and my-container_ in this file refer to resources in the Kubernetes cluster we have created (as per the guide we followed above). _$REVISION_ID_ is a variable value that Cloud Build injects into the configuration based on GitHub commit that triggers this build.
Run a Build manually (optional, for verification)
We can now deploy our application from our machine using Cloud Build
- Run the cloud build command on your terminal:
gcloud builds submit — config cloudbuild.yaml --substitutions=REVISION_ID=1 .
We’re also passing the revision id in this command, since we are manually running this build vs it being triggered by GitHub.
- Head over to the Cloud Builds page to see the build in action.
- At the end of the build, you can test out your Node application using the Kubernetes Service URL
You can make changes to your Node app and call this command again to kickoff more builds if you would like
Create a Build Trigger
The steps for setting this up are the same as that from the section above for App Engine. Go to Cloud Build Triggers page for this project, select the right GitHub repository, create a trigger called
continuous deploymentjust for themasterbranch and you’re done.- Run a Build automatically by pushing to GitHub
- This is also the same as the section above for App Engine — make a change, add, commit and push to GitHub which will kickoff a build that you can see on your Cloud Builds page. Once the builds completes, you will be able to see the updated app using the Kubernetes Service URL.
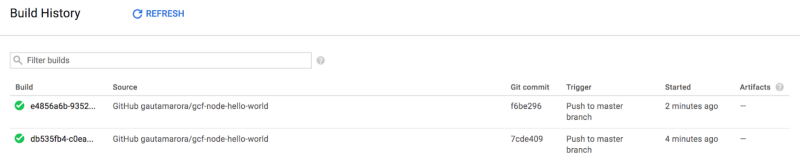
Here is a screenshot for a build being triggered through a GitHub push for our app:

The steps in this section were pretty much the same as the App Engine section. The main differences were that we had to containerize our application with Docker, spin up our Kubernetes cluster, and then have a Cloud Build configuration with just a few more steps.
But at its core, Cloud Build and its Build Triggers work pretty much the same and give us a seamless deployment experience. Our second application now gets deployed to Kubernetes Engine on every commit to master ??

Continuous Deployment for Cloud Functions
Sure, App Engine and Kubernetes Engine are great, but how about automated deployments for our Serverless app? I mean, having no servers to manage at all is really the best, right? Let’s do this!
Deploying a Node app to Cloud functions will require us to create a new project. No configuration files are needed, and once GCloud functions deploy on our terminal, our functions are deployed!
If you want to try this out for yourself, here are the resources you will need:
- Sample App for Cloud Functions
- Quickstart Guide for Node on Cloud Functions
- Locally Testing Cloud Functions using Node emulator
If you’ve been following along, you can probably already picture what steps we need to do:
Put our code on GitHub
We already know how to do this
Enable Cloud Build
Enable the Cloud Build API for our project
- Enable the Cloud Functions API for our project.
Grant Cloud Functions IAM to Cloud Build Service account by going to the IAM page, find this service account
<project-id>@cloudbuild.gserviceaccount.com, edit it and give it the Project Editor role.Create a Cloud Build Configuration file
Create a new file
cloudbuild.yamlthat looks like this:
steps:- name: 'gcr.io/cloud-builders/npm' args: ['install']- name: 'gcr.io/cloud-builders/npm' args: ['test']- name: 'gcr.io/cloud-builders/gcloud' args: - beta - functions - deploy - helloWorld - -- source=. - -- runtime=nodejs8 - -- trigger-http
Similar to the App Engine configuration, this configuration has 3 steps to install. Then test the build, and if all is good, then deploy it to Cloud Functions.
Run the Build manually (optional, for verification)
We can now deploy our function from our machine using Cloud Build
- Run this in your terminal:
gcloud builds submit — config cloudbuild.yaml . - Head over to the Cloud Builds page to see the build in action.
At the end of the build, you can test out your serverless app using the Cloud Function URL
Create a Build Trigger
The steps for setting this up are the same as that from the section above for App Engine and Kubernetes Engine. Go to Cloud Build Triggers page for this project, select the right GitHub repository, create a trigger called
continuous deploymentjust for themasterbranch, and you’re done.Run a Build automatically by pushing to GitHub
This is also the same as the section above for App Engine & Kubernetes Engine: make a change, add, commit and push to GitHub, which will kickoff a build that you can see on your Cloud Builds page. Once the build completes, you will be able to see the updated app using the Cloud Functions URL
Here is a screenshot for build being triggered through a GitHub push for our sample app:
Cloud Functions were super easy to setup with automated builds and makes the “code → build → test → push → deploy” workflow really really fast! Our third application now gets deployed to Cloud functions on every commit to master ???

Wrapping Up
Phew! We covered a lot of ground in this post. If this was your first time trying out GCP for Node, hopefully you got to see how easy and straightforward it is to try out the various options. If you were most eager to understand how to setup continuous deployment for apps on GCP, I hope you weren’t disappointed either!
Before you go, I just wanted to make sure that you didn’t miss the fact that all the sections had a sample app: Hello World for App Engine, Hello World for Kubernetes Engine and Hello World for Cloud Functions.
That’s it for now! Let’s go ship some code! ?
Thanks for following along. If you have any questions or want to report any mistakes in this post, do leave a comment.
If you found this article helpful, don’t be shy to ?
And you can follow me on Twitter here.