
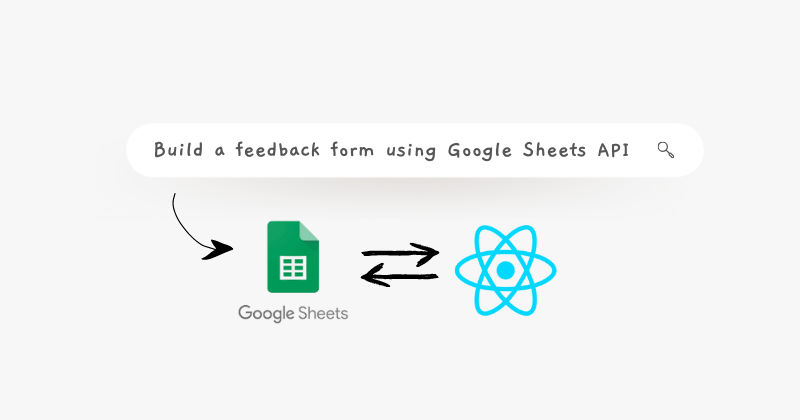
Google Sheets provide a simple way to create online forms and gather data from users. In this tutorial we will use Google Sheets and Next.js to build a simple form.
We'll use Next.js as our front end, and we'll use Google Sheets as the back end to send the data we receive through a form. This way we can learn how to use Next.js and Google Sheets to build a simple form.
Here's what we'll cover in this tutorial:
- How to set up a new project in Google Cloud Console
- How to connect the new project with a Google Sheet
- How to create a front-end form in a Next.js application.
- How to connect the form to the Google Sheet
To help you follow along, I have made a GitHub repo. If you ever get lost, have a look around.
How to Set Up a New Project in Google Cloud Console
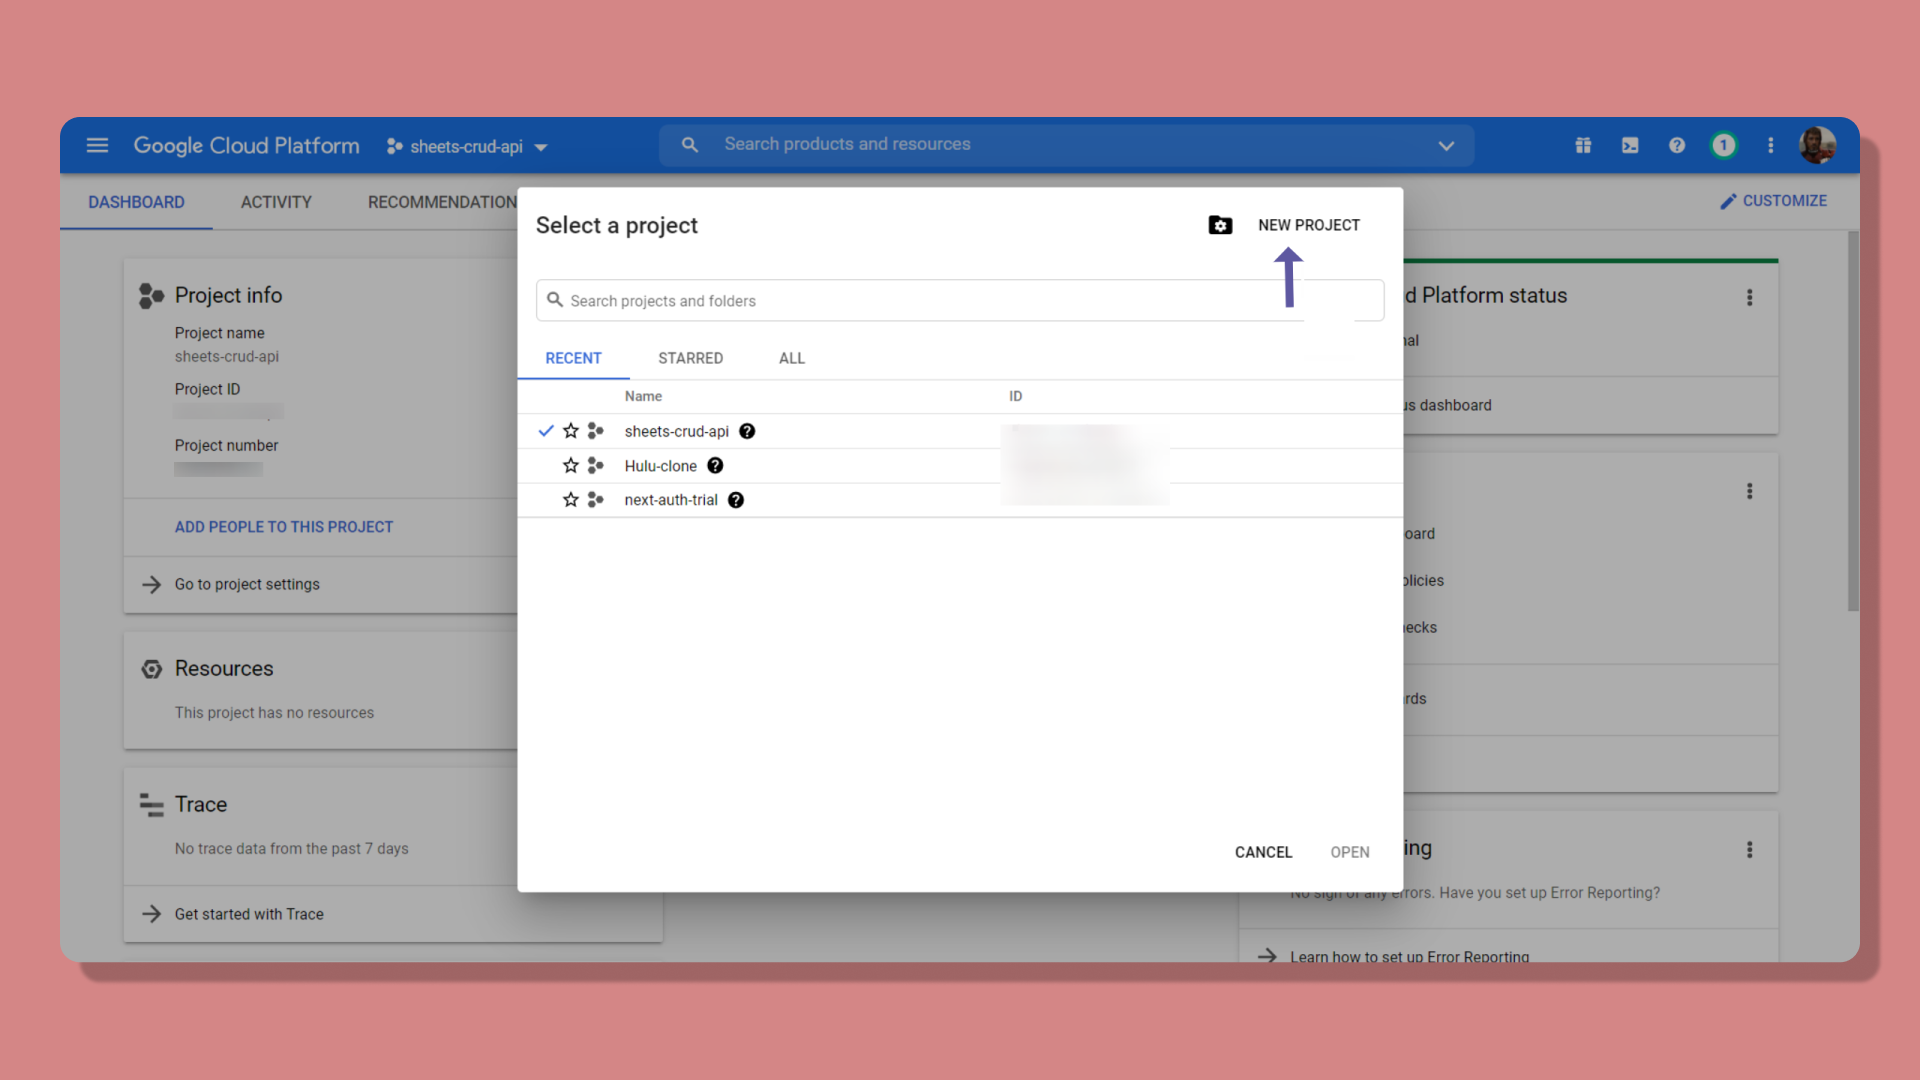
To access the Google Sheets API, we first need to set up a new project on Google Cloud Console. Head over to the site, go to the console and make a new project.
After the new project gets set up, go to APIs and Services and click on Enable APIs and Services.
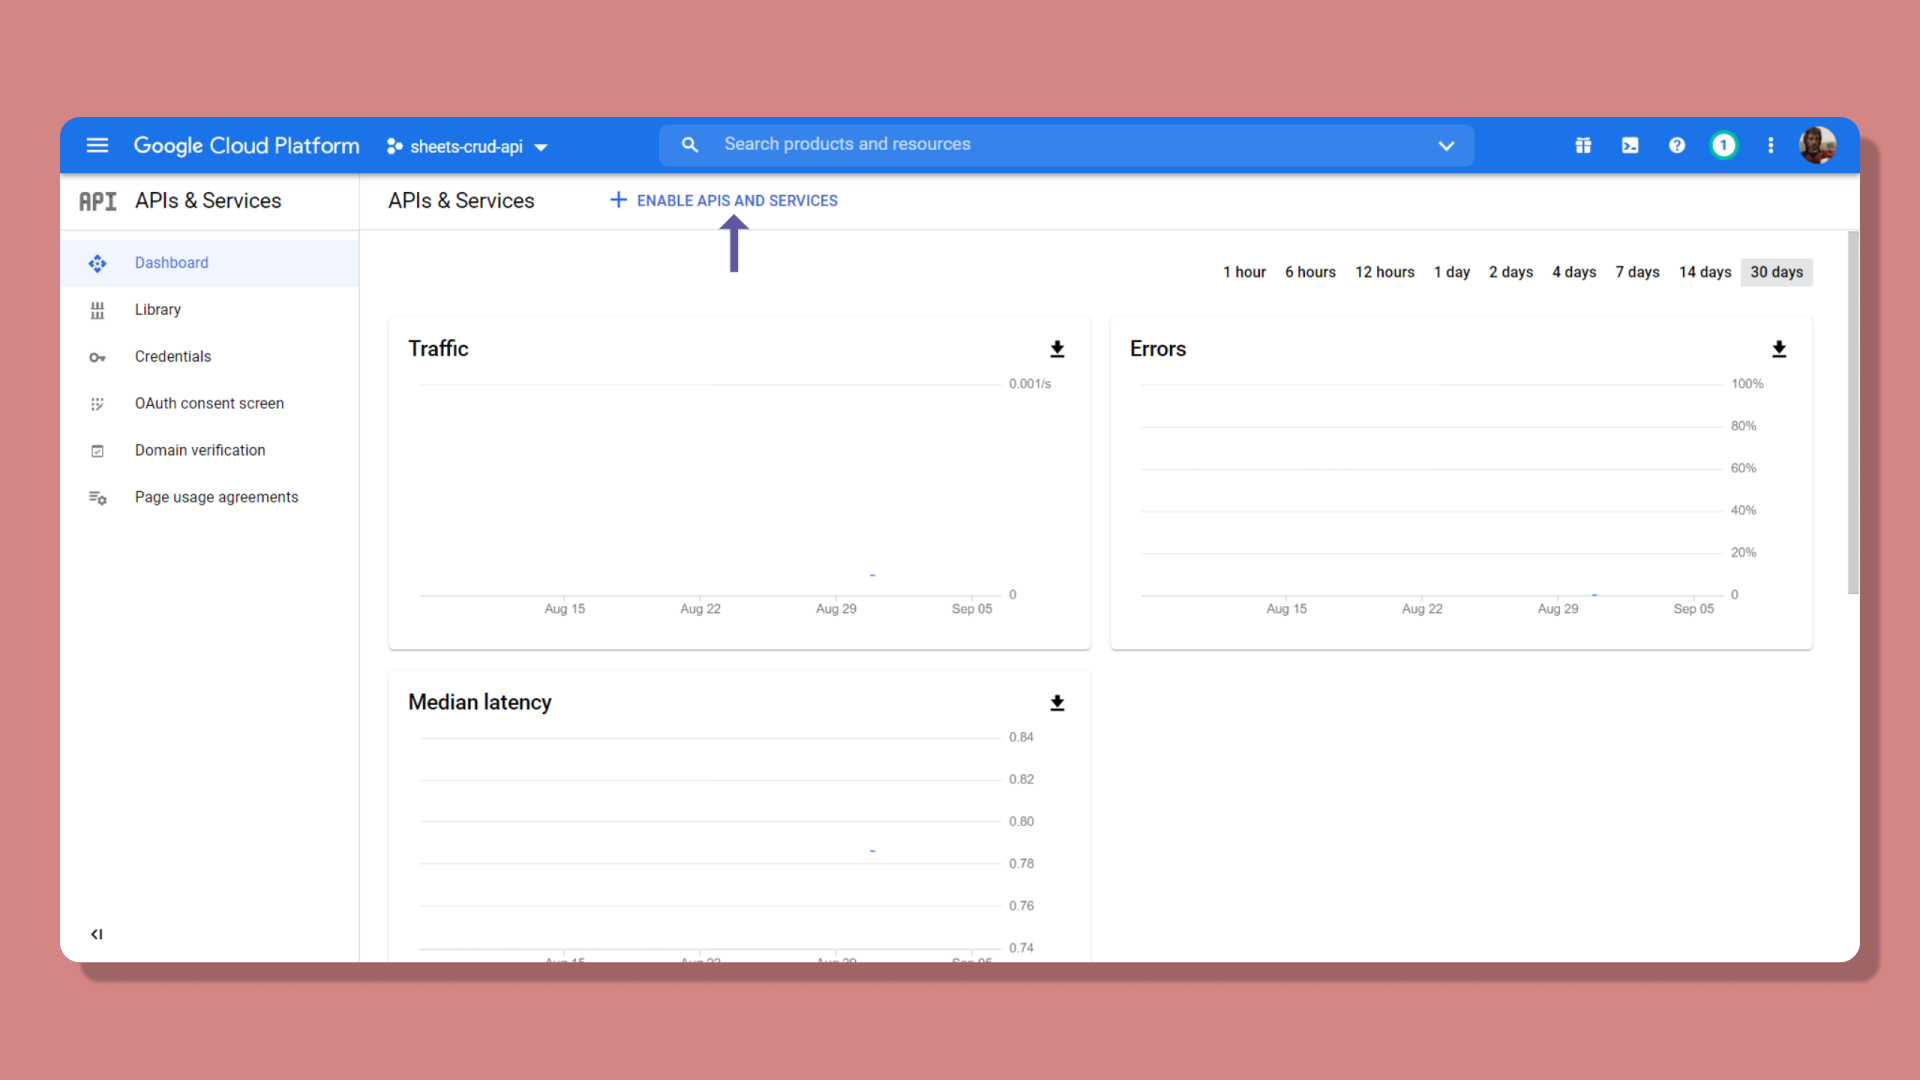
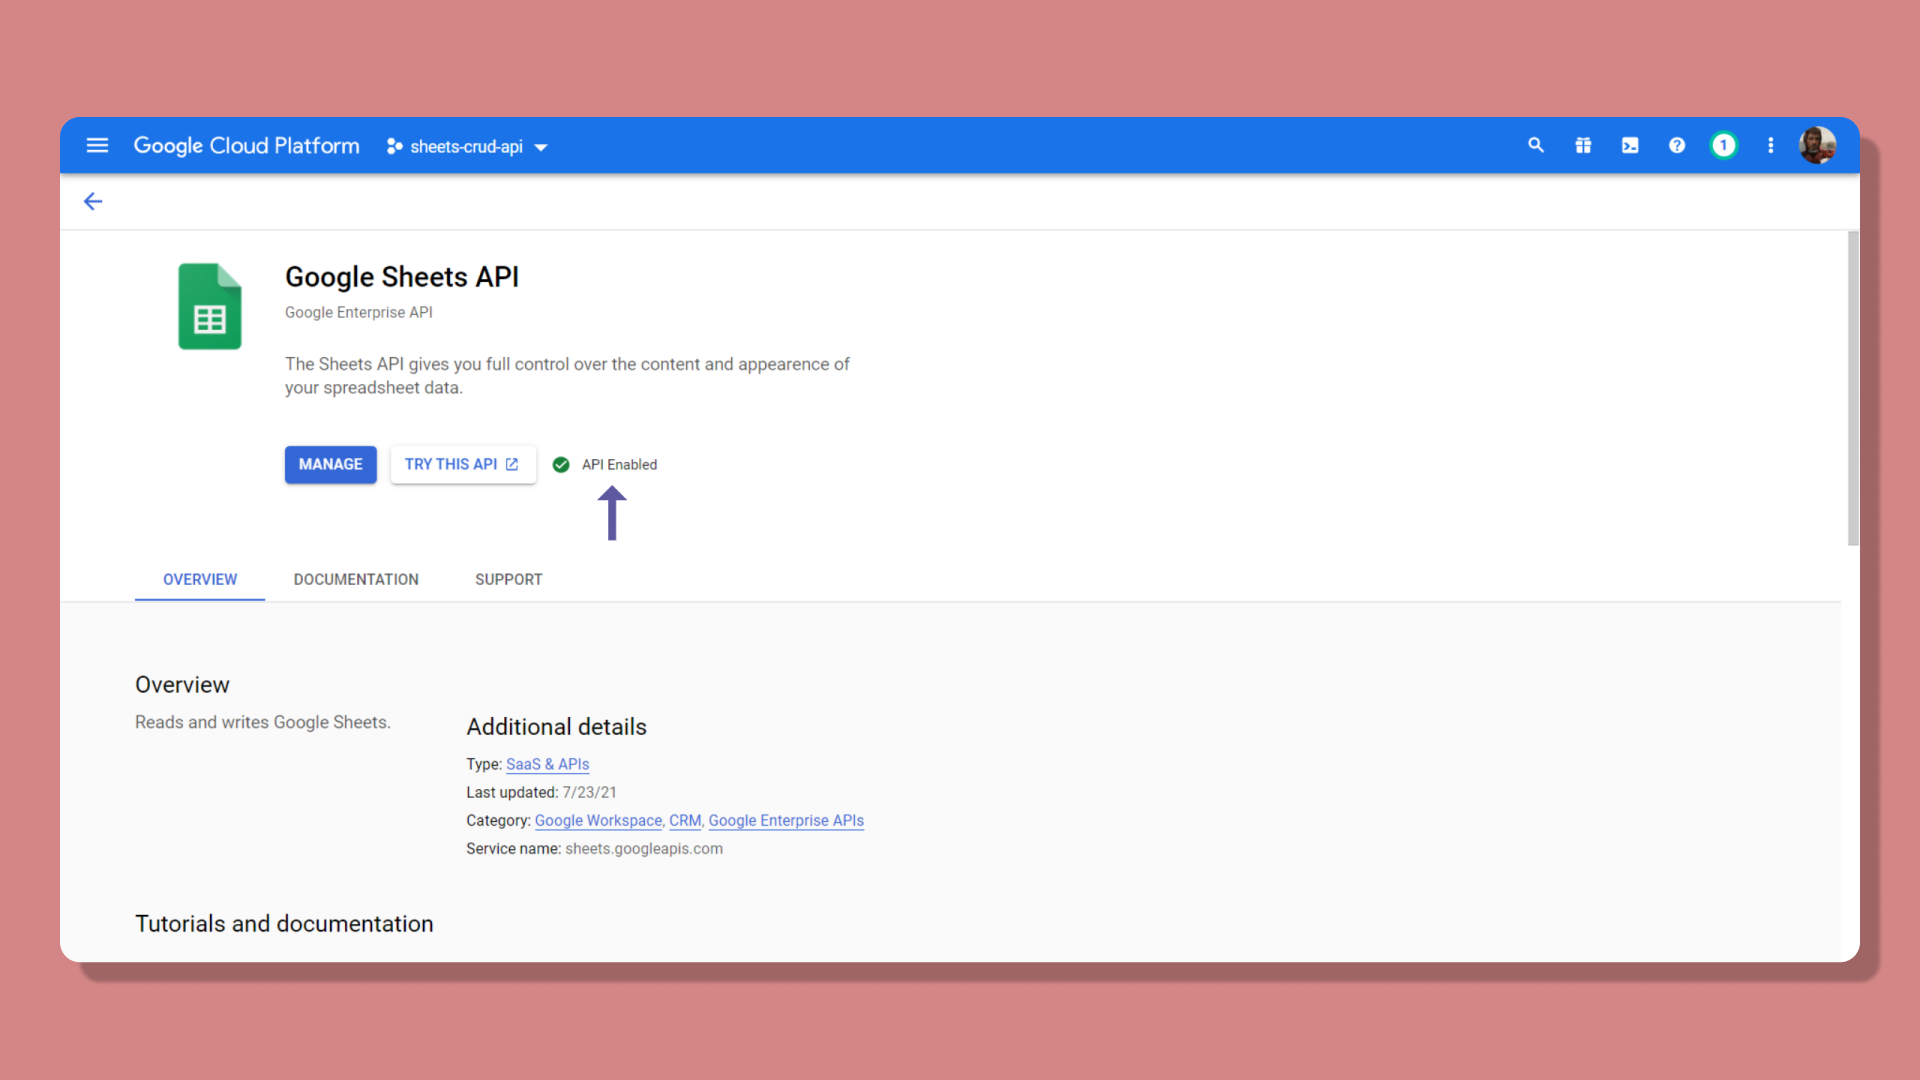
Search Google Sheets from the library and enable it.
Now, go to APIs and Services, then Credentials and click on New Credential. Make a new Service account.
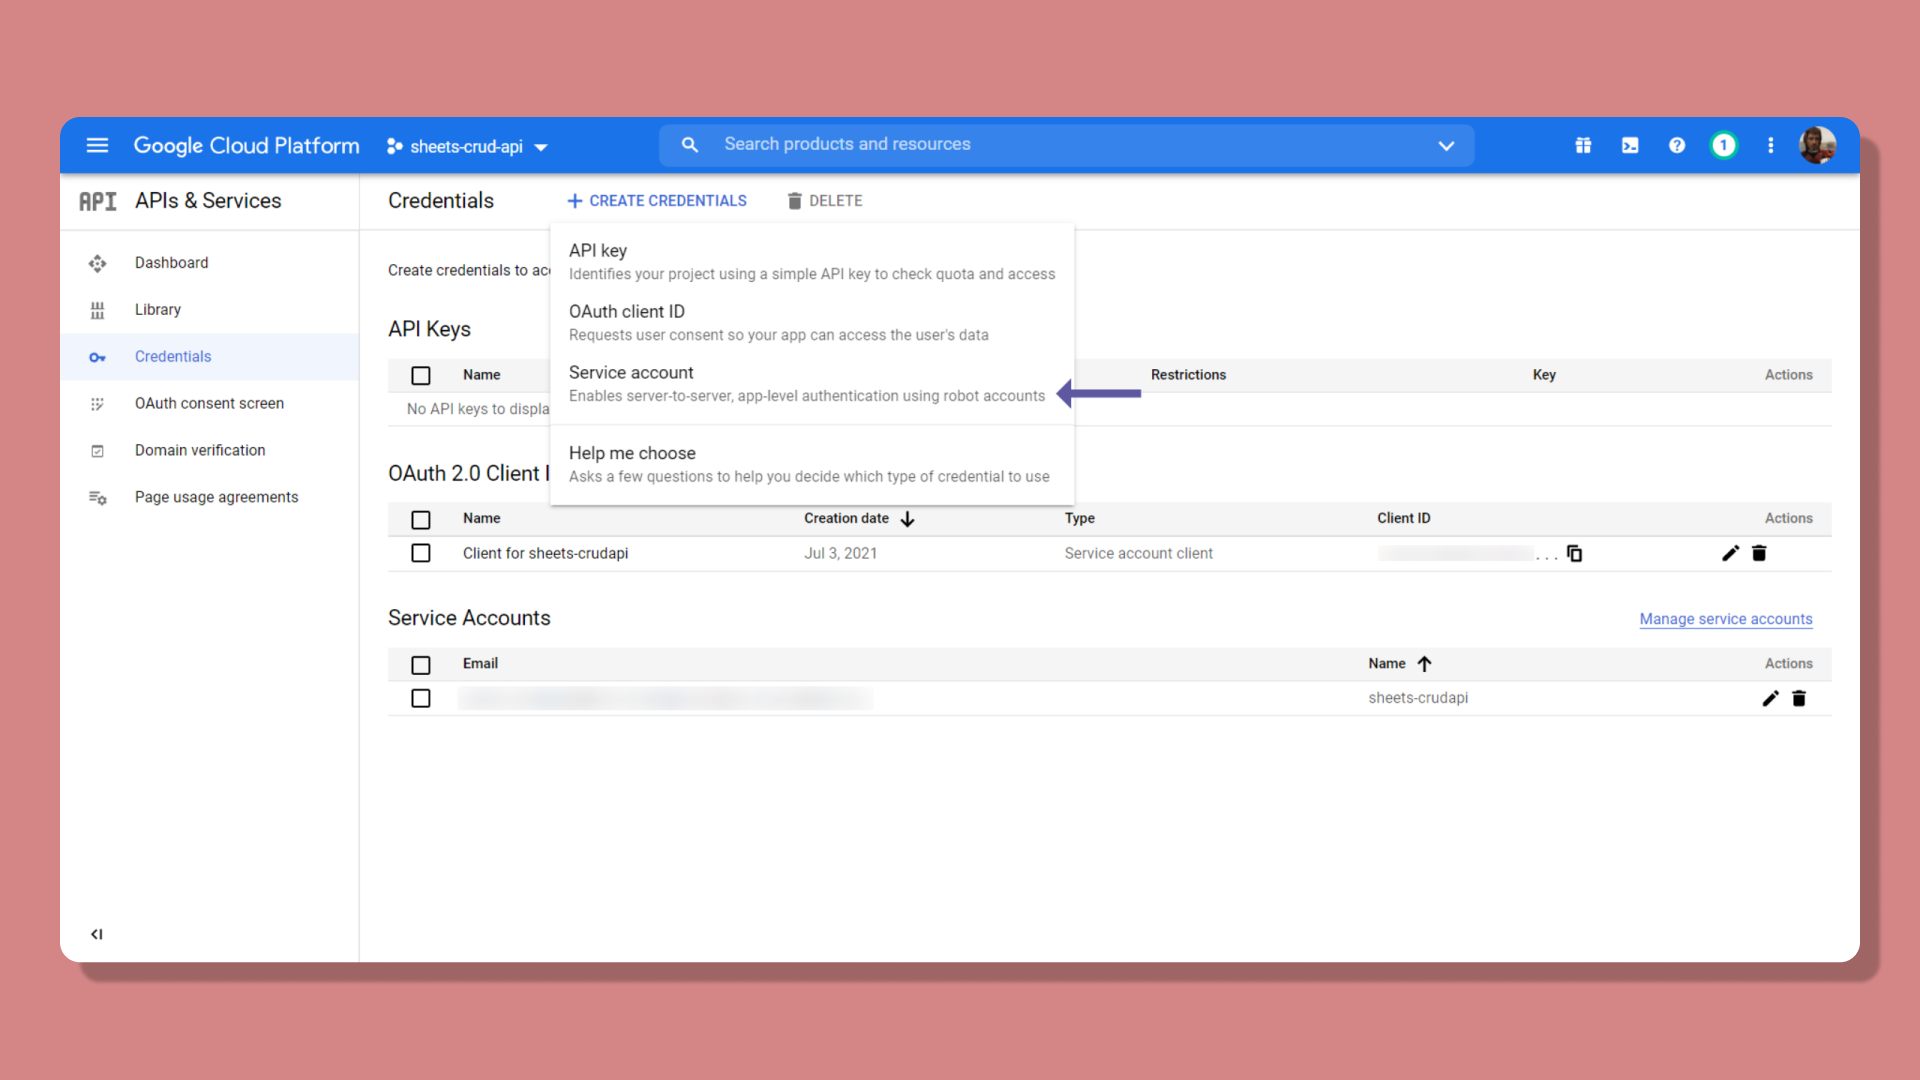
Give it a suitable name and fill in all the details. After generating the service account, copy the email ID somewhere. We'll need to add it to our Google Sheet afterward. We just created a Bot account to handle the various requests which will be sent from the front-end.
Next, click on the Service account in Credentials and them move to Keys. Click on Add Key. Make sure you set it to JSON format.

A file will get downloaded on creating the new key. It contains all the environment variables that we need while connecting our front-end application to the Google Sheets.
How to Connect the New Project to a Google Sheet
Now let's connect the newly created project on Google Cloud Console with a Google Sheet. Head over to Google Sheets and create a new spreadsheet.
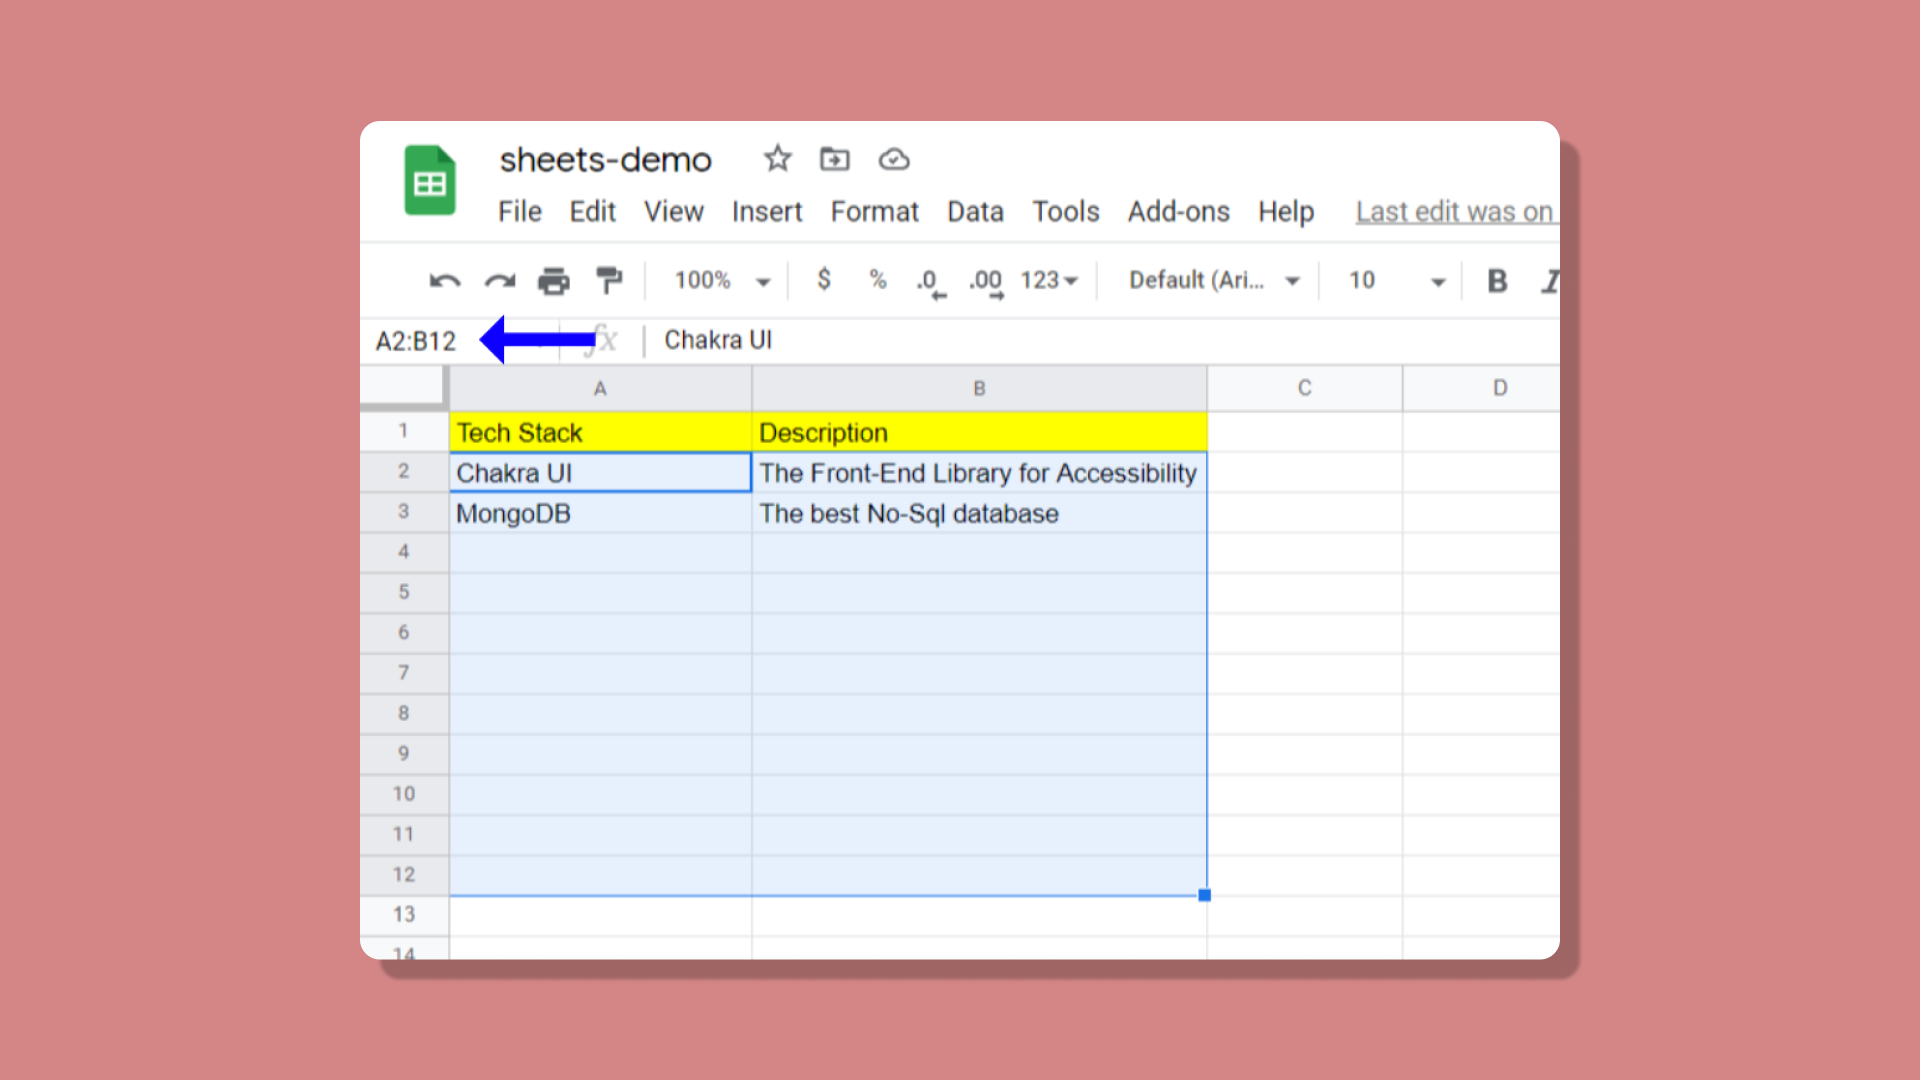
Before we move ahead, feel free to put in some raw data so that we have something to fetch while calling the requests in the next section.
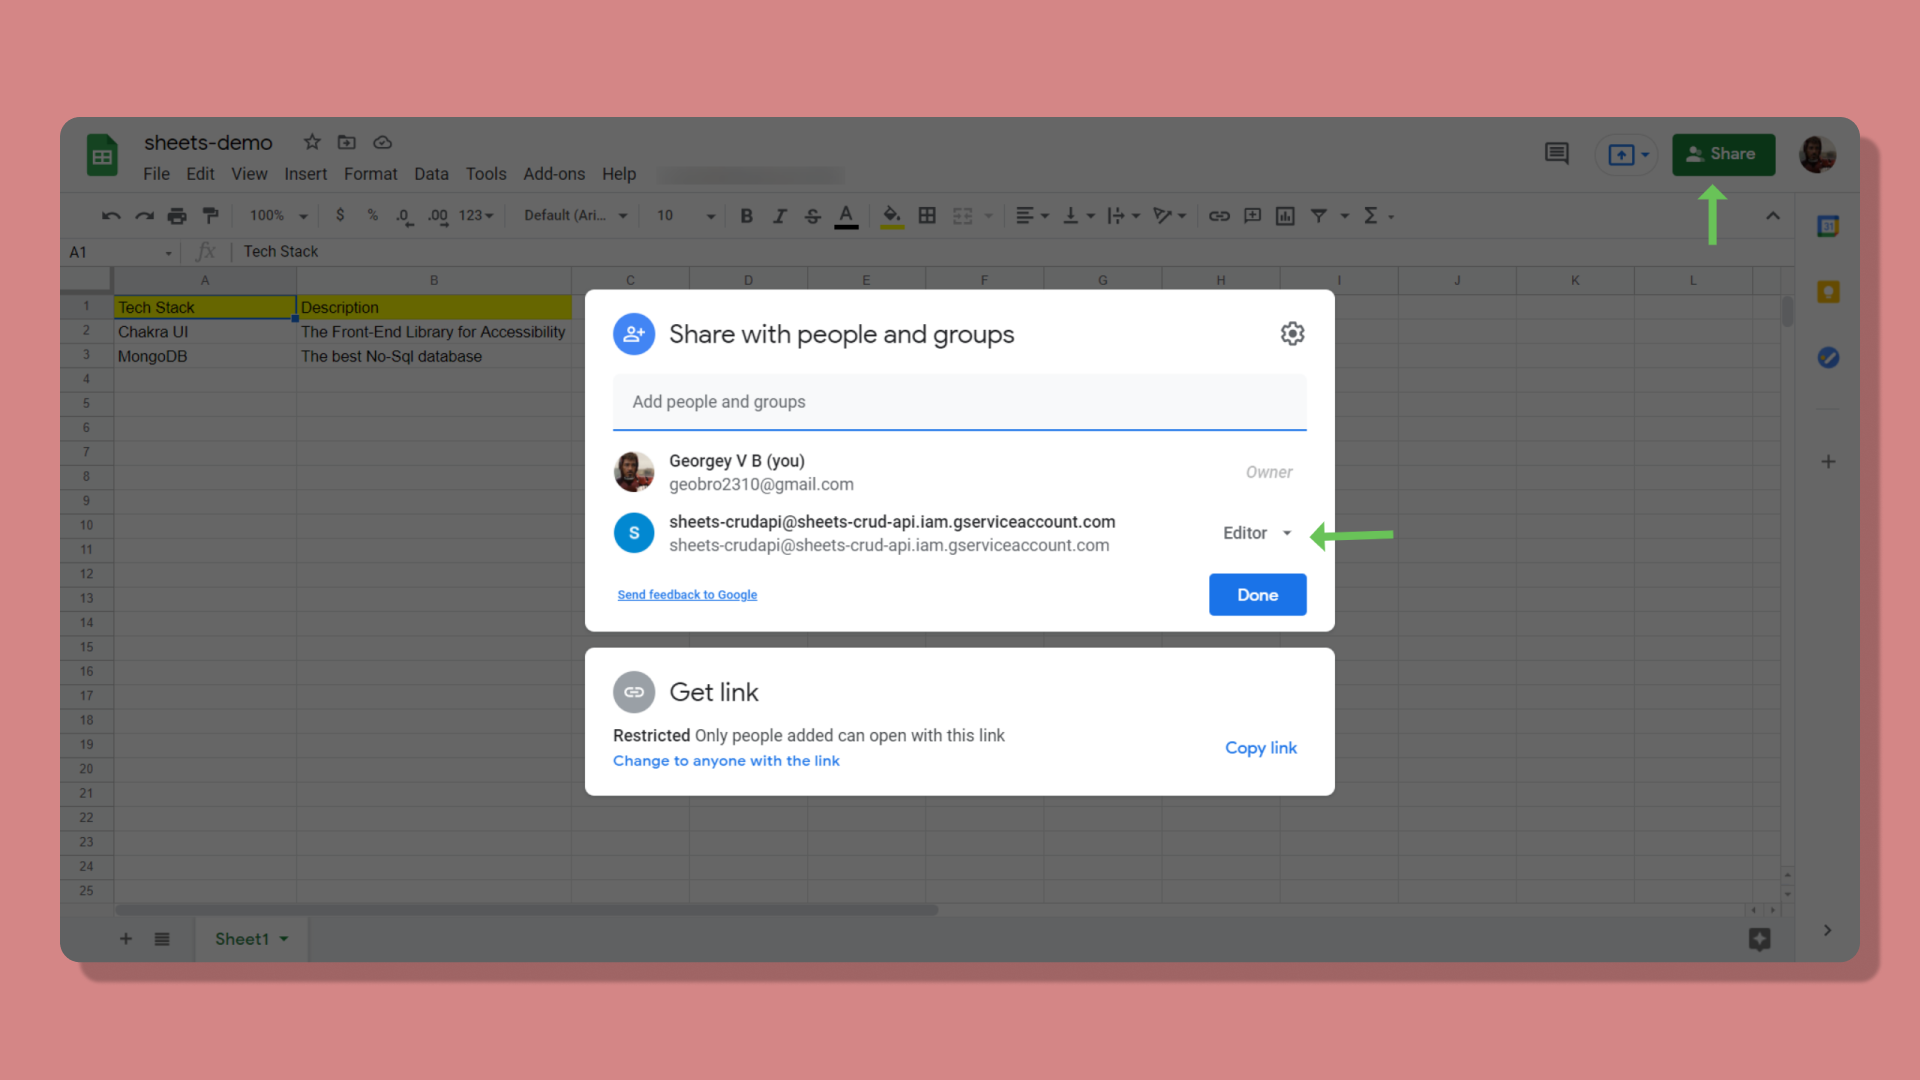
With that done, click on Share and add the service account email we just created. Make sure you give it Editor access and un-check Notify people.
Now for the fun part. Let's go over to the code editor and create the front-end for our form.
How to Create the Front-end Form
For building out the front end we'll use Next.js and use the API-routes feature to send a POST request to our Google Sheet.
Install Next using this command:
npx create-next-app
To build out the form and speed up the development process, we'll be using some third party packages. So go ahead and install the following:
npm i @chakra-ui/react @emotion/react@^11 @emotion/styled@^11 framer-motion@^4 react-hook-form
- Chakra-UI: an accessible framework that has personally helped me speed up the front-end design of most of my applications.
- React-Hook-Form: helps you build efficient forms with client-side validation on the fly.
In this tutorial, I'll be focusing more on executing the functionality of the form rather than building out the client-side validation. Here is a complete guide on adding client-side validation using React-Hook-Form. Of course feel free to pay a visit to the Chakra-UI documentation as well.
After installing all the packages, open it using any code editor. In Next.js, each file you create in the /pages folder is an individual route. You can create a new one but here I'll be using the root file itself, that is /pages/index.js.
Clear out all the pre-generated lines of code. Now, let's make a basic structure for the Form.
import { VStack, Text, Input } from "@chakra-ui/react"

function Home () {
    function submitHandler () {
     // POST request
    }

    return (
        <VStack>
          <Text fontSize="2xl" fontWeight="bold">
            Your response matters!
          </Text>

          <form onSubmit={submitHandler}>
              <Input placeholder="Enter Name" />
              <Button>Submit!</Button>
          </form>
        </VStack>
    )
}
VStack wraps all the elements vertically. It's easy shorthand for flex-direction: column. The rest of the code should be pretty much self-explanatory
The beauty of Chakra-UI is that each of its components closely resembles actual HTML elements, greatly reducing the learning curve.
You may add some more input fields of your choice. Here's the end result:

Now let's handle the form response when the user submits. For this we will use react-hook-form.
For getting the response from the form, we have to import the useForm hook, like this:
import { useForm } from 'react-hook-form';
From the hook, destructure the following:
const {
    register,
    handleSubmit
  } = useForm();
Wrap around the submitHandler we created earlier with handleSubmit:
<form onSubmit={handleSubmit(submitHandler)}>
   {/* Input fields here */}
</form>
Now add register to all the input fields as follows:
<Input placeholder="Enter your message" {...register('name') />
Now when the button is clicked, we should be able to see the entered data. For now simply log the data over to the console as follows:
function submitHandler (data) {
    console.log(data);
}
With that done, let's now create a new API-route for the POST request to be sent from the form.
How to Connect the Form to the Google Sheet
Create a new file in the ./pages/api/ route. Each file you make in this route is an api-route, which provides access to all Node.js features.
Go ahead and create a new file in the route, let's say ./pages/api/sheet.js. Structure out a basic GET request to see if all works fine:
function handler (req, res) {
    res.json({message: "It works!"});
}

export default handler;
To check if the API request is working at this point, go to http://localhost:3000/api/sheet.
With that done, let's first set up the POST request to be sent from the front-end using the native Fetch method.
async function submitHandler (data) {
    const response = await fetch("/api/sheet", {
            method: "POST",
            body: JSON.stringify(data),
            headers: {
                'Content-Type': 'application/json',
              },
        })
}
Before doing anything else, we have to download another package:
npm install googleapis
On the API-route (/pages/api/sheet), destructure the data we get from the front end.
import {google} from "googleapis"

async function handler (req, res) {
    if (req.method === "POST"){
            const {name, message} = req.body;
        res.json({message: "It works!"});
    }
}

export default handler;
Note: The API routes by default will listen for a GET request. So we have to explicitly check if the method is a POST request.
Before moving ahead, there's one last thing to set up, and that's the environment variables. Open the JSON file containing all the credentials while we created the new key.
Make a new file .env.local in the root. Go ahead and enter in the following variables.
CLIENT_EMAIL=yourclientemail
CLIENT_ID=yourclientid
PRIVATE_KEY=yourprivatekey
SPREADSHEET_ID=yourspreadsheetid
With that done, we are pretty much finished setting up the API route to handle the request we'll be sending to our Google Sheet. First, let's create a authentication token:
const auth = new google.auth.GoogleAuth({
    credentials: {
      client_email: process.env.CLIENT_EMAIL,
      client_id: process.env.CLIENT_ID,
      private_key: process.env.PRIVATE_KEY.replace(/\\n/g, '\n'),
    },
    scopes: [
      'https://www.googleapis.com/auth/drive',
      'https://www.googleapis.com/auth/drive.file',
      'https://www.googleapis.com/auth/spreadsheets',
    ],
  });
To gain access to the Google Sheet, our application needs to provide some scopes first – usually read and write access.
You can find more about scopes in the official Google Sheets documentation.
You might be wondering about the replace method I used in the third environment variable. This was due to a typical error I was encountering earlier. After browsing through Stack Overflow, I finally found the solution. Looks like the PRIVATE_KEY needs to be parsed properly by removing the slashes in the original key. This can be easily solved using the replace method.
You can find about this error in this Pull request I opened.
Next, pass in the auth token and specify the version of the API. The latest is v4.
const sheets = google.sheets({
    auth,
    version: 'v4',
  });
Then we call the spreadsheets.value.append method to append the user entry into cells in the spreadsheet.
const response = await sheets.spreadsheets.values.append({
      spreadsheetId: process.env.DATABASE_ID,
      range: 'Sheet1!A2:C',
      valueInputOption: 'USER_ENTERED',
      requestBody: {
        values: [[name, message]],
      },
    });
You can find the spreadsheet ID from the URL itself:
https://docs.google.com/spreadsheets/d/{spreadsheetID}/edit#gid=0
The range determines which rows and columns the application must read from or write to. If you're confused with how to find the range, you can determine it using Google Sheets itself using the user-interface.
The third property, valueInputOption, determines how the user entered value has to be parsed into the spreadsheet.
For example if the user has entered a number, then the spreadsheet will read it as a number as well.
The fourth property carries in the data to be appended into a particular cell. To append multiple values, you can put it all in an array, like in this case – name and message.
To end the API-route, at last send a response back to the front-end:
res.status(201).json({response, result: "Feedback posted to spreadsheet!"})
If all goes well, you should be able to make a POST request and successfully add a new cell value into the spreadsheet.
Conclusion
Congratulations! You're ready to start collecting feedback. You could build out your own feedback form on your website. Or you could integrate with an existing service like Typeform.
But you want to keep your feedback form on your site, on your page. This is where integrating with the Google Sheets API comes in handy.
The Google Sheets API is pretty basic – it can read and write to spreadsheets. Moreover it's completely free, although there is a limitation on the API requests you can make within a particular time frame.
So Google Sheets API would be ideal for small-scale application and platforms with a smaller audience. If you ever have any questions, do ping me on Twitter.