By Charlee Li
Recently I watched the famous video that creates a snake game in less than 5 minutes (on Youtube). It looked pretty interesting to do this type of quick coding, so I decided to do one by myself.
When I started to learn programming as a child, I learned a game called “Game of Life.” It is a great example of cellular automation and how simple rules can result in complex patterns. Imagine some kind of life form living in a world. At each turn, they follow some simple rules to decide whether a life is alive or dead.
Conway's Game of Life - Wikipedia
_Ever since its publication, Conway's Game of Life has attracted much interest, because of the surprising ways in which…_en.wikipedia.org
So I decided to code this game. Since it does not involve too many graphics — just a grid and some blocks — I decided React would be a good choice, and it can be used as a quick tutorial for React. Let’s start!
React setup
First we need to setup React. The amazing [create-react-app](https://github.com/facebook/create-react-app) tool is very handy for starting a new React project:
$ npm install -g create-react-app$ create-react-app react-gameoflife
After less than one minute, react-gameoflife will be ready. Now all we need to do is start it:
$ cd react-gameoflife$ npm start
This will start a dev server at http://localhost:3000, and a browser window will be opened at this address.
Design choices
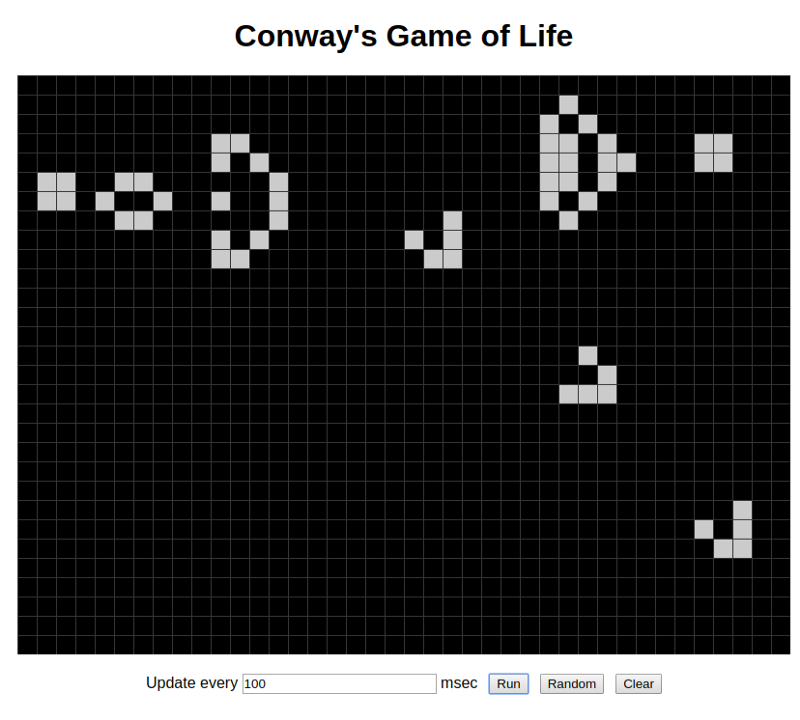
The final screen we want to make looks like this:
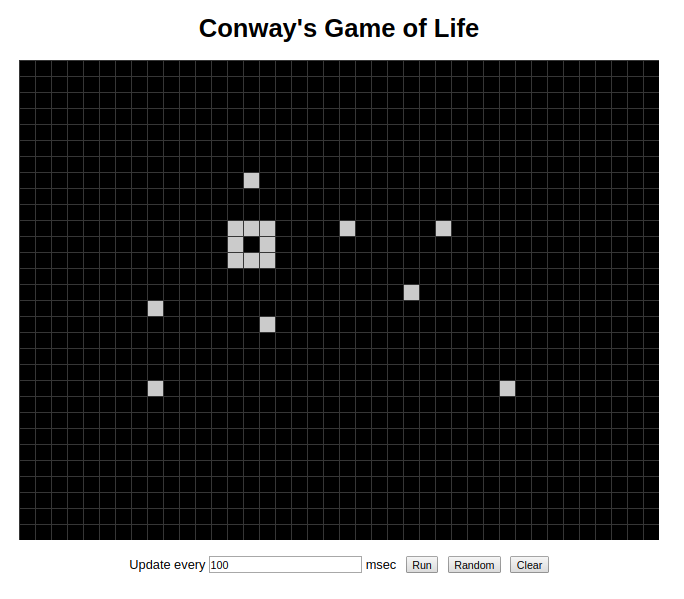
It is simply a board with a grid, and some white tiles (“cells”) which can be placed or removed by clicking the grid. The “Run” button will start the iterations at a given interval.
Looks pretty simple, huh? Let’s think about how to do this in React. First of all, React is not a graphic framework, so we won’t think about using canvas. (You can take a look at PIXI or Phaser if you are interested in using canvas.)
The board can be a component and can be rendered with a single <div>. How about the grid? It’s not feasible to draw the grids with
an use CSS3 linear-gradient for the grid.
In regard to the cells, we can use <div> to draw each cell. We will make it a separate component. This component accepts x, y as inputs so that the board can specify its position.
First step: the board
Let’s create the board first. Create a file called Game.js under the src directory and type in the following code:
import React from 'react';import './Game.css';
const CELL_SIZE = 20;const WIDTH = 800;const HEIGHT = 600;
class Game extends React.Component { render() { return ( <div> <div className="Board" style={{ width: WIDTH, height: HEIGHT }}> </div> </div> ); }}
export default Game;
We also need the Game.css file to define the styles:
.Board { position: relative; margin: 0 auto; background-color: #000;}
Update App.js to import our Game.js and place the Game component on the screen. Now we can see a completely black game board.
Our next step is to create the grid. The grid can be created with only one line of linear-gradient (add this to Game.css):
background-image: linear-gradient(#333 1px, transparent 1px), linear-gradient(90deg, #333 1px, transparent 1px);
In fact, we need to specify background-size style as well to make it work. But since the CELL_SIZE constant is defined in Game.js, we will specify background size with inline style directly. Change the style line in Game.js:
<div className="Board" style={{ width: WIDTH, height: HEIGHT, backgroundSize: `${CELL_SIZE}px ${CELL_SIZE}px`}}></div>
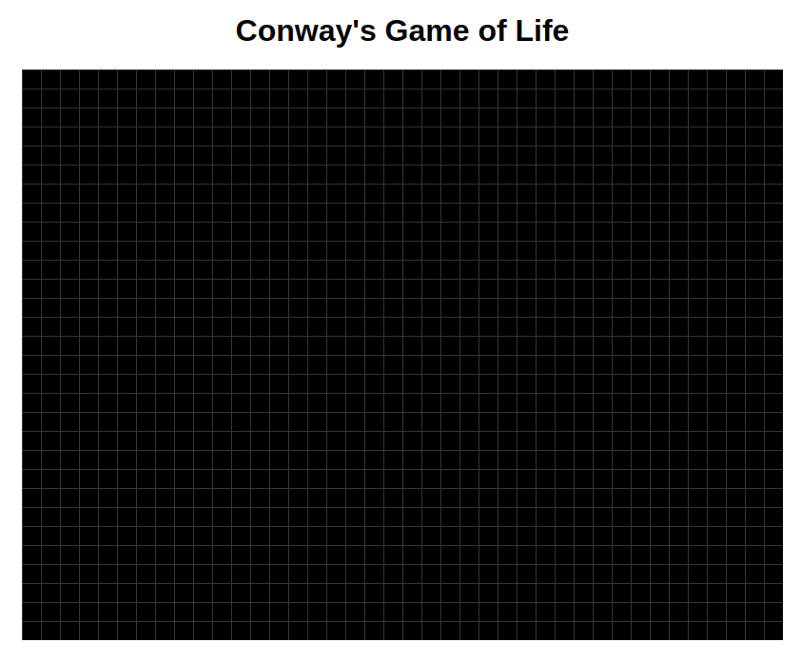
Refresh the browser and you will see a nice grid.
Create the cells
The next step is to allow the user to interact with the board to create the cells. We will use a 2D array this.board to keep the board state, and a cell list this.state.cells to keep the position of the cells. Once the board state is updated, a method this.makeCells() will be called to generate the cell list from the board state.
Add these methods to the Game class:
class Game extends React.Component { constructor() { super(); this.rows = HEIGHT / CELL_SIZE; this.cols = WIDTH / CELL_SIZE; this.board = this.makeEmptyBoard(); }
state = { cells: [], }
// Create an empty board makeEmptyBoard() { let board = []; for (let y = 0; y < this.rows; y++) { board[y] = []; for (let x = 0; x < this.cols; x++) { board[y][x] = false; } } return board; }
// Create cells from this.board makeCells() { let cells = []; for (let y = 0; y < this.rows; y++) { for (let x = 0; x < this.cols; x++) { if (this.board[y][x]) { cells.push({ x, y }); } } } return cells; } ...}
Next, we will allow the user to click the board to place or remove a cell. In React, <div> can be attached with an onClick event handler, which could retrieve the click coordinate through the click event. However the coordinate is relative to the client area (the visible area of the browser), so we need some extra code to convert it to a coordinate that is relative to the board.
Add the event handler to the render() method. Here we also save the reference of the board element in order to retrieve the board location later.
render() { return ( <div> <div className="Board" style={{ width: WIDTH, height: HEIGHT, backgroundSize: `${CELL_SIZE}px ${CELL_SIZE}px`}} onClick={this.handleClick} ref={(n) => { this.boardRef = n; }}> </div> </div> );}
And here are some more methods. Here getElementOffset() will calculate the position of the board element. handleClick() will retrieve the click position, then convert it to relative position, and calculate the cols and rows of the cell being clicked. Then the cell state is reverted.
class Game extends React.Component { ... getElementOffset() { const rect = this.boardRef.getBoundingClientRect(); const doc = document.documentElement;
return { x: (rect.left + window.pageXOffset) - doc.clientLeft, y: (rect.top + window.pageYOffset) - doc.clientTop, }; }
handleClick = (event) => { const elemOffset = this.getElementOffset(); const offsetX = event.clientX - elemOffset.x; const offsetY = event.clientY - elemOffset.y; const x = Math.floor(offsetX / CELL_SIZE); const y = Math.floor(offsetY / CELL_SIZE);
if (x >= 0 && x <= this.cols && y >= 0 && y <= this.rows) { this.board[y][x] = !this.board[y][x]; }
this.setState({ cells: this.makeCells() }); } ...}
As the last step, we will render the cells this.state.cells to the board:
class Cell extends React.Component { render() { const { x, y } = this.props; return ( <div className="Cell" style={{ left: `${CELL_SIZE * x + 1}px`, top: `${CELL_SIZE * y + 1}px`, width: `${CELL_SIZE - 1}px`, height: `${CELL_SIZE - 1}px`, }} /> ); }}
class Game extends React.Component { ... render() { const { cells } = this.state; return ( <div> <div className="Board" style={{ width: WIDTH, height: HEIGHT, backgroundSize: `${CELL_SIZE}px ${CELL_SIZE}px`}} onClick={this.handleClick} ref={(n) => { this.boardRef = n; }}> {cells.map(cell => ( <Cell x={cell.x} y={cell.y} key={`${cell.x},${cell.y}`}/> ))} </div> </div> ); } ...}
And don’t forget to add styles for the Cell component (in Game.css):
.Cell { background: #ccc; position: absolute;}
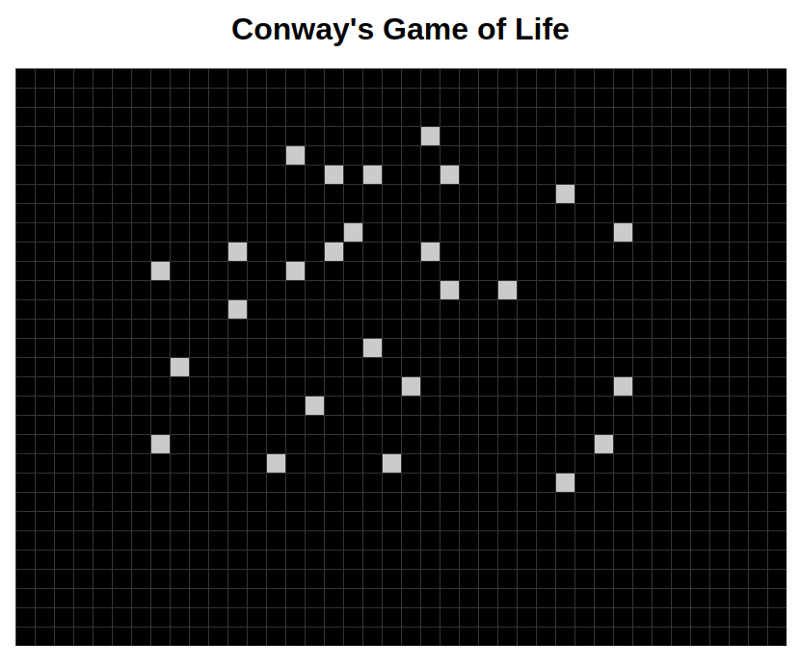
Refresh the browser and try to click the board. The cells can be placed or removed now!
Run the Game
Now we need some helpers to run the game. First let’s add some controllers.
class Game extends React.Component { state = { cells: [], interval: 100, isRunning: false, } ...
runGame = () => { this.setState({ isRunning: true }); }
stopGame = () => { this.setState({ isRunning: false }); }
handleIntervalChange = (event) => { this.setState({ interval: event.target.value }); }
render() { return ( ... <div className="controls"> Update every <input value={this.state.interval} onChange={this.handleIntervalChange} /> msec {isRunning ? <button className="button" onClick={this.stopGame}>Stop</button> : <button className="button" onClick={this.runGame}>Run</button> } </div> ... ); }}
This code will add one interval input and one button to the bottom of the screen.
Controllers
Note that clicking Run has no effect, because we haven’t written anything to run the game. So let’s do that now.
In this game, the board state is updated every iteration. Thus we need a method runIteration() to be called every iteration, say, 100ms. This can be achieved by using window.setTimeout().
When the Run button is clicked, runIteration() will be called. Before it ends, it will call window.setTimeout() to arrange another iteration after 100msec. In this way, runIteration() will be called repeatedly. When the Stop button is clicked, we will cancel the arranged timeout by calling window.clearTimeout() so that the iterations can be stopped.
class Game extends React.Component { ... runGame = () => { this.setState({ isRunning: true }); this.runIteration(); }
stopGame = () => { this.setState({ isRunning: false }); if (this.timeoutHandler) { window.clearTimeout(this.timeoutHandler); this.timeoutHandler = null; } }
runIteration() { console.log('running iteration'); let newBoard = this.makeEmptyBoard();
// TODO: Add logic for each iteration here.
this.board = newBoard; this.setState({ cells: this.makeCells() });
this.timeoutHandler = window.setTimeout(() => { this.runIteration(); }, this.state.interval); } ...}
Reload the browser and click the “Run” button. We will see the log message “running iteration” in the console. (If you don’t know how to show the console, try pressing Ctrl-Shift-I.)
Now we need to add the game rules to runIteration() method. According to Wikipedia, the Game of Life has four rules:
Any live cell with fewer than two live neighbors dies, as if caused by under population.
Any live cell with two or three live neighbors lives on to the next generation.
Any live cell with more than three live neighbors dies, as if by overpopulation.
Any dead cell with exactly three live neighbors becomes a live cell, as if by reproduction.
We can add a method calculateNeighbors() to compute the number of neighbors of given (x, y). (The source code of calcualteNeighbors() will be omitted in this post, but you can find it here.) Then we can implement the rules in a straightforward way:
for (let y = 0; y < this.rows; y++) { for (let x = 0; x < this.cols; x++) { let neighbors = this.calculateNeighbors(this.board, x, y); if (this.board[y][x]) { if (neighbors === 2 || neighbors === 3) { newBoard[y][x] = true; } else { newBoard[y][x] = false; } } else { if (!this.board[y][x] && neighbors === 3) { newBoard[y][x] = true; } } }}
Reload the browser, place some initial cells, then hit Run button. You may see some amazing animations!
Conclusion
In order to make the game more fun, I also added a Random button and a Clear button to help with placing the cells. The full source code can be found on my GitHub.
Thanks for your reading! If you find this post interesting, please share it with more people by recommending it.
